For a food blog, besides yummy recipes, the other important part of the post is the food photos. The saying “a picture is worth a thousand words” is especially true when it comes to presenting your tasty creations.
There are quite a lot of extensive posts on food photography so I won’t go into detail here, but if you’re a new food blogger, I highly recommend reading my blogger friends posts on Food Photography below:
- Gourmande in the Kitchen
- Spicie Foodie
- Family Spice
- Playful Cooking
- 6 Bittersweets
- Photography tips at Foodblogalliance.com
Since a lot of basic information about food photography is available, we will share what we wish we had known back then, along with what we know now about taking food photos.
From Point and Shoot to DSLR
When we started the blog, we knew we had to upgrade the camera gear from our low-end point and shoot camera. Not knowing anything about aperture, full vs. crop, or lens quality, Costco had what we considered a good deal for a Canon T2i plus 2 lens, so we bought it.
When We Started…
Nami started blogging in January 2011 and usually took the food photo right when she finished preparing the meal. The pictures were taken with a fairly low-end point and shoot camera under standard fluorescent bulb. Since there wasn’t much sunlight left around 5 or 6 pm, most photos were taken under the yellow fluorescent light and none of the photos were touched up. Nami submitted the very first blog photo of Unagi Chazuke to foodgawker and it was accepted (We still cannot believe this was accepted!).

Subsequently, they rejected almost every submission for quite a while, due to composition, lighting, etc. It was a humbling experience (sometimes frustrating) but a great opportunity for us to learn. In the early days, besides friends and food bloggers visiting our site, the most visits are from foodgawker and Tastespotting every time they accepted one of the food photos. It forced us to continue improving the pictures until slowly, the acceptance rate started increasing.
Understanding How to Take Good Photos
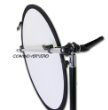
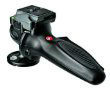
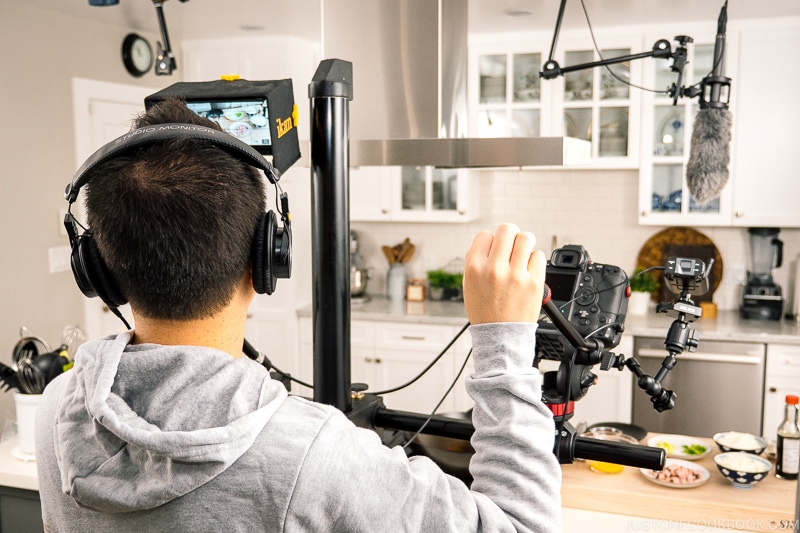
As the months went by, the pictures started to slowly improve as we understood lighting, composition, ISO, etc. We now shoot on a tripod (with this very awesome tripod head) so the pictures wouldn’t be blurry. The camera is also tethered to a laptop so we can see the image right away on a large screen. Reading photography books (see the end of post) to learn tips and best practices were also helpful.
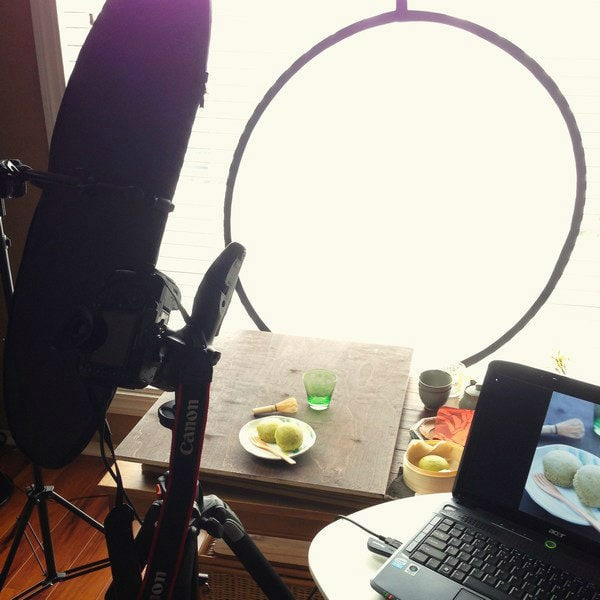
(Photo taken from Nami’s Instagram)
Upgrading the Camera Gear
We upgraded to a Canon 7D in 2011 and now we are shooting with a Canon 5D Mark iii. Would we have saved some money on camera gear if we had started with a 5D mark ii? Most likely; however, if we didn’t go through the progression, we definitely wouldn’t appreciate the 5Diii.
We are definitely not recommending someone to go out and buy a really expensive camera for food blogging. We suggest starting with a fairly high end point and shoot that allows manual mode and taking the picture in raw format. Reading photography books (see below) to learn tips and best practices is also helpful.
If the photos you’re taking are not meeting your satisfaction because of the point and shoot camera, then upgrade to a DSLR. I recommend a refurbished Canon 7D with a 50 mm lens. As I mentioned above, pictures are critical because even if recipes are good, if the picture doesn’t make it look tasty, readers won’t be as interested unfortunately.
Helpful Photo Editing Software
Invest in a photo editing software like Lightroom. There are many books dedicated to Lightroom so I won’t go into it here, but the one function I appreciate the most is the neutral droplet. If you are having trouble with the white balance of your photos, simply buy a gray card from Amazon. Within Lightroom, move the droplet to the gray card in the photo (see the picture below) and it’ll adjust the white balance for you.

Before and after adjustment example below:

(click the picture to enlarge the image)
Helpful Photography Books
If you are completely new to DSLR, I really like the From Snapshot to Great Shot series. They are really great for beginners to understand the basic features and function of DSLRs.
Here are photography books we have bought and would highly recommend. We have purchased many of the books to read on iPad with the Kindle app to save.
- Food Photography: From Snapshots to Great Shots by Nicole S. Young. One of our favorite books and really helped with lighting and setup instructions.
- Plate to Pixel: Digital Food Photography & Styling by Helene Dujardin
- The Adobe Photoshop Lightroom 4 Book for Digital Photographers by Scott Kelby
Other Helpful Links for Food Photography:
- Tip on how to create different backgrounds/backdrops from Lemon and Anchovies.
- Links and info on Canon deals – we shoot Canon.
- Canon official refurbished site, camera and lens (sometimes Adorama also carry Canon refurbished lenses).
Our Cameras and Lens for Photo Shooting:
From January 2011 to December 2011, we used a Canon T2i with Canon Canon 50mm f/1.4 lens and Tamron 60mm f/2.0 macro lens for most of my photos. The latest version of T2i is T4i.
Then from January 2012, we have been using a Canon 7D and added Canon 5D Mark iii in October 2012. Now we use 7D for step-by-step pictures and 5Diii for final pictures.
Our other lenses include:
- Canon EF 24-70mm f/2.8L II lens
- Canon 70-200mm f/2.8L IS lens
- Canon EF100mm f/2.8L macro lens
- Canon 50mm f/1.4 lens
- Canon EF 180mm f/3.5L Macro
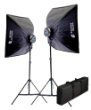
Tools We Love


Next: Growing Visitors to Your Site.
Blogging Tips Home
Platform | Hosting | Technology Tips | Growing Visitors


There is NO need for a $4000 camera to take good pictures. Wow.
Ken! I agree! These days even cellphone smartphones take pretty amazing food pictures.. 🙂
Thanks for this whole series about food blogging! I definitely pinned this on pinterest to share it with others who are starting blogging like I am. I am thankful for my photography experience that i already have though!
Thank you for all your wonderful tips and recipes. I’m just starting my website and it can be very overwhelming looking at other blogger’s fancy photos. I like the layout of your website easy and nice to read.
Thank you for reading, Jen! I tried to visit your blog, but your doesn’t seem to work. 🙁 Thanks again!
Nami, thank you so much for sharing your knowledge! I have one more question, I hope it’s not a secret. I really llike your photo backgrounds. Where did you get them? I’m asking because I’ve moved to San Francisco from Poland one month ago and I had to left all mine backgrounds. Now I need to find some new one and I have no ide where to start. Any tips? Thank you! monika
Hi Monica! Thank you so much for your kind words. Backgrounds mean the wooden board? I have several backdrops – painted or stained. Try going to Home Depot or Lowes and get some woods and paints. Is that what you did too for your backdrops? I really need to work on mine too – new boards have been in garage for a long time now waiting for me to paint… and welcome to San Francisco!!! Hope you’re enjoying your new life in SF. 🙂
It’s interesting to learn the setup and process behind the wonderful pictures of the yummy creations that I see on this blog. Reminds me of the elaborate set up for some of the craft blogs I visit. Definitely a lot to learn and thanks for sharing all the great info.
Thank you for your kind comment Kit! 🙂
I love my 5d MkIII too, but I am a bit stingy on buying more lenses…:-( thank you for the very helpful tips and links, your photos are always inspirational.
Thank you Shen And Nami for great tips on photography.
Enlightening posts! I’m curious… what have been some specific advantages of the 7D and 5D Mark iii over something like the T2i? I’m happy with my T3i, yet curious about upgrading one day.
Hi Shirley,
When we purchased the 7D, the idea is also have it as a family camera. The shutter speed is quite fast (8 frames per second) and we wanted to capture our children at their sports activities. Besides the faster shutter speed, it also has more function buttons for convenience. Other enhancements include weather-seal and more cross-type focus points, but these features do not affect the image quality. The entry level dslr camera such as T3i are so well made there’s not a lot of reason to upgrade to 7D if the goal is to improve image quality.
The 5Diii on the other hand has a full frame sensor and Digic 5 processor compared to the T3i. The image you get with a full-frame sensor is much larger than a crop-sensor. When shooting food photography we are sometimes frustrated with crop-sensor since it limits how much of the shot we wanted to include. We also find images processed by Digic 5+ vs. Digic 4 much sharper and easier on the eye. The 61 points focus allow you to control exactly where you want to focus.
Before buying a camera or a lens, I would recommend renting one from http://www.borrowlenses.com/ and make sure it’s the one that works for you before committing to purchase.
Your photos are always so clear and well-illuminated. (I call them Food Art!) Thanks for showing what’s “behind the scenes” and also for the love you put into your efforts. That shows most of all!
Thank you both for this!!
Hi Nami and Shen!
Thank you so much for taking the time to put these blog posts together and share all of the experience and knowledge. I just started blogging in June.. so only a few months ago, and my biggest struggle are still the pictures, which I’m learning about. I also get a lot of photos rejected by the recipe site, like FoodGawker, DessertSpotting, etc because of lighting and composition issues…
All of these tips and the info on the equipment is so helpful. Now, I just need to get out and purchase them! 😉 Thank you, thank you!! And I love your blog, photography and recipes.
Wow, no wonder you guys take such incredible photographs!
🙂 Mandy