Learn how to make udon noodles from scratch with the traditional Japanese method. It’s easy and fun, and you will be rewarded with delicious handmade noodles far superior to store-bought ones!
One of the easiest Japanese noodles you can make at home is Udon Noodles (うどん). Thick, chewy, smooth, and utterly slurp-worthy, they are my all-time favorite. Udon holds a special place in my heart because it is humble and comforting.
While I often stock up on frozen packages of udon, I take great pleasure in making these noodles from scratch. It is a fun and fulfilling cooking experiment that even a beginner will enjoy!
Table of Contents
What Are Udon Noodles?
Udon noodles, or simply Udon (うどん) as we would say in Japan, are a wheat flour noodle commonly used in Japanese cuisines. These thick chewy noodles are loved for their springy, supple texture and neutral flavor.
Udon noodles can be served in hot dashi soup broth made with kombu and katsuobushi (bonito flakes), eaten cold by dipping in a soy sauce-based sauce called tsuyu, or stir-fried with vegetables and your choice of protein, such as chicken, beef, shrimp, or tofu.
Beyond the classic Japanese-style udon dishes, these noodles are also delicious with various sauces, such as curry, pesto, miso, gochujang, and more!
Why Make Homemade Udon Noodles
I’ve never made pasta or soba noodles (yet!), but I enjoy making homemade udon for these few reasons:
- Fresh tasting and great texture – The texture of udon noodles sold in grocery stores is usually not of good quality. Not only do the noodles break too easily, but they can be floury and doughy. Homemade noodles are chewy with a springy toothsome bite. The freshness is simply unbeatable.
- Easy and requires 3 simple ingredients –The methods for making udon are very straightforward and best of all, you’ll need only flour, water, and salt.
- No special kitchen gadget required –Unlike making pasta noodles, which requires a pasta machine, udon noodles only call for your hands, your feet (read on to find out why), and a sharp knife!
Sounds great, right? There are two things you need to know before we begin.
- It takes time – To be exact, you need at least 3.5 to 4 hours from start to finish (which includes 2.5 hours of inactive time). Just like making bread, the dough must rest to relax the gluten.
- It requires your feet – No, I’m not joking. Because the dough is very hard to knead with hands, the Japanese have used our feet to roll out the dough for many years!
My family devours these homemade udon noodles every time I make them. There are no preservatives and the taste and texture are much better than store-bought brands.

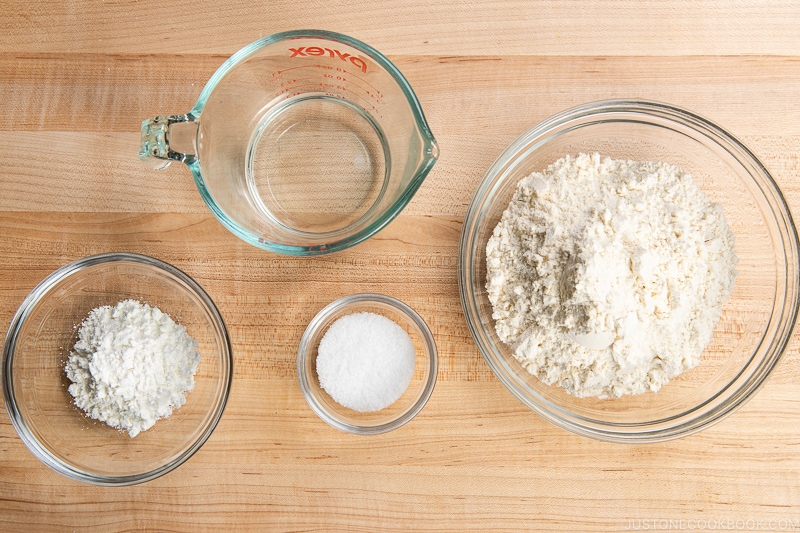
Ingredients for Homemade Udon Noodles
The ingredients and method for making udon noodles are very simple!
- All-purpose flour or plain flour (中力粉)
- Salt
- Water
- Potato starch (cornstarch) for dusting
Why do we use potato starch (or cornstarch) instead of flour? The flour will be absorbed into the noodle dough; therefore, it’s best to use potato starch or cornstarch to prevent the dough from sticking to each other.
Standard Udon Noodle Recipe Measurement
For one serving:
– 100 g all-purpose flour
– 50 g salted water (5 g salt and 45 g water)
So, for two and four servings, it is as simple as:
2 servings: 200 g all-purpose flour + 100 g salted water (10 g salt + 90 g water)
4 servings: 400 g all-purpose flour + 200 g salted water (20 g of salt + 180 g water)
For the best result, please use a kitchen scale. I didn’t include a “cup” measurement (I’m sorry!) as 1 cup of flour varies depending on how you measure it. The flour is compressed while you scoop, so it will not be accurate.
How to Make Fresh Udon Noodles
- Make the dough by combining ingredients together.
- Rest for 30 minutes. [Inactive Time]
- Knead the dough by stepping on it with your feet.
- Rest for 2 hours (3 hours in winter). [Inactive Time]
- Roll out the dough and cut into noodles.
How to Store
You can cook the freshly made udon right away! But if you use it later, you can divide the uncooked noodles into smaller portions and freeze them for up to a month.
Udon making is truly one of the rewarding and joyful rituals for any noodle lovers and home cooks. Give it a go and let me know how it turns out for you!
How to Cook Fresh Udon Noodles
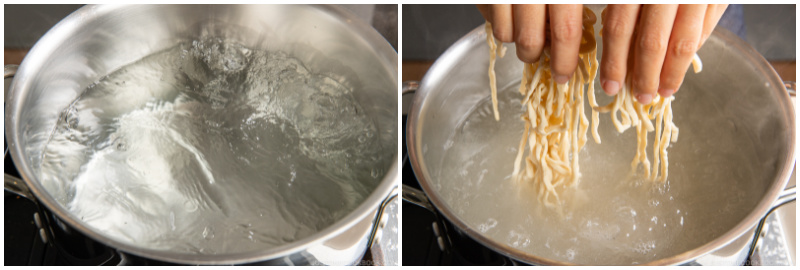
Bring a big pot of water to a rolling boil. You don’t need to add salt to the water; the noodles are already seasoned and will release some salt during cooking). Loosen the noodles, leaving the excess starch behind, and add them to the pot.
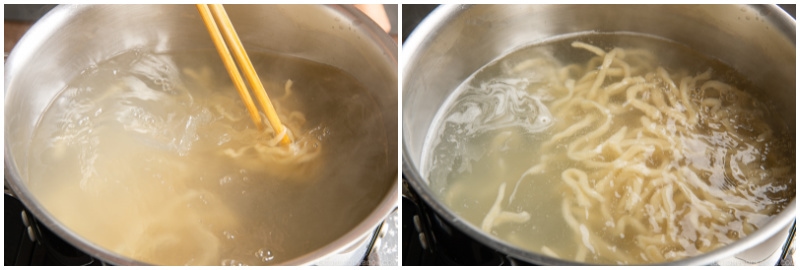
Cook, stirring occasionally, for 10 minutes (depending on the thickness of your noodles).
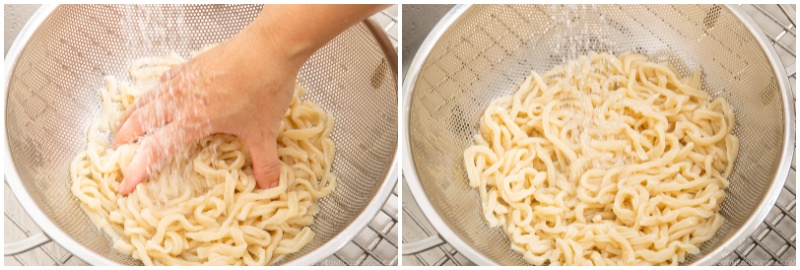
Drain and rinse well under cold running water to remove the starch and give the noodles a firm texture. The noodles are now ready to use in your favorite udon recipe.
How to Best Enjoy Your Udon Noodles
You can enjoy a variety of soups, sauces, and toppings with your udon noodles to make a complete, delicious meal.
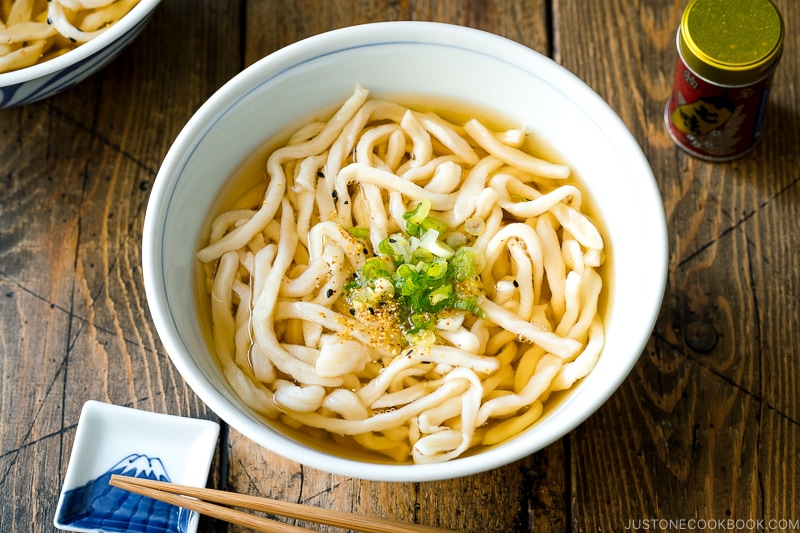
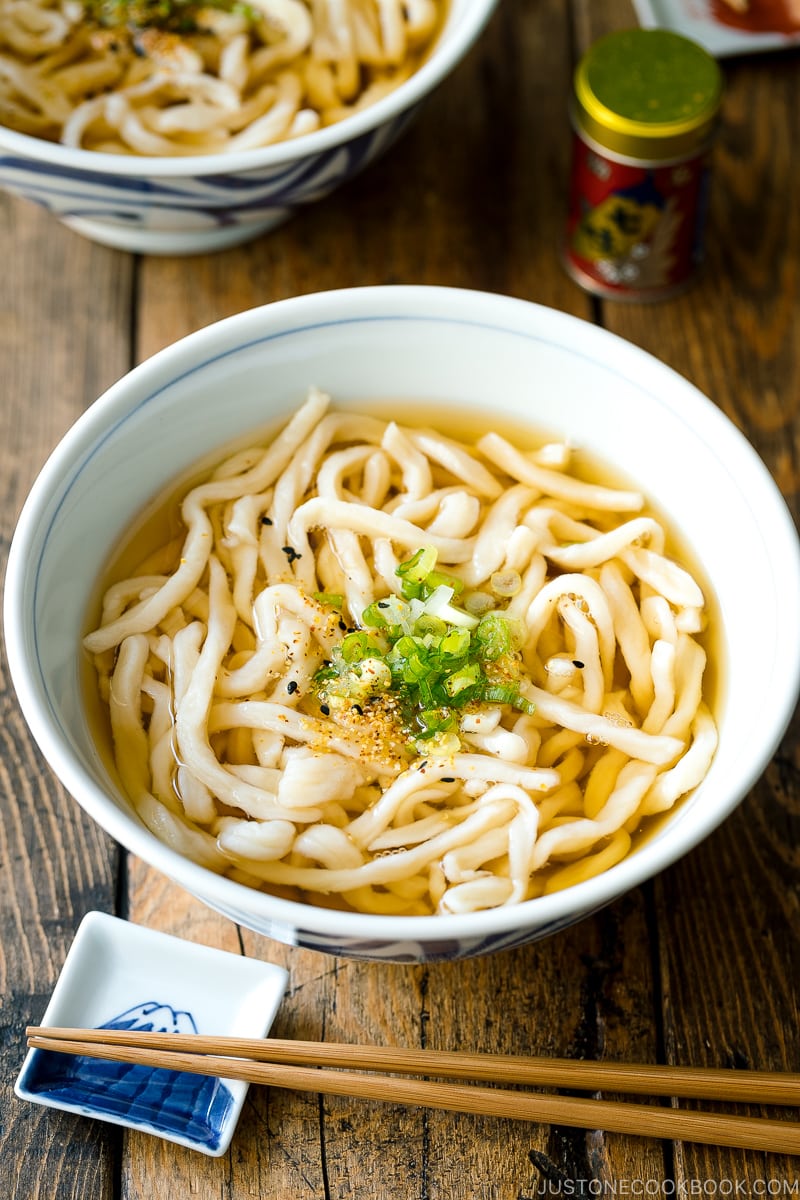
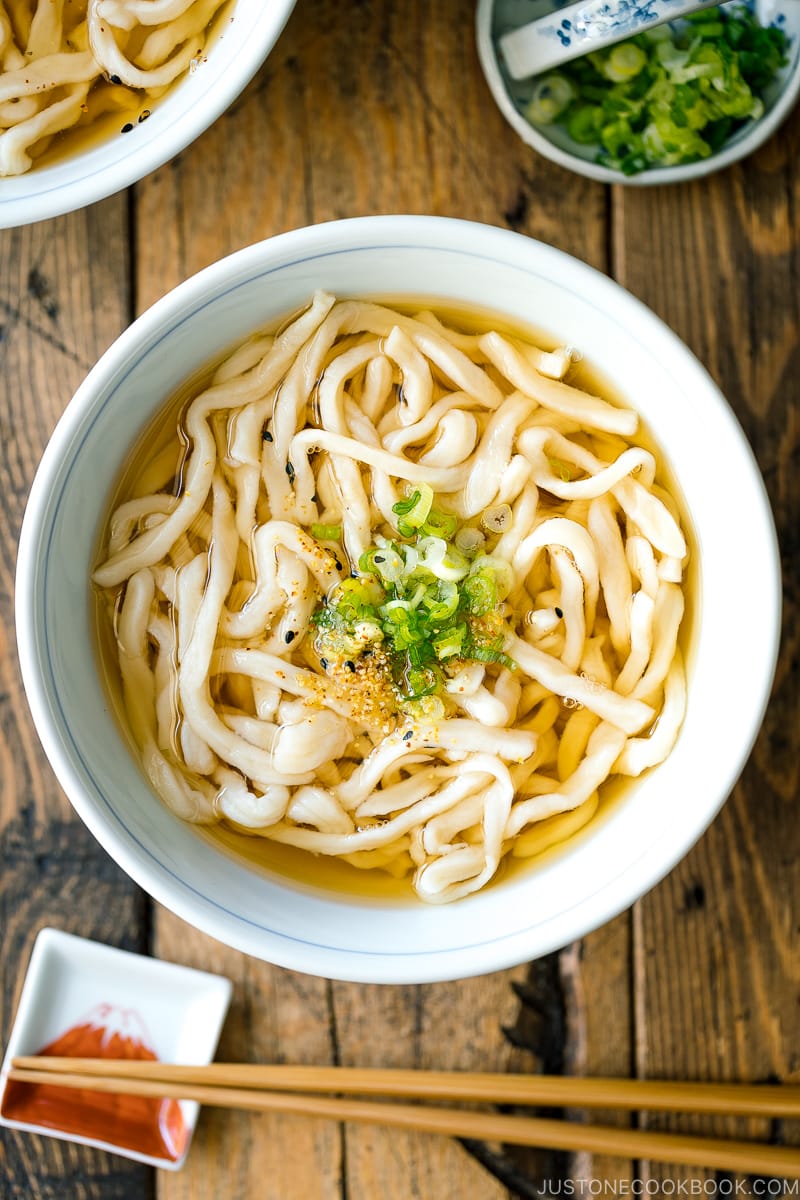
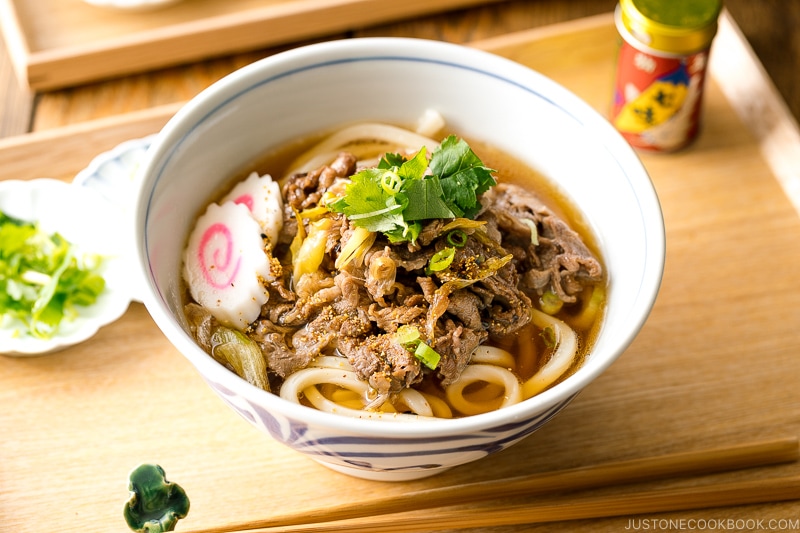
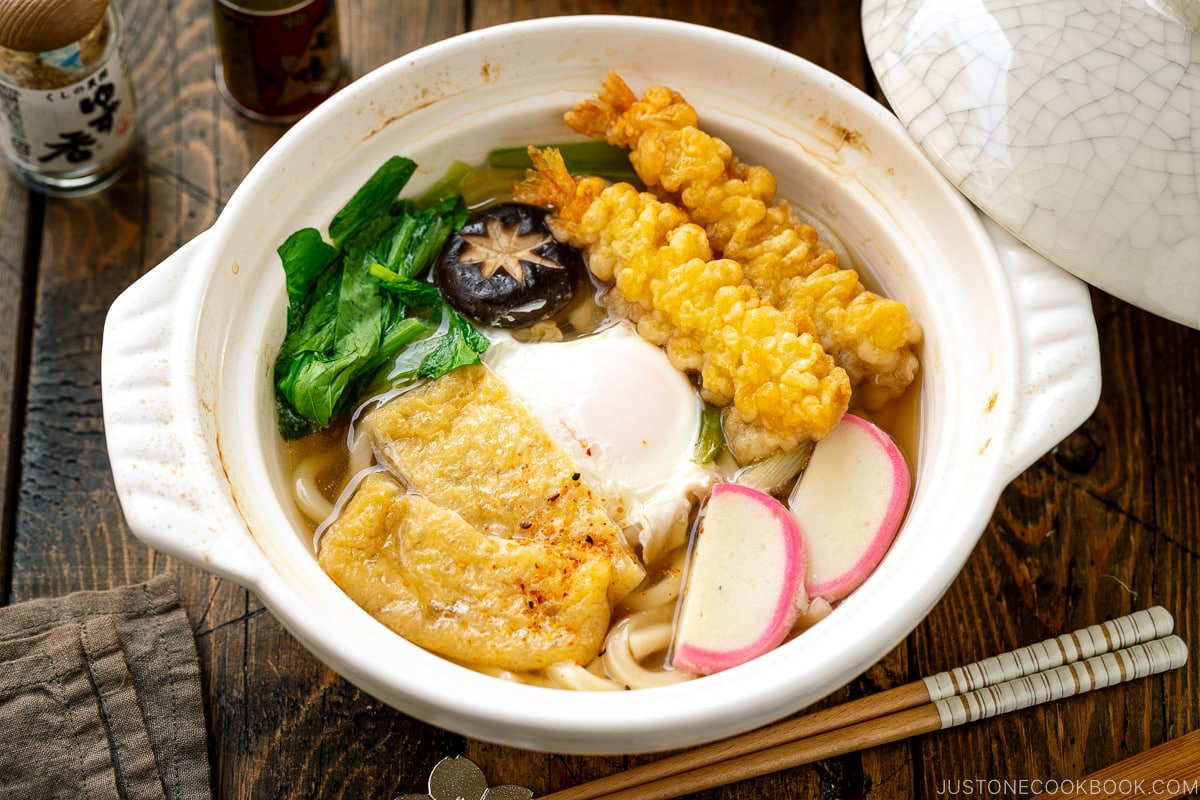
For hot noodle soup, quickly heat the cooked noodles either in a pot of hot water or under hot running water. Serve in individual bowls, pour soup broth, and garnish with green onion on top. This is the classic Udon Noodle Soup (Kake Udon). You can make various hot noodle soups like Beef Udon, Nabeyaki Udon, Vegetarian Udon, Kitsune Udon, and Curry Udon.
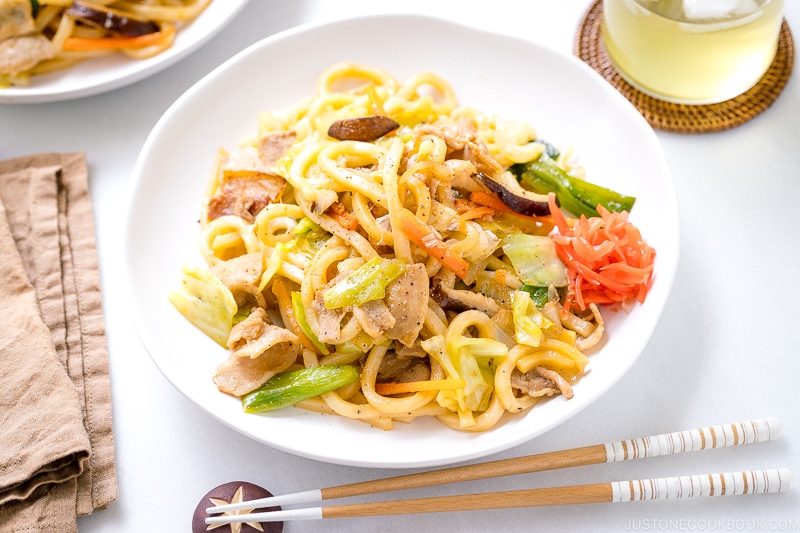
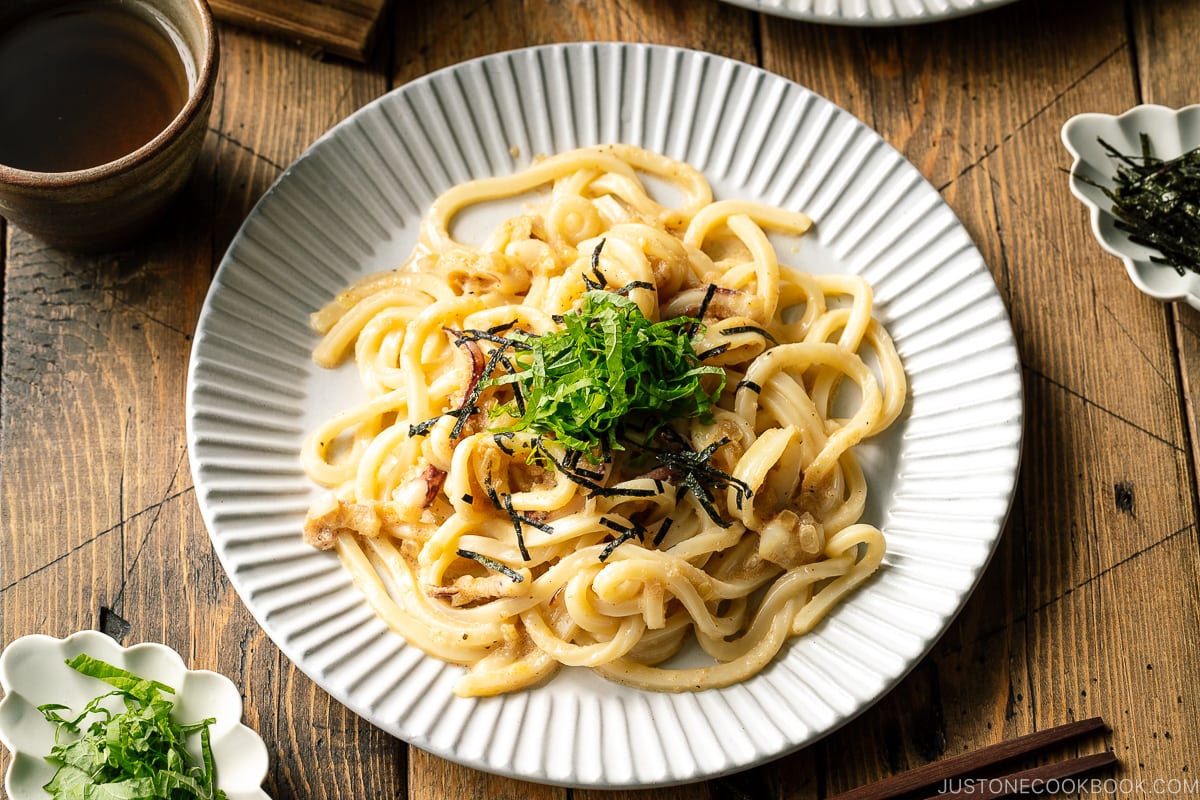
For soulless udon noodles, stir-fry noodles like Yaki Udon are perfect for a busy weeknight. Stir fry cabbage, carrot, mushrooms, and protein (beef, chicken, egg, seafood, and tofu) along with udon noodles. Don’t miss trying out Japanese-style wafu pasta such as Mentaiko Udon.
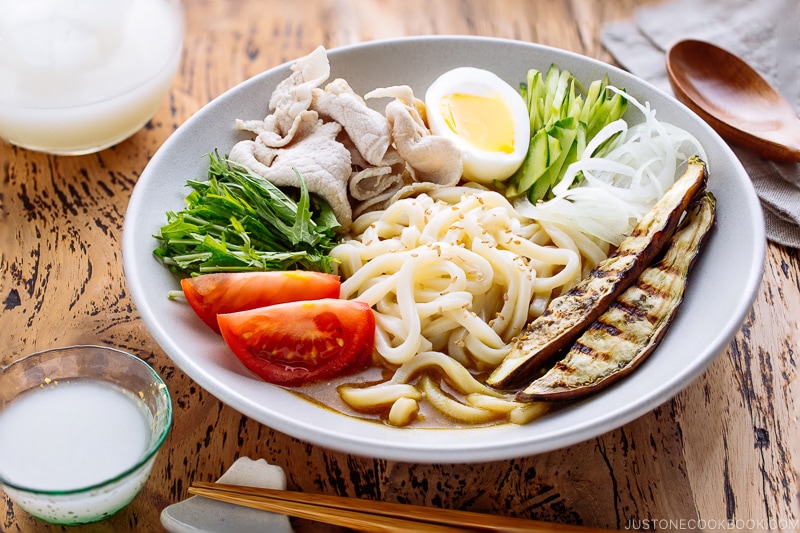
I also recommend refreshing chilled noodle dishes like Cold Tanuki Udon and Cold Curry Udon.

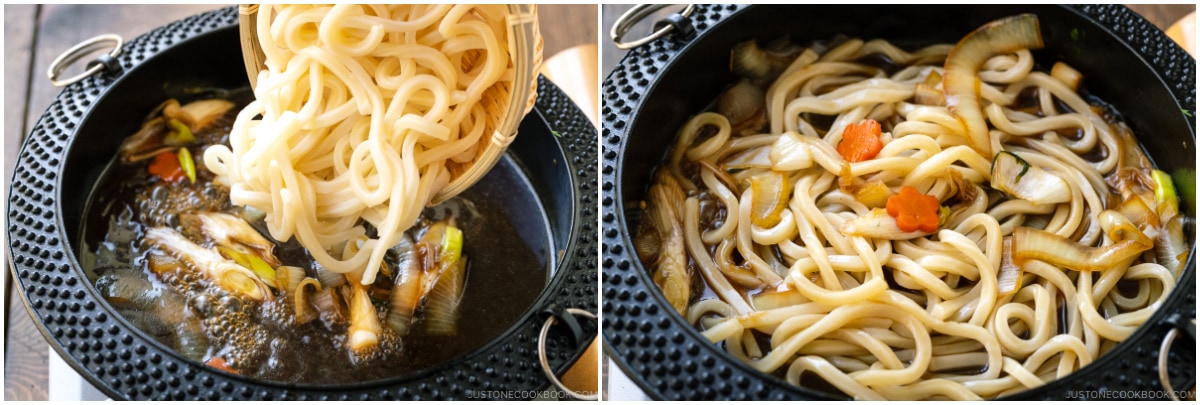
Lastly, you can enjoy the udon noodles for the finishing course of a Sukiyaki meal.
10 Important Tips to Remember
Tip #1: Use a Kitchen Scale
The kitchen scale these days is about $10, and measuring ingredients in metrics is effortless. And, zero error! If ten people use a kitchen scale to measure flour, everyone gets the same amount, and you know it’s almost impossible with a cup measurement.
Tip #2: Don’t adjust the amount of salt
There are a few reasons, but salt plays a key role in tightening the flour’s gluten and increasing the dough’s elasticity.
Don’t worry, the noodles will release some salt while cooking in unsalted water and won’t be salty. Trust me!
Tip #3: Evenly distribute salted water
When adding salted water to the flour, you want to go slow and steady and distribute it evenly into all parts. This helps to achieve a consistent elasticity of the dough.
Tip #4: Try not to add more water
This is probably the MOST IMPORTANT TIP. Bear in mind that the udon dough is tough. If you can knead it with a rolling pin or hands, you probably added more water than you should.
If you struggle to combine the dough mixture into a ball, add a very small amount of water, but do so carefully. If possible, avoid adding more.
Tip #5: Get a large plastic bag
I try not to use plastic bags, but it is a very helpful tool, especially when stepping on them with our feet. Get a 2-gallon bag for this recipe. No, those 1-gallon ones are way too small.
Tip #6: Do not skip “resting” time
The same approach as bread making, it’s very important to let the gluten relax before you work on the noodle dough.
Tip #7: Step on the dough from the center
When you press down the dough, start stepping from the center with your toes. Then spread the dough toward the outer edges, just like you would roll the dough with a rolling pin.
Tip #8: Knead until earlobe texture
“Knead until the dough is as soft as your earlobes” is a common expression in Japanese cookbooks and recipes. After kneading, the dough should become pliable and softer, so you can finally roll it out with a rolling pin!
Tip #9: Roll out the corners of the dough
Ideally, you want the dough rolled out perfectly rectangular or square. That way, all of your noodles will be equal in length.
Tip #10: Use a sharp knife
A sharp knife gives a clean edge to the noodles, leading to a great texture.
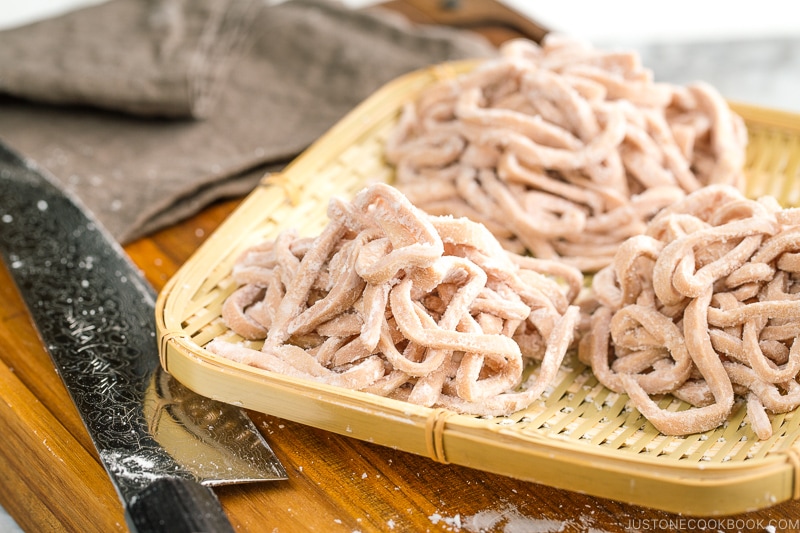
How to Make Pink Udon Noodles
In 2015, I collaborated with other talented YouTubers for Tastemade‘s new “Hero Series“. The star ingredient was beets, which I used as a natural dye to make pink udon noodles. If you are wondering about the taste of these pink udon noodles, you don’t really taste the beets.
Ingredients for Pink Udon Noodles
- 200 g (7 oz) all-purpose flour
- 80 ml (⅓ cup) water
- 10 ml (2 tsp) beet juice (see below)
- 10 g tsp kosher/sea salt
- potato starch/cornstarch (for dusting)
For Beet Juice: Peel and slice a beetroot ½” (1.3 cm) thickness. Boil it in 1 cup (240 ml) of water for 20 minutes until the beet juice is reduced to 2 tablespoons. You will only need 2 teaspoons of this liquid to color the udon.
Follow the same method as the regular udon noodle recipe below or watch my tutorial video.
My daughter LOVED these pink udon noodles. They are fun for special occasions, such as Valentine’s Day, Japanese Gir’s Day, or Breast Cancer Awareness Month.
Do You Like Making Food from Scratch?
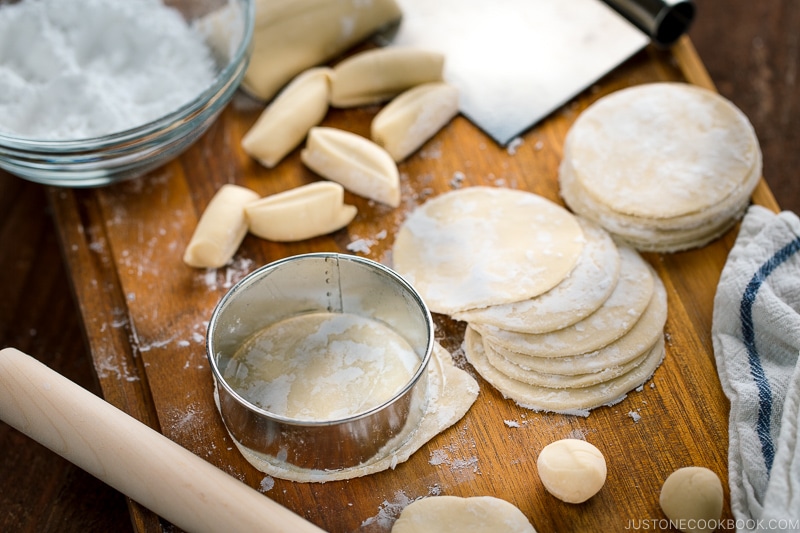
Looking for another delicious made-from-scratch cooking project? These Homemade Gyoza Wrappers are a treat!
Wish to learn more about Japanese cooking? Sign up for our free newsletter to receive cooking tips & recipe updates! And stay in touch with me on Facebook, Pinterest, YouTube, and Instagram.
Homemade Udon Noodles
Video
Ingredients
- 7 oz all-purpose flour (plain flour) (1½ cups + 3 Tbsp; weigh your flour or use the “fluff and sprinkle“ method and level it off)
- 6 Tbsp water
- 0.35 oz Diamond Crystal kosher salt (3½ tsp; weigh your salt since different varieties vary in weight)
- potato starch or cornstarch (for rolling and dusting)
Instructions
- Gather all the ingredients. I highly encourage you to weigh your flour and salt using a kitchen scale for this recipe. Click on the “Metric“ button at the top of the recipe to convert the ingredient measurements to metric. If you‘re using a cup measurement, please follow the “fluff and sprinkle“ method: Fluff your flour with a spoon, sprinkle the flour into your measuring cup, and level it off. Otherwise, you may scoop more flour than you need.

To Make the Udon Dough
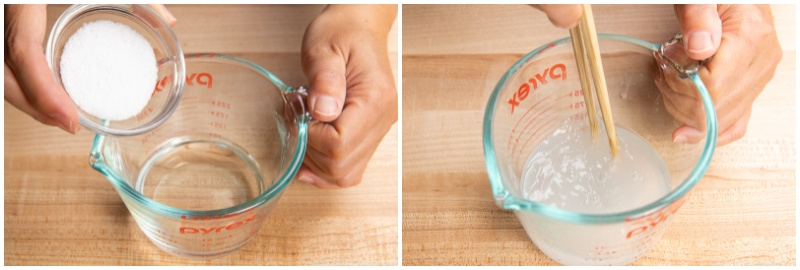
- Add 0.35 oz Diamond Crystal kosher salt to 6 Tbsp water and stir until it’s completely dissolved. Important: The amount of salt may seem like a lot, but some of it will be released into the boiling water while cooking. Also, you will not need to salt the cooking water because the udon noodles are already salted.

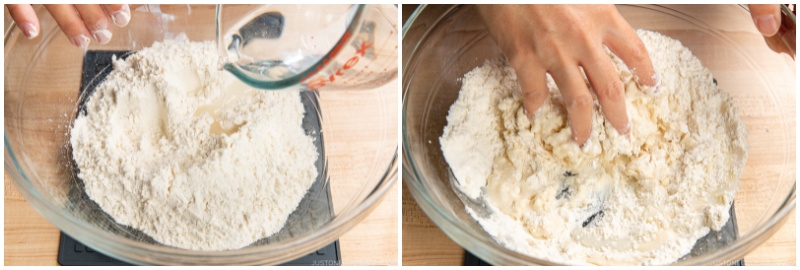
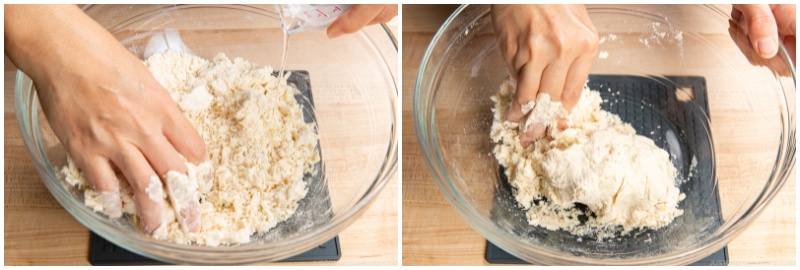
- Place 7 oz all-purpose flour (plain flour) in a large bowl. Gradually distribute the salted water evenly over all parts of the flour while mixing with your hands. This way, salt doesn‘t get absorbed into one part of the dough.
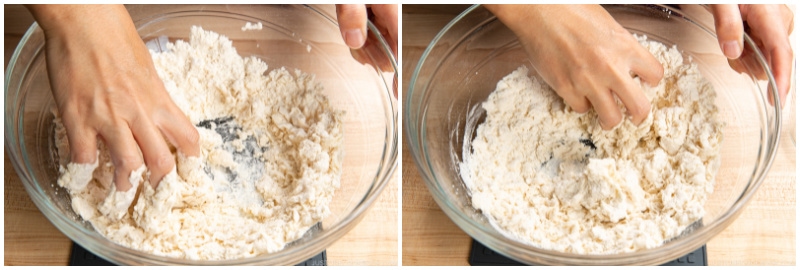
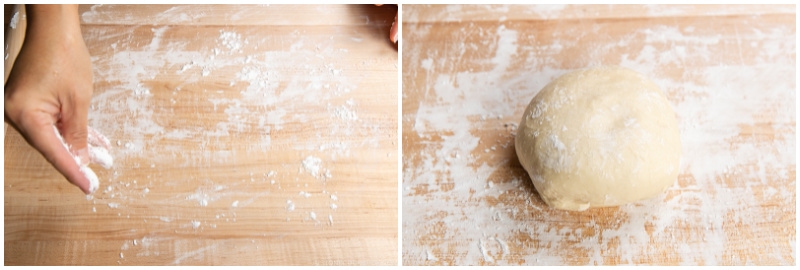
- Combine the dough until there is no dry flour left and form it into a ball.
- If there is some dry flour left, add only a very small amount of water needed to hydrate the flour. Important: The dough should be really tough, unlike bread dough. Try your best to avoid adding water, unless you have a really hard time pressing the dough into a ball. Again, use as little water as possible.
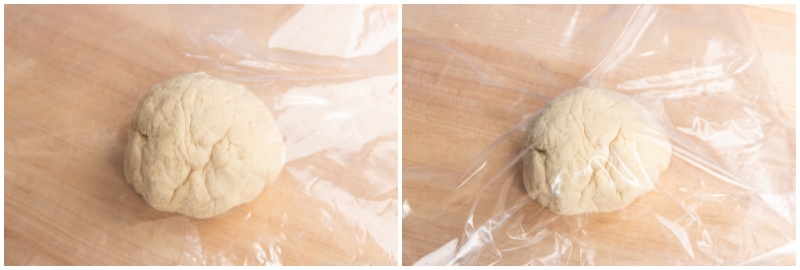
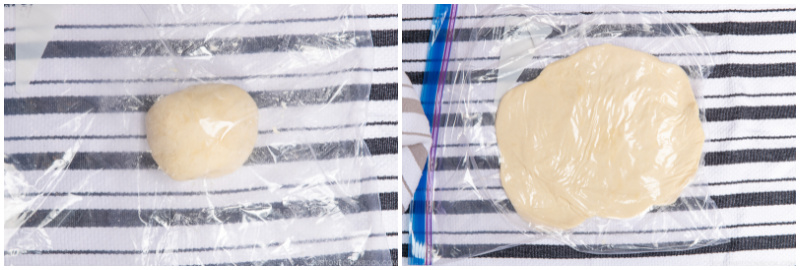
- Place the dough ball in a large durable plastic bag (such as a 2-gallon Ziploc bag).
- Close the bag leaving a small air gap and leave it for 30 minutes to relax the gluten.

To Knead the Dough
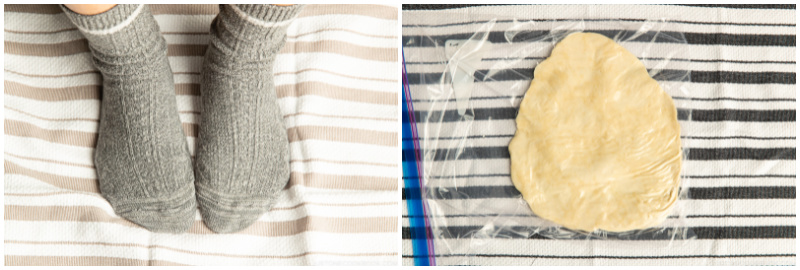
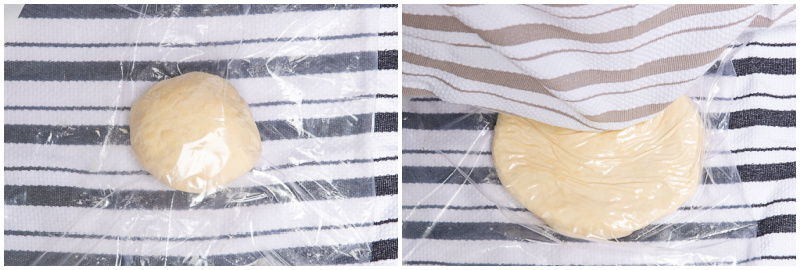
- To keep your dough and its bag clean while kneading, place the bag between two kitchen towels on the floor.
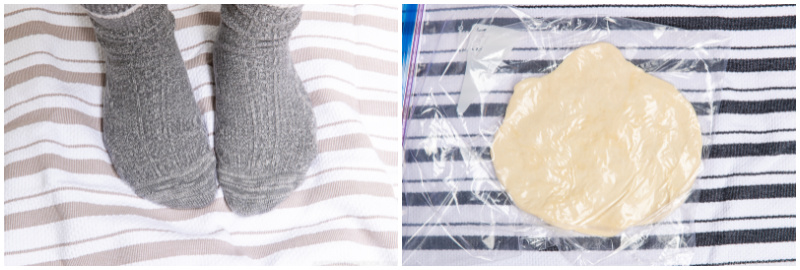
- Step on the bag with the dough inside using the heels of your feet. Use your weight to flatten, slowly turning 360 degrees as you stretch out the dough from the center to the edge. You can knead with your hands instead, but it will take more effort and time. Stepping on udon dough with your feet is a common practice in Japan! Continue to step on the dough until it is stretched out and completely flat.
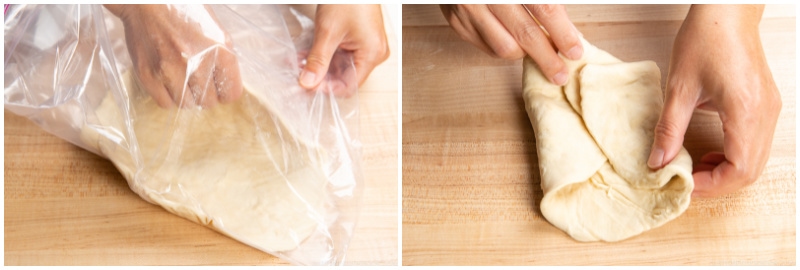
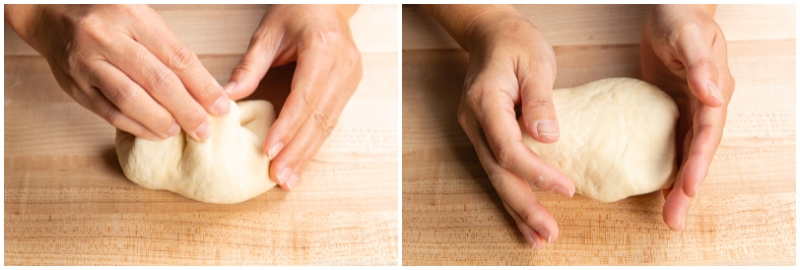
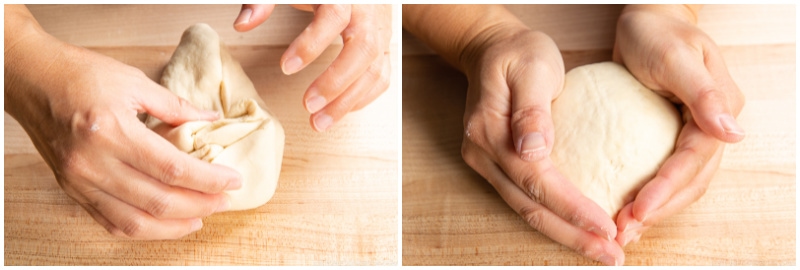
- Remove the dough from the bag and fold in the edges toward the middle.
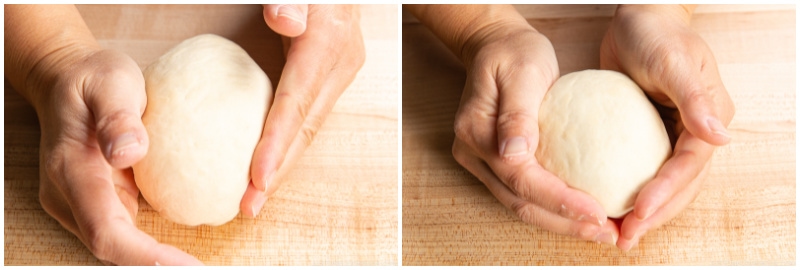
- Collect the edges in the center of the dough and flip it over so the seam is facing down.
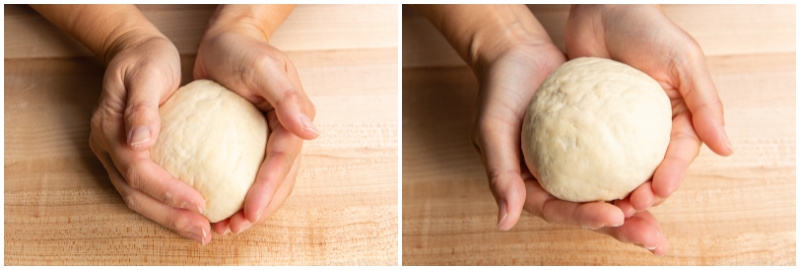
- Press and rotate the dough with cupped hands to form it into a ball.
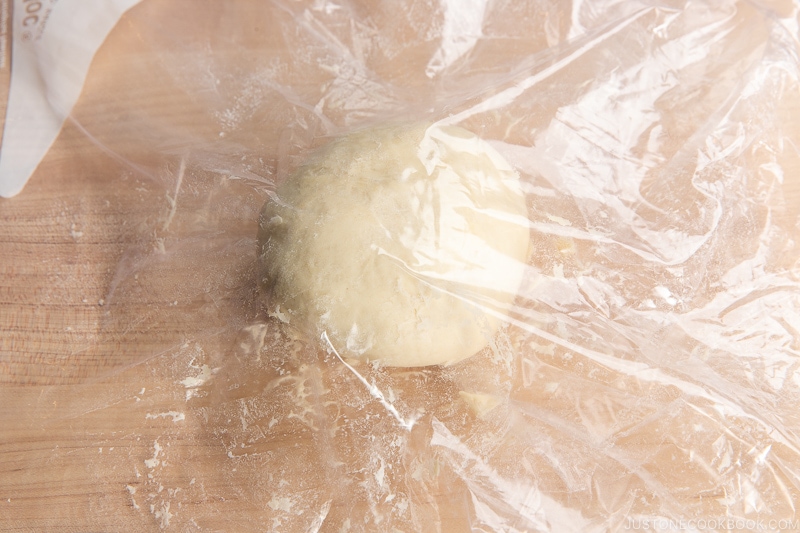
- Place the dough ball back into the bag and close the bag, leaving a small air gap. Repeat the dough kneading or “stepping“ process from Step 2. You can see if you are stepping on the right location to flatten the dough by occasionally lifting the towel to check.
- Continue stepping on the dough until it is stretched and flattened.
- Remove the dough from the bag and fold the edges toward the center, flip it over, and form it into a ball again.
- You will notice that the dough is slightly more pliable than the first time.
- Repeat this process three more times (for a total of five rounds of dough stepping), or until the dough is as soft as an earlobe (that’s how we describe the texture of the finished udon dough in Japan).
- After the fifth round of dough stepping, take out the dough and form it into a nice, round ball. Put the dough back into the bag and close.


To Rest the Dough (2 Hours)
- Rest the dough on the kitchen counter for 2 hours (3 hours in the wintertime). You can also keep the dough in the bag and store it in the refrigerator overnight if you would like to continue the rest of the process on the following day.
To Roll Out the Dough
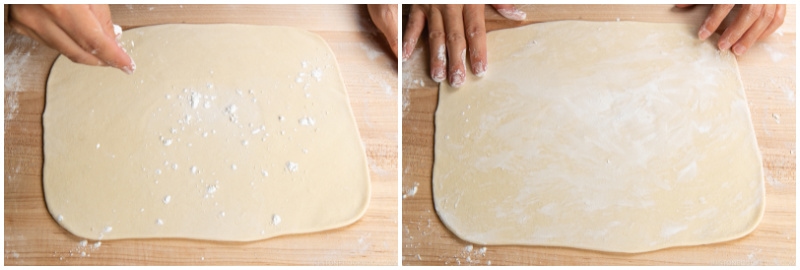
- Dust the work surface with potato starch or cornstarch and take out the dough from the bag. Tip: It‘s especially important to use potato starch or cornstarch if you plan to freeze the noodles since the noodles tend to absorb wheat flour and cause them to stick to each other.
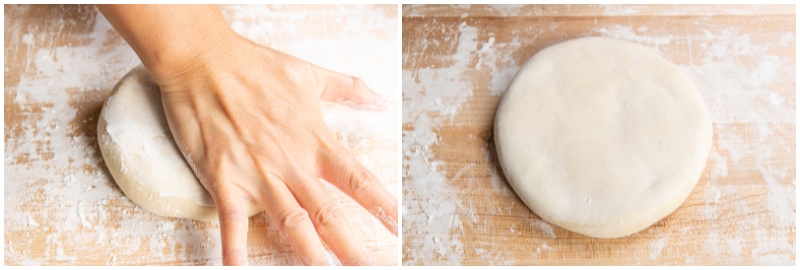
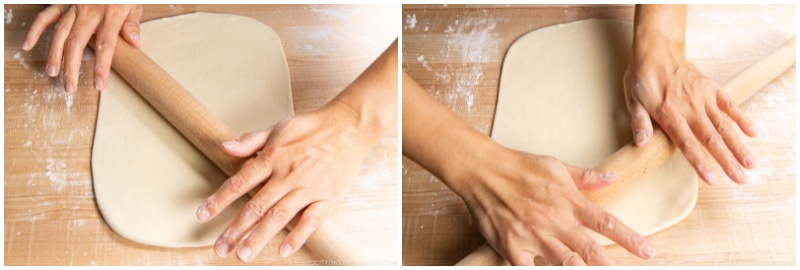
- Flatten the dough with your hand.
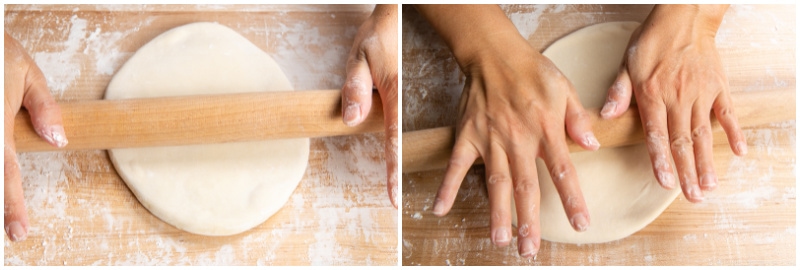
- Using a rolling pin, first roll out the dough into an oval shape. Then, turn the dough 90 degrees and roll it out evenly in the other direction.
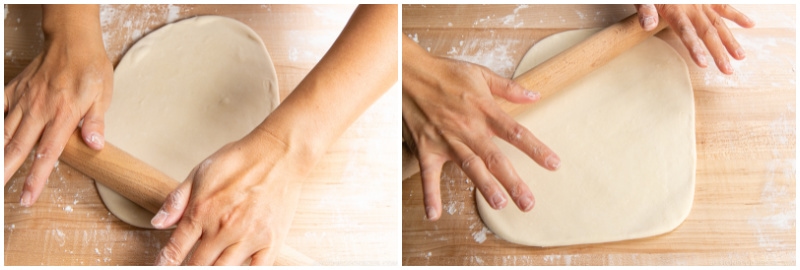
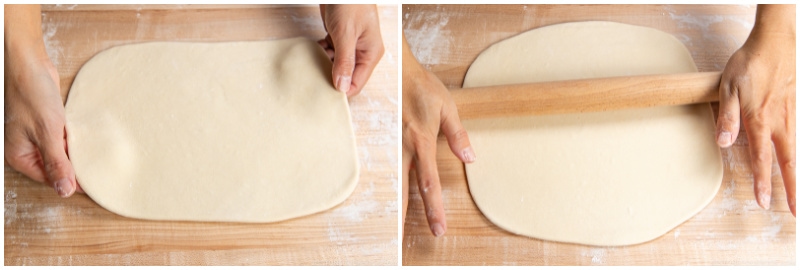
- Then, roll out the corners to create a rectangular shape.
- Dust the dough with potato starch or cornstarch occasionally to make sure the dough does not stick to the rolling pin or the work surface.
- Turn the dough 90 degrees and roll out the dough more.
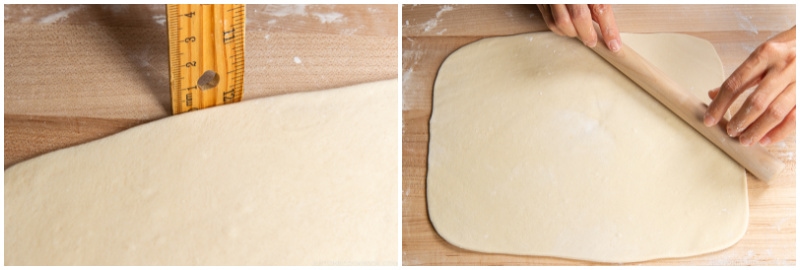
- The dough should be 3 mm (⅛ inch) thick and about 10-12 inches long.
- Roll out each rounded corner so the dough forms a rectangle. This will allow the noodles to be the same length when you cut them.
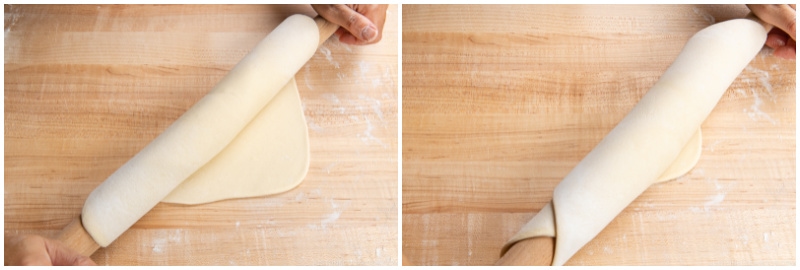
- Dust more potato starch on top of the dough and spread it thinly.
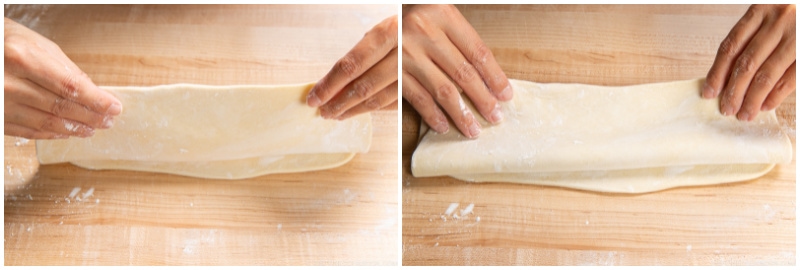
- Fold the dough in half or thirds and sprinkle more potato starch on top
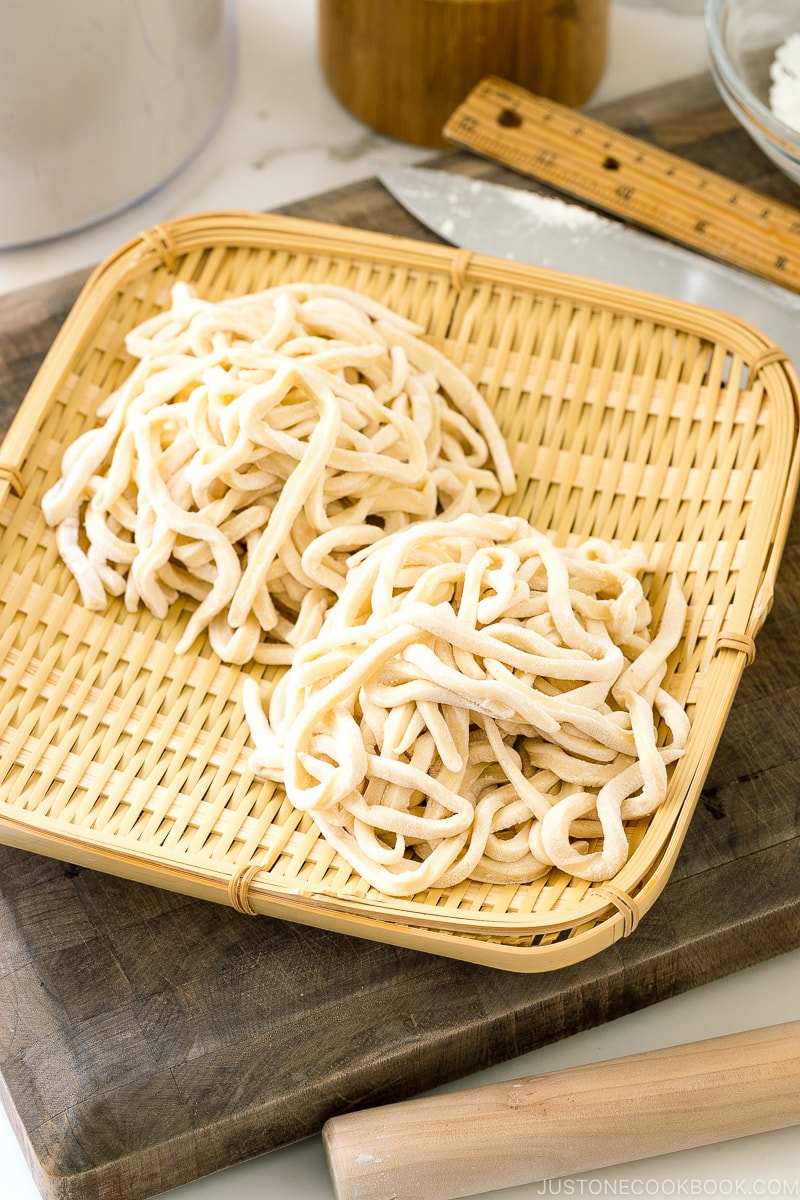
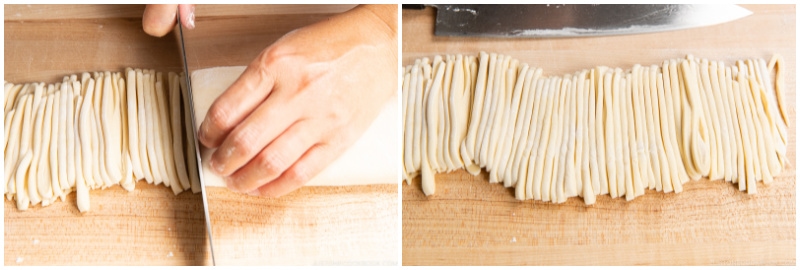
To Cut into Noodles
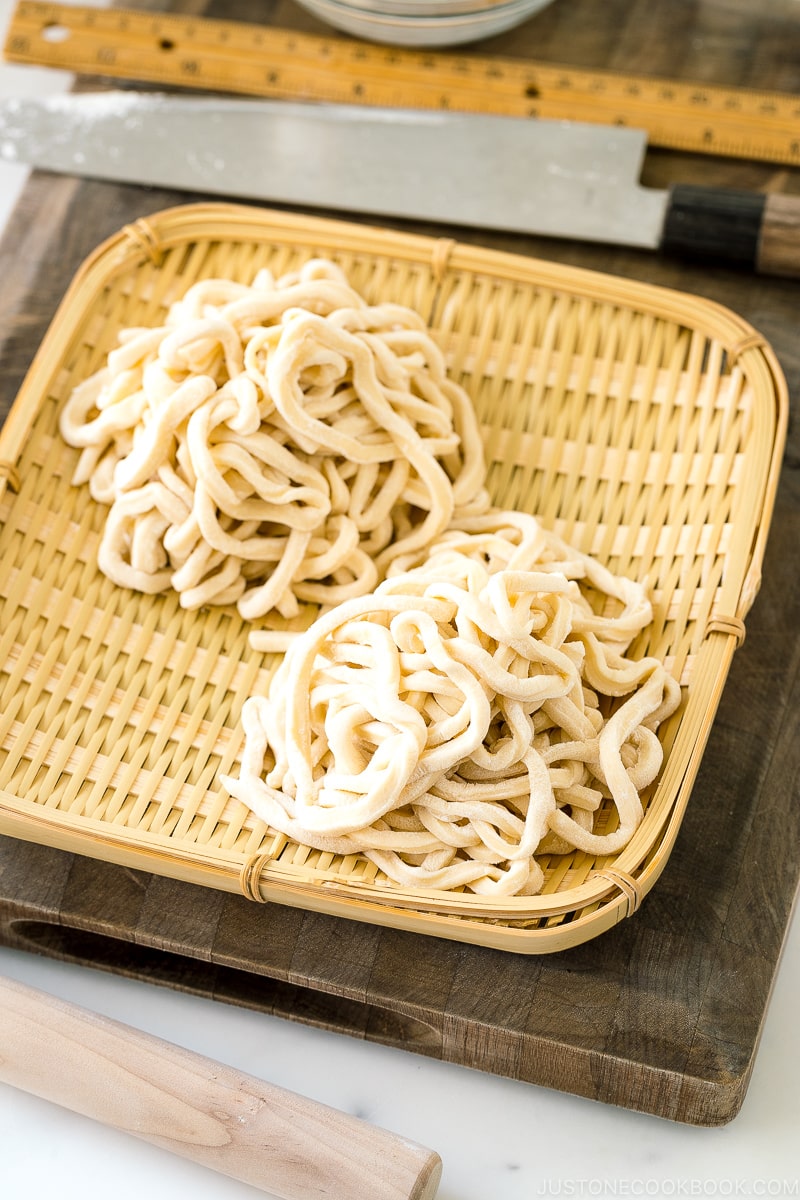
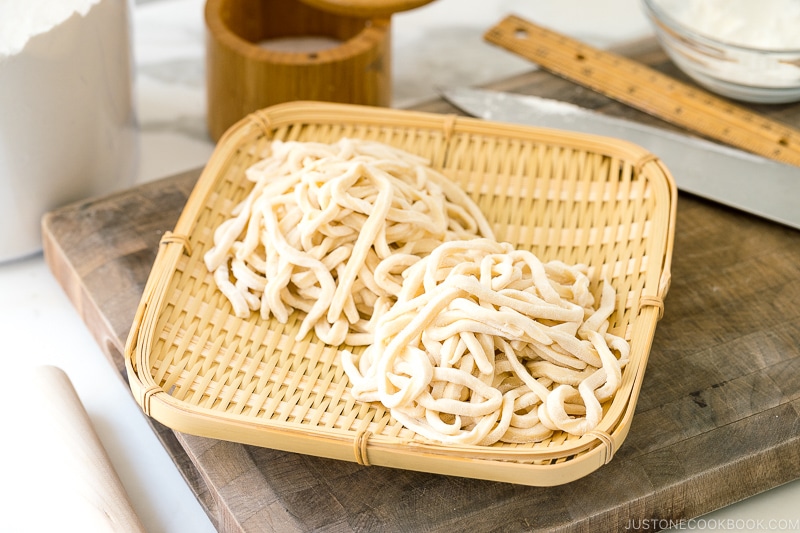
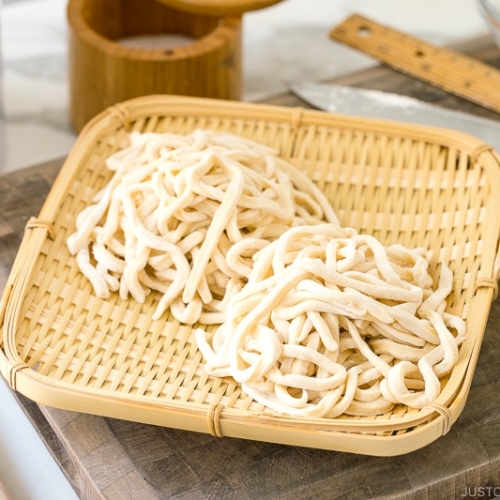
- With a sharp knife or cleaver, cut the folded dough into noodles about 3 mm (⅛ inch) wide.
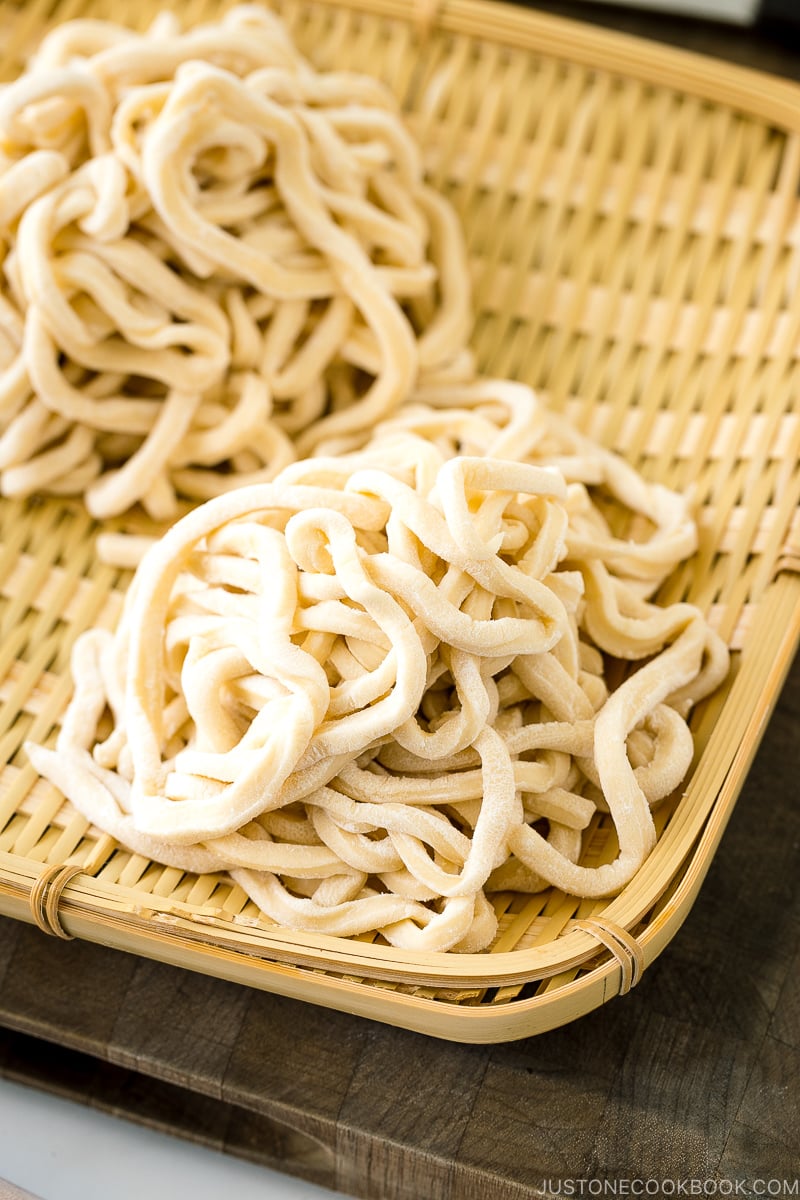
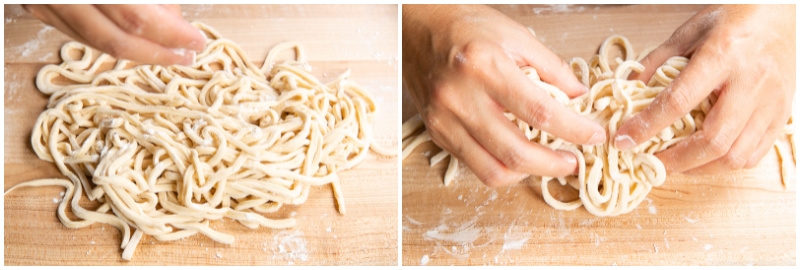
- Pick up some of the noodles and fluff them with your fingers to make sure they are covered with the potato starch/cornstarch to prevent them from sticking to each other. The noodles are ready to cook now or freeze for later.
To Cook the Fresh Noodles
- Bring a big pot of water to a rolling boil (DO NOT add salt to the water; the noodles are already seasoned and will release some salt during cooking). Loosen up the noodles, leaving the excess starch behind, and add the noodles to the pot.
- Cook, stirring occasionally, for 10 minutes (depending on the thickness of your noodles).
- Drain and rinse well under cold running water to remove the starch and give the noodles a firm texture. The noodles are now ready to use in your favorite udon recipe.

To Serve the Cooked Noodles
- For hot noodle soup, you can quickly heat up the cooked noodles either in a pot of hot water or under hot running water. Serve in individual bowls and pour soup broth on top. Please see my Udon Noodle Soup (Kake Udon) recipe to make my classic udon broth. You can use these noodles in hot soups like Beef Udon, Vegetarian Udon, Nabeyaki Udon, and Curry Udon.
- You can also enjoy these udon noodles in stir-fries like Yaki Udon, refreshing chilled dishes like Cold Tanuki Udon and Cold Curry Udon, the finishing course of a Sukiyaki meal, and wafu pasta-style Mentaiko Udon.
To Store the Fresh Noodles for Later
- Divide the uncooked noodles into individual portions (150 g per person) and freeze in an airtight container or bag for up to a month. You can refrigerate it for a few days, but it tastes better when you freeze the fresh udon right away. To cook from frozen, bring a large pot of water to a boil and cook the frozen udon for 12 minutes without defrosting. Drain and rinse well under cold running water to remove the starch. For hot noodle soup, you can quickly heat up the noodles in hot water or warm them up under hot running water.
Nutrition
Editor’s Note: This post was originally published on February 7, 2015. The post has been updated with a new video, new images, and new content in October 2021.


Living in rural South Africa, without quick access to Asian stores, I decided to try this out. WOW, it was amazing! I didn’t believe for a second that the dough would transform as it did. It was silky smooth & super soft when I went to roll it out. I added them to a spicy chicken stir-fry – it was a hit!
Thank you so much – Next is Quick Kimchi
Hi Charleen! We are so happy to hear you enjoyed Nami’s recipe!
Thank you so much for taking the time to review her recipe. Happy Cooking!
I’ve tried making this recipe 3 times, but on every single occasion i’ve had the dough tear and break during the kneading. I’ve also had to rest much longer because it was not elastic enough. The end result is always incredibly difficult to roll out, leaving me with thick uneven noodles.
I’ve tried to be as strict with the recipe as I could, adding no additional water but this keeps happening. Any ideas on how to prevent this? It seems like from the very beginning it just does not want to soften
Hi, Jack! Thank you for trying Nami’s recipe.
It could be different in the kind of flour you use. Check out Nami’s 10 Important Tips to Remember in this post, and if the problem persists, you may need to add a little water. Your location may be more dry, which might be contributing to the discrepancy.
We hope this helped!
Way too much salt. I was concerned, but stuck to the tips and directions anyway. The water did not cook off nearly any of the salt. It is so overwhelmingly salty. My best recommendation is add maybe half the salt it calls for, if even that.
I would love to make this recipe again with just one teaspoon of salt. I used less than the exact measurements too.
Hello, Finn. Thank you so much for trying Nami’s recipe.
It might be the kind of salt you used. We hope that your next try with your preferred salt amount will make your Udon delicious.
Happy cooking!
Greetings from Norway! I’m about to start to make this recipe, but didn’t manage to buy koscher salt (since that is not regular salt item you can buy in a grocery store). Is it ok to use regular salt, if not which other salt do you recommend, if not koscher? 🙂
Thanks again for the recipe, and looking forward to make these udon noodles and some of the other recipes from yours!
Hello, Yann. Thank you so much for trying Nami’s recipe.
You may use table salt, but we recommend using only half of the recipe’s amount.
We hope this helped!
wowowow what technique, thank you nami so much and for all your efforts sharing & naomi taking time answering questions with us!
making dough for my brother and noodles are a lot less intimidating now thanks to you. i was wondering how to consider the rest timing:
ie. after second time what would be best if dough sitting >2 hr at room temp?
is it ok to knead/rest bf serving?
finally interested if anyone knows if udon can be adapted with whole wheat? thank you so much!
Hello, Alice! Aww. Thank you for trying out Nami’s recipe and providing your valuable feedback. 😊 It made our day!💞
If you wish to rest the dough for more than 2–3 hours, we recommend keeping it in the refrigerator.
Regarding whole wheat udon, we have seen people attempt it, but we haven’t had a chance to try it ourselves. As a result, we are uncertain about the amount of water that would provide the best texture. If you decide to experiment with it, please share your results with us! 🤗
Hello,
Thank you so much for this recipe, the noodles came out great and tasted amazing. I really appreciate the time and effort you put into this guide!
Sincerely,
Pasquale
I was wondering if I could use a kitchen stand mixer in order to knead the dough?
Hi Pasquale, Thank you so much for trying Nami’s recipe!
We are so happy to hear you enjoyed homemade Udon.🙂
The Udon dough is pretty tough and way harder than bread dough, so we don’t recommend using the stand mixer.
Hi, thank you for all your lovely recipes! In this one would it be better if I used a higher or a lower protein content AP flour? I have King Arthur at 11.7% it General Mills at about 10.5%. Thank you in advance! Michaela
Hi Michaela, Thank you for trying Nami’s recipe.
The best flour to make udon has a protein content of 8–10%. It will produce a mochi-like and chewy texture.
We hope this helps and that you enjoy making udon soon!
Please let us know how it goes!
If I want to double the recipe do I do it as 2 balls of dough or 1? If it’s 1 ball then is the sheet then 20-24 inches long instead of 10-12?
Hello, Laurie. Thank you for trying Nami’s recipe.
If you used two-gallon ziplock bags, making two balls and arranging them in two bags would be easier.
The final noodle length should be 10-12 inches, so if you make one giant ball, you’ll need to make a wider sheet or 22 inches long and cut it in two.
We hope this was helpful!
Thank you so much!
I am autistic and this is a simple, yummy safe food for me. Never a miss! Thanks a lot for this very easy recipe. Love from France,
Hi Amber! Thank you so much for reading Nami’s post and trying her recipe!
We are so happy to hear this recipe was very easy to follow and you enjoyed it.
Happy Cooking! 😊
Hi, I’ve have made your udon so many times and they are great pretty much every time. I was wondering if you had any ideas on how I could send some to my brother in another State?
Hi Lindsey, Thank you so much for trying Nami’s recipe and for your kind feedback.
This Udon can be frozen; how about shipping them via FedEx? https://www.fedex.com/en-us/shipping/how-to-ship-perishables.html
We hope this helps and that your brother can enjoy the handmade Udon soon.☺️
can you use this receipe on the pasta noodle machine?
Hello, Grace. Thank you for experimenting with Nami’s recipe!
We haven’t tried it yet with the machine, but it should work.
If you try it, please let us know how it goes.
Hello there,
I use my pasta machine for kneading the dough and for cutting the noodles, and it works well. I think I prefer to cut the noodles with a knife after prepping the sheets with the machine, since I only have linguine and spaghetti widths. Hope this helps.
Hi, Grey! Thank you for experimenting with Nami’s recipe and sharing your results!
We’re pleased to hear that the pasta machine worked well! Happy cooking!
Thank you! That was super helpful. I had Udon soup at a restaurant yesterday and now I am obsessed. You had a lot of great ideas to make it easier. I am excited to try to make them.
Hi Noelle! Thank you so much for your kind words about Nami’s recipe!
We are so happy to hear that her guidance made things easier.
We hope you enjoy making homemade Udon Noodles! ☺️
Can you freeze this recipe
Hi Mary! Thank you for trying Nami’s recipe!
Yes! You can freeze uncooked noodles for up to one month. Please see the instruction at the end of the recipe card.
We hope this helps!
This recipe was super easy and yummy!
Hi Grace! Aww. 🥰 We are so happy to hear you enjoyed Nami’s homemade Udon Noodles recipe!
Thank you for trying the recipe and for your kind feedback!
Awesome recipe.
However scary part was when you said.. use feet to kneed.
It was NOT until I saw pictures that I could relax seeing the dough in the plastic bag
as I assumed it will be barefoot kneading :)..
Hi Olimpia! 😁 We are glad that you check a recipe! 😆
Thank you for reading Nami’s post and for your feedback. We hope you enjoyed the homemade Udon Noodles!