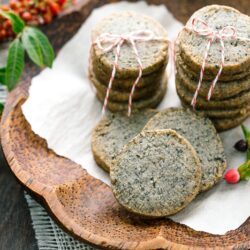
Black Sesame Cookies
These delicious Black Sesame Cookies are buttery, nutty and crisp. With a savory-sweet combination, they are delightful with a cup of coffee or tea. The perfect holiday cookies to make and gift!
Ingredients
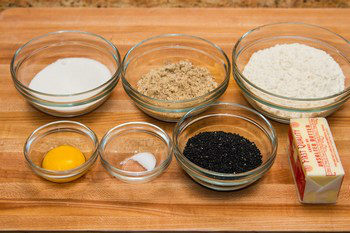
- 120 g unsalted butter (½ cup (8 Tbsp, 1 stick) + ½ Tbsp)
- 1⅓ cups all-purpose flour (plain flour) (weigh your flour; for weights, click the Metric button; or use the “fluff and sprinkle“ method and level it off)
- 40 g almond meal (¼ cup + 4 tsp; I used Trader Joe‘s almond meal)
- 6 Tbsp sugar
- ⅛ tsp Diamond Crystal kosher salt
- 5 Tbsp toasted black sesame seeds
- 1 large egg yolk (use only the yolk for the most crumbly, rich, and crisp texture; you can add the whole egg, but the final texture will be different)
Instructions
- Before You Start…Please note that this recipe requires at least one hour of chilling time. Gather all the ingredients. I highly encourage you to weigh your ingredients using a kitchen scale for this recipe. For weights, click the Metric button above. If you‘re using a cup measurement, please follow the “fluff and sprinkle“ method: Fluff your flour with a spoon, sprinkle the flour into your measuring cup, and level it off. Otherwise, you may scoop more flour than you need.
To Make the Dough
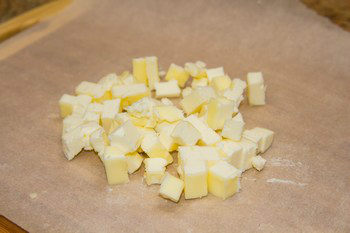
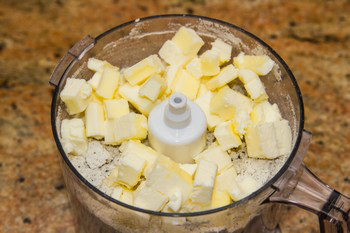
- Cut 120 g unsalted butter (½ cup + ½ Tbsp) into small cubes. Keep them refrigerated until ready to use (I cut it on parchment paper and wrap up the butter for easy transfer).
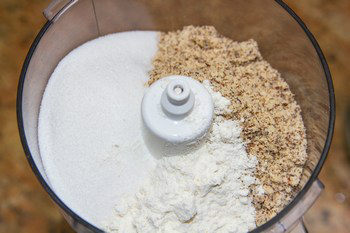
- In a food processor, combine 1⅓ cups all-purpose flour (plain flour), 40 g almond meal (¼ cup + 4 tsp), 6 Tbsp sugar, and ⅛ tsp Diamond Crystal kosher salt. If you don’t have a food processor, you can simply use a bowl to mix all the ingredients.
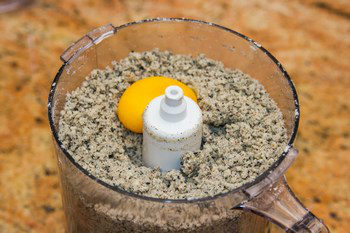
- If you want a finer texture for your 5 Tbsp toasted black sesame seeds, add them now to the food processor. If you prefer to keep them whole, add them later with the egg yolk.

- Take out the butter from the refrigerator, add to the food processor, and mix together. If you use a regular bowl to mix, use a dough/pastry blender to combine the butter into the dry ingredients.
- Lastly, add 1 large egg yolk.
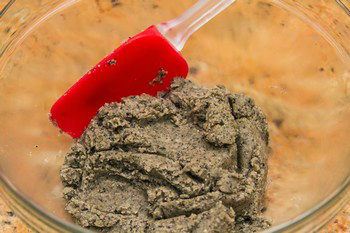
- If the food processor is small (like mine) and it doesn’t look like it’s mixed completely, take it out and mix well with a silicone spatula.
To Roll and Chill the Dough
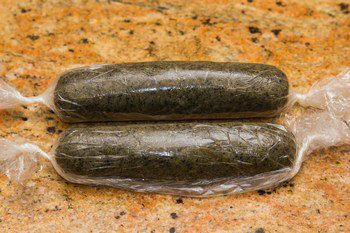
- Put the dough on your work surface. Form it into a ball and divide into 2 equal portions.

- Roll each portion into a log approximately 2 inches (5 cm) in diameter. For me, it’s easier to work the dough when it is wrapped in plastic wrap. While rolling, unwrap some parts of the plastic wrap, then roll again. Form a nice shape.
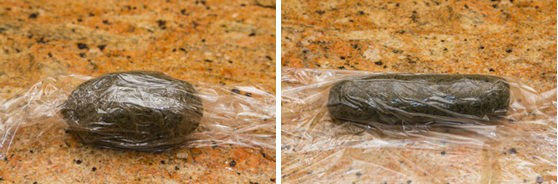
- Wrap the logs tightly in plastic wrap and refrigerate until firm, for at least 1 hour (you can put them in the freezer to speed up the process as well). Tip: You can place the dough logs on a bed of raw rice to prevent them from becoming flat on the bottom.
To Bake
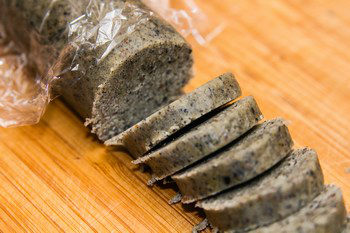
- Preheat the oven to 350°F (175°C). For a convection oven, reduce the cooking temperature by 25ºF (15ºC). Remove the plastic wrap and cut the dough into discs about ¼ inch (6 mm) thick. If you prefer thicker cookies, cut into discs about ½ inch (1.3 cm) for a total of 20 thick cookies.
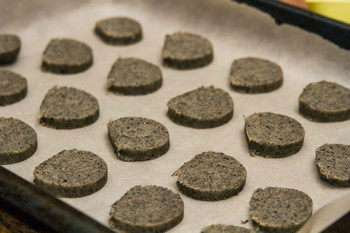
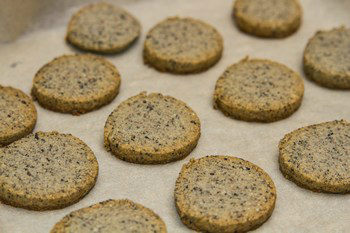
- Place them on 2 baking sheets lined with parchment paper. Bake for about 15 minutes, or until lightly browned around the edges. If you are baking in batches, make sure to keep the second batch in the refrigerator to chill until it‘s time to bake.
- Remove from the oven and allow to cool on the baking sheet for about 10 minutes. Then, transfer to a wire rack to cool completely.
To Store
- Store cookies in an airtight container. Enjoy the cookies within 3 days while they are freshest, or keep them in the freezer for up to a month.
Nutrition
Calories: 53kcal, Carbohydrates: 5g, Protein: 1g, Fat: 3g, Saturated Fat: 2g, Trans Fat: 1g, Cholesterol: 11mg, Sodium: 4mg, Potassium: 10mg, Fiber: 1g, Sugar: 2g, Vitamin A: 77IU, Calcium: 13mg, Iron: 1mg
