Homemade Udon Noodles
Learn how to make udon noodles from scratch with the traditional Japanese method. It‘s easy and fun, and you will be rewarded with delicious handmade noodles that are far superior to store-bought ones!
Servings: 2
Calories: 361kcal
Ingredients
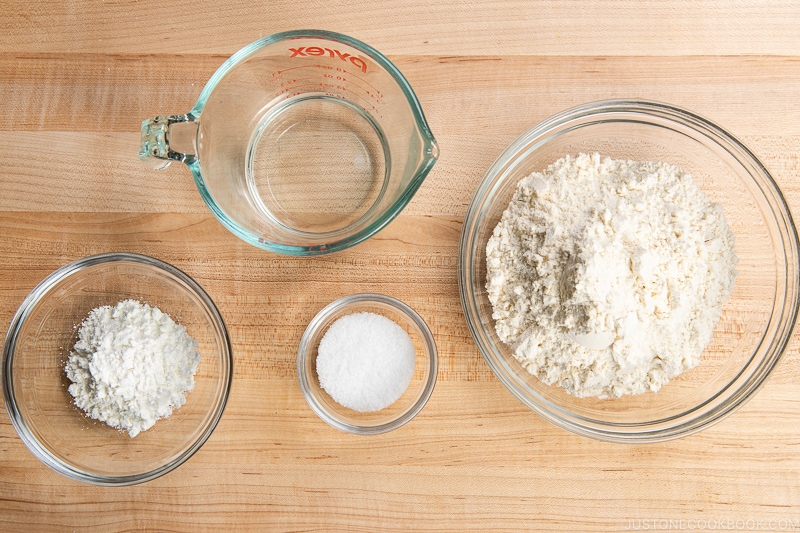
- 7 oz all-purpose flour (plain flour) (1½ cups + 3 Tbsp; weigh your flour or use the “fluff and sprinkle“ method and level it off)
- 6 Tbsp water
- 0.35 oz Diamond Crystal kosher salt (3½ tsp; weigh your salt since different varieties vary in weight)
- potato starch or cornstarch (for rolling and dusting)
Instructions
- Gather all the ingredients. I highly encourage you to weigh your flour and salt using a kitchen scale for this recipe. Click on the “Metric“ button at the top of the recipe to convert the ingredient measurements to metric. If you‘re using a cup measurement, please follow the “fluff and sprinkle“ method: Fluff your flour with a spoon, sprinkle the flour into your measuring cup, and level it off. Otherwise, you may scoop more flour than you need.
To Make the Udon Dough
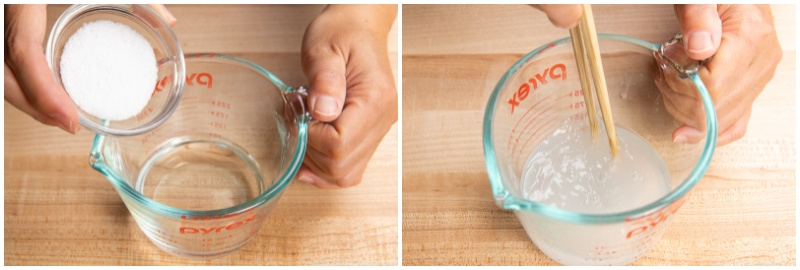
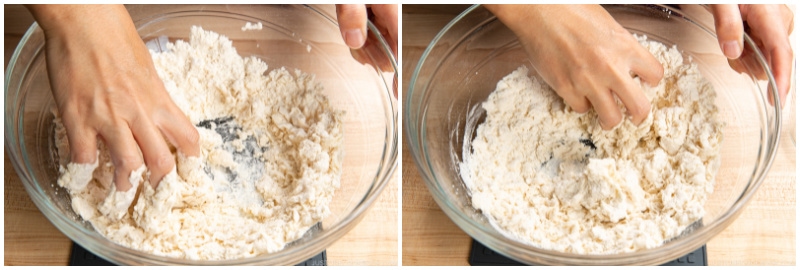
- Add 0.35 oz Diamond Crystal kosher salt to 6 Tbsp water and stir until it’s completely dissolved. Important: The amount of salt may seem like a lot, but some of it will be released into the boiling water while cooking. Also, you will not need to salt the cooking water because the udon noodles are already salted.
- Place 7 oz all-purpose flour (plain flour) in a large bowl. Gradually distribute the salted water evenly over all parts of the flour while mixing with your hands. This way, salt doesn‘t get absorbed into one part of the dough.
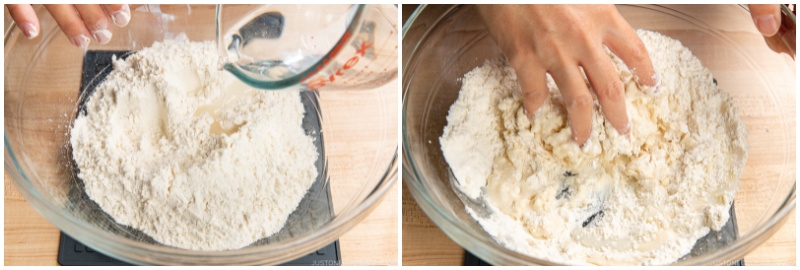
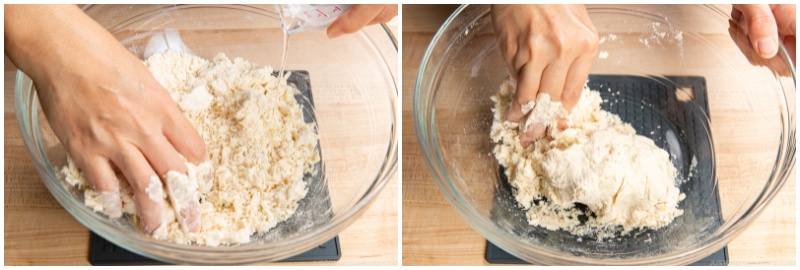
- Combine the dough until there is no dry flour left and form it into a ball.
- If there is some dry flour left, add only a very small amount of water needed to hydrate the flour. Important: The dough should be really tough, unlike bread dough. Try your best to avoid adding water, unless you have a really hard time pressing the dough into a ball. Again, use as little water as possible.
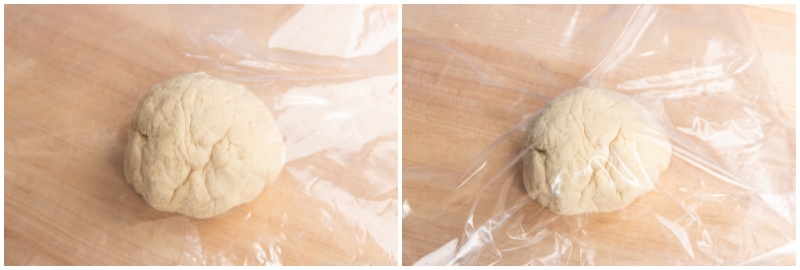
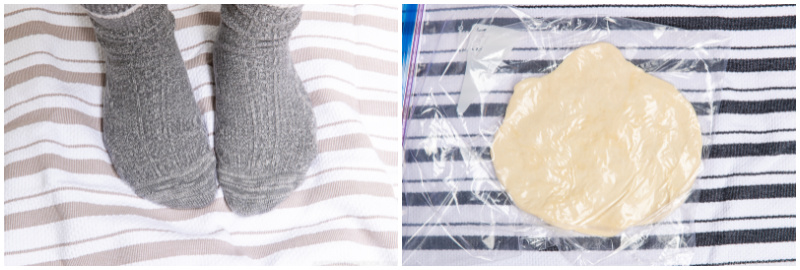
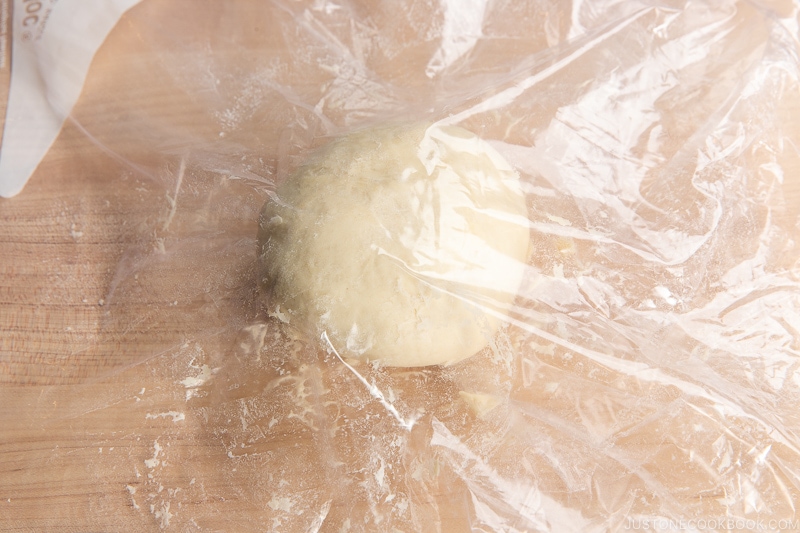
- Place the dough ball in a large durable plastic bag (such as a 2-gallon Ziploc bag).

- Close the bag leaving a small air gap and leave it for 30 minutes to relax the gluten.
To Knead the Dough
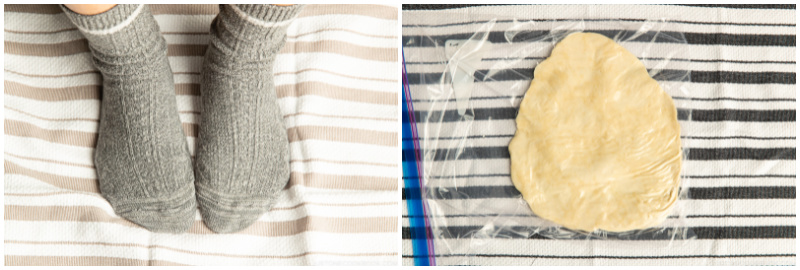
- To keep your dough and its bag clean while kneading, place the bag between two kitchen towels on the floor.

- Step on the bag with the dough inside using the heels of your feet. Use your weight to flatten, slowly turning 360 degrees as you stretch out the dough from the center to the edge. You can knead with your hands instead, but it will take more effort and time. Stepping on udon dough with your feet is a common practice in Japan! Continue to step on the dough until it is stretched out and completely flat.
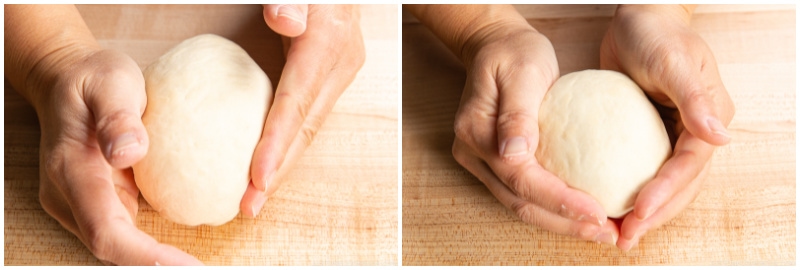
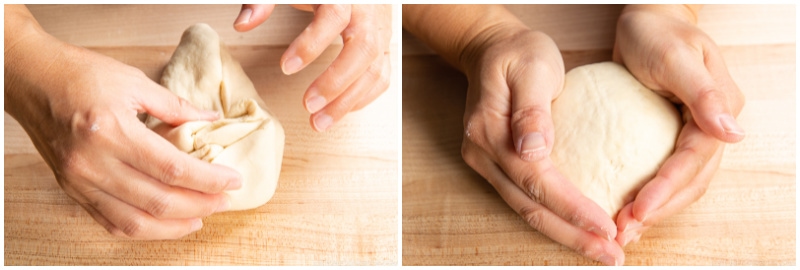
- Remove the dough from the bag and fold in the edges toward the middle.
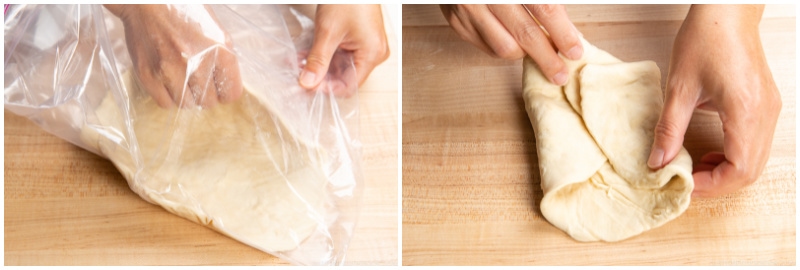
- Collect the edges in the center of the dough and flip it over so the seam is facing down.
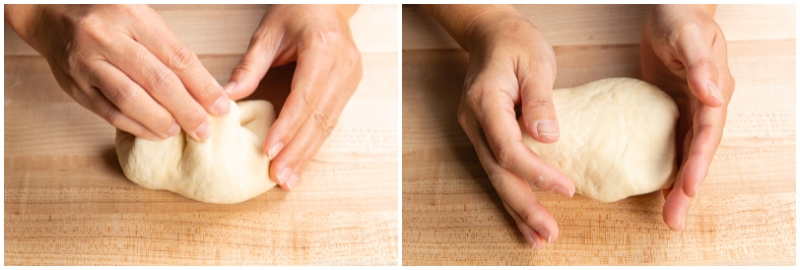
- Press and rotate the dough with cupped hands to form it into a ball.
- Place the dough ball back into the bag and close the bag, leaving a small air gap. Repeat the dough kneading or “stepping“ process from Step 2. You can see if you are stepping on the right location to flatten the dough by occasionally lifting the towel to check.
- Continue stepping on the dough until it is stretched and flattened.
- Remove the dough from the bag and fold the edges toward the center, flip it over, and form it into a ball again.

- You will notice that the dough is slightly more pliable than the first time.
- Repeat this process three more times (for a total of five rounds of dough stepping), or until the dough is as soft as an earlobe (that’s how we describe the texture of the finished udon dough in Japan).
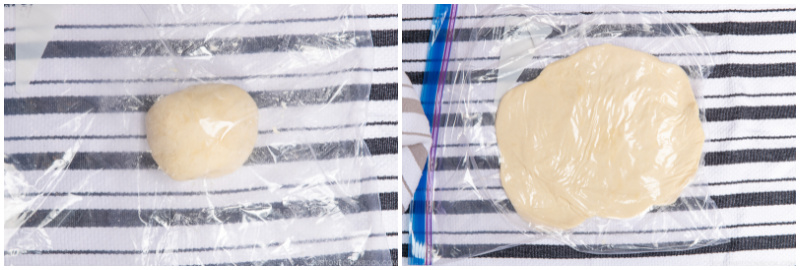
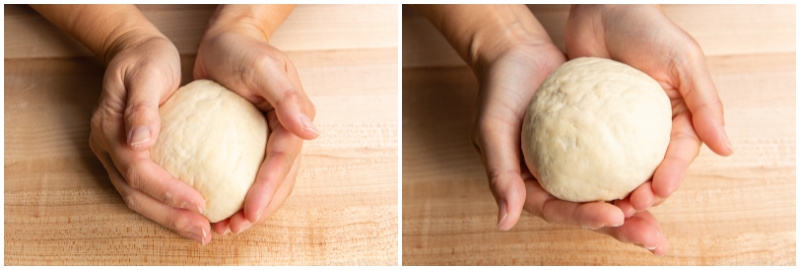
- After the fifth round of dough stepping, take out the dough and form it into a nice, round ball. Put the dough back into the bag and close.
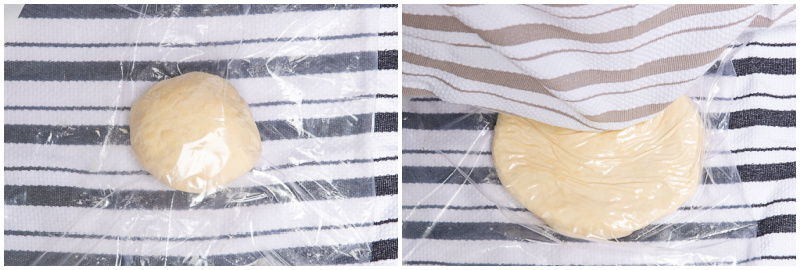
To Rest the Dough (2 Hours)
- Rest the dough on the kitchen counter for 2 hours (3 hours in the wintertime). You can also keep the dough in the bag and store it in the refrigerator overnight if you would like to continue the rest of the process on the following day.
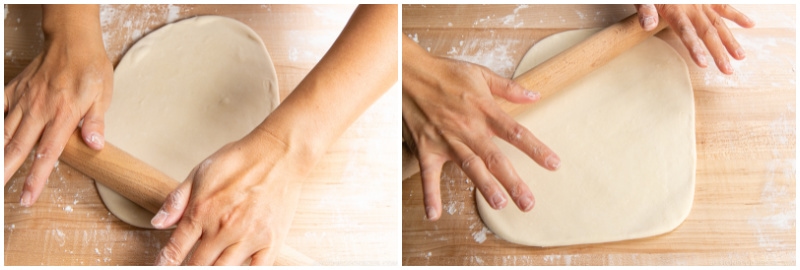
To Roll Out the Dough
- Dust the work surface with potato starch or cornstarch and take out the dough from the bag. Tip: It‘s especially important to use potato starch or cornstarch if you plan to freeze the noodles since the noodles tend to absorb wheat flour and cause them to stick to each other.
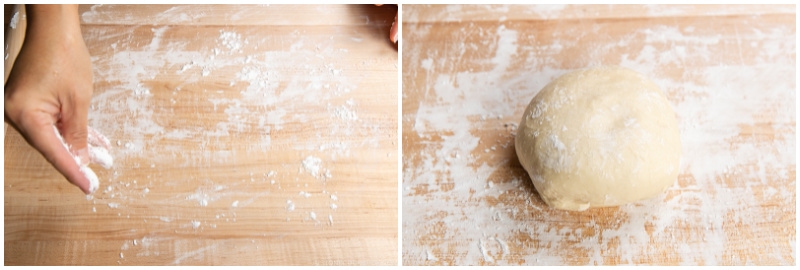
- Flatten the dough with your hand.
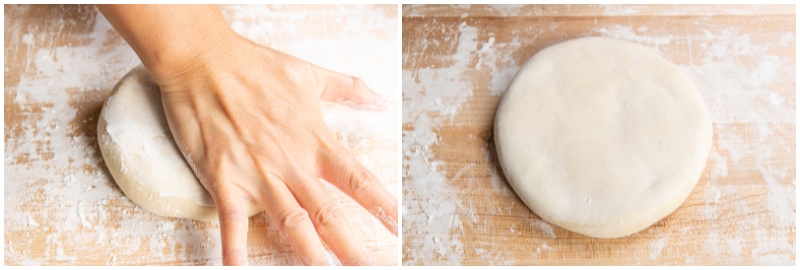
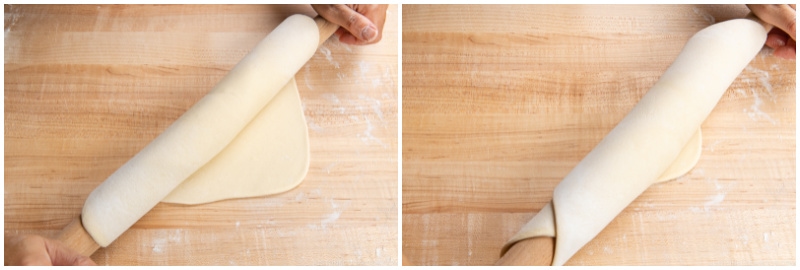
- Using a rolling pin, first roll out the dough into an oval shape. Then, turn the dough 90 degrees and roll it out evenly in the other direction.
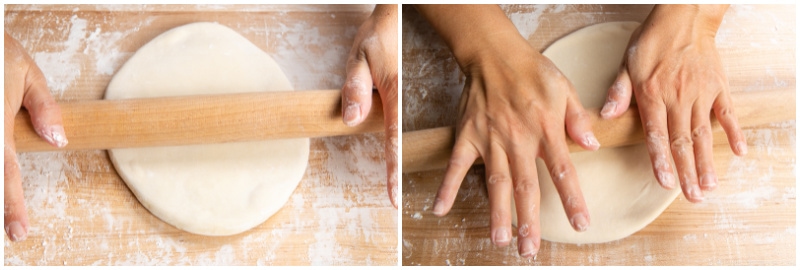
- Then, roll out the corners to create a rectangular shape.
- Dust the dough with potato starch or cornstarch occasionally to make sure the dough does not stick to the rolling pin or the work surface.
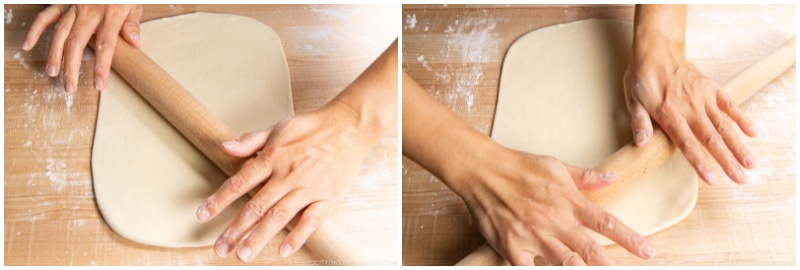
- Turn the dough 90 degrees and roll out the dough more.
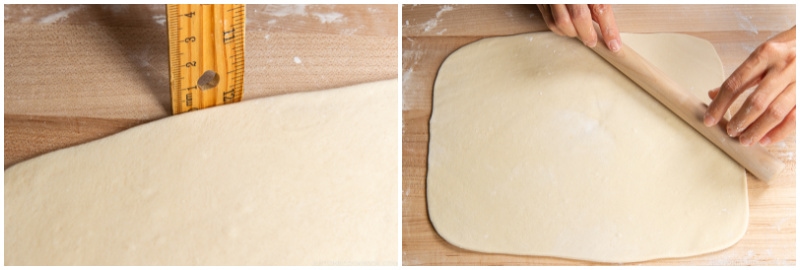
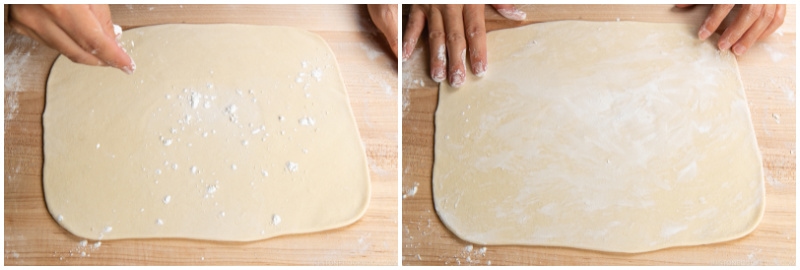
- The dough should be 3 mm (⅛ inch) thick and about 10-12 inches long.
- Roll out each rounded corner so the dough forms a rectangle. This will allow the noodles to be the same length when you cut them.
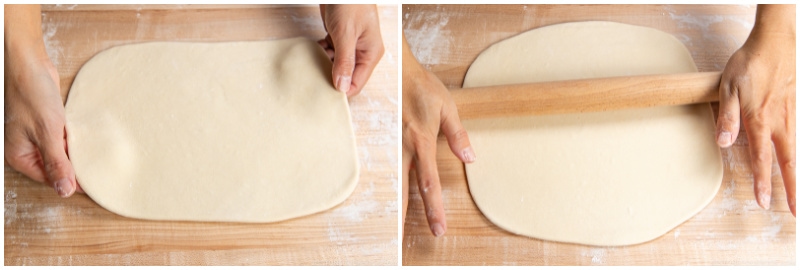
- Dust more potato starch on top of the dough and spread it thinly.
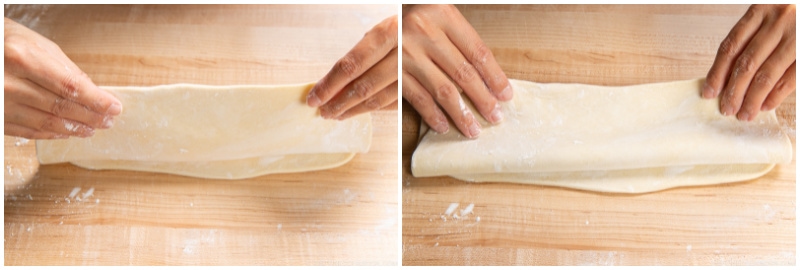
- Fold the dough in half or thirds and sprinkle more potato starch on top
To Cut into Noodles
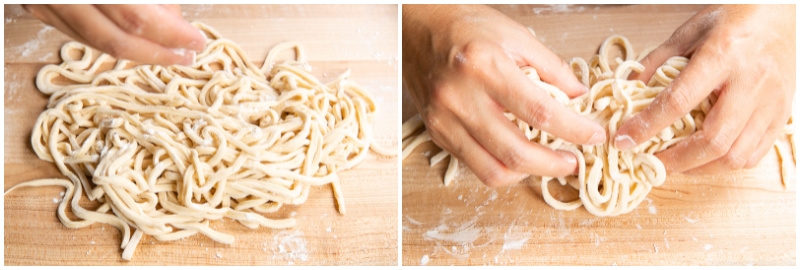
- With a sharp knife or cleaver, cut the folded dough into noodles about 3 mm (⅛ inch) wide.
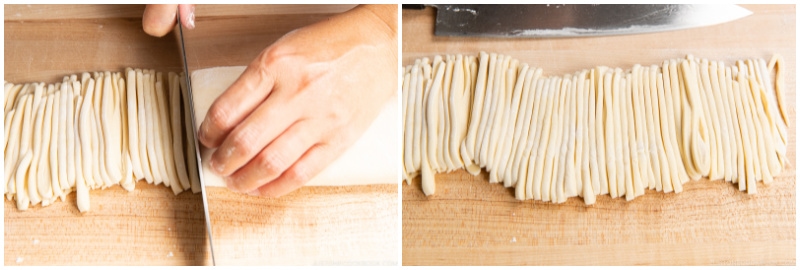
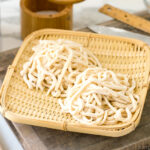
- Pick up some of the noodles and fluff them with your fingers to make sure they are covered with the potato starch/cornstarch to prevent them from sticking to each other. The noodles are ready to cook now or freeze for later.
To Cook the Fresh Noodles
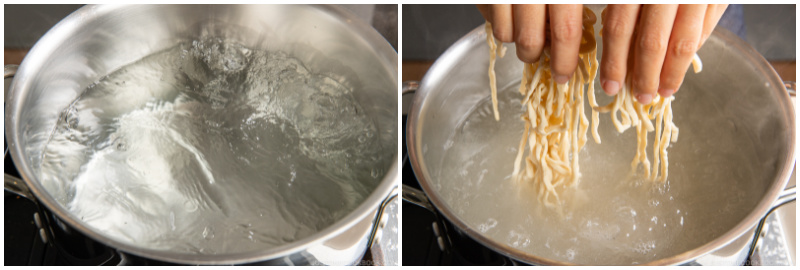
- Bring a big pot of water to a rolling boil (DO NOT add salt to the water; the noodles are already seasoned and will release some salt during cooking). Loosen up the noodles, leaving the excess starch behind, and add the noodles to the pot.
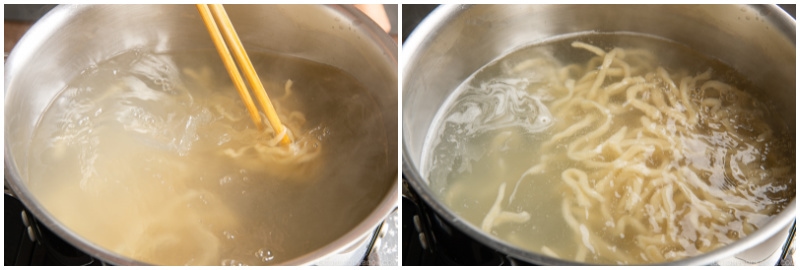
- Cook, stirring occasionally, for 10 minutes (depending on the thickness of your noodles).
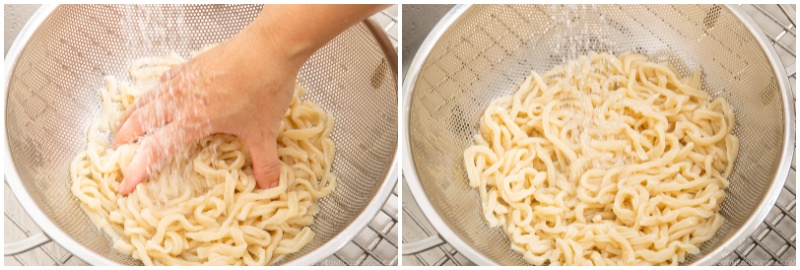
- Drain and rinse well under cold running water to remove the starch and give the noodles a firm texture. The noodles are now ready to use in your favorite udon recipe.

To Serve the Cooked Noodles
- For hot noodle soup, you can quickly heat up the cooked noodles either in a pot of hot water or under hot running water. Serve in individual bowls and pour soup broth on top. Please see my Udon Noodle Soup (Kake Udon) recipe to make my classic udon broth. You can use these noodles in hot soups like Beef Udon, Vegetarian Udon, Nabeyaki Udon, and Curry Udon.
- You can also enjoy these udon noodles in stir-fries like Yaki Udon, refreshing chilled dishes like Cold Tanuki Udon and Cold Curry Udon, the finishing course of a Sukiyaki meal, and wafu pasta-style Mentaiko Udon.
To Store the Fresh Noodles for Later
- Divide the uncooked noodles into individual portions (150 g per person) and freeze in an airtight container or bag for up to a month. You can refrigerate it for a few days, but it tastes better when you freeze the fresh udon right away. To cook from frozen, bring a large pot of water to a boil and cook the frozen udon for 12 minutes without defrosting. Drain and rinse well under cold running water to remove the starch. For hot noodle soup, you can quickly heat up the noodles in hot water or warm them up under hot running water.
Nutrition
Calories: 361 kcal · Carbohydrates: 76 g · Protein: 10 g · Fat: 1 g · Saturated Fat: 1 g · Polyunsaturated Fat: 1 g · Monounsaturated Fat: 1 g · Sodium: 198 mg · Potassium: 106 mg · Fiber: 3 g · Sugar: 1 g · Calcium: 21 mg · Iron: 5 mg