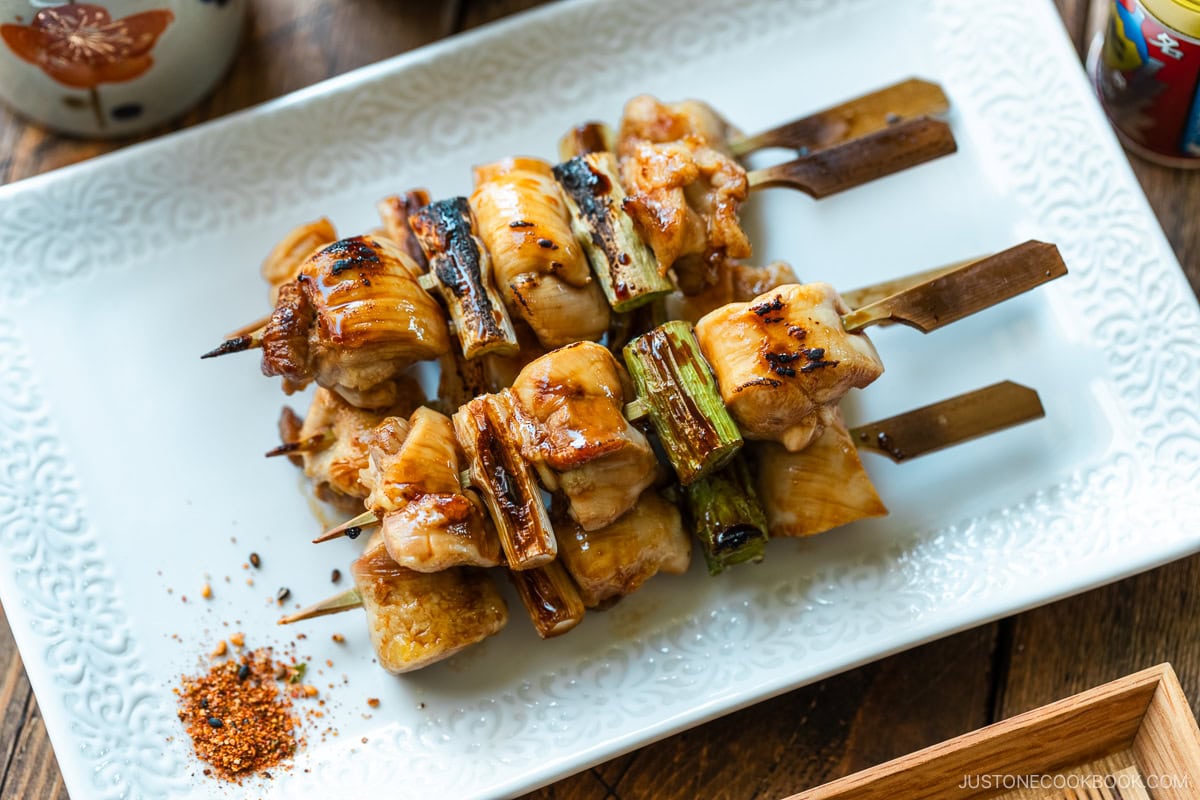
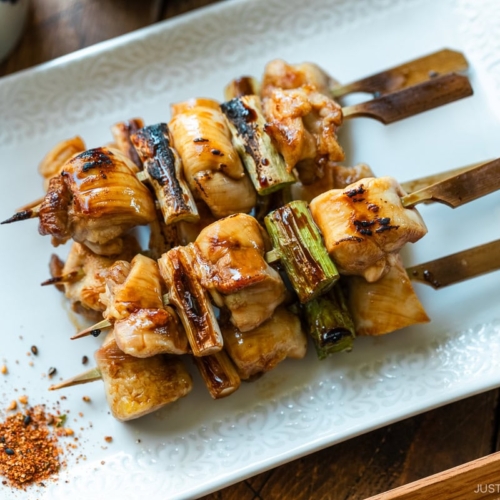
Glazed in a homemade Yakitori Sauce, these Japanese Grilled Chicken and Scallion Skewers are hard to resist! You’ll love this simple Yakitori recipe with an easy savory-sweet sauce that you can make ahead. It’s great for grilling outdoors or under the broiler.
When it comes to chicken on a stick, the Japanese have their own best version known as Yakitori (焼き鳥). The name directly translates to “grilled chicken,” but yakitori represents much more than that—it embodies the essence of good times and joyful hours in Japan.
These chicken skewers are a beloved classic dish often found in izakaya, which are Japanese-style pubs offering a combination of chilled beer, delectable bites, and lively conversations. They are the hallmark offering at specialty restaurants exclusively dedicated to serving Yakitori.
The great news is that making delicious Yakitori at home is easily within anyone’s reach. Allow me to guide you through the process!
Yakitori in Japan
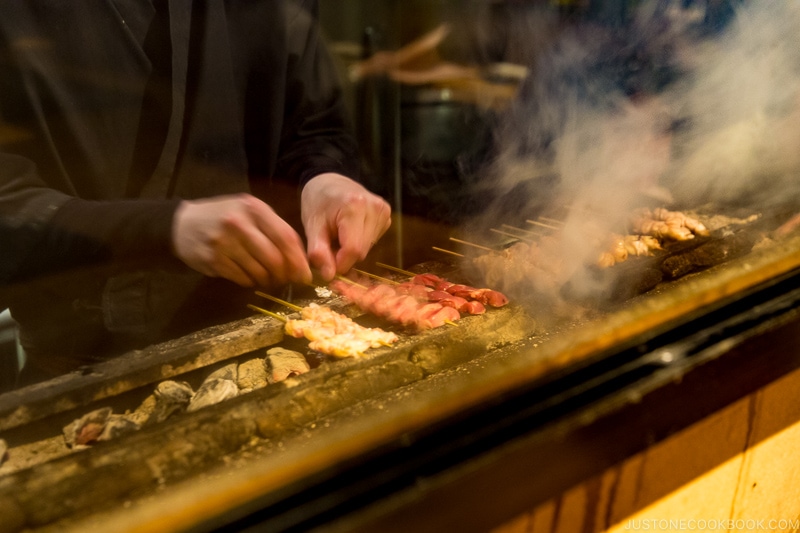
Just like sushi and tempura, Yakitori in Japan is a serious business. At specialty restaurants, the chefs would go as far as sourcing special breeds of chicken from specific regions known for their unique texture and flavors. Various methods of butchering, skewering, and grilling are applied. And the patrons get to choose from an astonishing selection – from breasts, thighs, cartilage, wings, skins, tenderloin, livers to gizzards.
Here are the examples you’d get on the menu:
- Chicken Thigh (momo, もも)
- Chicken Breast (mune, むね)
- Chicken Thigh & Scallion (negima, ねぎま)
- Chicken Tender (sasami, ささみ)
- Chicken Skin (kawa, 皮)
- Chicken Wings (tebasaki, 手羽先)
- Chicken Tail (bonjiri, ぼんじり)
- Chicken Cartilage (nankotsu, 軟骨)
- Chicken Heart (hatsu, ハツ)
- Chicken Liver (rebā, レバー)
- Chicken Gizzard (sunagimo, 砂肝)
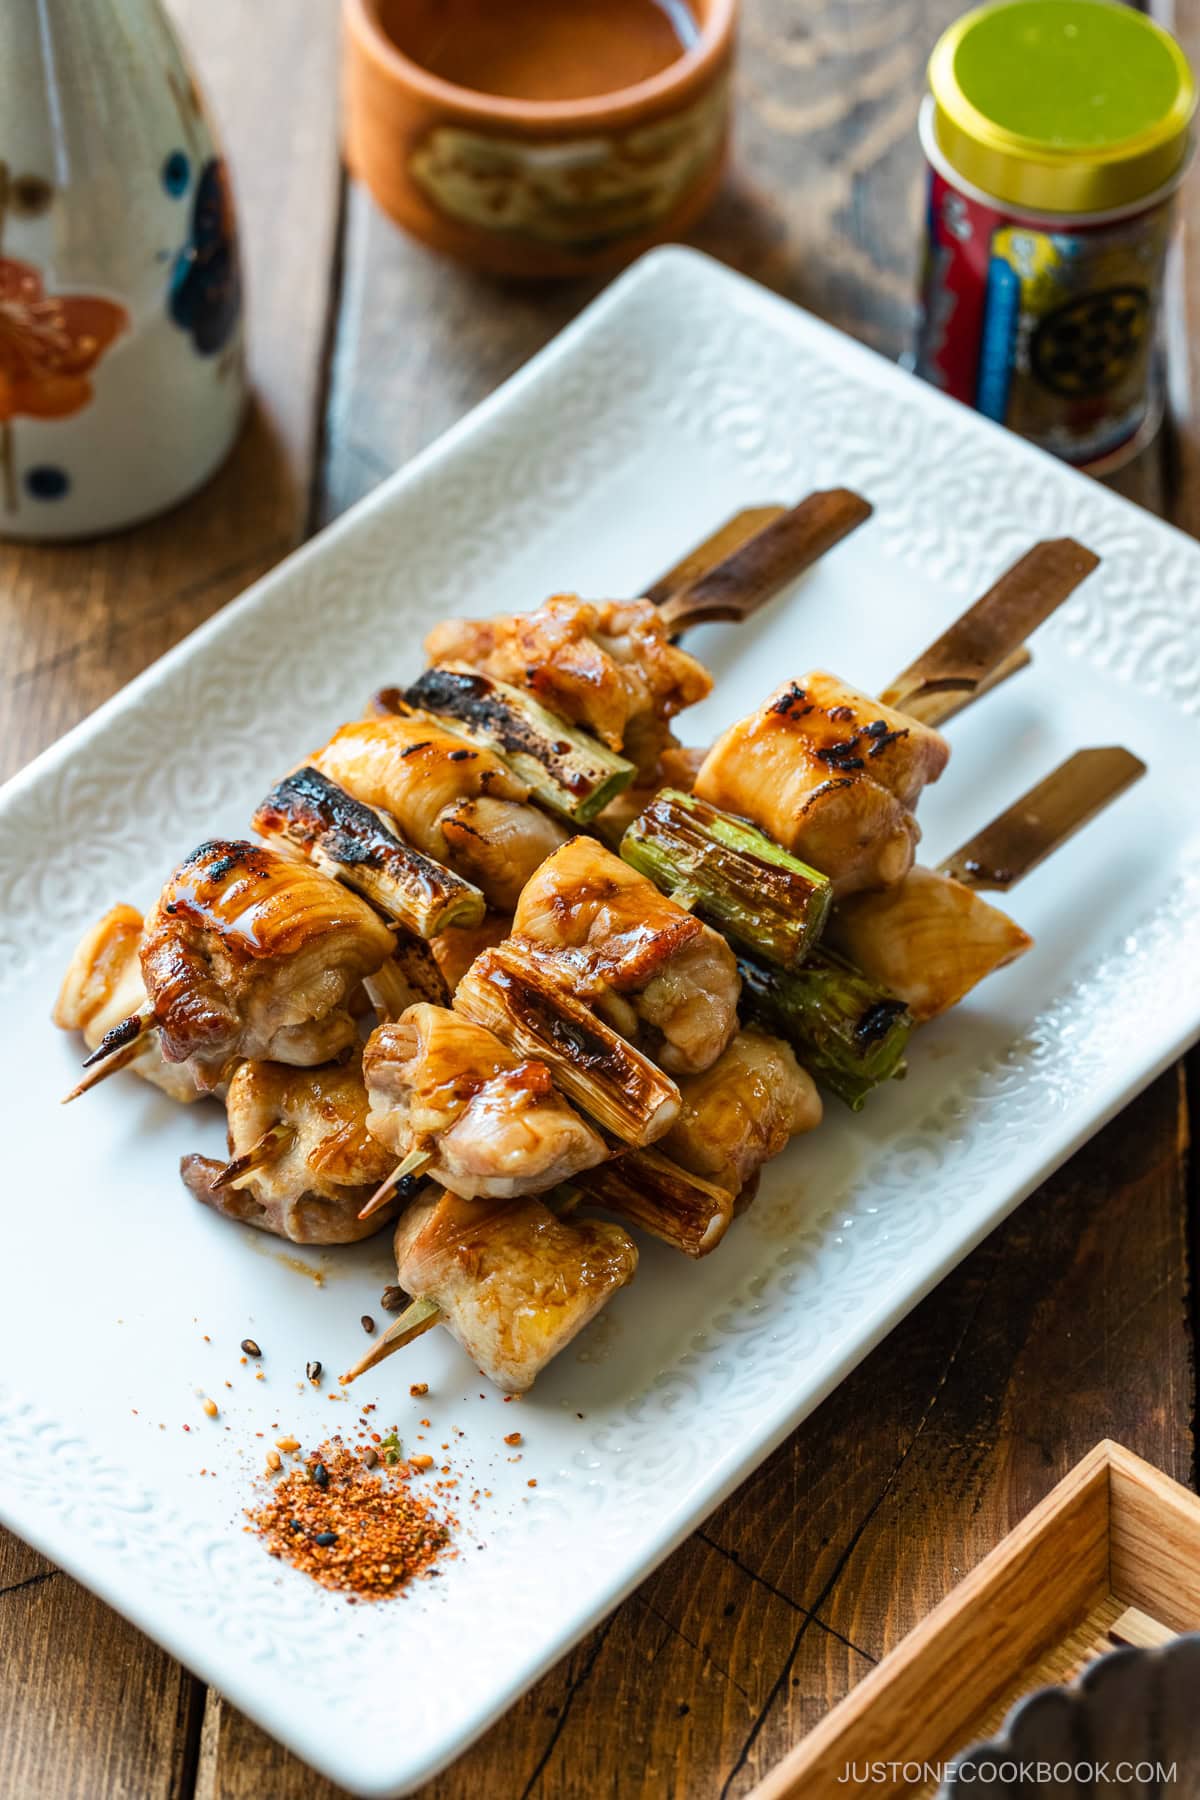
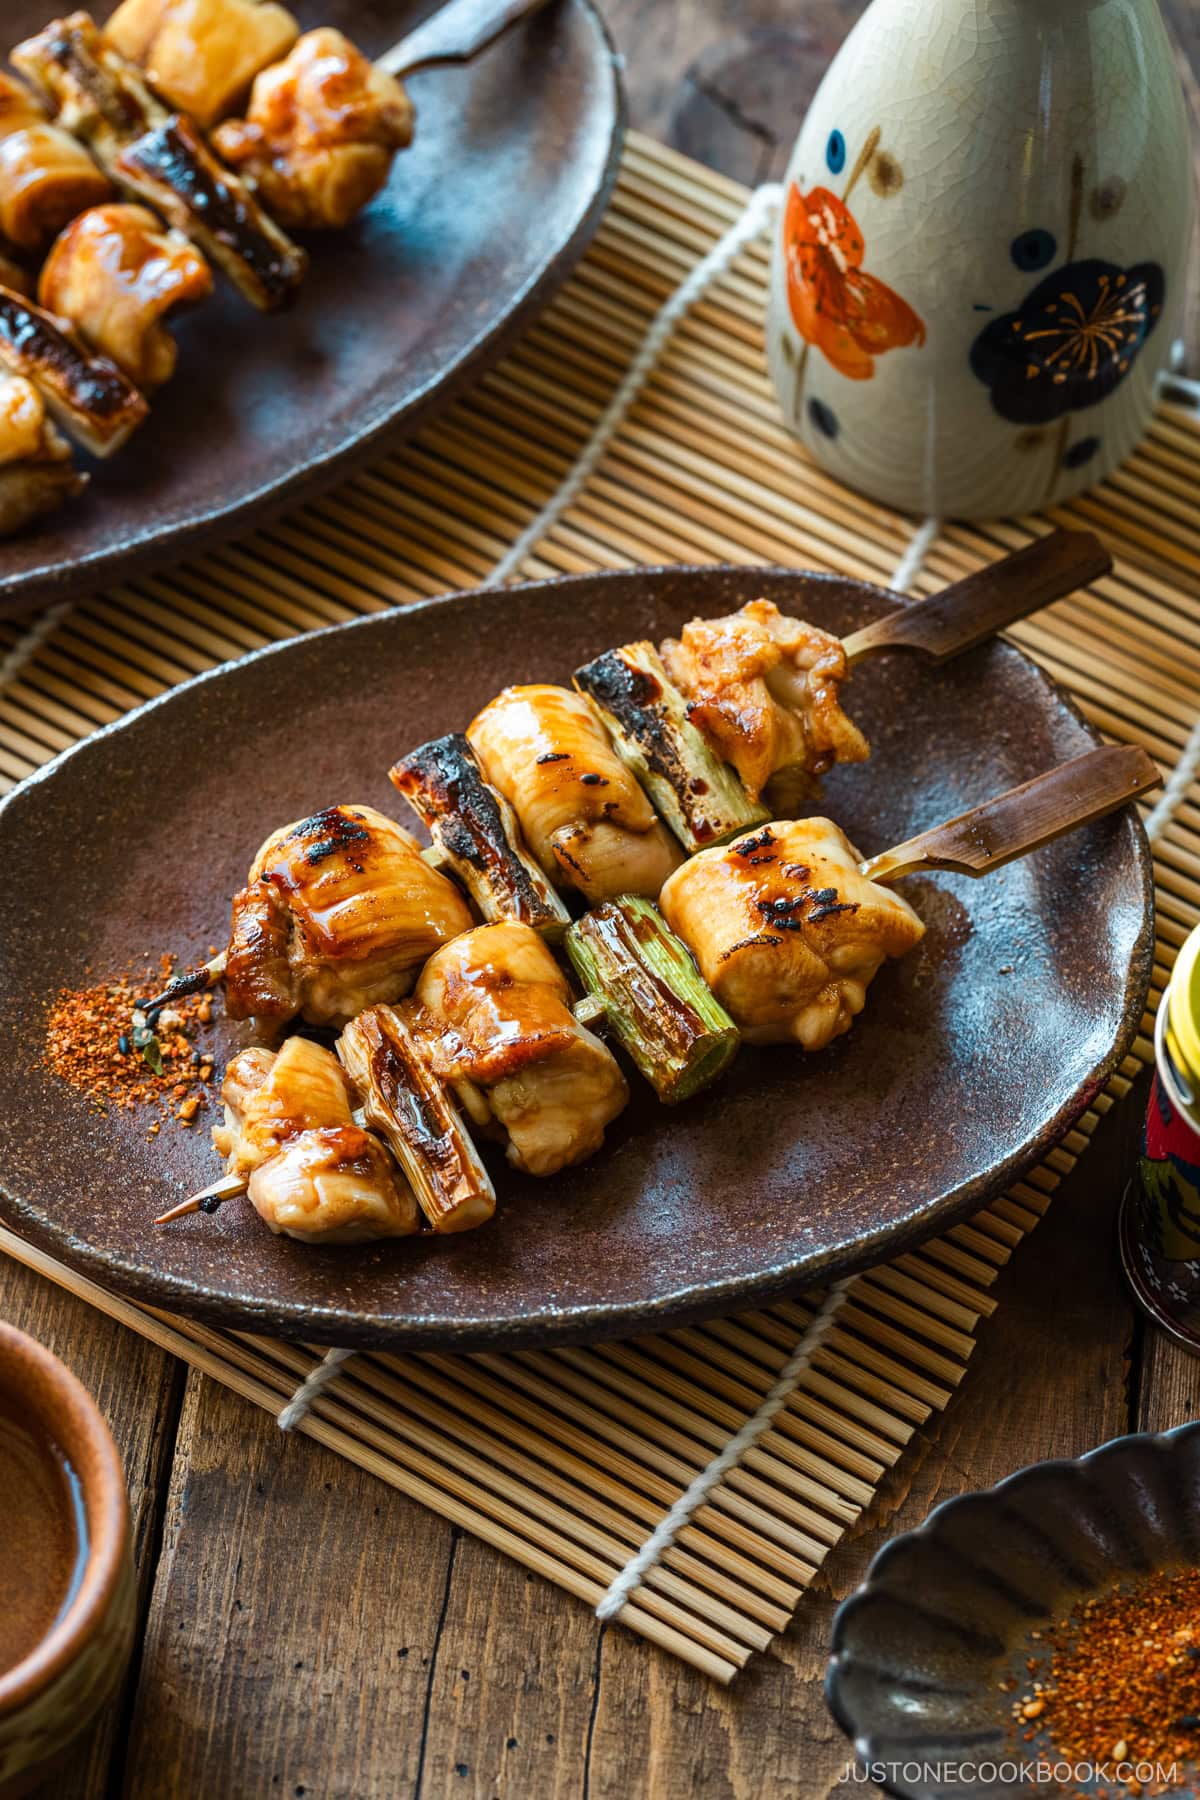
Here, I’m sharing one of the most popular yakitori dishes called Negima Yakitori – chicken thigh and scallion skewer. This is a super easy recipe you’ll love!
3 Quick Tips for Making Delicious Yakitori
- Use boneless, skinless chicken thighs. They stay juicy and more flavorful compared to breasts.
- Soak the bamboo skewers in water for 30 minutes before threading the ingredients.
- Alternate the chicken with big pieces of scallion on skewers, and make sure they are tightly snugged to each other.
The Seasonings (Shio or Tare)
Most yakitori joints will only offer two simple flavorings: salt (shio) or yakitori sauce (“tare” is pronounced [ta-reh]).
Tare is made of soy sauce, mirin, sake, and sugar. I tested several sauces over the years and we like this version best. It has a good balance between sweet and salty. You can add ginger and other ingredients for the sauce, but in this case, a minimalist is a great approach.
For the purest taste of grilled chicken, you can go without the sauce and simply sprinkle salt before grilling. It’s really amazing how the meat can transform into something so delicious with simple treatments.
Bamboo Skewers for Yakitori
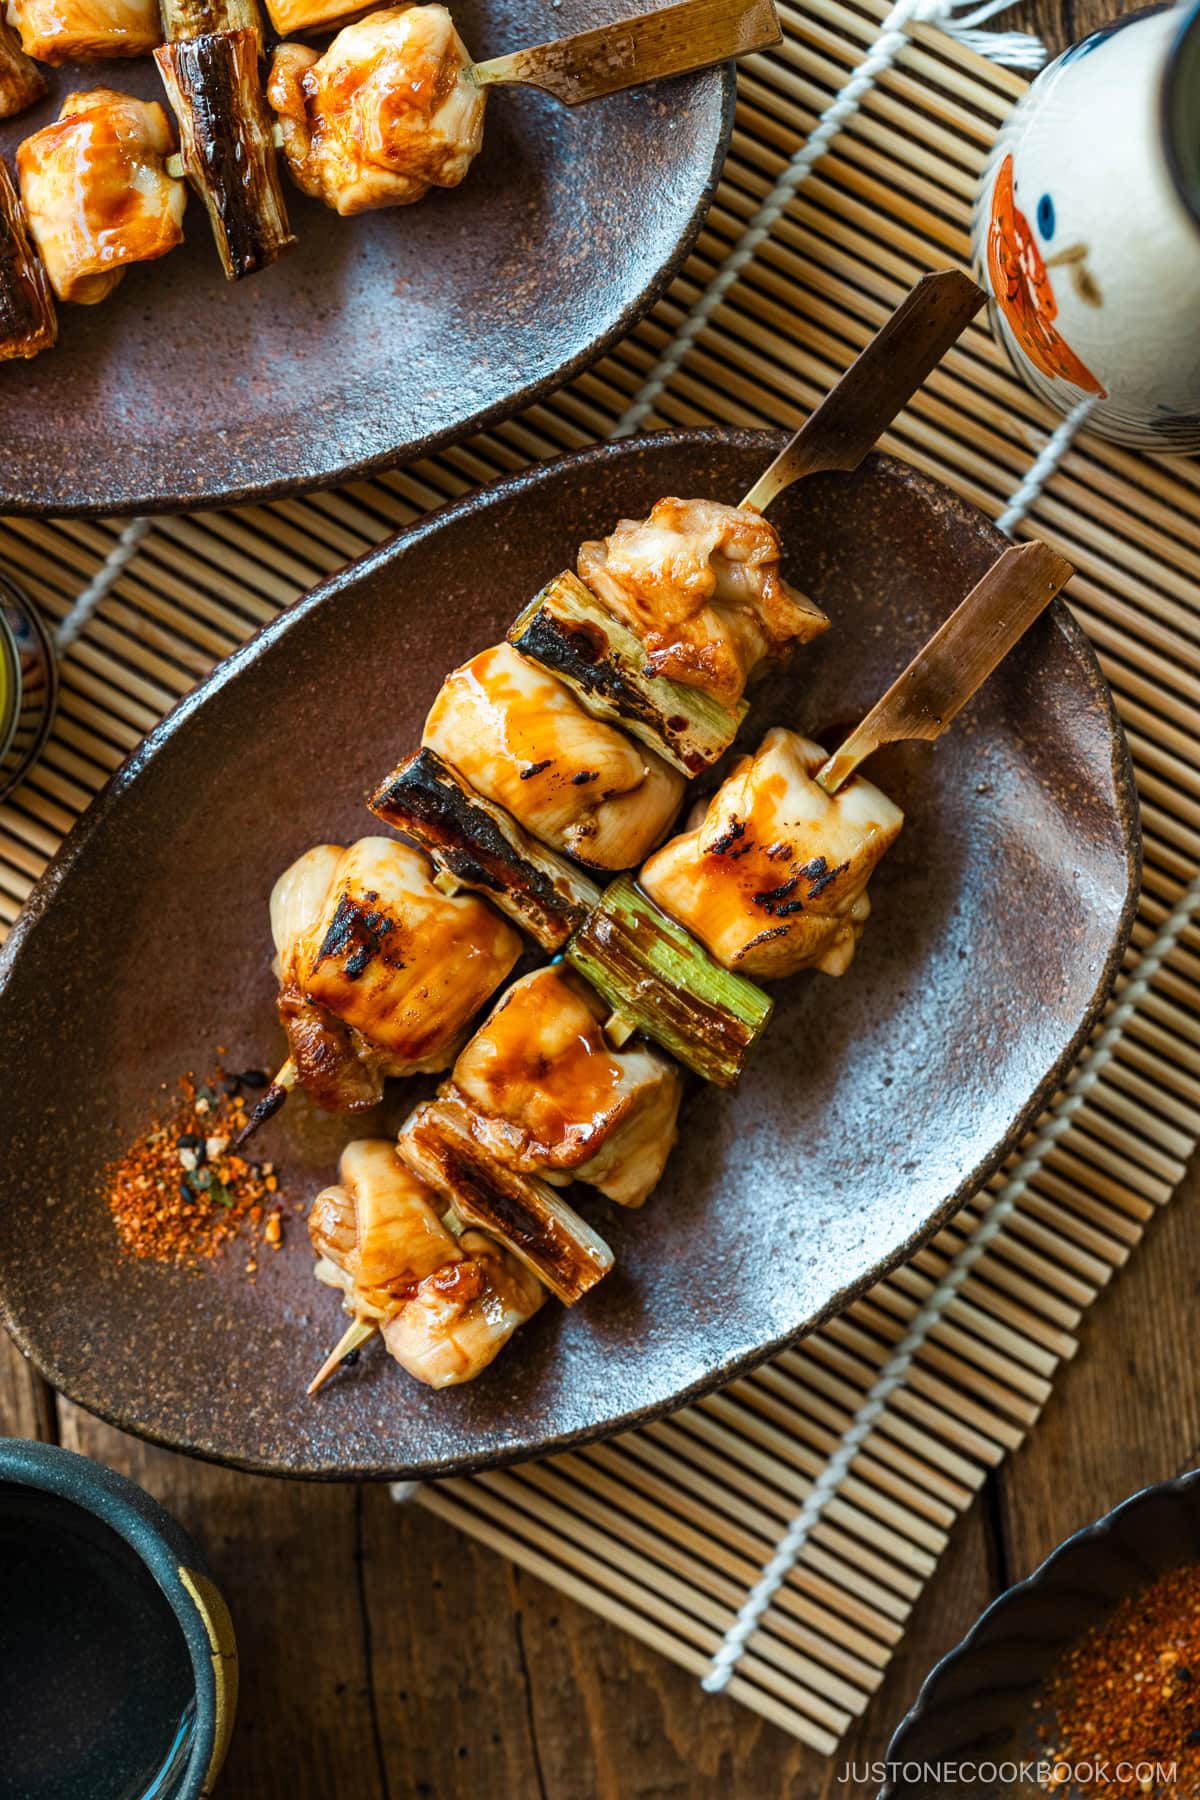
For yakitori, the skewers are usually made from bamboo. We call the typical skewers “teppogushi” (literally means “gun skewer” from its shape). The tapered skewers have a flat tab on one end which makes them easier to turn or hold. They also won’t roll on the grill and allow the chef to grill one side at a time.
You can buy them at Japanese supermarkets or Amazon (regular bamboo skewers will also work).
Easy Oven Broil Method
While you may not be able to create the atmosphere of yakitori joints, you won’t go wrong with this easy oven broil method that I share here.
Start by making the tare sauce, then thread the chicken and scallions into skewers. When ready to grill, set the broiler on high at 500ºF, and let the oven does the job. Within 15 minutes, you’d be rewarded with some nicely char-grilled results for the chicken. The recipe works great for the outdoor grill, too.
I love that we can easily recreate this izakaya favorite without any fuss. They are great as a main dish or as an appetizer or as a snack for movie night. There is really nothing not to love about these delicious chicken on the sticks.
Wish to learn more about Japanese cooking? Sign up for our free newsletter to receive cooking tips & recipe updates! And stay in touch with me on Facebook, Pinterest, YouTube, and Instagram.
Yakitori (Chicken Skewers) with Homemade Yakitori Sauce
Video
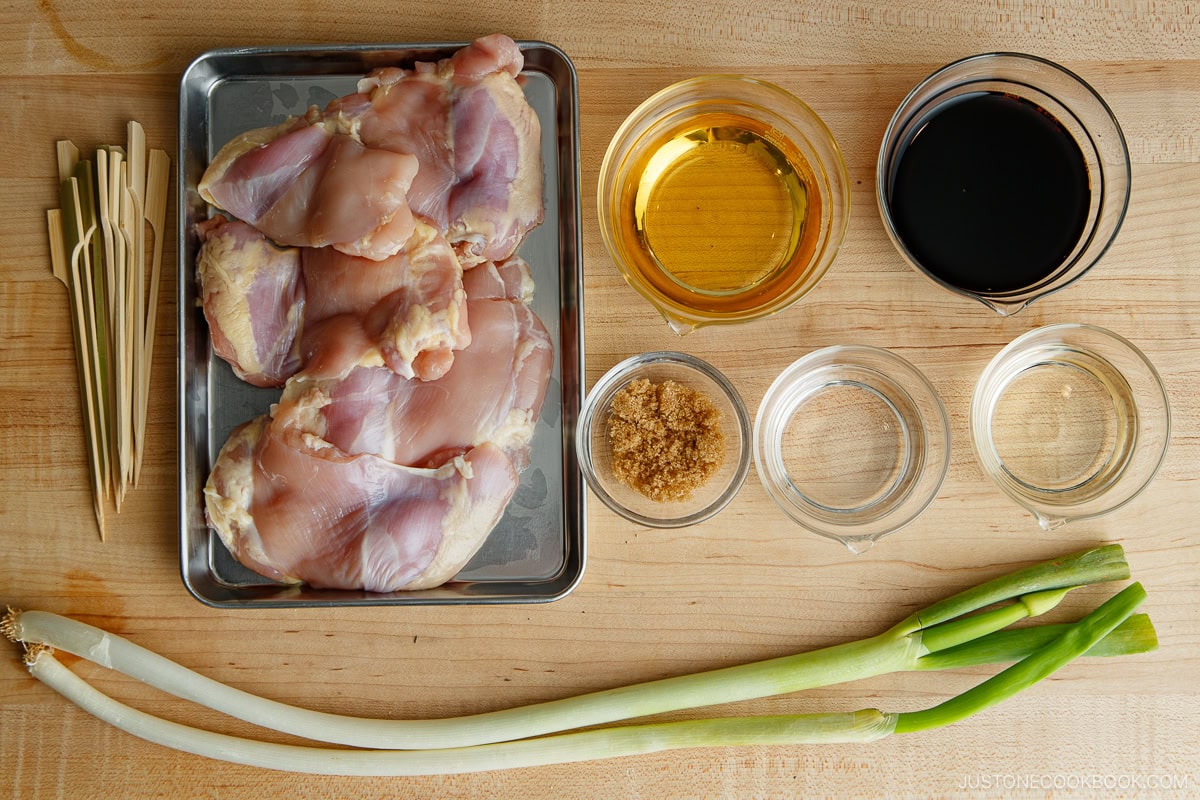
Ingredients
For the Yakitori Sauce (“Tare“):
For the Chicken Skewers
- 2 Tokyo negi (naga negi; long green onion) (9 green onions)
- 1 lb boneless, skinless chicken thighs (at room temperature)
- neutral oil (for brushing the wire rack)
- shichimi togarashi (Japanese seven spice) (optional; for a spicy kick)
Instructions
- Gather all the ingredients.

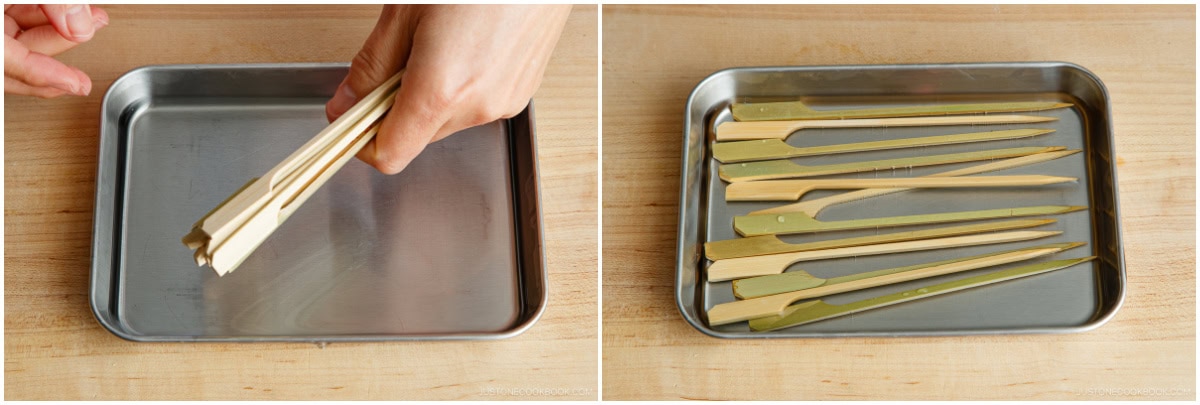
- Soak about 10 to 12 5-inch bamboo skewers in water for 30 minutes.

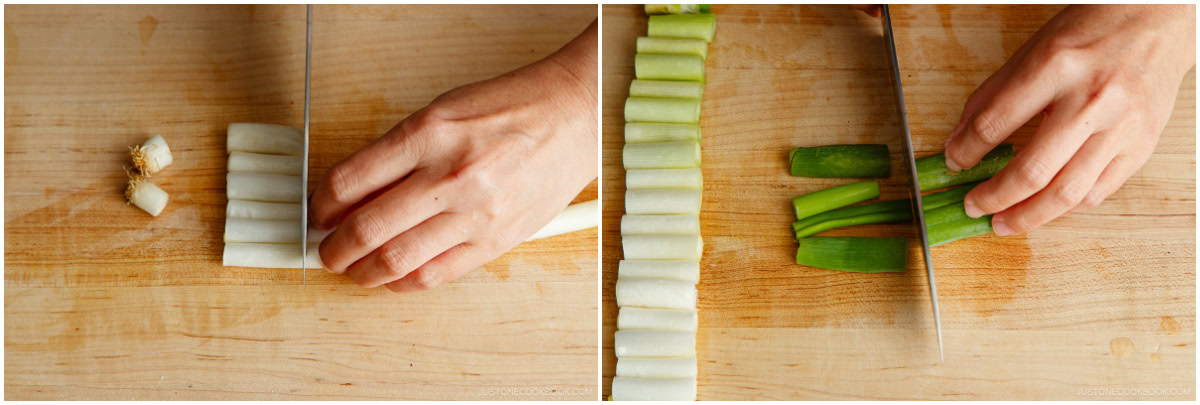
- Cut the white and light green parts of the 2 Tokyo negi (naga negi; long green onion) into 1¼-inch (3-cm) pieces. Cut the remaining green parts in half lengthwise.
To Make the Yakitori Sauce (Tare)
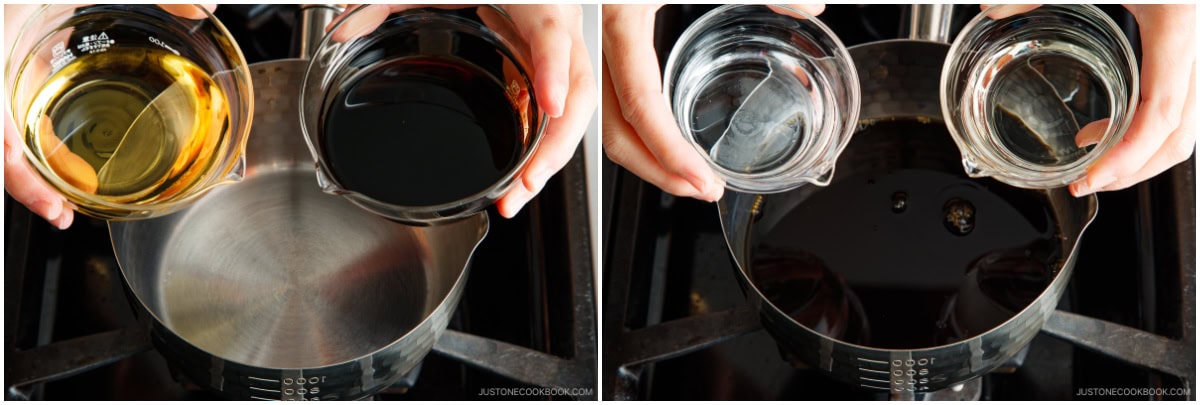
- In a small saucepan, add ½ cup soy sauce ½ cup mirin, ¼ cup sake, and ¼ cup water.
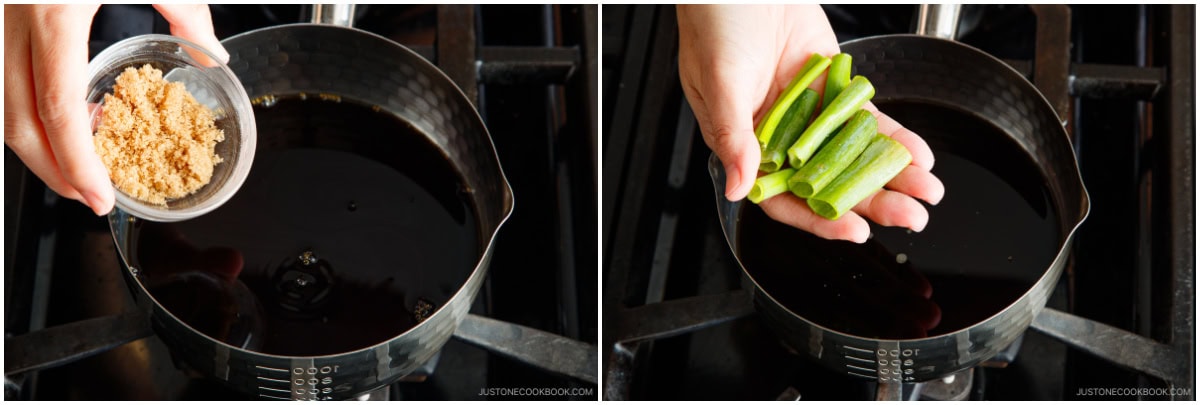
- Add 2 tsp brown sugar and the green part of Tokyo negi.
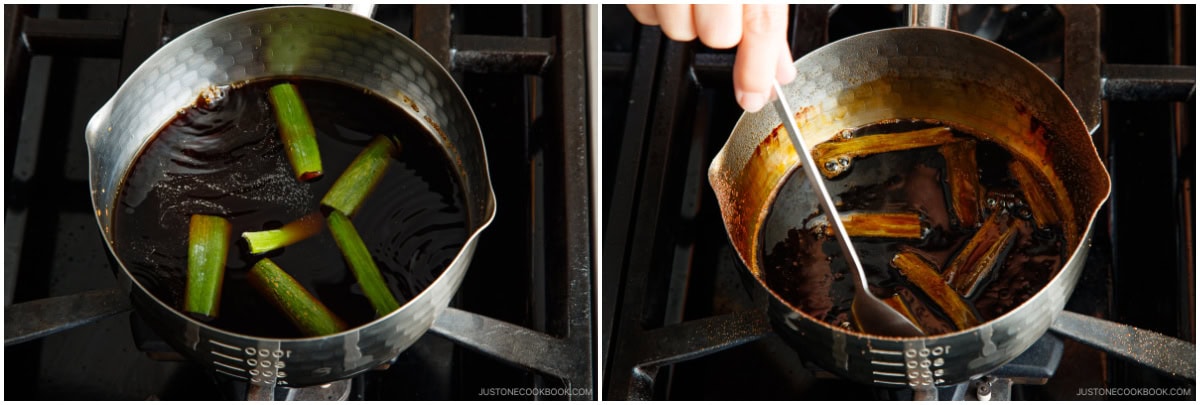
- Bring it to a boil over high heat. Once boiling, reduce the heat to low and simmer, uncovered, until the sauce reduces to one-third of its original volume. It will take about 30 minutes. Let it cool to room temperature before using. The sauce will thicken with a glossy shine as it cools. Tip: You can make the sauce ahead of time. To store, remove the green onion from the sauce and pour into a mason jar. Keep in the refrigerator for up to 2–3 months.
- Tip: If you want to serve the extra sauce at the table, reserve one-third of the sauce in a small bowl for final basting, just before serving. To prevent cross-contamination, use this reserved sauce with a clean brush only after the chicken is fully cooked.
To Prepare/Assemble the Yakitori
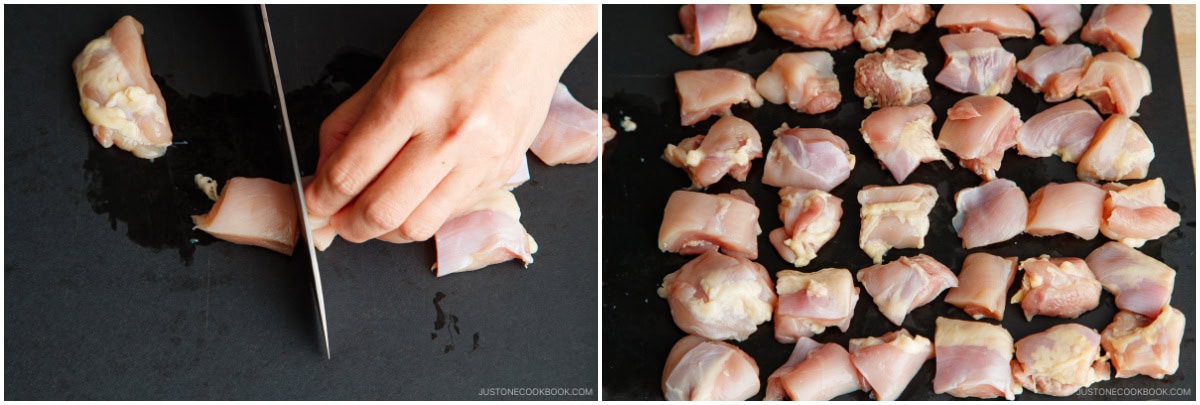
- Cut 1 lb boneless, skinless chicken thighs into 1¼-inch (3-cm) squares.
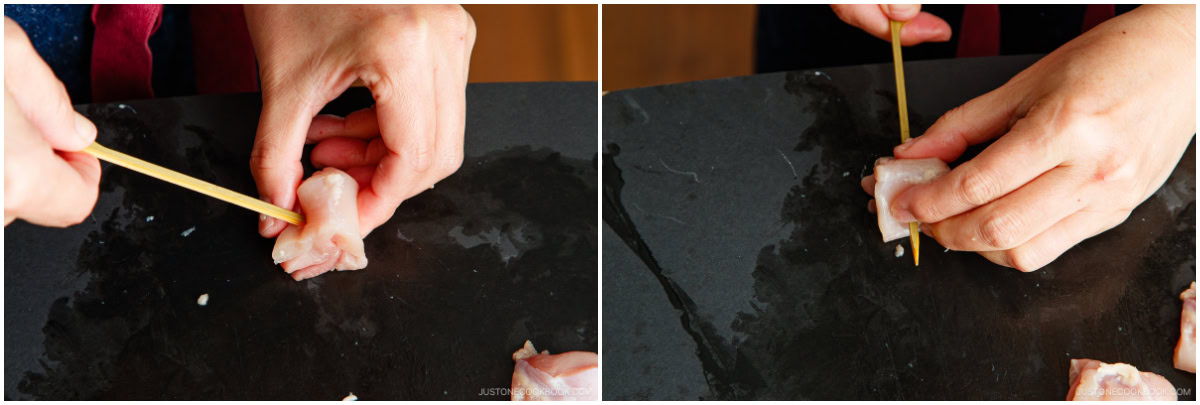
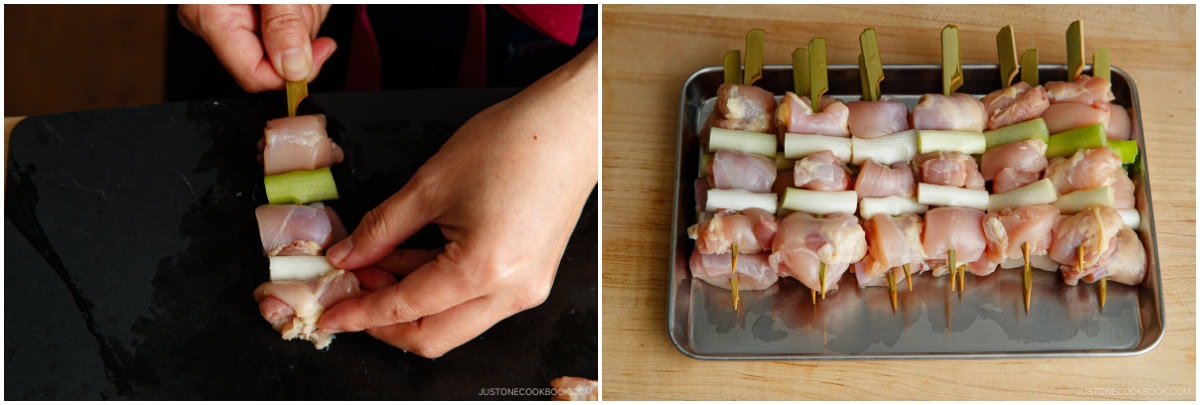
- On a flat work surface, fold each slice of chicken in half, insert a bamboo skewer into the chicken at a 45-degree angle, and press down on the skewer to pierce the meat through the center.
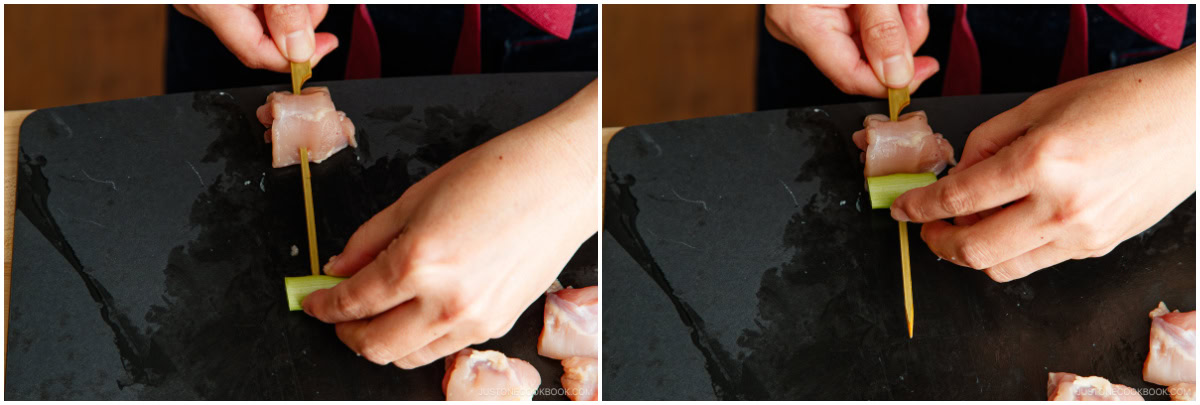
- Next, add a piece of Tokyo negi perpendicular to the skewer.
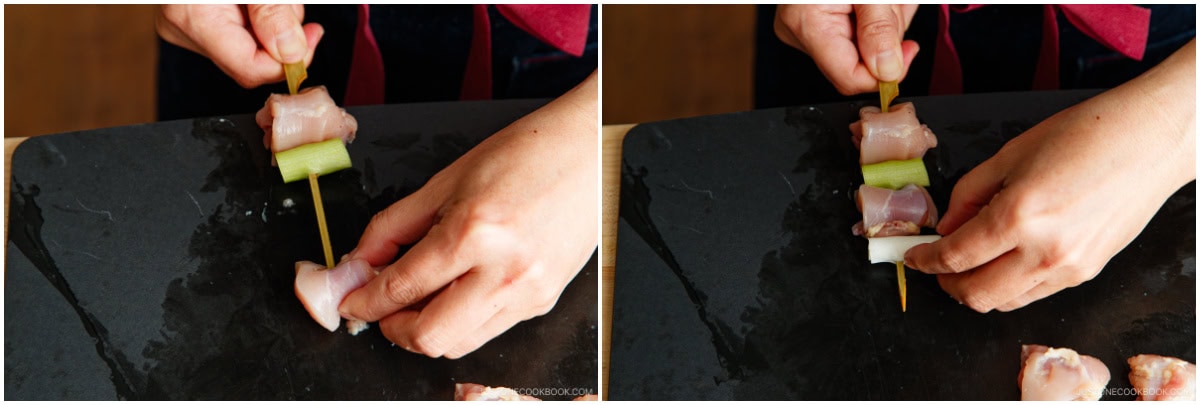
- Continue to alternate a chicken slice with a piece of Tokyo negi.
- End with a piece of chicken. Each 5-inch skewer will hold about 3 chicken slices and 2 Tokyo negi pieces.
To Grill/Broil the Yakitori
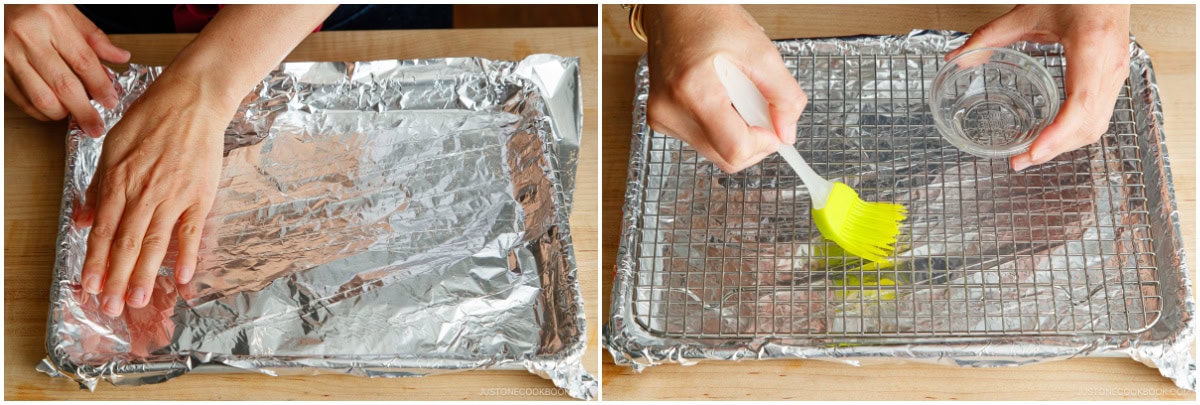
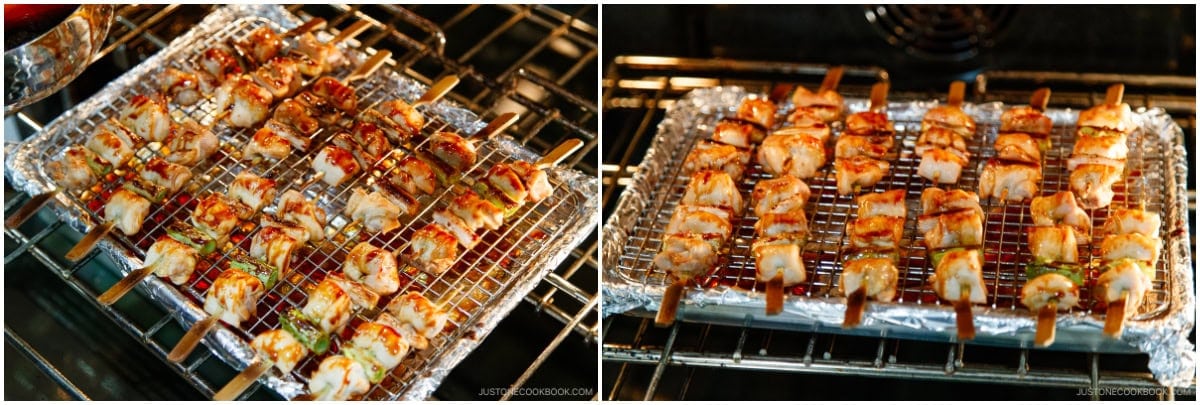
- Like a baking sheet with aluminum foil for easy cleanup. Place an oven-safe wire rack on top. Grease the grate of the wire rack with neutral oil to keep the chicken from sticking to the grate.
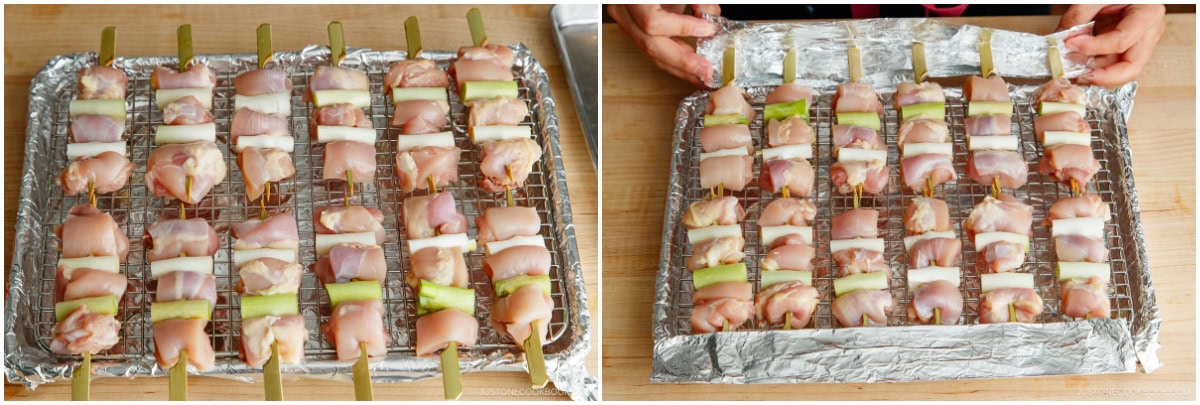
- Place the skewers on top, with the handles resting on the edge of the baking sheet. Cover the handles with sheets of aluminum foil to prevent them from burning.
- Preheat the broiler to High and wait until the heating elements are hot, about 3–5 minutes. Then, place the skewers under the broiler. Broil for 6 minutes.
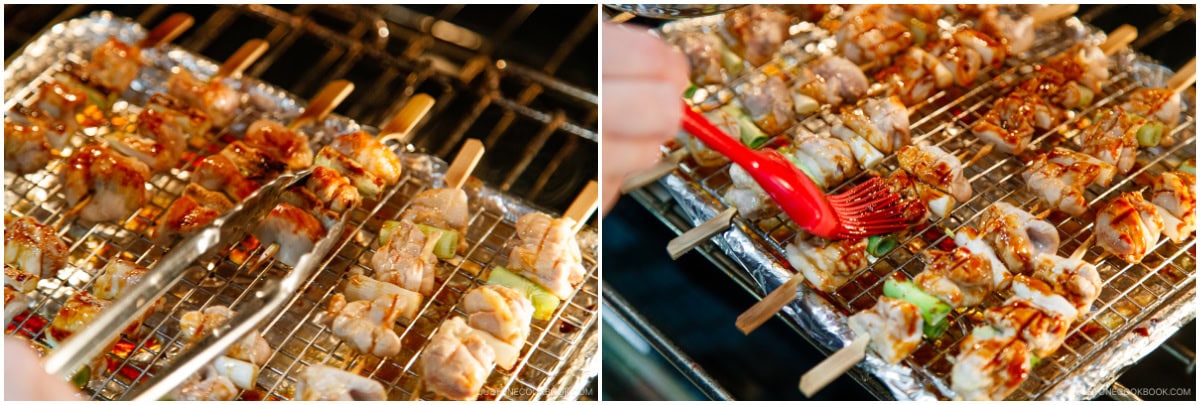
- After 6 minutes, brush the meat and Tokyo negi with the Yakitori Sauce.
- Flip the skewers carefully with a pair of tongs. Brush on the other side with the Yakitori Sauce. Continue to broil for 3–4 minutes to caramelize the sauce.
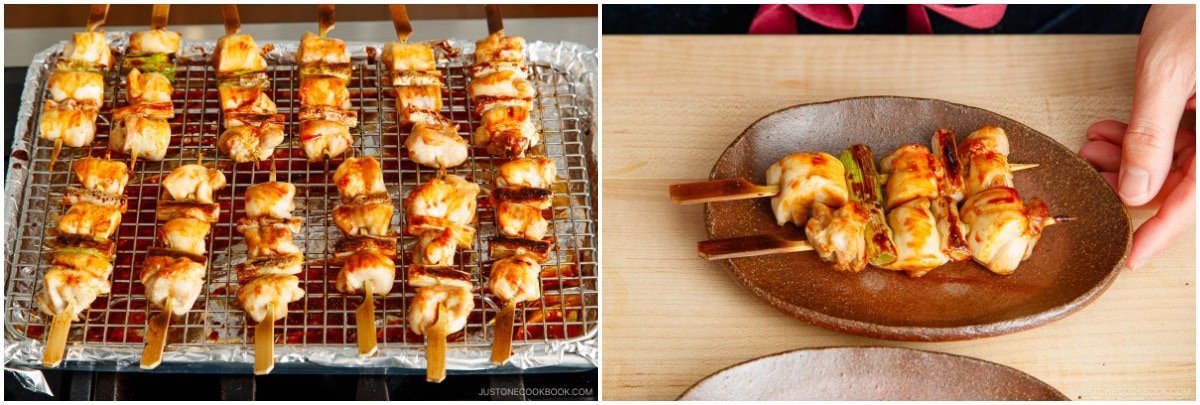
- Finally, flip one more time (now this is the presentation side). Brush with the Yakitori Sauce and broil for 1–2 minutes. Remove the baking sheet from the oven.


To Serve
- Transfer the skewers to a serving plate. Optionally, with a clean brush, baste the top of the chicken skewers with the reserved sauce. Serve with shichimi togarashi and enjoy!
To Store
- You can keep the leftovers in an airtight container and store in the refrigerator for up to 3 days or in the freezer for up to a month.
To Pan-Fry the Yakitori (Optional)
- Heat a large frying pan on medium heat. When it's hot, add the oil. Wait until the oil is hot and place the skewers in a single layer. Cook until both sides are brown, about 5 minutes. Then, cook, covered, on low heat for 2–3 minutes. Pour the sauce and cook until well-coated. Remove from the heat and serve.
Nutrition
Editor’s Note: This post was originally published on Apr 13, 2014. I was updated with new step-by-step and final images on April 18, 2024.


Made this and it turned out very delicious!
I made this recipe and it was very simple and very tasty. The directions are very clear and easy to follow. Our house smelled delicious and the chicken tasted delicious after the bastings during cooking. Highly recommend trying this recipe!
Hi, Lacey! Aww. We’re so glad you enjoyed Nami’s recipe!
Thank you for trying her recipe and providing positive comments. 🤗
I cook Nami chan’s yakitori 2x a month at least since I printed out the recipe couple of years, and sooo delicious and simple to follow her recipes. Thank you 👍
Hi Kniomy! Thank you so much for your kind feedback!
We are so happy to hear that you enjoy Nami’s recipe very much. Happy Cooking! 🥰
Hi Nami! Can this recipe be cooked in an electric hot pot or in an air fryer? I don’t have the grill you mention, so I’m wondering if one of those 2 items or my oven work best for this recipe. Thank you!
Hello, Stephanie! Thank you for experimenting with Nami’s recipe!
We’ve never cooked this in an air fryer or an electric hot pot, so we’re not sure how it will turn out.
If we do attempt it, an air fryer could be the best option.
If you try it, please let us know how it goes.😃
I did this exact recipe over a small charcoal grill, similar to a binchotan. It was phenomenally good!! A local Japanese restaurant is famous here for their yakitori, but I won’t need to go there anymore, haha.
Hi Daniel! Thank you so much for trying Nami’s recipe and for your kind feedback.
We are glad to hear you enjoyed homemade Yakitori!
Happy Cooking!🥂
The yakitori stand under my local train tracks use to wrap asparagus with thin bacon and grill them. Dip them in a little Kewpie. They are amazing. Also, skewer and grill small cubes of fatty pork belly.
Hello, Bkhuna! Thank you for taking the time to read Nami’s post and share your experience with us!
Yes! Bacon asparagus is delectable! Here’s Nami’s quick version recipe: https://www.justonecookbook.com/bacon-wrapped-asparagus/