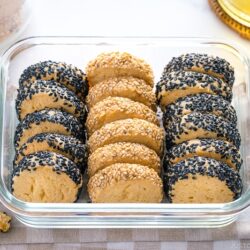
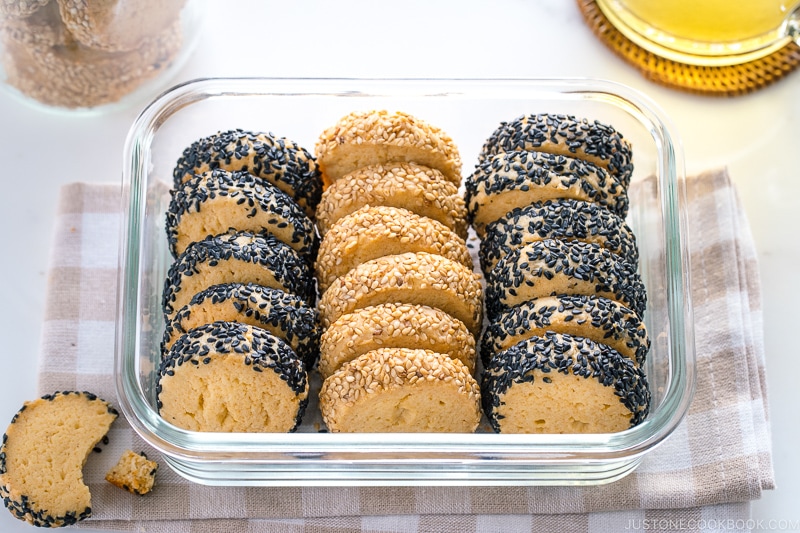
Miso Butter Cookies
Crisp, buttery, and melt-in-your-mouth, these Miso Butter Cookies make the most insanely delicious afternoon treat! They hit the right notes with a serious depth of flavor. You need only 7 pantry ingredients!
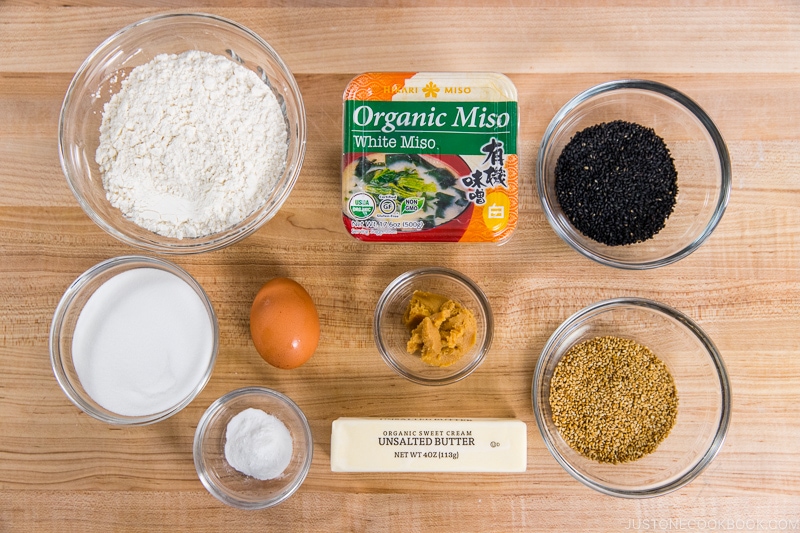
Ingredients
- ½ cup unsalted butter (1 stick; at room temperature)
- ½ cup sugar
- 2 Tbsp miso (I use mild and mellow white miso; a different miso type will give a slightly different taste and color; reduce the amount if you‘re using saltier red miso or dashi-included miso)
- 1 large egg (50 g each w/o shell) (at room temperature)
- 1⅔ cups all-purpose flour (weigh your flour or use the “fluff and sprinkle“ method and level it off)
- 1 tsp baking powder
- 3 Tbsp toasted white sesame seeds
- 3 Tbsp toasted black sesame seeds
Instructions
- Before You Start…Please note that this recipe requires at least 30 minutes of chilling time. Gather all the ingredients. I highly encourage you to weigh your ingredients using a kitchen scale for this recipe. Click on the “Metric“ button at the top of the recipe to convert the ingredient measurements to metric. If you‘re using a cup measurement, please follow the “fluff and sprinkle“ method: Fluff your flour with a spoon, sprinkle the flour into your measuring cup, and level it off. Otherwise, you may scoop more flour than you need.
To Make the Dough
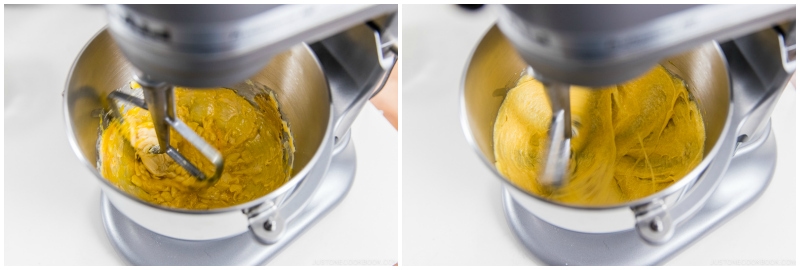
- In a large bowl, using a handheld mixer or a stand mixer fitted with a paddle attachment, beat ½ cup unsalted butter (at room temperature) for 30 seconds. Tip: To bring cold butter to room temperature, microwave a cold stick of butter for 5 seconds on each side for 20 seconds total.
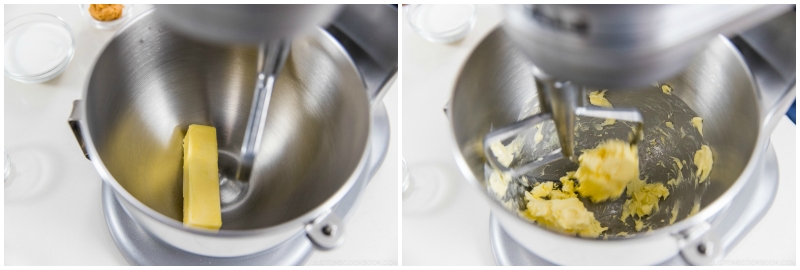
- Add ½ cup sugar and 2 Tbsp miso.

- Beat everything together on medium-high speed until smooth, light, and fluffy, about 2 minutes.

- Crack 1 large egg (50 g each w/o shell) at room temperature and whisk in a small bowl. (If the egg is cold, soak it in warm water to bring to room temperature.) Gradually add the egg to the butter mixture while mixing.
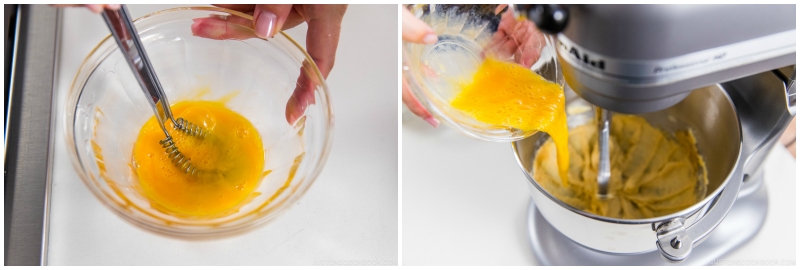
- Beat on high speed until combined, about 1 minute. Scrape down the sides and up the bottom of the bowl and beat again as needed to combine in between.
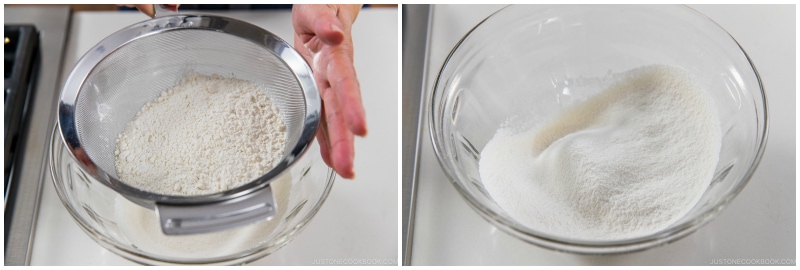
- In a small bowl, combine 1⅔ cups all-purpose flour and 1 tsp baking powder and mix with a fork. I do this extra step so the baking powder is evenly distributed when sifting.
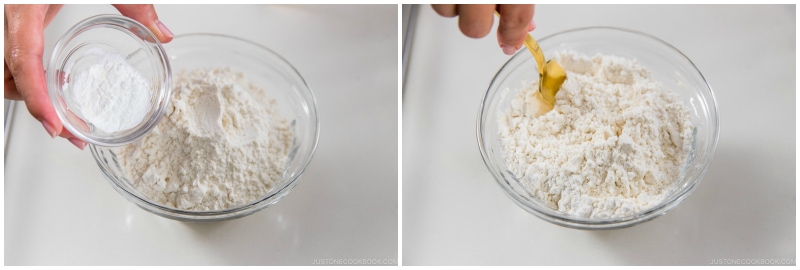
- With a fine-mesh sieve, sift the flour mixture over a medium bowl.
- Gradually add the flour mixture into the mixing bowl at low speed.
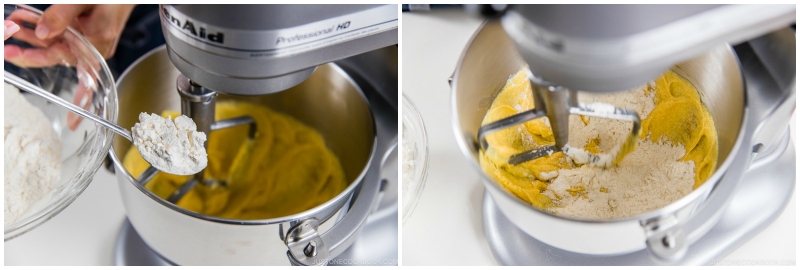
- Once you finish adding all the flour mixture, turn up to high speed and beat until incorporated.

To Roll the Dough Logs
- Sprinkle a small amount of flour on the working surface and transfer the dough. If the dough is very soft, chill it in the refrigerator for 15 minutes. By chilling, the butter/fat will solidify and it‘ll be easier to work with.
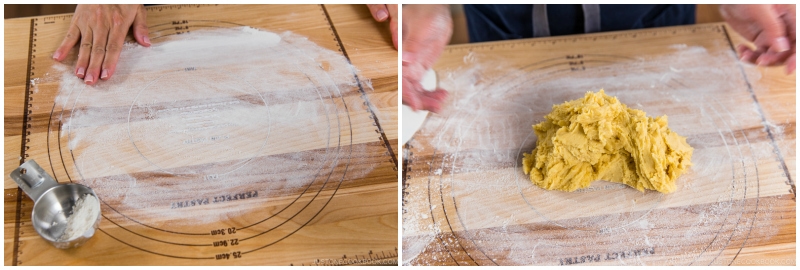
- Roll the dough into a ball and cut it in 2 pieces. Note: This recipe can be used for cutout cookies: Form the dough into a disc, wrap and chill, roll out to ¼–½ inch thickness, cut, and bake.

- Roll the dough into 2 long logs.
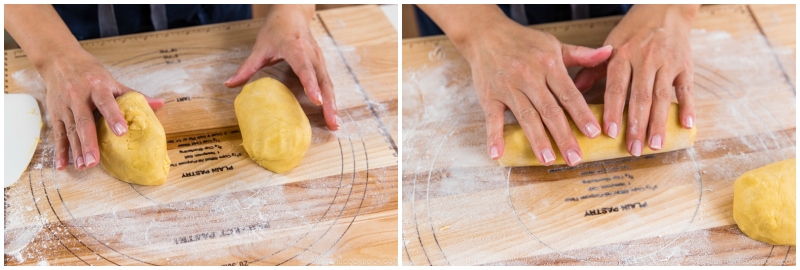
- Each log should be 10 inches (25 cm) long with a 1-inch (2.5-cm) diameter.

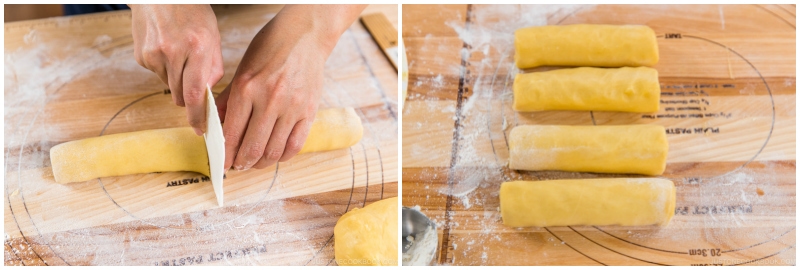
- Cut the long logs in half; now you have 4 logs that are each 5 inches (12.5 cm) long.
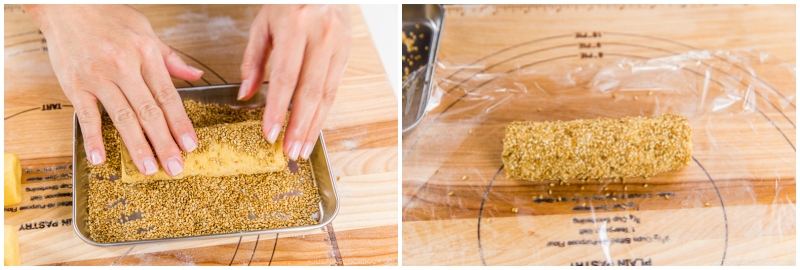
- Prepare a small flat container (or baking sheet) and add 3 Tbsp toasted white sesame seeds (save the black ones for later). Moist a sheet of paper towel with water and wrap around a log so the dough is moistened.
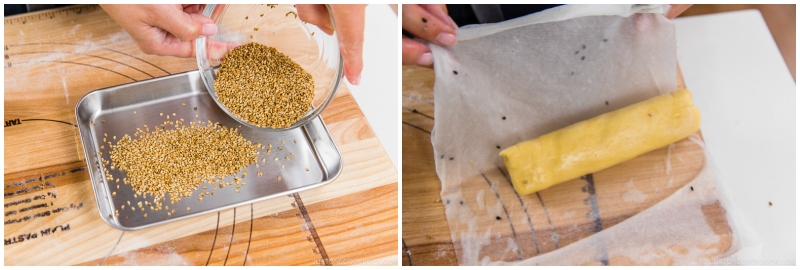
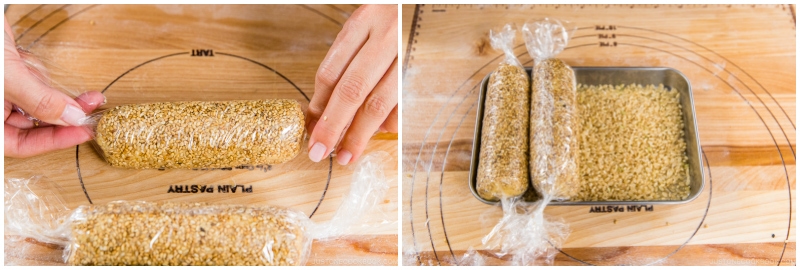
- Roll 2 moistened logs in the sesame seeds and wrap in parchment paper or plastic.
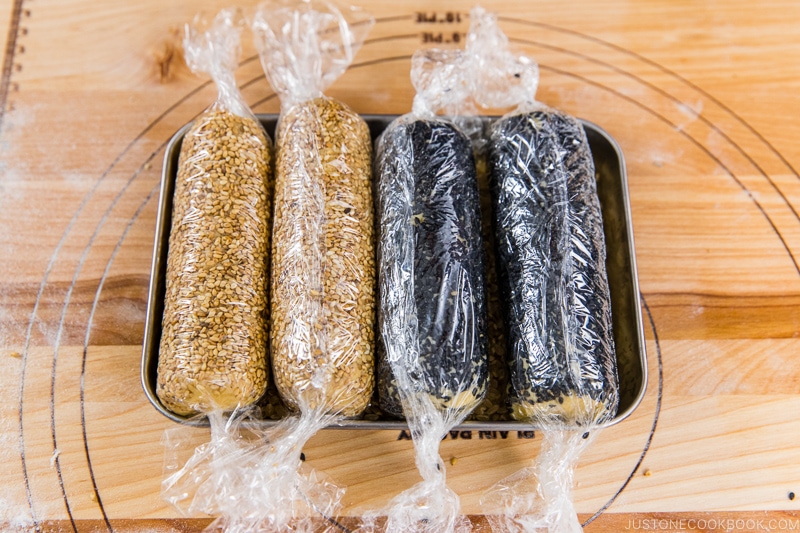
- I‘ve learned the best way to keep the dough from flattening out on the bottom is to place the dough logs on a bed of raw rice.
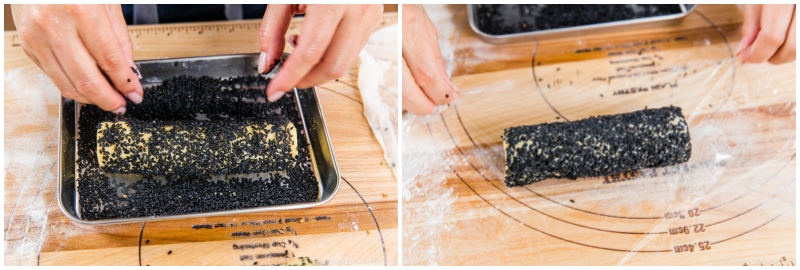
- Roll the other 2 moistened logs in 3 Tbsp toasted black sesame seeds and wrap in parchment paper or plastic.
To Slice and Bake the Cookies
- Chill the cookie dough in the refrigerator for at least 30 minutes. Meanwhile, preheat oven to 350°F (180°C). For a convection oven, reduce cooking temperature by 25ºF (15ºC). Prepare a baking sheet lined with parchment paper. Tip: I highly encourage you to use an aluminum baking sheet and check your oven‘s temperature using an oven thermometer; see the Notes section below for more details.
- Once the dough is chilled, use a sharp knife to cut one dough log into 8 slices of even thickness.
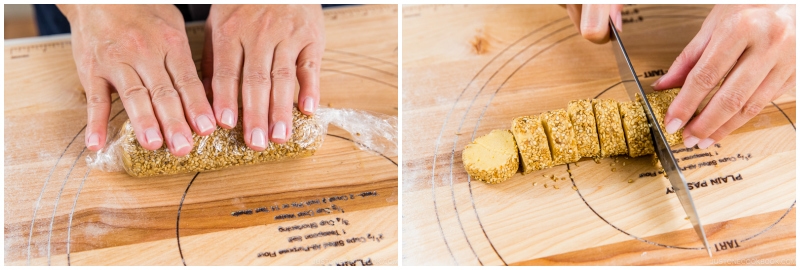
- Cut the rest of the cookie dough and transfer to the baking sheet lined with parchment paper. If the dough is no longer chilled, you can put the baking sheet in the refrigerator for 15 minutes until the cookies are chilled and firm. Tip: If the cookie dough is chilled, they will not completely lose their shape.

- Bake the chilled cookies for 20–22 minutes or until lightly browned on the edges. Tip: Closely monitor the cookies in the oven and be ready to adjust the bake time if needed, especially if you‘re not using an aluminum baking sheet.
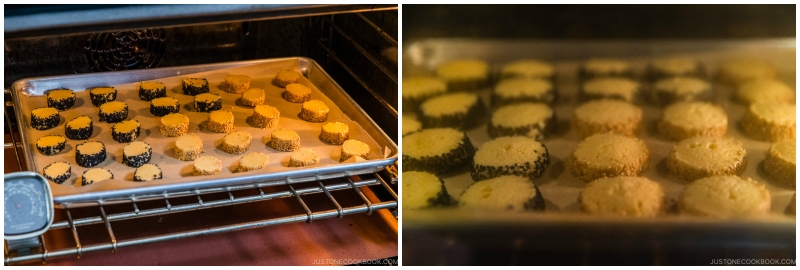
- Remove from the oven and allow to cool on the baking sheet for 5 minutes before transferring to a wire rack to cool completely.

To Store
- These cookies stay fresh in an airtight container at room temperature for up to 1 week. I usually reheat the cookies at 350ºF (180ºC) in the toaster oven (or oven) until toasty. To freeze the dough: Tightly wrap the logs in plastic wrap and put them into freezer bags. Freeze for up to 3 months. Let them thaw in the refrigerator for 2 hours before slicing.
Notes
Baking Sheets: I strongly encourage you to use a light-colored aluminum baking sheet that conducts heat uniformly so your cookies and pastries brown evenly. I had success testing this recipe on an aluminized steel baking sheet as well. You will not have the same result if you use another type of baking sheet with a dark-colored surface. In my experience, I’ve burned the bottom of my baked goods on a dark-colored carbon steel baking sheet, so I highly discourage using this kind of pan.
Ovens: I encourage you to check your oven‘s temperature with an oven thermometer, as the actual temperature inside may differ from the display setting. Every oven is different; please adjust your setting to achieve the correct actual temperature. Also, I tested this recipe in a full-sized oven. Your baked goods may cook faster if you use a countertop (or other small) oven. Closely monitor your baking and be ready to adjust the bake time if needed.
Nutrition
Calories: 74kcal, Carbohydrates: 9g, Protein: 1g, Fat: 4g, Saturated Fat: 2g, Trans Fat: 1g, Cholesterol: 13mg, Sodium: 56mg, Potassium: 19mg, Fiber: 1g, Sugar: 3g, Vitamin A: 98IU, Calcium: 25mg, Iron: 1mg
