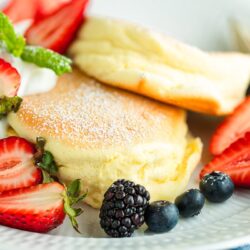
Fluffy Japanese Soufflé Pancakes
Fluffy Japanese soufflé pancakes are tall, cottony stacks that taste like eating a cloud. The secret is stiff-peak meringue folded into the batter, then cooked low and slow with steam. My step-by-step recipe will help you make them at home for a weekend breakfast you won’t want to miss.
Equipment
- nonstick frying pan with lid, 11–12-inch (28–30 cm); must use a tight-fitting lid; an electric nonstick griddle with lid also works
- infrared thermometer gun, helpful to check the pan's temperature
Ingredients
Servings: pancakes (1 serving)
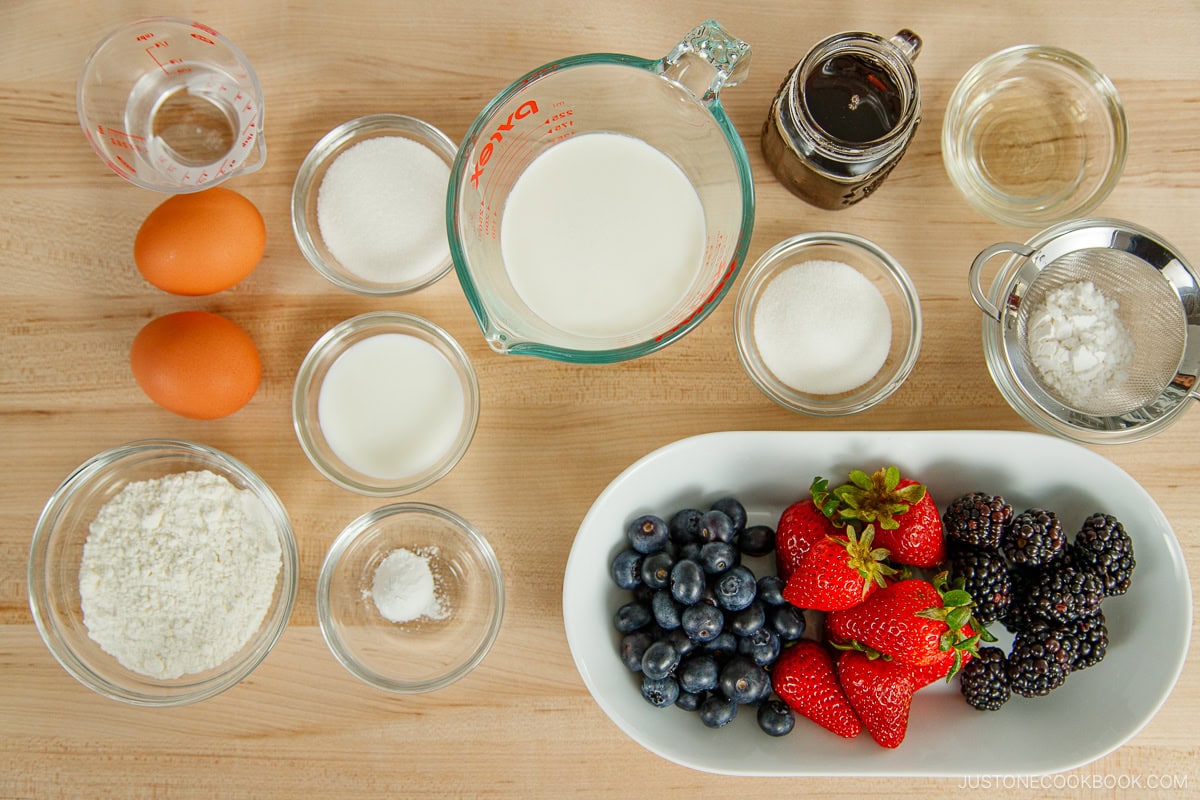
- 2 large eggs (50 g each w/o shell)
- 1½ Tbsp whole milk (see end Notes)
- ¼ tsp pure vanilla extract
- ¼ cup cake flour (click the Metric button above and weigh the flour for accuracy; you can make homemade cake flour)
- ½ tsp baking powder (see end Notes)
- 2 Tbsp sugar
- 1 Tbsp neutral oil (for the pan)
- 2 Tbsp water (for steaming)
For the Fresh Whipped Cream (optional)
- ½ cup heavy (whipping) cream
- 1½ Tbsp sugar (or more, to taste)
For the Toppings
- 1 Tbsp confectioners’ sugar
- fresh berries (strawberries, blueberries, etc.)
- maple syrup
Instructions
Before You Start
- Read the blog post carefully for tips before starting—timing and temperature are critical.You'll need a nonstick frying pan and tight-fitting lid. Use a kitchen scale for accuracy (switch to Metric above) or learn how to measure flour with a measuring cup.Gather all the ingredients. If you're serving optional whipped cream, make it ahead of time so you can serve the pancakes immediately. See the instructions at the end.
To Mix the Batter
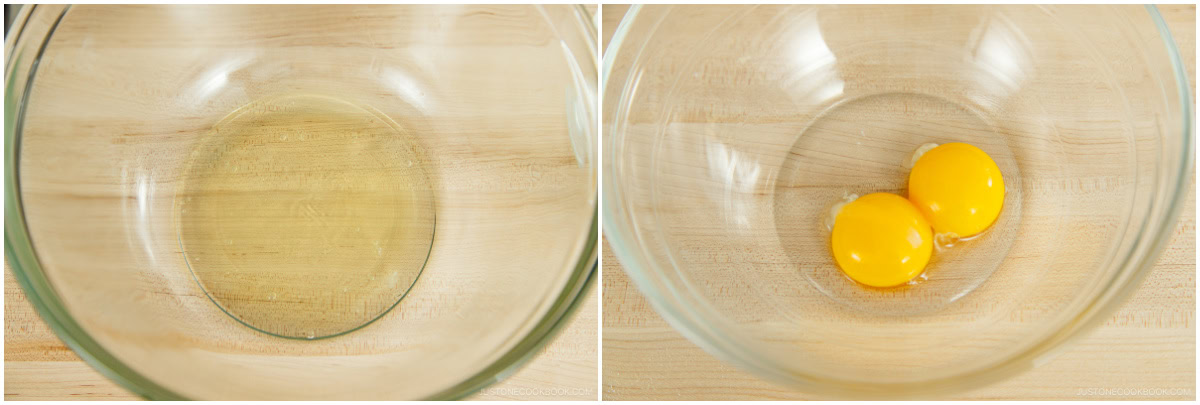
- Cook one batch (1 serving) of batter at a time, or the batter will deflate if it sits too long. Use multiple nonstick frying pans or a griddle if you double or triple the recipe.Separate the yolks and whites of 2 large eggs (50 g each w/o shell) into different bowls. Put the bowl of egg whites in the freezer for 15 minutes—set a timer so you don't forget.Nami's Tip: Partially freezing the egg whites strengthens their protein structure, making them whip faster and form a much more stable meringue.
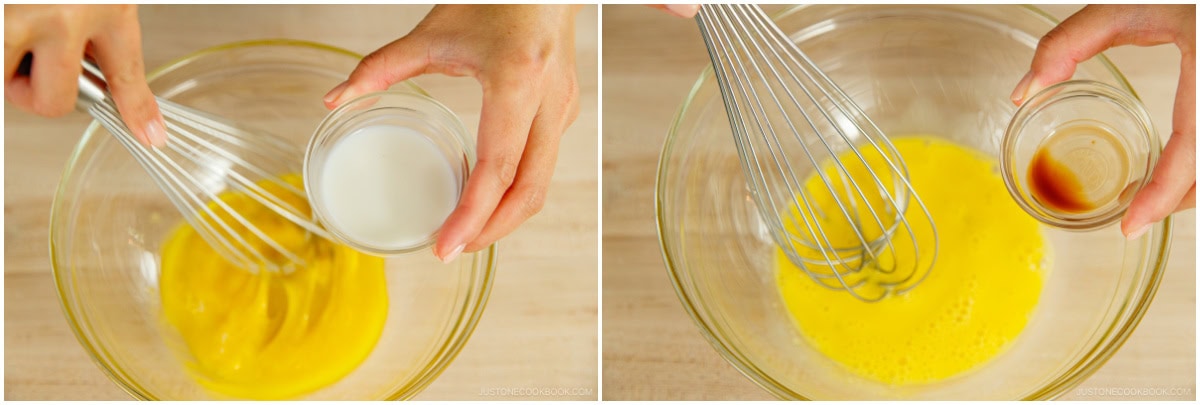
- Add 1½ Tbsp whole milk and ¼ tsp pure vanilla extract to the egg yolks. Whisk by hand until pale, thick, and frothy.
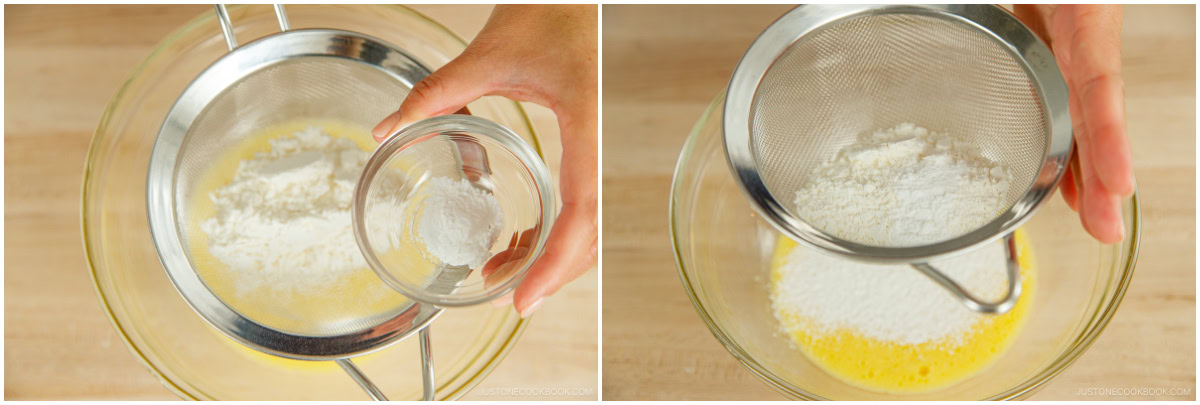
- Sift ¼ cup cake flour and ½ tsp baking powder directly into the yolk mixture.
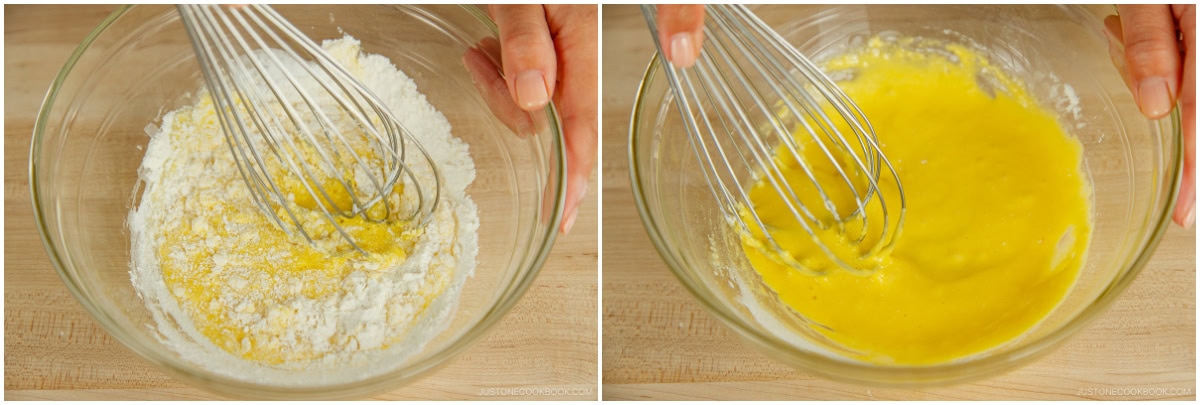
- Whisk just until the batter comes together smoothly—do not overmix.
To Make the Meringue
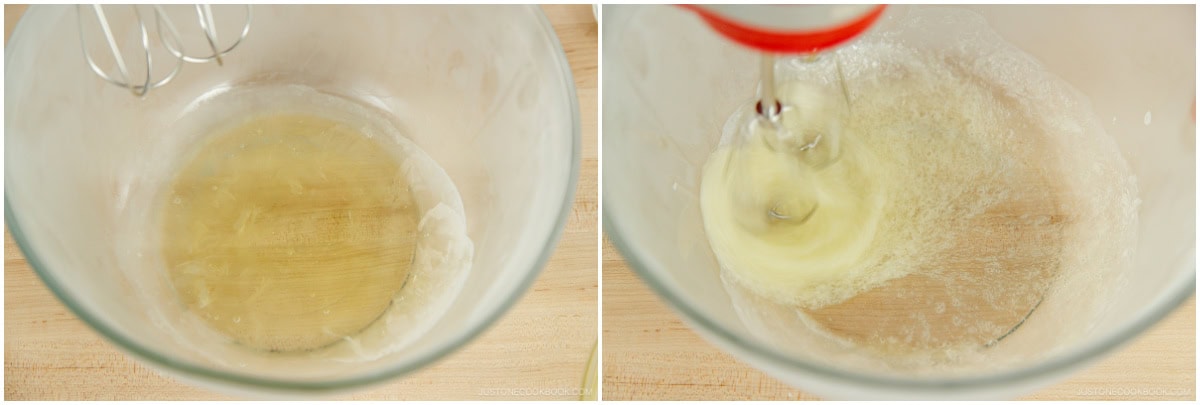
- Preheat: Set your nonstick frying pan over the lowest heat to preheat to 300ºF (150ºC) and keep it warm while preparing the batter.Take out the bowl of egg whites from the freezer.Beat the half-frozen egg whites with a hand mixer or stand mixer on low speed (Speed 2–3) until foamy with large bubbles (about the texture of a cappuccino foam).
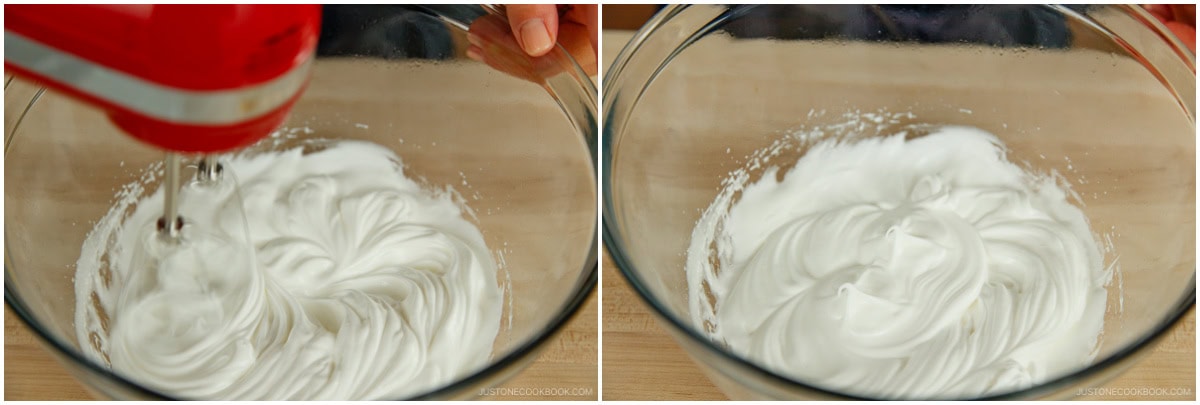
- With the mixer running on medium speed (Speed 4–6), add 2 Tbsp sugar, one-third at a time, allowing each addition to dissolve before adding the next.Once all the sugar is incorporated, increase the speed to medium-high (Speed 6–8) and beat until stiff, glossy peaks form, about 2 minutes.
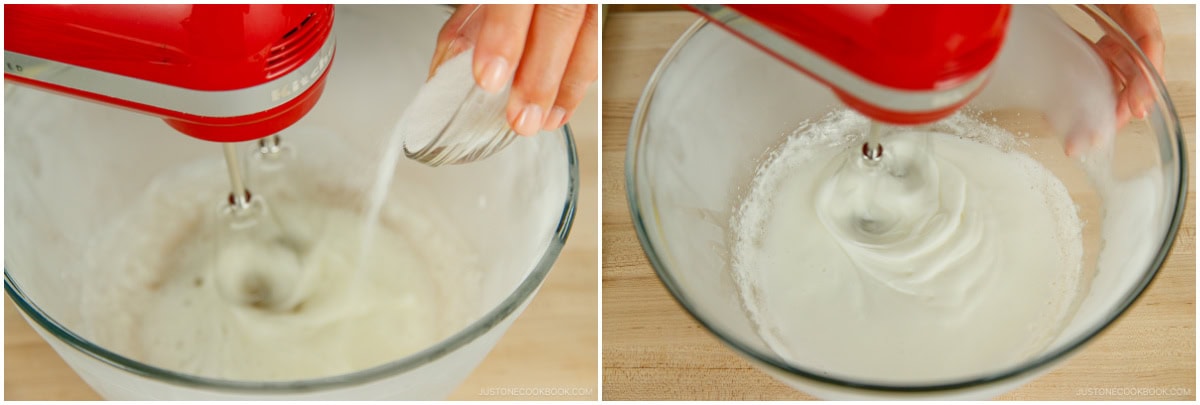
- Pause near the end to sweep any unwhipped egg whites along the bowl's edge into the center.Finish beating on medium speed (Speed 4–6) if using a hand mixer. If using a stand mixer, detach the whisk attachment and finish beating with a hand whisk.Lift the whisk straight up to check the consistency. The meringue should hold a firm peak that stands straight up or folds over slightly at the tip, looking smooth and glossy.Nami's Tip: Be careful not to overbeat, or the meringue will become grainy and difficult to fold into the batter.
To Fold In the Meringue
- Add one-third of the meringue to the egg yolk mixture. Whisk by hand until fully combined and smooth.Nami's Tip: Don’t worry about breaking air bubbles during this first addition—this step is to lighten the thick yolk base so the rest folds in easily.
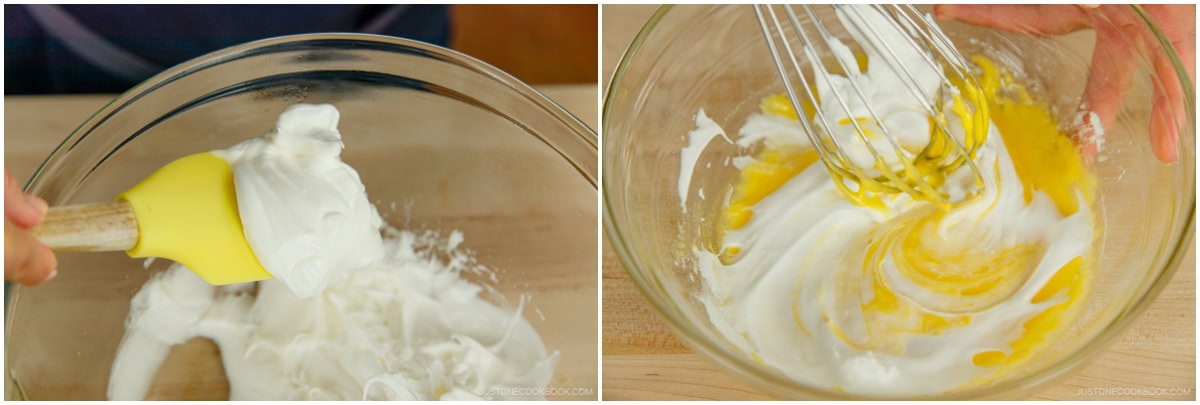
- Add half of the remaining meringue to the yolk mixture. Gently fold with a hand whisk using a gentle bottom-to-top motion, taking care not to deflate the trapped air.Nami's Tip: A balloon whisk actually folds meringue into batter more gently and evenly than a silicone spatula, as the wires cut through without crushing the structure.
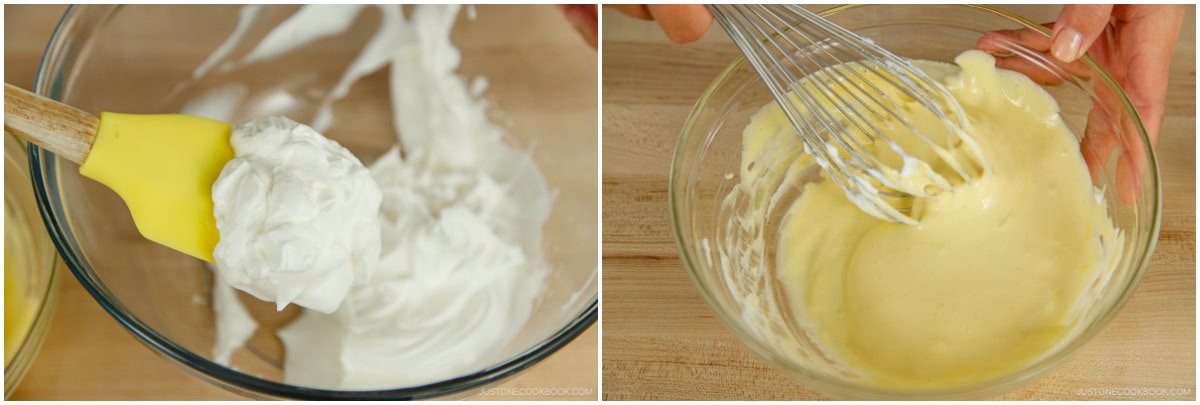
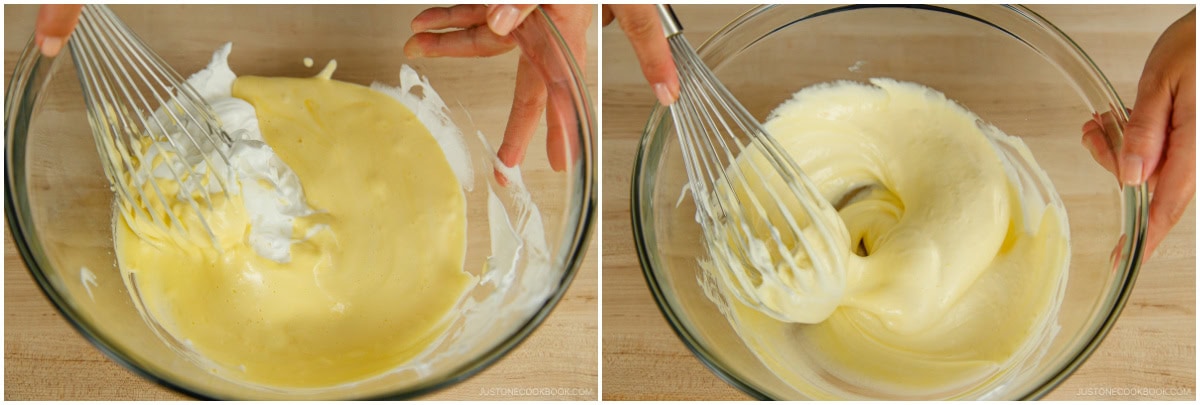
- Pour the lightened yolk mixture directly into the meringue bowl with the last portion of meringue. Fold gently until completely homogenous and no white streaks remain. Proceed immediately to cooking.
To Cook the Pancakes
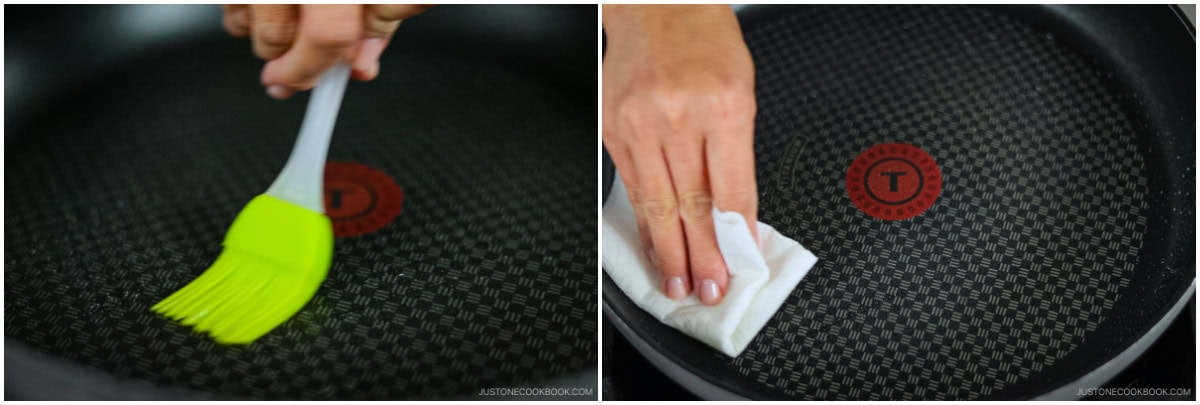
- By now, your pan should be preheated to 300ºF (150ºC) over the lowest heat. Lightly brush with 1 Tbsp neutral oil, then blot with a paper towel to leave a thin, even film. Nami's Tip: A clean, lightly oiled pan ensures an even, golden color without hot spots.
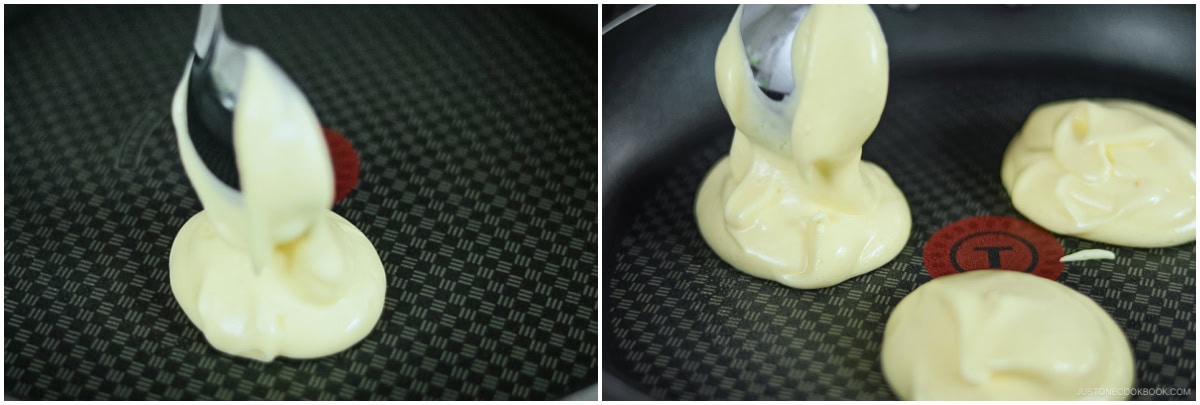
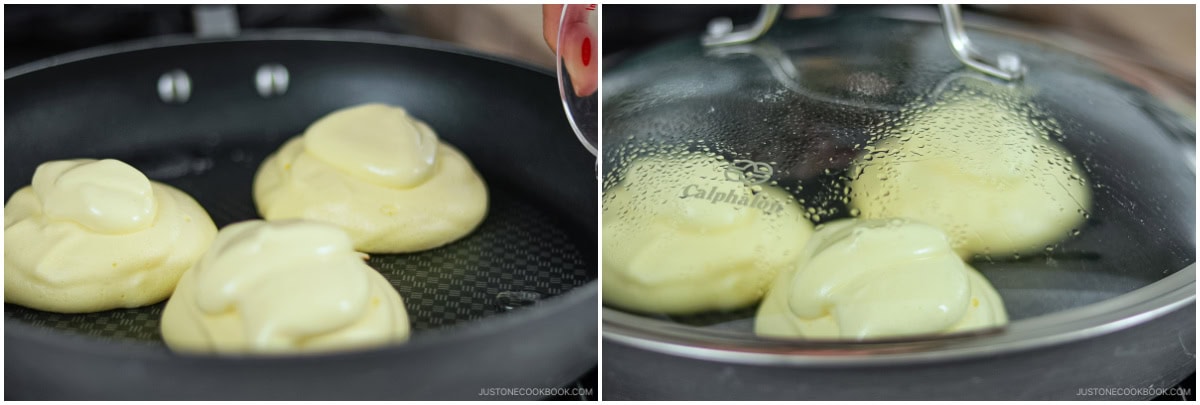
- Using a cookie scoop, scoop the batter into the pan to make 3 tall mounds. Increase the stove's setting to low heat to maintain the pan's temperature at 300ºF (150ºC).Note: Two more scoops will be added to each pancake.
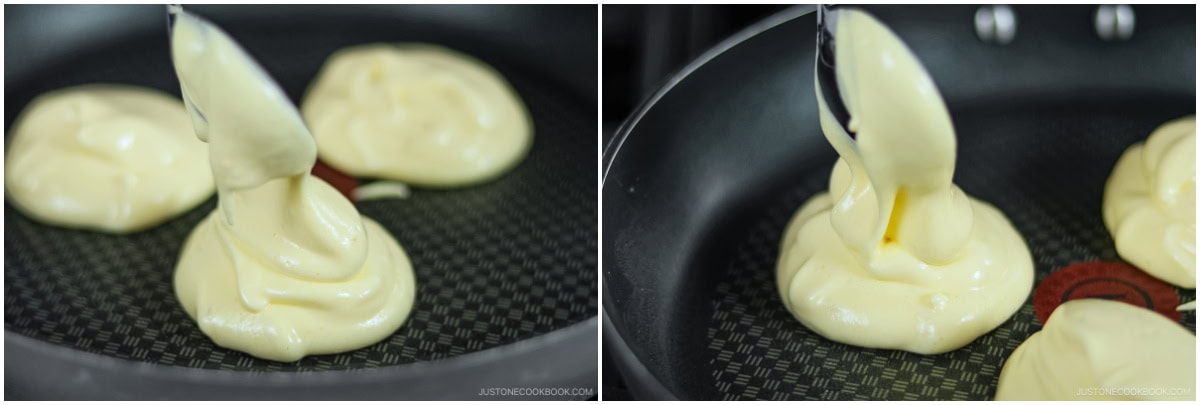
- When the surface of the pancake looks slightly dry, stack a second scoop directly on top of each mound to build height.Nami's Tip: You should have at least three scoops left in the bowl.
- Pour 1 Tbsp water into the open spaces in the pan (avoid pouring water directly on the pancakes). Cover with the lid and steam cook for 6 to 7 minutes over low heat—set a timer so you don't forget.Nami's Tip: The steam keeps the pancakes moist and helps them rise evenly without drying out.
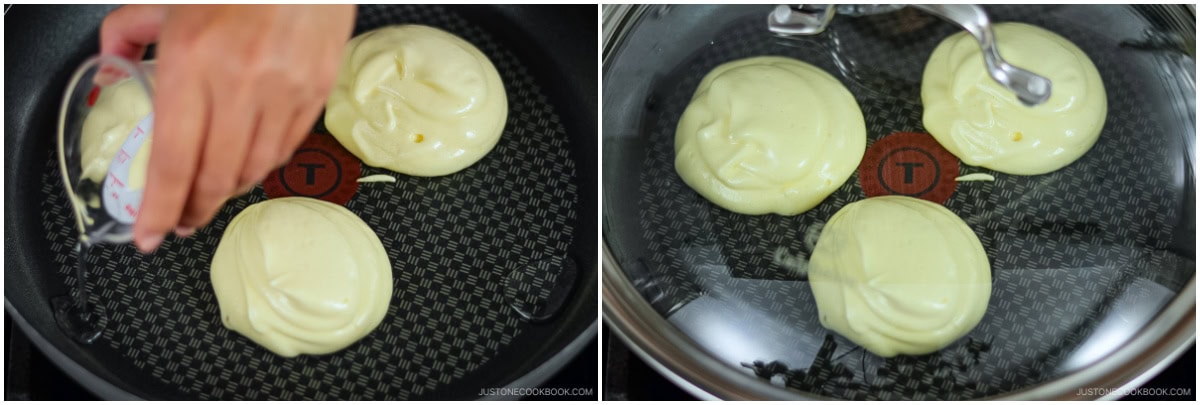
- At the 2-minute mark, quickly uncover and mound a final scoop of batter onto each pancake. If the water has evaporated, add another small splash. Re-cover immediately and continue cooking.
To Flip the Pancakes
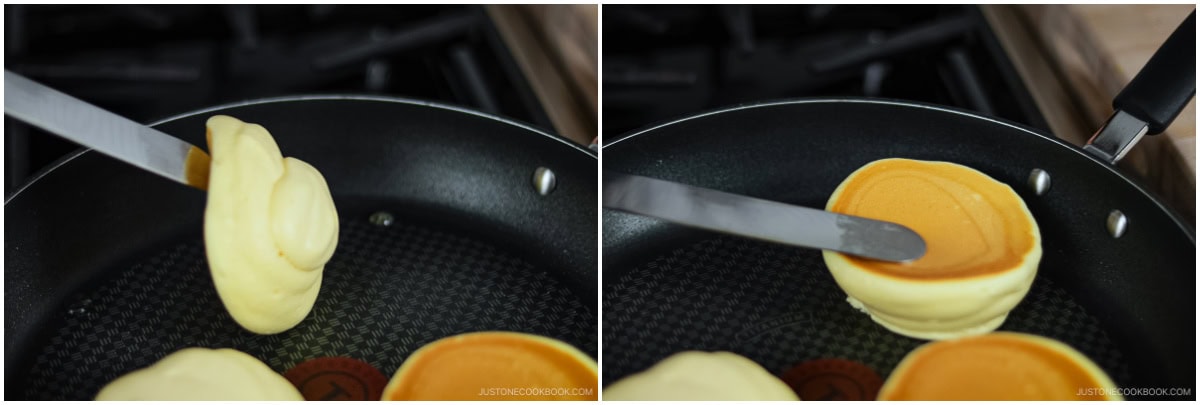
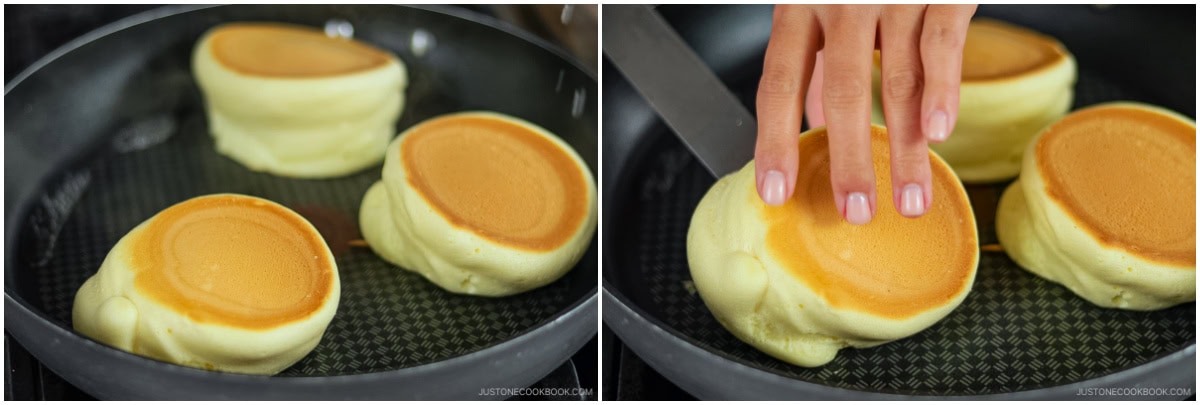
- When the timer goes off, slide an offset spatula under one pancake. Gently pull it to one side to create space, then use a smooth rolling motion to flip it over.Nami's Tip: If the pancake resists, don't force it—give it another 30–60 seconds to set before flipping, or it may crack.
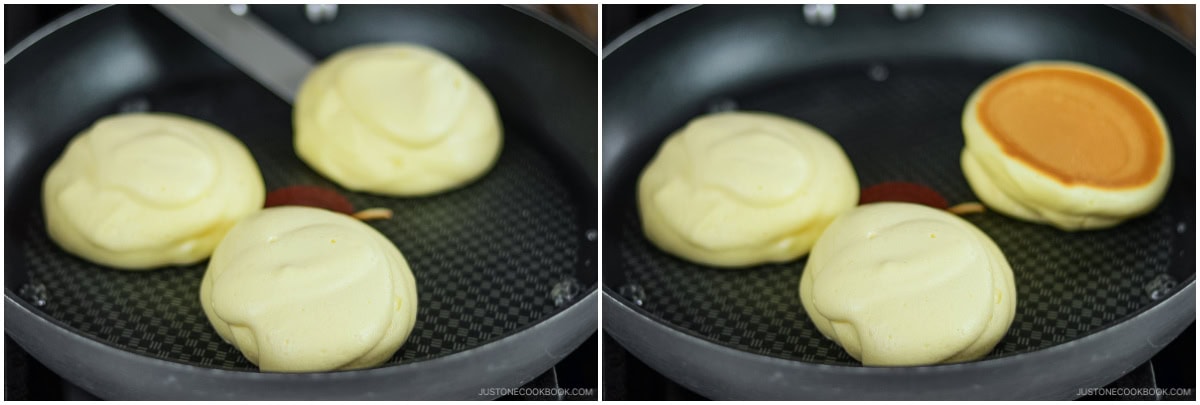
- Flip the remaining pancakes using the same rolling motion.
- Add 1 Tbsp water to the open spaces, cover with the lid, continue cooking for 4 to 5 minutes on the lowest heat—set a timer so you don't forget.
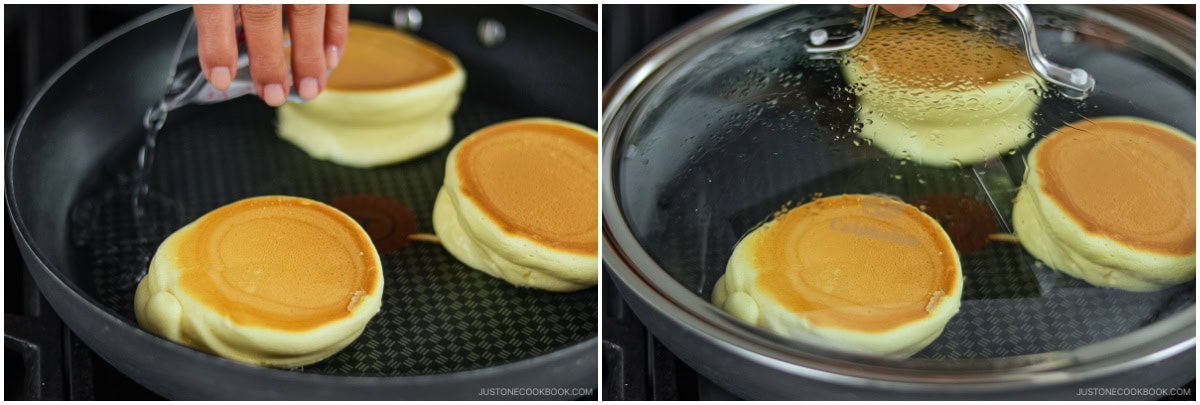
- When the timer goes off, check to see the bottoms are golden brown and the sides feel set when gently touched. Transfer immediately to serving plates.
To Serve
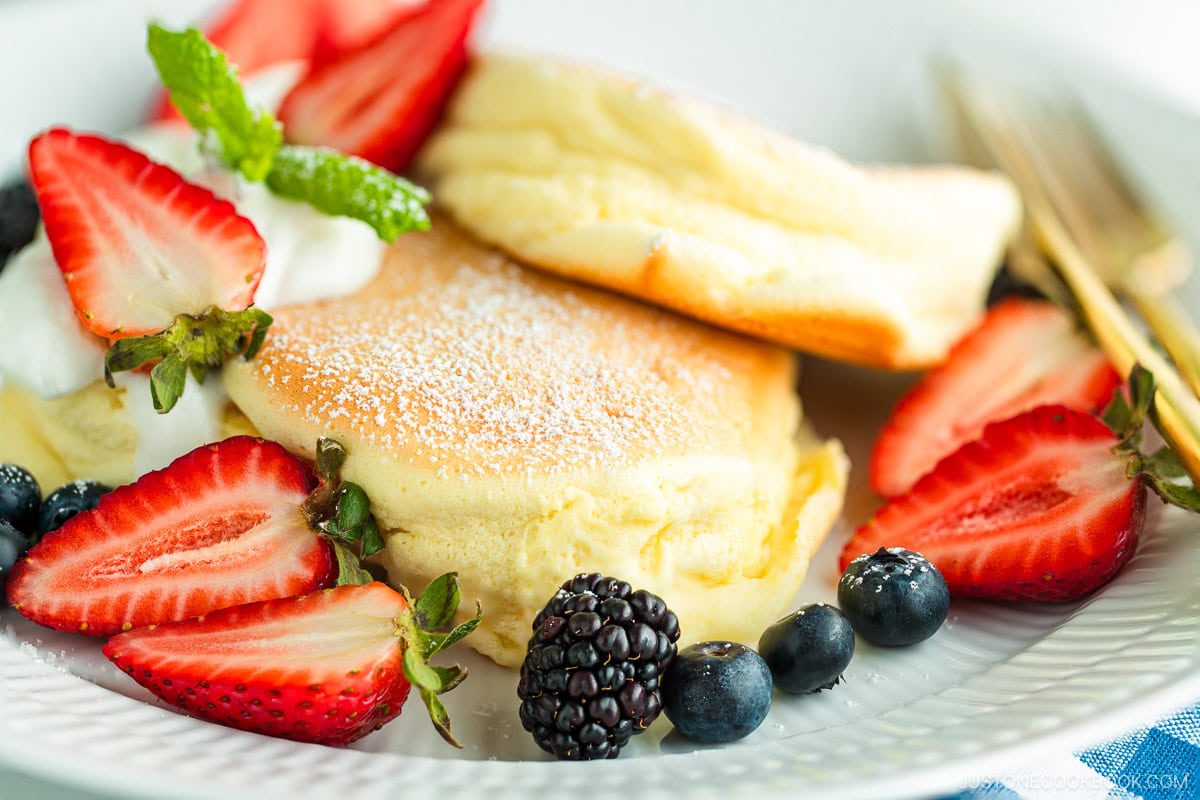
- Dust with 1 Tbsp confectioners’ sugar , top with fresh berries and a dollop of whipped cream (if using), and drizzle with maple syrup. Serve immediately for the best texture. Fluffy soufflé pancakes are best enjoyed hot right out of the pan, as they naturally lose some of their height as they cool.
To Store
- Store any leftover pancakes in an airtight container in the refrigerator for up to 2 days. You can freeze leftovers for up to 1 month, though they will lose their delicate soufflé height and thaw into a regular, flat pancake.To Reheat: Warm gently in a covered nonstick pan over low heat with a small splash of water to re-steam them until warm. A microwave works in a pinch (10–15 seconds), but the pan method restores the best texture.
To Make the Whipped Cream (optional; make ahead)
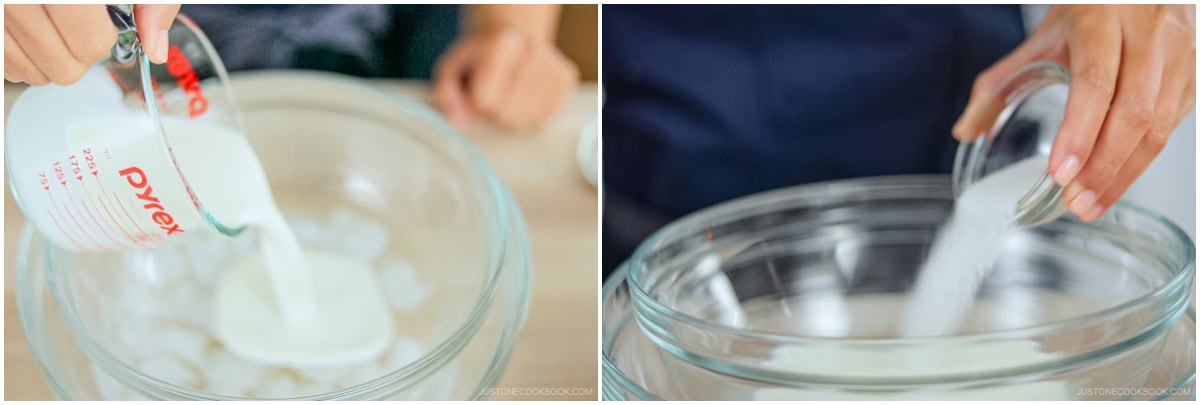
- Fill a large bowl halfway with ice cubes and water. Nest a clean, dry medium bowl on top.Add ½ cup heavy (whipping) cream and 1½ Tbsp sugar. Nami's Tip: The ice bath keeps the fat firm in the cold cream. This helps trap air so the whipped cream doesn't separate.
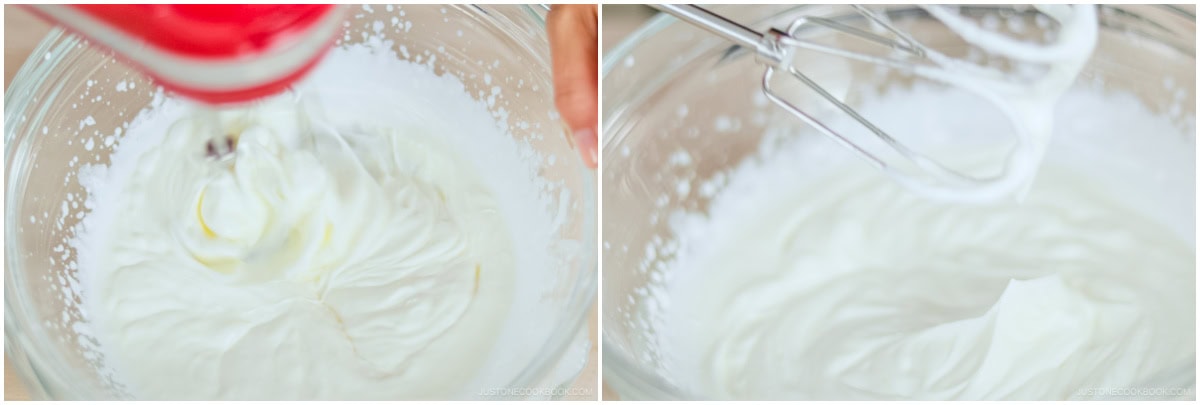
- Whisk on high speed to medium-firm peaks: The cream mounds and holds its shape, with tips that curl rather than flop. Chill it in the fridge until ready to serve.
Notes
Ingredient Notes
- Whole milk: I haven‘t tried reduced-fat, low-fat, nonfat, or plant-based milk for this recipe as I believe they will make the batter too thin.
- Baking powder: It makes the pancakes light and fluffy. If it’s old or expired, they’ll come out flat and dense. Check that yours is still active—replace it if it’s been more than 6 months since opening.
- Don't underbeat the egg whites. Whip to stiff, glossy peaks before folding
- Don't overmix the batter. Fold gently and stop as soon as no white streaks remain
- Don't use high heat. Low and slow is non-negotiable; rushing the cook collapses the structure
- Don't undercook. Cook through fully so the structure sets before you plate them
- Make it matcha. Add matcha powder to the batter for green tea flavor—see my Matcha Souffle Pancakes recipe for measurements.
- Swap the flour. No cake flour? Replace 2 tablespoons per cup of all-purpose flour with cornstarch and sift 3–5 times.
- Switch up the fruit. Peaches, mangoes, or whatever is in season work beautifully in place of berries.
- Try a different syrup. Swap maple for kuromitsu (Japanese black sugar syrup), chocolate sauce, or strawberry sauce.
- Add mix-ins. Fold chocolate chips into the batter just before cooking.
Nutrition
Serving: 1pancake, Calories: 168kcal, Carbohydrates: 18g, Protein: 6g, Fat: 8g, Saturated Fat: 5g, Polyunsaturated Fat: 1g, Monounsaturated Fat: 2g, Trans Fat: 1g, Cholesterol: 125mg, Sodium: 122mg, Potassium: 67mg, Fiber: 1g, Sugar: 10g, Vitamin A: 192IU, Calcium: 69mg, Iron: 1mg
The nutrition facts shown are generated by an online calculator and are estimates only. Please consult a professional nutritionist for specific dietary needs.
