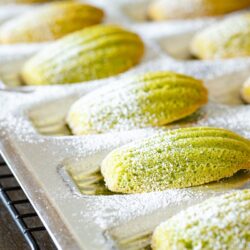
Matcha Madeleines
Delicate and soft classic French cookies flavored with green tea powder, these Matcha Madeleines make the most delightful sweet treat. Invite your friends over and enjoy it with Japanese tea like sencha, hojicha, or genmaicha.
Ingredients
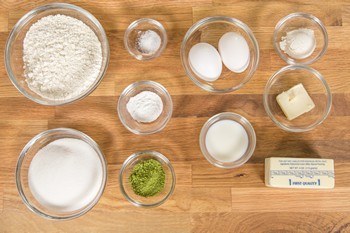
- ½ cup unsalted butter (1 stick, 4 oz, 8 Tbsp; plus 1 Tbsp for coating the pans)
- ⅔ cup sugar
- 1 cup all-purpose flour (plain flour) (weigh your flour or use the “fluff and sprinkle“ method and level it off; plus 1 Tbsp for dusting the pans)
- ¼ tsp Diamond Crystal kosher salt
- 1 tsp baking powder
- 1 Tbsp matcha (ceremoial or culinary grade) (1 Tbsp matcha is 6 g)
- 2 large eggs (50 g each w/o shell) (at room temperature)
- 1 Tbsp whole milk (at room temperature)
- 1 Tbsp confectioners’ sugar (optional, for dusting)
Instructions
- Before You Start: I highly encourage you to weigh your ingredients using a kitchen scale for this recipe. Click on the “Metric“ button at the top of the recipe to convert the ingredient measurements to metric. If you‘re using a cup measurement, please follow the “fluff and sprinkle“ method: Fluff your flour with a spoon, sprinkle the flour into your measuring cup, and level it off. Otherwise, you may scoop more flour than you need.Please note that this recipe requires 3 hours of resting time for the batter.
- Gather all the ingredients. You will need 2 madeleine pans.
- Melt ½ cup unsalted butter in a small saucepan over medium low heat. Be careful not to burn the butter. Once melted completely, transfer to a small bowl and let it cool.

- In a large bowl, add ⅔ cup sugar. Then sift 1 cup all-purpose flour (plain flour), ¼ tsp Diamond Crystal kosher salt, 1 tsp baking powder, and 1 Tbsp matcha (ceremoial or culinary grade).
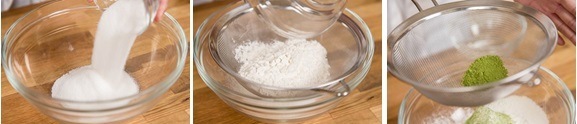
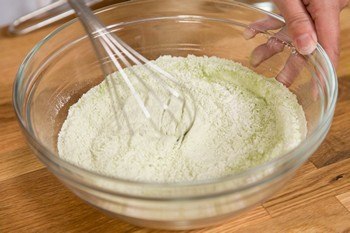
- Whisk it all together to combine.
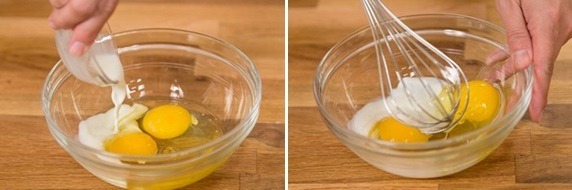
- In a medium bowl, whisk together 2 large eggs (50 g each w/o shell) and 1 Tbsp whole milk until frothy.
- Add the egg mixture into the flour mixture. Using a rubber spatula, stir until just combined.
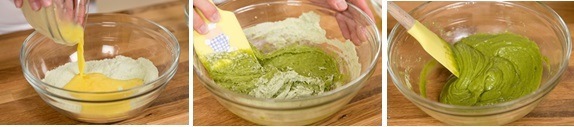
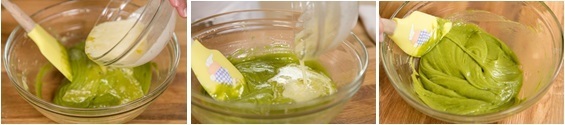
- Slowly add half of the cooled melted butter. Make sure to blend the butter and mixture well before you add more butter. Mix until just blended and do not overmix.
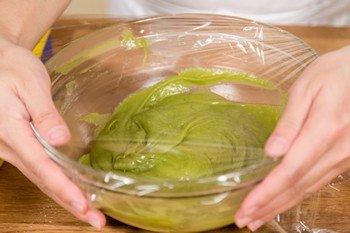
- Cover the bowl with plastic wrap and refrigerate to rest the batter for 3 hours, or if you have the time, overnight (highly recommended). If you don‘t bake it soon, put the batter in an airtight bag and store it in the freezer for up to 2 weeks.
- Center a rack in the oven and preheat the oven to 375°F (190°C). For a convection oven, reduce cooking temperature by 25ºF (15ºC).
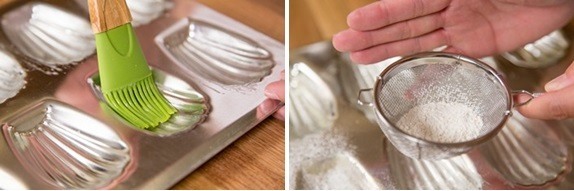
- Melt 1 Tbsp butter in the microwave. Using a pastry brush, brush the butter in the molds of two full-sized madeleine pans (12 wells per pan). Then, using a fine-mesh strainer, lightly dust 1 Tbsp flour over the molds.
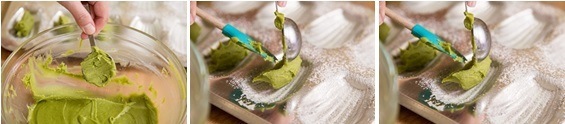
- Remove the batter from the refrigerator and fill each mold in the madeleine pan with 1 Tbsp of the batter. I scoop the batter with a 1 tablespoon measuring spoon and transfer the batter into each mold with a mini rubber spatula. No need to smooth out the batter in the mold as it’ll melt in the oven.
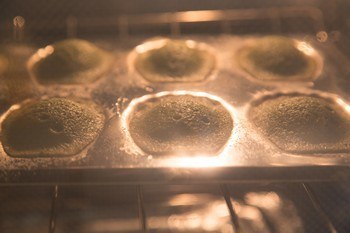
- Bake at 375°F (190°C) for 11–13 minutes, or until their edges looks done and the tops spring back when touched.
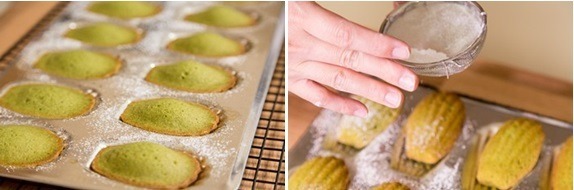
- Remove the pan from the oven and let cool for 3 minutes. Using a fork, gently release the madeleines from the molds and transfer them onto a cooling rack.
To Serve
- The madeleines are ready to serve when they are slightly warm or at room temperature. Dust the tops with 1 Tbsp confectioners’ sugar, if desired. If you are storing/freezing the madeleines, do not dust with sugar until you are ready to serve.
To Store
- Madeleines get dry rather fast and are best eaten within a few hours after they came out of the oven. To store them longer, let the madeleines cool COMPLETELY. Then you can freeze them (they‘ll keep for 2 months) or place them in a resealable plastic bag (and enjoy within 48 hours). Defrost the madeleines at room temperature first before dusting with confectioner’s sugar. The nice crunch they have right after being baked will slowly fade away and the madeleines will become soft.
Notes
All-purpose flour: The weight of 1 cup of all-purpose flour varies depends on how you measure it. A properly measured cup of flour weighs 120 g (4.25 oz). When you measure flour by volume, please follow the methods below. I’ve tested this method many times, and if you do it properly, 1 cup is VERY close to 120 g each time.
1. Fluff up the flour several times with a spoon.
2. Using the spoon, sprinkle the flour into your dry-cup measure (the one that measures exactly a cup at the top).
3. Scrape off the excess with a knife. Recipe adapted from Julia Child's "From Julia Child's Kitchen”. All images and content on this site are copyright protected. Please do not use my images without my permission. If you’d like to share this recipe on your site, please re-write the recipe in your own words and link to this post as the original source. Thank you.
Nutrition
Calories: 82kcal, Carbohydrates: 9g, Protein: 1g, Fat: 4g, Saturated Fat: 3g, Polyunsaturated Fat: 1g, Monounsaturated Fat: 1g, Trans Fat: 1g, Cholesterol: 26mg, Sodium: 36mg, Potassium: 13mg, Fiber: 1g, Sugar: 6g, Vitamin A: 172IU, Calcium: 15mg, Iron: 1mg
