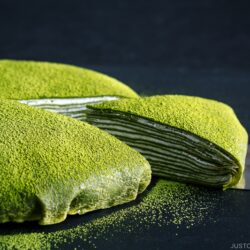
Matcha Mille Crepe Cake
Matcha Mille Crepe Cake is a Japanese twist on the French classic of paper-thin crepes layered with fresh whipped cream. Light and creamy, it‘s a no-bake cake that‘s subtly sweet and slightly earthy from the green tea powder. This elegant dessert will wow your guests at any celebration!
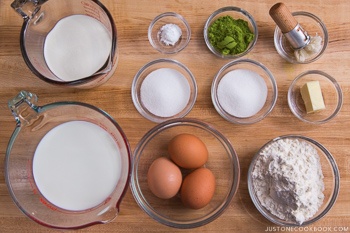
Ingredients
- 1¾ cups whole milk (plus 1–2 Tbsp to thin out the batter, if needed; use whole milk for crepes that are easier to handle; if you‘ve made crepes before, you can use reduced-fat milk for thinner crepes)
- 3 Tbsp sugar
- 3 large eggs (50 g each w/o shell)
- 1½ Tbsp unsalted butter (melted)
- 1 cup cake flour (weigh your flour or use the “fluff and sprinkle“ method and level it off; DO NOT use a different type of flour; you can make Homemade Cake Flour)
- 2 Tbsp matcha (ceremoial or culinary grade)
- ½ tsp baking powder
- neutral oil (for cooking the crepes)
For the Fresh Whipped Cream
- 1 cup heavy (whipping) cream (for layering)
- 3 Tbsp sugar
For Serving
- 2 tsp matcha (ceremoial or culinary grade) (for dusting)
- fresh whipped cream (optional; make a second batch of the above recipe right before you serve)
Instructions
Before You Start...
- Please note that this recipe requires 1 hour of resting time and 2 hours of chilling time.
- Gather all the ingredients. I highly encourage you to weigh your ingredients using a kitchen scale for this recipe. Click on the “Metric“ button at the top of the recipe to convert the ingredient measurements to metric. If you‘re using a cup measurement, please follow the “fluff and sprinkle“ method: Fluff your flour with a spoon, sprinkle the flour into your measuring cup, and level it off. Otherwise, you may scoop more flour than you need. Please use cake flour only! Do NOT use flour with a high-gluten content such as bread flour or all-purpose/plain flour for this recipe. Otherwise, you will end up with a rubbery cake.
To Make the Crepe Batter
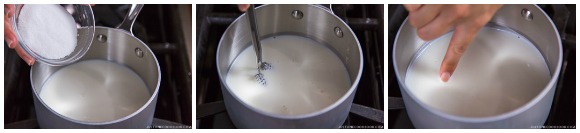
- Add 1¾ cups whole milk and 3 Tbsp sugar to a small saucepan and combine well. Heat on medium until the milk is warm to the touch.
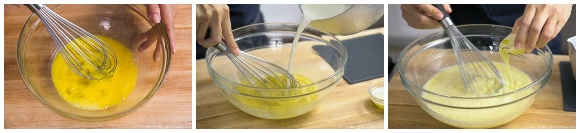
- Beat 3 large eggs (50 g each w/o shell) in a large bowl. Then, whisk the eggs continuously as you slowly and gradually add the warmed milk. Next, slowly add 1½ Tbsp unsalted butter to the egg mixture, whisking continuously.
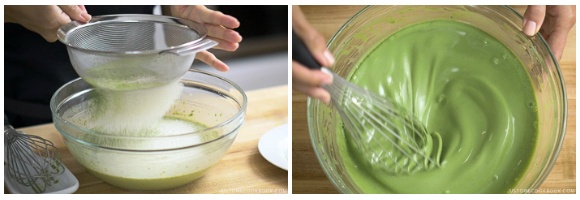
- Set up a fine-mesh sieve over the bowl. Add 1 cup cake flour, 2 Tbsp matcha (ceremoial or culinary grade), and ½ tsp baking powder to the sieve. Then, sift half of the dry ingredients into the batter. Use a whisk to combine the dry and wet ingredients together.
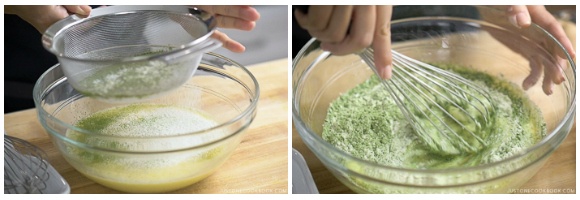
- Sift the rest of dry ingredients and gently mix just until there are no lumps in the batter. IMPORTANT: Do not overmix; mixing increases gluten formation in the batter and causes a rubbery texture.
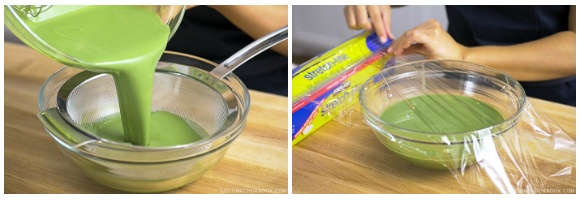
- Next, set the fine-mesh sieve over a large bowl and pour the batter through the sieve. This will remove any lumps and give you a smooth batter texture. Cover with plastic wrap and refrigerate for at least 1 hour. (DO NOT SKIP!) Tip: If you overmix the batter, you may want to rest the batter for a few hours. This allows the gluten to relax. If you don‘t rest it long enough, the crepes will be more rubbery due to gluten development.
To Cook the Crepes
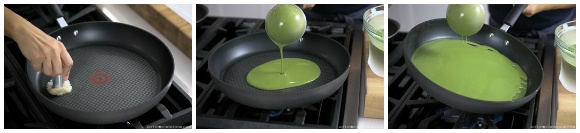
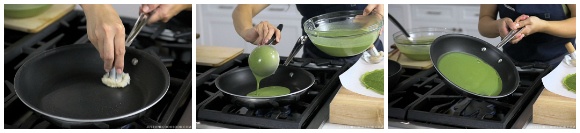
- Prepare a work surface with a sheet of parchment paper large enough to hold your cooked crepes. Now, make one large crepe for the top layer. First, set a 12-inch nonstick frying pan on low heat. Why low heat? We want to take time to thoroughly heat up the entire pan without a hot spot. Once the pan is hot throughout, brush the surface with a thin layer of neutral oil (I used an oil brush); remove any excess oil with a paper towel (don’t worry, a thin layer of oil will remain). Increase the pan to medium-low heat. Stir the batter with a ladle and pour just enough batter to cover the bottom of the frying pan in a thin layer. For my pan, this is about ⅓ cup (80 ml) of batter. Swirl the pan to distribute the batter and form a thin layer. Tip: If your first crepe seems too thick, thin the batter by gradually adding 1 Tbsp of milk.
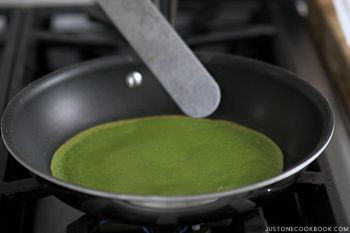
- Cook the crepe on medium-low heat for 2 minutes without touching it. After 2 minutes, the outside edge of the crepe will get a bit crispy. Using a chopstick, a spatula, or your hand, carefully flip the crepe.
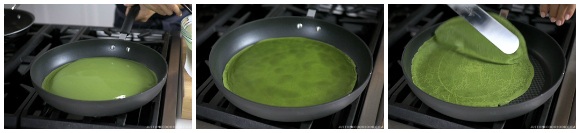
- Cook the other side for 30 seconds and transfer the crepe to the work surface lined with parchment paper.
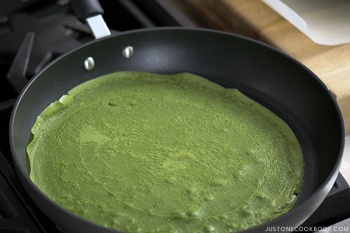
- To make the crepes for the cake layers, set a 10-inch nonstick frying pan on low heat. Again, take time to make sure the entire pan is hot. Once the pan is hot*, brush it with the oil and remove any excess with a paper towel. Increase the pan to medium-low heat. Pour just enough batter to cover the bottom of the frying pan in a thin layer, about ¼ cup (60 ml) for my pan. Swirl the pan to distribute the batter into a thin layer.* The hot pan helps to steam the liquid in the eggs and milk, allowing the crepe to puff up and become softer.
- Cook the crepe on medium-low heat for 2 minutes without touching. After 2 minutes, the outside edge of the crepe will get a bit crispy. Using a chopstick, a spatula, or your hand, carefully flip the crepe.
- Cook the other side for 30 seconds and transfer it to the work surface lined with parchment paper.

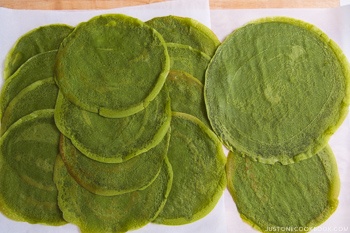
- Continue making crepes until you‘ve used all the batter. Make sure to stir the batter EVERY TIME before you make a new crepe (otherwise, the batter will become too thick toward the end). With this batter, I made 1 large crepe for the top and 13 smaller crepes for the layers.
To Make the Whipped Cream
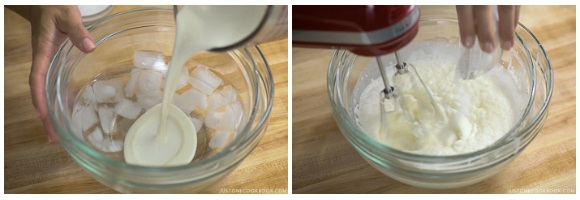
- Prepare an ice bath by adding ice cubes and water to a larger bowl and setting a smaller bowl on top. Add 1 cup heavy (whipping) cream to the smaller bowl. Using a hand mixer, start whisking it at a low speed. Once you see bubbles form, slowly add 3 Tbsp sugar.
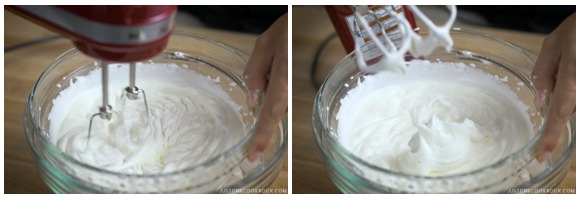
- Increase the speed and whip the cream until firm peaks form. With medium peaks, the whipped mixture is firm and glossy. When you lift up your beaters, peaks will form but curl down slightly at the tips.
To Assemble the Cake
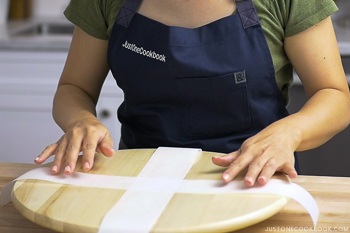
- Prepare two long strips of parchment paper and lay them down in a cross pattern on a working surface or rotating cake stand (I used IKEA‘s lazy Susan). These strips will go under the cake and help you transfer it to a dish. Tip: You can watch how I assemble the cake in my video.
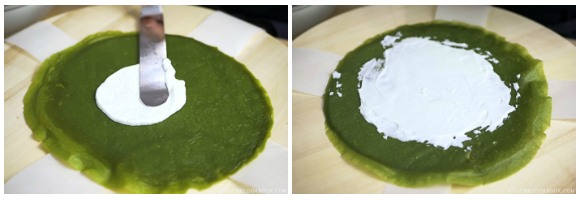
- First, center the larger crepe on top of the crossed strips. This will be the top layer when we flip the cake over. Put a small amount of the freshly whipped cream in the center. Using an offset spatula, spread it evenly and thinly, about ⅛ inch (3 mm) thick, in the center 8 inches of the crepe, leaving a 2-inch (5-cm) border around the edge.
- Next, center and place another crepe on top of the cream layer. Spread a small amount of whipped cream evenly in the middle of the crepe, leaving a ½-inch (1.3-cm) border around the edge.
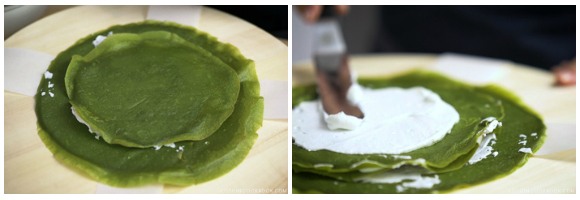
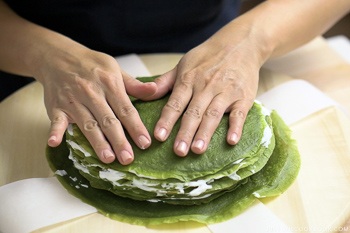
- Continue this process of layering, ending with the final crepe on top.
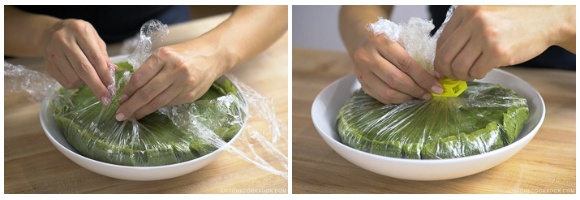
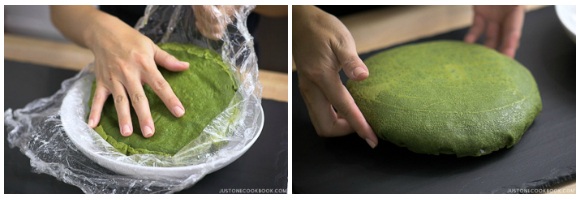
- Prepare a round, curved shallow dish (mine is from IKEA) and line it with a piece of plastic wrap large enough to wrap around the entire cake. Remove any air pockets and smooth out the plastic on the dish‘s surface. Using the paper strips you made, transfer the mille crepe to the shallow dish. Place your cake in the middle of the dish and remove the strips from the bottom of the cake.
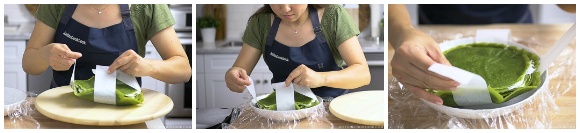
- Starting at one corner and moving clockwise, pull the plastic wrap snugly over the cake edge so it‘s smooth and curved and gather the plastic in one hand above the center of the mille crepe. Continue to wrap this way until you‘ve gathered all the plastic in the center. This will make the final cake evenly round; you won‘t get a smooth, curved shape if you wrap it randomly. Secure the gathered plastic with a clip (I use one from IKEA). Refrigerate for at least 2 hours until the cake is set.
To Serve
- Once chilled, unwrap the plastic wrap and flip the mille crepe over onto a serving platter. Now, the large crepe will be on top of the cake.
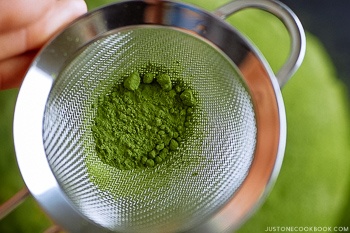
- Dust 2 tsp matcha (ceremoial or culinary grade) over the cake using a fine-mesh sieve. If you plan to serve extra fresh whipped cream on the side (optional), make a second batch now. Slice your Matcha Mille Crepe Cake into wedges while chilled (as it‘s easier to cut), and let it stand at room temperature for 5 minutes before serving.
To Store
- Wrap and refrigerate any leftover cake. Enjoy it within a few days as we are using fresh cream.
Nutrition
Serving: 110 inch whole cake, Calories: 2287kcal, Carbohydrates: 191g, Protein: 71g, Fat: 135g, Saturated Fat: 78g, Polyunsaturated Fat: 9g, Monounsaturated Fat: 39g, Trans Fat: 1g, Cholesterol: 971mg, Sodium: 702mg, Potassium: 1072mg, Fiber: 3g, Sugar: 94g, Vitamin A: 7416IU, Vitamin C: 1mg, Calcium: 855mg, Iron: 11mg
