
Crispy Taiyaki
A classic street vendor snack in Japan, Crispy Taiyaki is a warm, fish-shaped pastry filled with sweet red bean paste. With an eggless batter, my authentic recipe yields a supercrisp and less cakey texture. Follow my tips to make this fresh, waffle-like treat at home anytime! {Vegan Adaptable}
Servings: 4 pieces
Calories: 217kcal
Ingredients
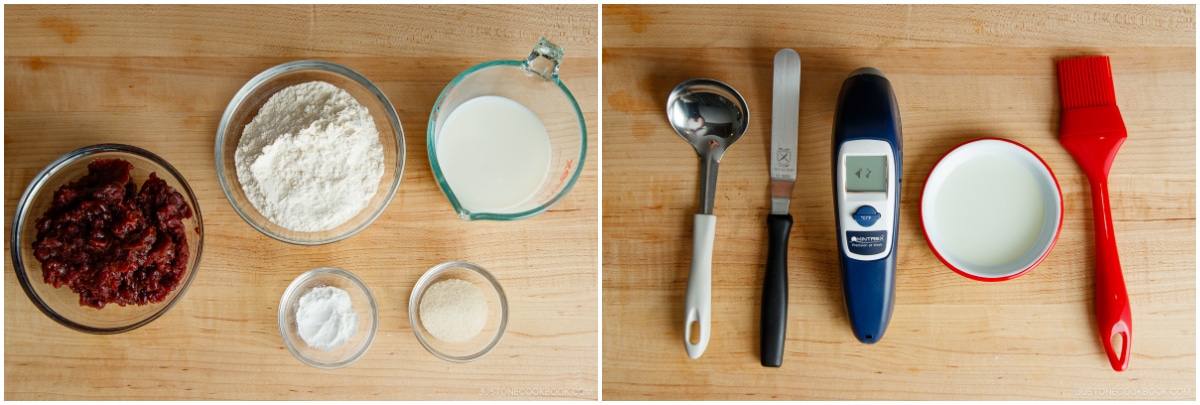
- 1 cup cake flour (weigh your flour; for weights, click the Metric button; or use the “fluff and sprinkle“ method and level it off)
- ⅔ cup milk (I used lactose-free 2% reduced fat milk, but you can also use whole or nonfat; use plant-based milk for vegan)
- 1 tsp baking powder
- 1 Tbsp sugar
- sweet red bean paste (anko) (you can make my homemade Anko or Pressure Cooker Anko recipe; or substitute Nutella, custard, or your favorite filling)
Instructions
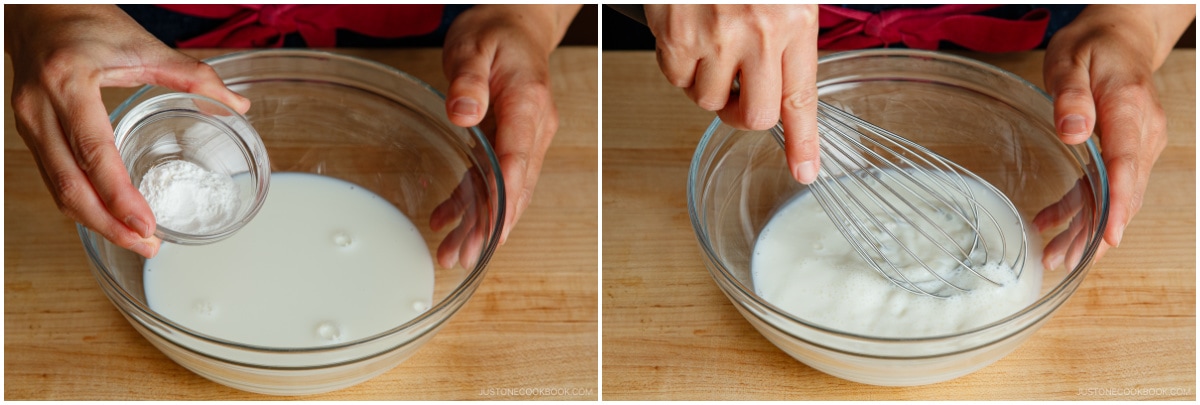
- Before You Start: Please note that I recommend a batter resting time of 1 hour (optional). You will need a taiyaki pan for this recipe. To get the right batter consistency, I highly encourage you to weigh your ingredients using a kitchen scale. For weights, click the Metric button above. If you‘re using a cup measure, please follow the “fluff and sprinkle“ method: Fluff your flour with a spoon, sprinkle it into your measuring cup, and level it off. Otherwise, you may scoop more than you need. Now, gather all the ingredients. I also use a small ladle, a small offset spatula, a thermometer gun, cooking oil, and a silicone brush.
To Prepare the Batter
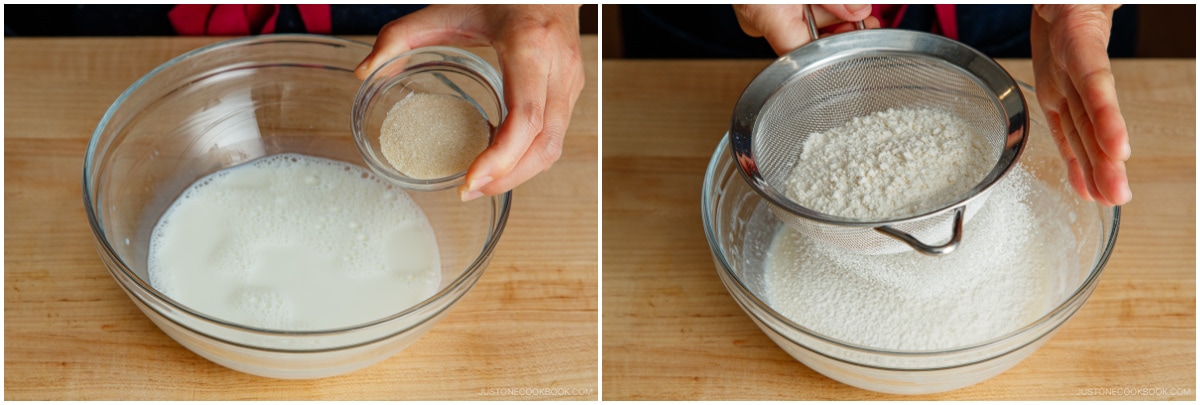
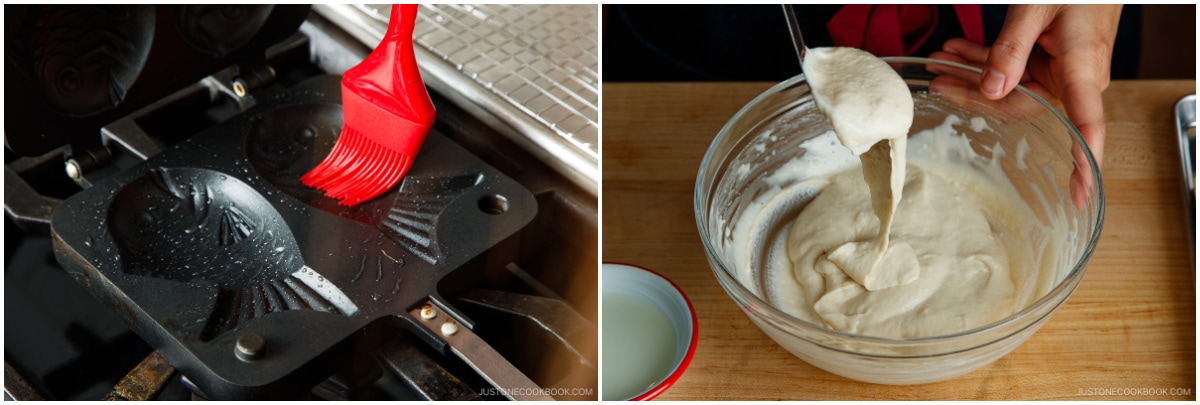
- In a medium bowl, add ⅔ cup milk and 1 tsp baking powder and whisk together thoroughly.
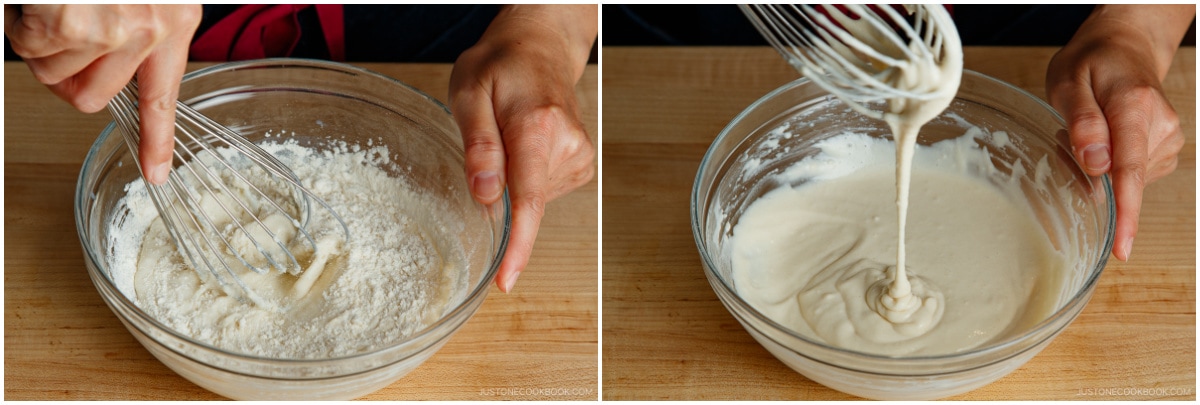
- Add 1 Tbsp sugar. Then, sift 1 cup cake flour into the mixture using a fine-mesh sieve.
- Combine all the ingredients just until incorporated. Do not overmix the batter. If you have time, cover and rest the batter for one hour (optional). Tip: Set aside to relax the gluten in the batter while you prepare the filling, or else the pastry will have a chewy texture.
To Prepare the Filling
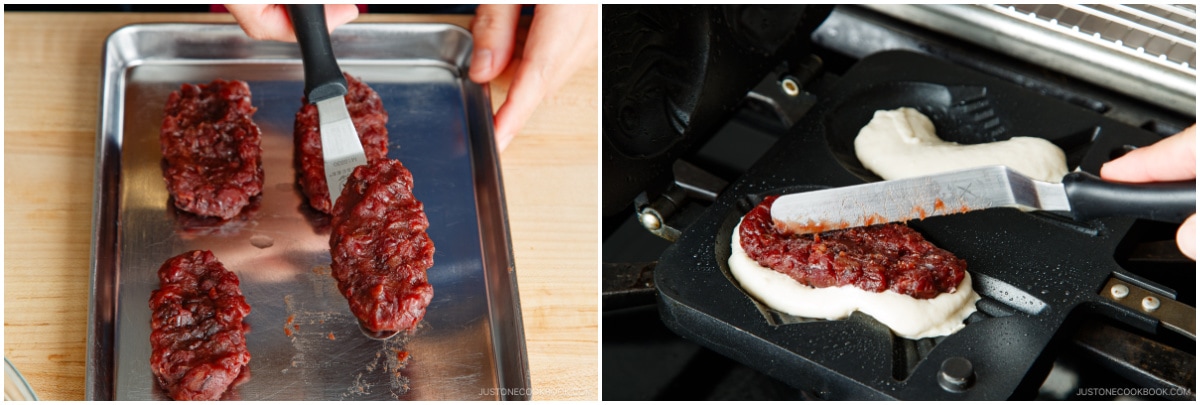
- Pre-measure and pre-shape the sweet red bean paste (anko) filling so you can transfer the filling quickly and easily. I found it‘s easier to work with 2 tablespoons (40 g) of filling. You can use a 1.5-tablespoon cookie scoop and measure one heaping scoop for each filling. Using wet hands, form each filling into a long oval shape, with its length slightly shorter than the length of a taiyaki mold. Place on a tray or plate near your cooktop.

To Cook the Taiyaki
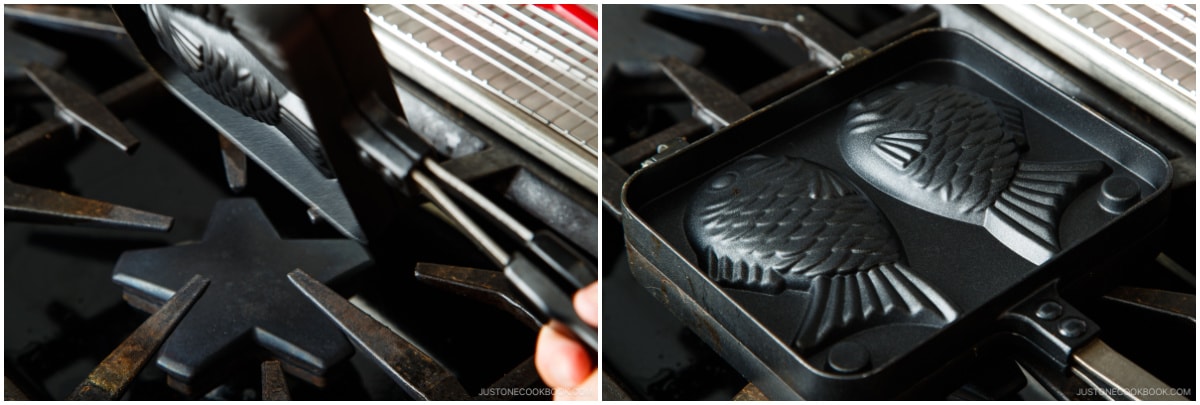
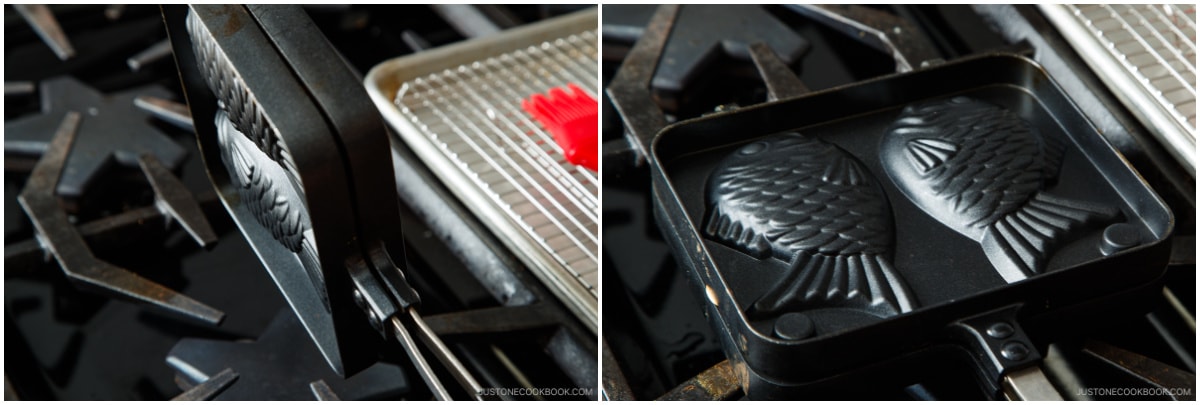
- Heat the taiyaki pan thoroughly on low heat while you set up the work station. You‘ll need a dish with cooking oil, a pastry brush, a ladle (if you have a small one), an offset spatula (or knife), and a wire rack set over a baking sheet. Once the pan is warmed up thoroughly, turn up the stove‘s heat to medium-low to medium. Brush the oil inside and around the mold of the taiyaki pan. Stir the batter one last time. It should be a thick paste.
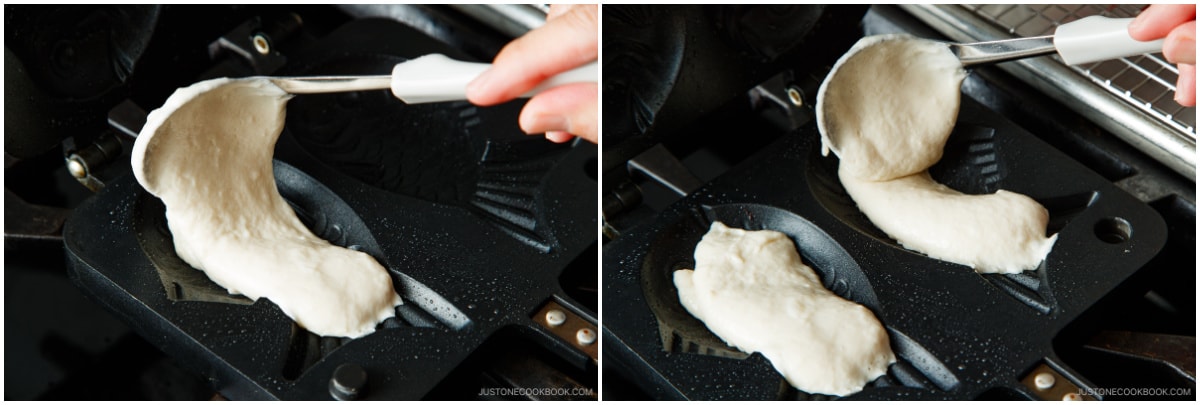
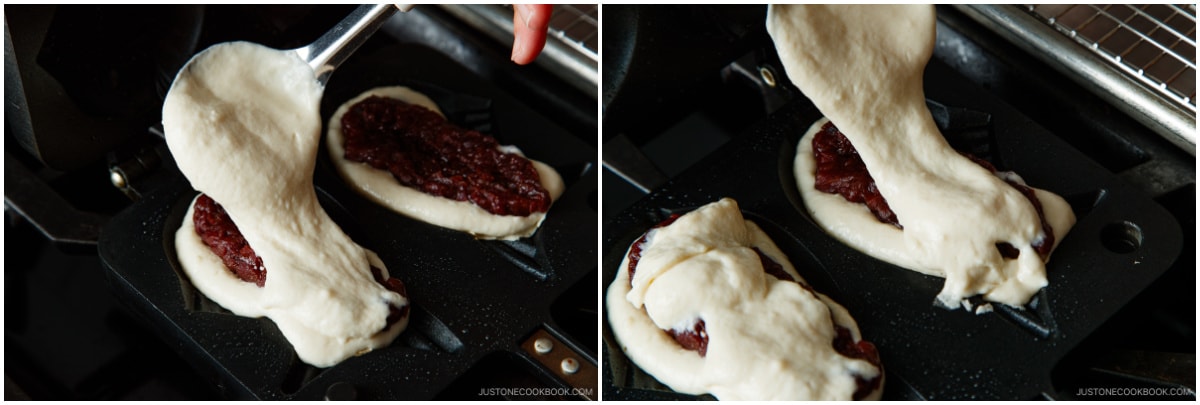
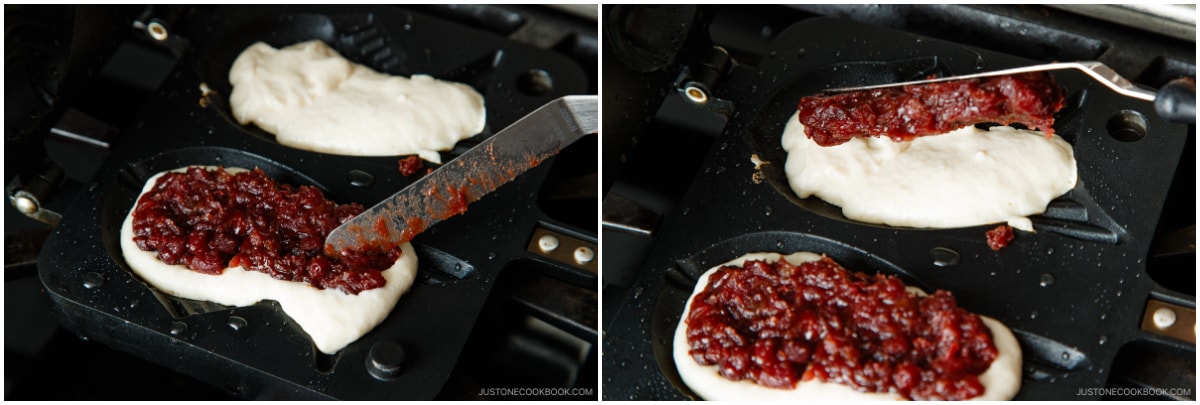
- The 1st Round: When the taiyaki pan is thoroughly heated, spread the batter from the tail to the head in each mold. Fill it about one-third full. When you add the filling in the next step, it will push up the batter to fill the mold halfway.
- Using the offset spatula (or knife), scoop up the anko filling, keeping its shape, and place it on top of the batter. Work quickly so the batter does not dry out.
- Repeat for the next mold. Gently press down the fillings to flatten them and spread evenly into the empty spots of the mold.
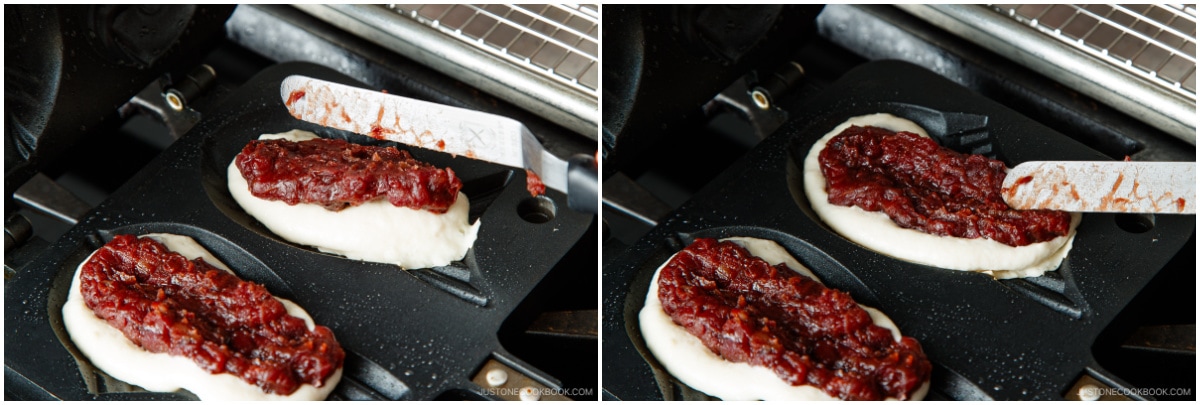
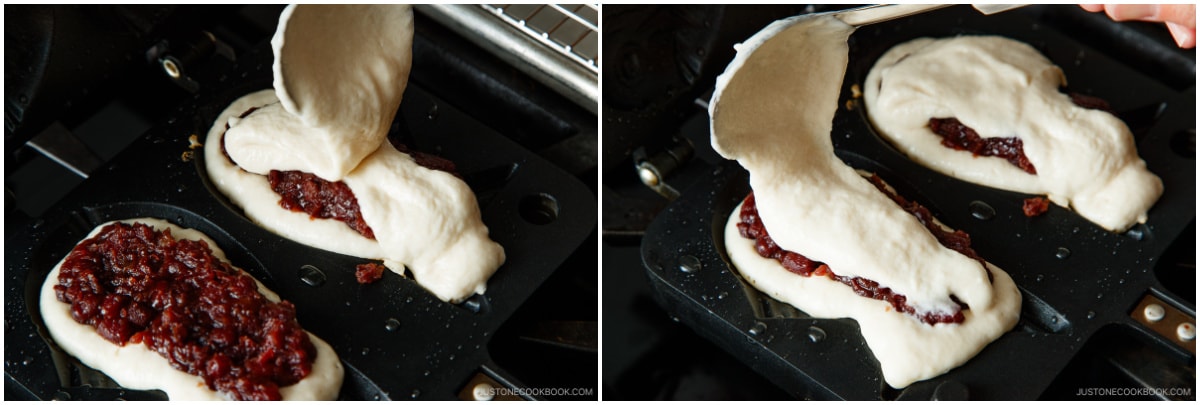
- Spoon a small portion of batter over the anko filling to cover it completely. If you see a spot that‘s not covered, spread the surrounding batter to cover it up without pouring more. The mold should be about three-quarters full of batter and filling. Tip: The key is to use less batter here to avoid overflow.
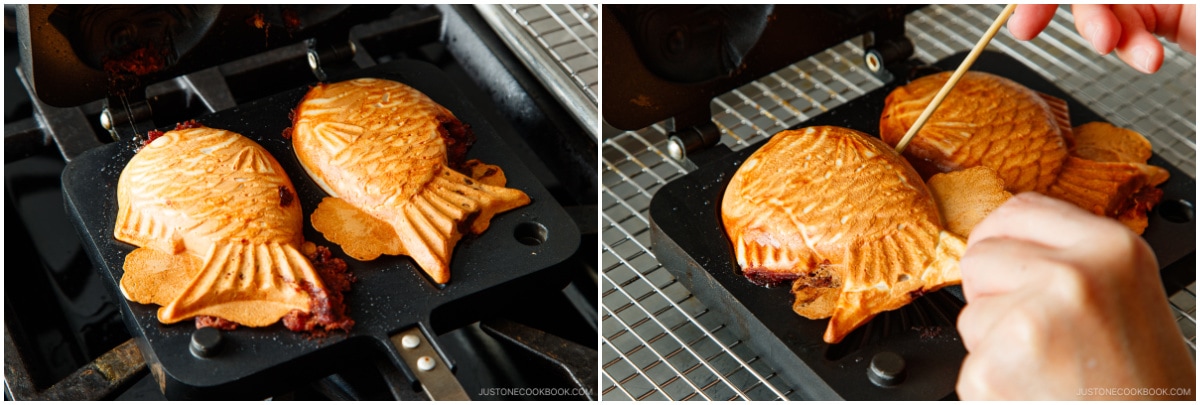
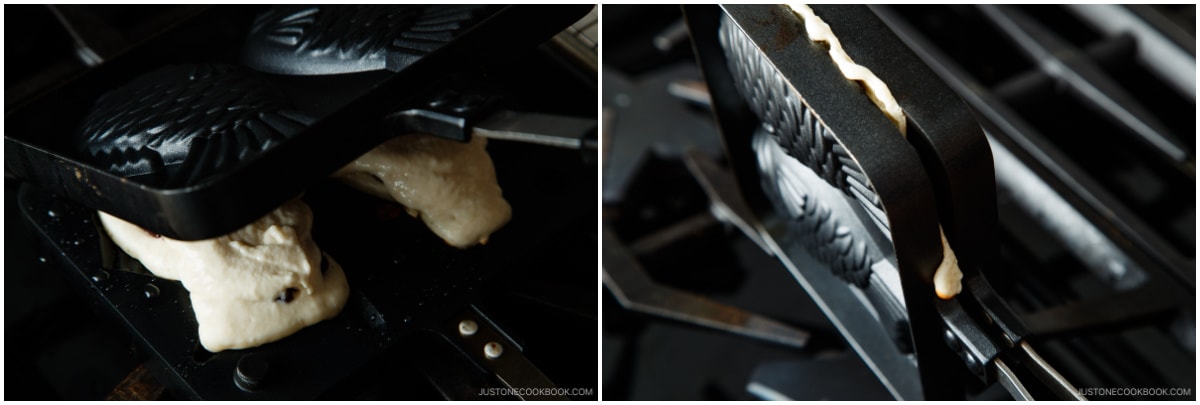
- Close the lid and immediately flip the pan. Cook for 2½ to 3 minutes on that side.
- Then, flip the pan again and cook for another 2½ to 3 minutes.
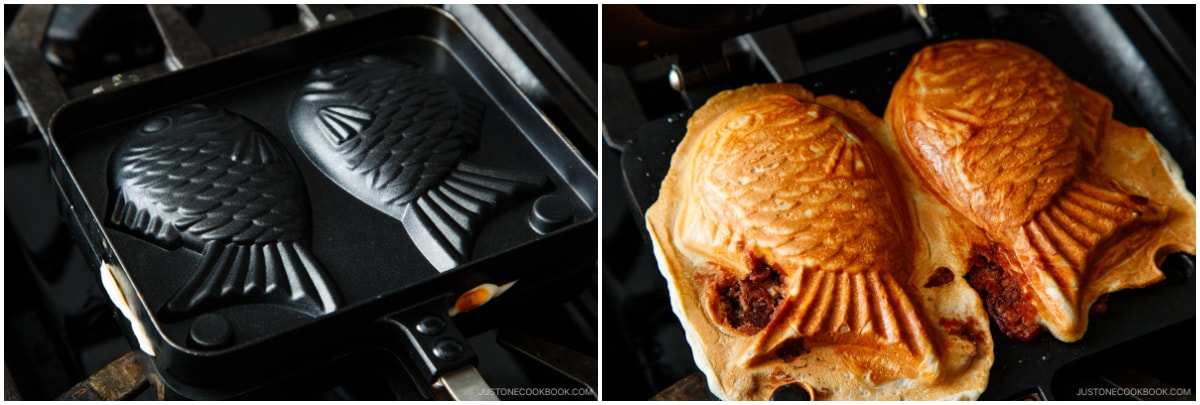
- Open the pan and check if the taiyaki is cooked; it‘s done when the pastry is golden brown. Remove from the pan and cool on a wire rack. I used a wooden skewer to loosen the pastry from the mold. Tip: If your batter overflowed a bit, don‘t worry. You will trim the edges later.
- The Next Round: Cook the remaining taiyaki. If the mold has some burnt spots, typically from the sweet red bean paste sticking to the pan and burning, wipe it off with a paper towel or simply wash it off and start clean. This way, your next taiyaki will have a clean crust. Now, I‘ll show you what happens when I pour too much batter and don‘t cover the filling completely.

- As soon as I placed the anko filling, the batter rose to the edge of the mold.
- I still had to cover the filling, so I added more batter. Luckily, the batter is thick so it stayed in place rather than sliding down. See the amount of batter here.
- When I closed the pan, there was too much batter in each mold, so it spread to the sides.
- Despite the overflow, you can continue to cook it. When it‘s done, your taiyaki will have extra crispy edges around the pastry. Some prefer this style of taiyaki, but my recipe doesn‘t include enough batter to do that. Also, note that the red bean paste filling squeezed out of the pastry. This happened because I did not cover the filling completely, so the hot pan heated the bean paste, which exploded and burned.
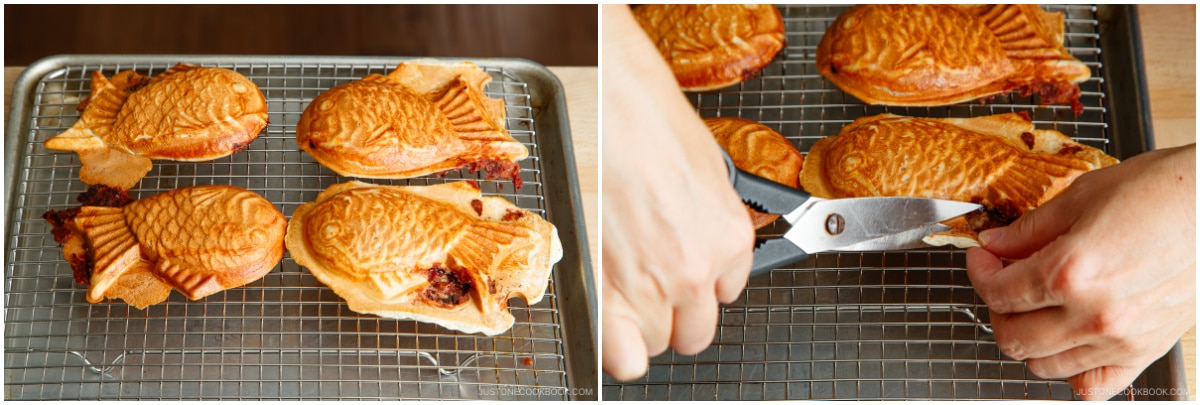
To Trim the Pastry
- Let the taiyaki cool on the wire rack. Cut off any excess pastry around the edges of the taiyaki with a pair of kitchen scissors.
To Serve
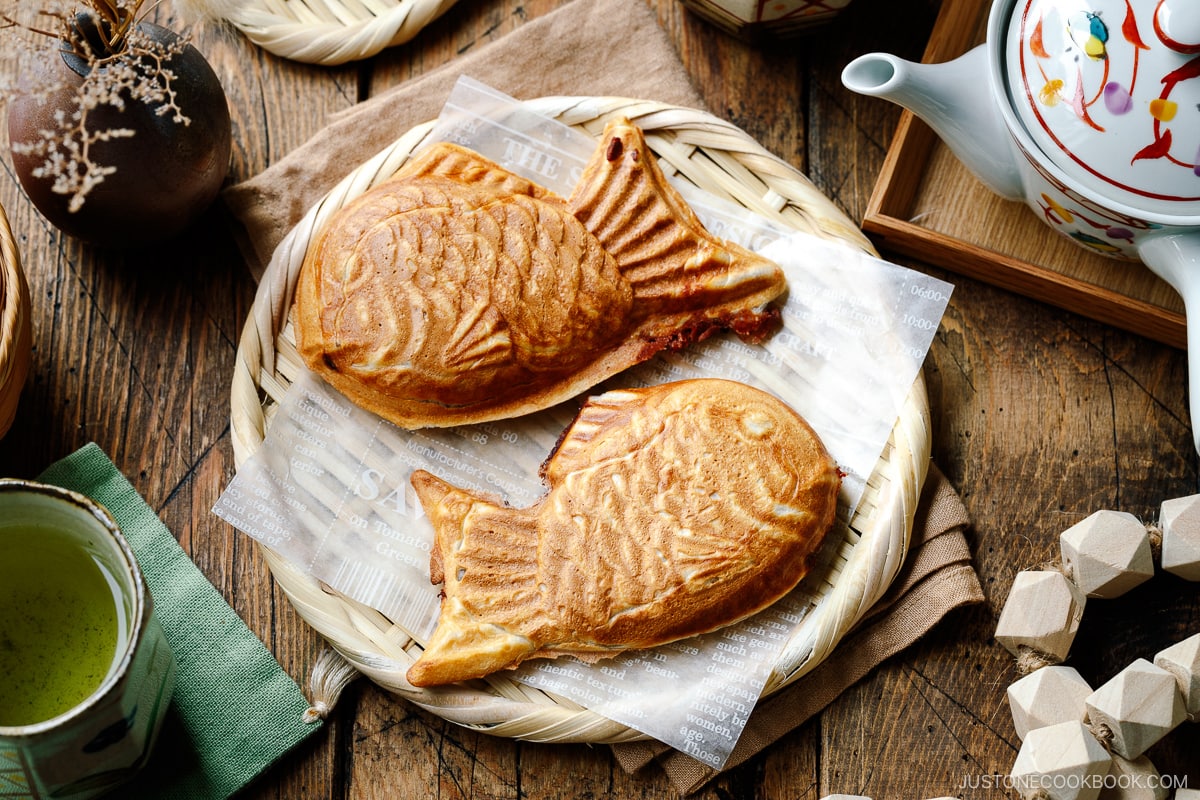
- Serve the Crispy Taiyaki warm. If the taiyaki get cold, you can toast them in the toaster oven or oven until they‘re crispy on the outside.
To Store
- You can keep the taiyaki in an airtight container and store in the refrigerator for up to 2 days or in the freezer for up to a month. To reheat, toast them in the toaster oven or heat in the oven at 350ºF (180ºC) until they‘re crispy on the outside.
Equipment
Nutrition
Calories: 217 kcal · Carbohydrates: 43 g · Protein: 7 g · Fat: 3 g · Saturated Fat: 2 g · Polyunsaturated Fat: 0.3 g · Monounsaturated Fat: 0.3 g · Cholesterol: 5 mg · Sodium: 151 mg · Potassium: 219 mg · Fiber: 2 g · Sugar: 14 g · Vitamin A: 68 IU · Calcium: 119 mg · Iron: 2 mg