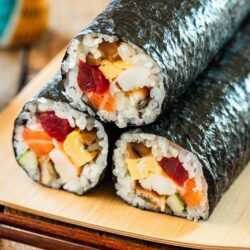
Ehomaki
Ehomaki is a long and thick sushi roll that we enjoy during Setsubun, a Japanese festival marking the transition from winter to spring. Bring good fortune with my modern version of homemade ehomaki that uses seven simple fillings!
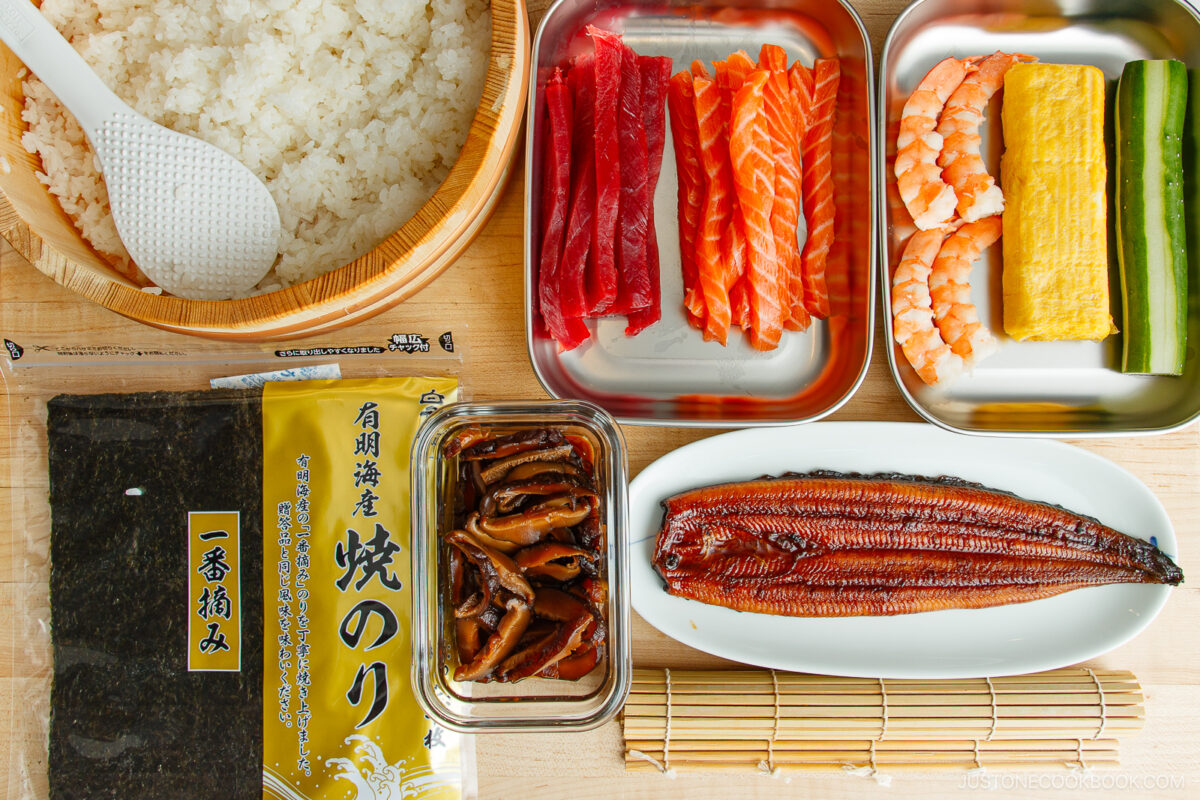
Ingredients
- 6 oz sashimi-grade salmon (block; cut lengthwise into 8 long strips about ½-inch thick)
- 6 oz sashimi-grade tuna (block; cut lengthwise into 8 long strips about ½-inch thick)
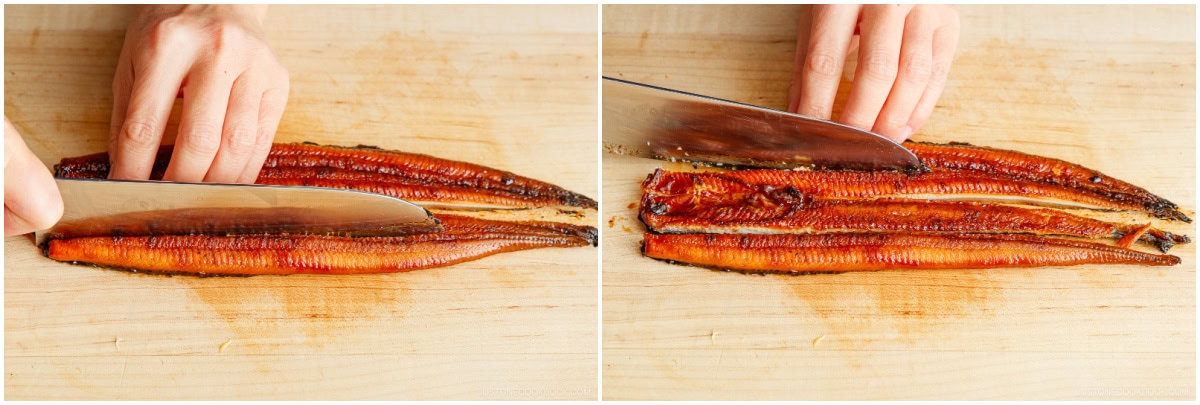
- 1 unagi (freshwater eel) fillet (grilled)
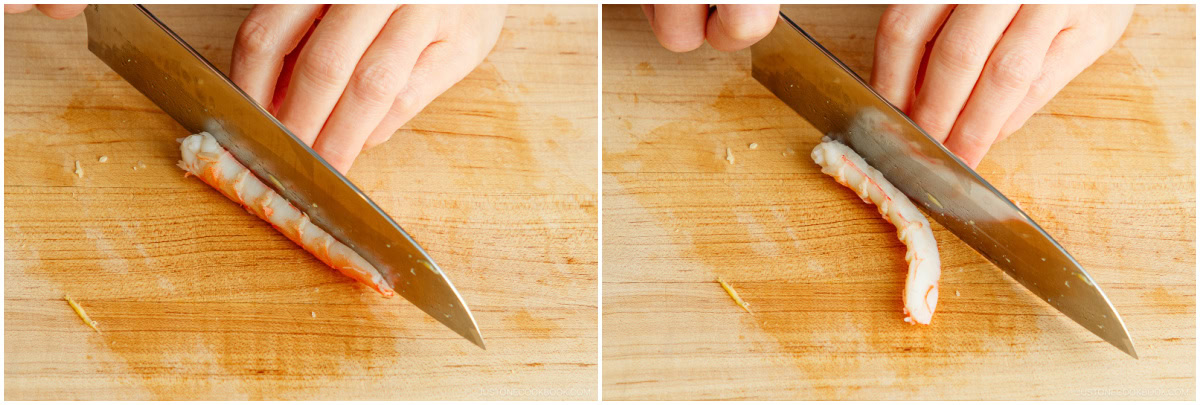
- 4 cooked shrimp (large; deveined, pressed to straighten, and boiled with the shells on; see below for details)
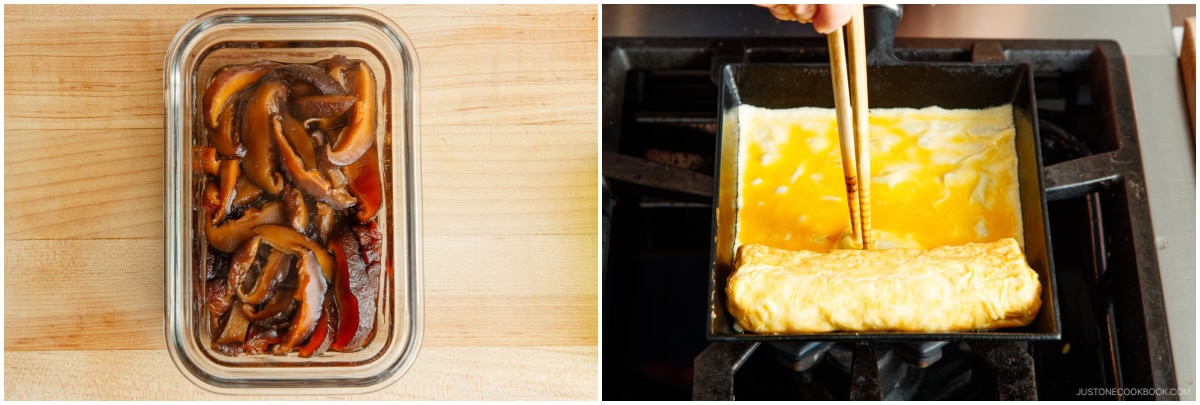
- 1 batch Tamagoyaki (Japanese Rolled Omelette) (I used my 3 Ingredient Tamagoyaki recipe)
- 1 batch Simmered Shiitake Mushrooms (prepared 1–2 days in advance)
- 1 Japanese or Persian cucumber
- 4 cups sushi rice (cooked and seasoned) (see How to Make Sushi Rice; I used 1½ cups (2 rice cooker cups) of uncooked Japanese short-grain rice)
- 4 sheets nori seaweed
Instructions
Before You Start
- Make ahead (optional): I prepare the Simmered Shiitake Mushrooms and 3 Ingredient Simple Tamagoyaki 1–2 days in advance and refrigerate them until ready to use. To prepare the shrimp: Devein shell-on large shrimp (see How to Devein Shrimp), push their backs to straighten, and quickly boil in 2 cups (475 ml) water with a splash of sake until their color changes. Peel the shells afterward.
- The sushi rice takes about 90 minutes to make. Please note that 1½ cups (300 g, 2 rice cooker cups) of uncooked Japanese short-grain rice yield 4⅓ cups (660 g) of cooked white rice. You can follow my How to Make Sushi Rice recipe for step-by-step instructions.Now, gather all the ingredients and a sushi mat. A sushi making kit is helpful but not required.
To Prepare the Ingredients
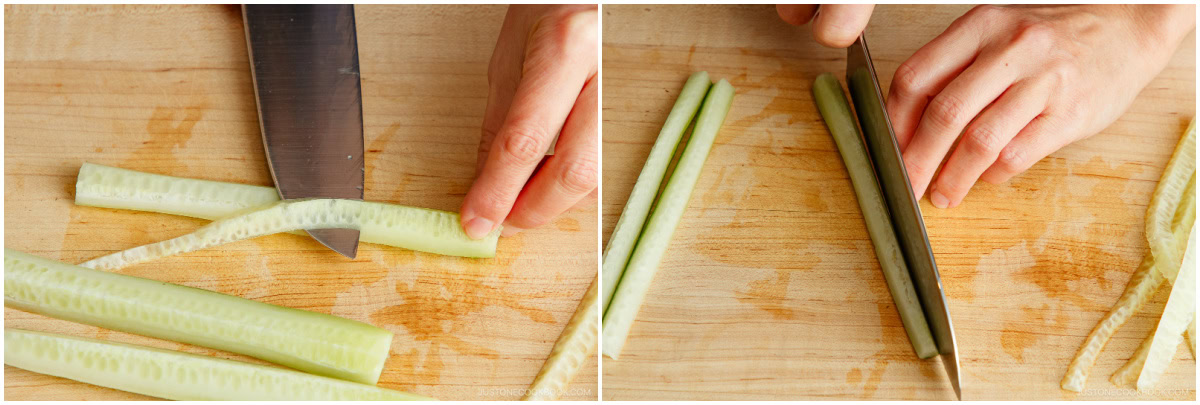
- Cut off the ends of 1 Japanese or Persian cucumber. (Optional: You can peel the skin alternately to create stripes.) Cut it lengthwise in half, then lengthwise again into quarters.
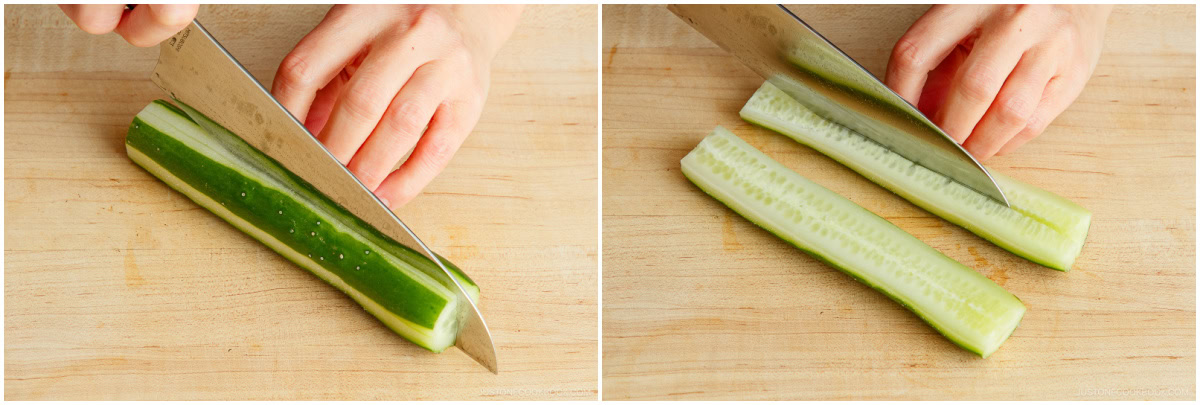
- Slice off the seeds with a knife. Then, cut the quarters lengthwise in half again to make 8 cucumber sticks.
- Cut 1 batch Tamagoyaki (Japanese Rolled Omelette) lengthwise into 8 strips.

- Cut each of the 4 cooked shrimp in half lengthwise.
- Cut 1 unagi (freshwater eel) fillet lengthwise into 4 strips.
To Add the Sushi Rice and Fillings
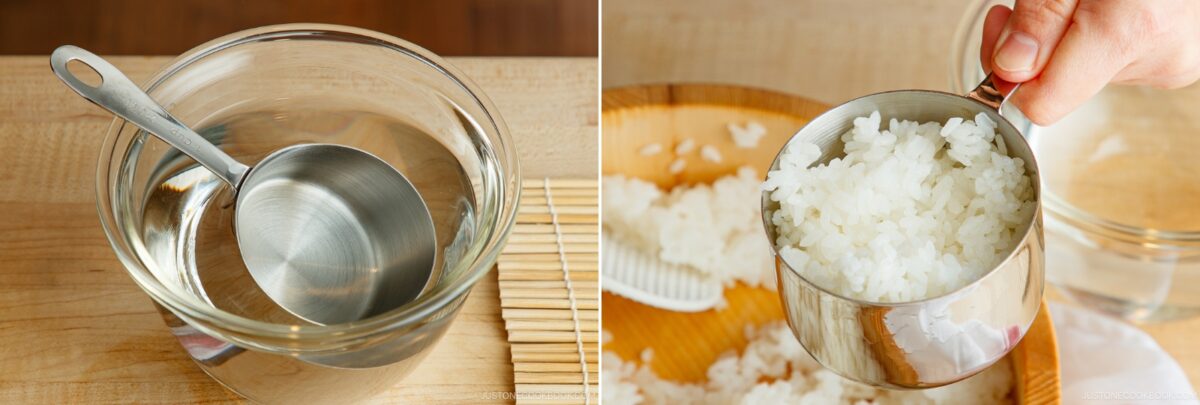
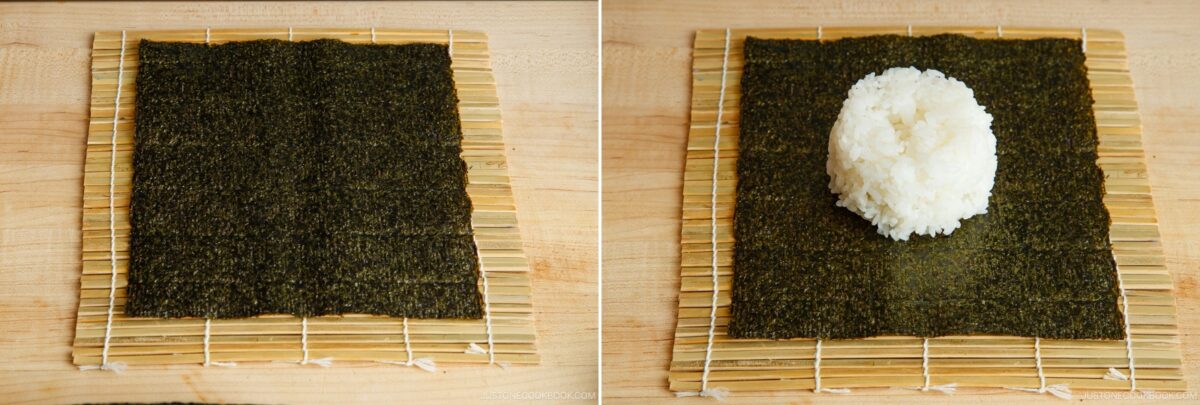
- Moisten a 1 cup measure in a small bowl of water, shake off the excess, and scoop 1 cup (150 g) sushi rice.
- Make one roll at a time. Set the sushi mat on a work surface with the bamboo slats running sideways (horizontally). Place 1 nori sheet shiny side down on the mat. Leave about 3–4 slats visible on the edge nearest you (the bottom edge). Place the measured sushi rice in the middle of the nori. Nami's Tip: For thick rolls, we often place the nori's short side along the mat's bottom edge so there's more room to roll the ingredients. For ehomaki, we often place the long side close to the bottom edge so the roll is thinner and easier to eat uncut. You can decide based on how you'll serve it.
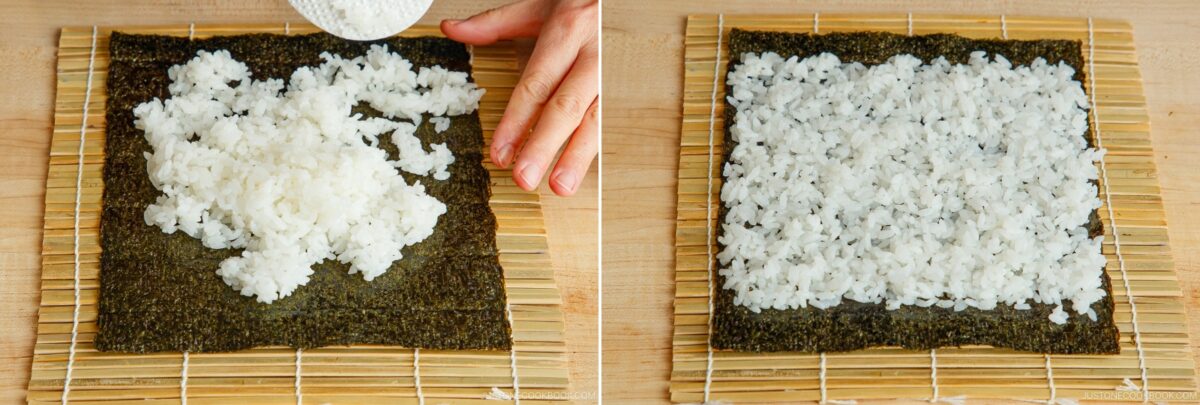
- Gently spread it with your fingers without mashing, leaving an empty strip of nori across the bottom ½ inch (1.5 cm) and top 1 inch (2.5 cm). Spread it evenly so the roll isn't lumpy.Nami's Tip: Instead of using your fingers, you can use a rice paddle held vertically to avoid mashing the rice. Or, to keep the rice from sticking, moisten your fingers in vinegared water (tezu) made with 1 cup (240 ml) water and 1 Tbsp unseasoned rice vinegar.
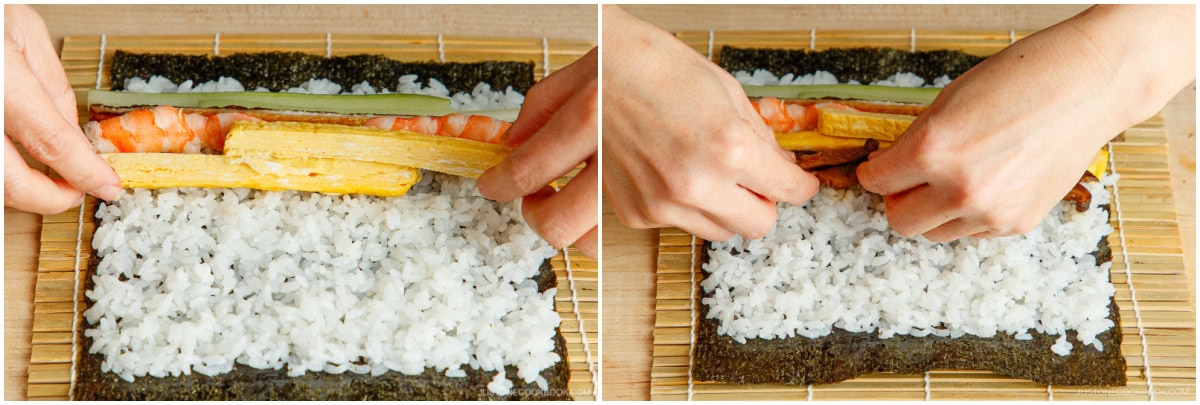
- First layer of fillings: Leave a ¼-inch (7 mm) strip of rice at the bottom and add the easy-to-hold fillings: 2 strips tamagoyaki, 1 strip unagi, and 2 strips shrimp. Turn both the unagi and shrimp on their sides to keep the first layer compact. Add one portion of simmered shiitake mushrooms. Finally, add 2 sticks cucumber to keep the shiitake from falling out when rolling.Nami's Tip: It's useful to place the cucumber last in the first layer, even though I didn't show it in the photo. Cucumber is a sturdy ingredient that gives your fingers something firm to pull against to help create a tight, straight roll. Also, keep in mind what the filling will look like after it's rolled. I try my best to arrange the ingredients so similar colors are not next to each other.
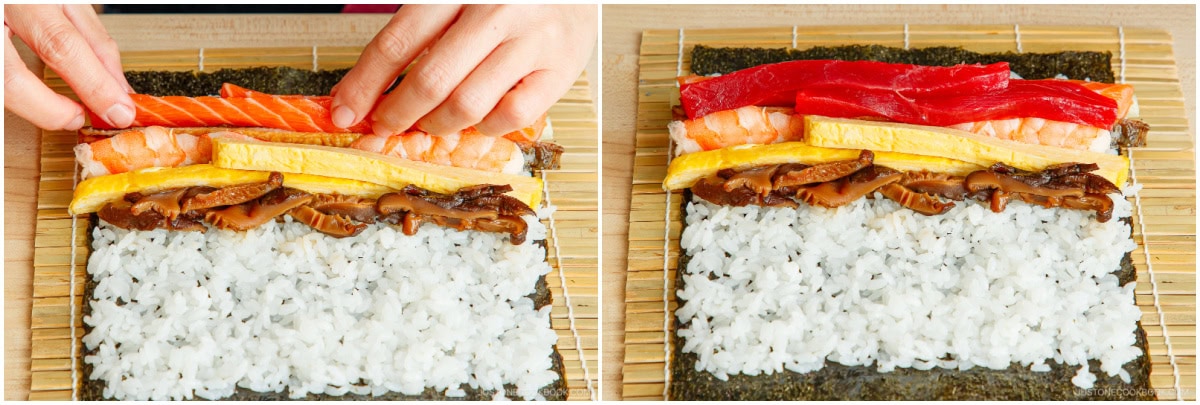
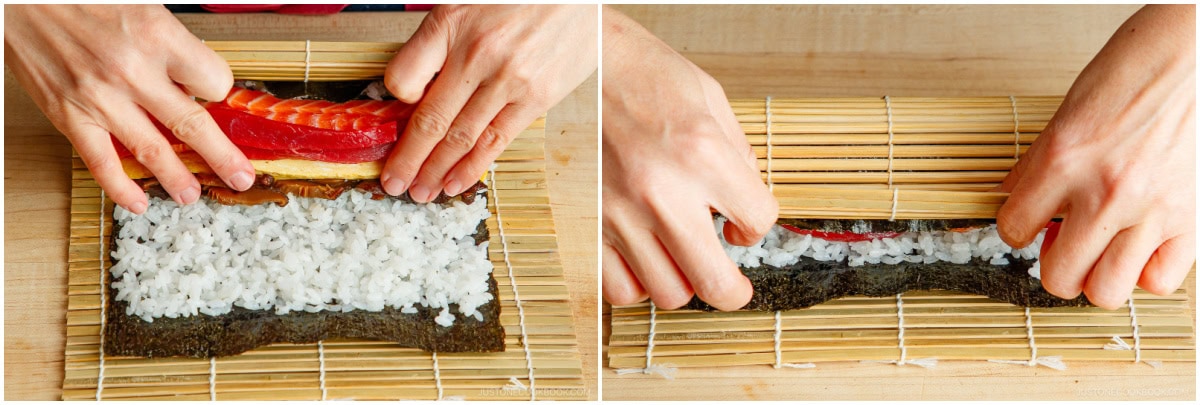
- Second layer of fillings: Place 2 strips salmon sashimi and 2 strips tuna sashimi on top of the cucumber and unagi.
To Roll the Ehomaki
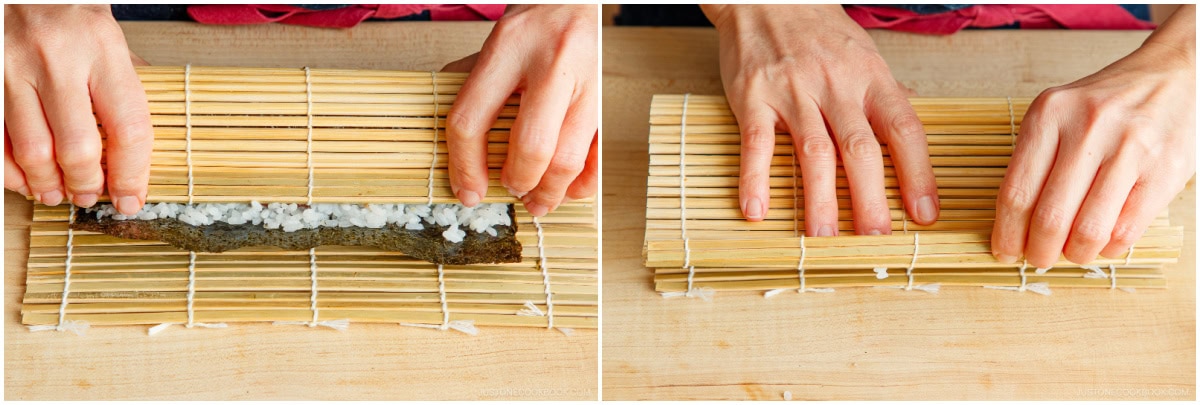
- Hold the ingredients in place with the fingers of both hands. Grab the bottom edge of the mat with your thumbs and index fingers, then tightly roll the bottom edge over the filling. Lift away the mat slightly as you roll firmly until the bottom and top rice meet.
- Press it through the mat to tighten the roll and secure the seam.
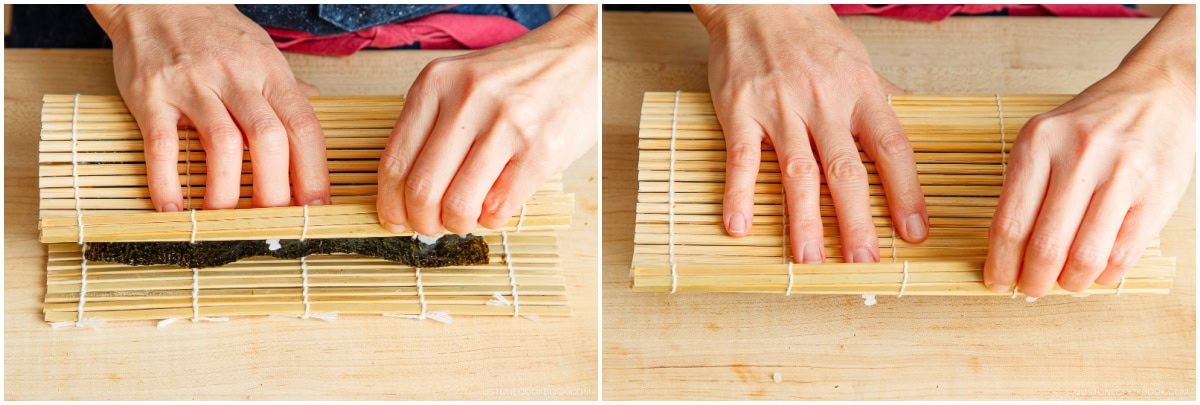
- Now, lift the bottom edge with one hand, pulling the mat forward as you finish rolling the rest of the way with your other hand. Then, place the mat on top of the roll and press/squeeze with both hands to correct the shape. Repeat to roll the rest of the ehomaki.
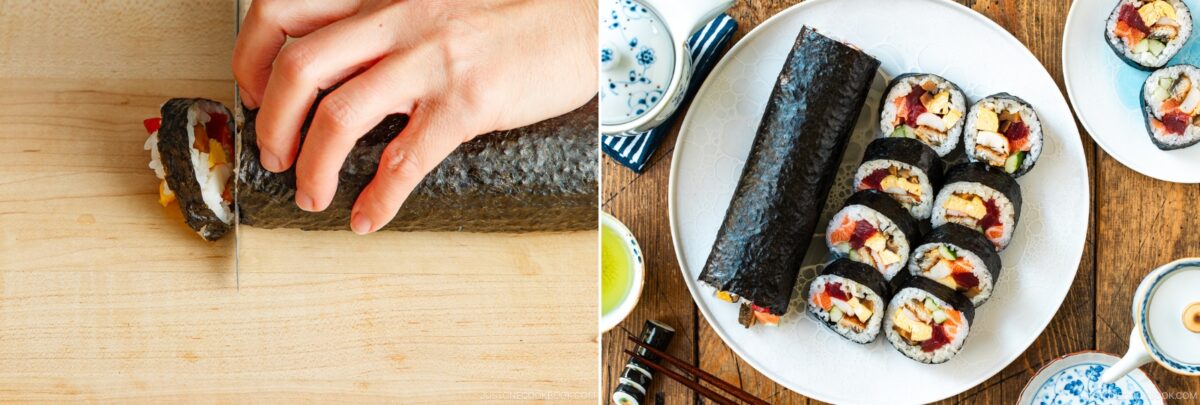
To Serve
- Enjoy the ehomaki uncut on Setsubun! Traditionally, ehomaki is not sliced on Setsubun to avoid cutting off good fortune. If you prefer a neater look, you can trim the ends. You can also slice and enjoy these sushi rolls any time of year.
How To Eat on Setsubun
- On Setsubun, face the year’s lucky direction (2026: South-southeast) and eat the ehomaki whole without cutting it. Stay silent as you finish the entire roll, and make a wish for good health and good fortune as you eat.
To Store
- It‘s best to enjoy ehomaki the same day you make them. Rice gets hard and dry in the refrigerator, so it's not ideal to store them overnight. If you really want to keep them in the fridge, I recommend covering them with plastic wrap and a thick kitchen towel, so the rice will stay cool and safe, but not get cold.
Notes
Variations and Customizations
Looking to change things up? Try these easy and tasty ideas!
- Make futomaki instead. This thick maki sushi with traditional fillings is the customary choice for ehomaki. Follow my Futomaki Sushi recipe to make it.
- Try a Korean seaweed roll. Some families enjoy uncut Kimbap rolls as ehomaki.
- Use plant-based fillings. Firm tofu cutlet (atsuage), freeze-dried tofu (koyadofu), shiso, spinach, avocado, thin carrot strips, or kanpyo (dried gourd) work.
- Swap out unagi. Try Catfish Kabayaki instead of eel.
- Use meat filling. Gingery ground chicken or thin-sliced Yakiniku Beef add rich flavor.
- Choose different seafood. Kamaboko, crab, sakura denbu (cod fish flakes), or other sashimi-grade fish are favorite fillings.
Nutrition
Calories: 520kcal, Carbohydrates: 44g, Protein: 40g, Fat: 18g, Saturated Fat: 6g, Polyunsaturated Fat: 2g, Monounsaturated Fat: 5g, Trans Fat: 1g, Cholesterol: 269mg, Sodium: 480mg, Potassium: 653mg, Fiber: 3g, Sugar: 5g, Vitamin A: 3151IU, Vitamin C: 7mg, Calcium: 65mg, Iron: 2mg
