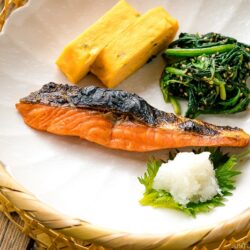
Japanese Salted Salmon (Shiozake)
Japanese Salted Salmon (Shiozake) is a classic dish made with salmon, salt, and sake. I’ll show you how to cut, cure, and broil salmon the Japanese way. The result is tender, flavorful fish with crisp skin that’s perfect with Japanese breakfast, bento lunch, or rice balls.
Ingredients
Servings: Japanese-style fillets (with 3 additional odd-sized pieces)
- 1.3 lb skin-on Japanese-style salmon fillets (store bought or cut your own; I recommend sockeye salmon; see end Notes)
- 3 Tbsp Diamond Crystal kosher salt (5% of the salmon‘s weight in salt of any kind; see Notes)
- 1–2 Tbsp sake
For Serving
- 2 inches daikon radish (grated; optional)
Instructions
- Before You Start: Please note that this recipe has a curing time of 2 days.
To Cut the Fillets (optional)
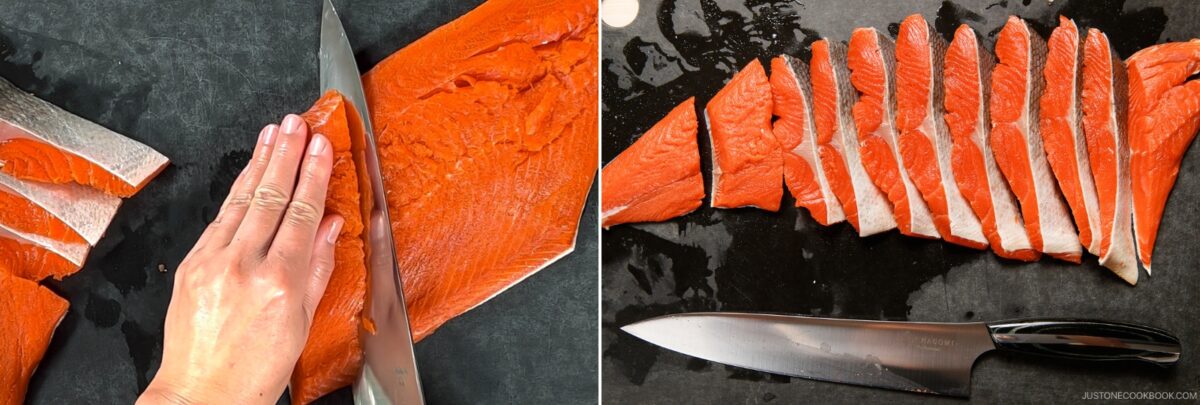
- If you're using pre-cut fillets, jump to the "To Salt the Salmon" section below. To cut fillets from a side of salmon, follow my detailed instructions with photos in How to Cut Salmon into Japanese-Style Fillets. Place a side of salmon skin side down with the narrow tail end to your left and cut off the narrowest part. Tilt your knife back 30 degrees and slice the salmon diagonally toward the tail into fillets about 1 inch (2.5 cm) thick. This side of salmon yielded 8 Japanese-style fillets and 3 odd-sized pieces.
To Salt the Salmon
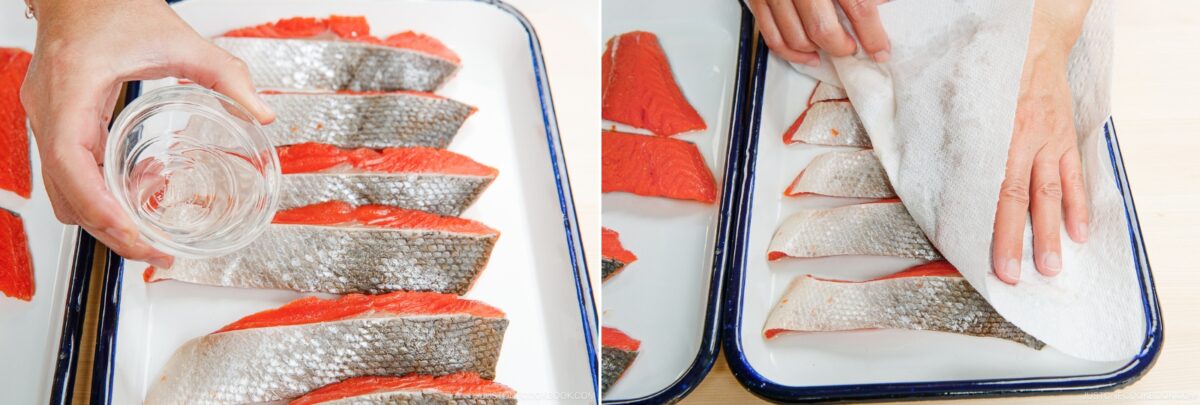
- Sprinkle 1–2 Tbsp sake over 1.3 lb skin-on Japanese-style salmon fillets. Turn to coat all sides. Let sit for 10 minutes. Pat the salmon dry with a paper towel.
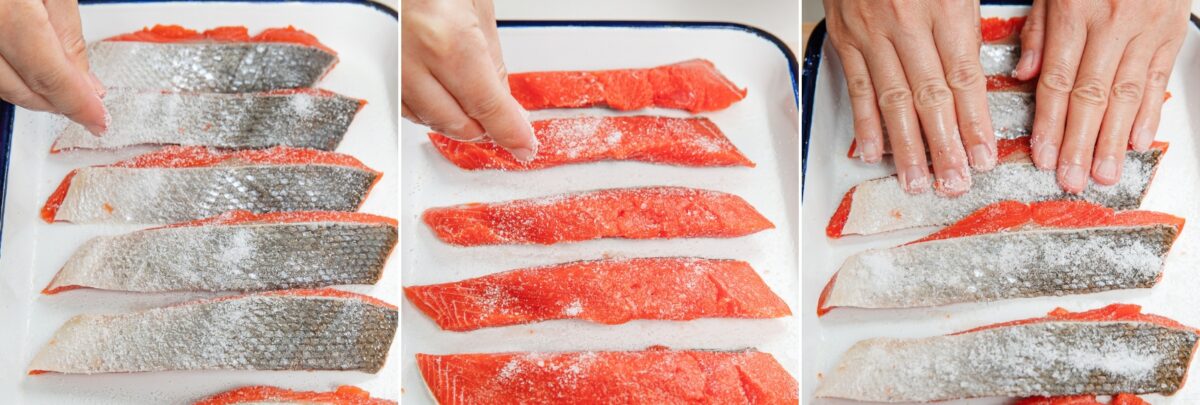
- Sprinkle some of the salt on the skin, then the remaining salt on both sides. Press any leftover salt onto the skin.Nami's Tip: I use 5% of the salmon's weight in salt. In Japan, the salt concentration ranges from 3–8% or more; see my blog post for more information.
To Pack and Cure
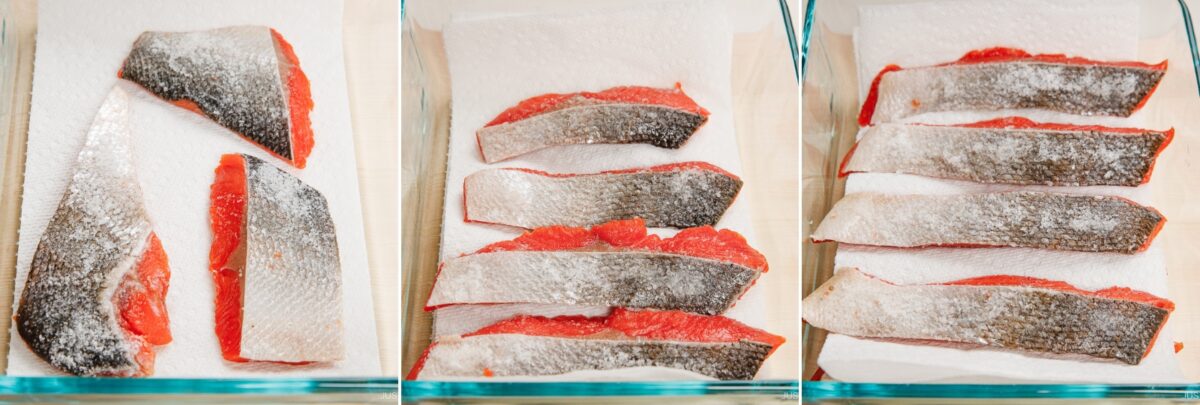
- Line the bottom of an airtight container with a paper towel to absorb moisture. Place a few salted fillets skin side up in a single layer in the container, then place another paper towel on top. Repeat for the second and third layers.Nami's Tip: The salt will draw out the moisture from the salmon.
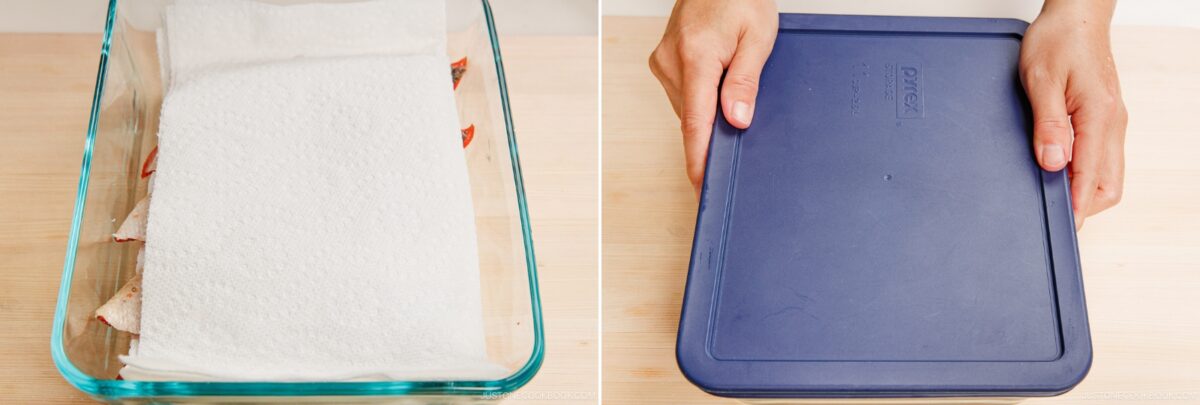
- Lay a final sheet of paper towel on top. Cover and refrigerate for 2 days.
To Pat Dry
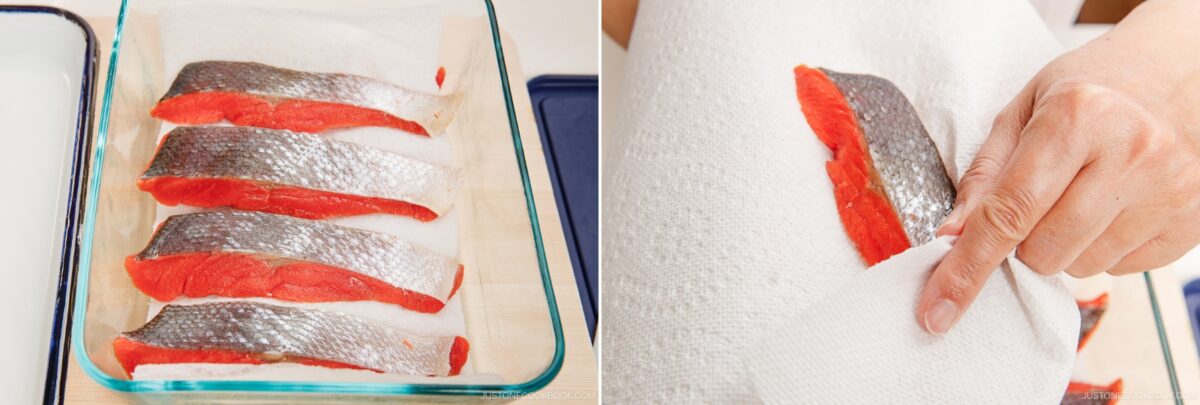
- Open the container after 2 days and discard the wet paper towels. The fillets will be darker and firmer. Gently pat them dry with a clean paper towel. The salted salmon fillets are now ready to use. To cook them now, jump to the “To Broil“ section. To freeze the fillets to use later, see the next step.
To Freeze for Later (optional)
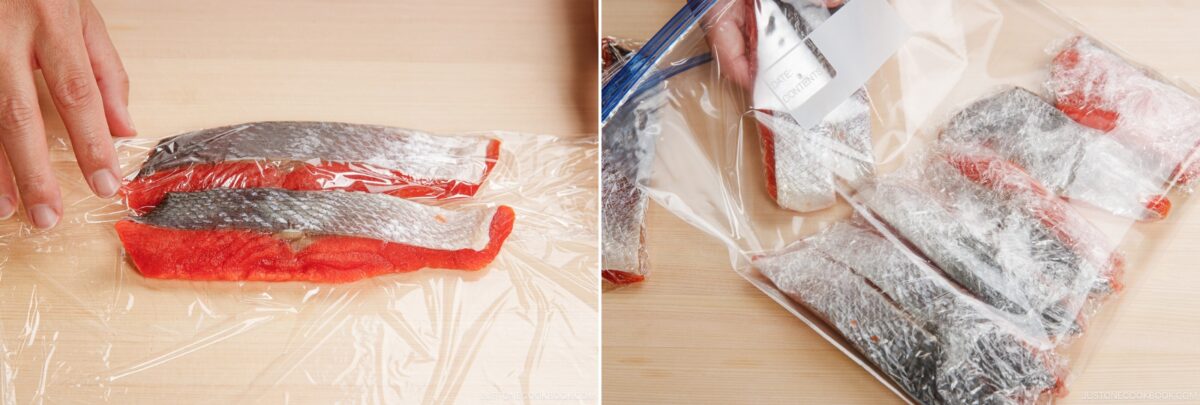
- Wrap the cured salmon fillets individually or in pairs to freeze and cook later. To wrap two fillets together in the same sheet of plastic wrap, see the next step.Nami's Tip: I usually wrap two fillets together, as I often need two for bento boxes or four for a family meal.
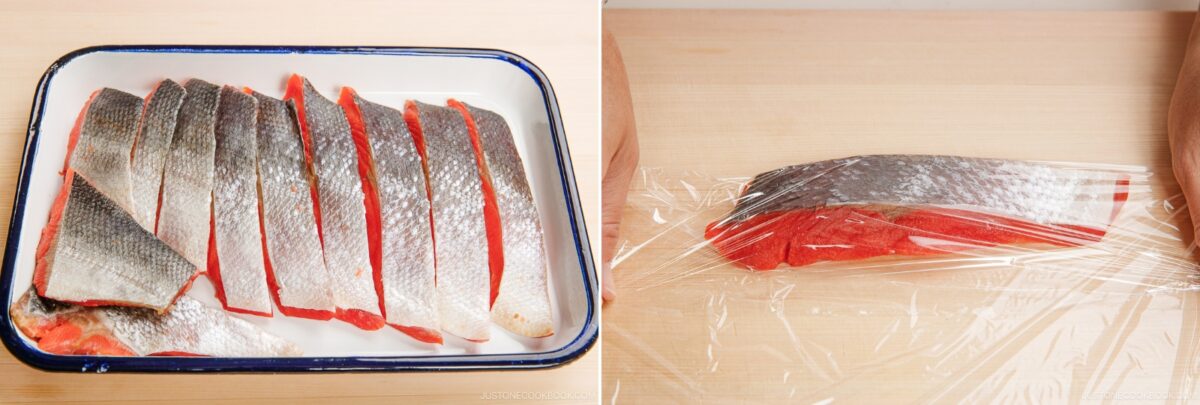
- To wrap two fillets together, fold one corner over one fillet, covering it completely. Place the second fillet next to it, separated by the plastic layer. Roll both tightly in the plastic wrap. Wrap the rest of the fillets, put them in a freezer bag, and store in the freezer for up to 1 month. Nami's Tip: Separating the fillets with a layer of plastic wrap keeps them from fusing together when frozen. This is helpful when you need to take out just one frozen fillet.
To Defrost the Frozen Fillets
- The night before cooking the salmon, place the frozen wrapped fillets in the refrigerator overnight to defrost completely. Let the salmon sit on the counter for 15–20 minutes to warm to room temperature.
To Broil (recommended)
- Gather all the ingredients. Place the oven rack in the center position, about 9 inches (23 cm) away from the top heating element. Preheat the oven broiler on High (550ºF/288ºC) for 5 minutes. Line a baking sheet with aluminum foil and apply a thin coat of (spray) cooking oil. Place the salmon on top, skin side up (for crispy skin). Nami's Tip: I use foil for easy clean up. When broiling, you don‘t control the temperature in the oven. Instead, you control the distance between the broiler and the surface of the food. It‘s similar to using hotter and cooler zones on your grill.
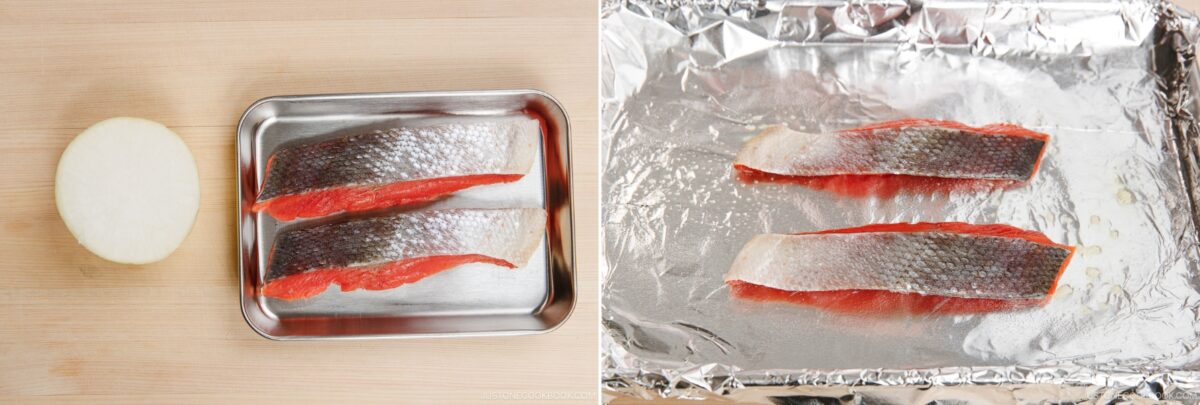
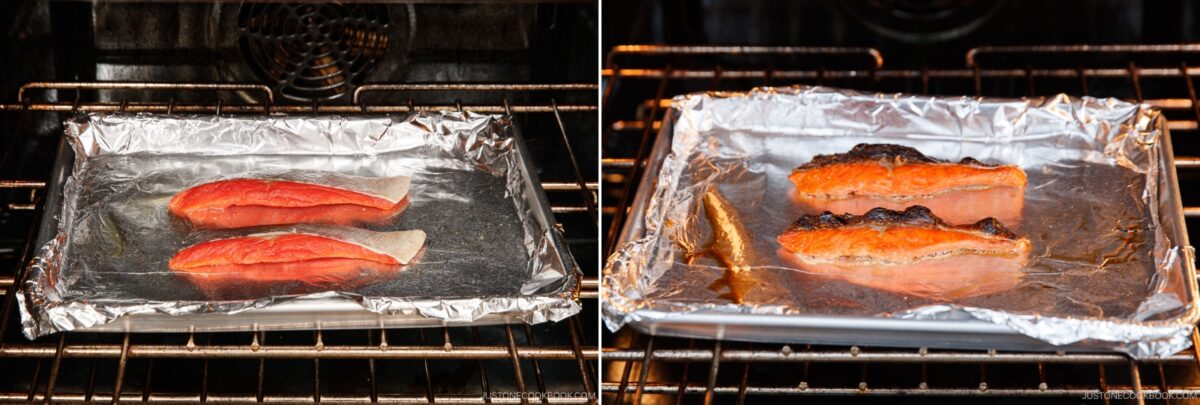
- Broil the salmon for 8–10 minutes, until well done—it should be flaky and more dry. No need to flip it.Nami's Tip: The cooking time varies depending on the thickness of the fish and the distance between the broiler and the food.
To Bake (optional)
- If you don't have a broiler, preheat the oven to 425°F (218ºC) with the rack placed in the middle position. Bake the salmon on a baking sheet lined with parchment paper for 10–12 minutes, until well done (more dry and flaky).
To Grill (optional)
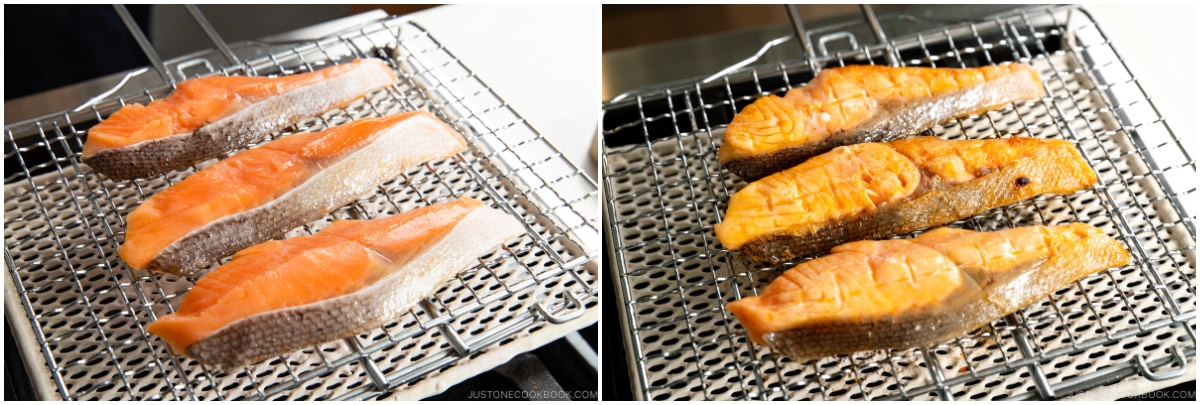
- If you prefer, cook the fillets on a wire fish grill on medium heat over a stovetop or direct fire. Cook about 5 minutes on each side, until well done (more dry and flaky).
To Serve
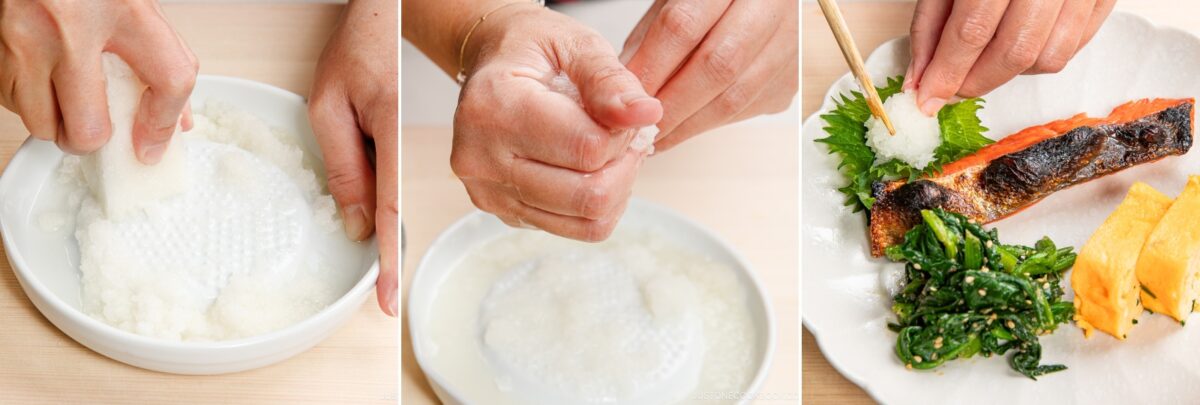
- Peel 2 inches daikon radish. (I use a ceramic grater.) Grate the daikon and gently squeeze out most of the liquid, keeping it moist. Serve the broiled salmon with grated daikon on the side. Nami's Tip: I also served Tamagoyaki (Japanese Sweet Rolled Omelet) and Spinach Salad with Sesame Dressing in this meal.
To Store
- Store in an airtight container in the refrigerator for up to 3 days and in the freezer for up to 2 weeks. Do not refreeze previously frozen fish.
Notes
Ingredient Notes
Salmon fillet: I recommend sockeye salmon because it's firm and lean, but I've also used fatty Atlantic salmon) for this recipe. I sliced the entire left side of wild sockeye salmon from Costco.
Salt: You can use any type of salt, but please go by the weight. 1 Tbsp Diamond Crystal salt weighs 10 g. For 600 g salmon, I used 30 g salt (5 percent of the salmon‘s weight).
Nutrition
Calories: 108kcal, Carbohydrates: 1g, Protein: 15g, Fat: 5g, Saturated Fat: 1g, Polyunsaturated Fat: 2g, Monounsaturated Fat: 2g, Cholesterol: 41mg, Sodium: 665mg, Potassium: 385mg, Fiber: 1g, Sugar: 1g, Vitamin A: 30IU, Vitamin C: 2mg, Calcium: 11mg, Iron: 1mg
The nutrition facts shown are generated by an online calculator and are estimates only. Please consult a professional nutritionist for specific dietary needs.
