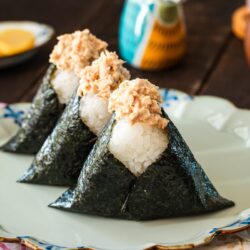
Tuna Mayo Onigiri
These Tuna Mayo Onigiri are sure to become your favorite grab-and-go food! They’re delicious, portable, and absolutely kid-friendly. I'll show you two easy ways to make these Japanese rice balls for your bento lunch, snack, or picnic.
Equipment
Ingredients
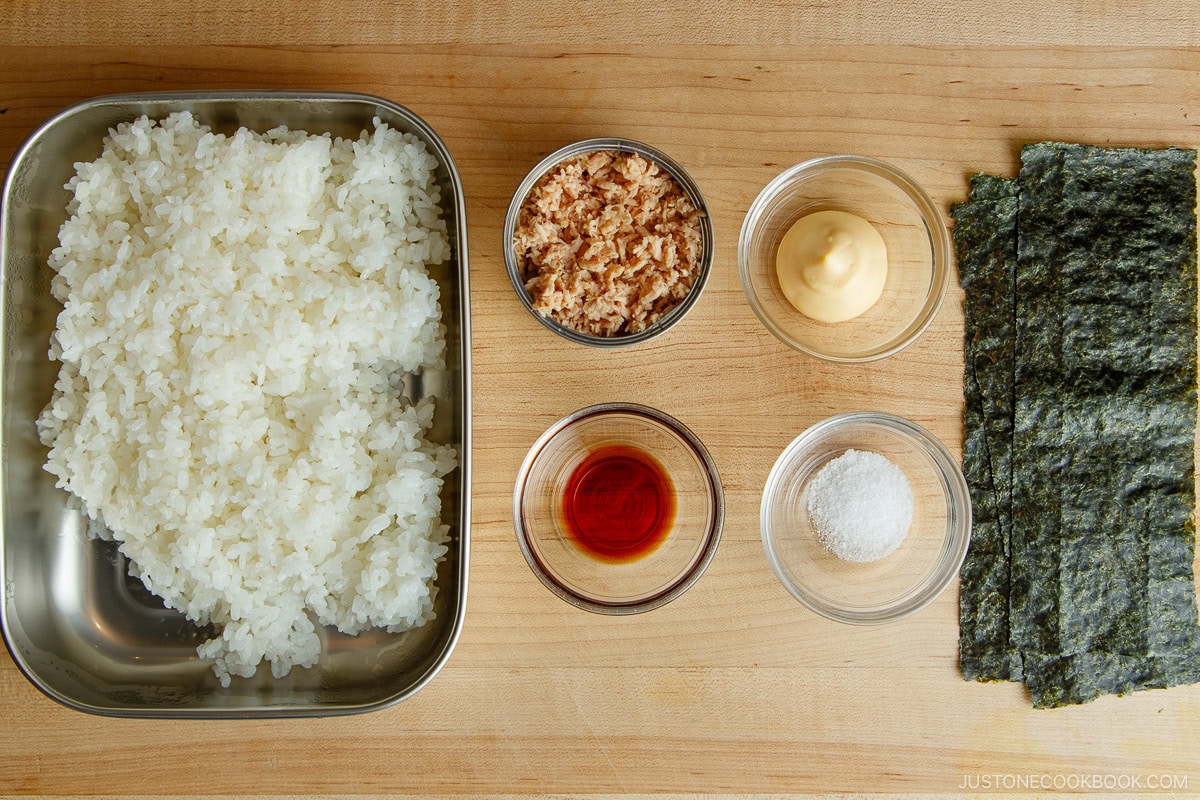
- ½ (5-ounce) can albacore tuna (preferably packed in olive oil) (2.8 oz, 80 g)
- 1 Tbsp Japanese Kewpie mayonnaise (store-bought or see How To Make Japanese Mayonnaise)
- ¼ tsp soy sauce
For the Onigiri
- ½ tsp Diamond Crystal kosher salt
- 2¼ cups cooked Japanese short-grain rice (hot and freshly cooked, made from 1 rice cooker cup or 150 g of uncooked rice)
- 1 sheet nori (dried laver seaweed) (cut into thirds)
Instructions
- Gather all the ingredients. For making onigiri, please use hot, freshly cooked Japanese short-grain rice. See how to cook it with a rice cooker, pot over the stove, Instant Pot, or donabe.
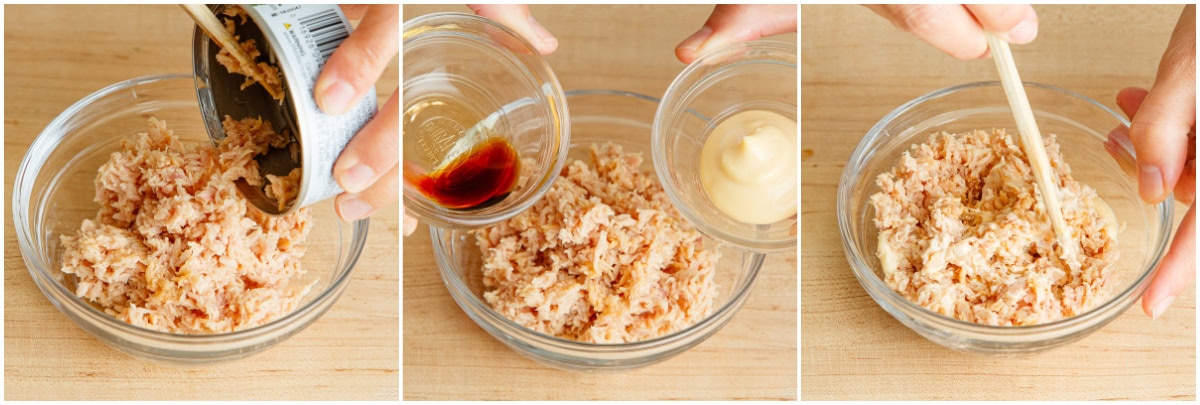
- To make the tuna salad, drain ½ (5-ounce) can albacore tuna (preferably packed in olive oil). Transfer to a bowl and break up the tuna chunks into small flakes. Add 1 Tbsp Japanese Kewpie mayonnaise and ¼ tsp soy sauce Mix well to combine.
To Shape the Onigiri
- Let the freshly cooked 2¼ cups cooked Japanese short-grain rice cool slightly in a large bowl or tray so it's easier to handle. The rice should be hot or warm when making onigiri.
Method 1: Using an Onigiri Mold
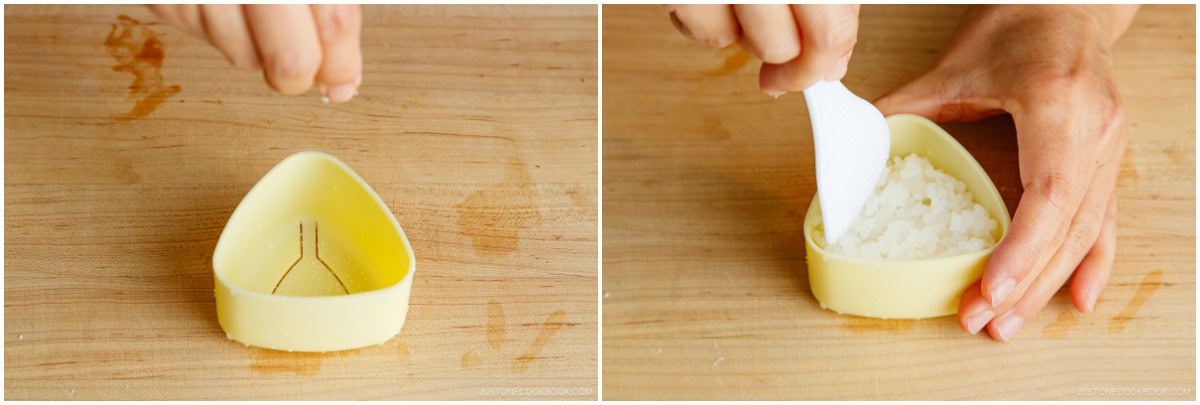
- To keep the rice from sticking to it, wet an onigiri mold and lid in a bowl of water and shake off the excess water. Sprinkle salt in the moistened mold. Fill it halfway with rice, making sure to tuck the rice into the corners.
- To the center, add a spoonful of tuna mayo filling (about 1–2 tsp). Add more rice to cover the tuna mayo and fill the mold to the top edge.
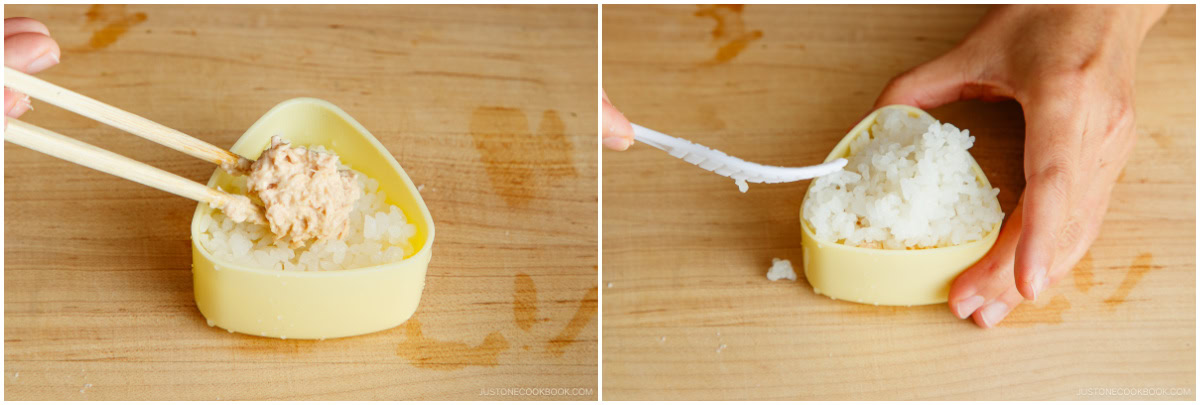
- Sprinkle the top of the rice with a bit more salt. Cover with the lid and push down firmly. You should feel a slight resistance as you compress the rice; if not, add a bit more.
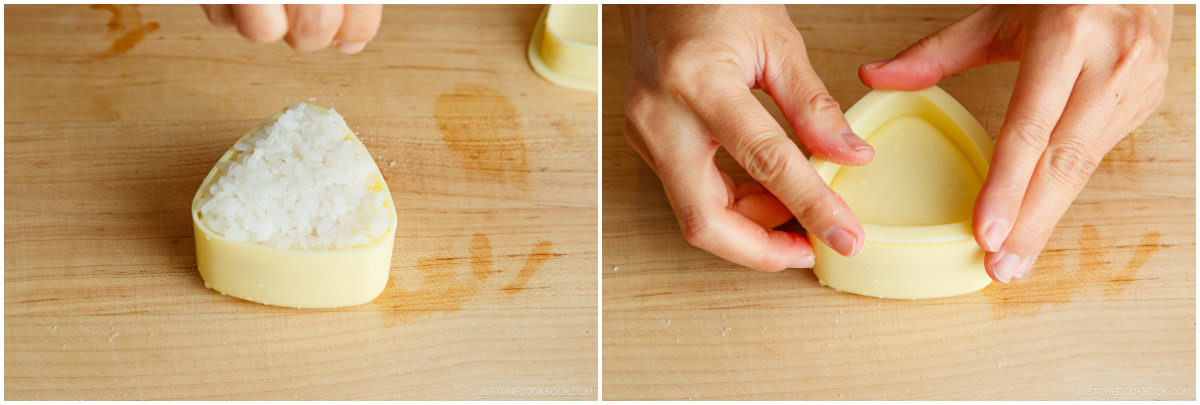
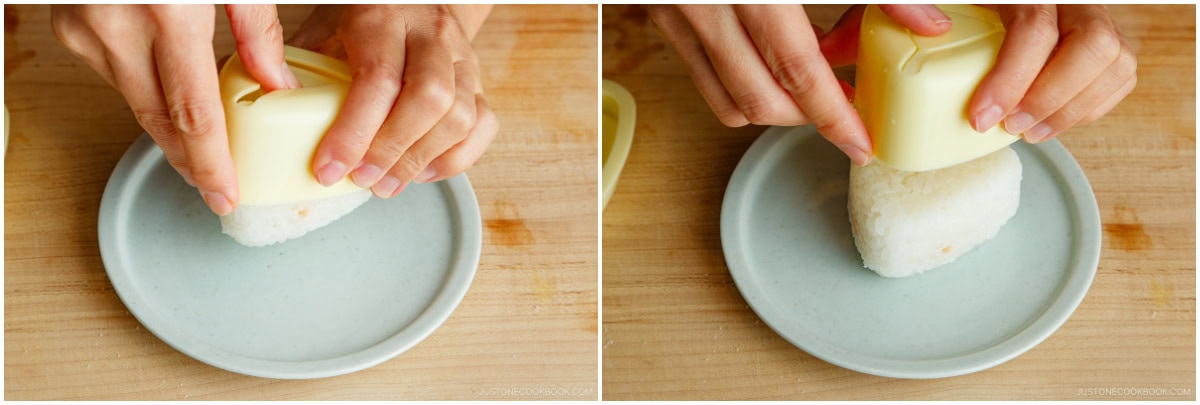
- Remove the lid, flip the mold over, and push the “button” to release the rice ball onto a plate. Repeat to make the remaining onigiri. Tip: Dip your fingers in water before touching the onigiri to keep the rice from sticking to them.
Method 2: Using Plastic Wrap
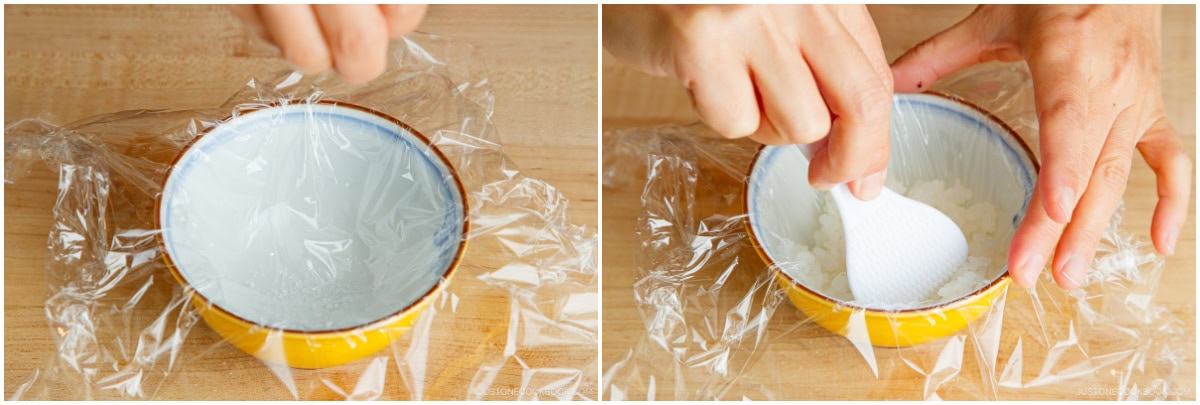
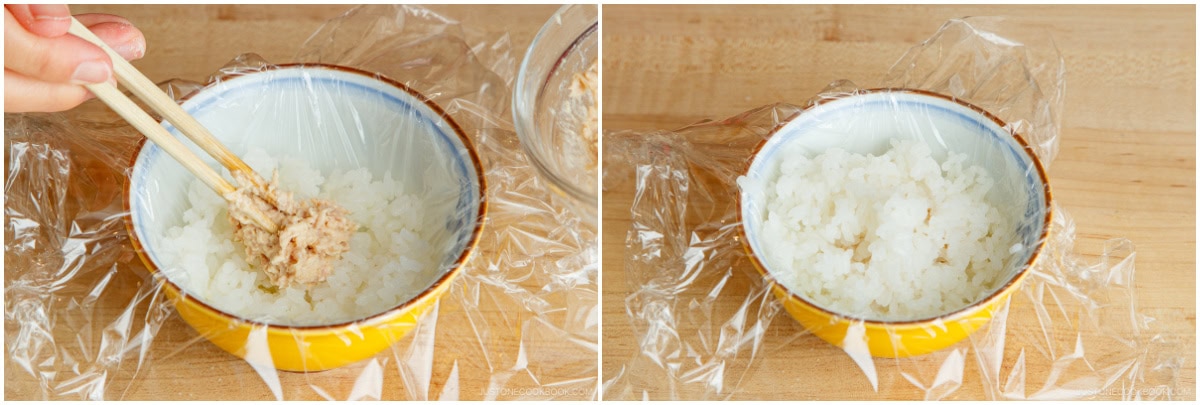
- Place a piece of plastic wrap in a rice bowl or any small bowl and sprinkle it with Diamond Crystal kosher salt. Add about ⅓ cup rice. Tip: Salting the rice helps to preserve it longer.
- Create a small indentation in the center of the rice, then add a spoonful of tuna mayo, about 1–2 tsp. Add another ⅓ cup rice on top to cover the tuna mayo completely.
- Sprinkle the rice with more salt. Gather the corners of the plastic wrap and twist the plastic to tighten it around the rice.
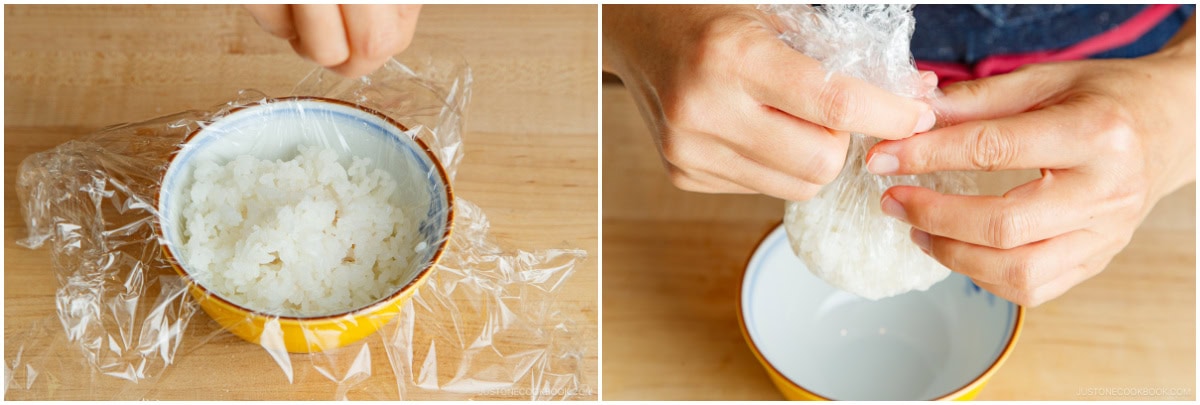
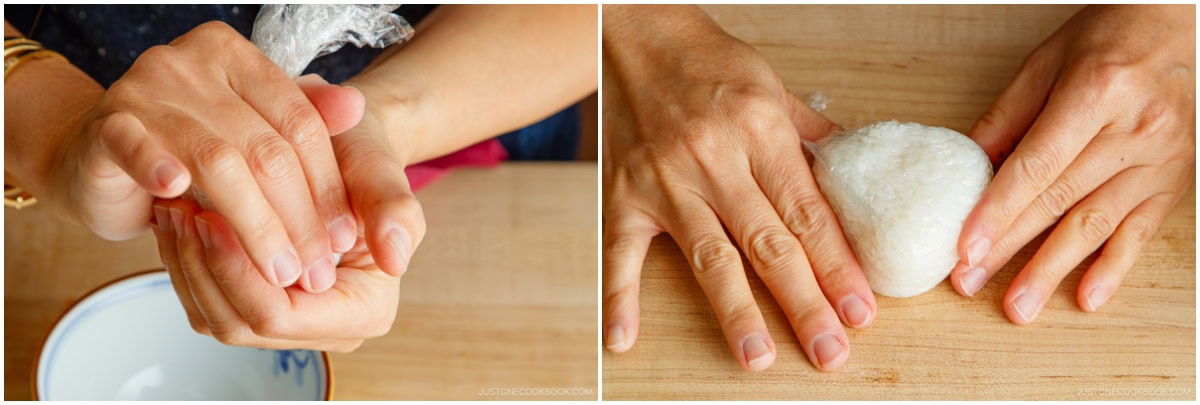
- Gently press the rice with your top hand in a "mountain" shape to form a triangle corner. At the same time, gently squeeze with your bottom hand to flatten either side. Rotate and press 2–3 more times to form the other triangle corners. Tip: Press firmly enough so the onigiri doesn’t fall apart, but don’t squeeze too tightly. Try to keep the rice ball as airy as possible.
To Wrap with Nori
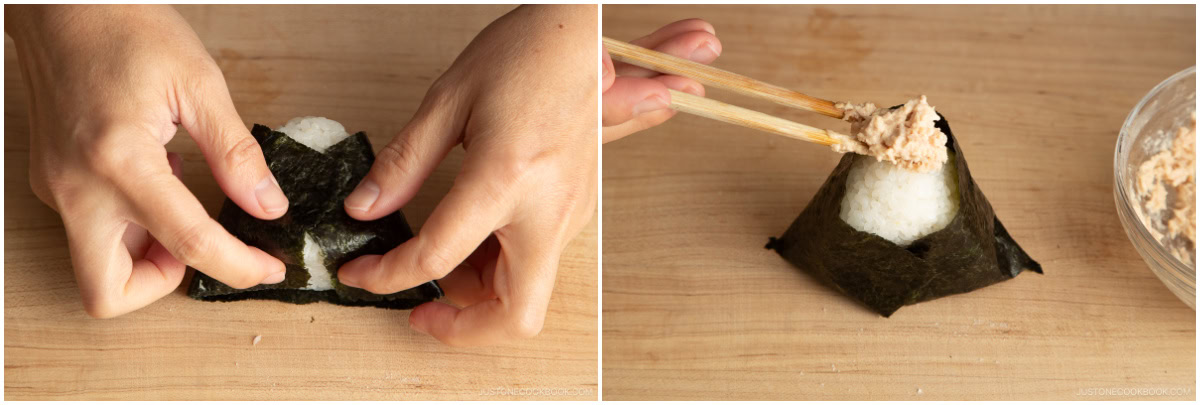
- Cut 1 sheet nori (dried laver seaweed) into thirds. Wrap the onigiri from both sides with a strip of nori seaweed, leaving the top corner exposed. If you like crispy nori, then wait to wrap the onigiri right before serving; keep the nori in an airtight container or bag so it does not get stale in the meantime.
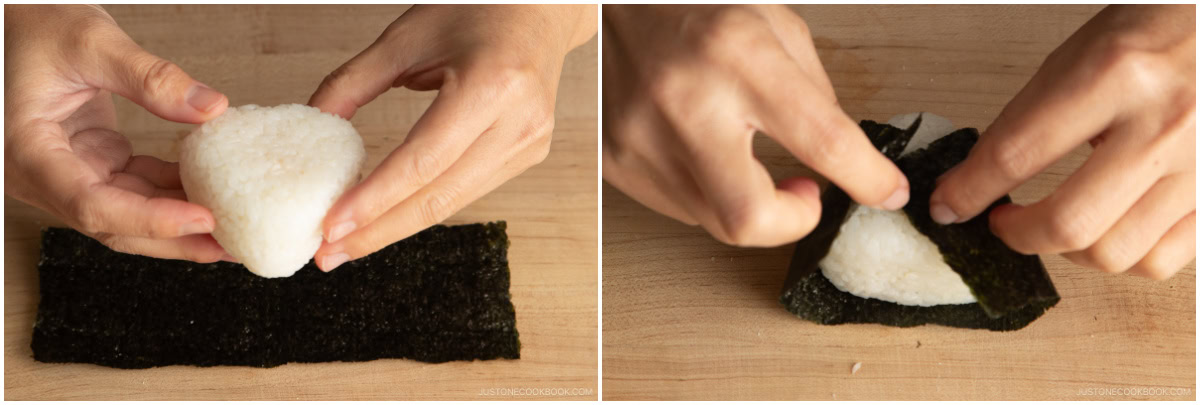
- Tuck the nori under the bottom of the onigiri. Place a dollop of tuna mayo filling on the top corner. Serve warm or at room temperature.
To Store
- If you‘d like to take onigiri for your lunch, keep it cool in an insulated bag with ice packs and consume within 6 hours. Onigiri gets hard when you refrigerate it and the cold air dries out the rice. So, I don‘t recommend making it too far ahead of time. But if you really need to, my trick is to wrap the onigiri with thick kitchen towels and store it in the fridge. The onigiri will be cool and safe but should not get cold and dry.
Nutrition
Calories: 199kcal, Carbohydrates: 32g, Protein: 8g, Fat: 4g, Saturated Fat: 1g, Polyunsaturated Fat: 2g, Monounsaturated Fat: 1g, Trans Fat: 0.01g, Cholesterol: 12mg, Sodium: 208mg, Potassium: 79mg, Fiber: 0.003g, Sugar: 0.03g, Vitamin A: 62IU, Vitamin C: 0.3mg, Calcium: 7mg, Iron: 2mg
