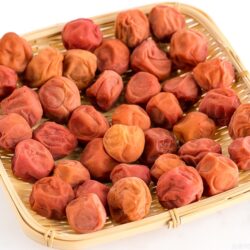
Umeboshi (Japanese Sour Salted Plums)
Learn how to make homemade Umeboshi (Japanese pickled plum), a centuries-old superfood known for its distinct sour and salty taste! You‘ll need sea salt, ripe golden yellow ume, and red shiso leaves to make this precious delicacy at home.
Ingredients
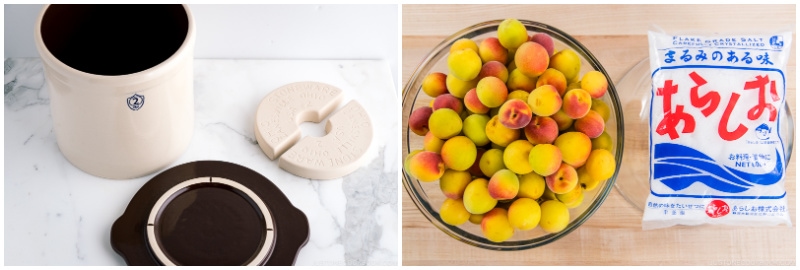
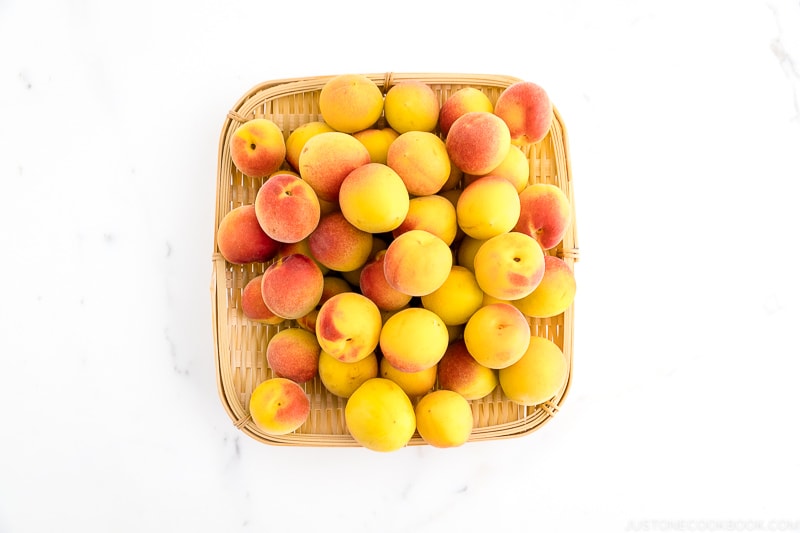
- 3 kg ume plums (use fully-ripened, golden yellow ume with blushes of peachy-pink; if yours are slightly green, ripen them at room temperature before using)
- 540 g coarse sea salt (use 18% of the weight of the ume, or 180 g salt per 1 kg ume)
- 120 ml shochu (for sterilizing; or use vodka or any alcohol higher than 35% ABV)
For the Red Coloring (optional)
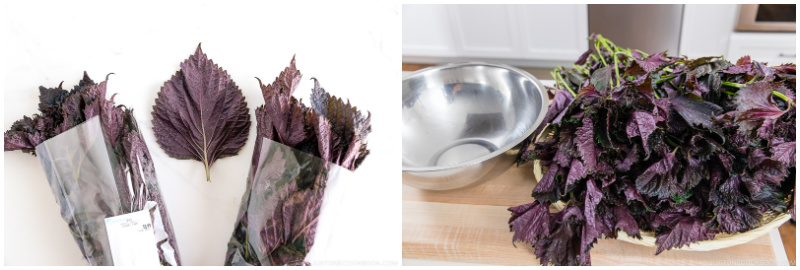
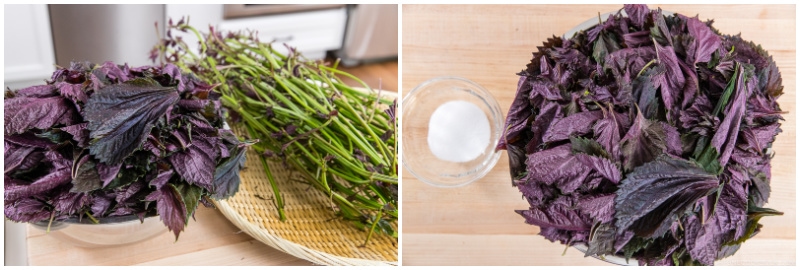
- 600 g red shiso leaves (perilla) (use 20% of the ume‘s weight; roughly 100 g leaves in a typical packet from Nijiya market)
- 108 g coarse sea salt (use 18% of the shiso‘s weight)
Instructions
- Before You Start…Please note that this recipe requires 34 days of pickling and sun-drying time
To Prepare the Equipment (Before Ume Season)
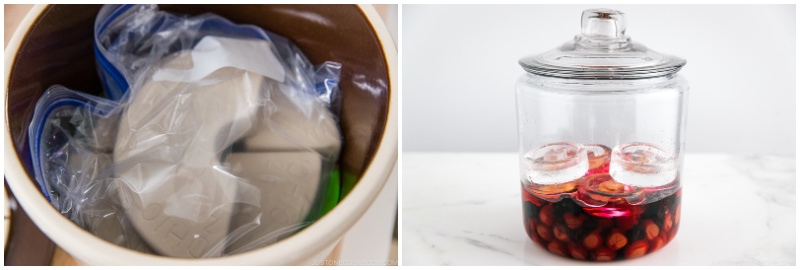
- Prepare your equipment ahead of time as you may need to order online. You will need a large bowl; a 2-gallon crock; crock weights (double the ume‘s weight; I used the 3.85-lb weights that came with the crock plus a bag of salt); a drop lid (you can make your own with a thin plastic cutting board cut slightly smaller than the crock’s opening); one or two large Japanese bamboo strainers called bonzaru; and a mesh hanging dry net.
[Optional] To Soak the Ume the Day Before (Day 0; June 4)
- Many recipes mention to soak the ume overnight to remove astringency (aku in Japanese). If you are using green ume, you may want to soak for 6 hours. If you are using green ume that you ripened, soak for 2–3 hours. If your ume are yellow and blushed like mine, skip this step as most have less astringency. Soaking also may discolor, dent, and promote mold growth on the ume. If you damage any ume, you can trim the damaged parts and use the ume to make jam.
To Pack the Ume in Salt (Day 1; June 5)
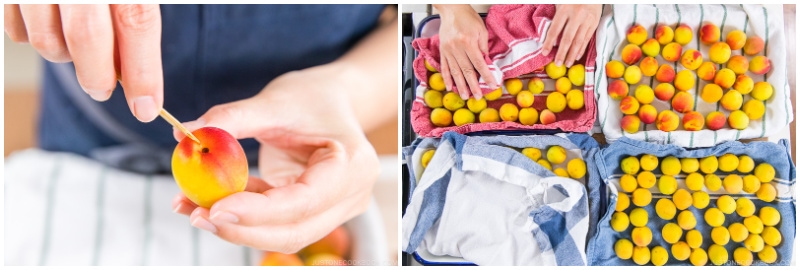
- Rinse 3 kg ume plums under cold running water. If you see blemishes or damage on the ume, don’t use it because they can start to grow mold from there.
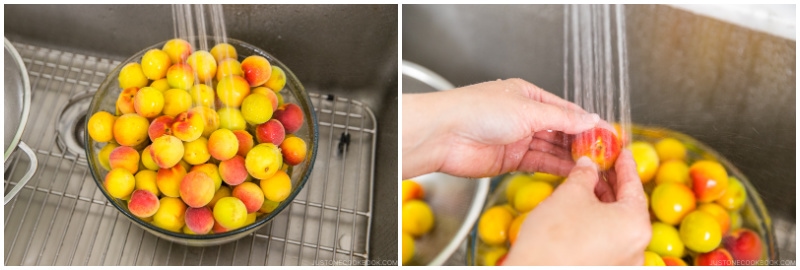
- Using a bamboo skewer, carefully remove the woody bits where the fruits were attached to their stems. It’s tedious work, but please do not skip. Gently dry the ume completely with a clean kitchen towel.
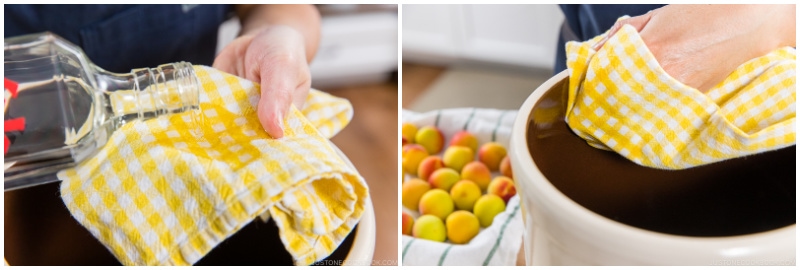
- With very clean hands, pour some of the 120 ml shochu on a clean kitchen towel and wipe the inside of the crock with the alcohol to sterilize.
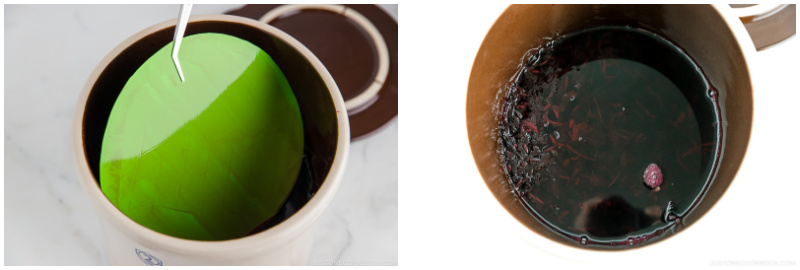
- Sprinkle some of the 540 g coarse sea salt to cover the bottom of the crock. Then, add 2 layers of ume.
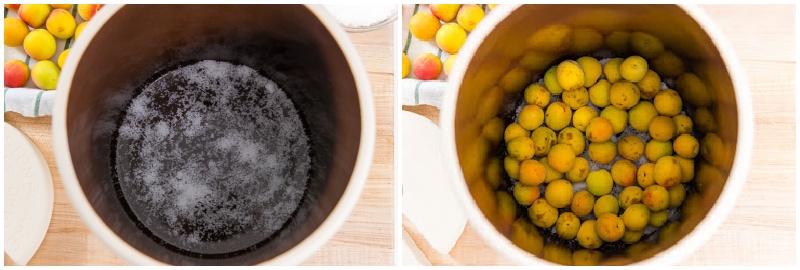
- Sprinkle more salt on top followed by 2 layers of ume.
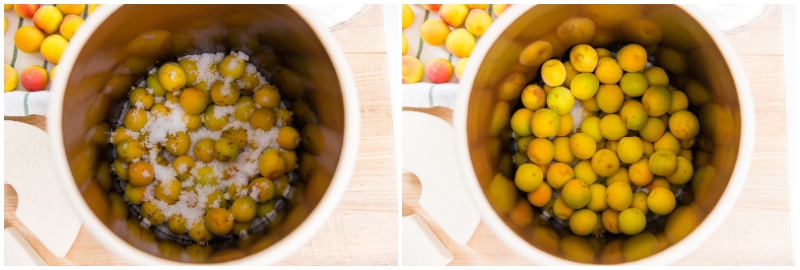
- Continue to layer the salt and ume alternatively.
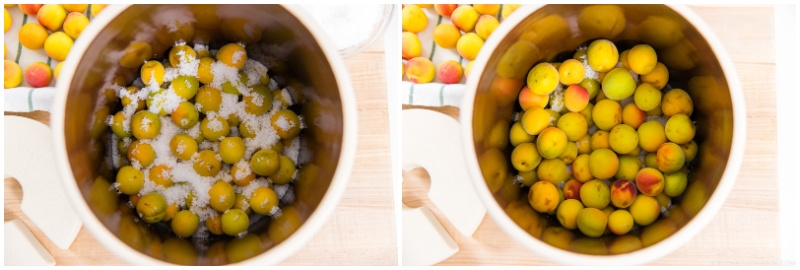
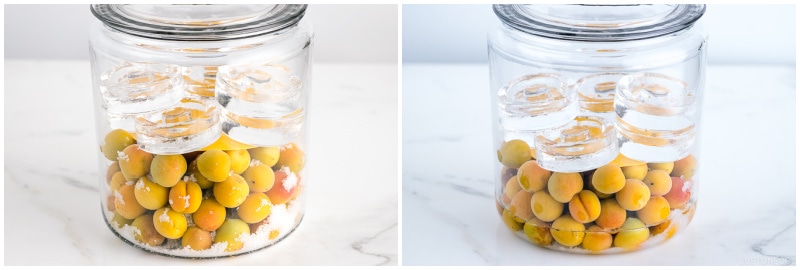
- If you use the same size crock as mine, the ume should fill it around two-thirds of the way to the top.
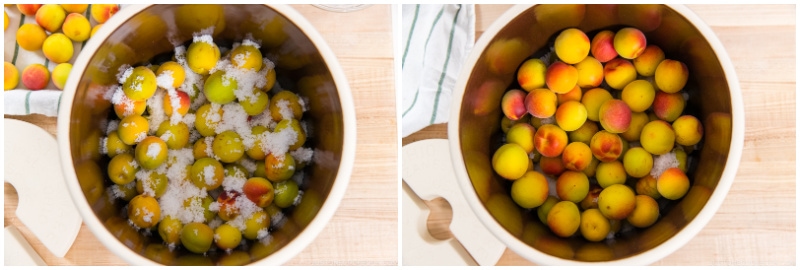
- End with a layer of salt. With some shochu on a clean kitchen towel, wipe to sterilize the plastic drop lid where it touches the fruit. Place on top of the ume.
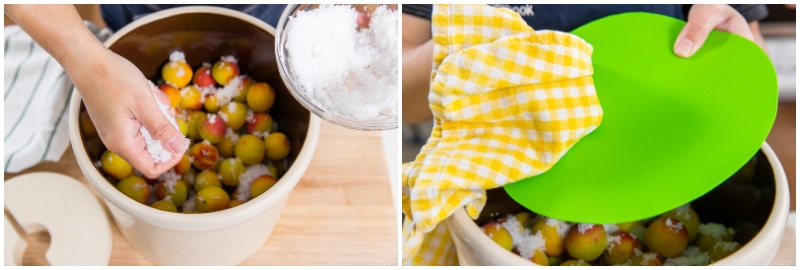
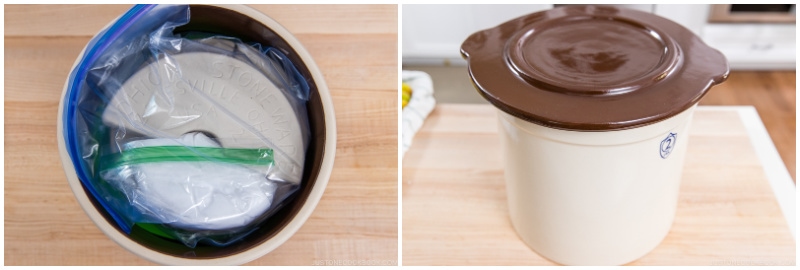
- Place the weights on top of the drop lid. You‘ll need twice the ume‘s weight (6 kg or 13.2 lb). Cover with the crock lid. Optional: If you live in a place with high humidity, you may want to wrap the top tightly with plastic and cover the crock with paper to prevent the umeboshi from growing mold. Label the crock with today’s date and leave the crock in a dark, cool place.
To Check for Ume Plum Vinegar (Day 2–3; June 6–7)
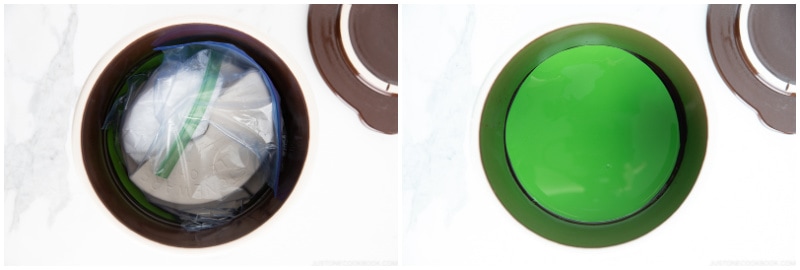
- After a few days, the ume will start releasing moisture. You should see a layer of ume plum vinegar (梅酢, umezu) on top. If the vinegar does not come up easily, increase the weight so that the ume sinks into the vinegar (this will protect the umeboshi from growing mold and going bad). The image below shows Day 1 and Day 2. It takes about 7 days to release enough vinegar to completely submerge the ume.
To Adjust the Weights (Day 7; June 11)
- Open the crock lid for the first time! Using clean hands and equipment, check to see if the ume are completely submerged in plum vinegar. If so, you can add the red shiso anytime, but it may not be available yet.
- Adjust the weights, as needed. If the ume plum vinegar is 1 inch (2.6 cm) above the plums, decrease the amount of weights to roughly equal the weight of the plums. If the plums are smashed or torn, also decrease the weights. You can store the crock in a cool and dark place for at least 1 month or so while you wait for the red shiso to be in season. Make sure to keep the ume completely submerged in the plum vinegar during this time. I added red shiso on Day 14 due to availability in my area.
To Wait Until Red Shiso Are Available
- In the meantime, patiently wait until red shiso (perilla) is in season, usually in mid- to late-June. You can leave your ume in the crock as long as they are submerged in the ume plum vinegar. Get red shiso when available in the Japanese grocery store. If your ume haven‘t reached 7 days at that time, wrap the shiso stems with a damp paper towel and store them in the refrigerator. If you can't get red shiso, you can skip and go straight to the sun-drying step.
To Add the Red Shiso (Day 14; June 18)
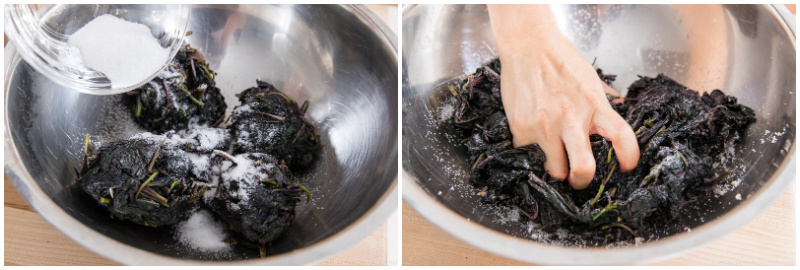
- Pick 600 g red shiso leaves (perilla) from the stems and put them in a large bowl.
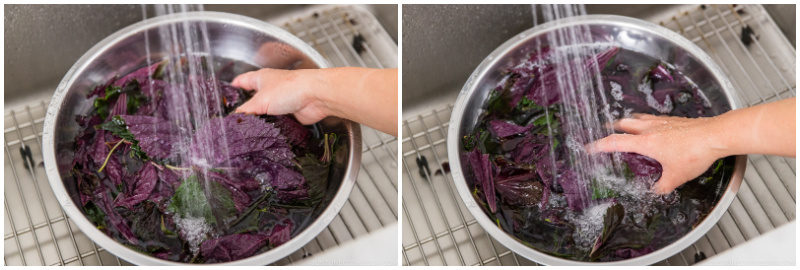
- Rinse them in plenty of water and drain well.
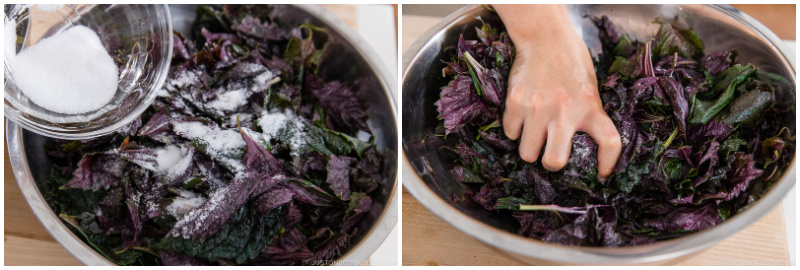
- Sprinkle with half of the 108 g coarse sea salt and knead the shiso really well. The salt slowly starts to draw the moisture from the leaves as you knead. Note: Red shiso is a powerful dye and will stain your hands red for a day or two. You can wear disposable food prep gloves to avoid this.
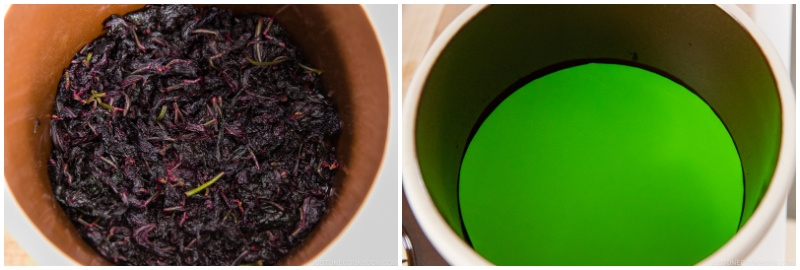
- The dark, frothy, purple shiso liquid contains astringency (aku). Squeeze the shiso tightly and discard the dirty water.
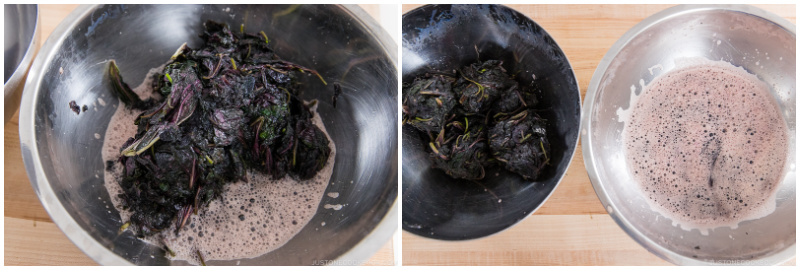
- Then, add the remaining salt to the squeezed shiso and loosen them up. Knead and rub until they release more juice. If you don’t get rid of the astringency at this stage, your umeboshi will be darker. So, do not skip this step.
- You will see more liquid coming out. This time, it’s a slightly prettier color than the first time. Squeeze the shiso and discard the dirty water again.
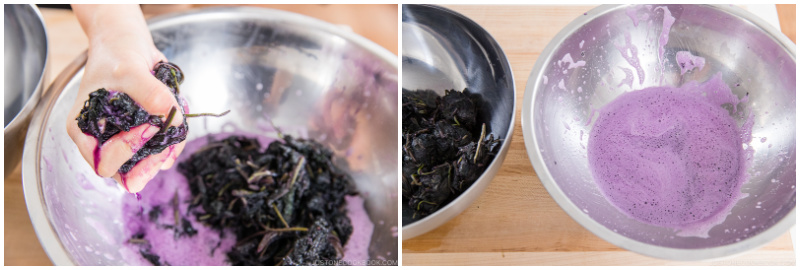
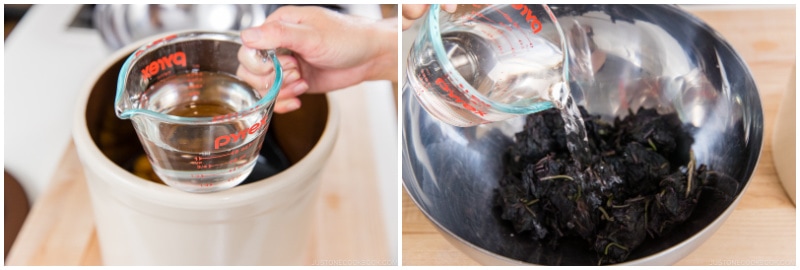
- Open up the crock. Take out 1 cup of clear ume plum vinegar (umezu). Add it to the squeezed shiso in the bowl.
- When you loosen up the red shiso, the ume plum vinegar will soon turn a bright purple/red color.
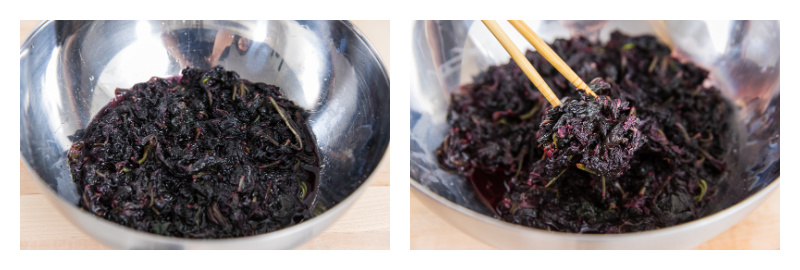
- Pour the red shiso leaves and remaining shiso liquid over the ume in the crock.
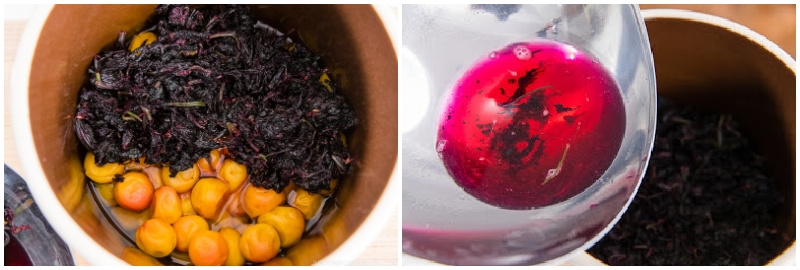
- Evenly distribute the shiso leaves to cover the ume. Replace the plastic drop lid on top.
- Place weights on top again, this time equal to the ume‘s weight (3 kg or 6.6 lb). Cover with the crock lid and put it back in the dark, cool place for one month. Over the next month, the shiso‘s red color will permeate the ume plum vinegar and ume. When the vinegar exceeds 1 inch (2.5 cm) above the shiso leaves, reduce the weight so the ume does not tear.
To Sun-Dry the Ume (One Month After Adding the Shiso; July 17–19)
- Check the forecast and plan on 3 straight days of ume drying on sunny days. On these 3 days, expose the ume all day to the strong summer sunshine to prevent mold growth. The moisture also evaporates, which yields more concentrated flavors and a meaty texture.
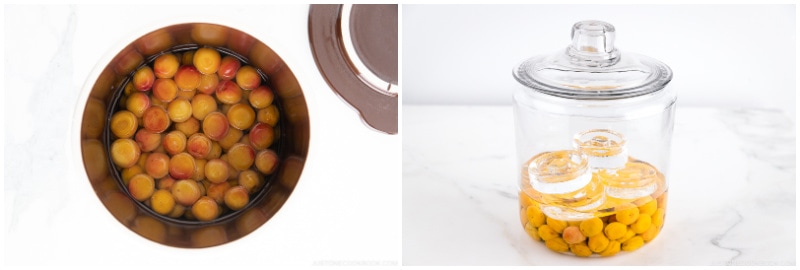
- Open the crock lid and remove the weights and drop lid. The ume plum vinegar now has a beautiful deep red color.
- Scoop away or move the layer of red shiso so you can see the ume. I just moved them aside so I can pick up the plums. The skin is very fragile, so handle it with care.
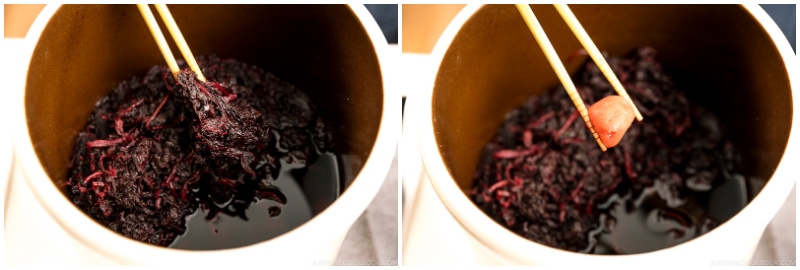
- Remove all the ume from the crock. Drain them in a sieve placed over a large bowl (I use a 4–cup measuring cup here) to catch the liquid.
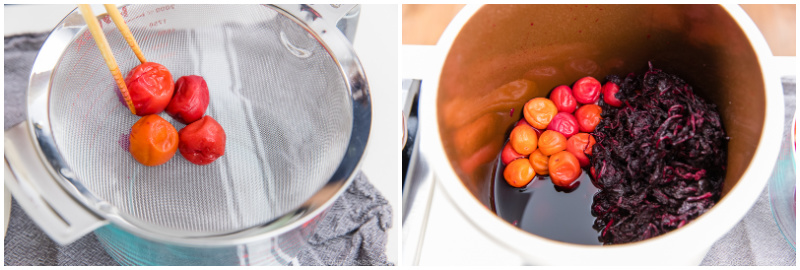
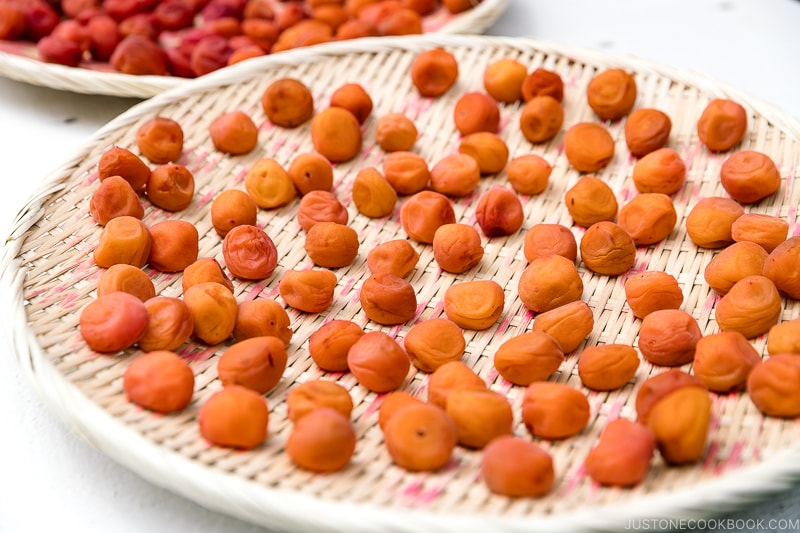
- The ume closer to the layer of shiso has a darker red color. Transfer the ume to a flat bamboo strainer, keeping some space between each of them. You will probably need 2 large strainers.
- Remove the shiso leaves from the crock and drain in the sieve placed over a bowl/measuring cup. Squeeze the liquid out.
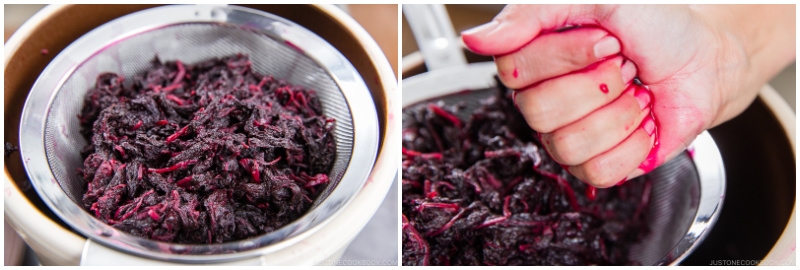
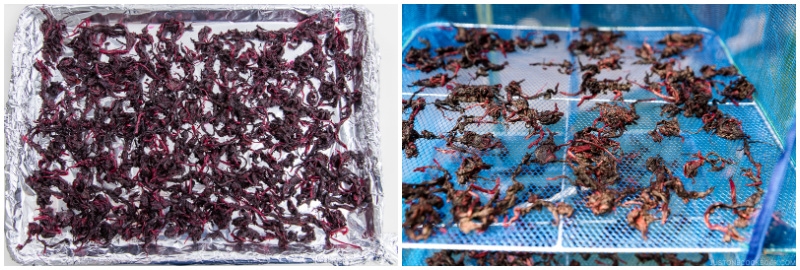
- Place them over a tray lined with foil or parchment paper. Then transfer the shiso to the hanging dry net and place outside for 2–3 days until they dry out completely (in the mid-afternoon, take them inside the house with umeboshi).
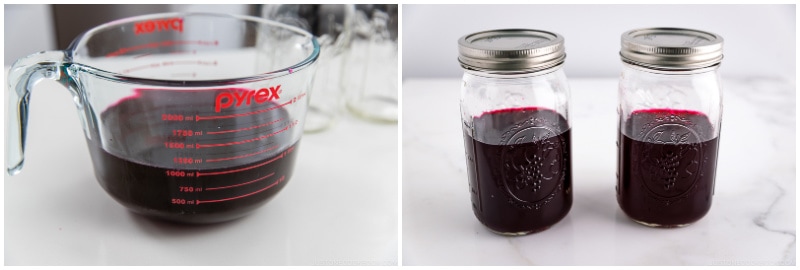
- Transfer the ume plum vinegar from the crock to sterilized mason jars. Keep it in the refrigerator.
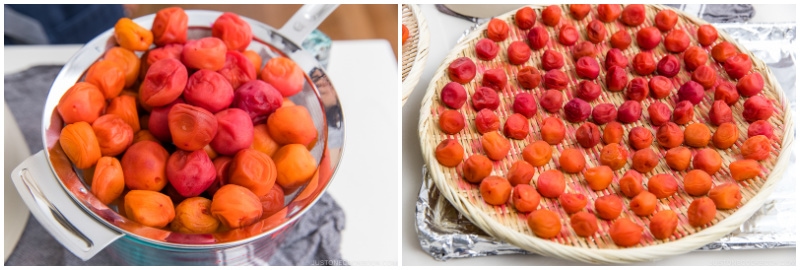
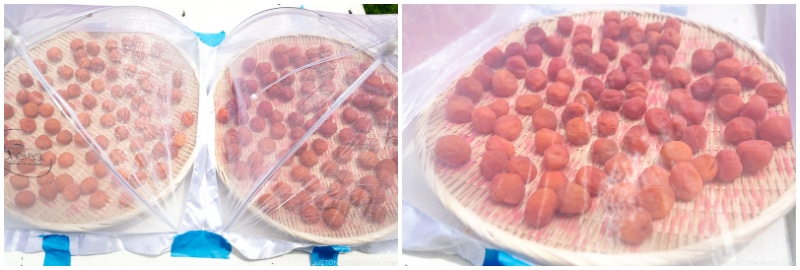
- Place the ume under the sunshine all day, from morning to mid-afternoon before the air gets cool and the moisture starts to build up.
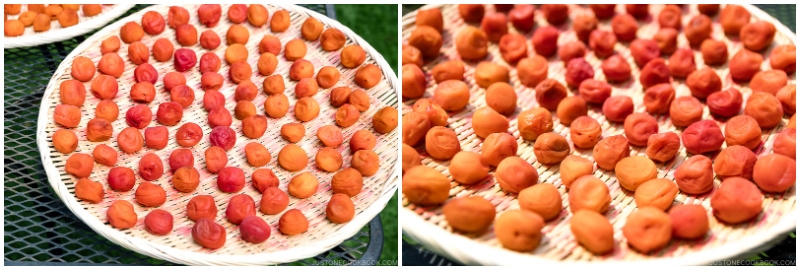
- You may use food cover tents to protect the ume from bugs. When I bring the ume indoors in the mid-afternoon, I keep them on the bamboo strainers. Some people put the ume back in the plum vinegar so they can absorb more juice and color after drying all day. It‘s up to you. The next morning, flip over the ume before you take the strainers outdoors again. The ume skin does not stick to the strainer overnight, so it‘s easier to turn them over in the morning. Repeat this drying process for another 2 days. By the 3rd day, the umeboshi are plump but slightly wrinkled. Some may have white salt visible on their surface.
To Store
- After 3 days of sun-drying, they are ready to pack away. You have 2 options: 1) put the umeboshi back into the ume plum vinegar to preserve; or 2) keep the umeboshi in a sterlized airtight mason jar as is. The first method will yield bright red, juicy, more sour umeboshi. The second method will yield less red, stickier, and less sour umeboshi. I use the second method.
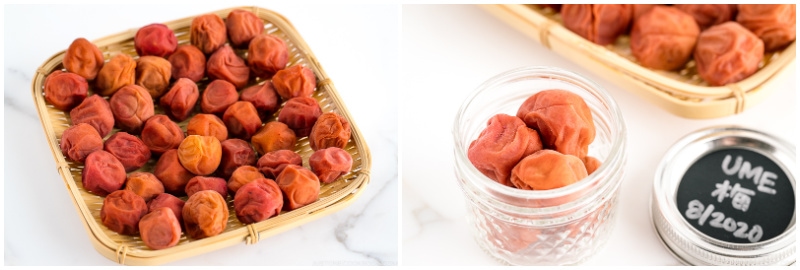
- It’s best to rest the umeboshi for at least 3 months so the flavors will mature (I wait for 6–12 months). Even if you can eat the umeboshi immediately, they are just too salty and are not very delicious. If they are stored for 3 months or more, they will mature and mellow out the salty, sour flavors slightly. You can keep the umeboshi in a dark, cool place for 2–3 years.
To Use the Umeboshi
- Your homemade Umeboshi are the classic accompaniment to many Japanese rice dishes like onigiri rice balls, mixed rice, and rice porridge. They‘re also a delicious flavoring for salad dressing, pasta, and bento. For more ideas, check my umeboshi recipes on the blog.
Nutrition
Serving: 1jar, Calories: 857kcal, Carbohydrates: 237g, Protein: 21g, Sodium: 69824mg, Potassium: 7214mg, Fiber: 76g, Sugar: 161g, Vitamin C: 180mg, Calcium: 403mg, Iron: 19mg
