
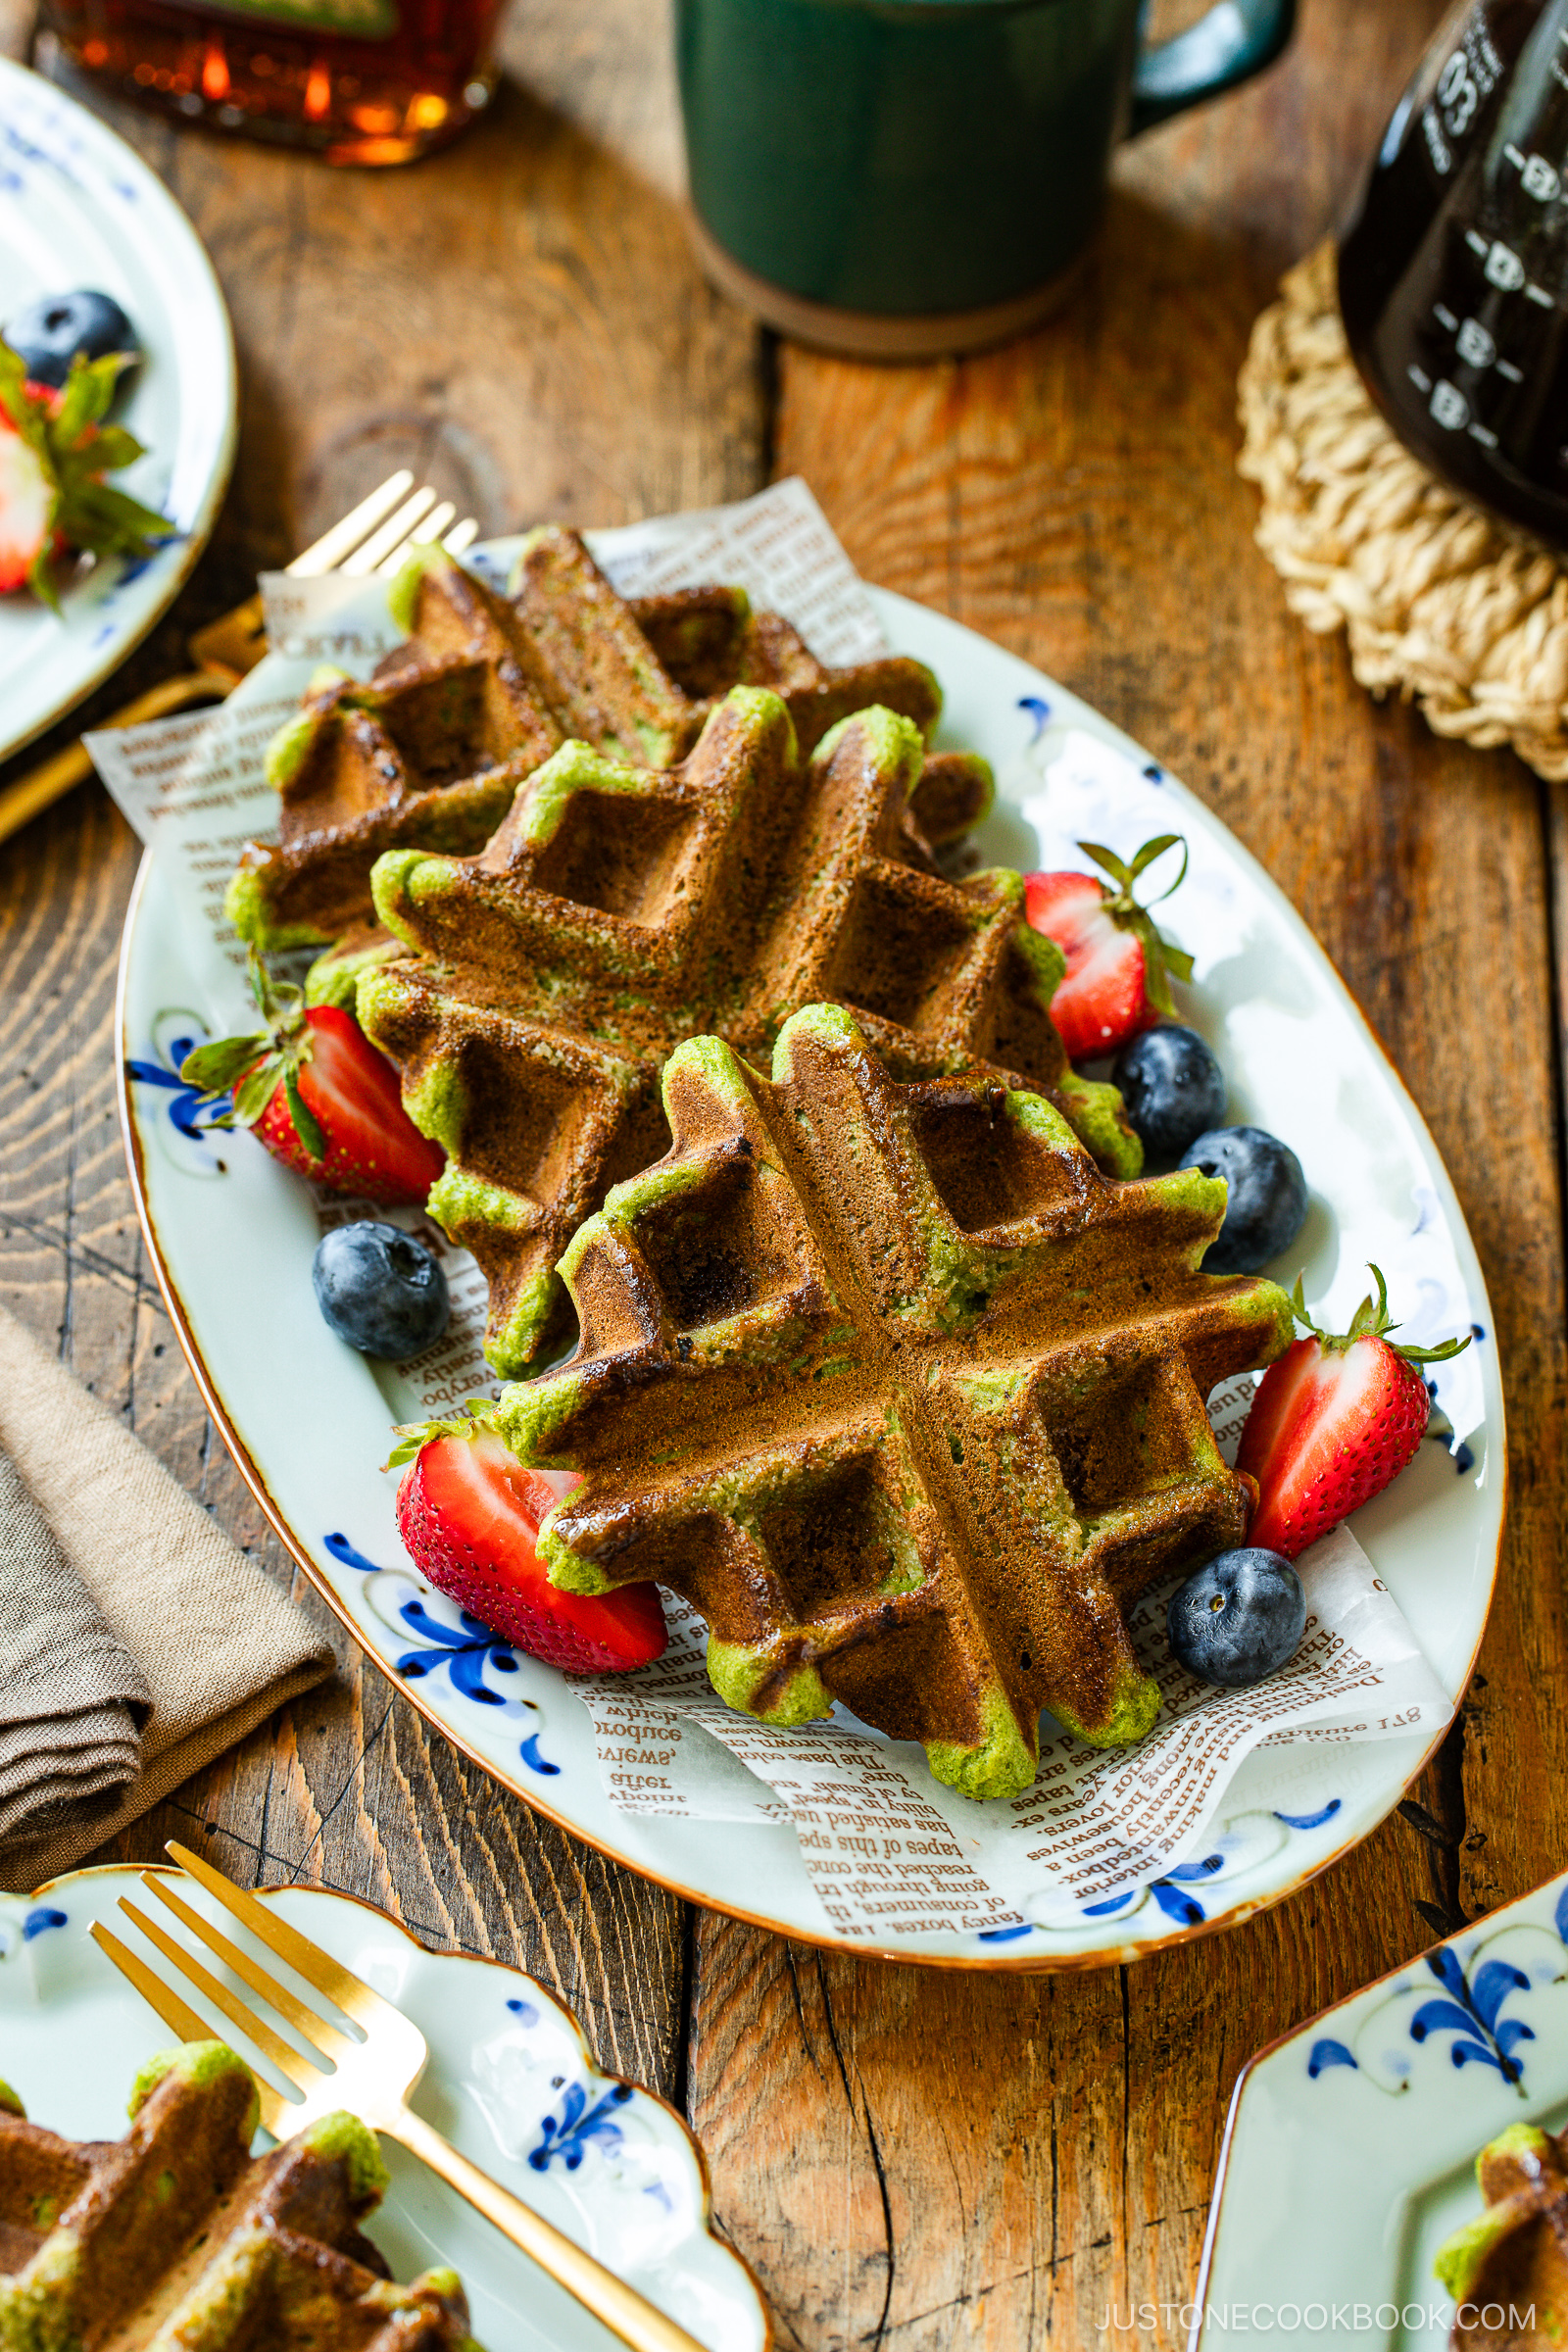
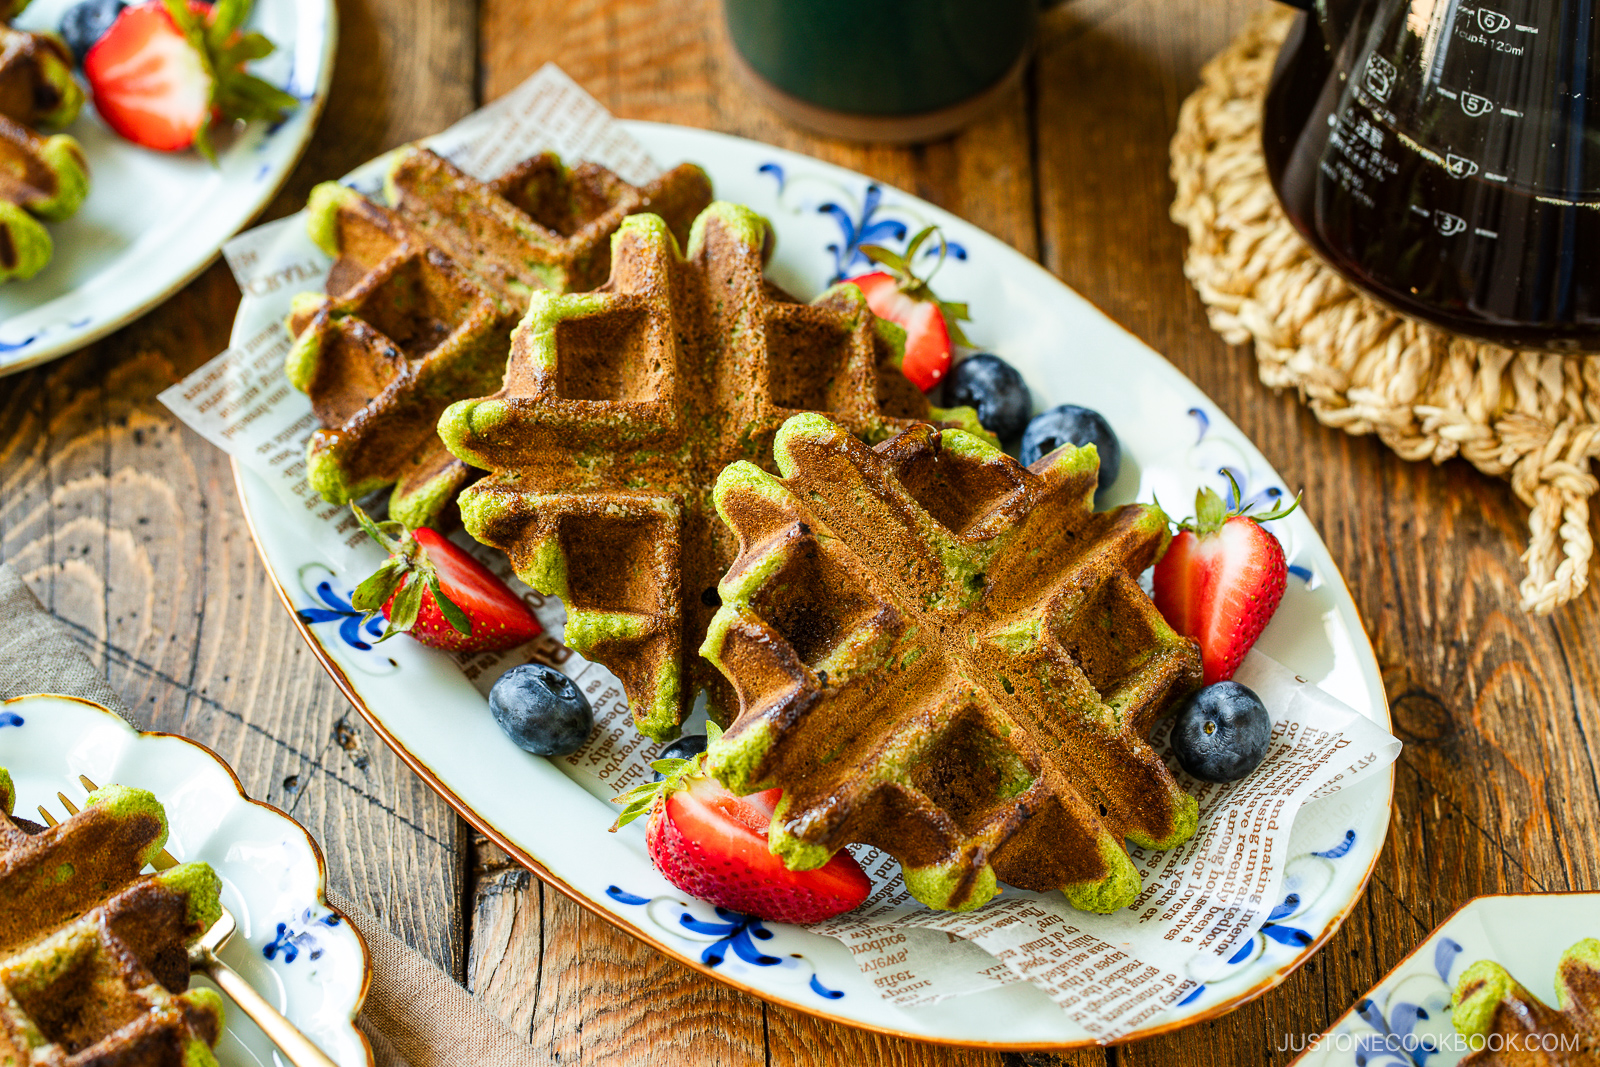
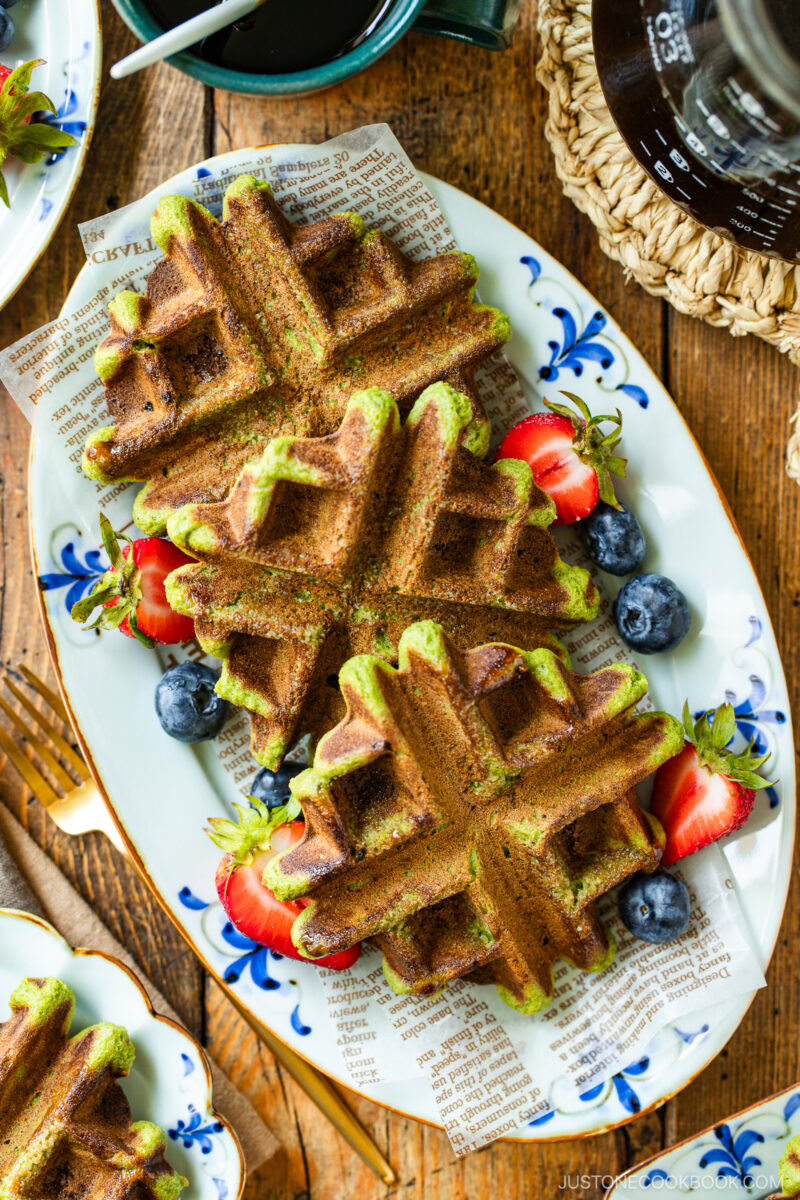
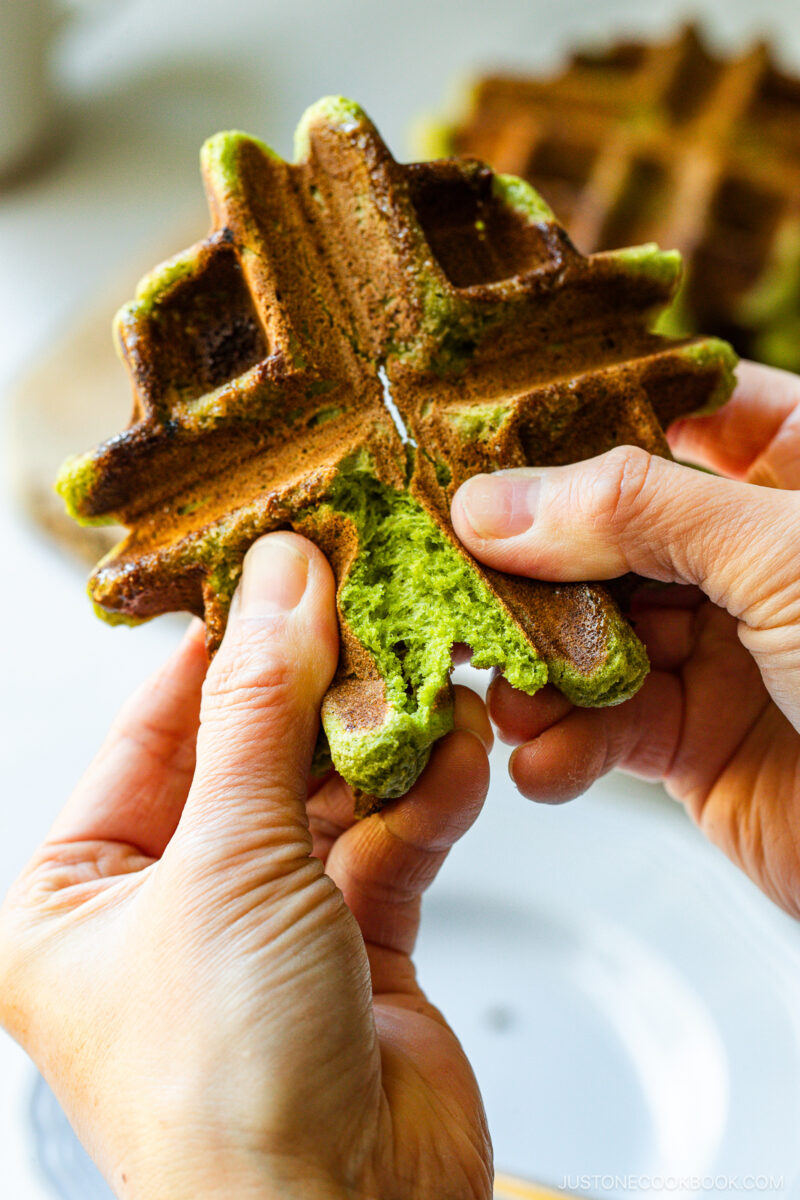
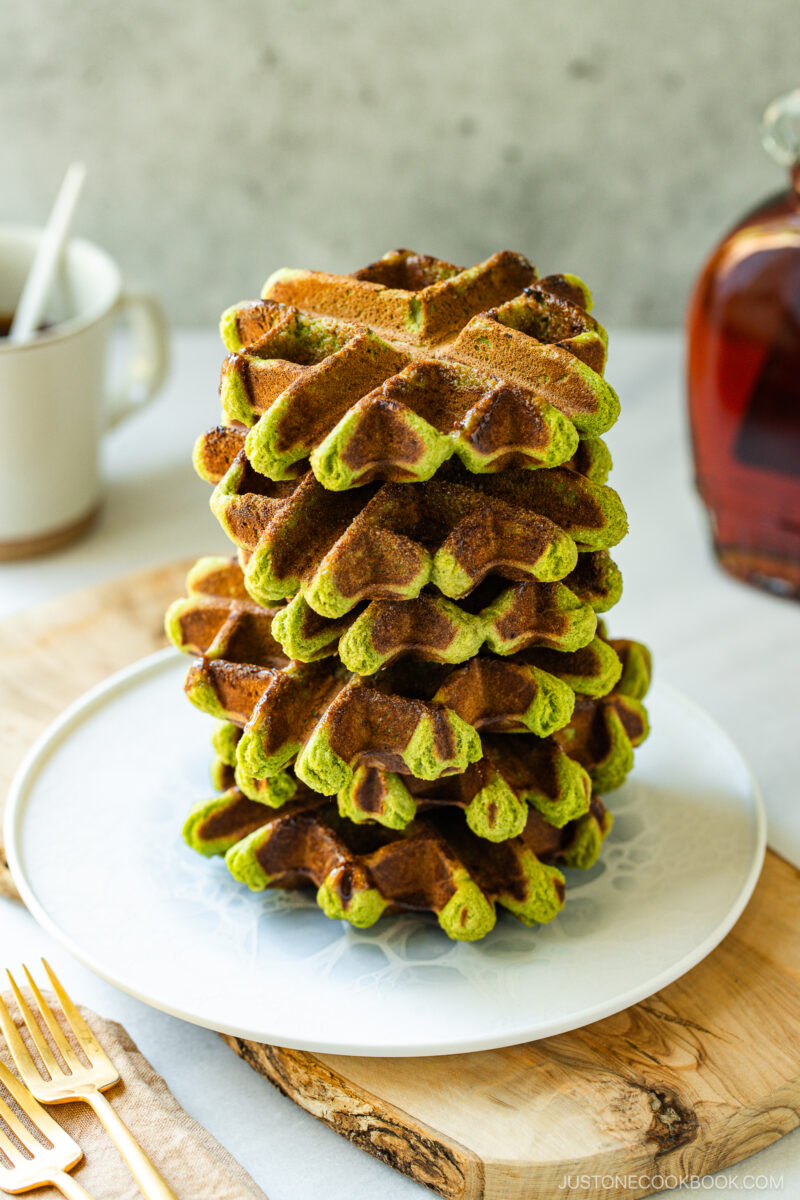
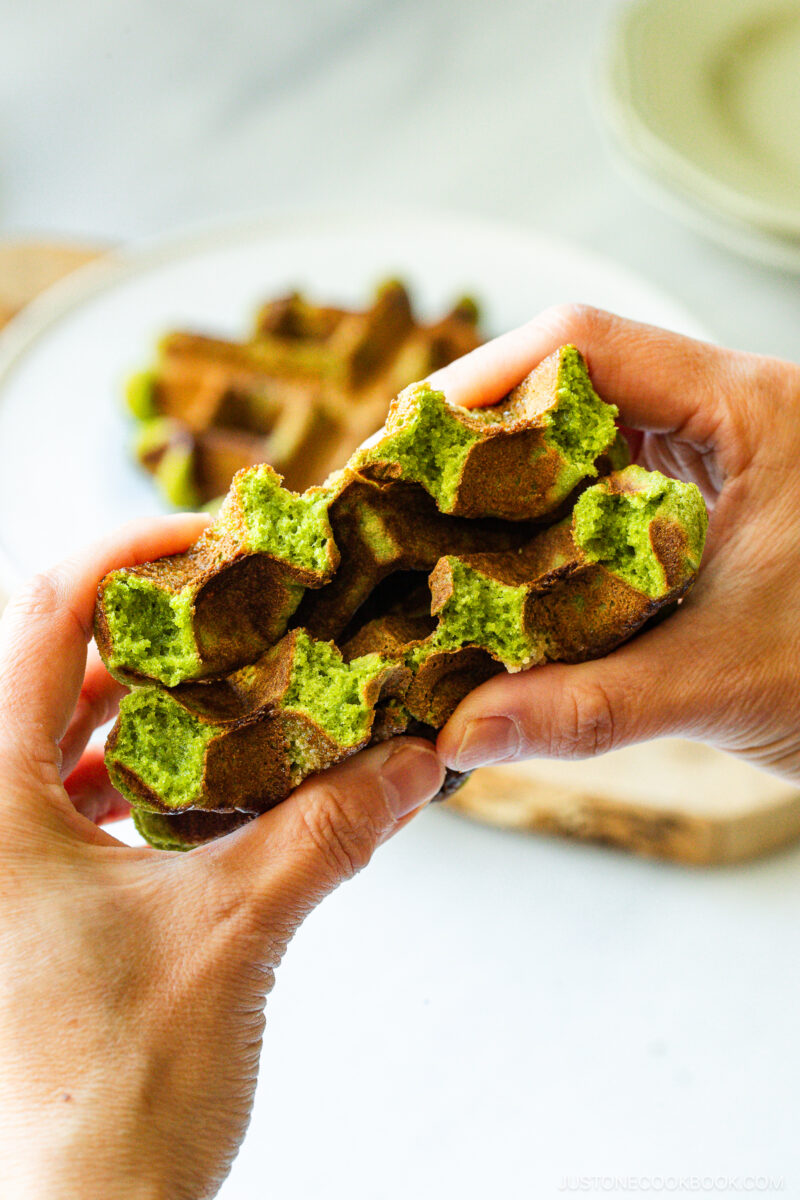
Mochi is one of my favorite Japanese snacks, and I love all things matcha. That’s why these Matcha Mochi Waffles are the perfect mashup in my book! With their chewy interior, crispy exterior, and heavenly matcha flavor, it just doesn’t get any better.
If you love matcha recipes, try my Matcha Marble Pound Cake, Matcha Cookies, and Matcha Mille Crepe Cake recipes next!
What are Mochi Waffles?
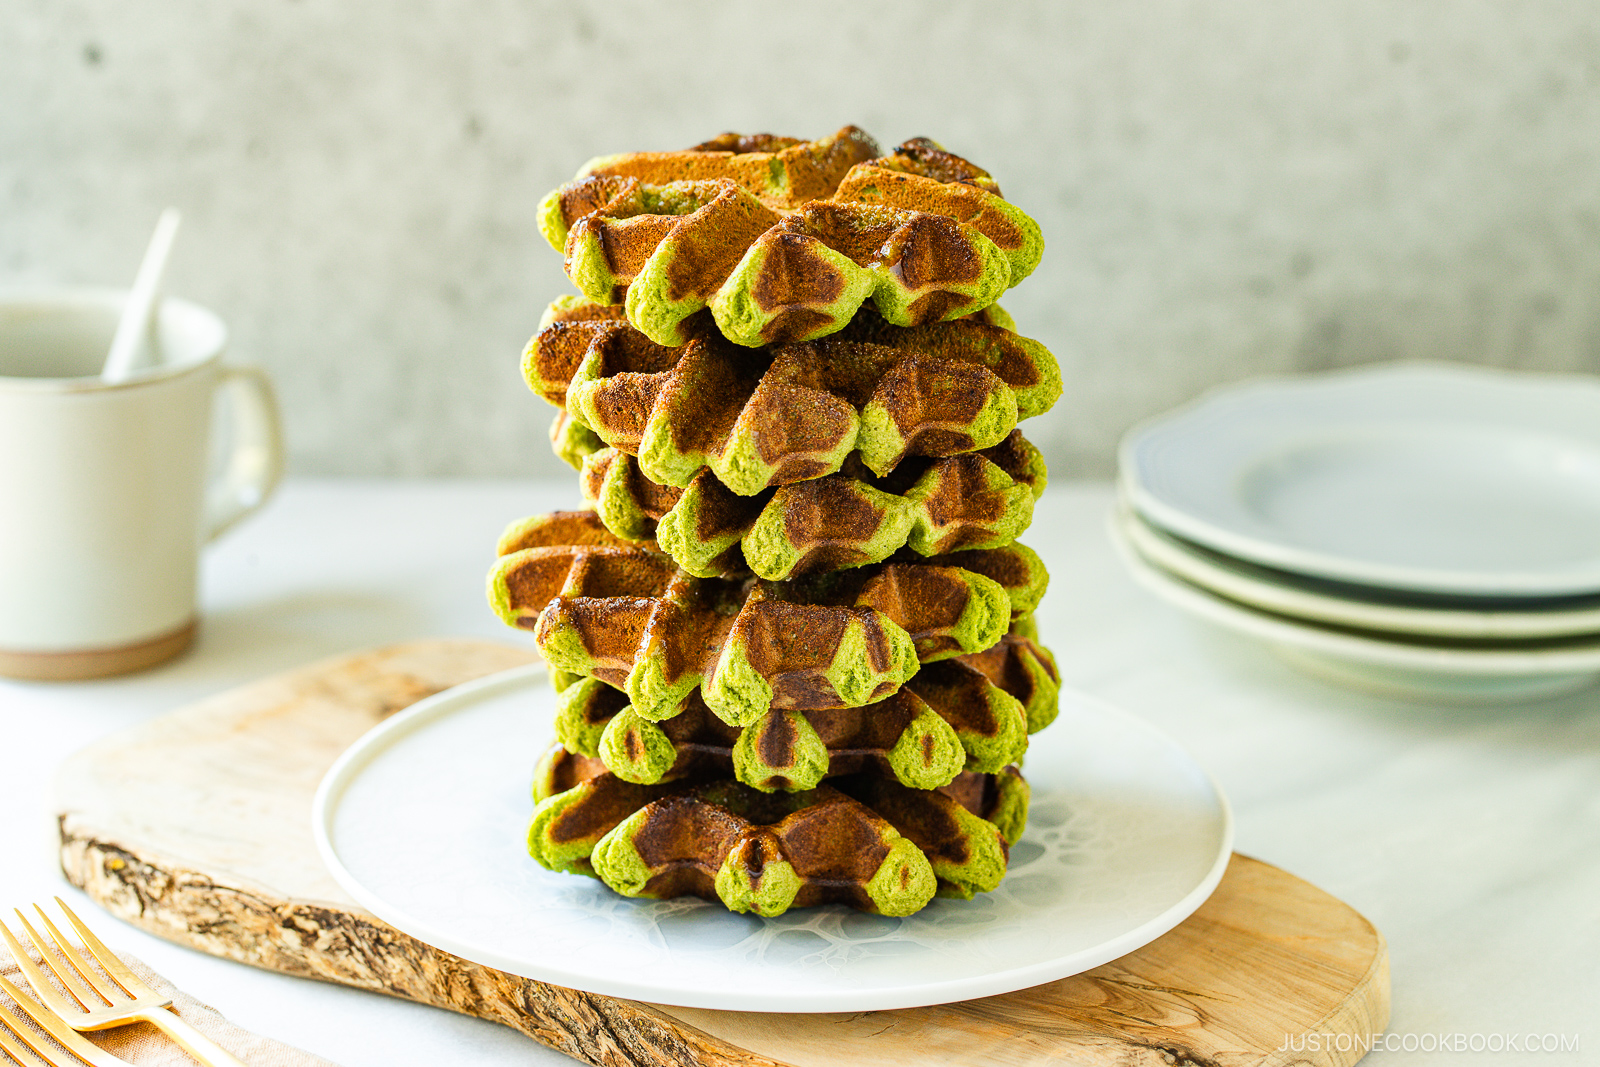
Mochi waffles are a contemporary twist on classic Western waffles, made with glutinous rice flour (mochiko) instead of all-purpose flour. Cooked in a waffle maker, they develop a crispy crust with a chewy, bouncy interior.
They likely began in Hawaii and the U.S., where mochiko is commonly used in baked goods. From there, mochi waffles spread to cafés around the world, celebrated for their irresistible chewy-and-crispy texture.

Why I Love This Recipe
- Chewy, mochi-mochi texture – Glutinous rice flour called mochiko delivers the signature chew and bounce that I love.
- Crispy crust – Cooked to a golden brown with spots of caramelized sugar, the waffle’s crisp exterior pairs perfectly with its chewy interior.
- Gluten free – There’s no all-purpose flour in the batter, making these pastries a versatile option for your breakfast or brunch spread.
- Freezer-friendly – Let the waffles cool completely, then freeze them while fresh. When reheated in a toaster, they taste just like newly made!
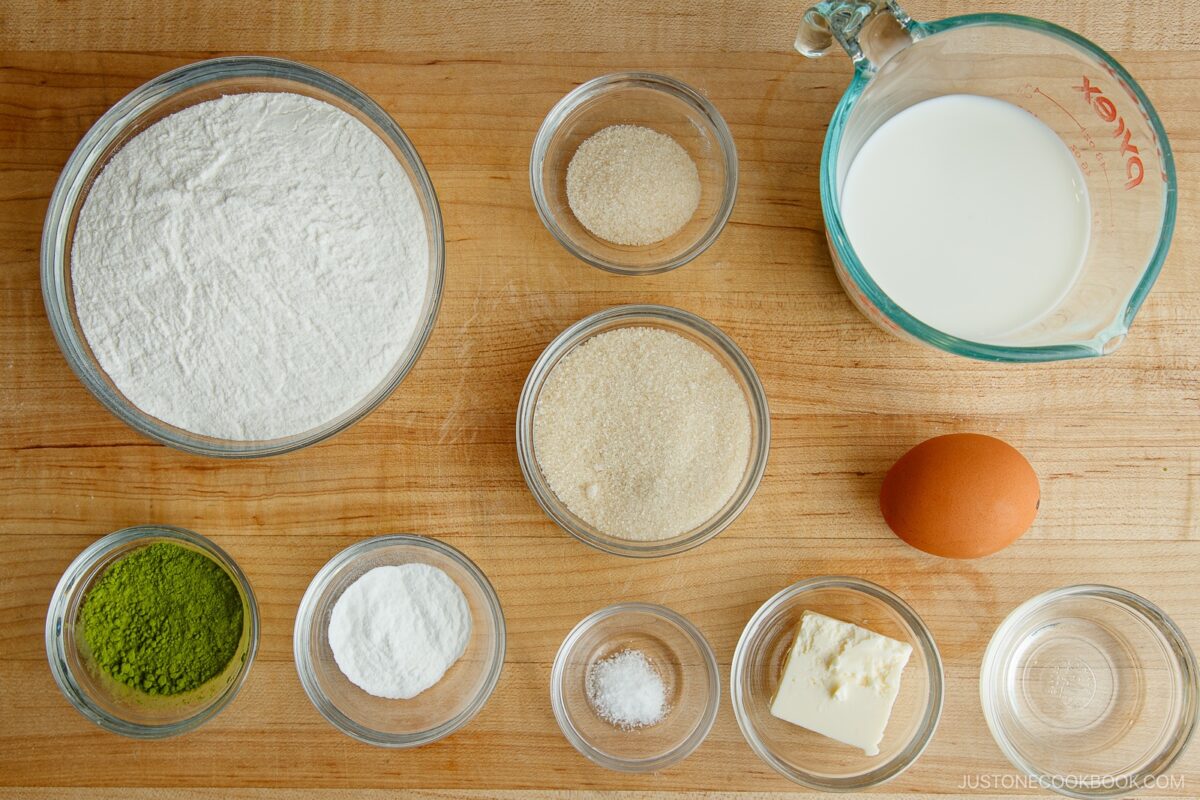
Ingredients for Matcha Mochi Waffles
- matcha (green tea powder)
- mochiko (glutinous rice flour/sweet rice flour)
- baking powder
- large egg
- sugar
- unsalted butter
- whole milk – or substitute plant-based milk
- salt
- for cooking
- neutral oil
- sugar for a caramelized effect
Find the printable recipe with measurements below.
Jump to RecipeKey Equipment
- waffle maker
How to Make Matcha Mochi Waffles
Batter
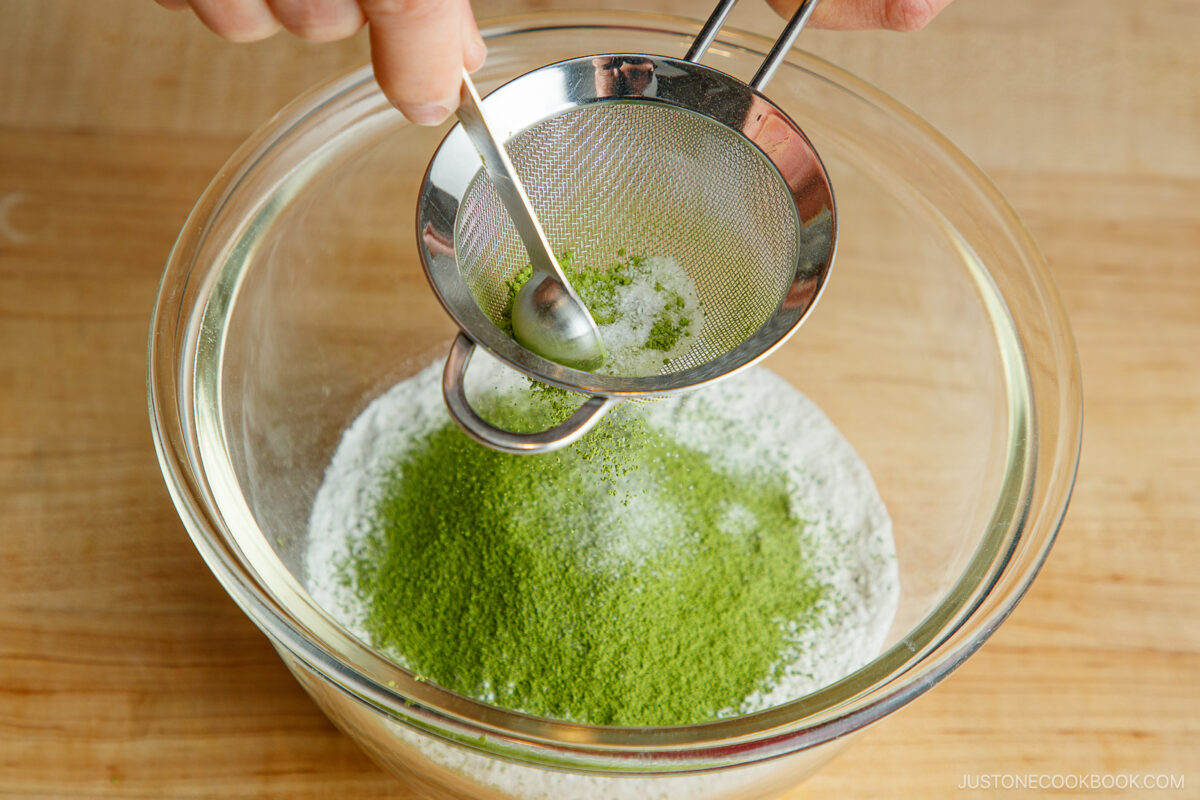
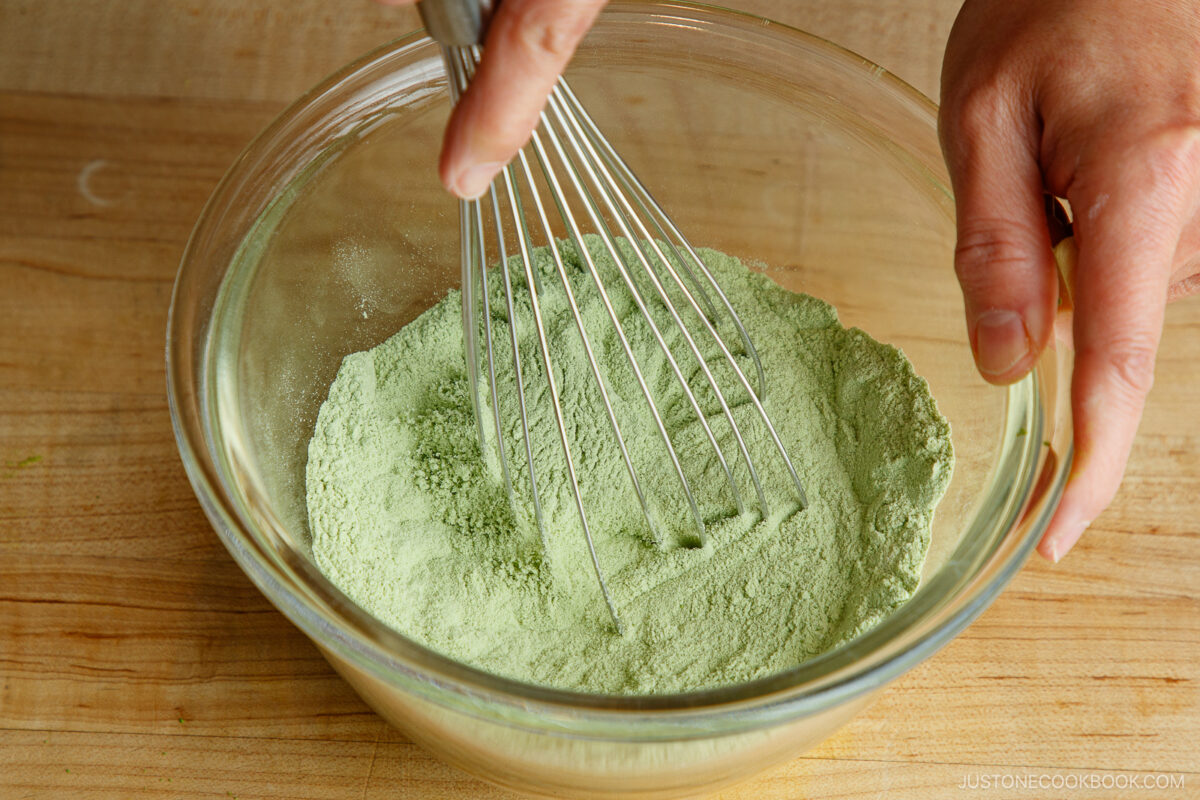
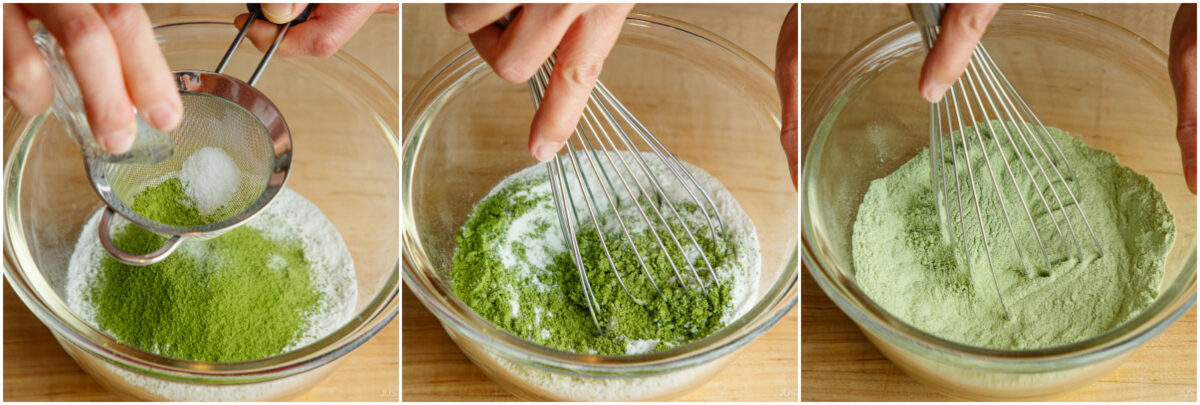
- Mix the dry ingredients. Sift the matcha powder, salt, and baking powder into the mochiko flour and whisk until combined.
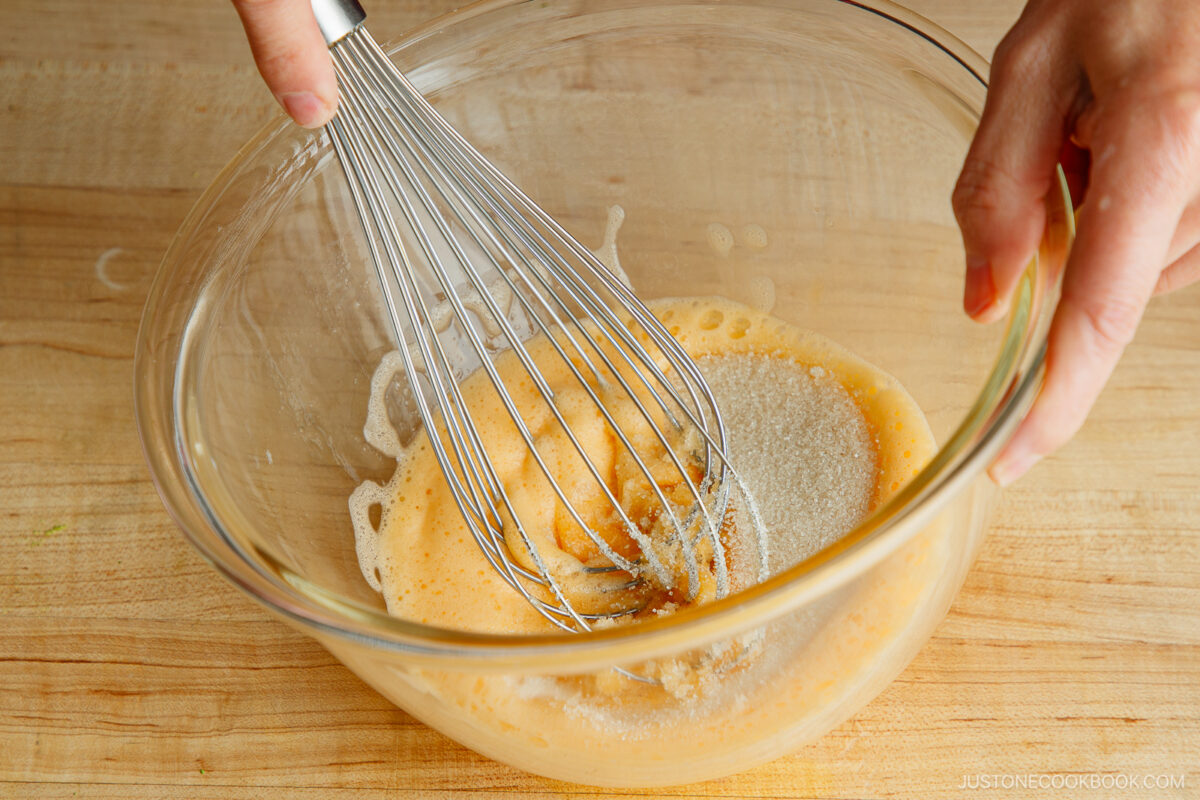
- Whisk the wet ingredients. Beat egg in a mixing bowl until pale. Whisk in sugar until thick and fluffy. Add melted butter and milk and mix until well incorporated.
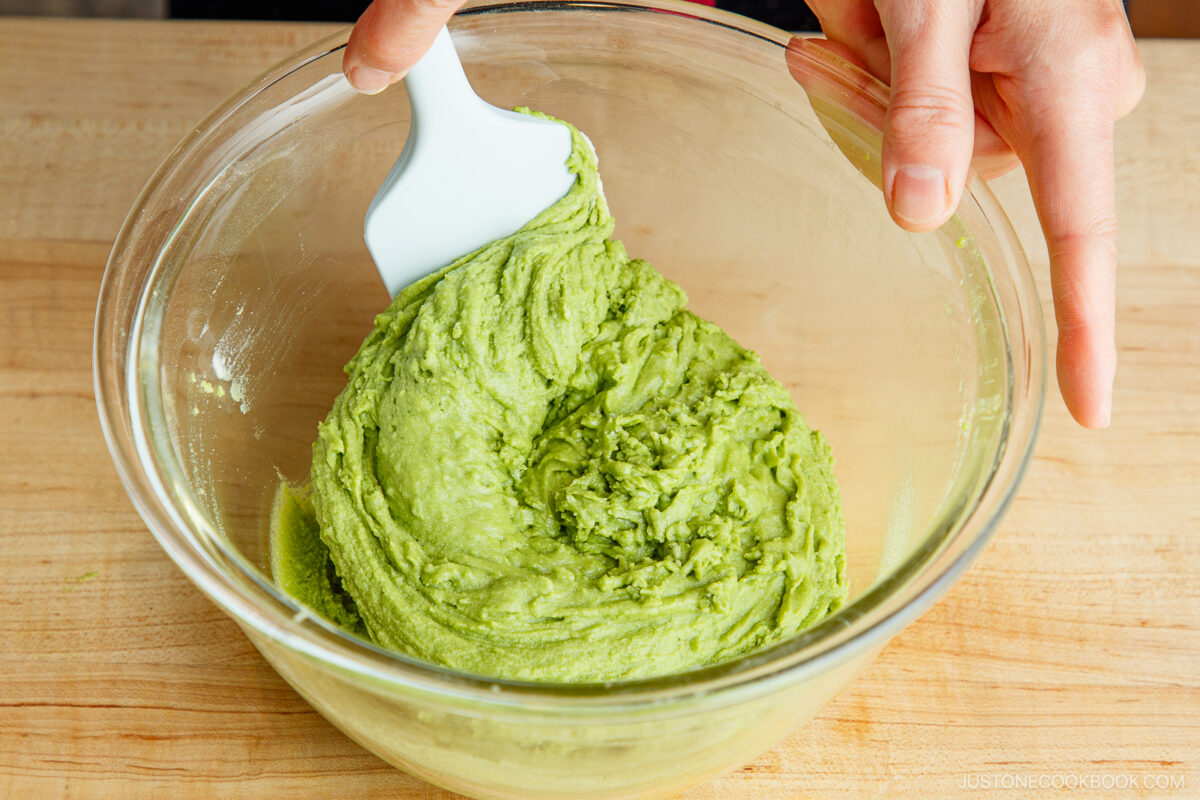
- Combine the batter. Add the wet ingredients to the dry mixture in two additions, scraping the bottom of the bowl so no dry spots remain. Fold with a spatula until smooth.
Cooking
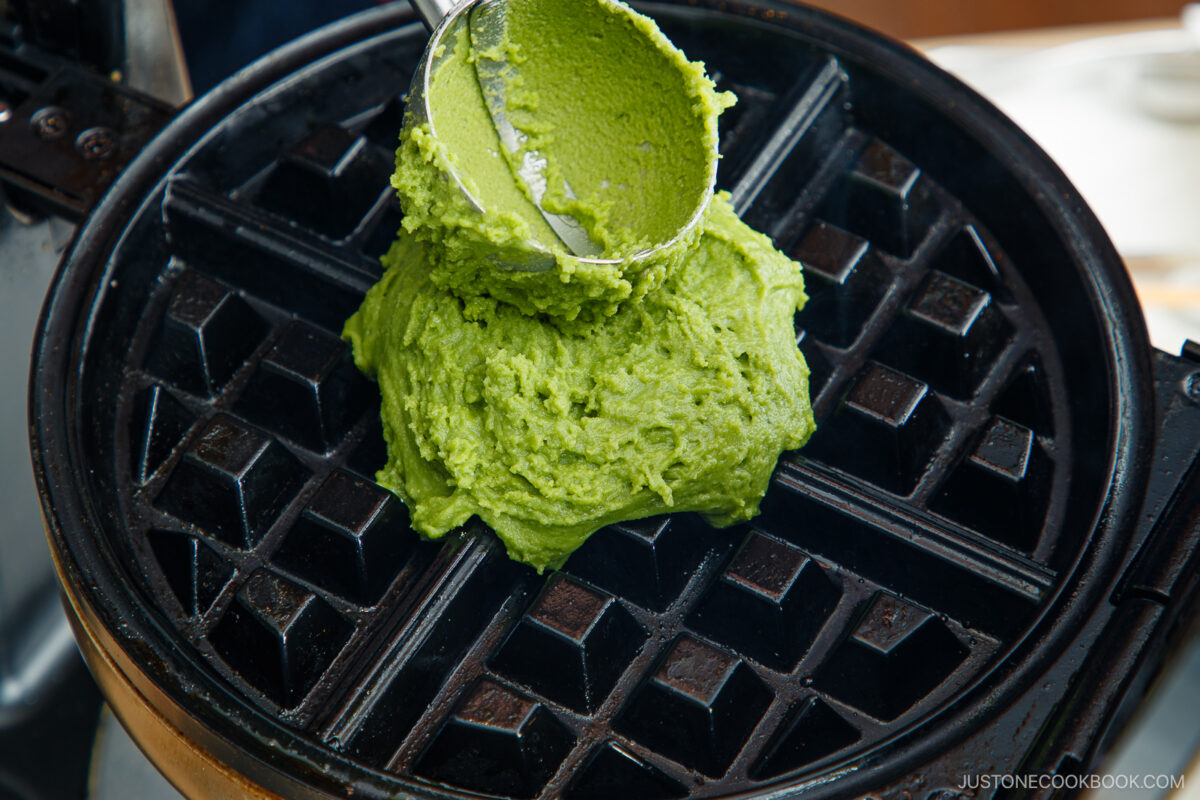
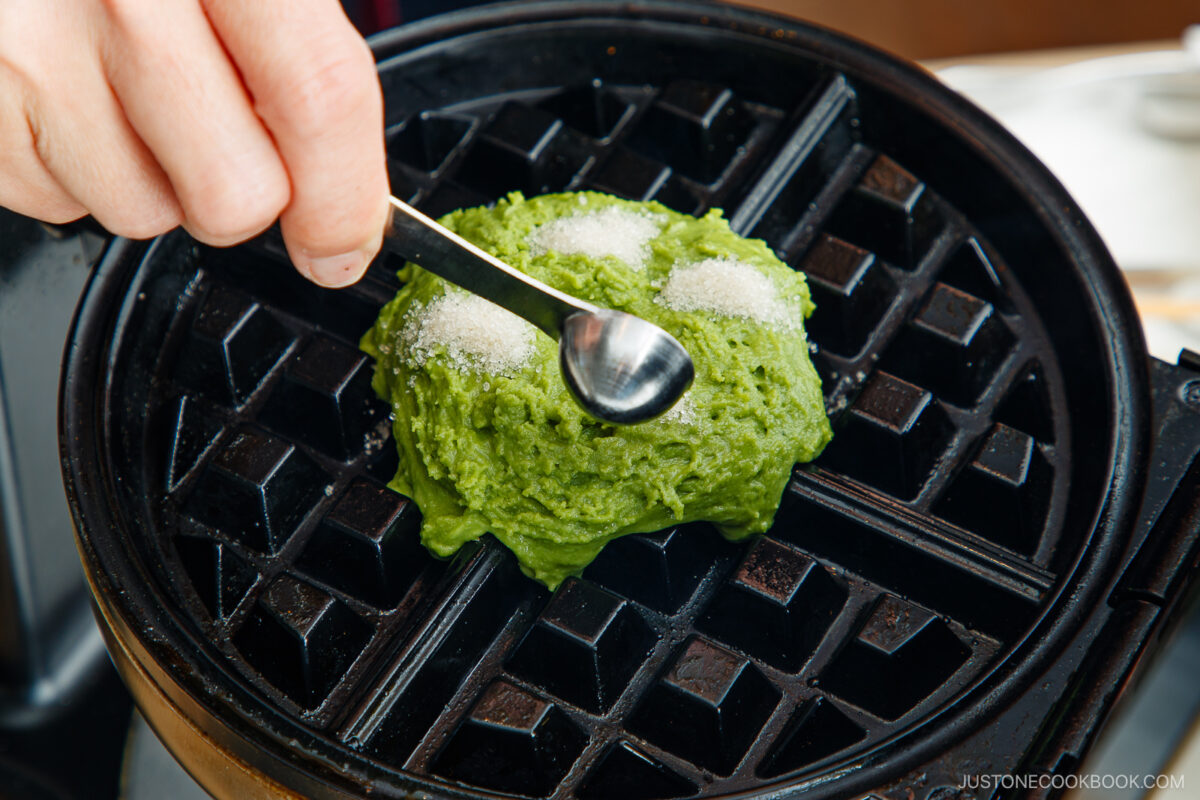
- Grease and scoop. Thinly coat the preheated waffle maker with oil. Add a scoop of batter and press down to flatten the thick batter. Place four small piles of sugar around the batter to create caramelized spots.
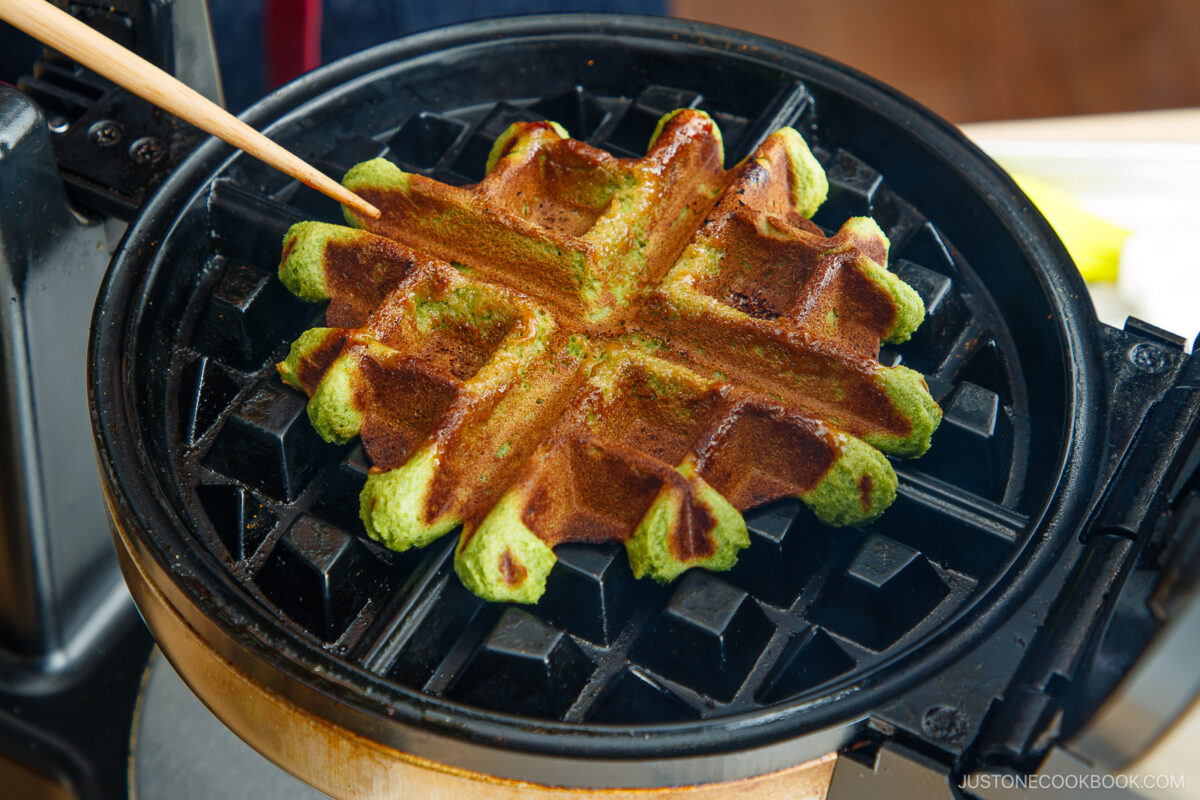
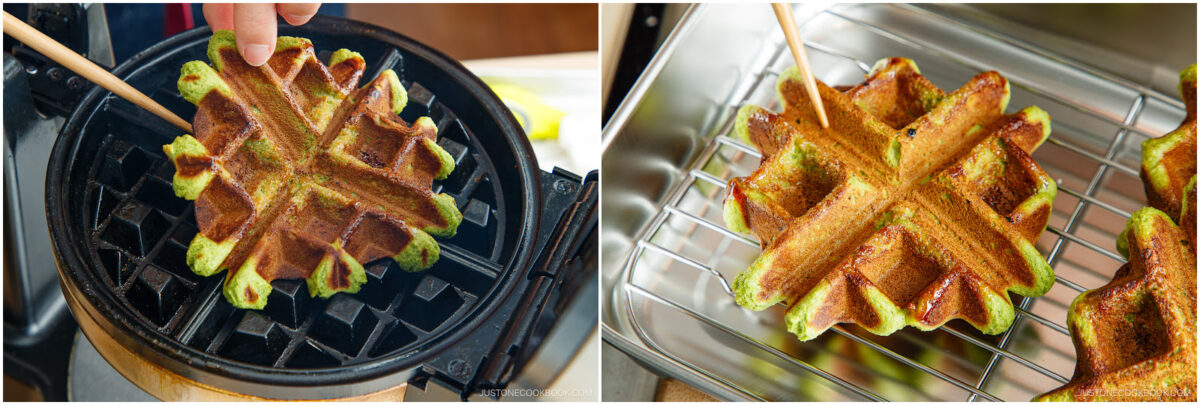
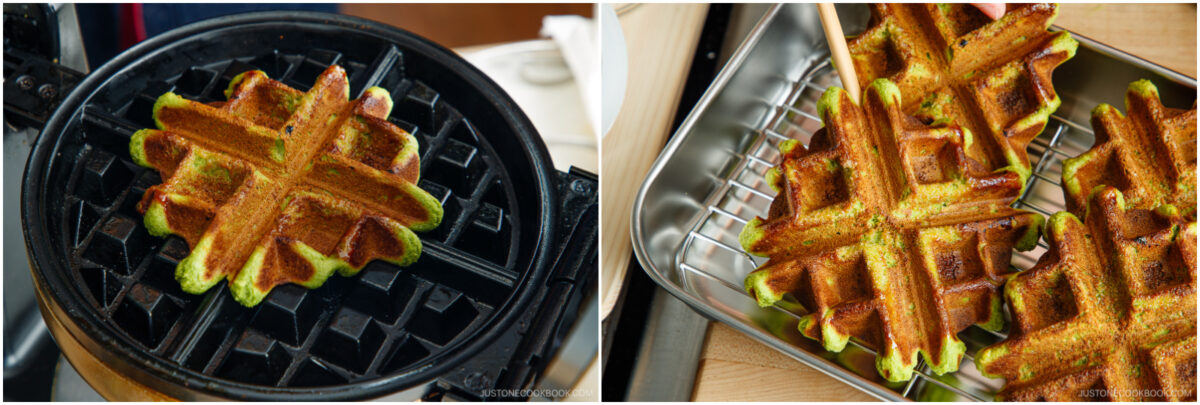
- Cook and serve. Cook to a golden brown, about 3 minutes. Serve with syrup, whipped cream, sweet red bean paste, or caramel topping.
Nami’s Recipe Tips
- Sift the matcha powder – superfine matcha powder clumps, so I highly recommend sifting it into the mochiko with a fine-mesh sifter or tea strainer.
- Beat the eggs and sugar well – You’re done mixing when it’s fluffy and thick.
- Slowly drizzle in butter and milk – This prevents curdling or separation, ensuring the batter stays smooth and uniform.
- Flatten the scooped batter – The batter is thick, so make a flat surface using the back of a spoon or ice cream scoop. This will prepare it to hold the tiny piles of sugar you’ll add next.
- Cluster the sugar – Pile the sugar in four places instead of scattering it evenly on the batter. You’ll love the sweet, browned, caramelized spots.
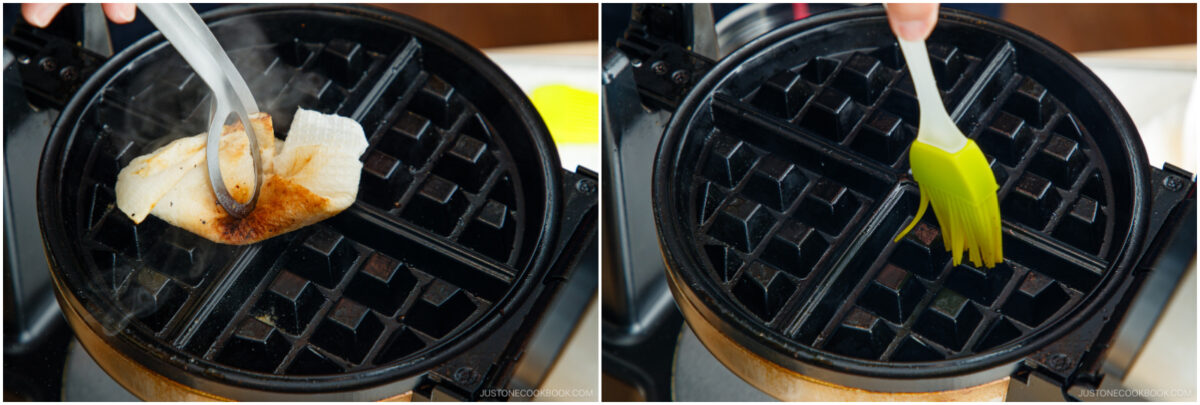
- Clean the waffle maker every time – Wipe off any crumbs or browned bits with a paper towel between waffles. Otherwise, the bits will burn and stick to the next waffle.
Variations and Customizations
- Skip the matcha. These chewy waffles are delicious with a splash of vanilla extract added to the batter.
- Add Belgian pearl sugar (and skip piling the sugar). Stir in a few tablespoons to create delicious caramelized spots in your waffles. For best results, mix it into the batter and let sit for 15 minutes before cooking.
- Top with sliced fruit. Try sliced strawberries or sliced bananas along with a dollop of whipped cream.
- Serve it cold. They are delicious even when cooled—the chewy texture improves!
What to Serve with Matcha Mochi Waffles
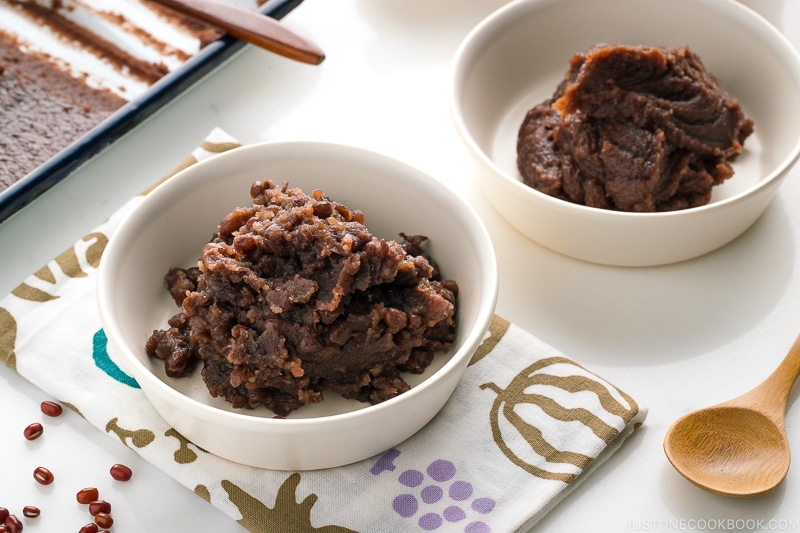
- Sweet red bean paste (anko) topping – Red bean with matcha is a classic flavor combo. Buy it premade or learn How To Make Anko from scratch.
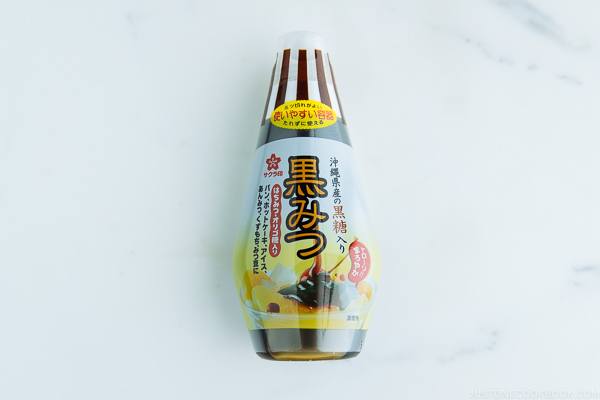
- Brown sugar syrup – Drizzle with mineral-rich Kuromitsu made with kurozato, an unrefined black sugar from Okinawa.
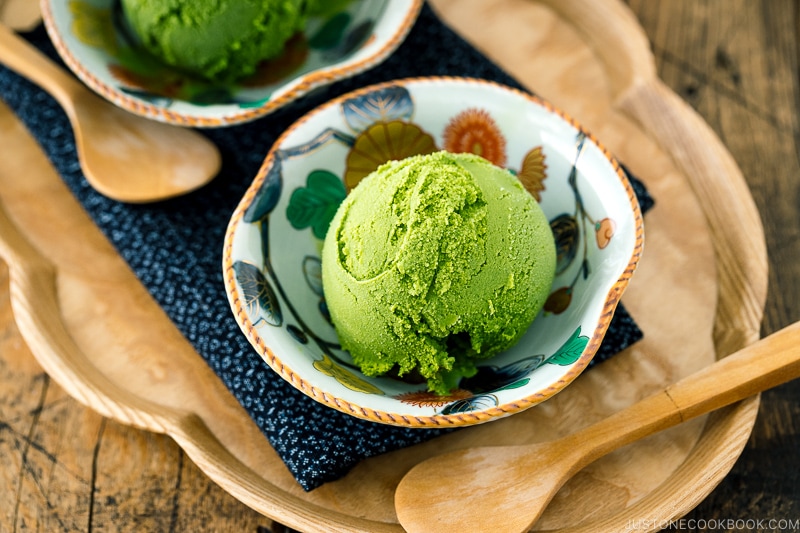
- Ice cream – Add a scoop of Matcha Ice Cream on top for a double dose of matcha goodness.
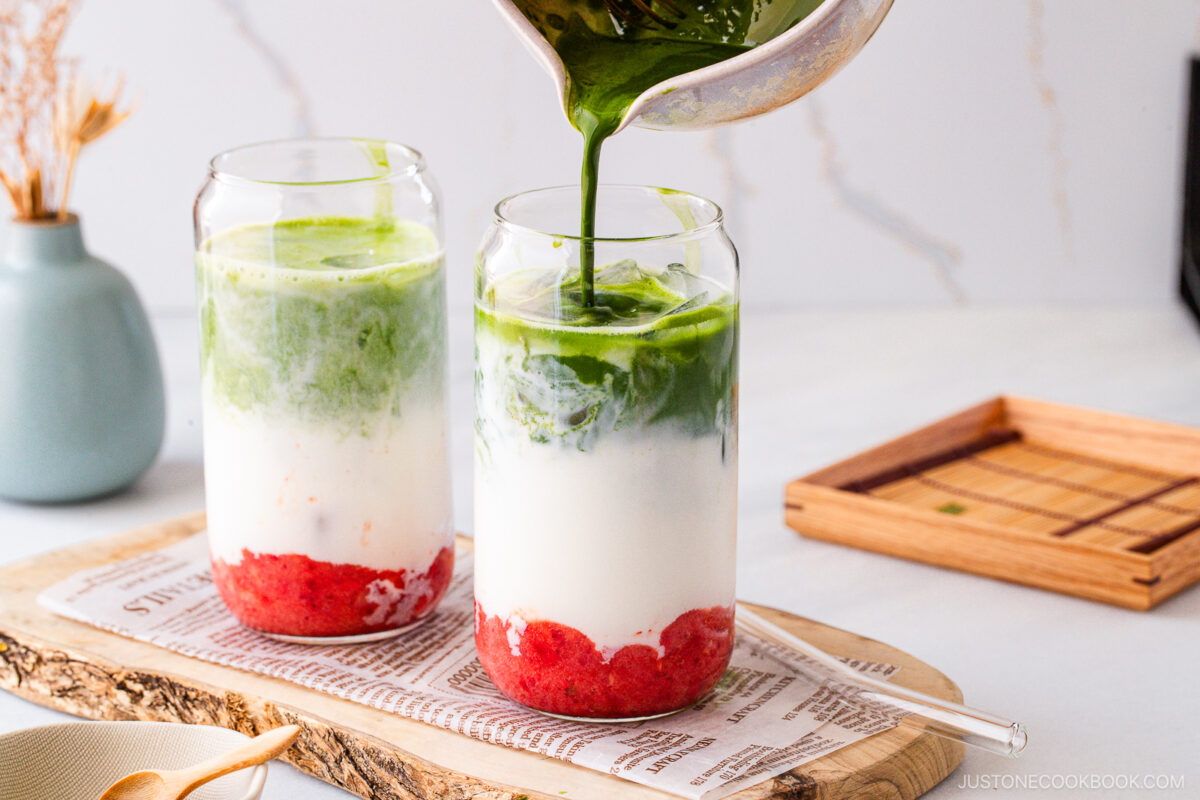
- Your favorite beverage – Pair it with a hot drink or an iced Strawberry Matcha Latte.
Storage and Reheating Tips
To store: Store in an airtight container for 2–3 days in the fridge. But I recommend freezing them while fresh! You can also wrap them individually, place in an airtight bag, and keep in the freezer for up to 1 month.
To reheat: Warm briefly in a toaster oven for a crispy finish.
Frequently Asked Questions
Yes. You can use oat milk or almond milk.
One batch of this recipe makes 6 medium waffles, but you can also make 8 small waffles or 4 large ones.
You can use nonstick cooking spray if you wish. Be sure to choose one with a neutral flavor.
Matcha Mochi Waffles
Equipment
Ingredients
- 2 Tbsp unsalted butter
- 1 Tbsp matcha (ceremoial or culinary grade)
- 1½ cups mochiko (glutinous rice flour/sweet rice flour) (do not substitute with shiratamako)
- 1½ tsp baking powder
- ¼ tsp Diamond Crystal kosher salt
- 1 large egg (50 g each w/o shell)
- ⅓ cup sugar
- ¾ cup whole milk (or substitute oat or almond milk)
For Cooking
- 1 Tbsp neutral oil (for greasing the waffle maker)
- 1 Tbsp sugar (¼–½ tsp per waffle, to taste, for a caramelized effect)
Instructions
- Gather all the ingredients. Preheat the waffle maker while you prepare the waffle batter.
To Make the Batter
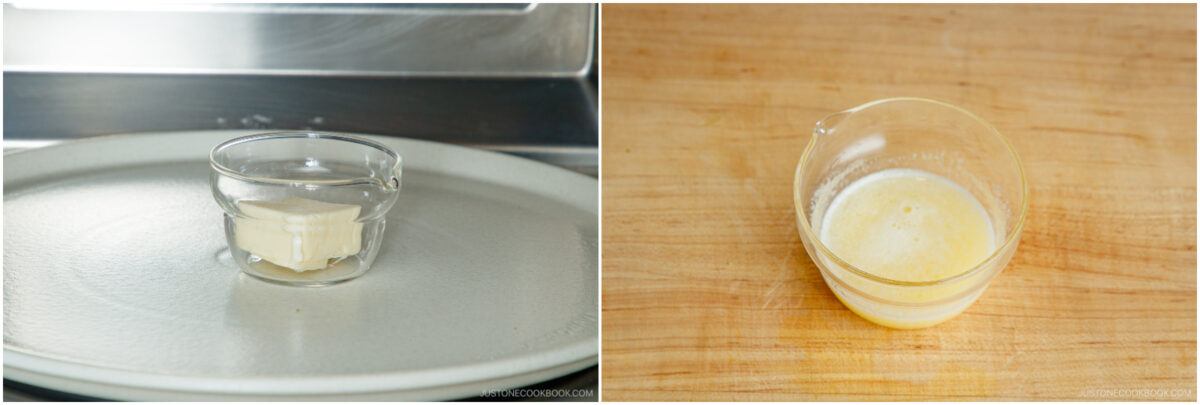
- Gently melt 2 Tbsp unsalted butter in a heat-proof bowl in the microwave and set aside. Do not overheat.
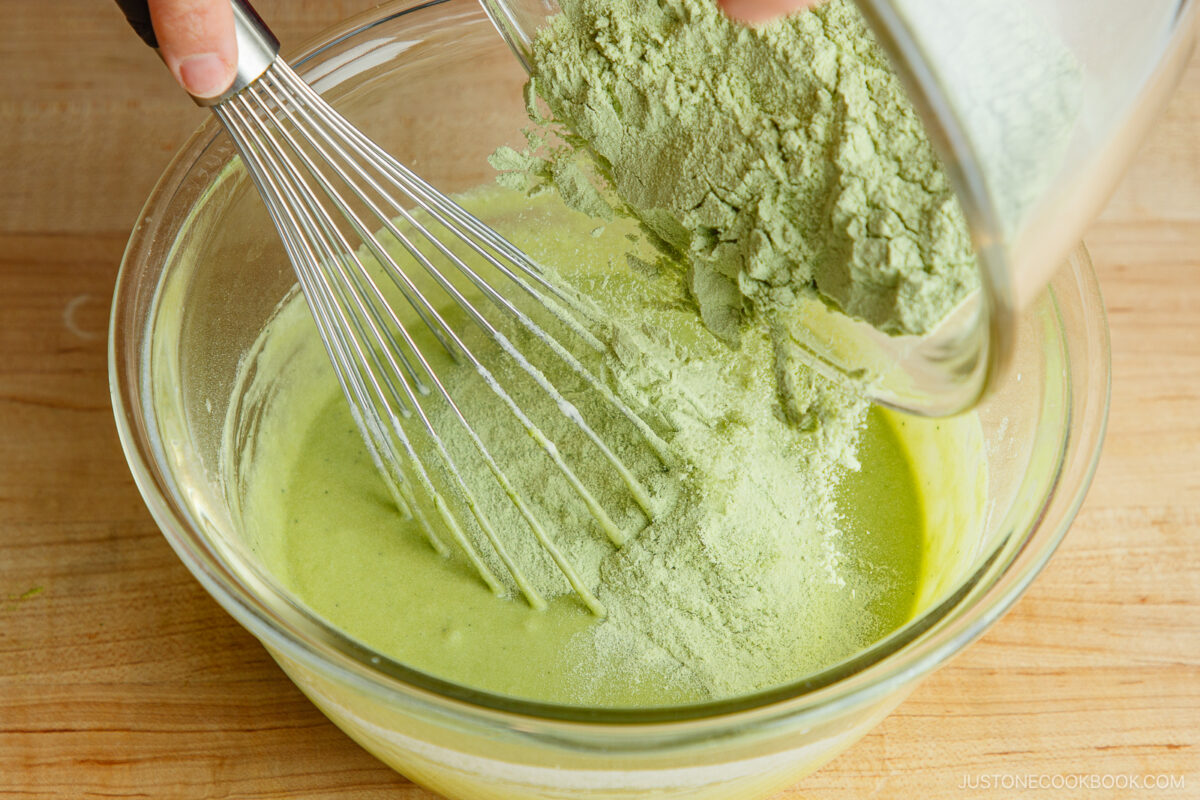
- Place 1½ cups mochiko (glutinous rice flour/sweet rice flour) in a mixing bowl. Sift in 1 Tbsp matcha (ceremoial or culinary grade) and 1½ tsp baking powder using a fine-mesh strainer to prevent clumps; a tea strainer works well here.
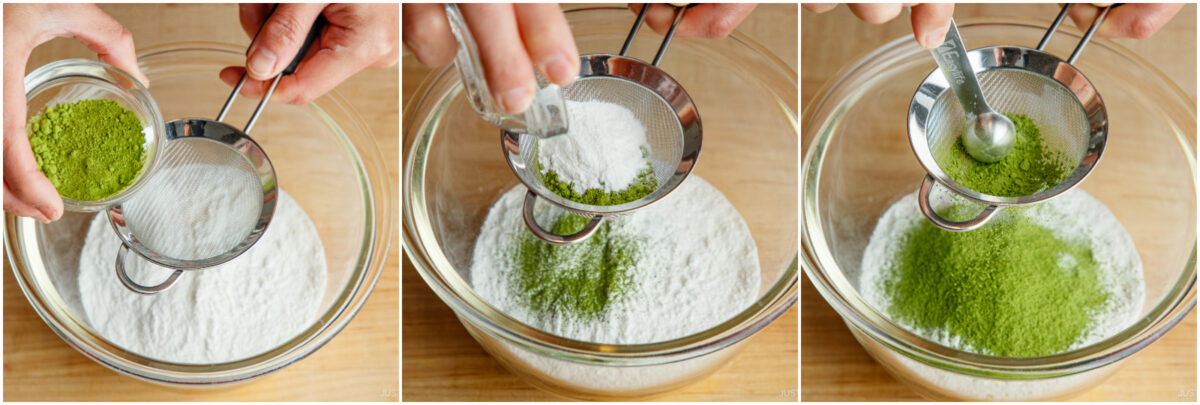
- Sift in ¼ tsp Diamond Crystal kosher salt. Whisk all the dry ingredients together using a hand whisk.
- In a separate large bowl, beat 1 large egg (50 g each w/o shell) until pale and frothy. Nami's Tip: I whisked it by hand, but you could use a stand mixer or electric hand mixer.
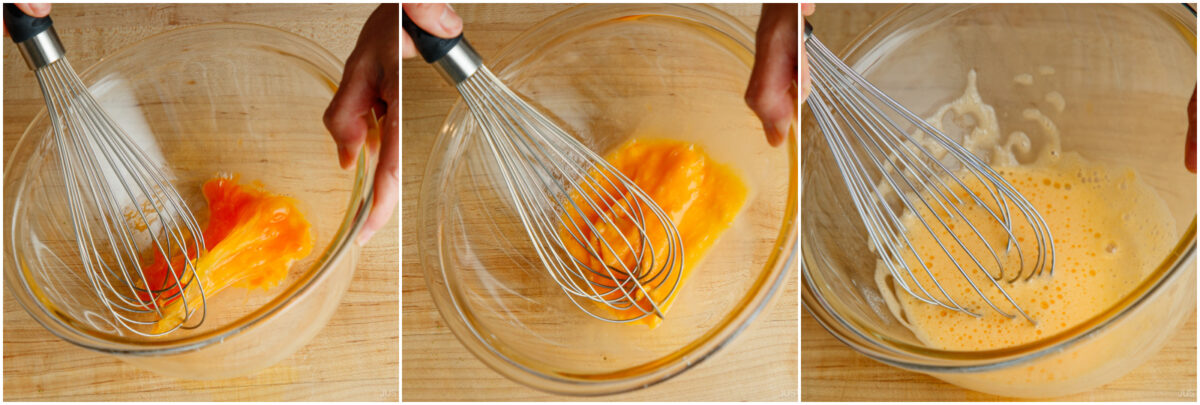
- Add ⅓ cup sugar and whisk vigorously until the mixture is pale, thick, and creamy. Nami's Tip: It will pass through stages: foamy (bubbly with large air bubbles), lightened (paler yellow with a smooth texture and fine bubbles), and finally ribbon stage (pale, thick, and creamy).

- At the ribbon stage, the mixture should nearly double in volume and fall back in ribbons when lifted.
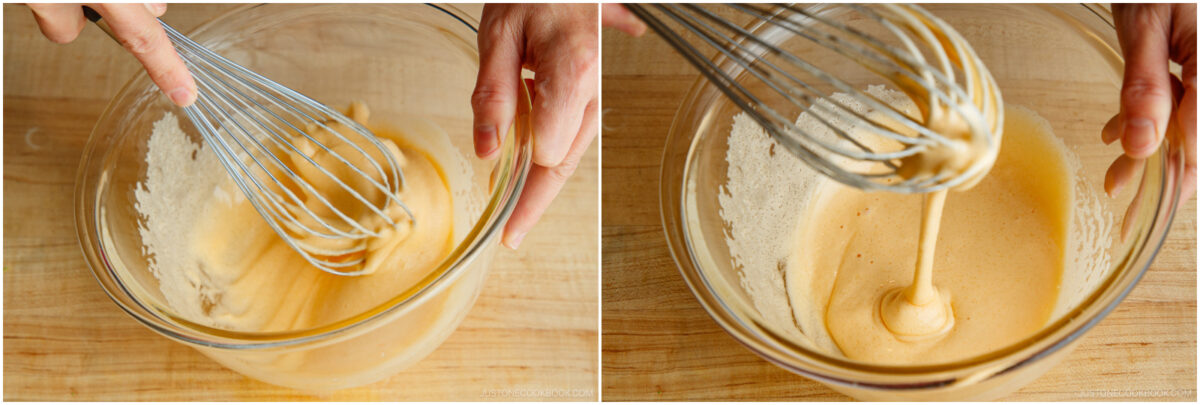
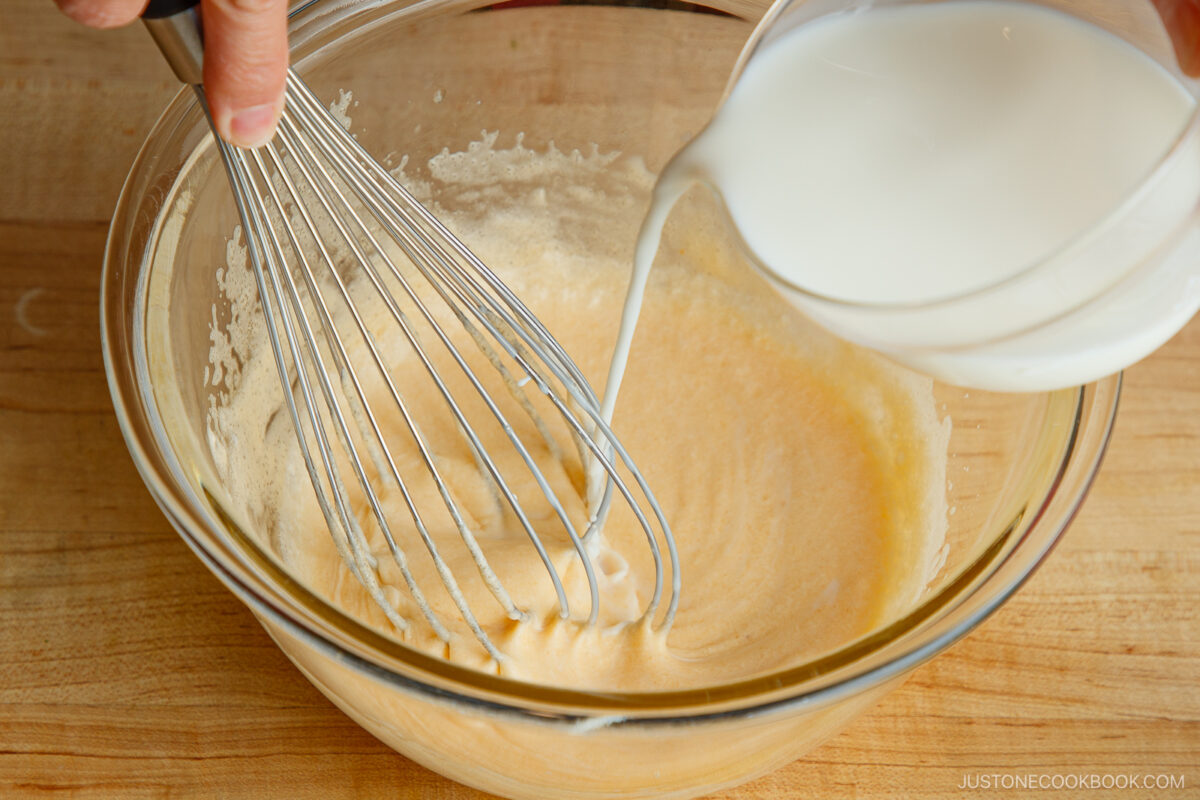
- Slowly drizzle in the melted butter, whisking constantly, until fully incorporated.
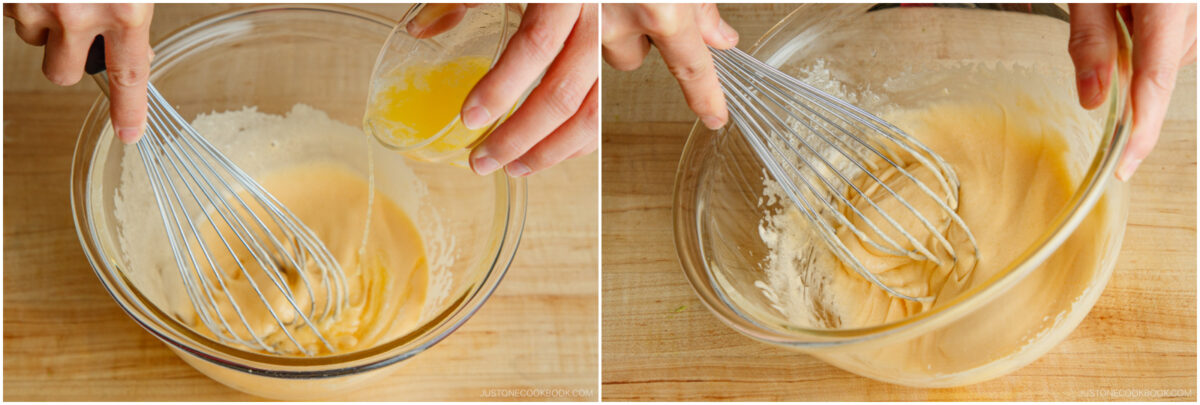
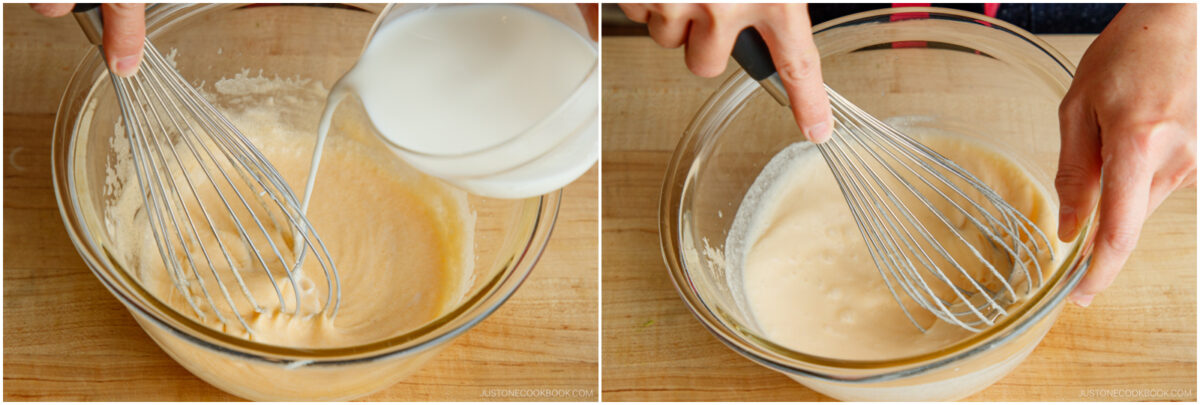
- Gradually add ¾ cup whole milk, stirring gently between additions, until the batter is smooth and even. Nami's Tip: This prevents curdling or separation, ensuring the batter stays smooth and uniform.
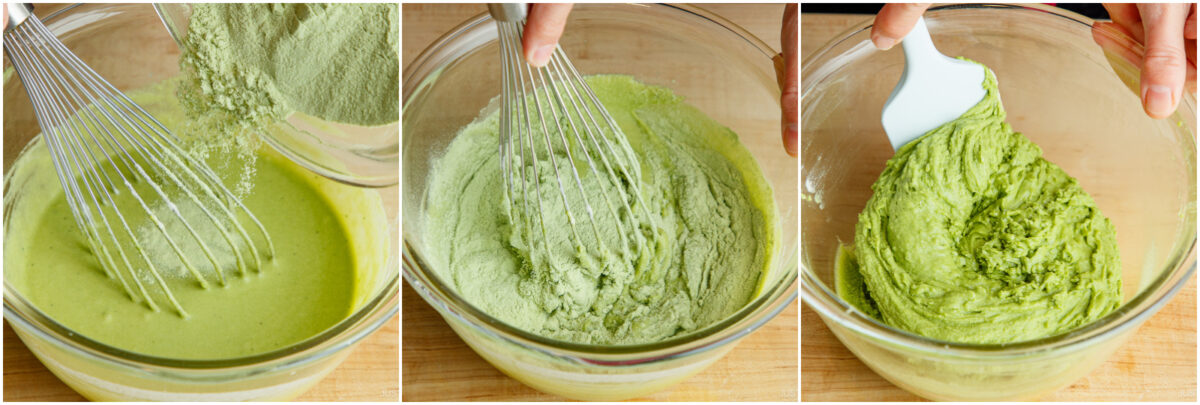
- Add half of the dry mixture into the wet ingredients, whisking from the bottom to incorporate without leaving any dry spots.
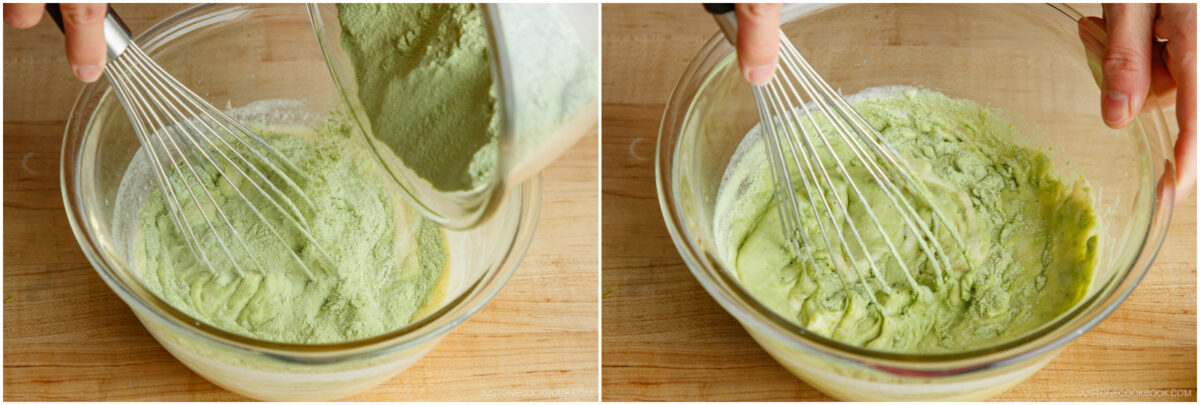
- Repeat with the remaining dry mixture, then fold with a spatula until smooth.
To Cook the Waffles
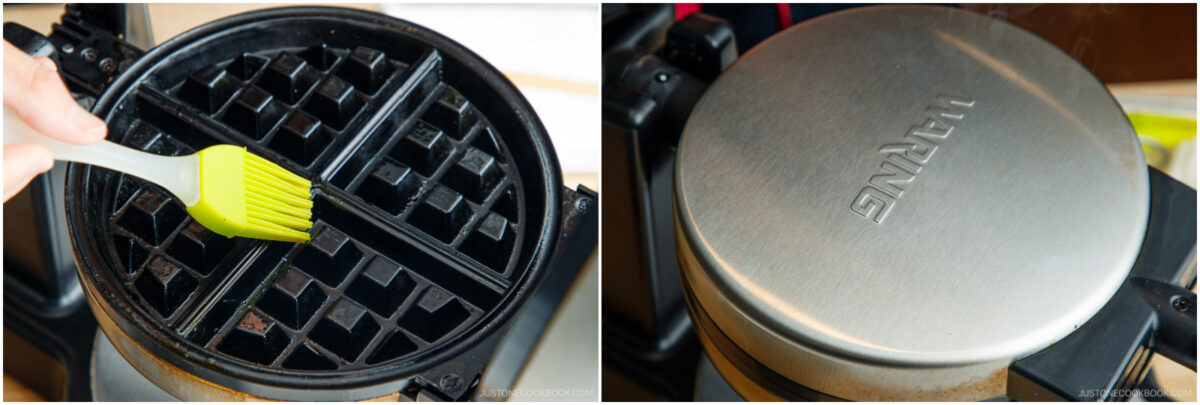
- Brush a thin layer of neutral oil on the preheated waffle maker, greasing all the crevices.
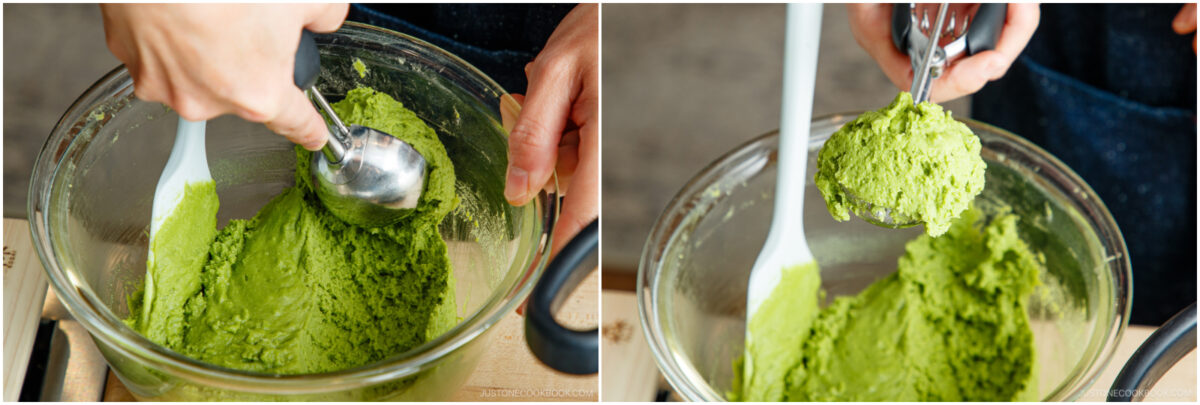
- Using an ice cream scoop, add one portion of batter to the center of the hot waffle maker. Press down slightly with the bottom of the scoop to flatten the thick batter. The batter won't fill the entire surface. Nami's Tip: This recipe makes 6 medium waffles; adjust to 4 large or 8 small as needed.
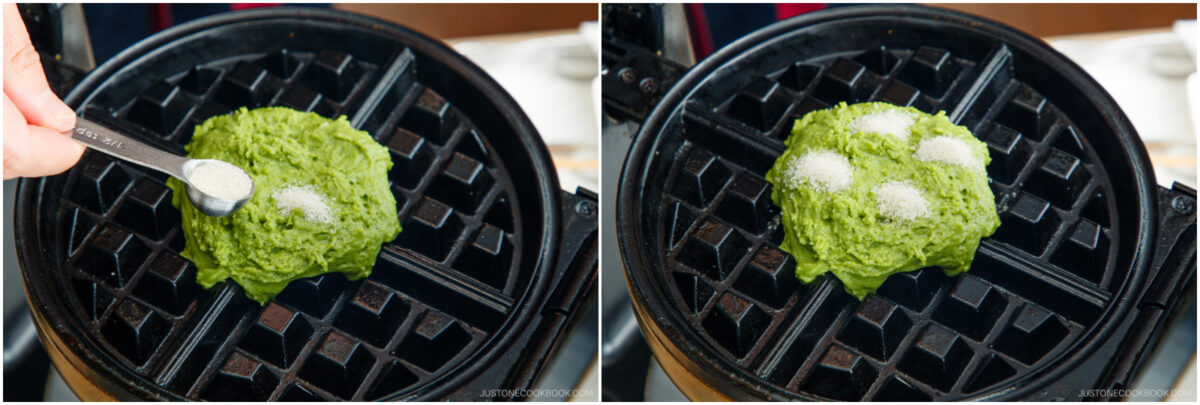
- With ¼–½ tsp sugar, drop tiny piles of sugar in four spots around the batter, avoiding the center. Nami's Tip: Placing sugar in small clusters rather than sprinkling evenly creates caramelized spots.
- Cook for about 3 minutes (total) until golden brown, following your waffle maker’s instructions (I used level 5.5 on my waffle maker).
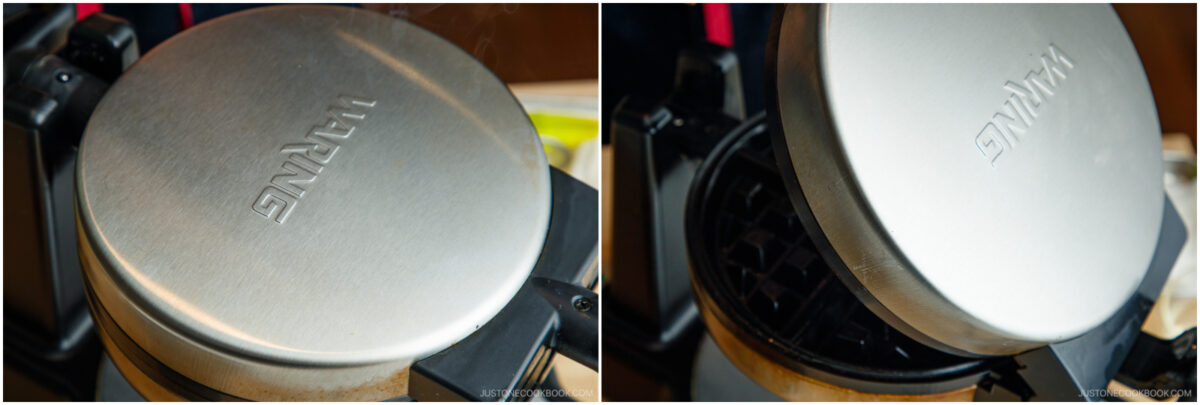
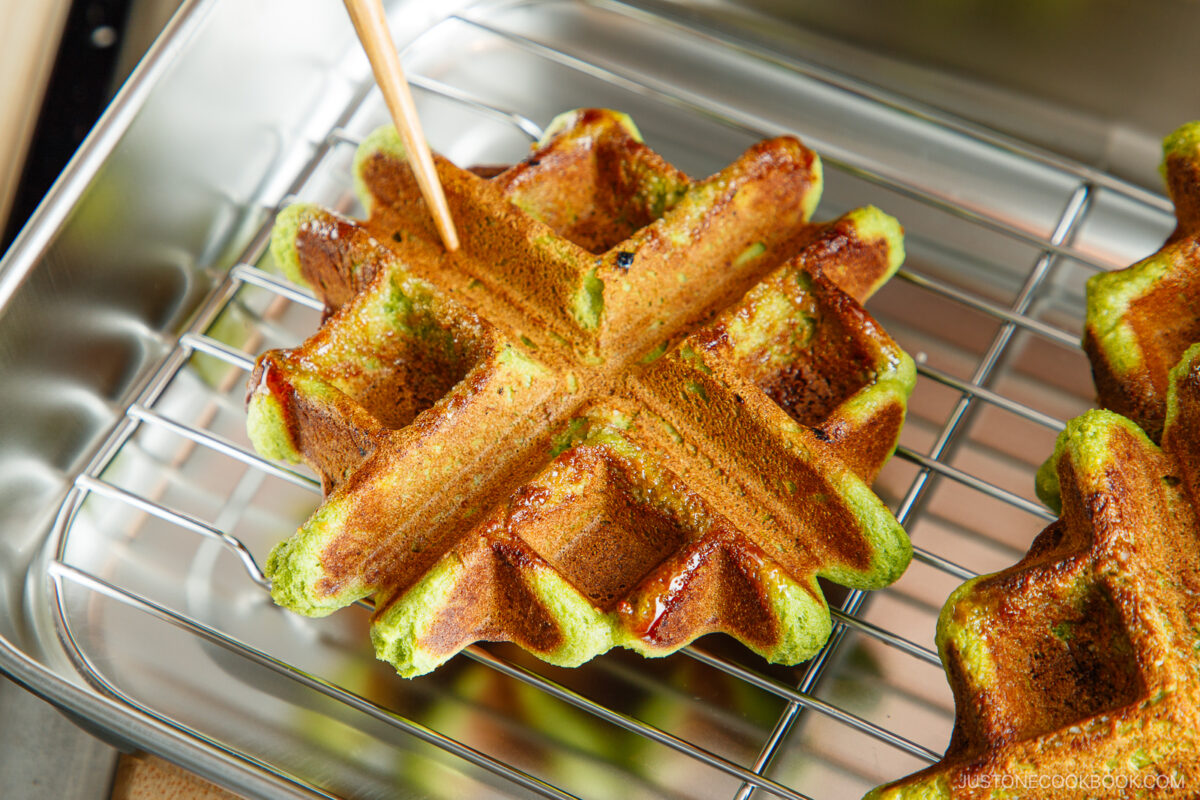
- Transfer to a plate or tray.
- Clean the waffle maker with a paper towel, lightly grease, and preheat.
- Continue with the remaining batter.
To Serve
- Serve warm with your favorite syrup, whipped cream, sweet red bean paste, or caramel topping. These waffles are delicious even when cooled—the chewy texture improves after cooling.

To Store
- Store in an airtight container for 2–3 days in the fridge. I recommend freezing them while fresh (Day 1)! To freeze, wrap individually, place in an airtight bag, and keep up to 1 month in the freezer. To reheat, warm briefly in a toaster oven for a crispy finish.
Nutrition
Did you make this recipe?
Tag @justonecookbook on Instagram so we can see your delicious creation!