
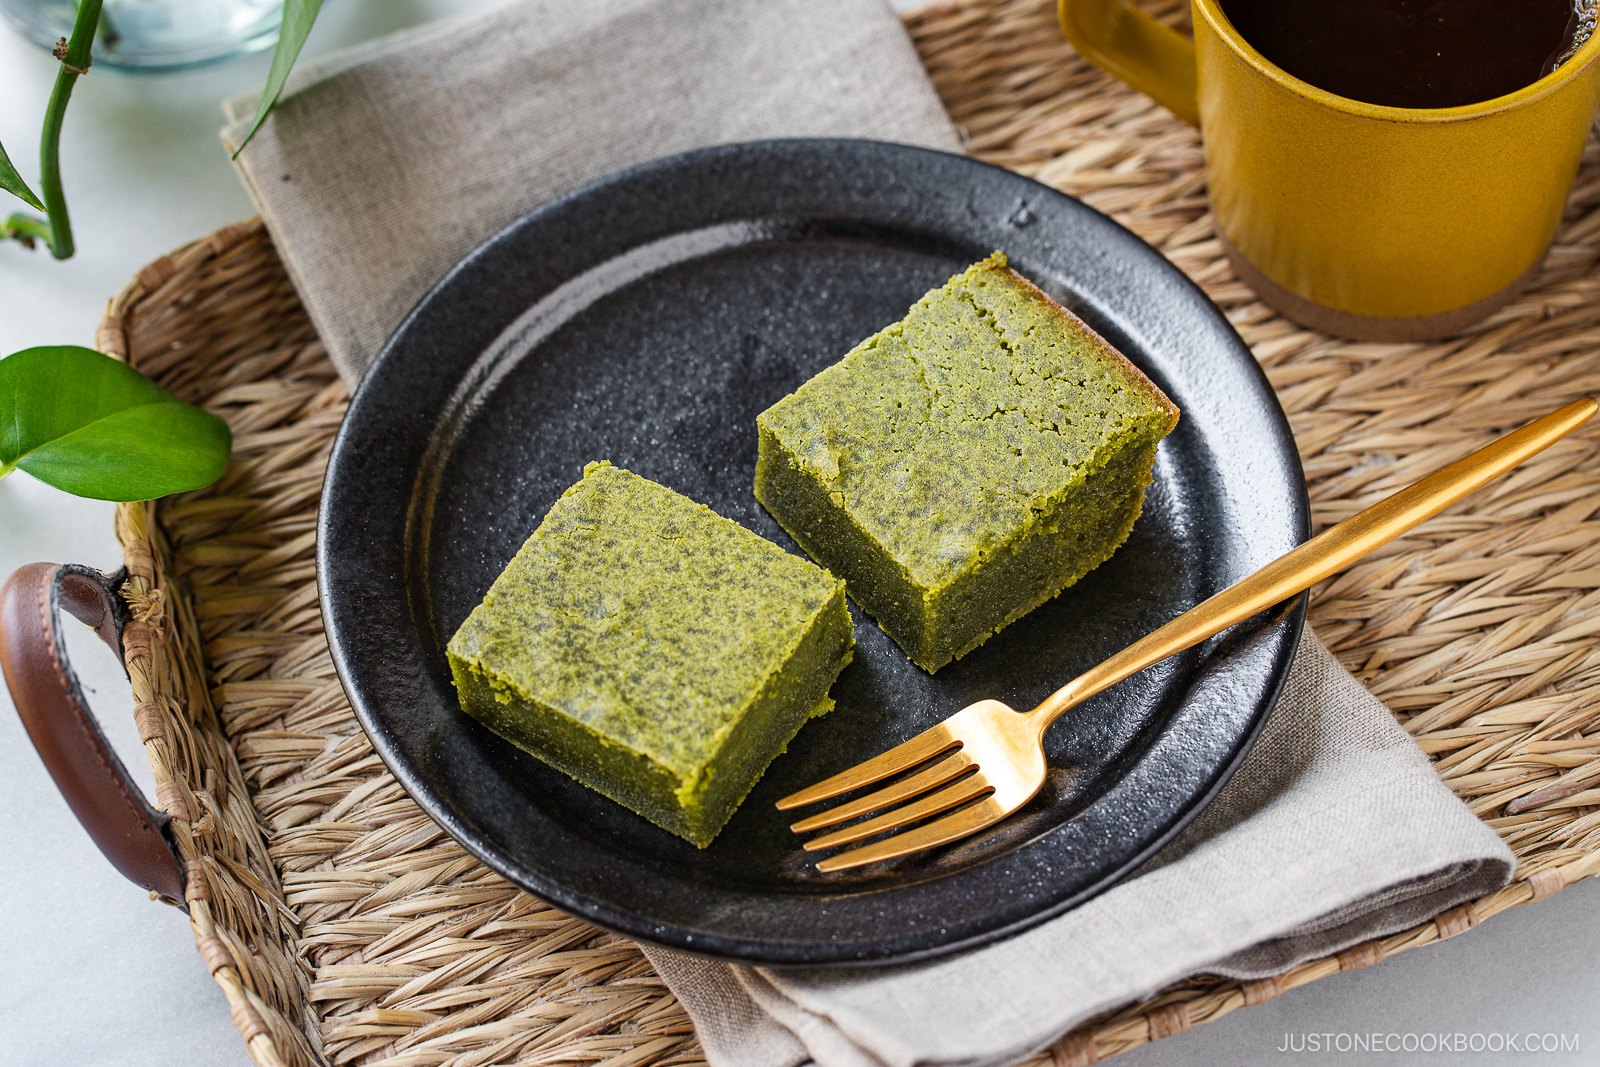
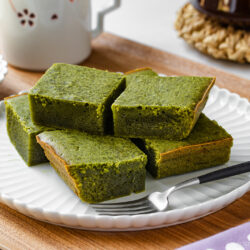
Butter mochi is a popular Hawaiian dessert that my own family loves, too. Since they’re fans of green tea powder, I decided to add this Japanese flair in my easy Matcha Butter Mochi recipe. Baked in one pan with a batter of mochiko (glutinous rice flour) and coconut milk, it has a subtle flavor and alluring aroma that everyone will love.
If you love matcha recipes, try my Matcha Cookies, Matcha Marble Pound Cake, and Matcha Ice Cream next!

What is Matcha Butter Mochi?
Butter mochi is a Hawaiian sweet cake made with mochiko (glutinous rice flour), butter, and coconut milk. In matcha butter mochi, we flavor it with Japanese green tea powder instead of vanilla extract. This unique Hawaiian dessert is part Japanese mochi and part tropical coconut custard cake that may have influences from the Filipino cake bibingka and Japanese chichi dango (乳団子) originally from Hiroshima.

Why I Love This Recipe
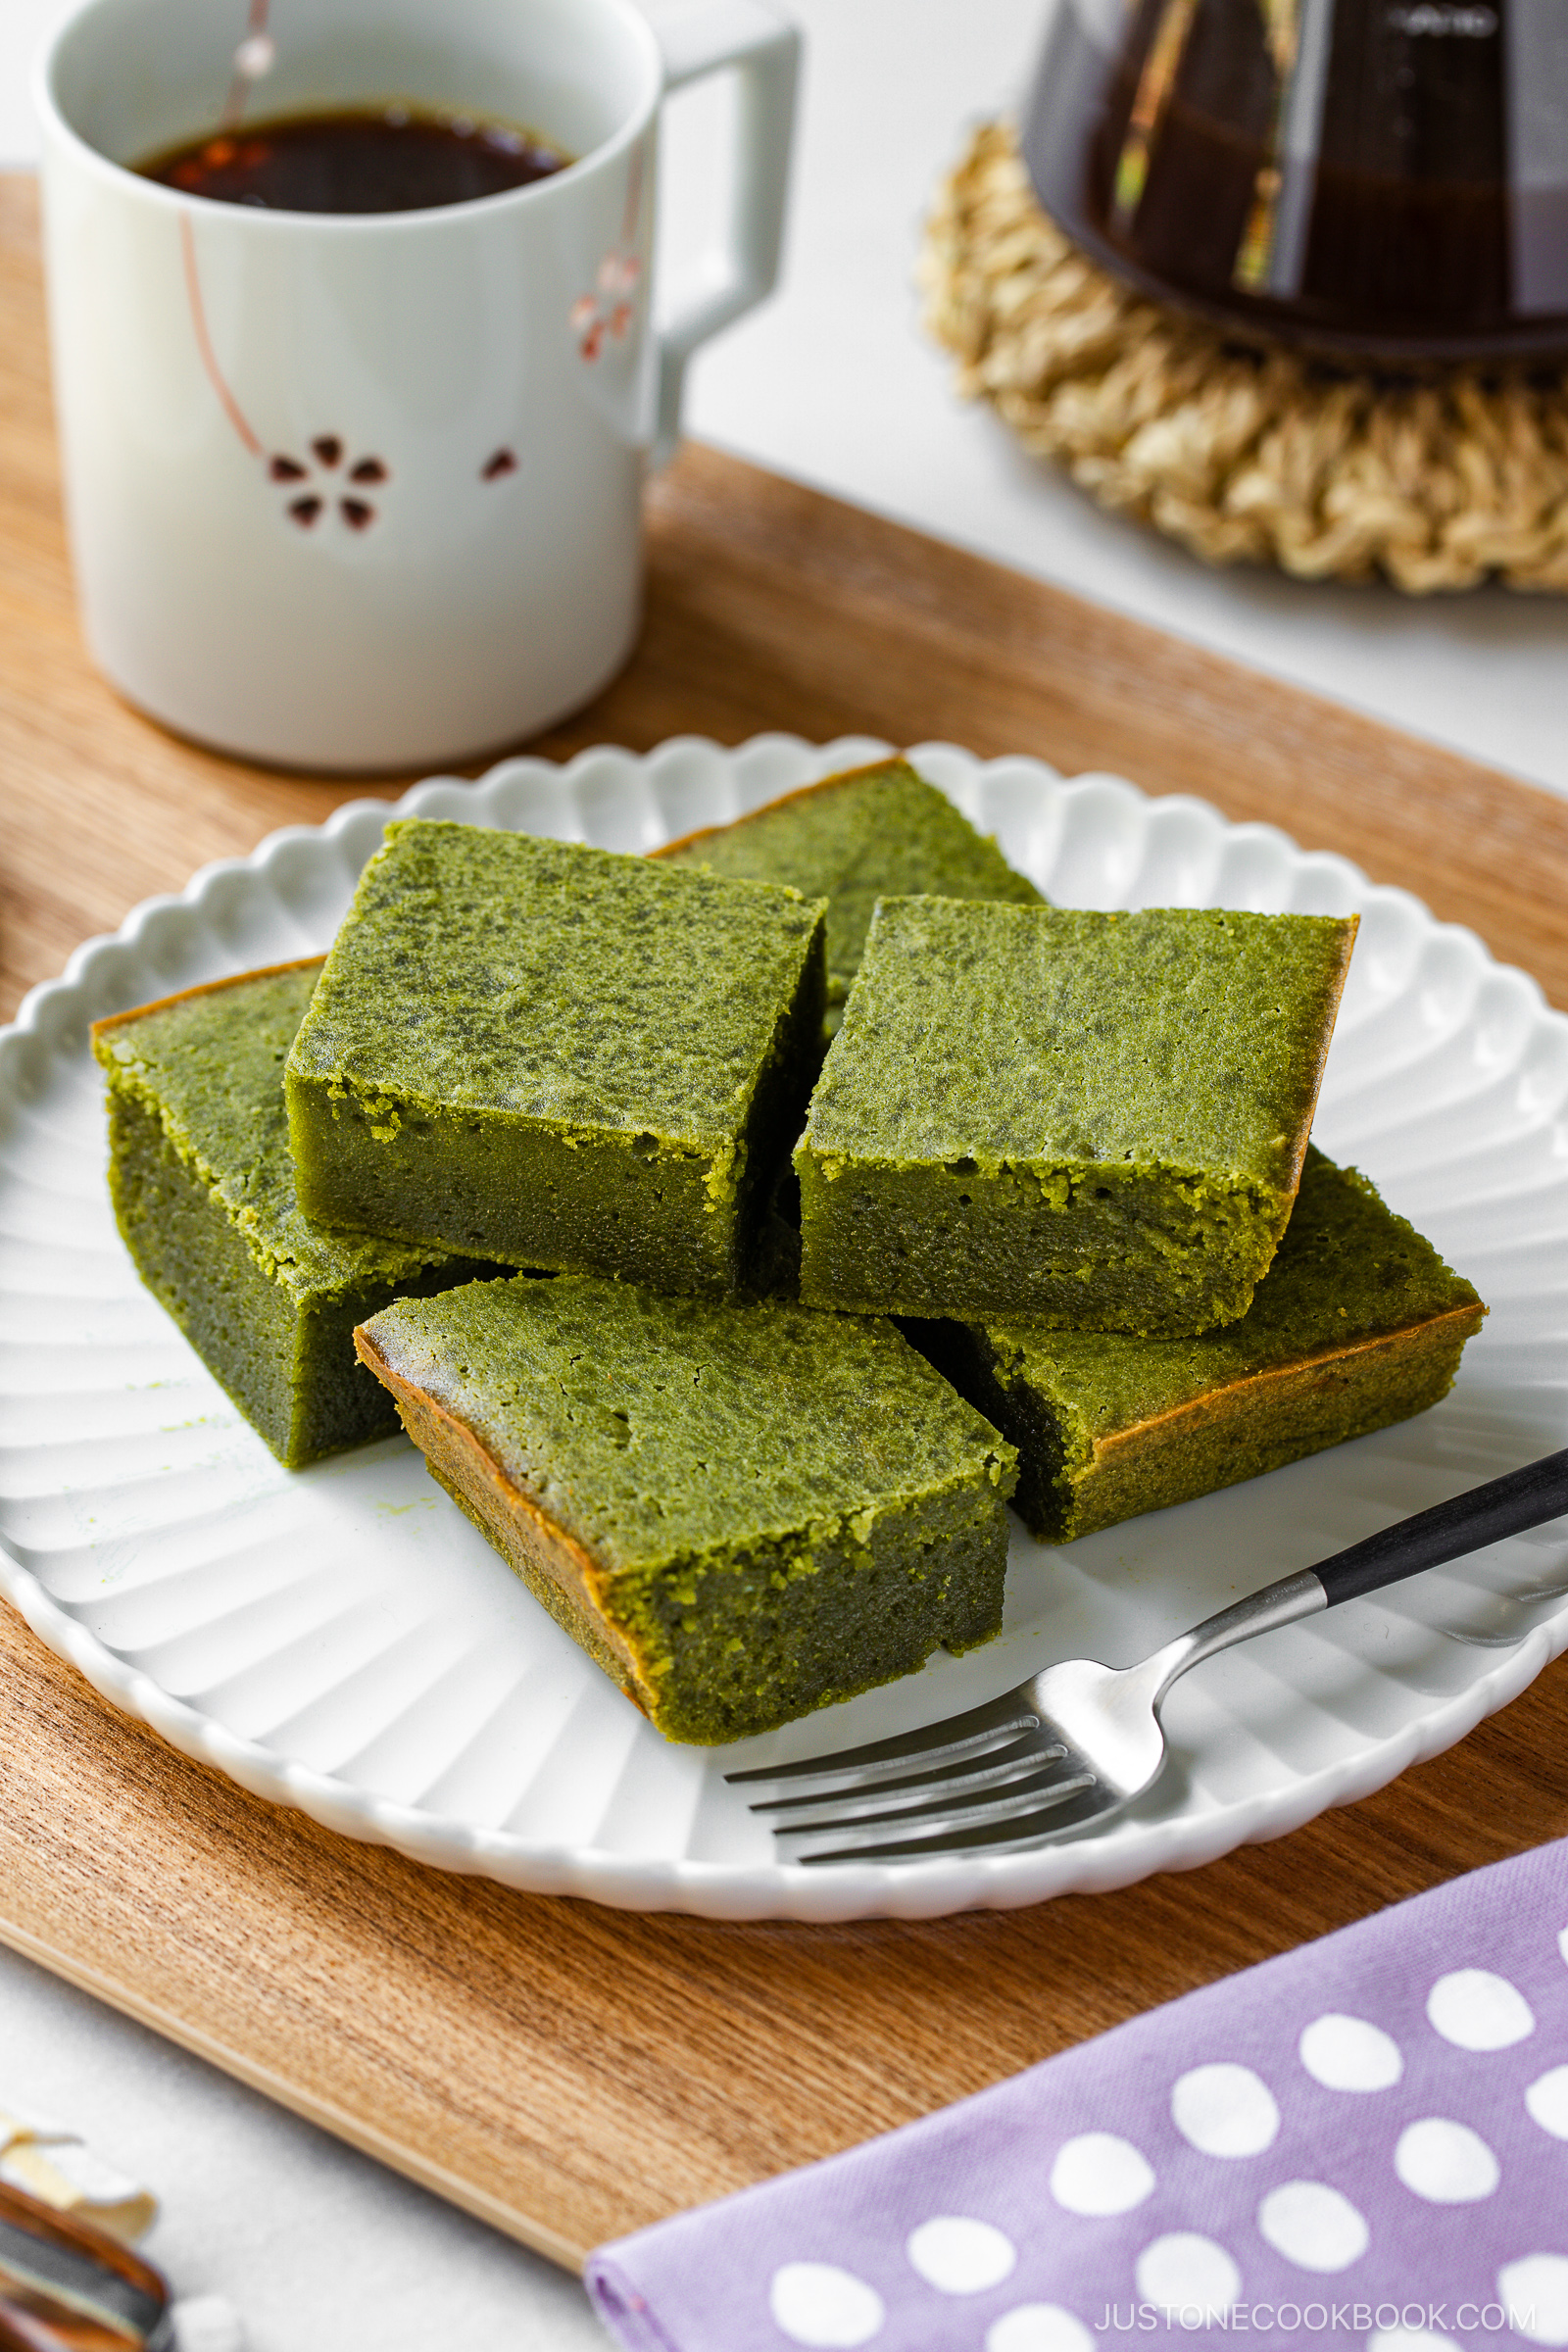
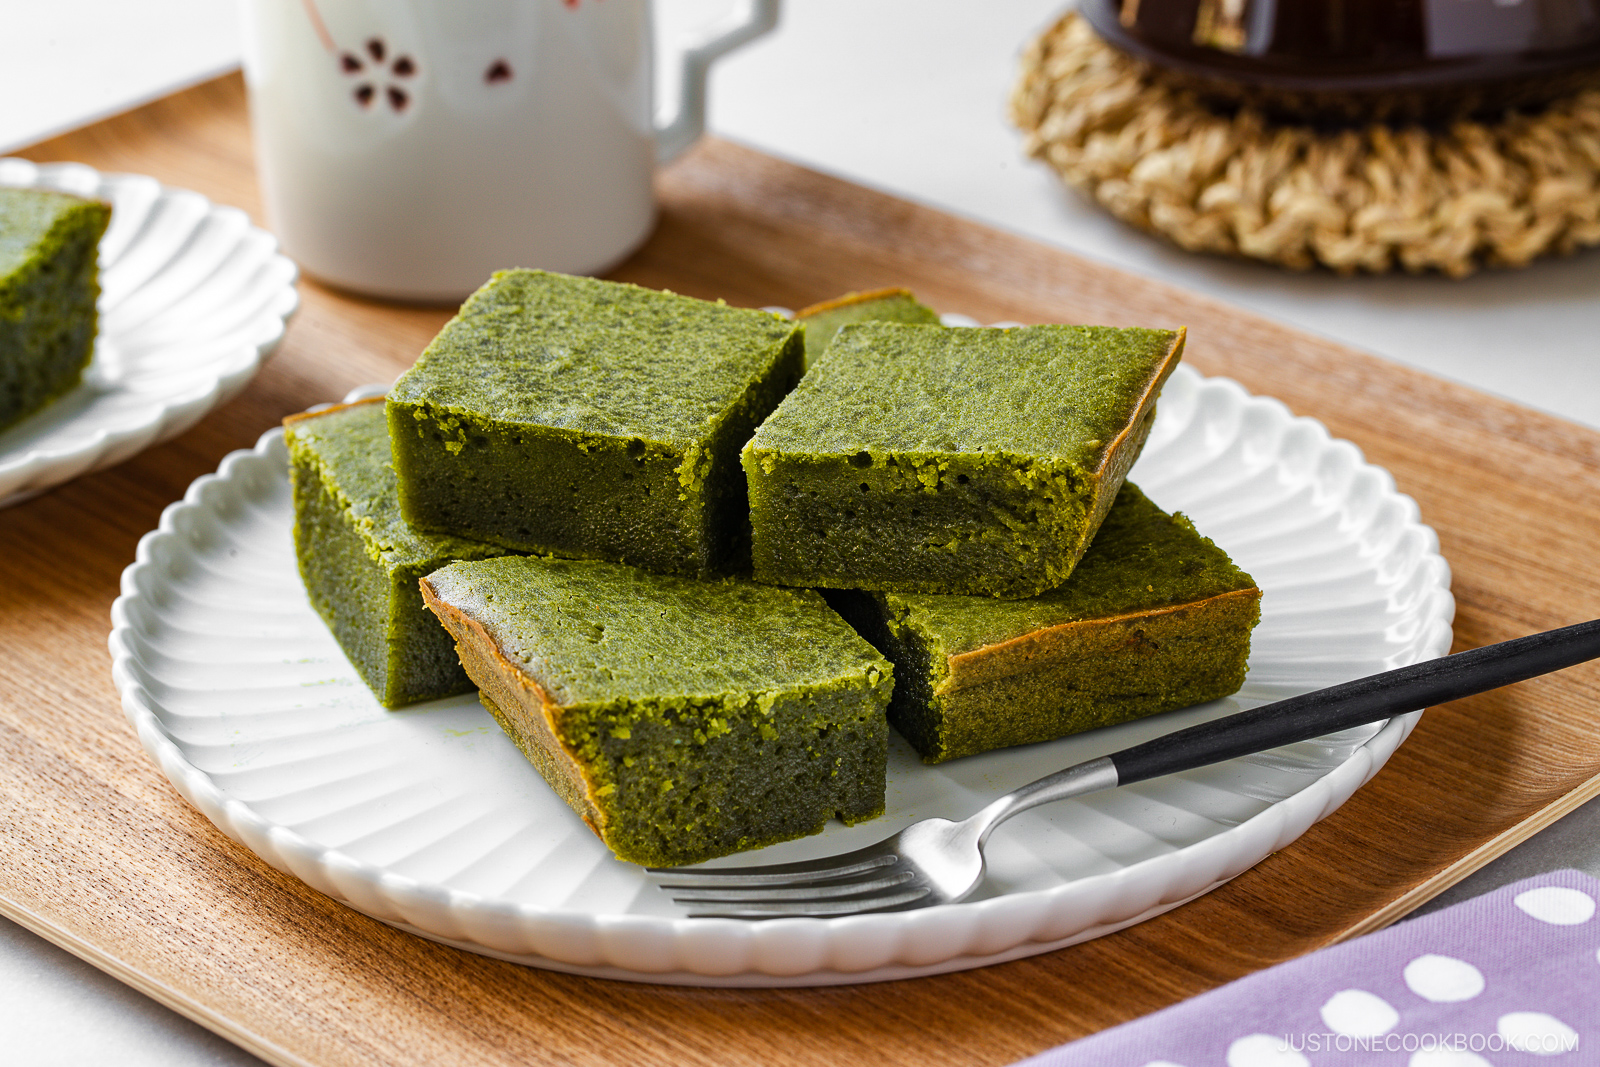
- Chewy mochi-mochi texture – If you enjoy mochi, you’ll love the signature chew of this cake.
- Addictively crispy edges – The baked crust provides a wonderful textural contrast with the chewy center.
- Dreamy green tea flavor – The subtle, earthy matcha taste and vanilla-like aroma are unmistakable.
- Easy to make – Ready in 1 hour, it’s perfect for a potluck party or family gathering!
Ingredients for Matcha Butter Mochi
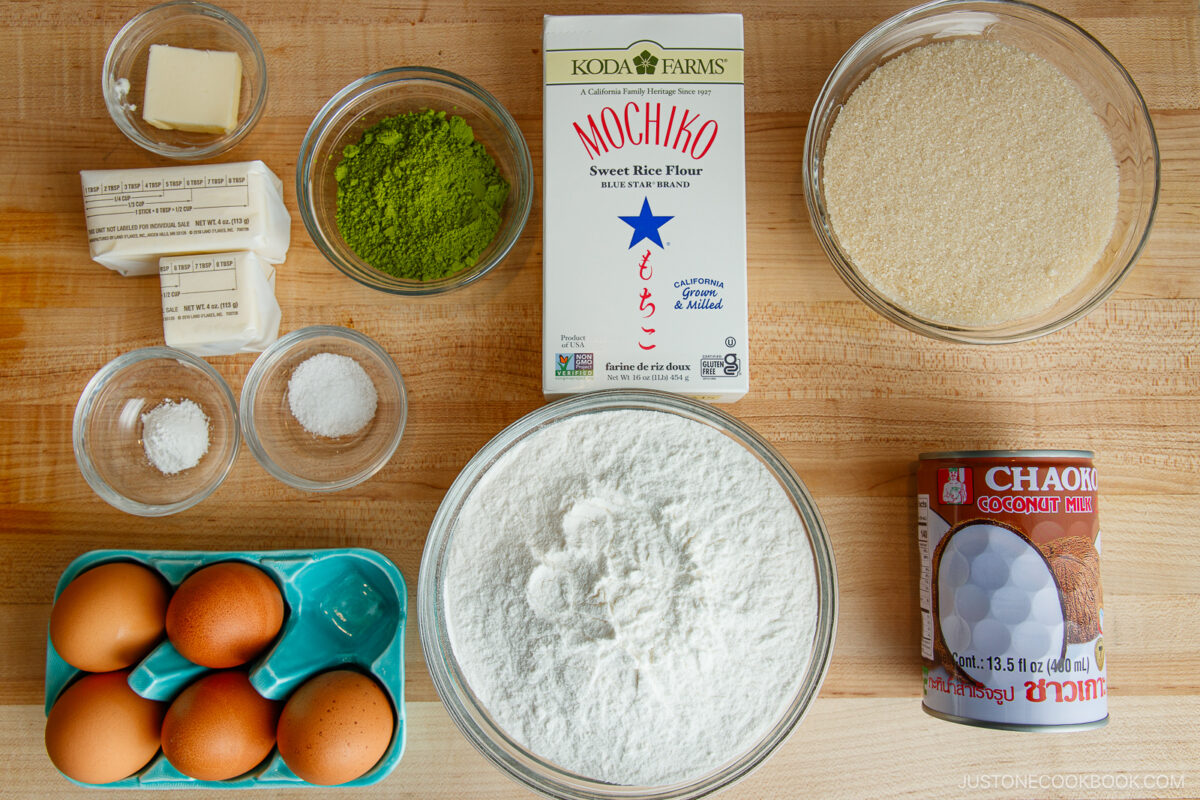
- matcha (green tea powder)
- unsalted butter
- mochiko (glutinous rice flour/sweet rice flour) – I use Koda Farms brand
- unsweetened coconut milk – Please use full-fat coconut milk
- large eggs – at room temperature
- baking powder
- sugar – I used organic cane sugar
- kosher salt
Find the printable recipe with measurements below.
Jump to Recipe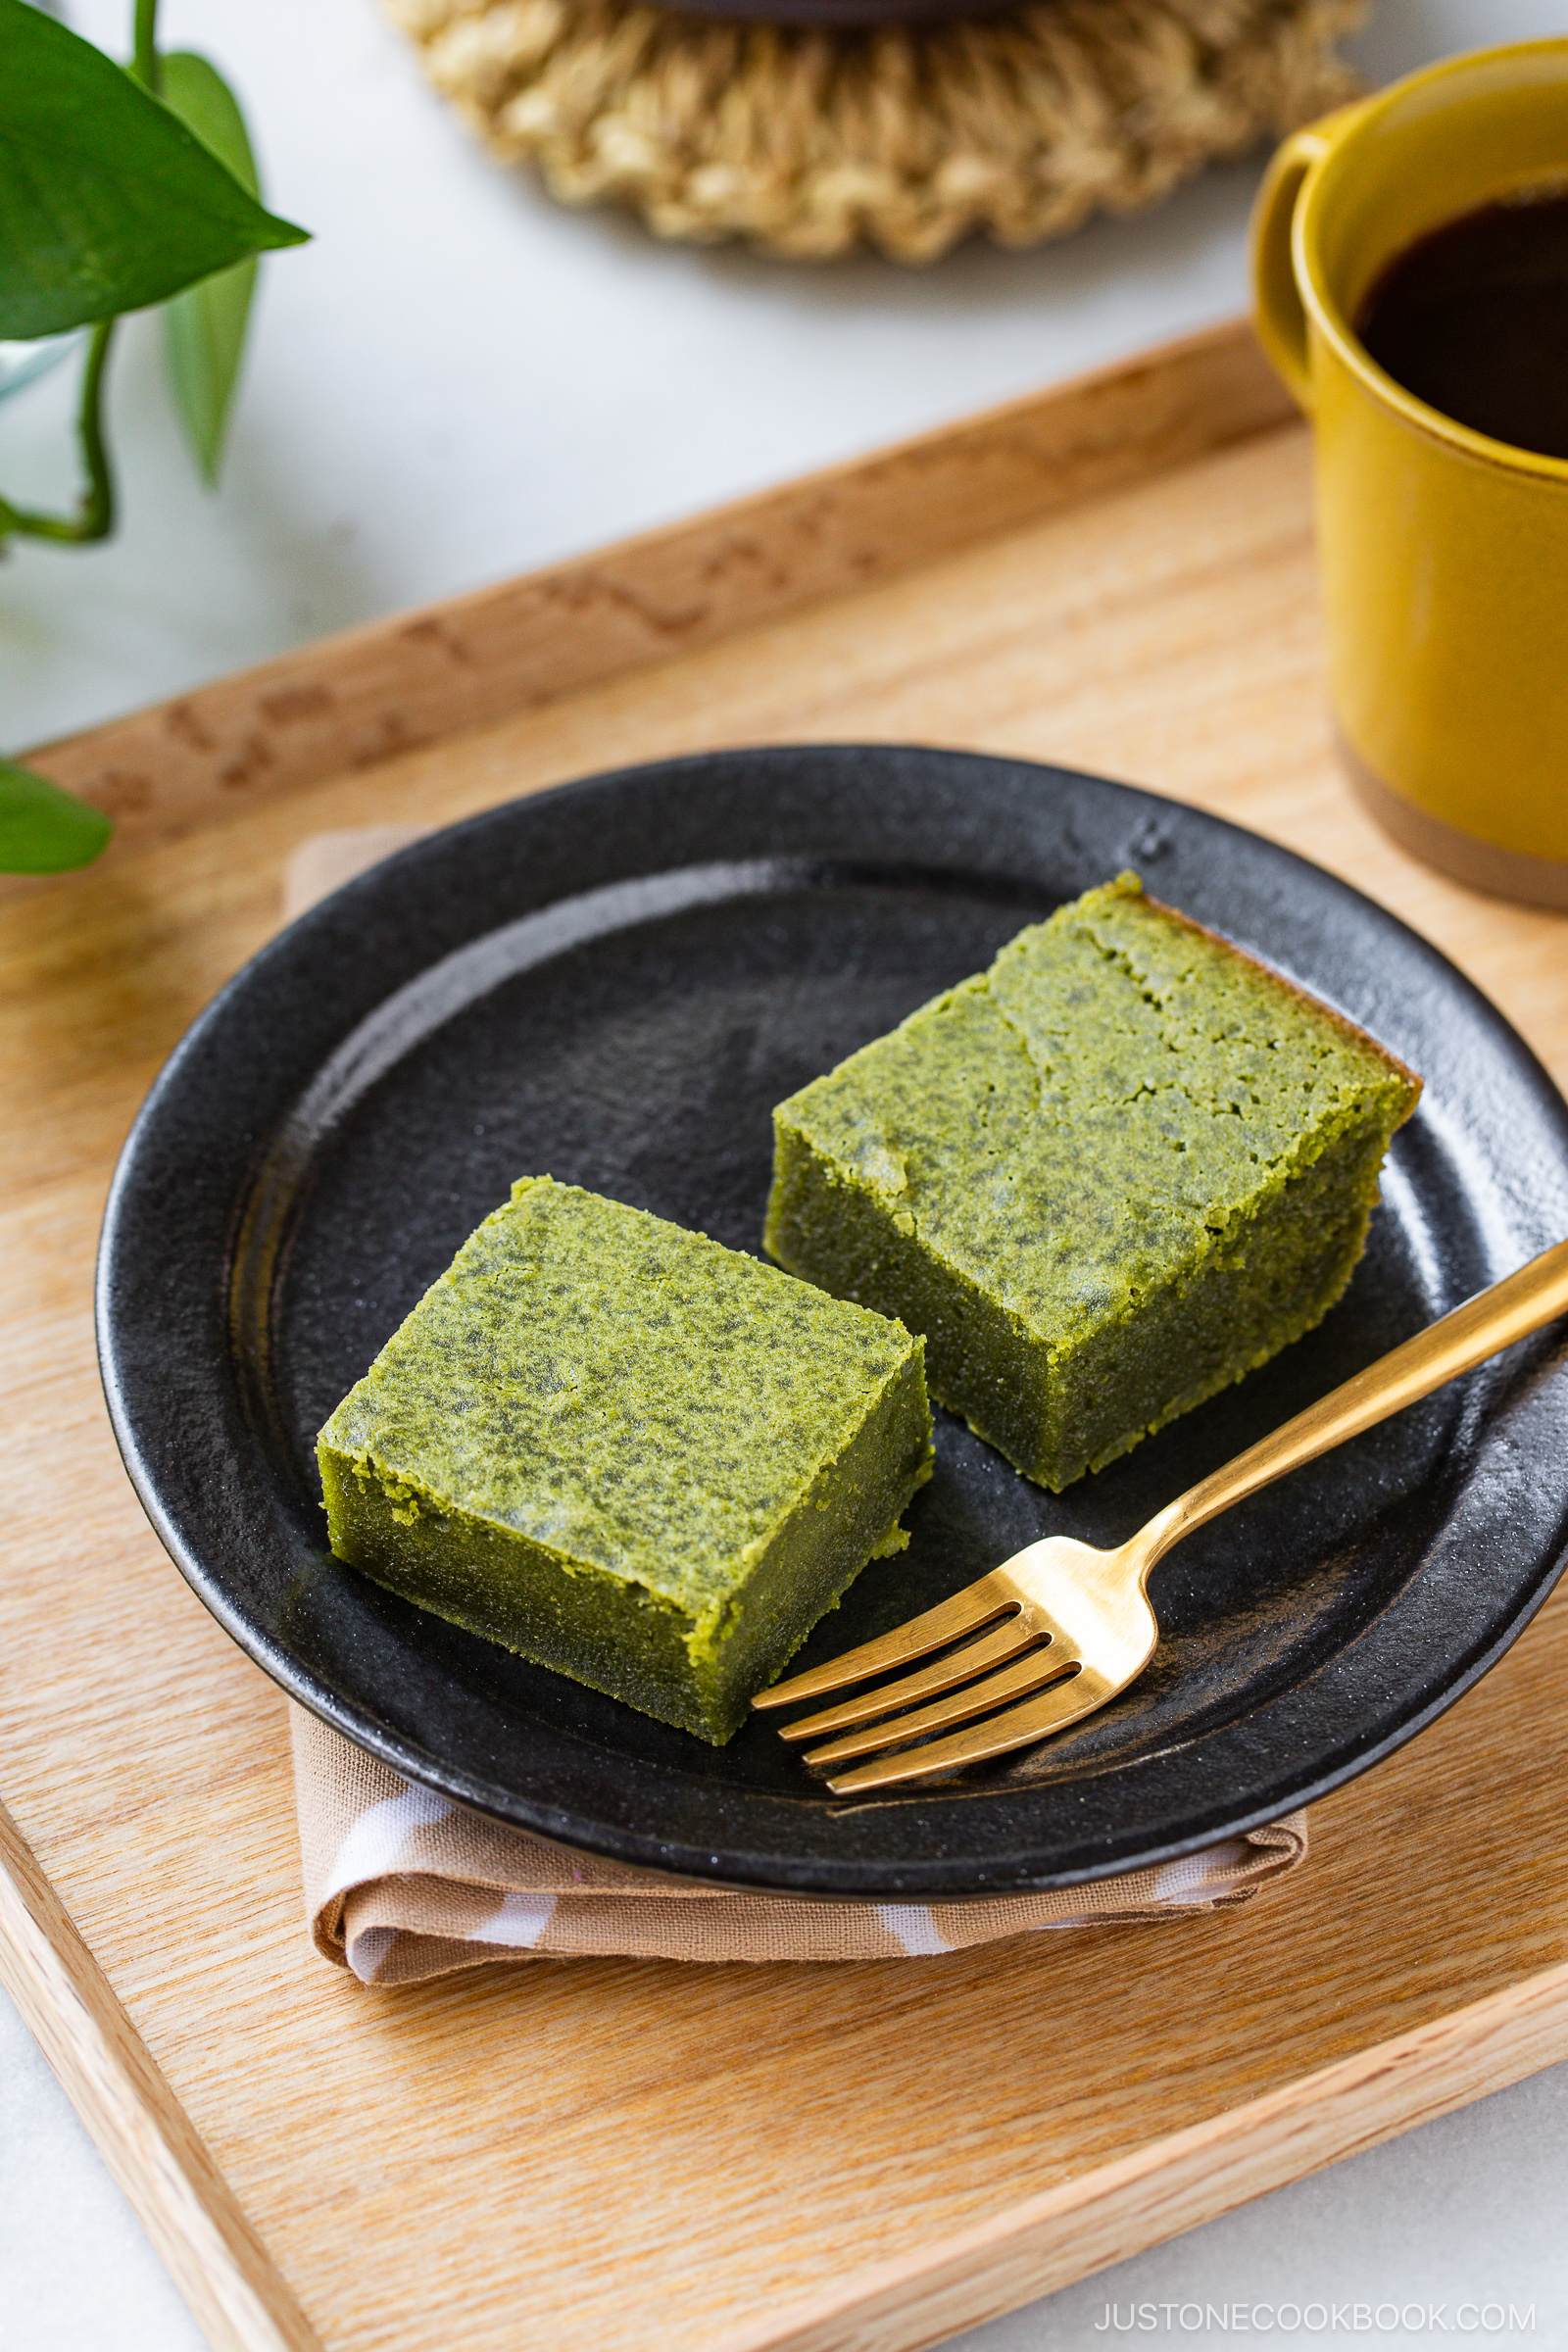
How to Make Matcha Butter Mochi
Preparation
- Make the matcha butter. Melt gently until warm and liquid in the microwave or a double boiler. Sift the matcha into the warm butter and stir with a spoon.
- Mix the eggs and sugar. Add the sugar in 3 additions, stirring slowly each time to combine.
- Add the matcha butter. Combine the butter mixture with the egg mixture. Stir in the salt and coconut milk.
- Fold in the dry ingredients. Add the dry ingredient mixture (mochiko and baking powder) in 3 additions until just combined.

Baking
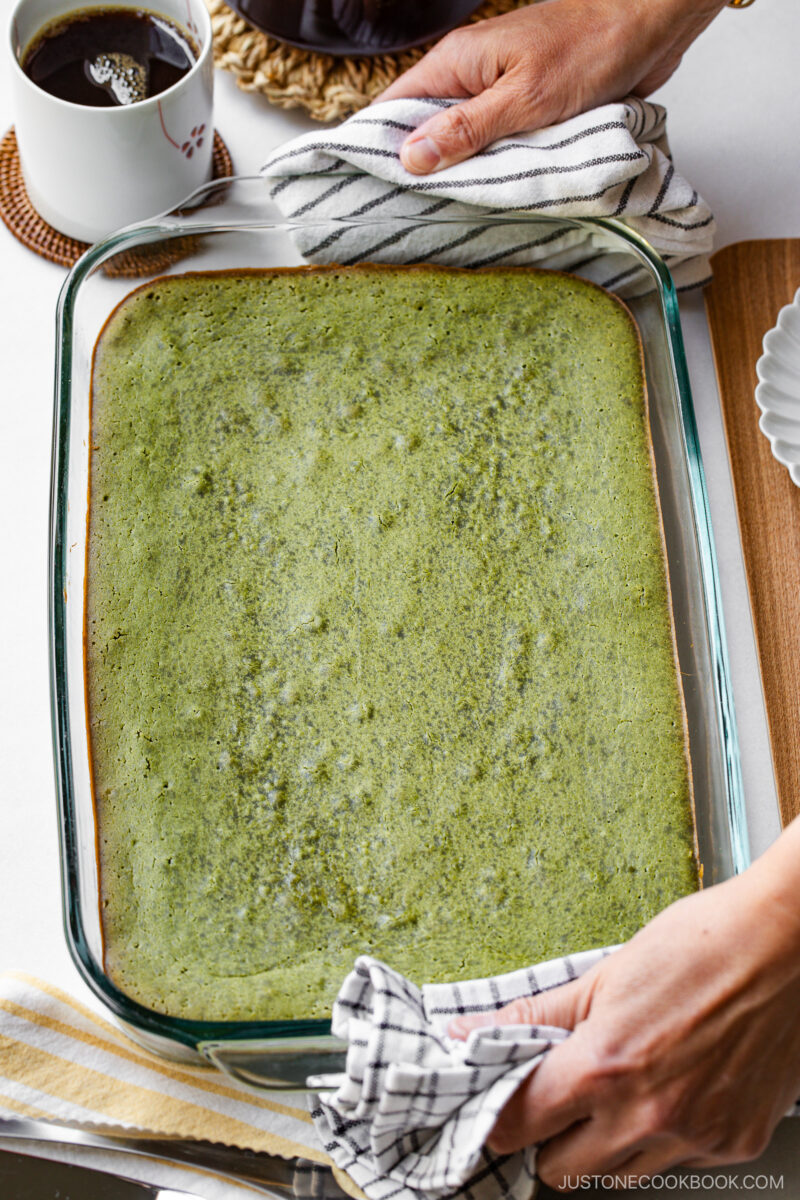
- Bake. Pour the butter mochi batter into a buttered baking dish, tap it on the counter to release the air bubbles, and bake until set, about 50 minutes.

Assemble
- Cool and serve. Cool in the pan on a wire rack, slice into desired pieces, and serve at room temperature or slightly warm.

Nami’s Recipe Tips
- Bloom the matcha – Add it to warm liquid so it dissolves smoothly and releases its full aroma and flavor. I let the melted butter cool to 160°F (70°C) before adding the matcha. It can turn bitter if the liquid is too hot, so be careful.
- Sift the matcha – Use a fine-mesh tea strainer to prevent clumps of matcha powder in the butter mixture.
- Do not whip – To get the classic mochi chew, gently stir the eggs and sugar until just combined. Whipping adds air and will make it lighter, fluffier, and more cake-like.
- Gently fold – Mix the dry ingredients into the wet ingredients until no dry pockets remain. Stir gently so you don’t aerate the batter.
- Cool in the pan – Let the cake cool and firm up before removing from the dish. If you try to lift it out while it’s hot, it may break apart.
- Rinse the knife – I rinse off and dry the knife halfway through slicing to prevent sticking.
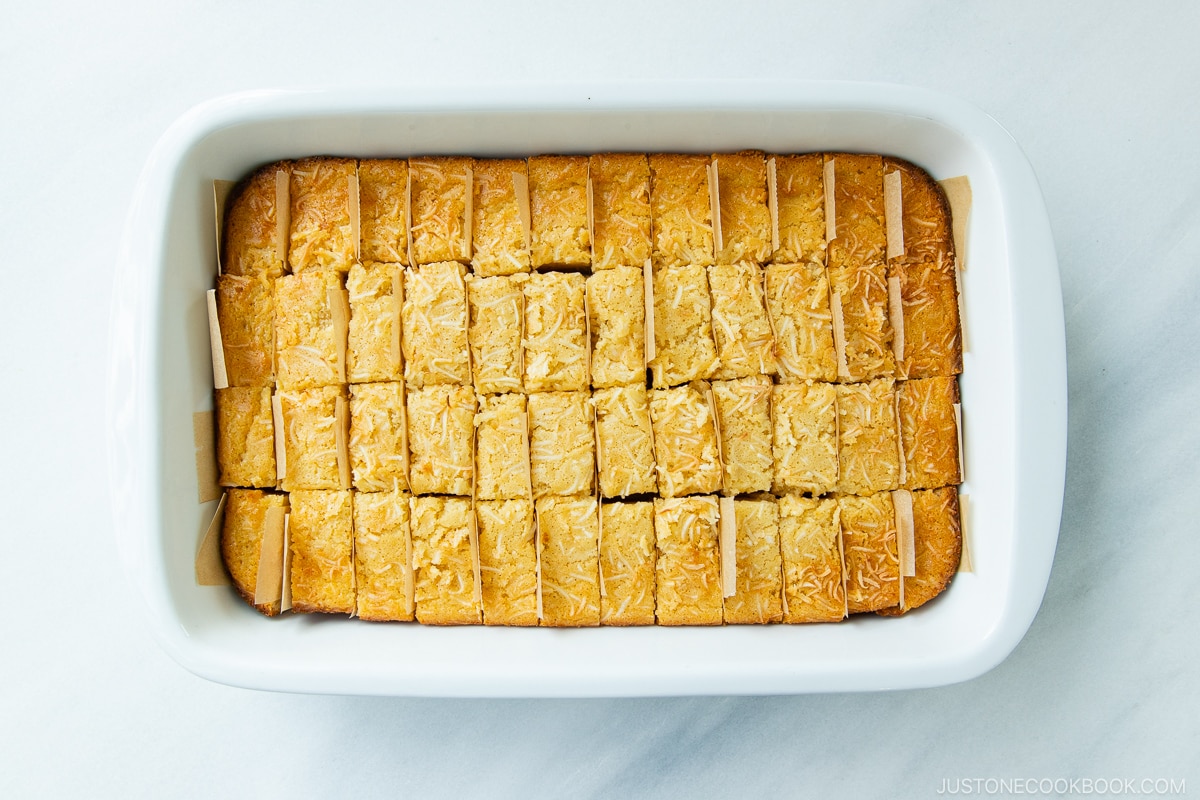
- Finger food size – Standard pieces are 2 x 2 inches (5 x 5 cm), which look nice. For serving, I cut them half as big so they’re easier to enjoy with your fingers (see below).
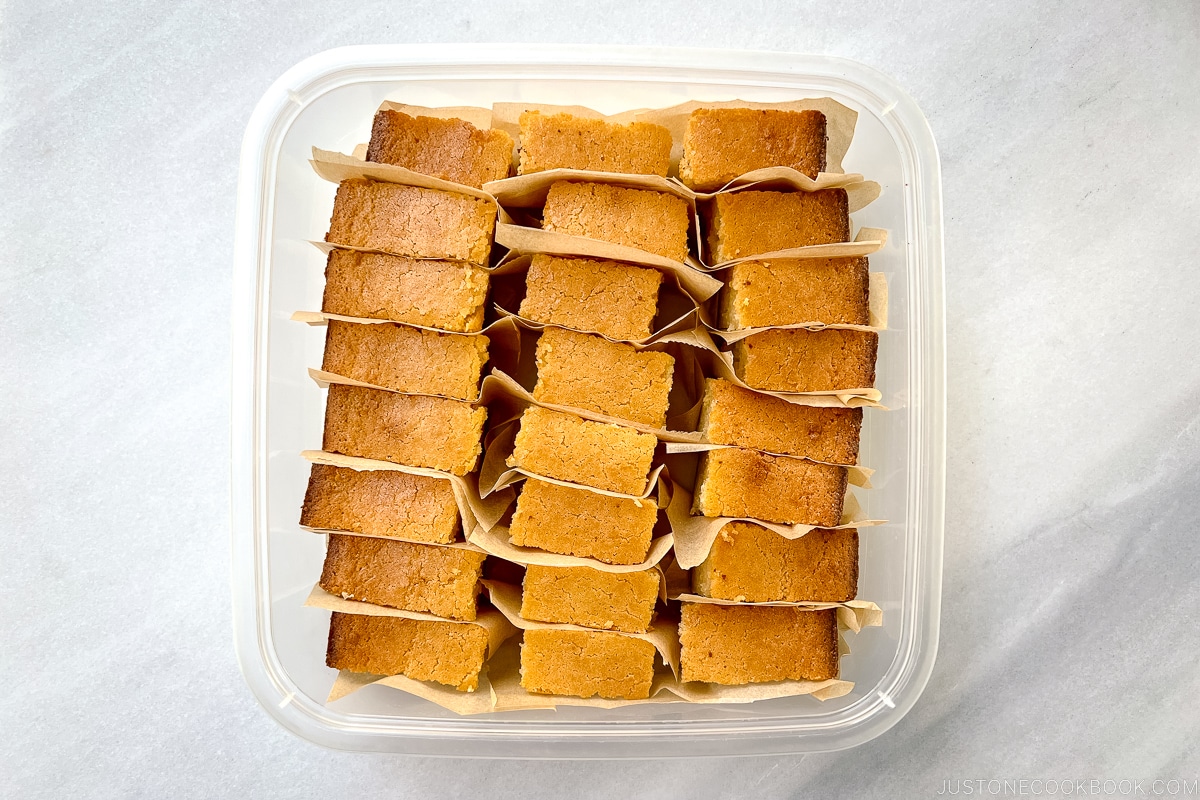
- Freeze while fresh on day 1 – Place pieces on parchment paper squares and store in an airtight container (see how I layer them below). Leftover matcha butter mochi will keep in the freezer for a month.
Variations and Customizations
- Add dried shredded coconut. Mix it into the batter and sprinkle some on top.
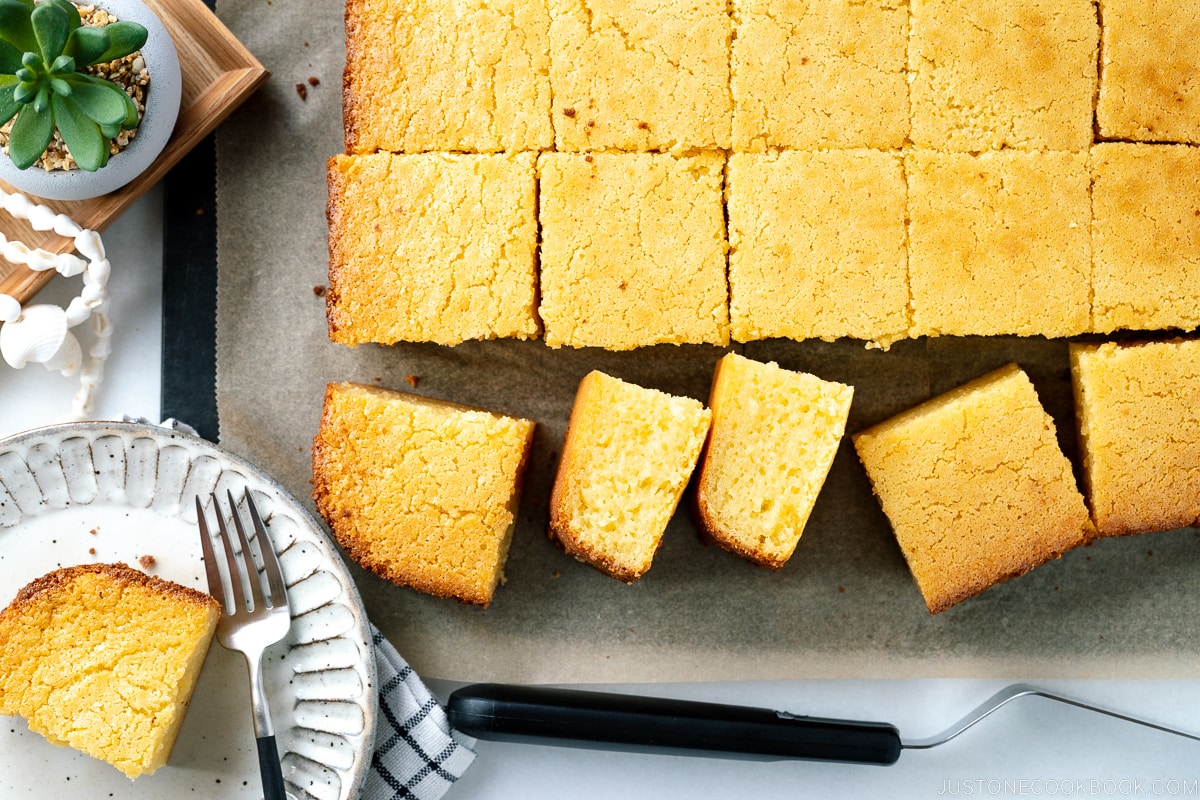
- Skip the matcha. Make my classic Butter Mochi recipe with vanilla extract.
- Make it chocolate. Swap in cocoa powder and melted chocolate chips.
How to Serve Matcha Butter Mochi
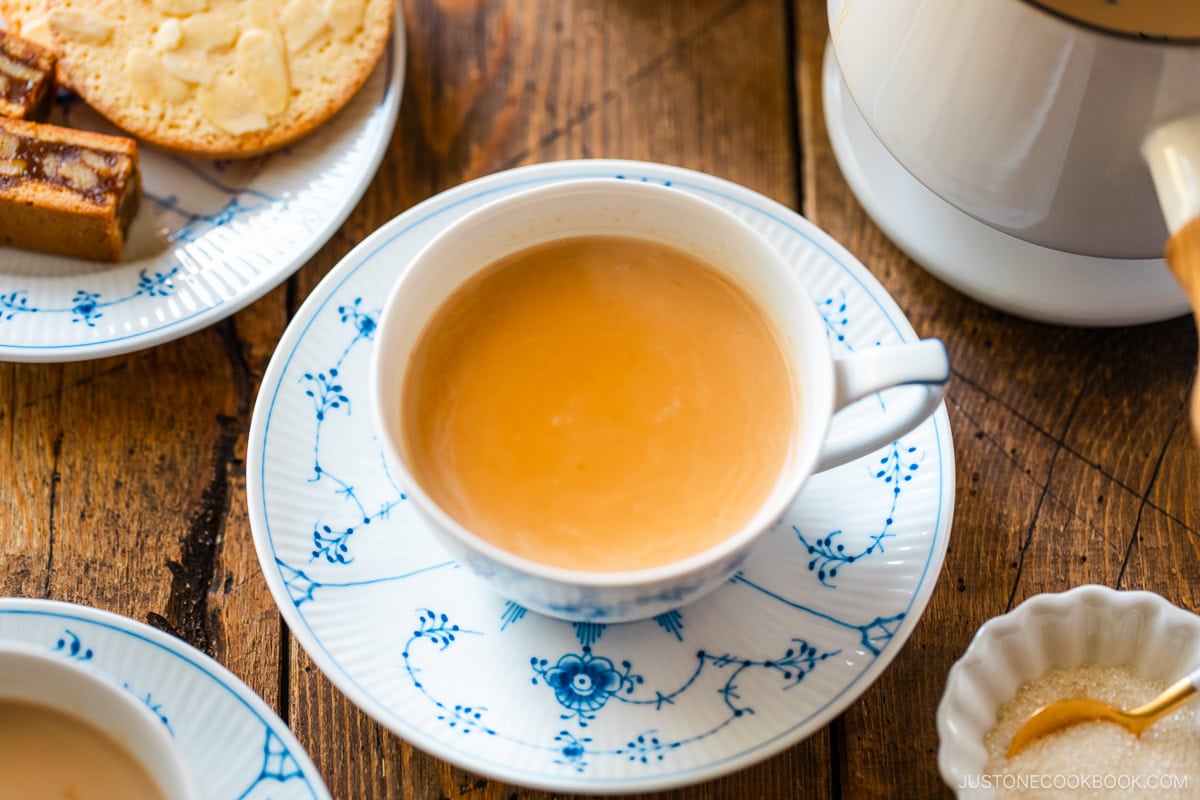
- At tea time with iced coffee or Royal Milk Tea
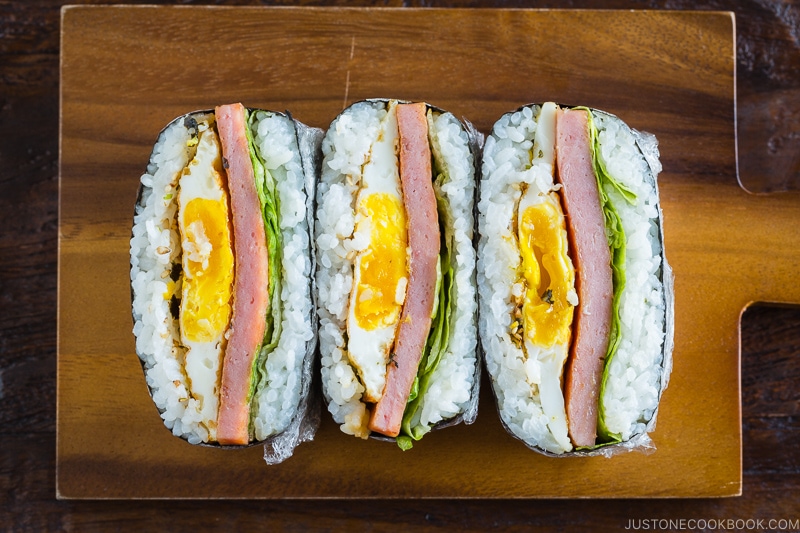
- In a potluck spread with Spam Onigirazu
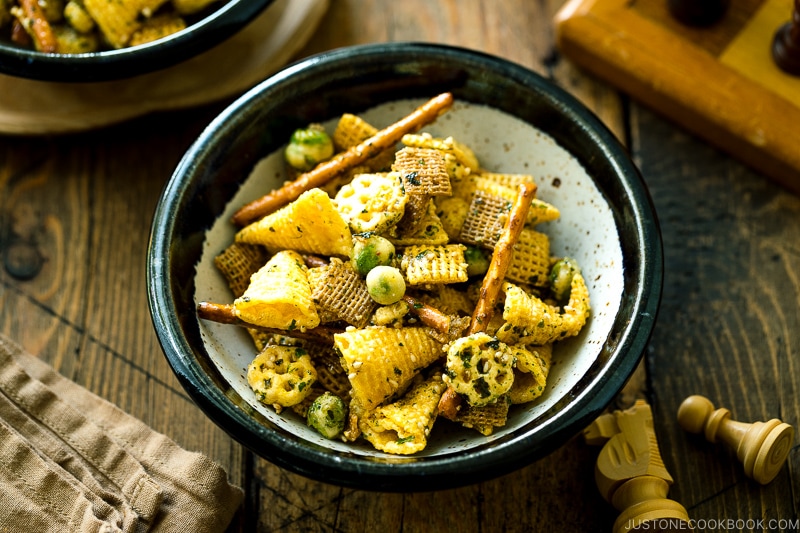
- With snacks like Furikake Chex Mix
- For dessert following a Hawaii-inspired Poke Bowl

Storage and Reheating Tips
To store: For best color retention, store uncut in a cool, well-ventilated place for 2–3 days. Matcha oxidizes and will turn brown over time, especially at the cut edges. Loosely cover it with a paper towel to shield it from light exposure, which also affects color. To freeze: Wrap in plastic wrap, place in a freezer bag or airtight container, and freeze for up to 1 month.
To reheat: Thaw overnight in the refrigerator or at room temperature. Serve at room temperature or heat in a microwave for 5–10 seconds until slightly warm.
Frequently Asked Questions
Yes, you can bake one batch of batter in two 8×8-inch baking pans. You may need to shorten the baking time.
Yes, you can stir it in a large bowl. Be sure not to whip air into it if you want a chewy texture.
Matcha Butter Mochi
Ingredients
- 4 Tbsp matcha (ceremoial or culinary grade) (or use 2–3 Tbsp if you prefer less caffeine and a milder flavor)
- 1½ sticks unsalted butter (12 Tbsp; plus more to grease the baking dish)
- 1 lb mochiko (glutinous rice flour/sweet rice flour) (1 box Koda Farms brand; actual amount may vary by brand, so please go by weight)
- ½ tsp baking powder
- 5 large eggs (50 g each w/o shell) (at room temperature)
- 2 cups sugar (I used organic cane sugar)
- ½ tsp Diamond Crystal kosher salt
- 1 (13½-oz) can unsweetened coconut milk (full fat; see Notes)
Instructions
- Gather all the ingredients.
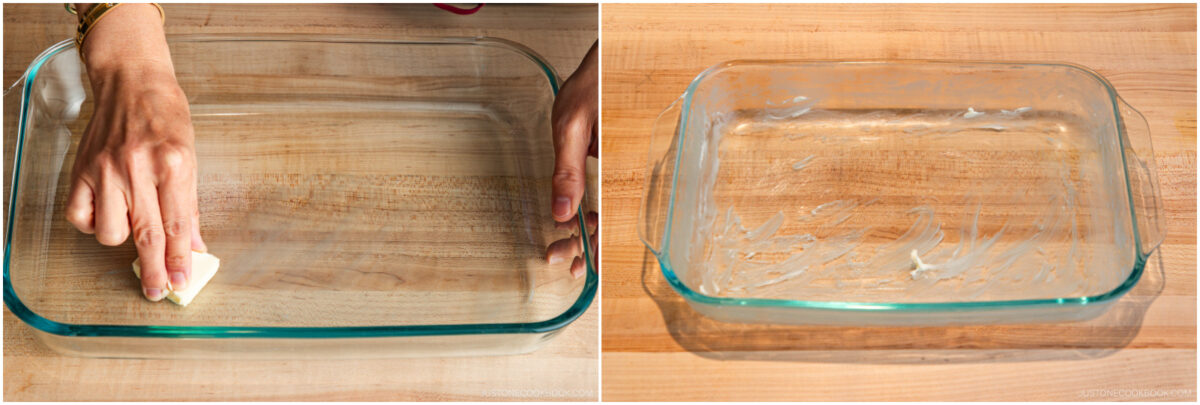
- Preheat the oven to 350ºF (175ºC). Grease a 9 x 13-inch (23 x 33-cm) glass baking dish with about ½ tablespoon of butter.
To Make the Matcha Butter Mixture
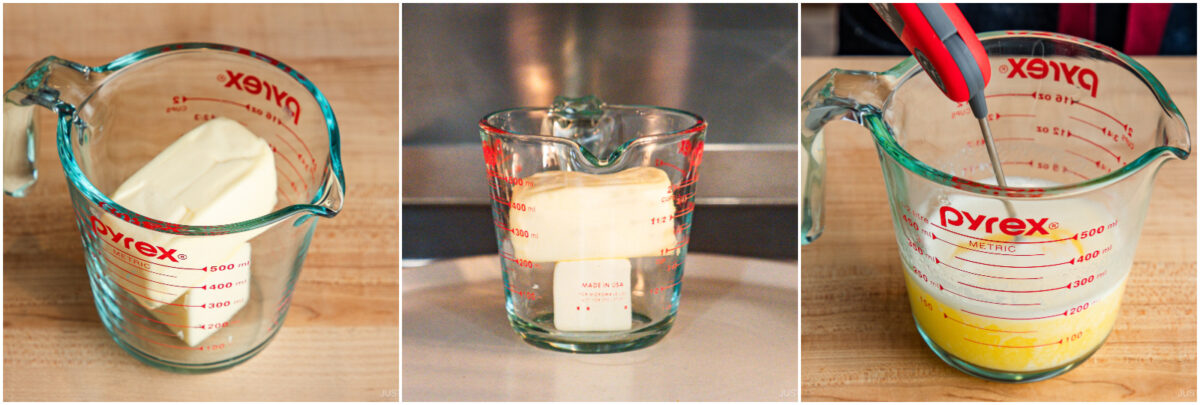
- Gently warm 1½ sticks unsalted butter in a double boiler or microwave until just melted. In the microwave, warm it in a heat-safe bowl for 30 seconds (1000W), stir, then heat for another 15 seconds. The butter should be liquid and warm—about 160ºF (70ºC)—but not hot. Do not overheat. Why? Matcha can turn bitter if the liquid is too hot.
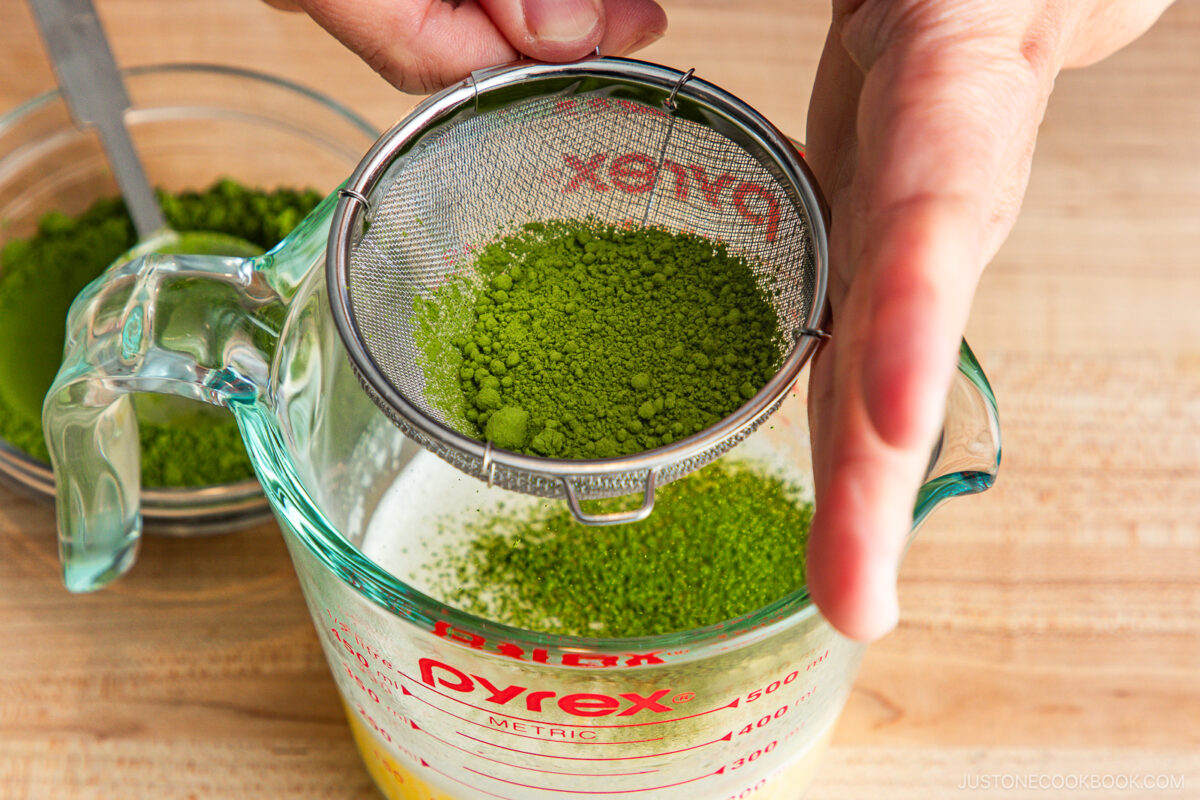
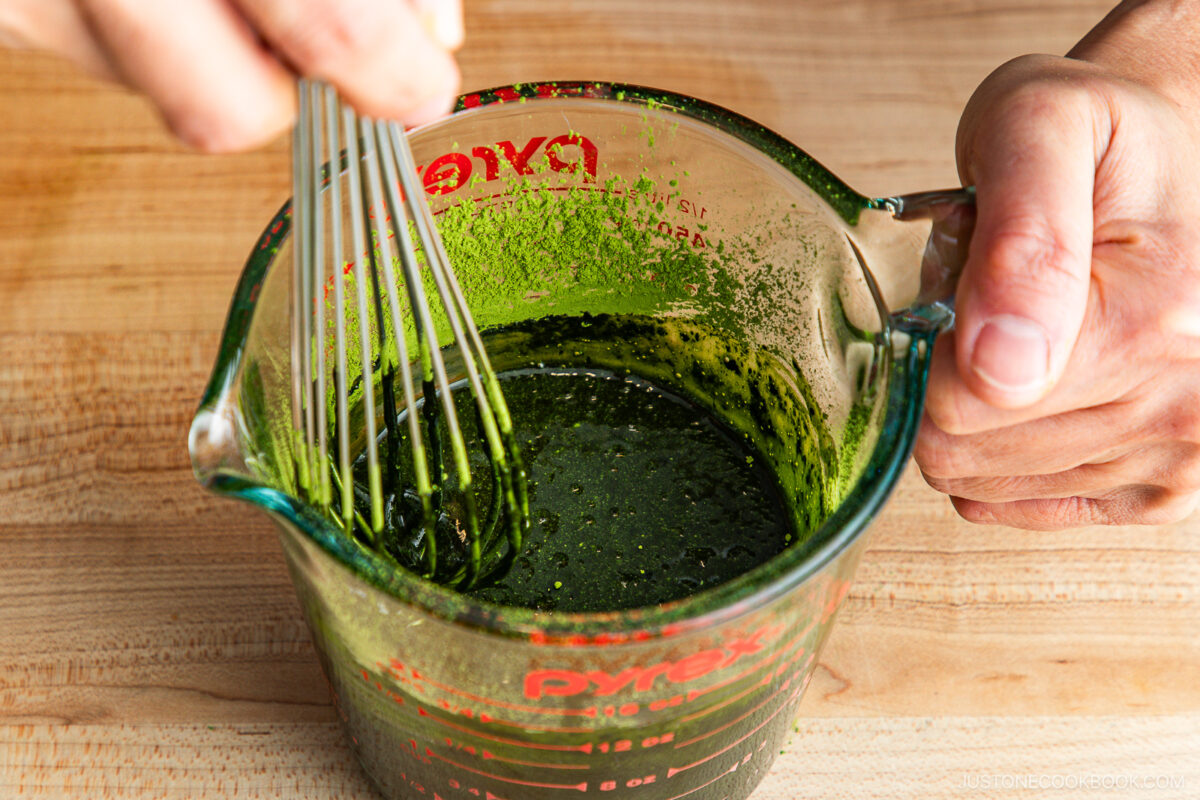
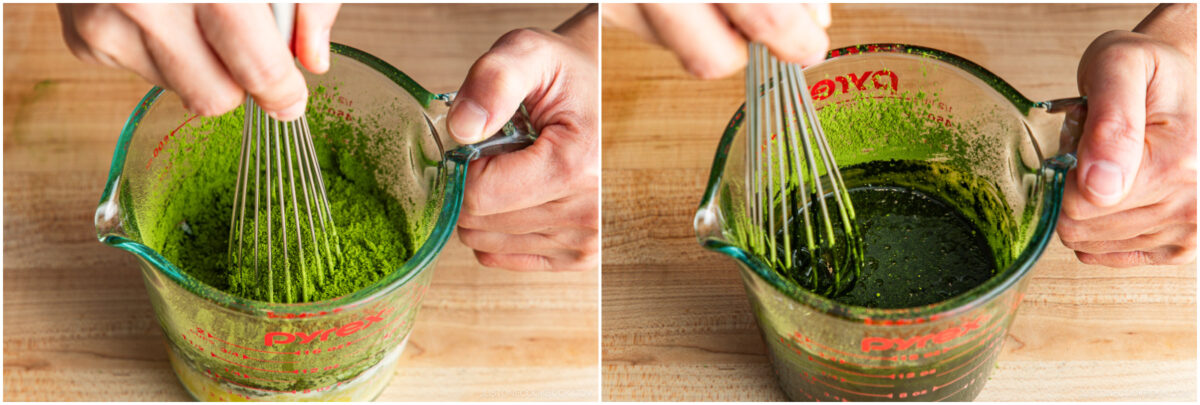
- Sift 4 Tbsp matcha (ceremoial or culinary grade) into the melted butter using a fine-mesh strainer.
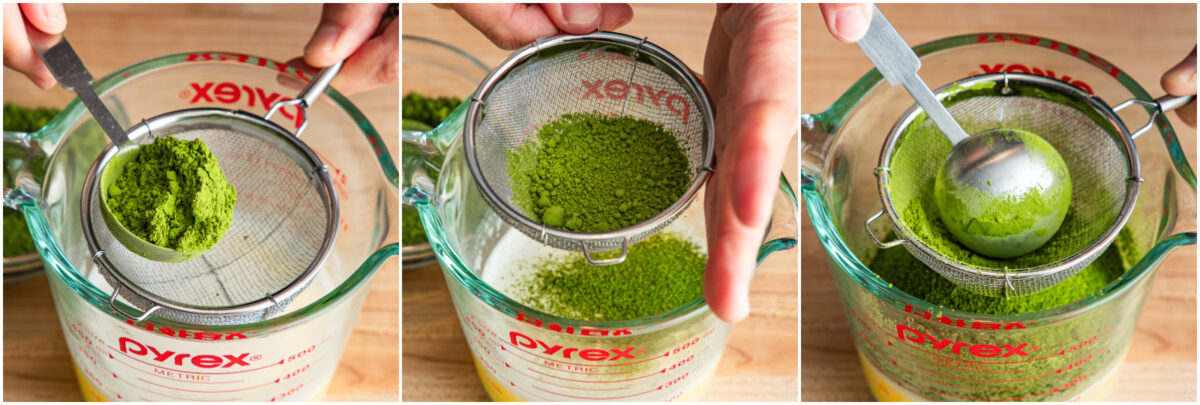
- Mix well with a whisk to fully incorporate and remove lumps. Set aside. Nami's Tip: We mix matcha into warm butter, which brings out the aroma and flavor.
To Mix the Batter
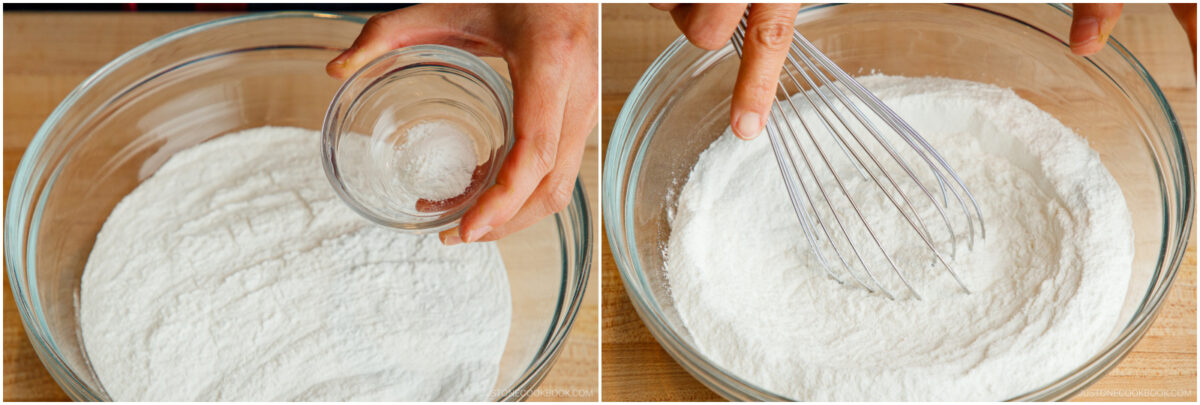
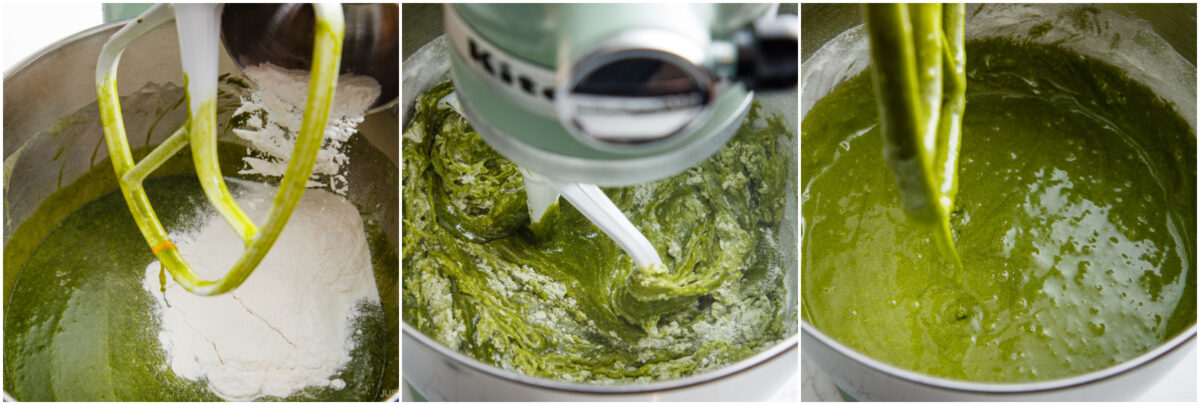
- Combine 1 lb mochiko (glutinous rice flour/sweet rice flour) and ½ tsp baking powder in a separate bowl with a hand whisk until well incorporated. Set aside.
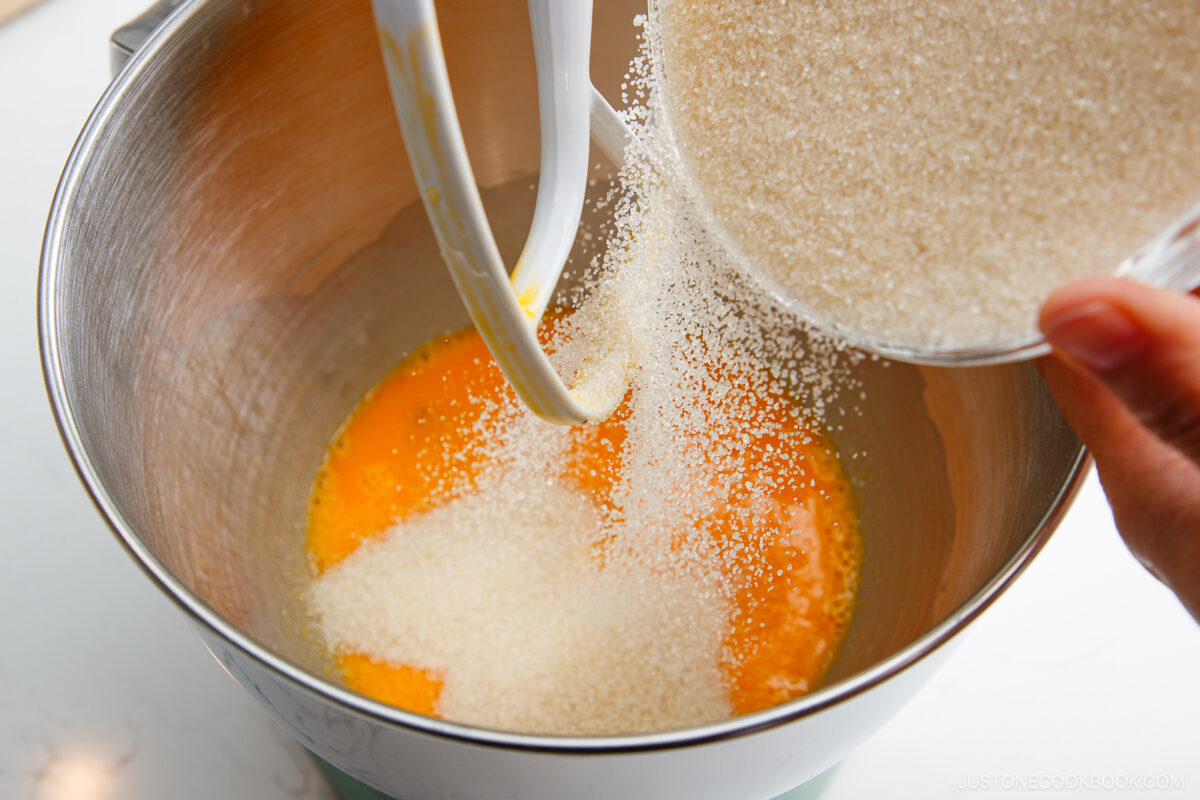
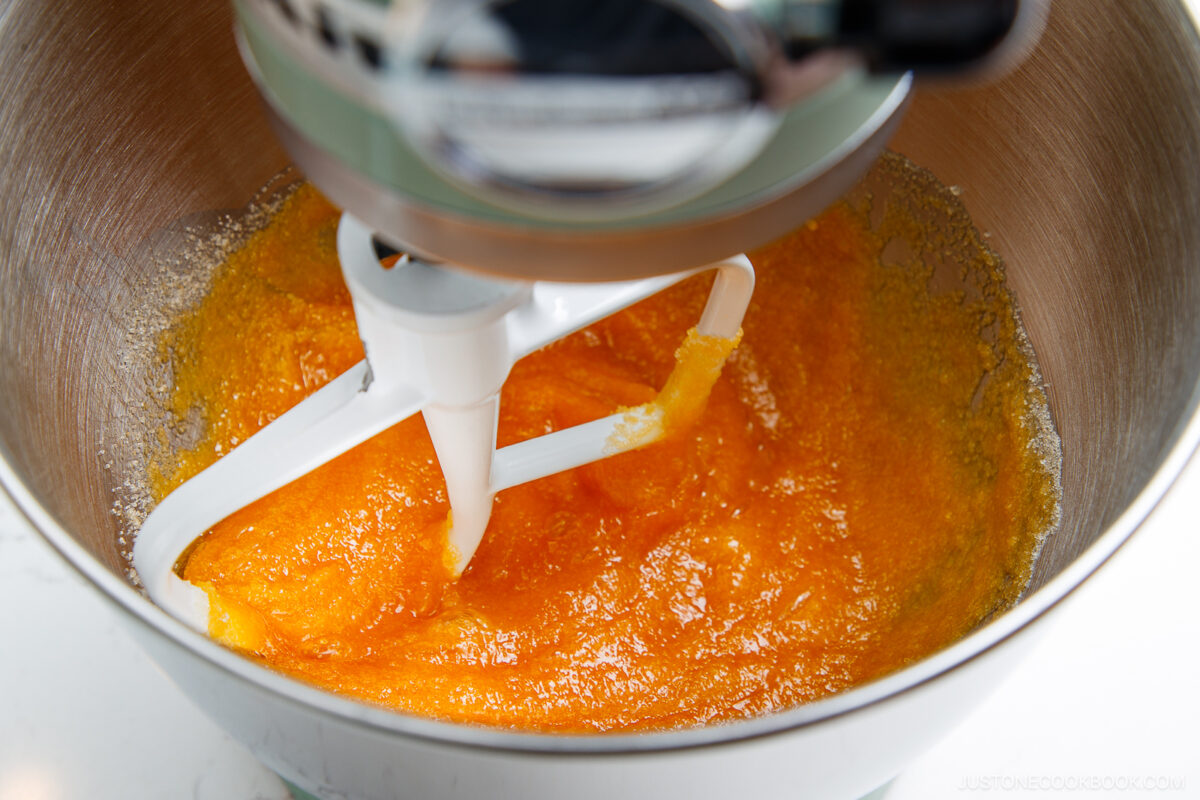
- Crack 5 large eggs (50 g each w/o shell) into the bowl of a stand mixer fitted with the paddle attachment. Beat gently just until the yolks and whites combine, about 1 minute on the Stir or Speed 2 setting. (You could also mix it in a large bowl with a hand whisk or electric hand mixer.)

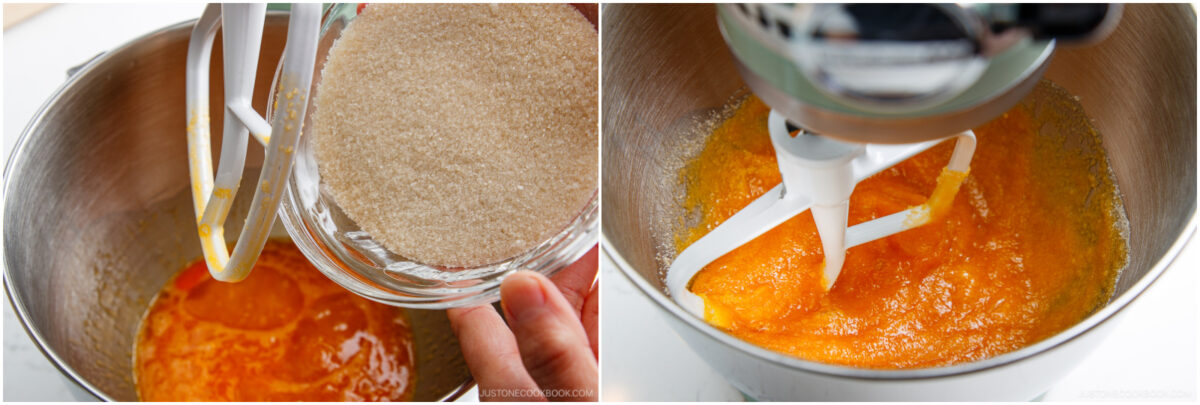
- Gradually add 2 cups sugar in three additions, mixing each time for 1 minute on low speed (Stir setting).
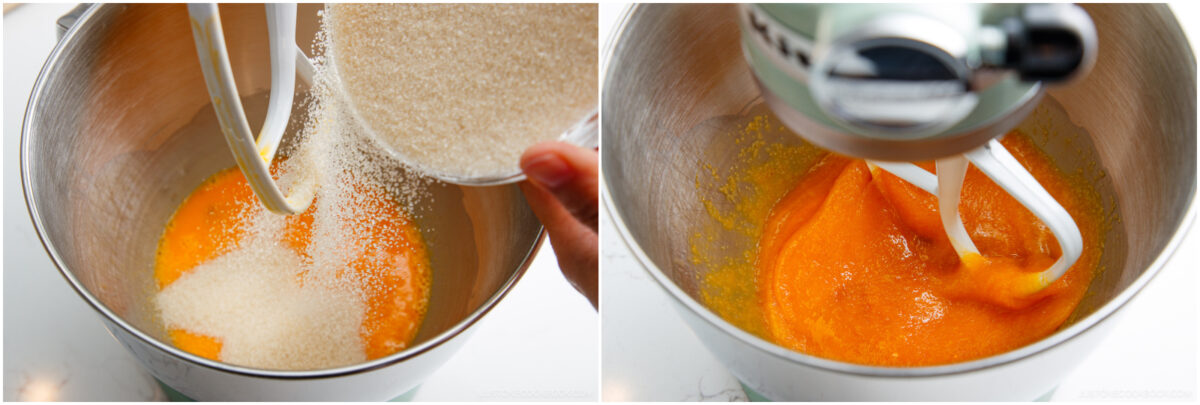
- Nami's Tip: Do not whip. For that classic chewy texture, gently stir the eggs and sugar until just combined. Whipping adds air, which makes the butter mochi lighter, fluffier, and more cake-like.
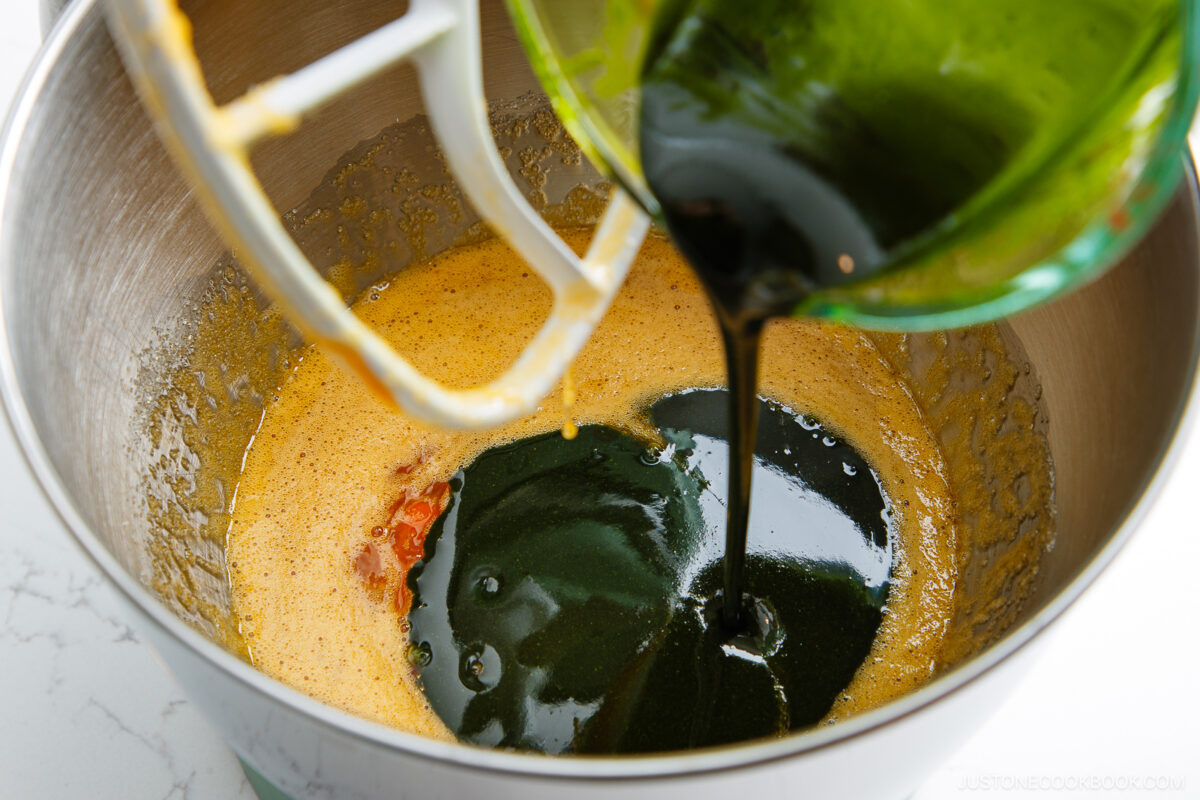
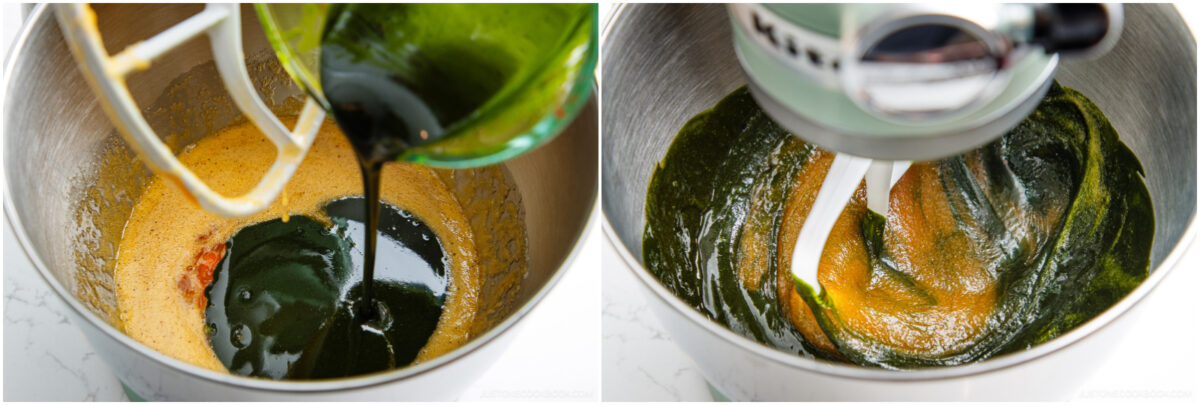
- Next, add the matcha butter mixture to the egg mixture and stir gently until just combined. Do not whip.
- Add ½ tsp Diamond Crystal kosher salt and stir briefly until well combined, about 15 seconds. Nami's Tip: I add the salt to the wet ingredients to ensure it blends well into the batter.
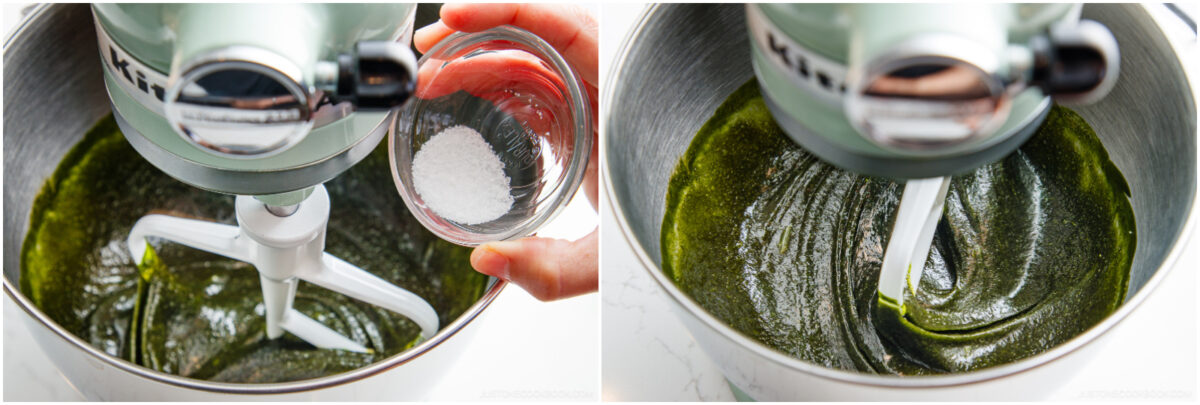
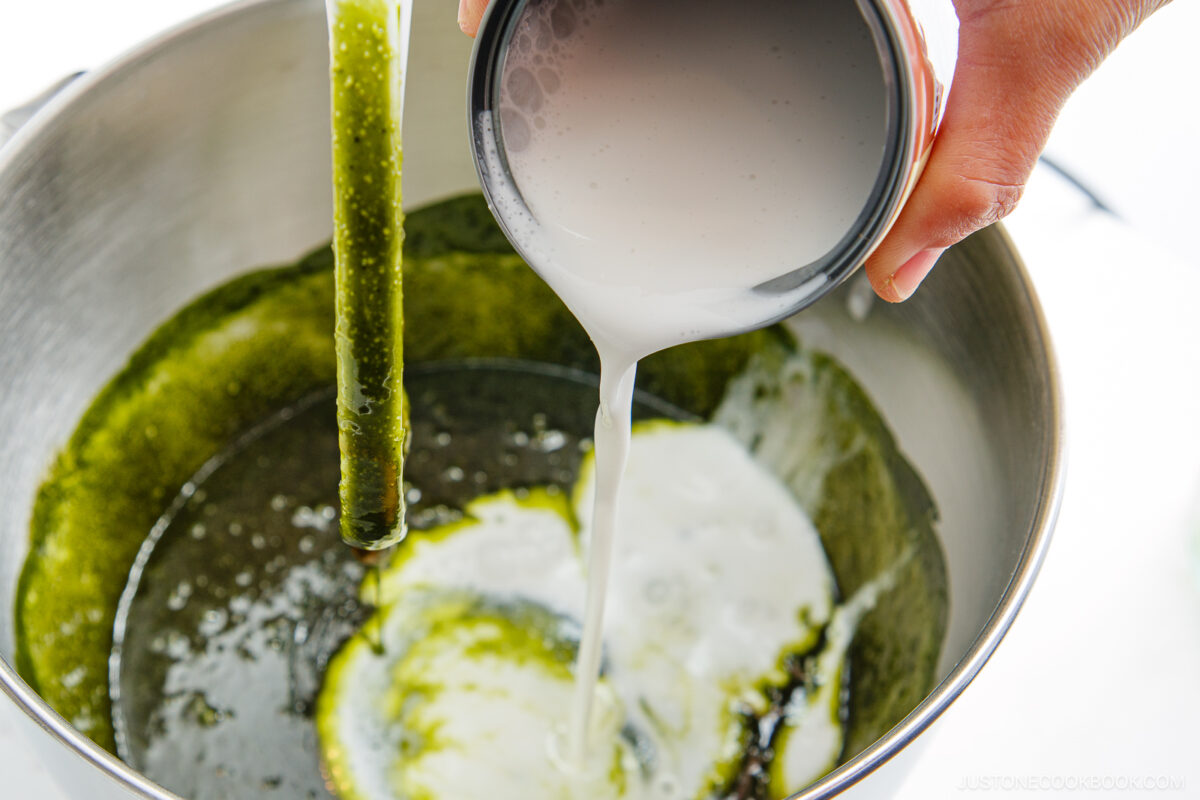
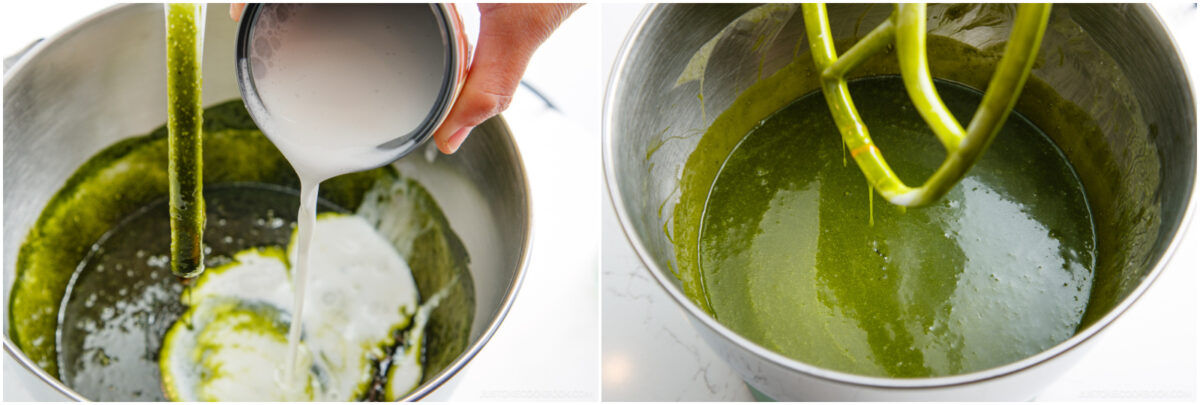
- Shake 1 (13½-oz) can unsweetened coconut milk well before opening to recombine any separated fat. Pour it into the egg mixture and stir for about 1 minute on low speed. Nami's Tip: Some brands are hard to mix if the fat solidifies, so use a hand mixer to blend if needed. For example, Edward & Sons’ organic coconut milk is often clumpy, so pre-mixing helps.
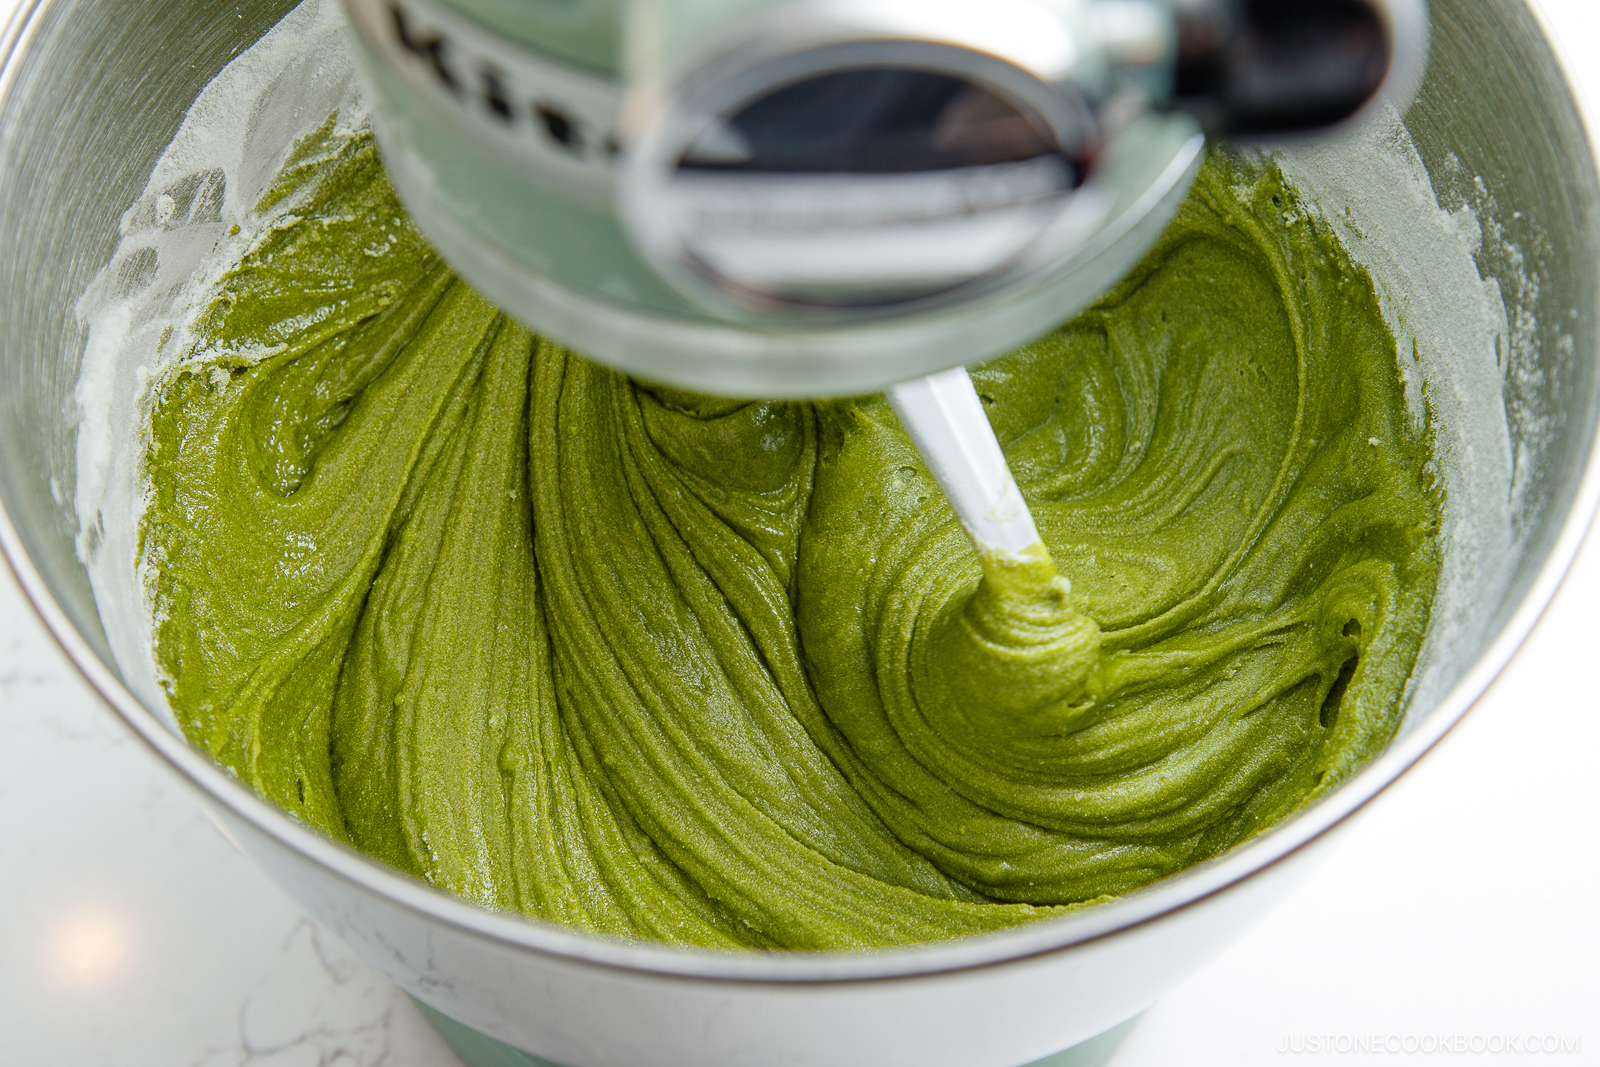
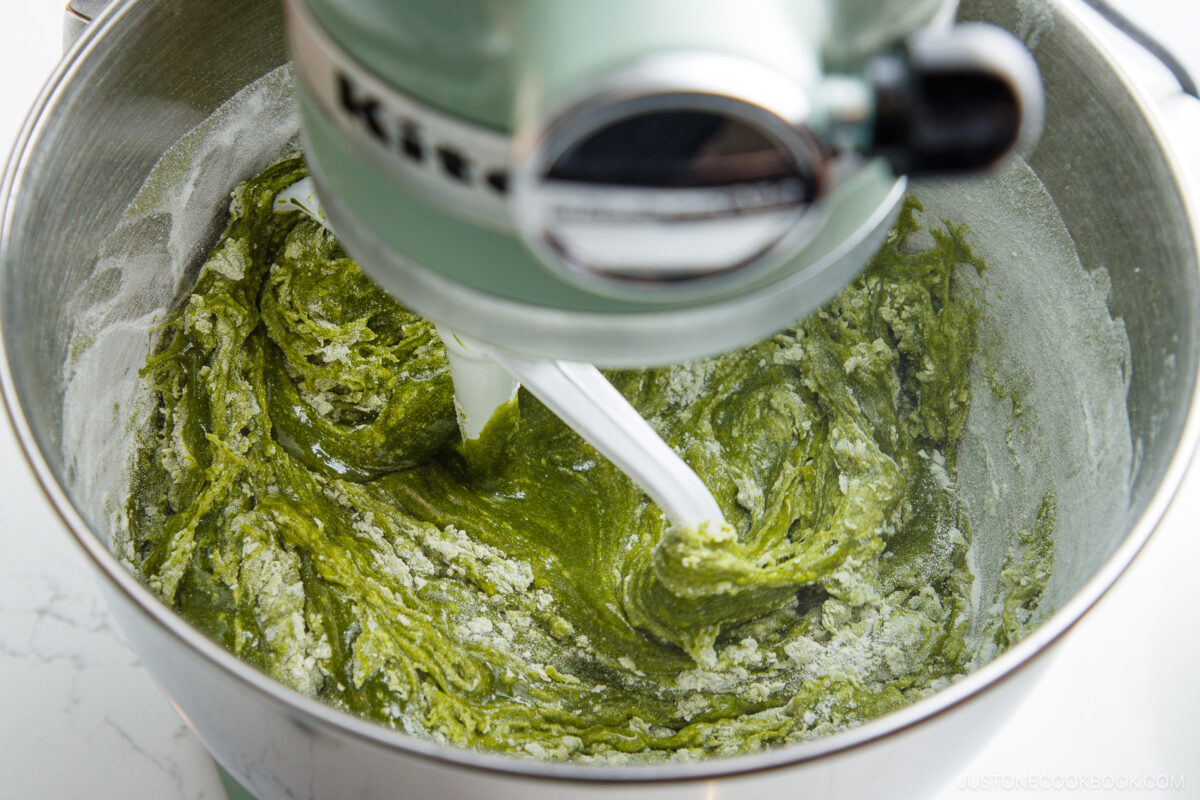
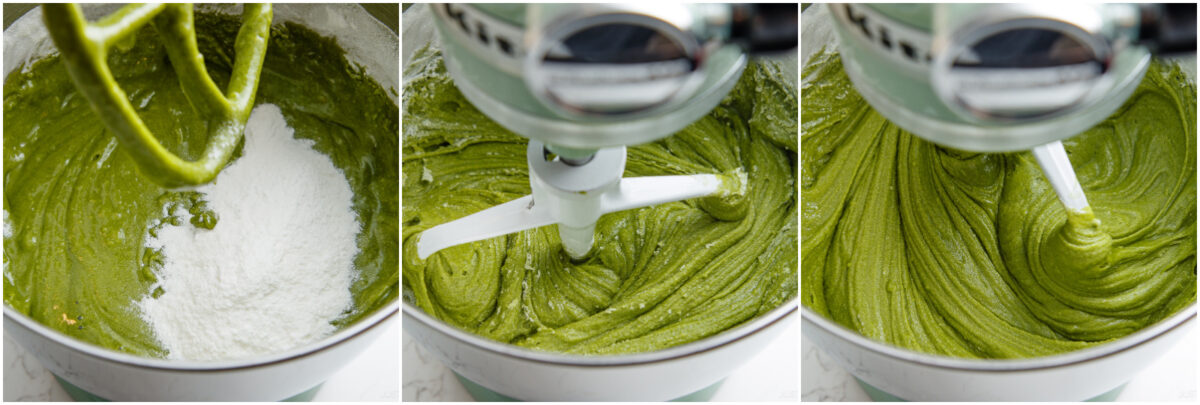
- Add the dry mochiko mixture to the wet ingredients in three additions, mixing gently each time.
- This is the second addition of the mochiko mixture.
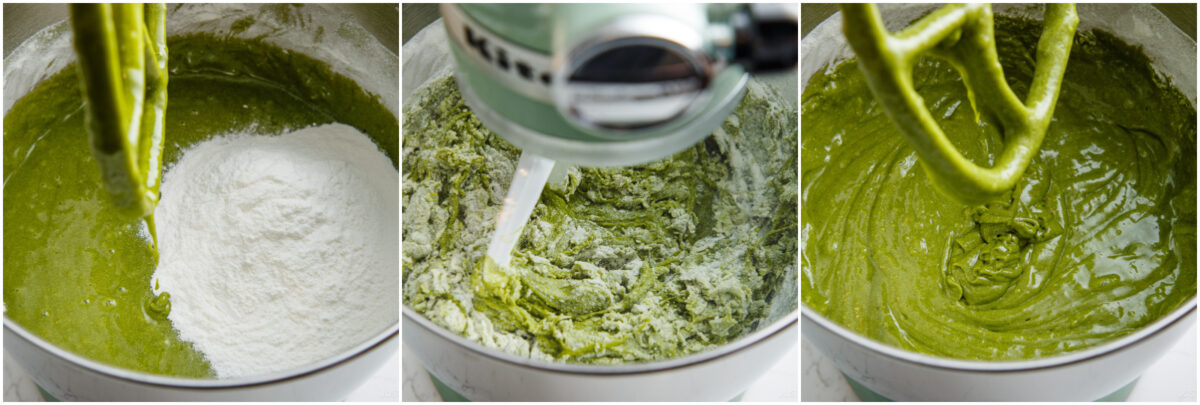
- Here's the last addition of the mochiko mixture. Nami's Tip: For a signature chewy texture, do not overmix—there’s no gluten in mochiko, but adding in too much air can give it a cake-like texture.
To Bake
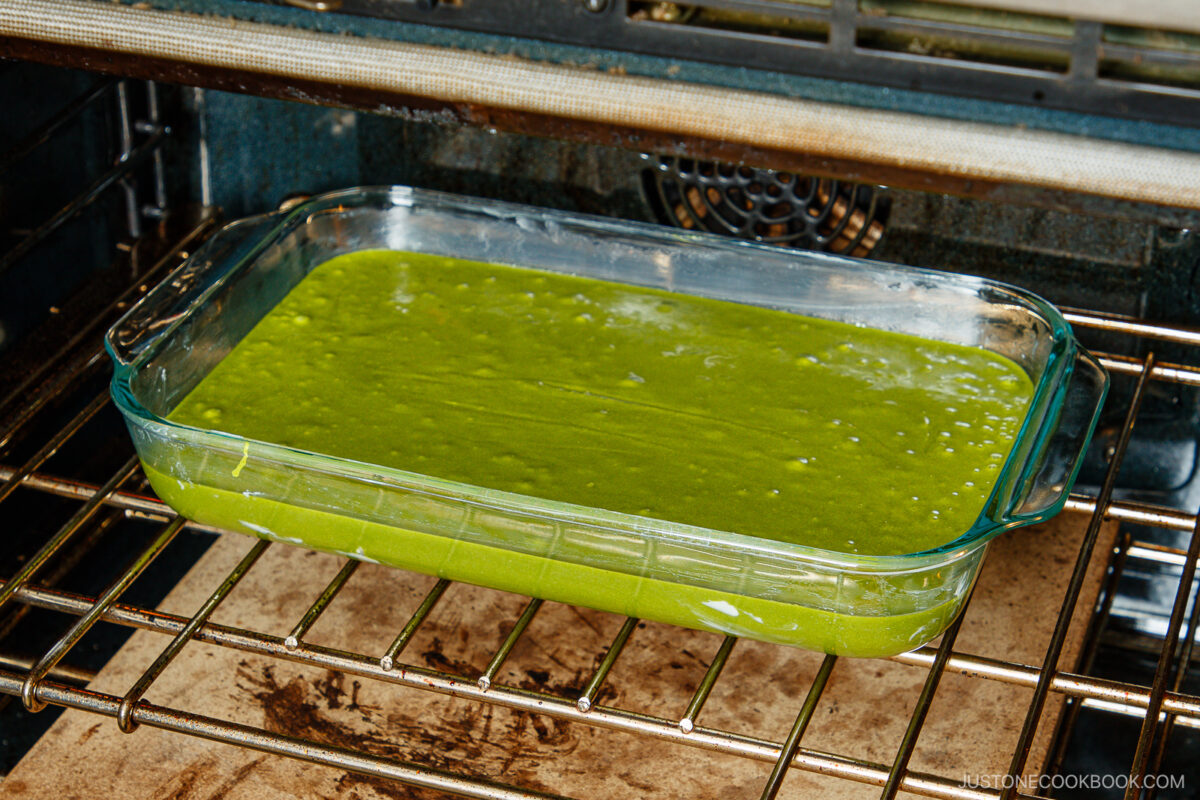
- Pour the batter into the prepared baking dish.
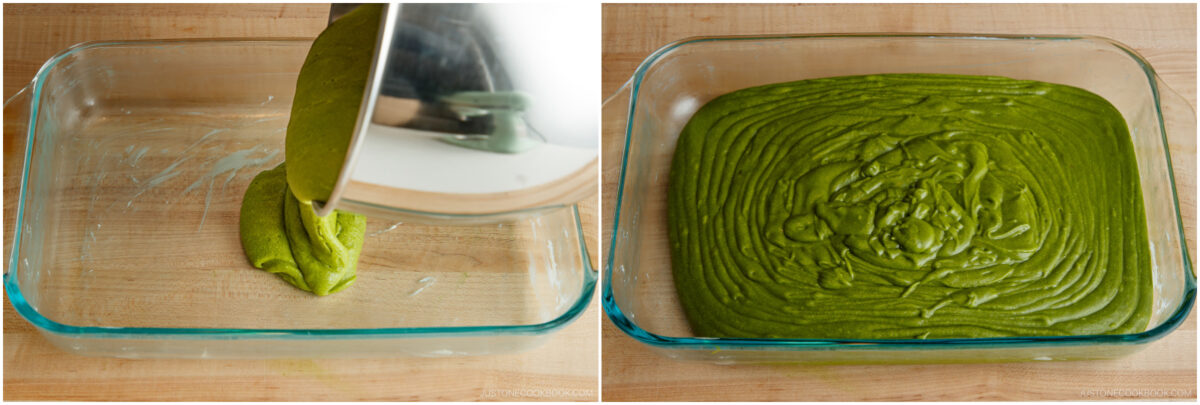
- Smooth the top with a spatula. To release air bubbles, tap the pan on the countertop one or two times from a height of 3–4 inches (7–10 cm). Gently shimmy the pan from side to side to even out the surface.

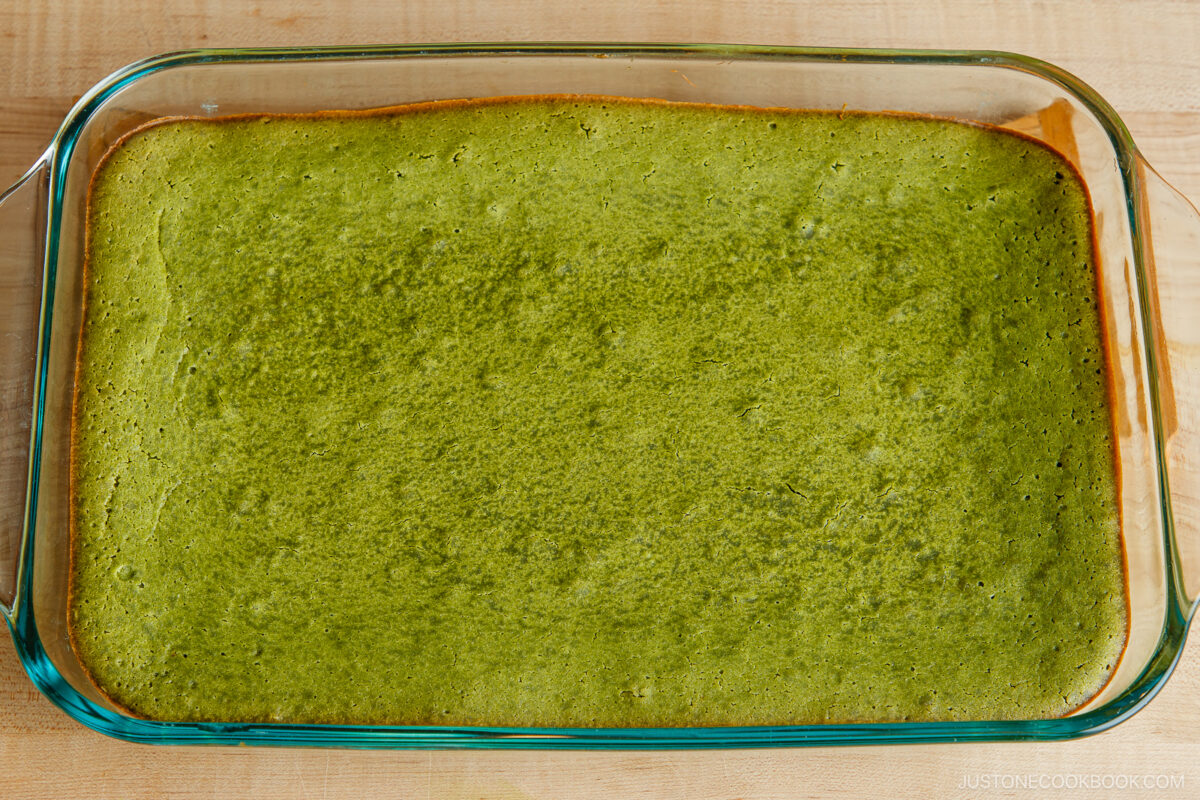
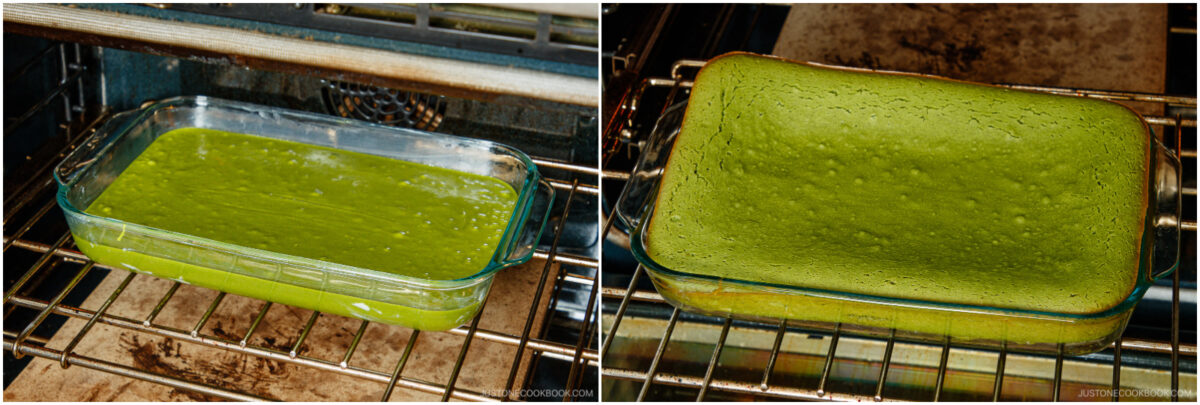
- Bake in the center rack of the 350ºF (175ºC) preheated oven until set, about 50 minutes. Adjust the baking time depending on the thickness of your pan. The mochi cake is done when it's golden brown on the edges and an inserted wooden skewer comes out with moist crumbs.
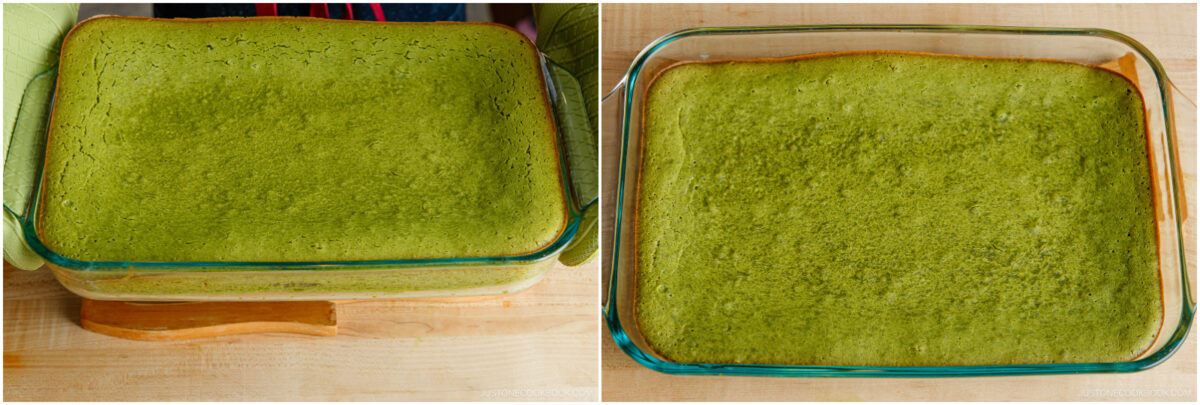
- Remove from the oven and cool in the pan on a wire rack. It will firm up as it cools. While it's still warm, run an offset spatula or butter knife along the edges. Nami's Tip: Don't worry if one corner of the Matcha Butter Mochi pops up while baking—it will sink back into the pan as it cools (just like mine did).
To Serve
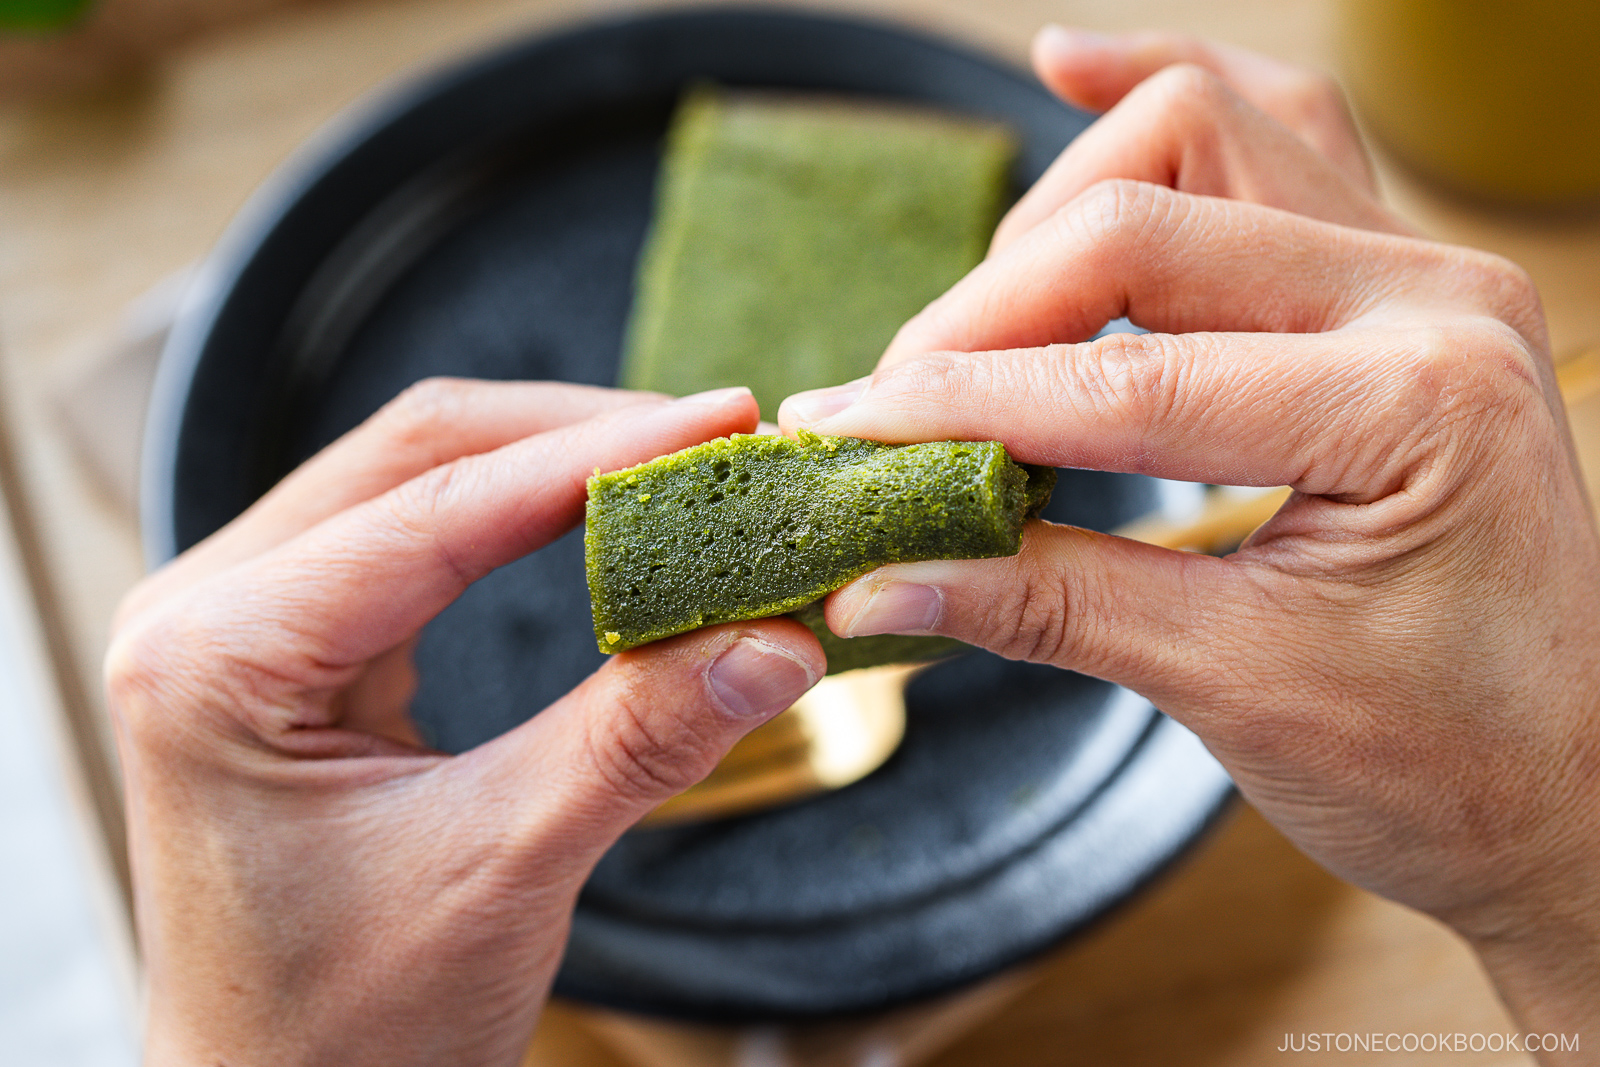
- Slice the butter mochi directly in the baking pan or unmold it to slice clean-cut pieces. To serve from the pan: Let the mochi cake cool completely in the pan for about 1 hour, then slice into small pieces. I rinse my knife halfway through slicing to keep it from sticking. Nami's Tip: You can cut the pieces 2 x 2 inches (5 x 5 cm) for standard size or 1 x 2 inches (2.5 x 5 cm) for finger food size. To slice clean pieces: Cool the mochi cake for 1 hour. Invert it onto a tray or cookie sheet lined with parchment paper. Flip it right side up onto another tray, then slice it into small pieces. Rinse the knife halfway through slicing to prevent sticking.
- Serve at room temperature or slightly warm (my preference). To warm, heat in the microwave for 5–10 seconds.
To Store
- To Retain Matcha Color: Store the Matcha Butter Mochi uncut in a cool, well-ventilated place for up to 2–3 days. Matcha will oxidize and the vibrant green will turn brown over time, especially on cut edges. Exposure to light also affects color, so once cooled, loosely cover with a paper towel to shield from light.To Freeze: Freeze some while they're fresh on day 1—don’t wait till day 3. Place each piece on a small square of parchment paper, then store them in an airtight glass container. They will keep well in the freezer for up to a month. Thaw overnight in the refrigerator or on the countertop before serving. Serve at room temperature or heat in a microwave for 5–10 seconds to enjoy warm.
Notes
- Unsweetened coconut milk: I recommend using coconut milk with a short, clean ingredient list and a smooth, rich consistency. Some cheaper brands can be watery or separate or rely on stabilizers and thickeners like guar gum and xanthan gum, which can affect the texture or taste.
Nutrition
Did you make this recipe?
Tag @justonecookbook on Instagram so we can see your delicious creation!