
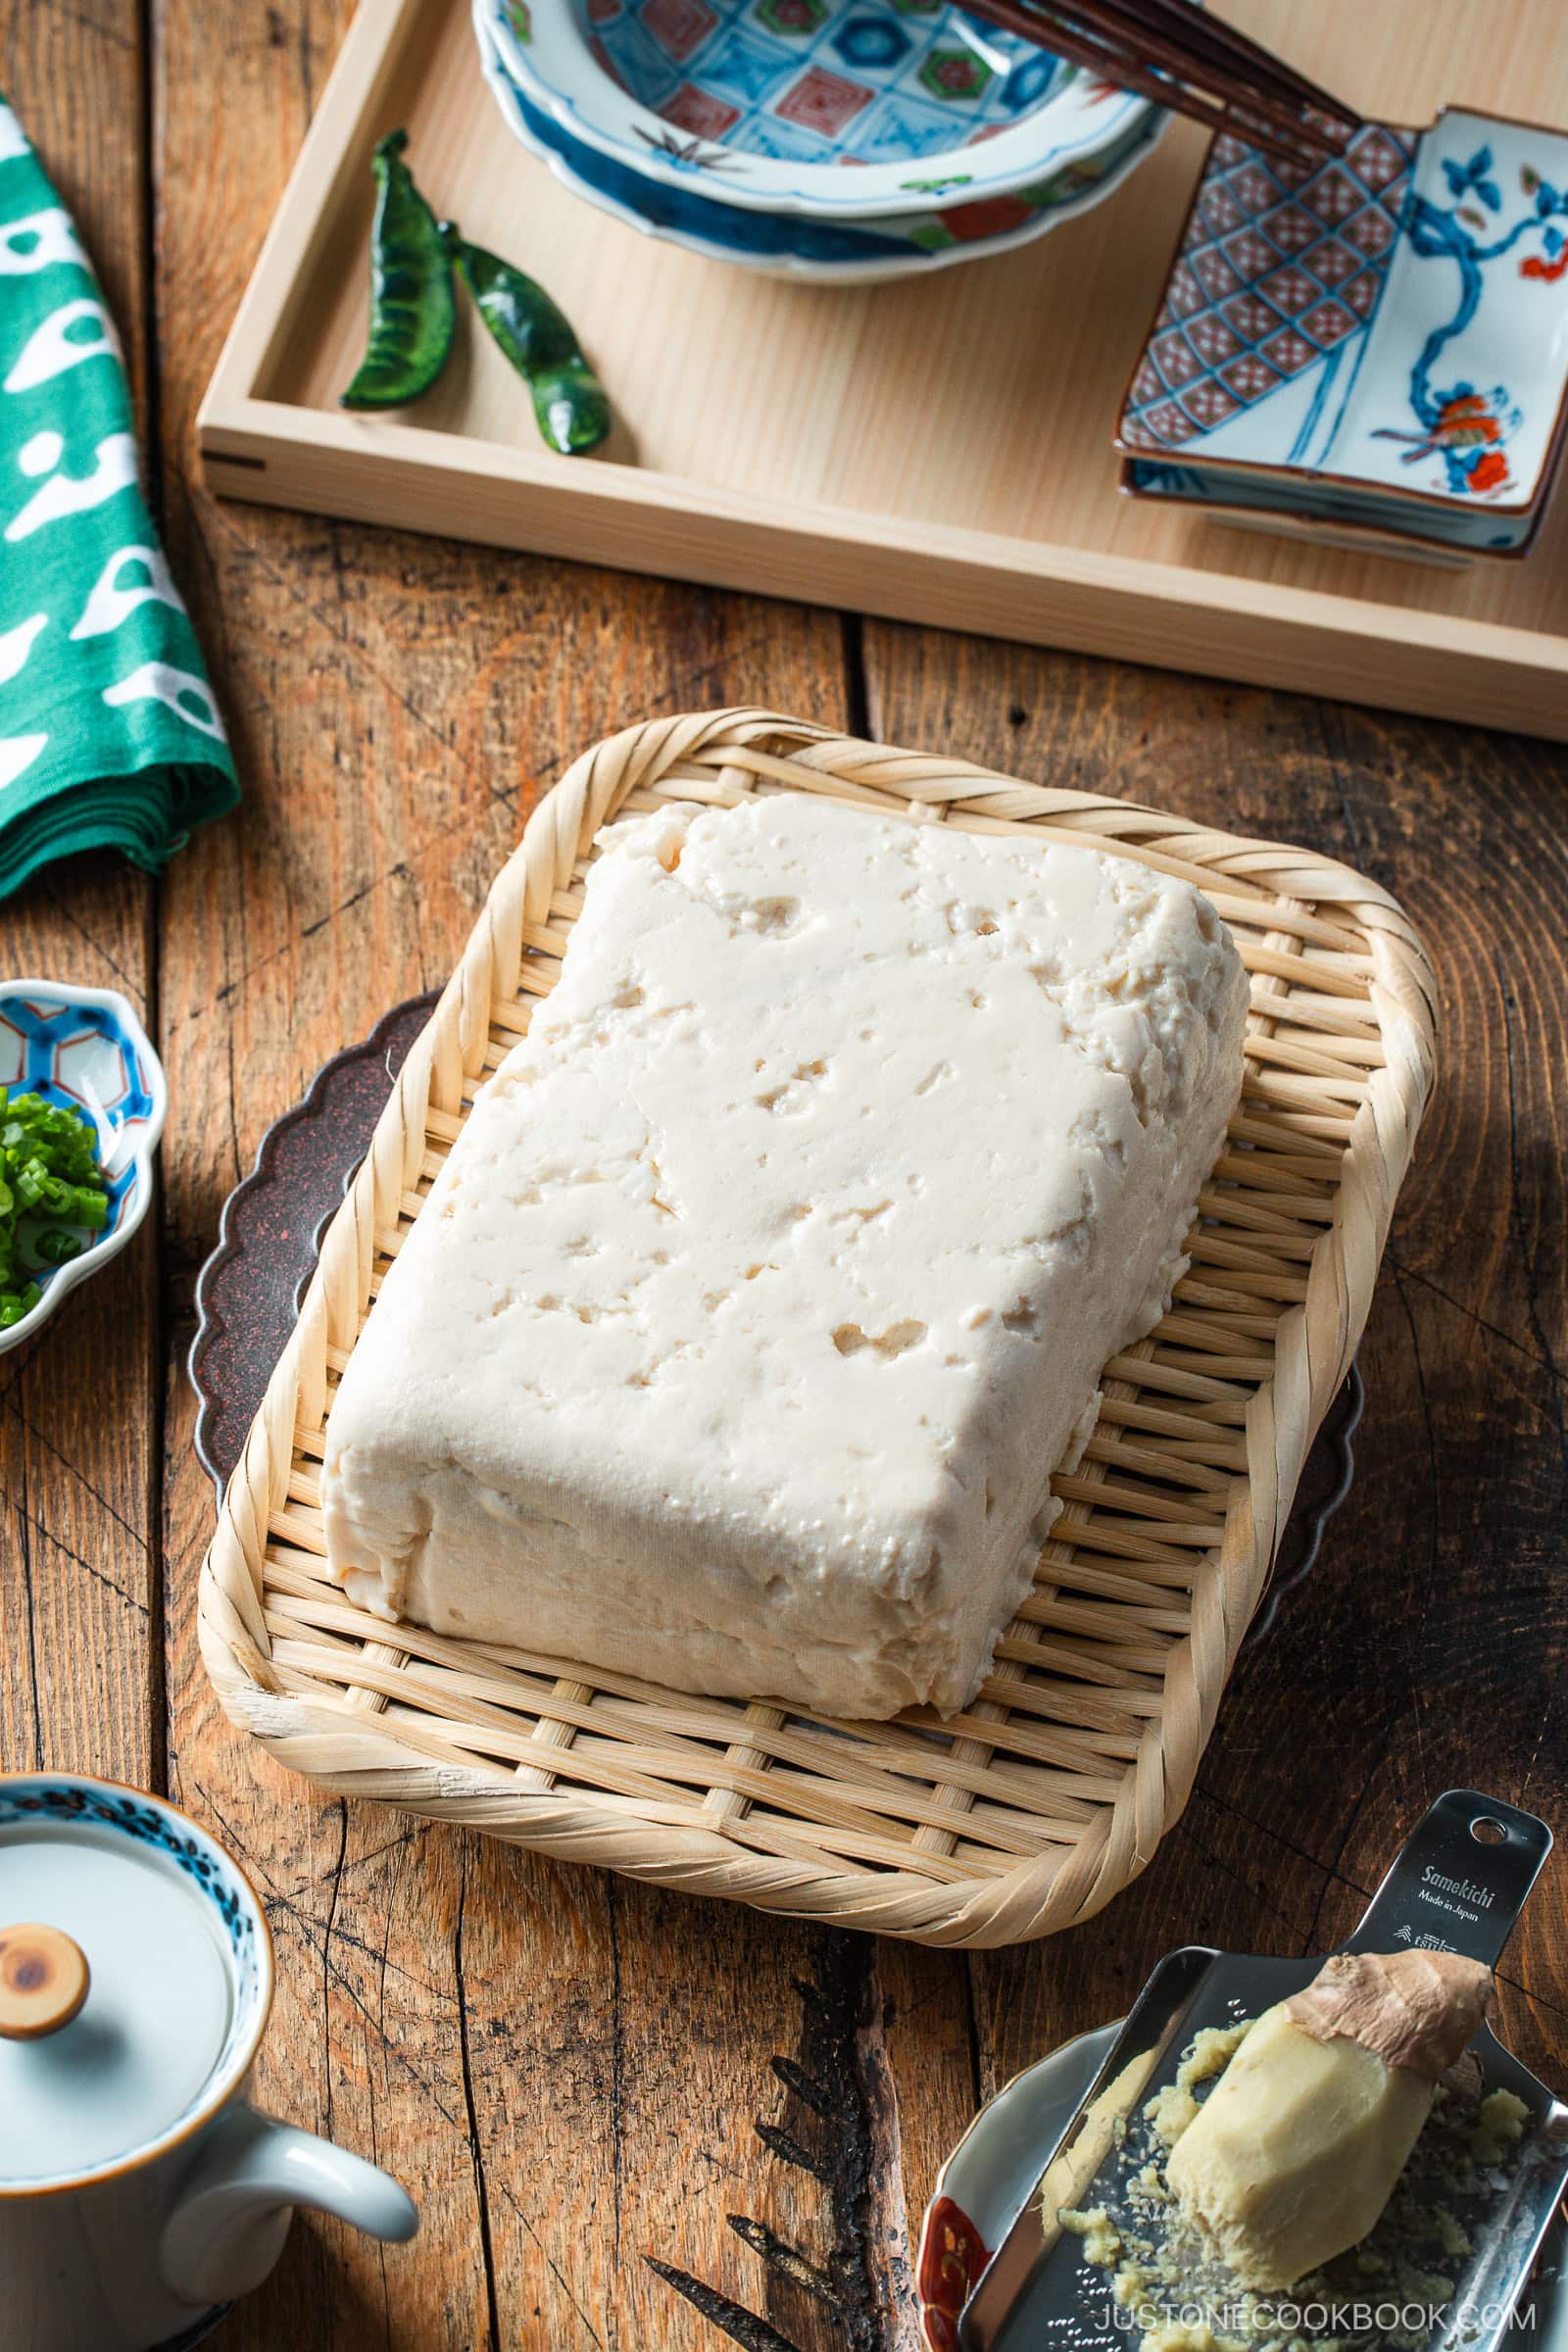
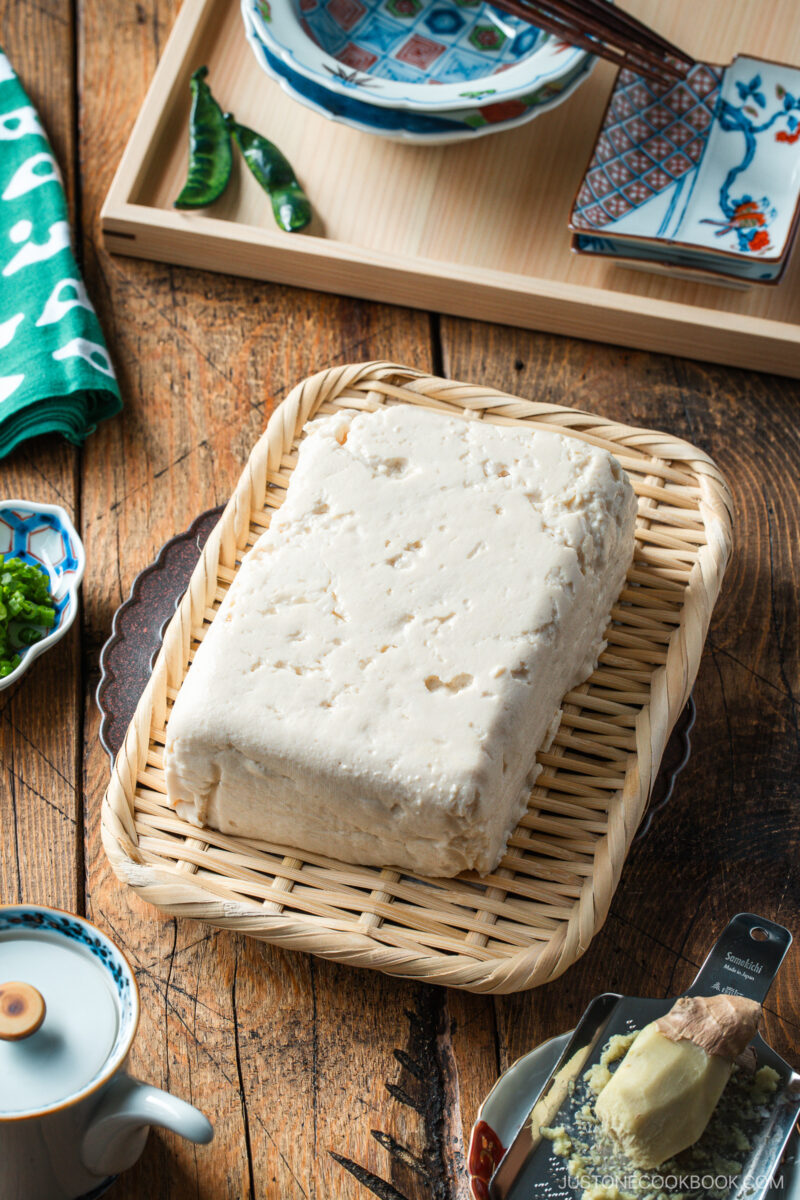
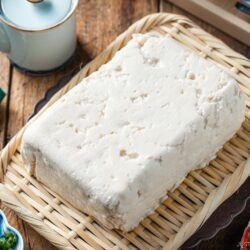
Tofu is a major ingredient in Japanese cooking and Asian cuisine, and it’s easy to buy it freshly made in Japan from specialty shops and artisan makers. However, it’s hard to find fresh soybean curd elsewhere, so I hope you’ll make a batch of my Homemade Tofu recipe to experience this smooth and delicious taste for yourself. There’s really nothing like it!
If you’re craving tofu recipes, try my Mapo Tofu, Agedashi Tofu, and Teriyaki Tofu recipes next!


Why I Love This Recipe
- Delicate taste and texture – Homemade tofu tastes far superior to the kind you buy in a plastic tub.
- Preservative-free – Tofu from scratch has no added chemicals or preservatives, just three all-natural ingredients.
- You can’t beat the freshness! – It’s hard to find fresh tofu in the US. I’m happy to share this recipe so you can experience how delicious it is.
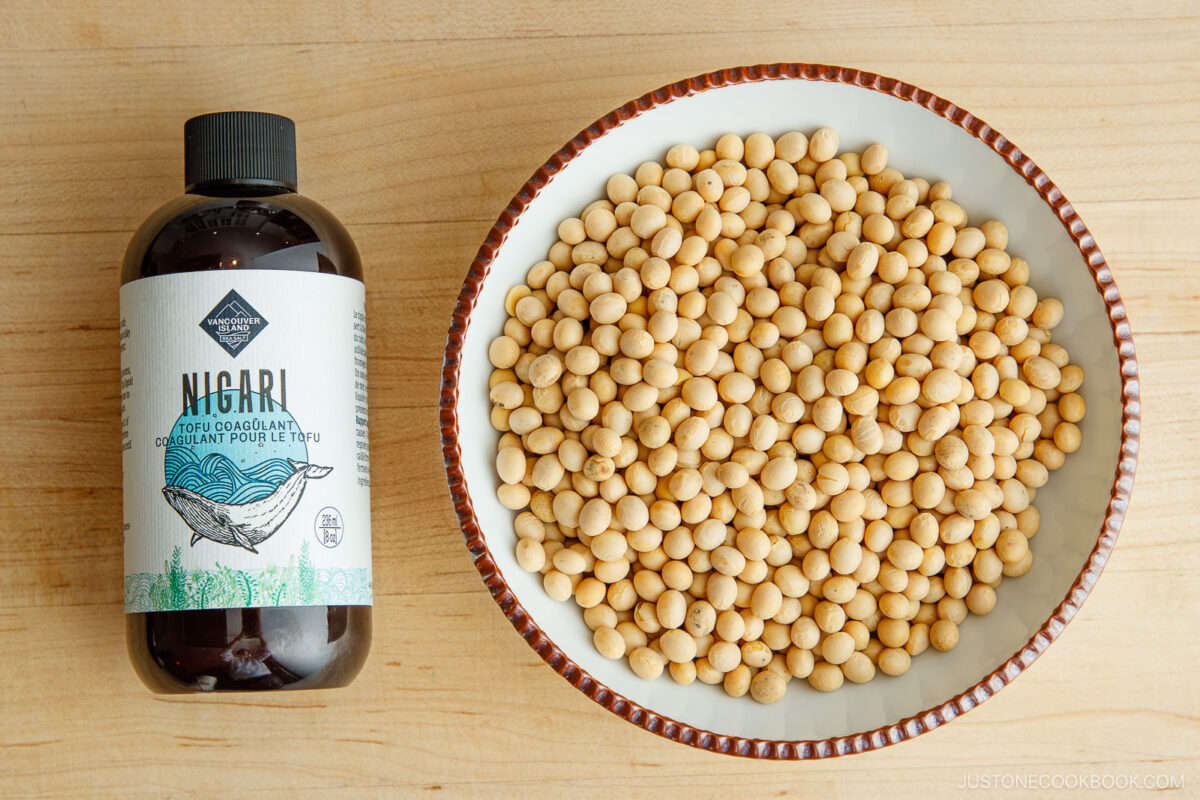
Ingredients for Homemade Tofu
- dried soybeans – You can get non-GMO soybeans from Amazon
- liquid nigari (bittern) – I used 100% natural nigari from Amazon
- water
Find the printable recipe with measurements below.
Jump to Recipe
What is Nigari?
Nigari (also called bittern) is a natural coagulant used to transform soy milk into tofu and sometimes to make fresh cheese. It’s the mineral-rich liquid that remains after harvesting salt during the salt-making process.
Nigari contains mostly magnesium chloride and is rich in magnesium, calcium, and potassium.
Where to Get Nigari:
You can find it sold in liquid form, coarse granules, or fine crystals on Amazon or at Japanese grocery stores.
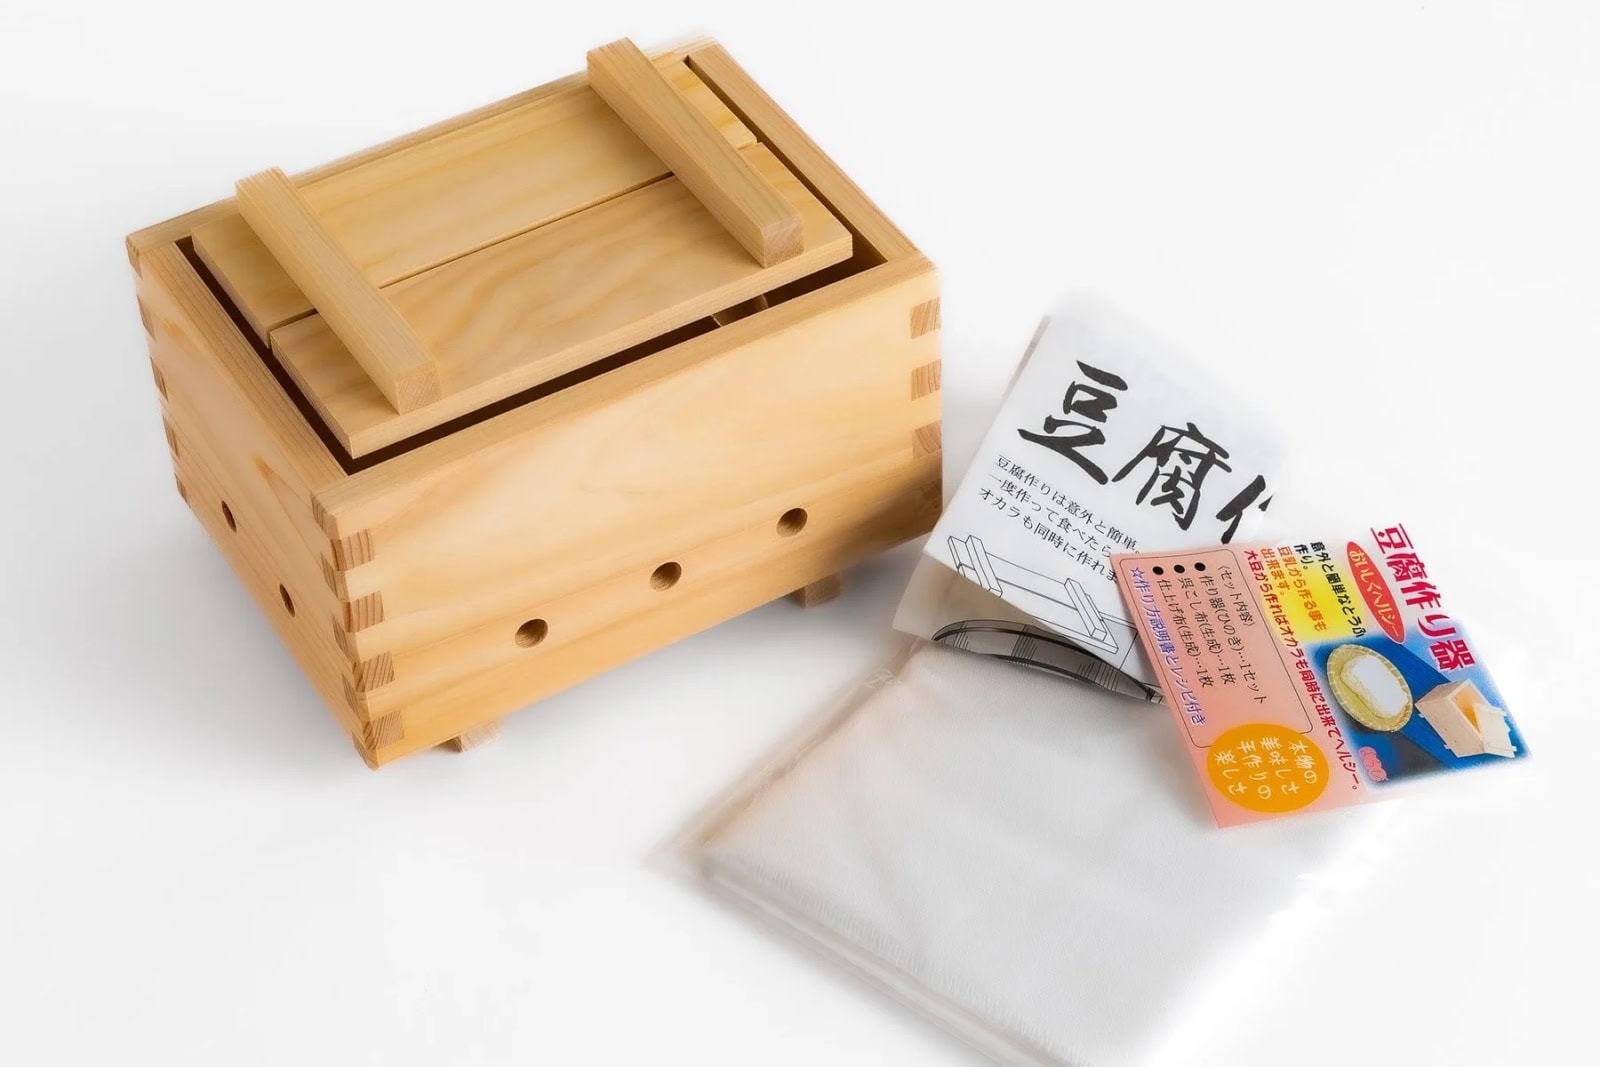
Key Equipment
- tofu mold – I use a traditional Hinoki Tofu Maker from JOC Goods.
- straining bag and finishing cloth – These came with the tofu-making kit I used. You could also use a nut milk bag and muslin cloth or cheesecloth.
- instant-read thermometer – I use this thermometer for accuracy, and it’s essential for this recipe. It takes away the guesswork and helps prevent mistakes.
How to Make Homemade Tofu
Prepare the Soy Milk
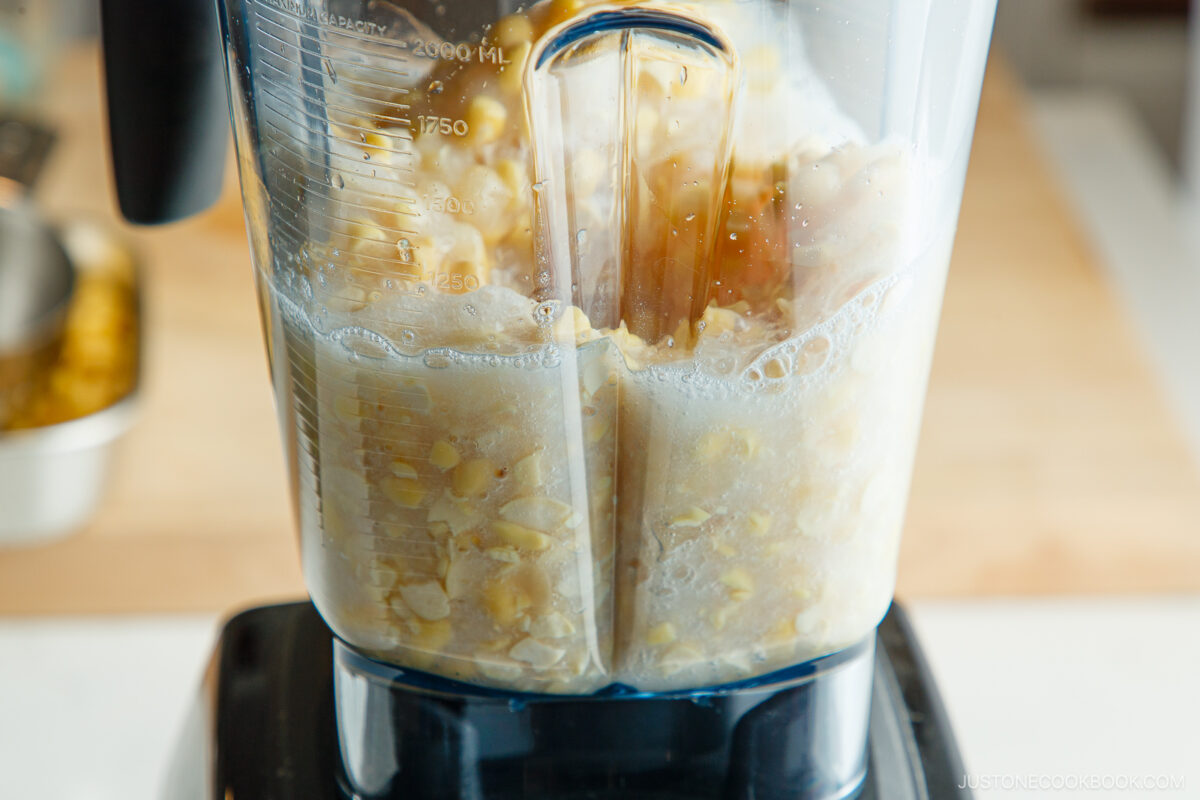
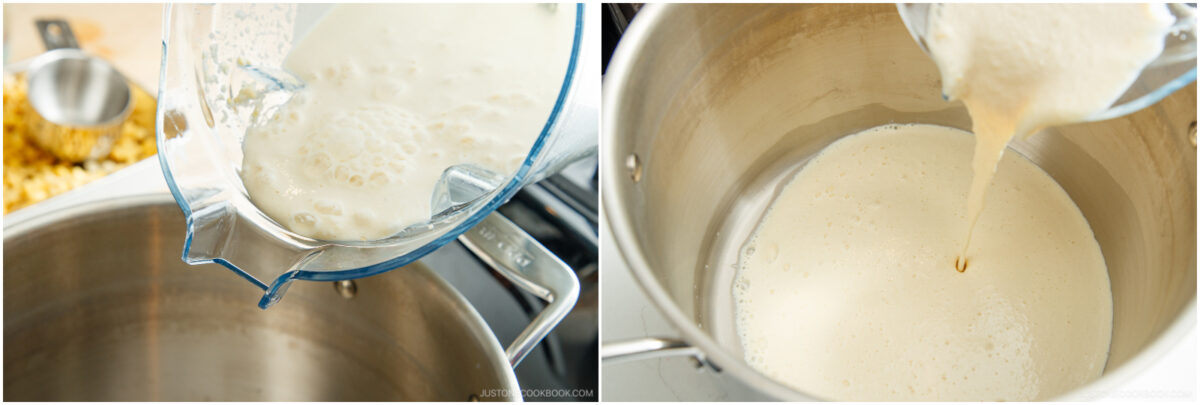
- Soak and blend. Rehydrate the beans overnight in a large bowl, then purée with water in a blender until smooth. Transfer it to a large pot.
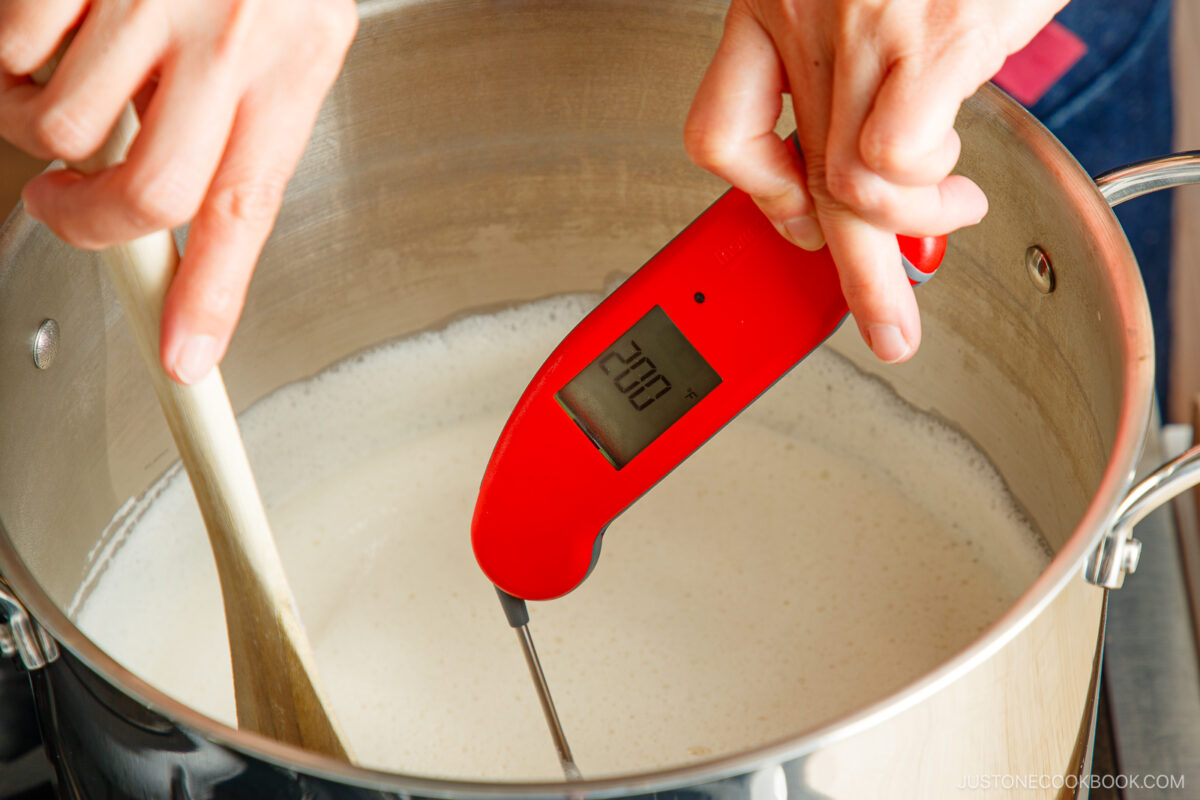
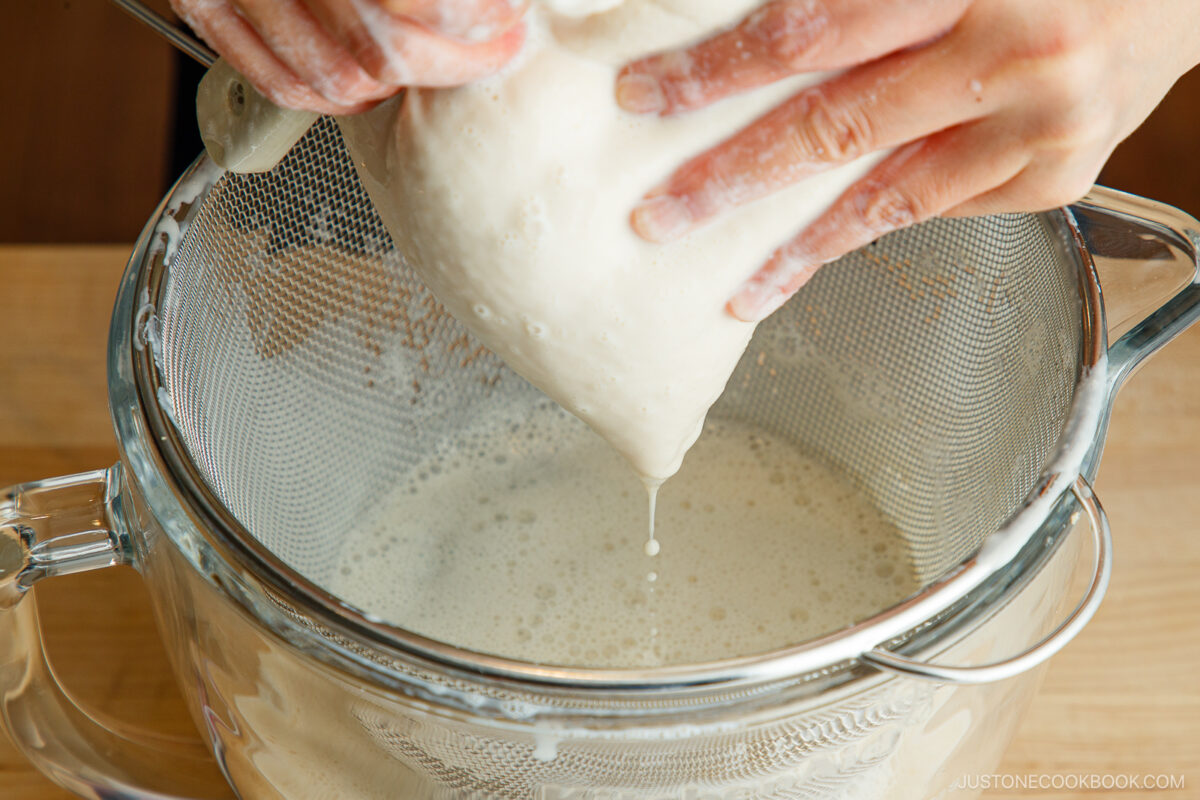
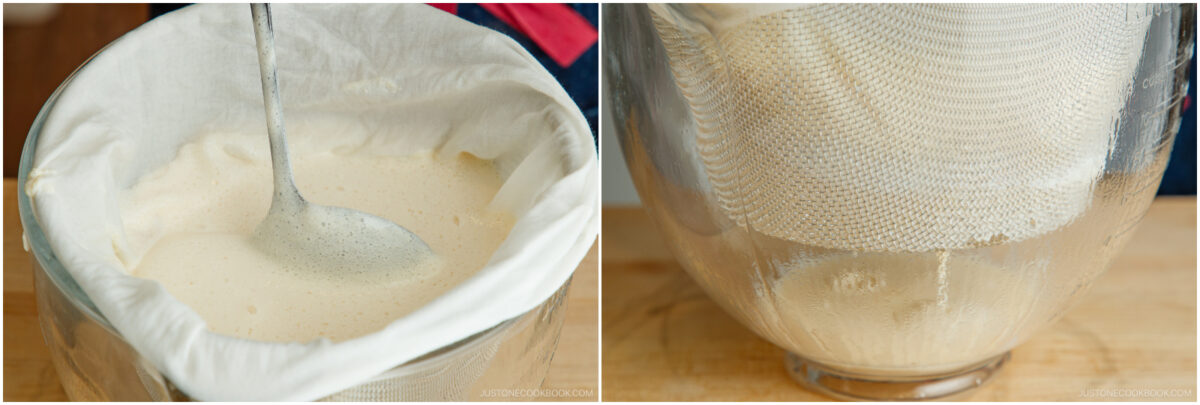
- Cook and strain. Bring the mixture to a gentle boil (about 200ºF or 93ºC), then simmer for 8–10 minutes. Pour it through a strainer lined with a straining bag. The smooth milk will pass through, while the pulp remains behind.

Curdle the Soy Milk
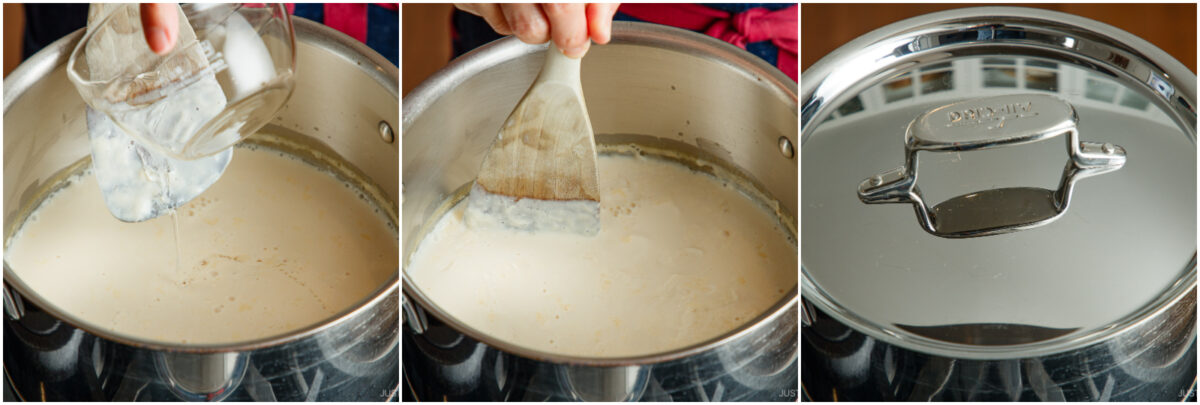
- Warm the soy milk. Heat it to 170ºF (75ºC) for 2 minutes, then turn off the heat.
- Add the nigari. Pour half over the soy milk. Stir with a wooden spoon or spatula, cover, and let sit for 3 minutes. Pour in the rest; stir, cover, and let sit for 15 minutes.
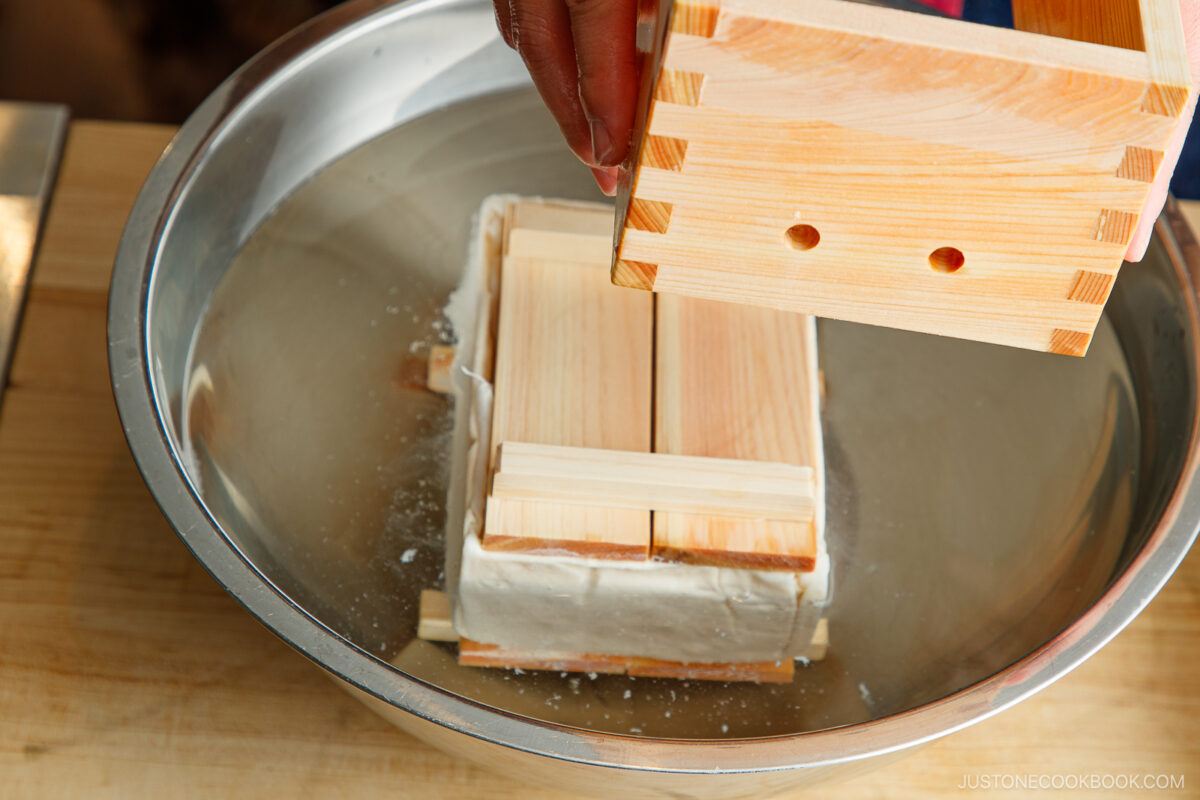
Shape the Tofu
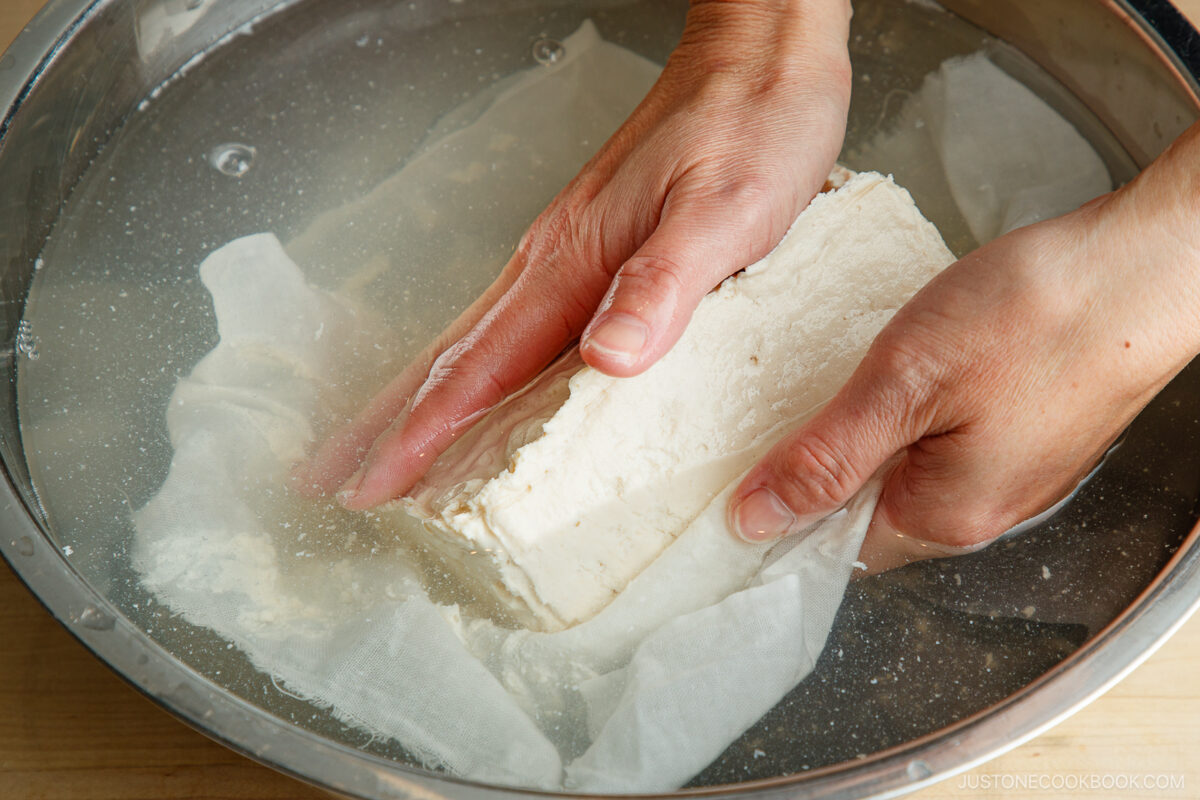
- Transfer curds and press. Scoop the curds into a lined tofu box. Add the lid and place a weight or heavy object on top. Drain for 30 minutes for medium-firm tofu. Unmold and soak the wrapped tofu in a bowl of cool water for 30 minutes. Your homemade tofu is best enjoyed about 4 hours after it’s made. If it’s still warm, add ice to chill; otherwise, transfer to a container and refrigerate.
Nami’s Recipe Tips
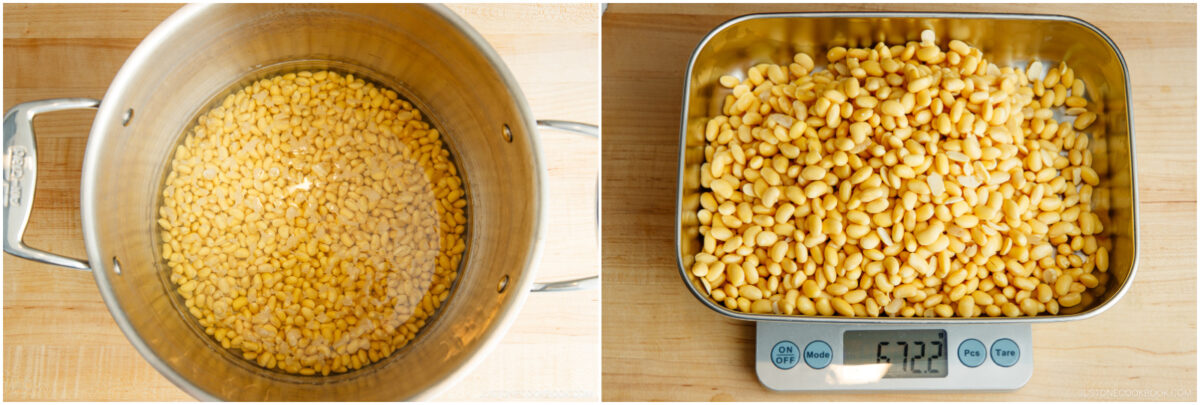
- Calculate the water amount – Weigh your rehydrated soy beans and multiply by 2.3 to determine how much water to blend.
- Use a large pot – The purée will foam up as it cooks, so I recommend a 6-qt. or a larger stockpot.
- Cook the soy milk gently – Stir the bottom of the pot to prevent scorching, and keep it at a gentle simmer.
- Strain while hot – Warm pulp separates more easily, yielding smoother soy milk and less waste.
- Maintain the right temperature – When adding nigari, keep soy milk around 170ºF (75ºC); if too cool, the tofu won’t set; if too hot, it will become too firm.
- Do not overmix the nigari – If you do, the tofu will be too firm. I use six gentle figure-8s to mix in the nigari.
- Press with the right weight – Light pressing creates soft, silky tofu. Heavy, longer pressing makes firm tofu.
- Use clean tools – Disinfect cloths, bags, strainers, and molds to keep tofu fresh and safe.
- Soak the pressed tofu – Submerge it in cool water to get rid of the nigari’s bitter flavor.
- Enjoy fresh tofu a few hours after making! It sets fully, releases excess moisture, and the flavor settles beautifully.
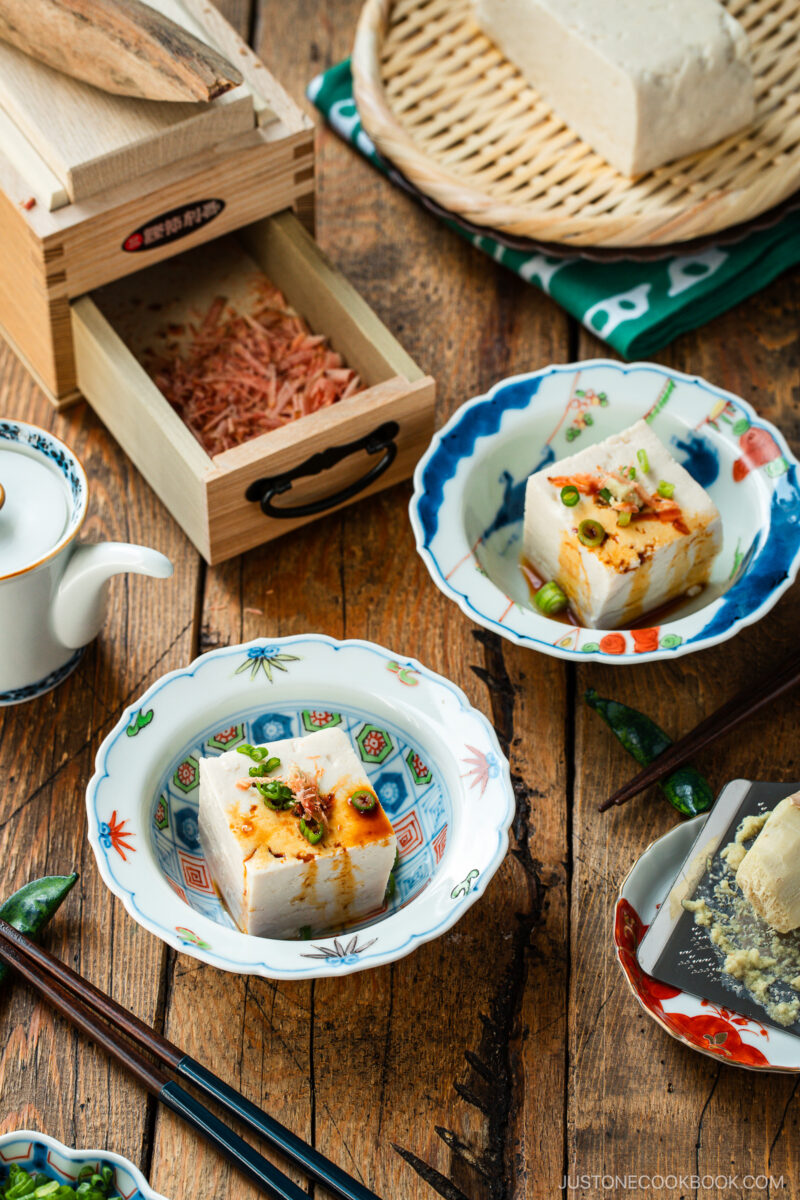
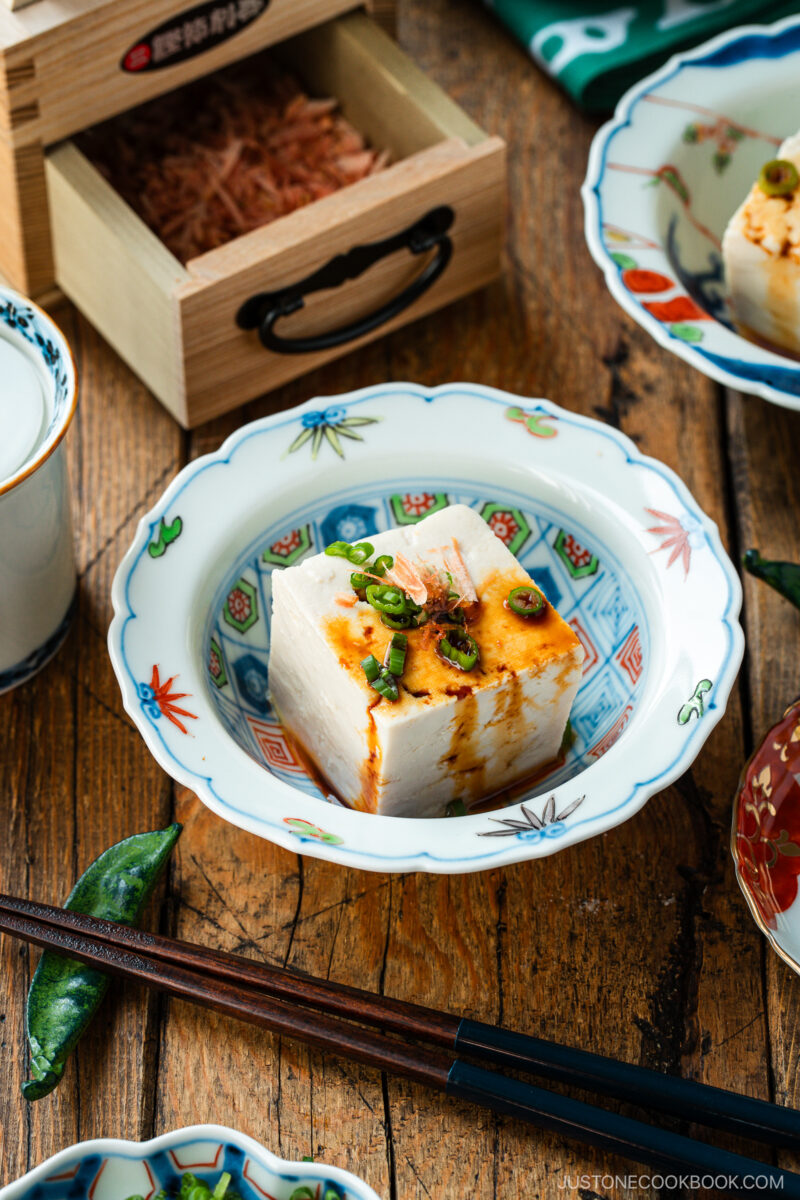
How to Enjoy Homemade Tofu
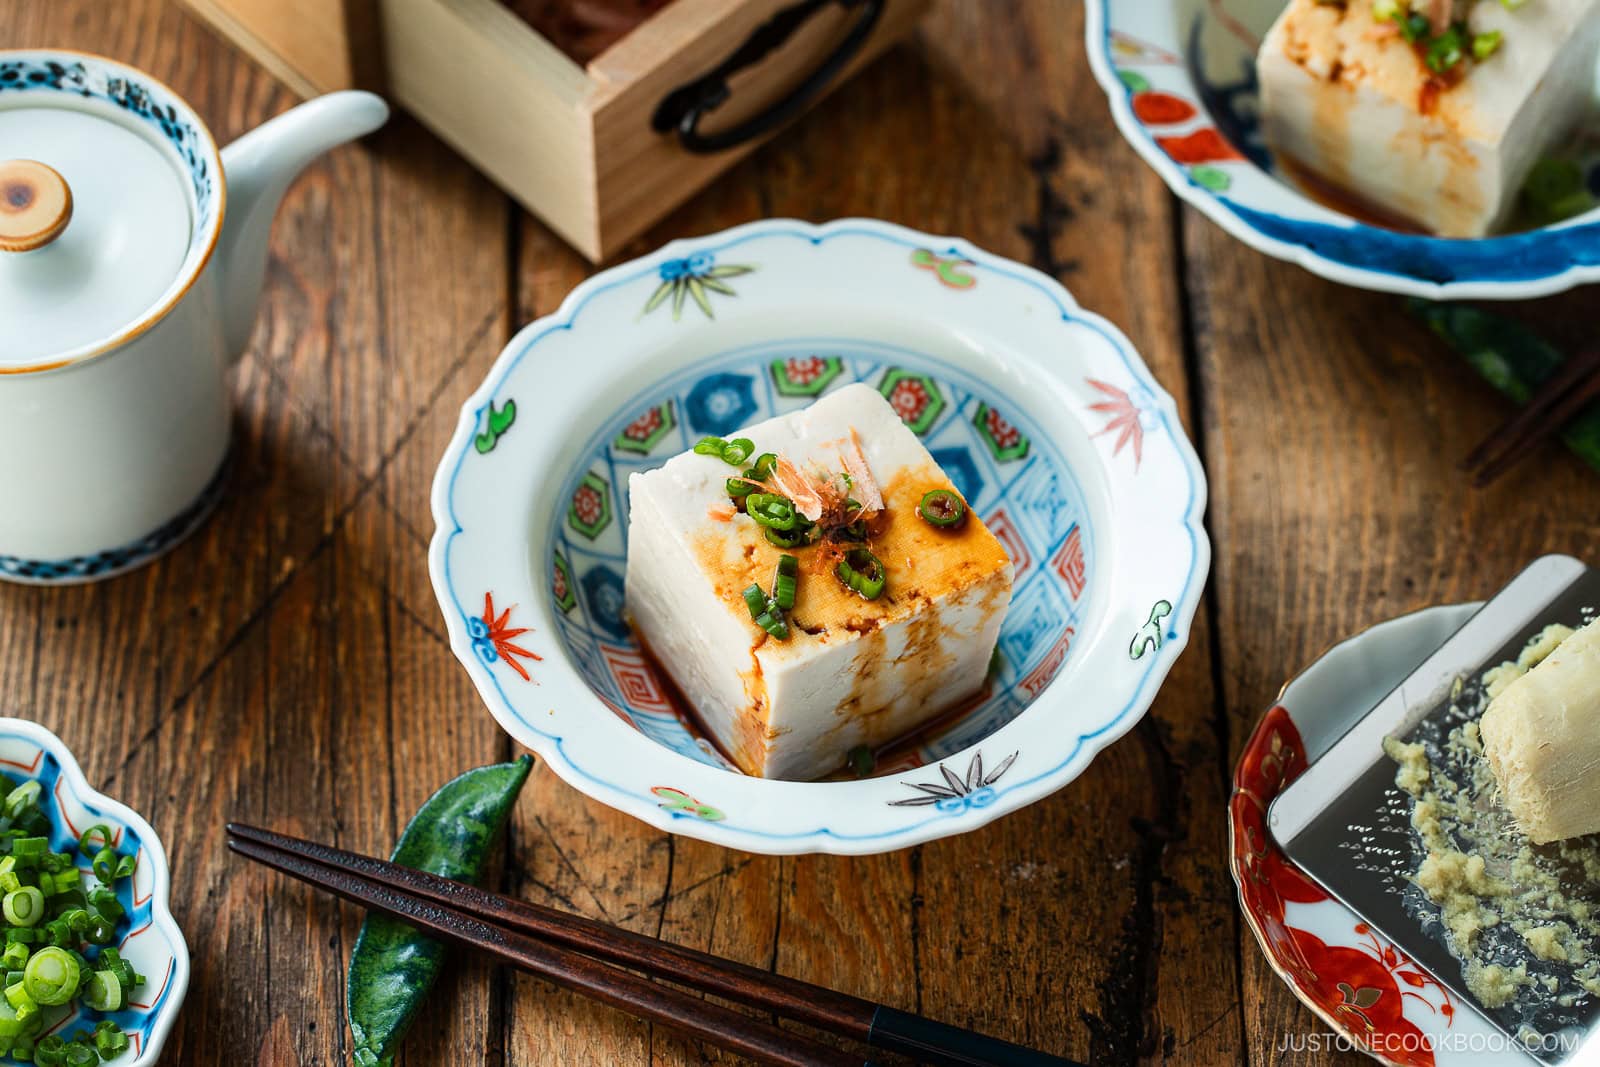
Your homemade tofu is best enjoyed about 4 hours after it’s made because it needs time to set fully and release excess moisture. Let it rest to cool, firm up, and settle the flavors for that delicate yet cohesive tofu texture and taste.
- In an appetizer – Japanese Cold Tofu (as shown in this post)
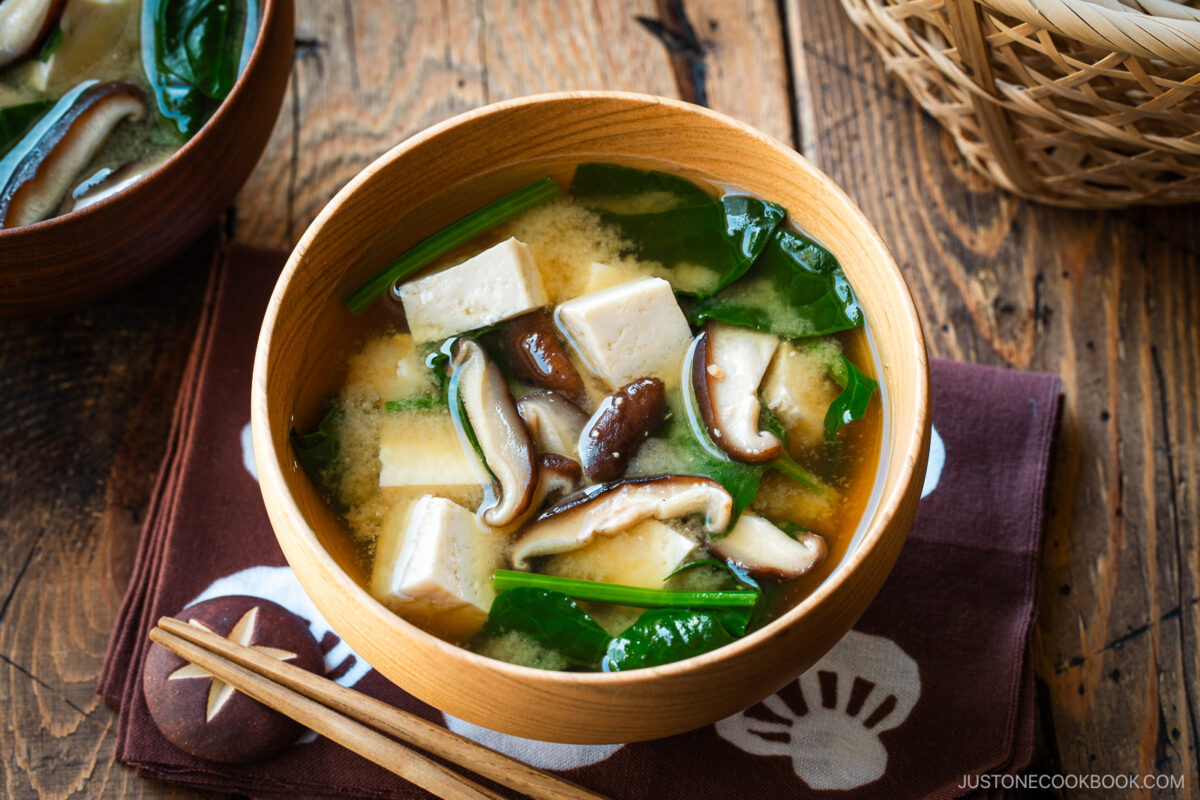
- In soup – Homemade Miso Soup
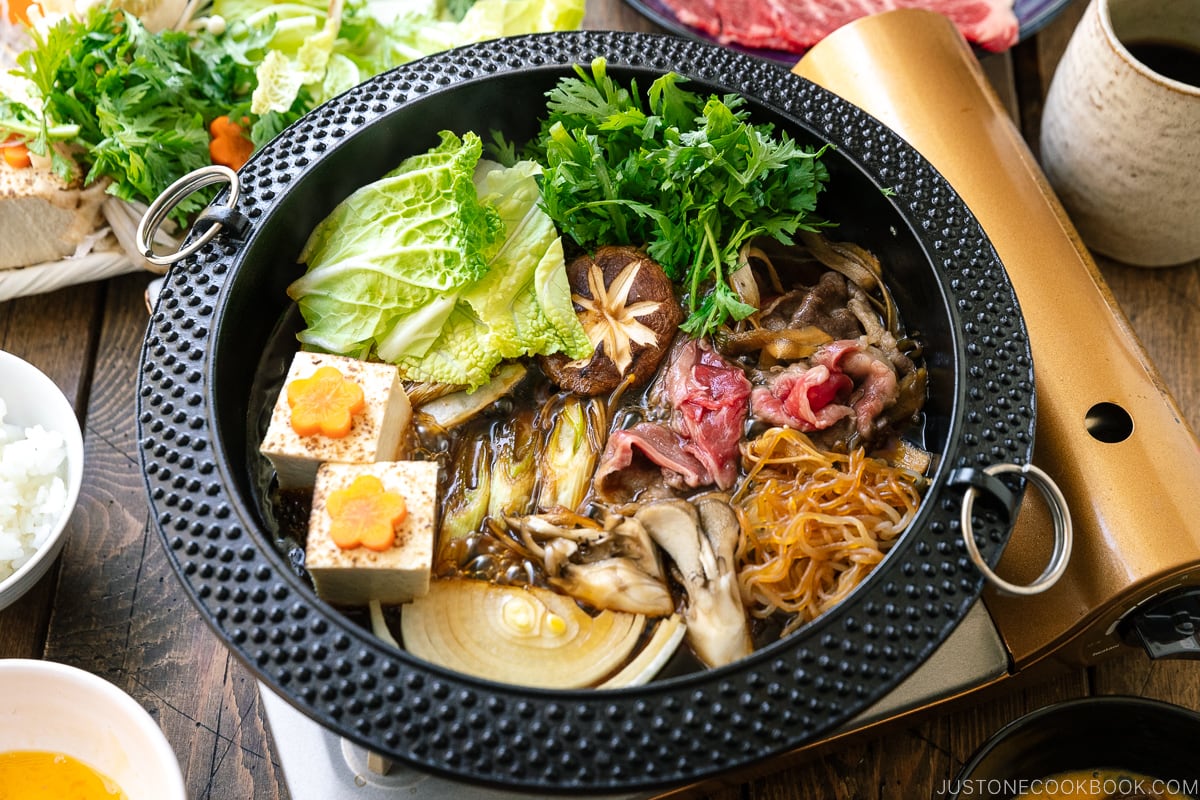
- In hot pot – Sukiyaki
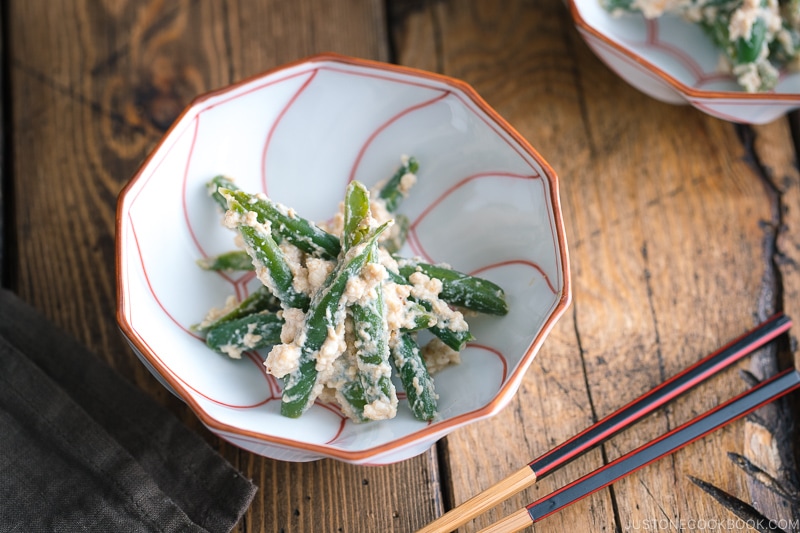
- In salad – Green Bean Shiraae (mashed tofu salad)
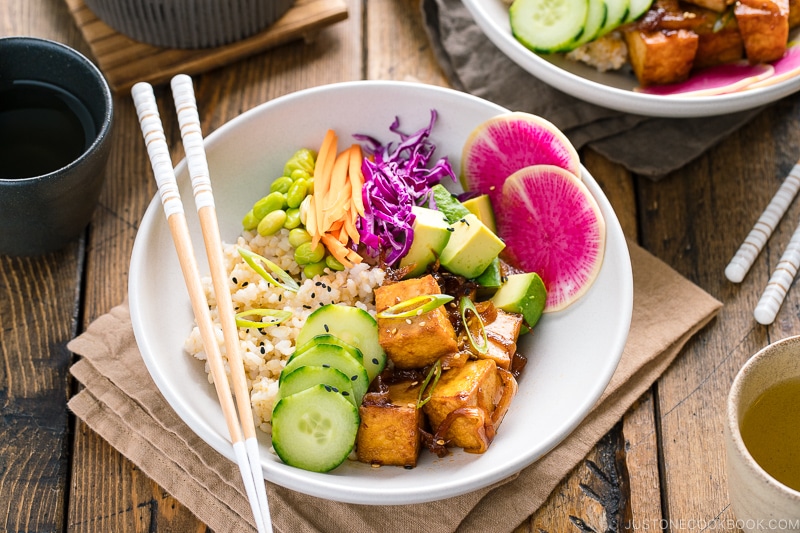
- In a rice bowl – Vegan Poke Bowl
- In pasta – Creamy Miso Pasta with Tofu and Asparagus
Storage Tips
To store: Because it has no preservatives, it should be enjoyed the same day for the best quality. However, if you’d like to store it, transfer the tofu to a container and cover with fresh water. You can refrigerate it for up to 1–2 days, but be sure to change the water every day. You can store the soy pulp (okara) in the fridge for 2–3 days or in the freezer for up to 1 month.
How to Adjust the Tofu Texture
Want softer silken tofu instead of medium-firm? You can control the texture of bean curd by how much nigari you add, how heavy the weight is, and how long you press it.
- For soft tofu or silken tofu: Use slightly less nigari so the curds set loosely, and skip the pressing or press only very lightly. This keeps more moisture in the tofu and gives it a smooth, custard-like texture.
- For firm tofu or extra-firm tofu: Add slightly more nigari to bind the curds tightly, then press the block under a heavy weight for 30–40 minutes (or a longer time). This removes more water and creates a dense, sturdy tofu that holds up well in stir-fries, grilling, and braised dishes.
How to Use Leftover Soy Pulp (Okara)
When you make your own tofu or soymilk, you’ll be left with a soft, pale soy pulp called okara. Don’t throw it away! This fiber-rich ingredient is highly nutritious and versatile.
In Japan, people have cooked with okara for centuries—adding it to soups, stir-fries, and stews. These days, people enjoy it in baked goods, veggie burgers, or even smoothies.
- Stir-fries – Sauté with vegetables, sesame oil, and soy sauce for a quick side dish.
- Soups and stews – Add to miso soup, veggie soups, or Japanese simmered foods (nimono) for extra body and nutrition.
- Baked goods – Mix into muffins, cakes, pancakes, or bread for added fiber.
- Veggie burgers or croquettes – Combine with potatoes, beans, or tofu to make patties.
- Smoothies – Blend a spoonful into smoothies for protein and creaminess.
- Okara “scramble” – Cook with onions and other vegetables as a vegan alternative to scrambled eggs.
- Dog treats – Many people bake okara into pet biscuits (just be sure to avoid ingredients dogs can’t eat).
It’s a wonderful way to reduce waste while adding texture, flavor, and nutrition to your meals!

Frequently Asked Questions
Soy pulp is a delicious ingredient, and I have a section above called “How to Use Leftover Soy Pulp (Okara)” to answer the question.
If not much, enjoy drinking it while it’s fresh. If you make a lot, try one of my favorite hot pot recipes—Soy Milk Hot Pot.
I’d love to hear how yours turned out! 💛 Please leave a star rating and comment below to share your experience. Your feedback not only supports Just One Cookbook but also helps other home cooks discover recipes they can trust.
Easy Homemade Tofu
Equipment
- hinoki tofu mold, (with a straining bag and finishing cloth—see Notes if you're a first-time user)
Ingredients
- 2 cups soybeans (dried)
- 8 cups water (for soaking; use 4–5 times the volume of the dried beans)
- 6½ cups water (for blending; use 2.3 times the weight of the rehydrated beans)
- 2 tsp liquid nigari (bittern) (10 ml; use 1% of the soy milk amount; I used Vancouver Island Sea Salt Nigari)
- 2 tsp lukewarm water (for the nigari)
Instructions
DAY 1
- Gather the ingredients. Remove any discolored or damaged soybeans.
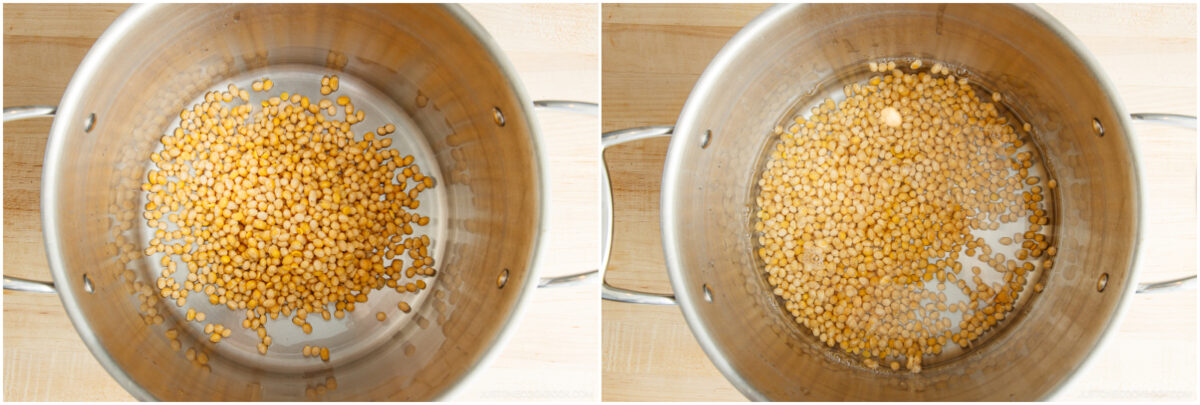
- Rinse 2 cups soybeans several times until the water runs clear and drain well. Soak in 8 cups water (4–5 times their volume of water) in a large bowl or stock pot. The beans will swell to about three times their original size. Soak times: 8–9 hours in summer (68–77ºF, 20–25ºC); 15 hours in spring/fall (50–59ºF, 10–15ºC); or 20 hours in winter (32–41ºF, 0–5ºC). Nami's Tip: Give them plenty of soaking time so they blend smoothly and release more milk.
DAY 2
To Measure
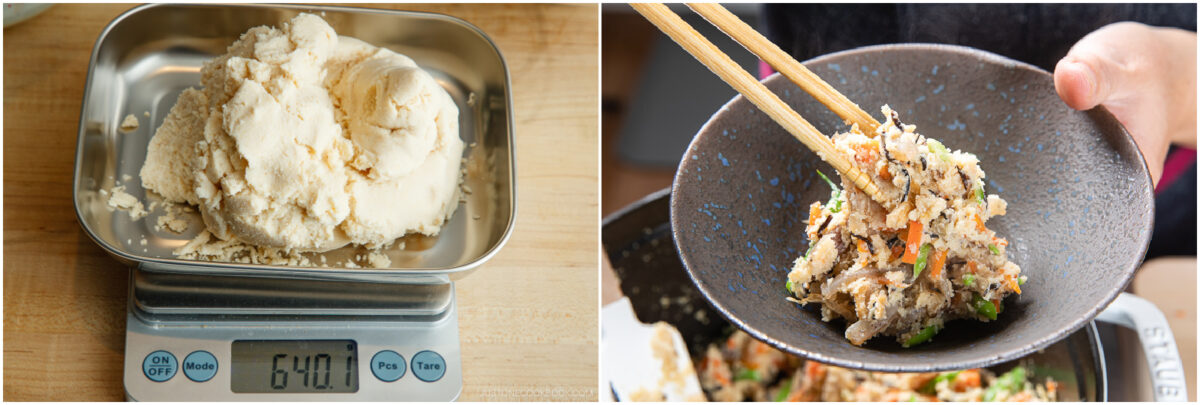
- Check if the beans are ready. When they're soft enough to crush between your fingers and split in half, they're done soaking. Drain well. Then weigh your beans. Mine weighed 672 g. Multiply the weight by 2.3 to calculate the amount of blending water. In my case, 672 x 2.3 = 1546, so I'll use 1546 ml (6½ cups) of blending water. *Why 2.3? See my Recipe Notes.
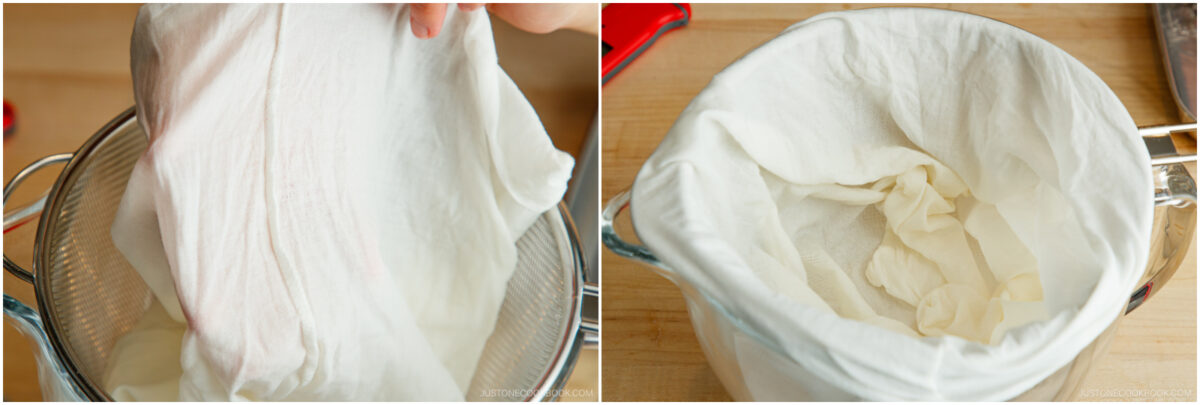
To Disinfect the Bag and Cloth
- Bring a pot of water to a boil, then boil the straining bag and finishing cloth for 5 minutes to disinfect. You can also disinfect the strainer.
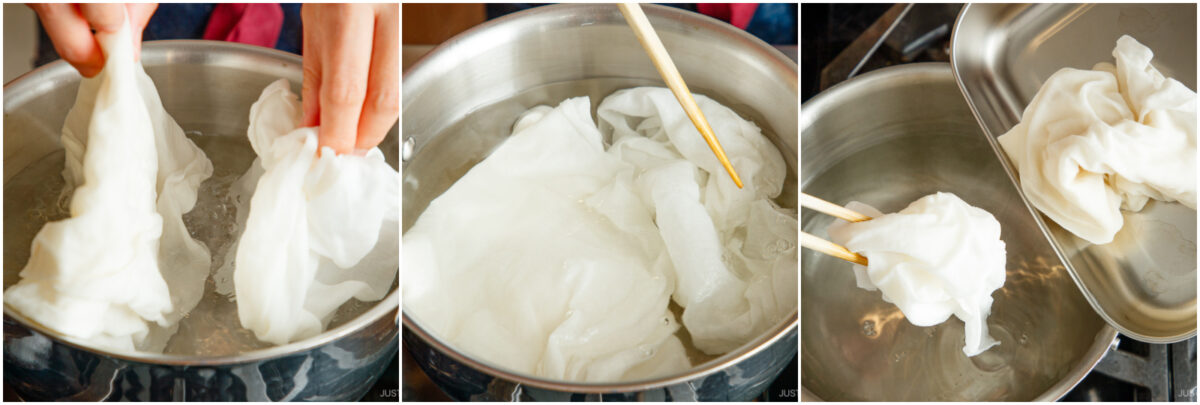
- Line a strainer with the sanitized straining bag. Then, place the strainer over a deep bowl (I use a 5-qt KitchenAid glass bowl).
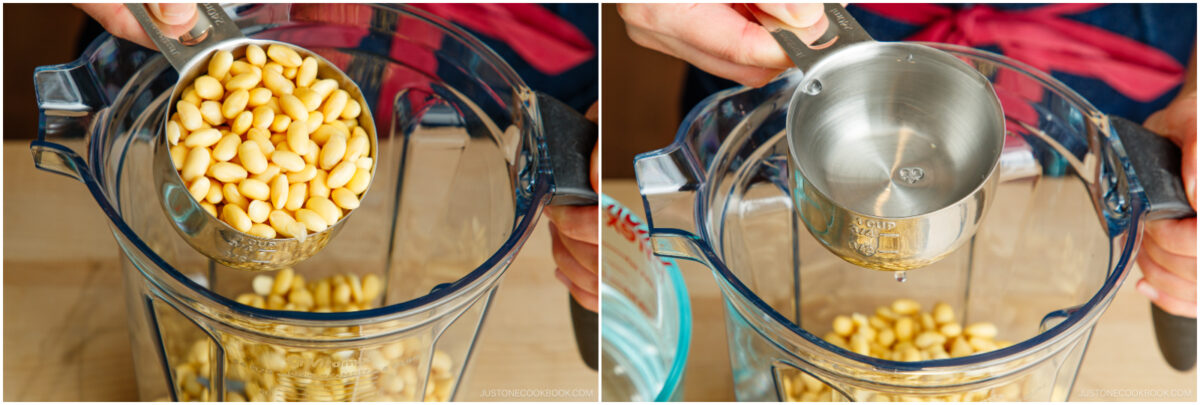
To Blend
- Next, you will blend the beans and the measured blending water. Depending on your blender's size, you need to run in batches. Since you cannot introduce additional water, it's crucial to divide the water carefully.Also, it's a smart idea to reserve about 1 cup of blending water to clean the blender after the final batch.
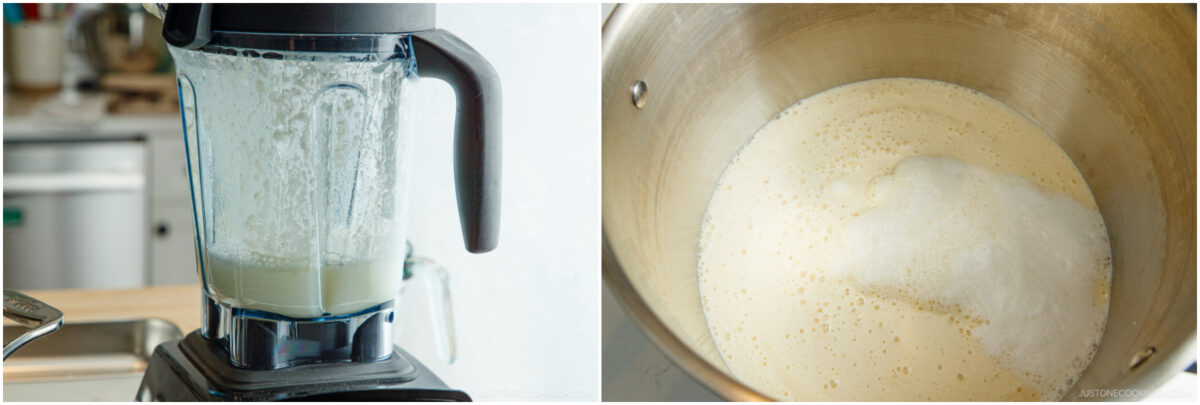
- Add half of the beans and half the water to a high-performance blender (or one-third of each if using a standard blender). Nami's Tip: The mixture will foam up, so fill the carafe no more than two-thirds full.
- Purée until smooth, about 1½ minutes on a medium setting (or 2 minutes for the standard blender).Nami's Tip: The smoother you blend, the more soy milk you'll get—and the silkier your tofu will be.
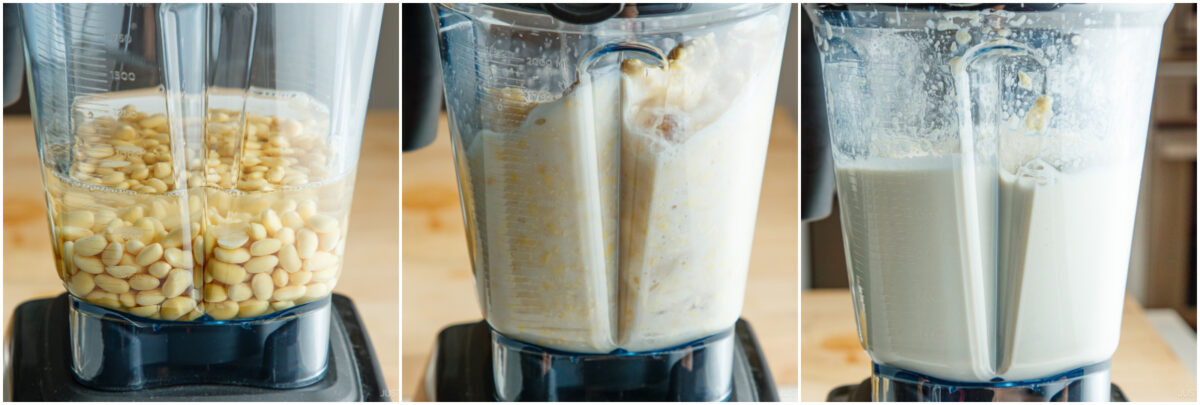
- Transfer it to a large pot (6 quarts or larger). Then, blend the other half of the beans and water (or continue with 2 more batches for the standard blender).
- After the final batch, use the reserved 1 cup of blending water to rinse out the purée from the blender and add it to the pot. Be sure to use all the measured blending water. Nami's Tip: This blended raw mixture is called namago in Japanese. The namago will foam up as it cooks, so use a pot with plenty of room.
To Cook the Namago
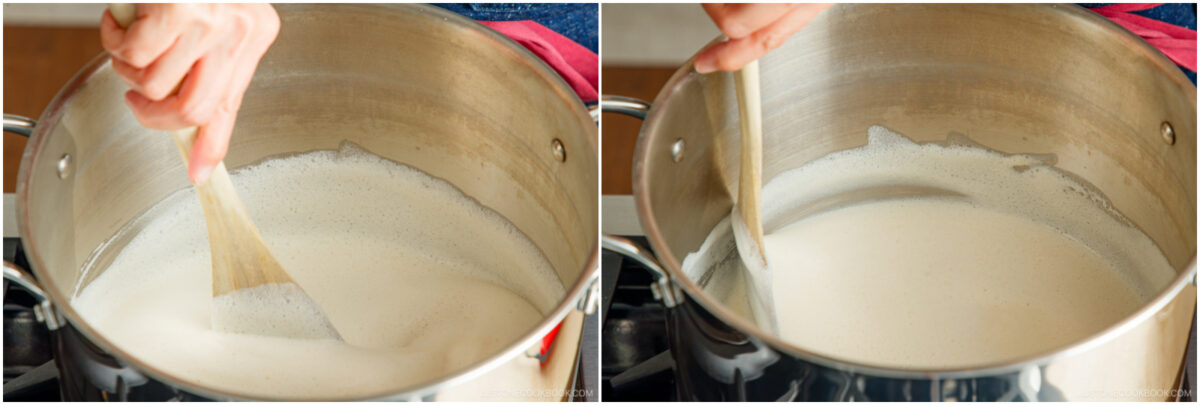
- Heat the mixture over medium-high heat, stirring gently with a wooden spatula and scraping the bottom of the pot to prevent sticking. Bring it to a gentle boil (about 200ºF or 93ºC), then turn off the heat. Otherwise, it will quickly overflow.

- Let the foam settle for 1–2 minutes. Then, turn the stove back on to low and cook gently for 8–10 minutes, stirring the bottom of the pot constantly to prevent burning. Turn off the heat and remove the pot from the stove.
To Strain
- Pour the cooked mixture into the strainer lined with the sanitized bag.
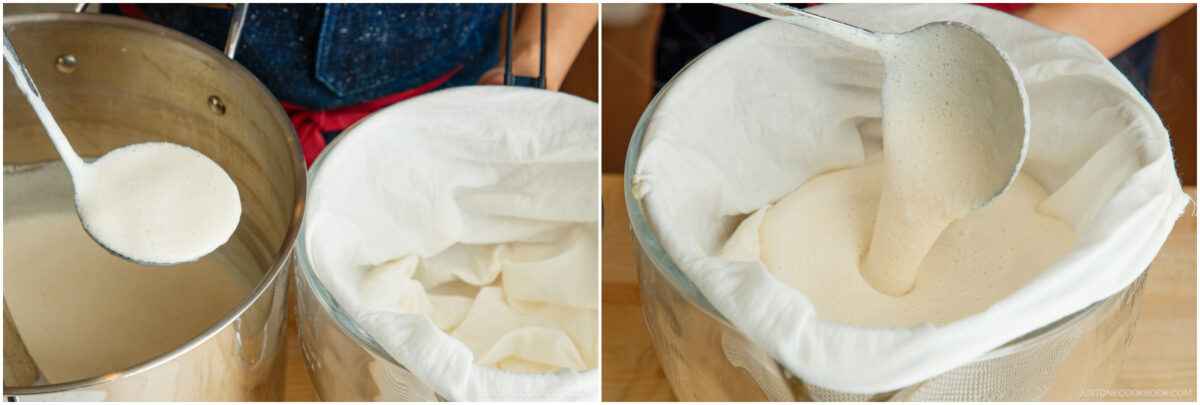
- To speed up straining, press gently with a ladle or spatula while still hot. Nami's Tip: We strain the soy pulp while it’s still hot because it makes the process smoother and safer. When hot, more flavor and protein are released, so you get better soy milk. It also prevents bacteria from growing, which can happen if the mixture cools down too much. Plus, the hot pulp is softer, so the liquid separates more easily and gives you a silky, smooth soy milk.
- Once you finish draining the mixture with the ladle or spatula, gather the cloth bag.
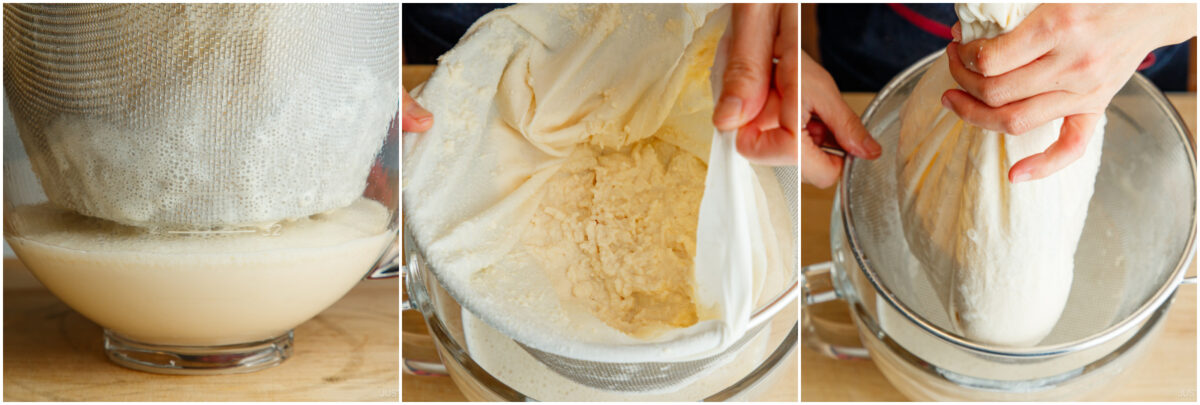
- Wash and cool your hands, then squeeze out the remaining soy milk by hand. For a standard tofu size (wooden box), you will need a minimum of 4⅛ cups (1000 ml) of soy milk.
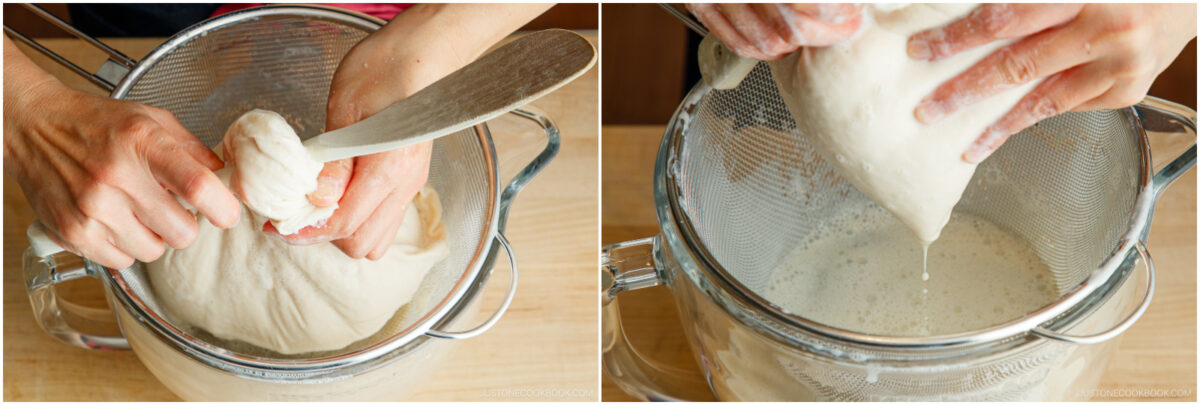
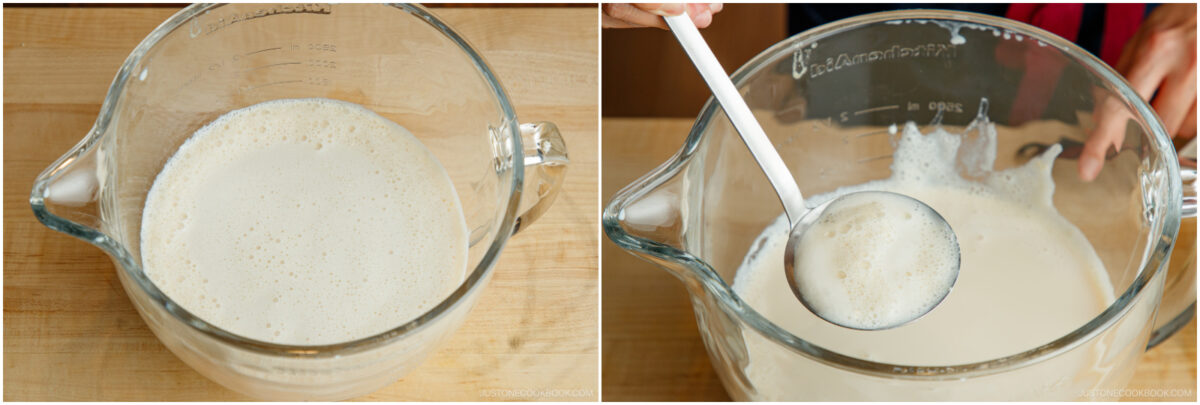
- If any foam remains in the soy milk, skim it off or strain it again for a smoother tofu texture.
- You now have soy milk and soy pulp, okara. Store the leftover okara in the refrigerator or freezer for other recipes like my Okara (Unohana) – Simmered Soy Pulp & Vegetables.
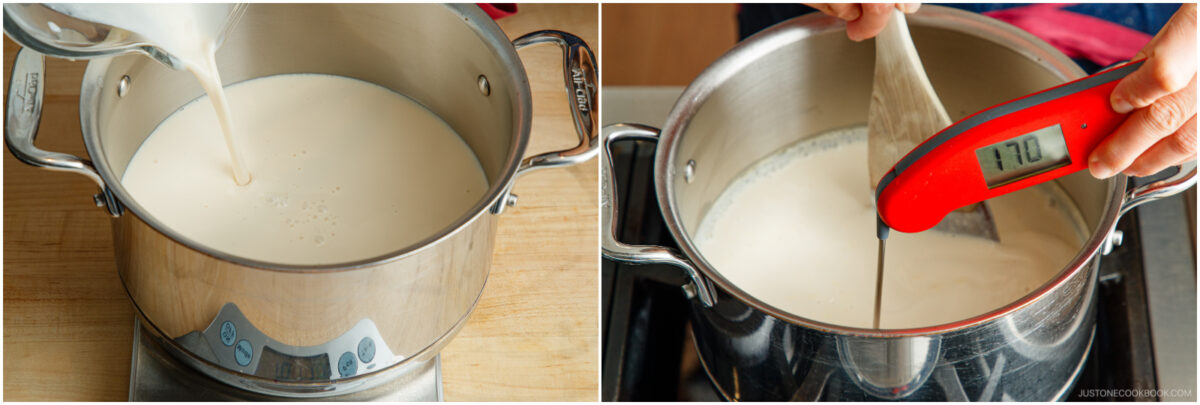
To Warm the Soy Milk
- Measure exactly 4⅛ cups (1000 ml) of soy milk. Heat it in a medium pot over low heat until it reaches 170ºF (75ºC). I use an instant-read thermometer. Keep it at that temperature for 2 minutes, then turn off the heat.Nami's Tip: If the soy milk is too cool, the tofu won't set; if it's too hot, it will become too firm.
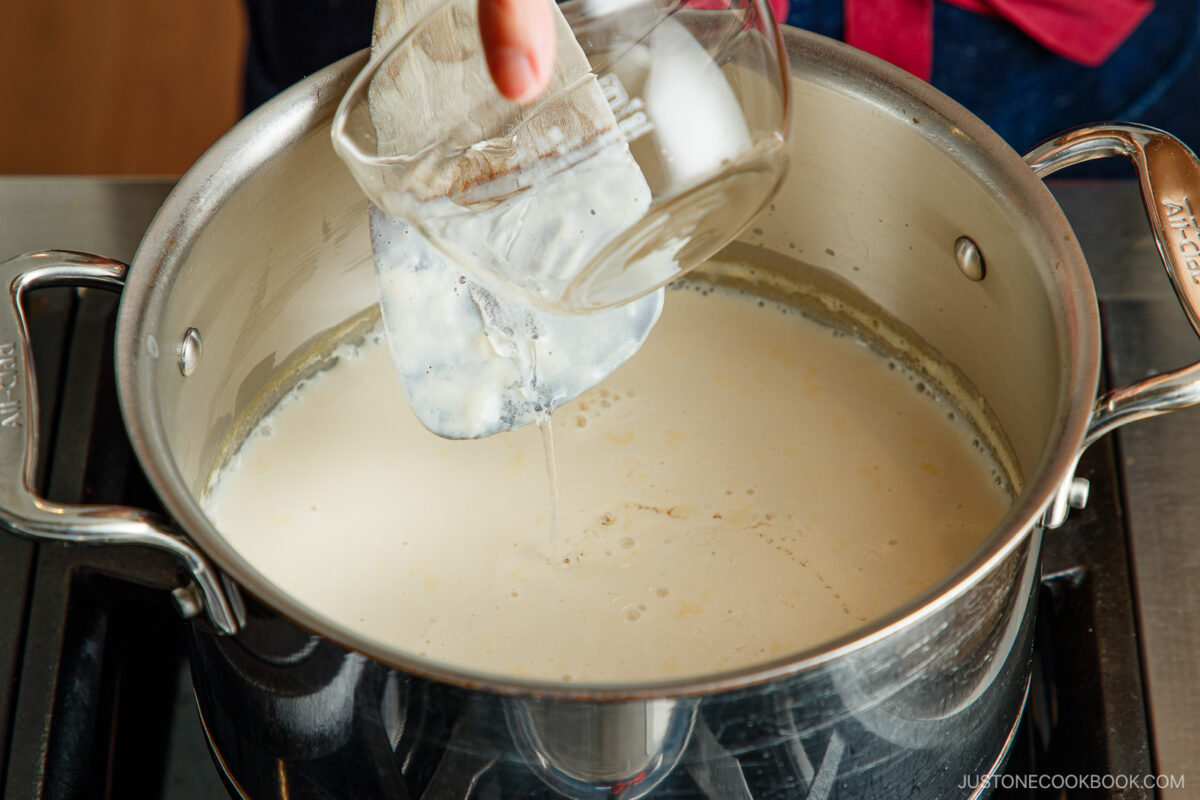
To Add the Nigari
- Mix 2 tsp liquid nigari (bittern) with 2 tsp lukewarm water in a small bowl. Pour half of the prepared nigari slowly over the soy milk, guiding it with a wooden spatula.
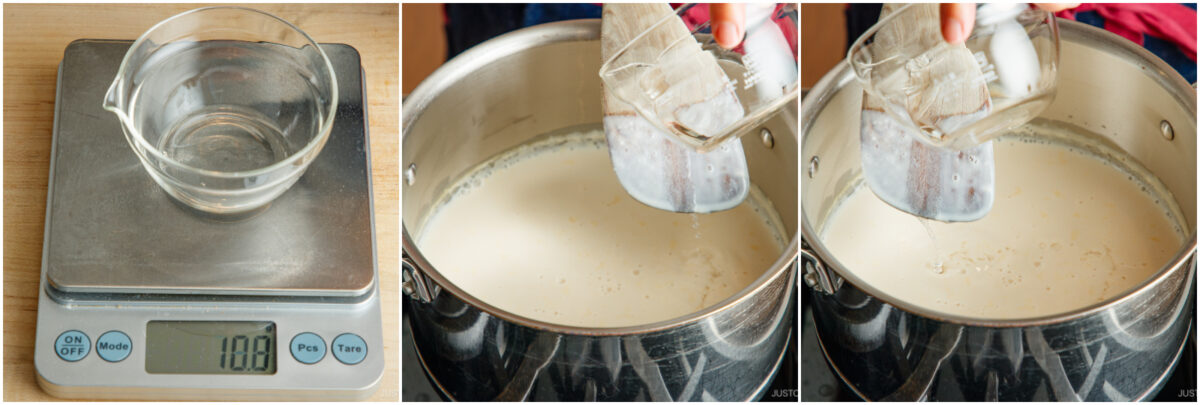
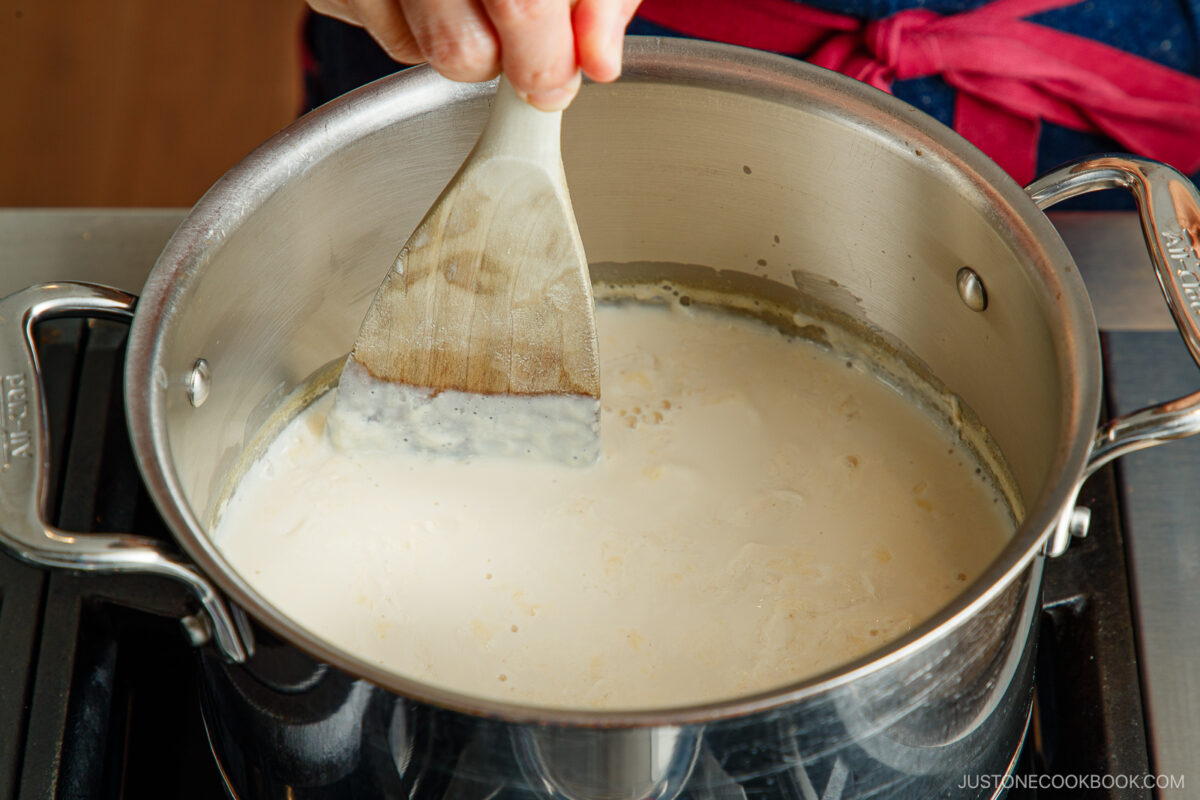
- Gently stir two figure-8 motions with the wide side of the spatula. Cover and let it sit for 3 minutes. Nami's Tip: Do not overmix, or the tofu will become too firm. After adding nigari, cover the pot to keep the mixture warm, let it set quietly, and prevent the surface from drying out.
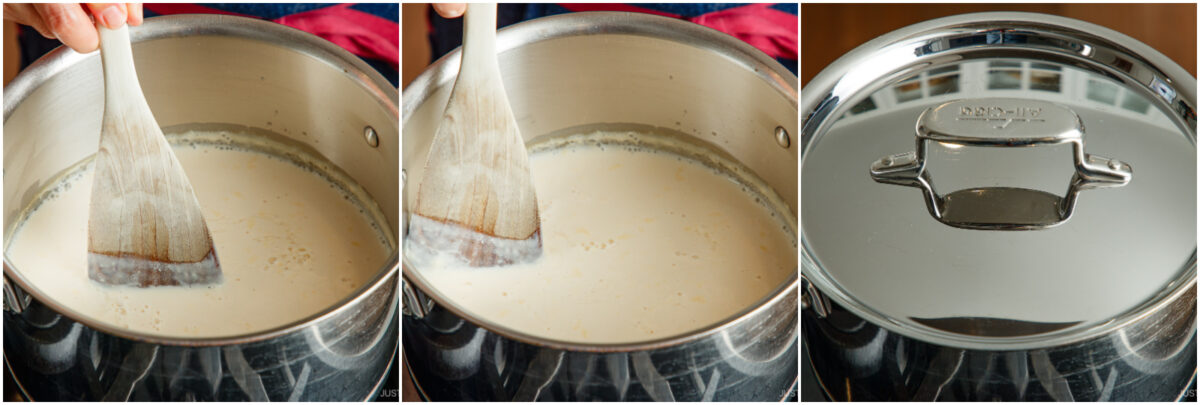
- Pour in the other half of the nigari the same way. Gently stir four figure-8 motions. Cover with the lid and let it sit for 15 minutes. Then, start preparing the tofu box.Nami's Tip: While waiting, make sure the temperature doesn’t drop below 158ºF (70ºC). If it’s too low, the tofu won’t set; if it’s too high, it will turn out firm. If the temperature has dropped, bring it back to 170ºF (75ºC).
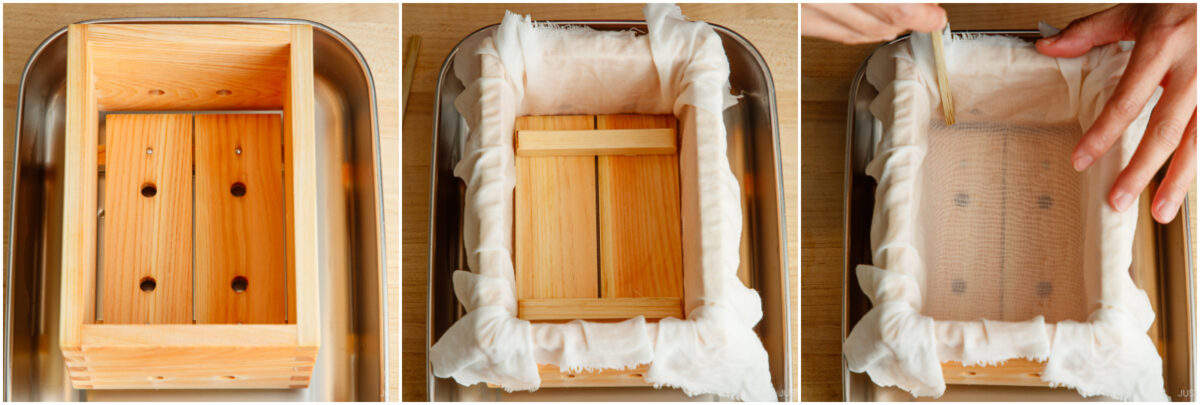
To Prepare the Tofu Box
- Soak the tofu mold in water to moisten thoroughly. Line the inside of the tofu mold with the sanitized finishing cloth, smoothing it tightly. Place a flat tray (I use my favorite prep tray) underneath to catch the draining liquid.
To Check Coagulation
- Check that the mixture has separated into soft curds and a clear puddle of liquid. If you do not see any clear liquid, then it has not fully separated. If this happens, draw one more gentle figure-8, let it rest another 5–10 minutes, and check again.If nothing changes, first check the temperature. If the temperature is fine, add a little more nigari.

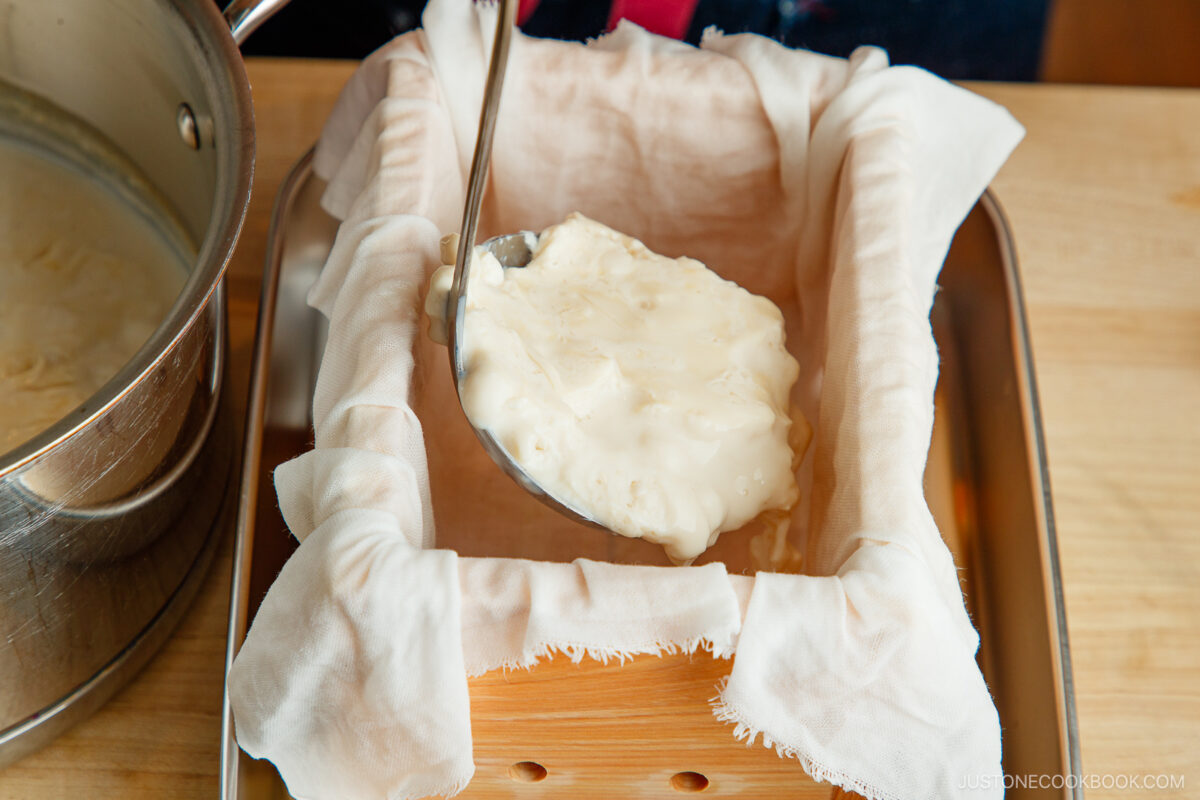
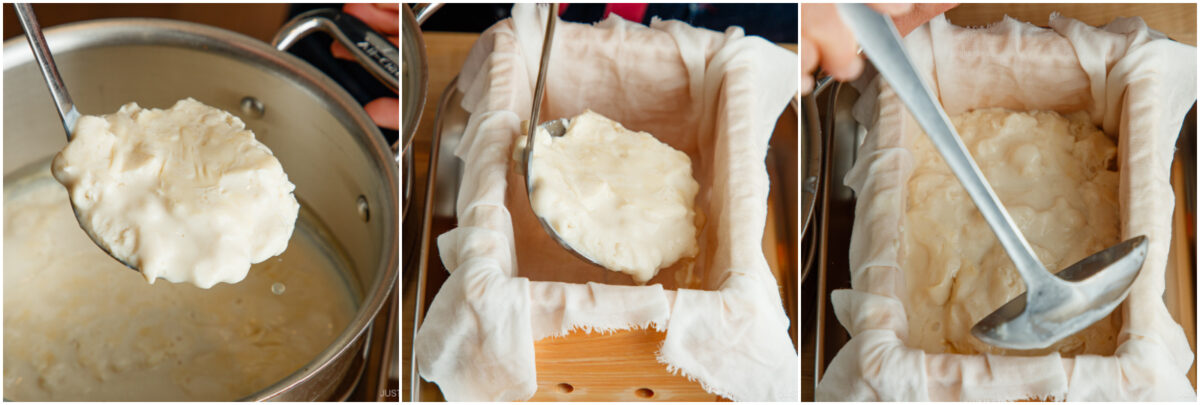
To Press the Tofu
- Scoop the coagulated curds carefully into the lined tofu box.
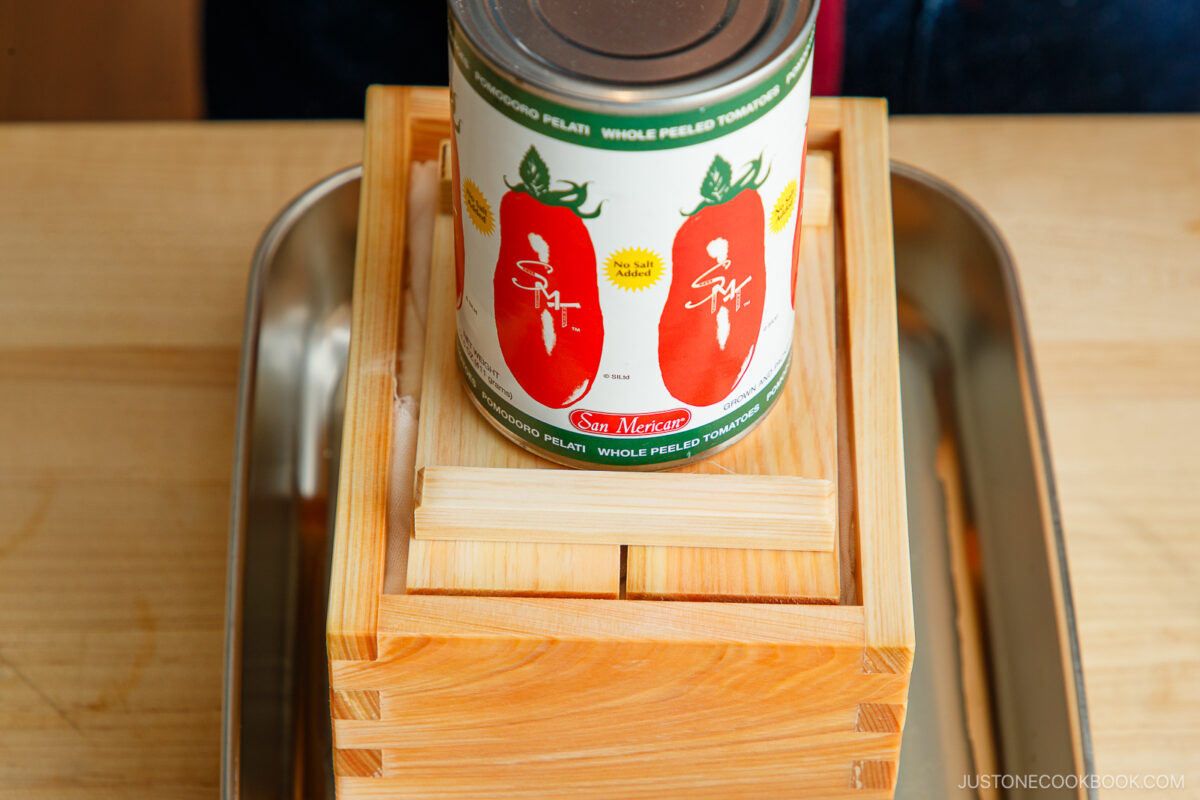
- Fold the cloth over the top and place the pressing lid on top.
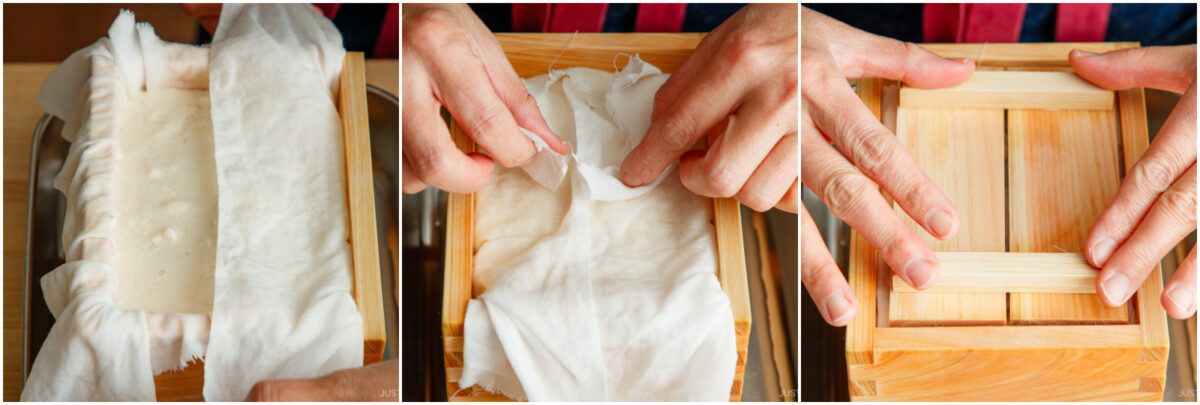
- Place a weight (425 g or a bit less than 1 lb) on the lid. Press for about 30 minutes for medium-firm tofu. Nami's Tip: If the weight is too heavy, the tofu will be overly firm.
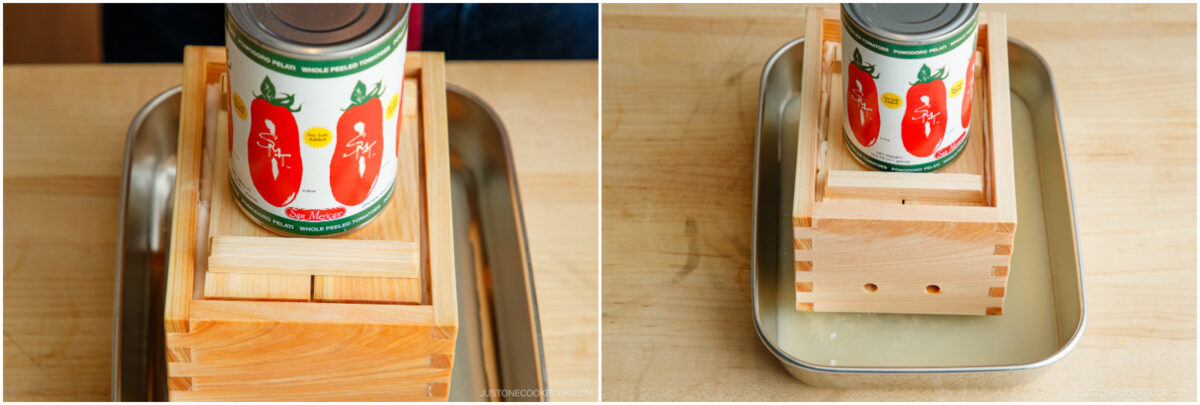
To Soak and Chill the Tofu
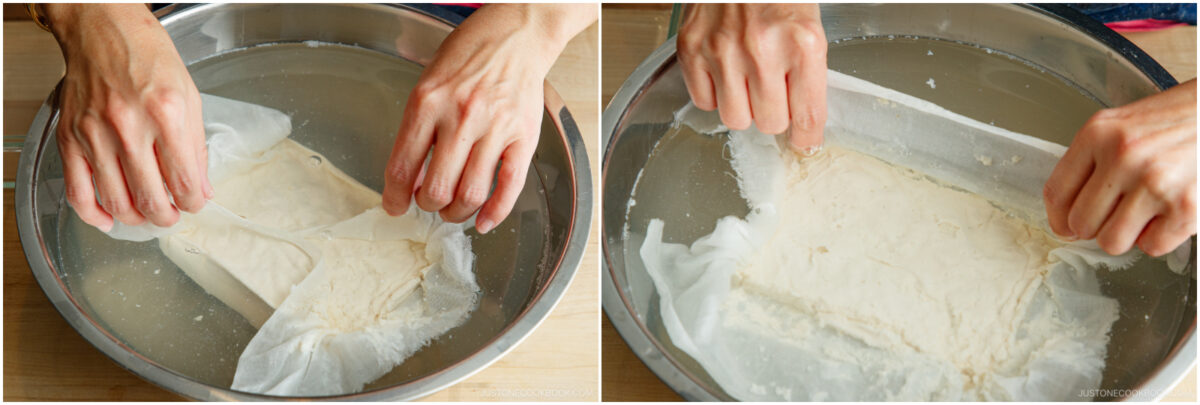
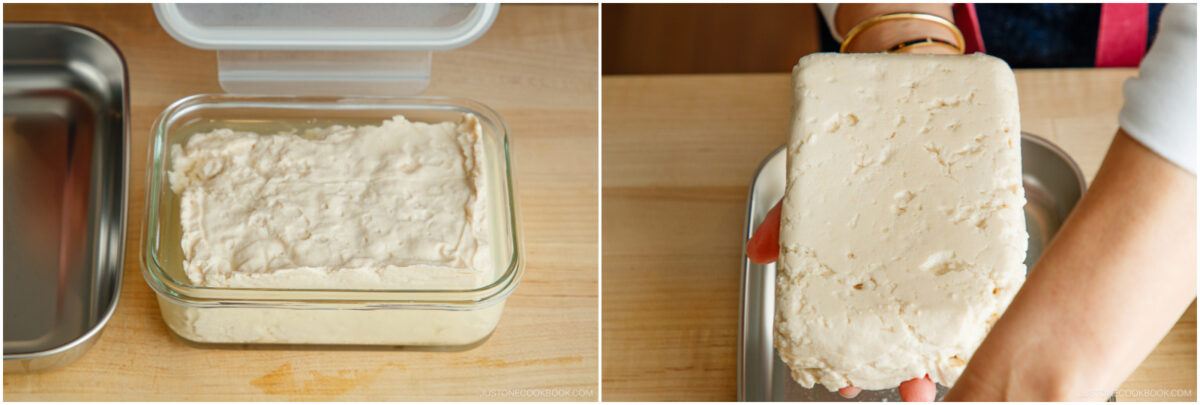
- Submerge the entire tofu box in a large bowl of cold water (add ice if it's hot). Carefully remove the mold, keeping the tofu wrapped in the cloth. Soak the wrapped tofu for about 30 minutes, changing water a few times. Nami's Tip: Soaking removes the nigari's bitterness and firms up the tofu. If it's still soft after 30 minutes, add more ice and soak another 10 minutes.
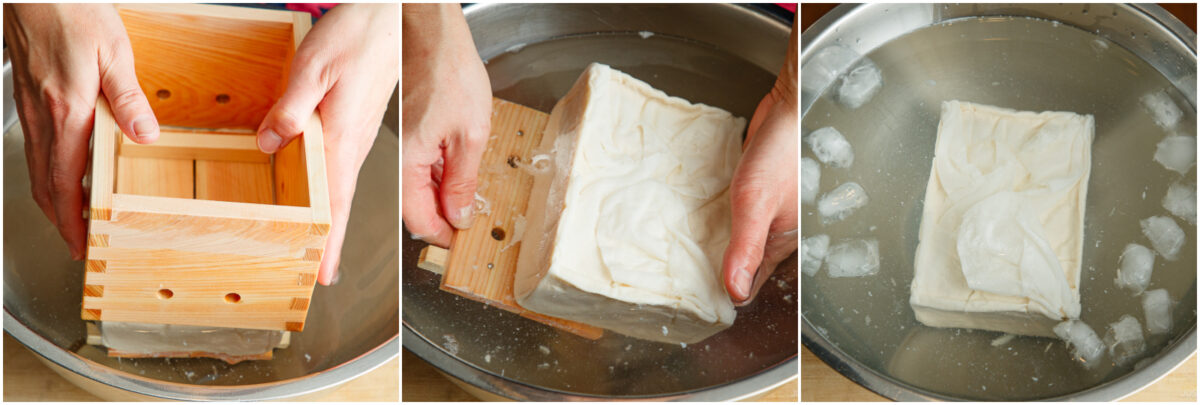
- Carefully unwrap the tofu.
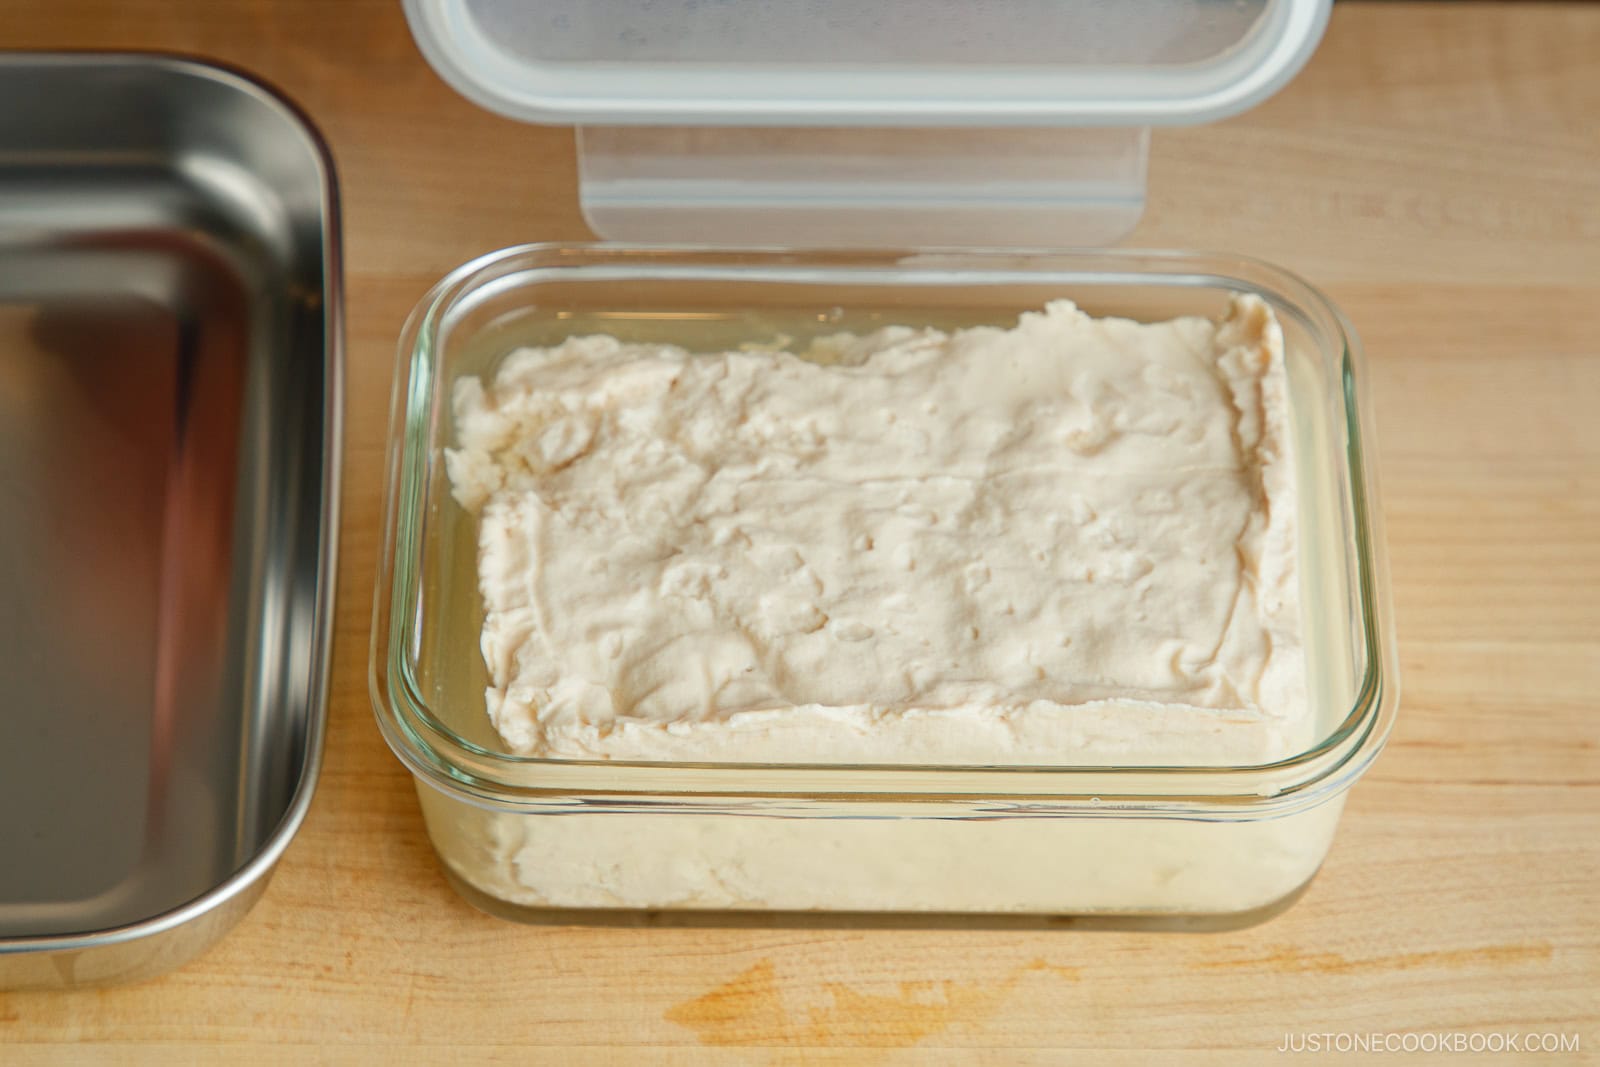
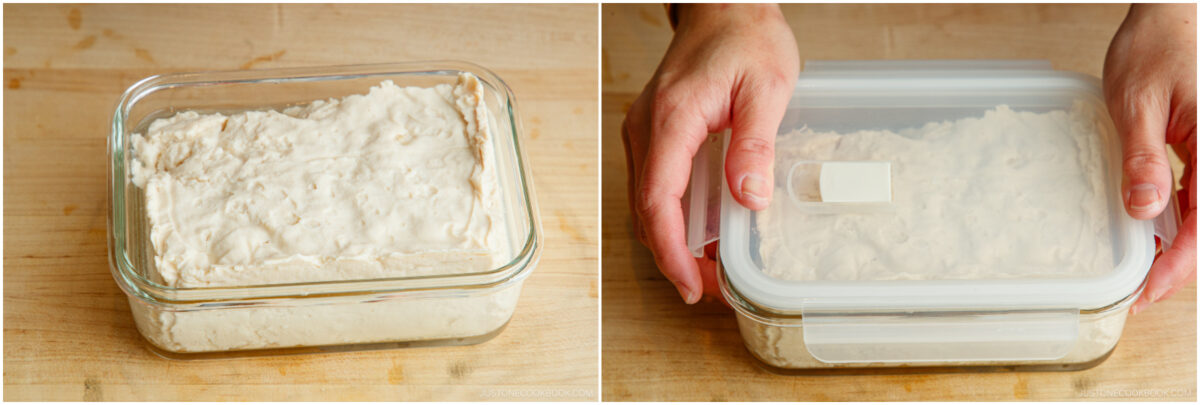
- Remove it from the water. I transfer it to an airtight container.
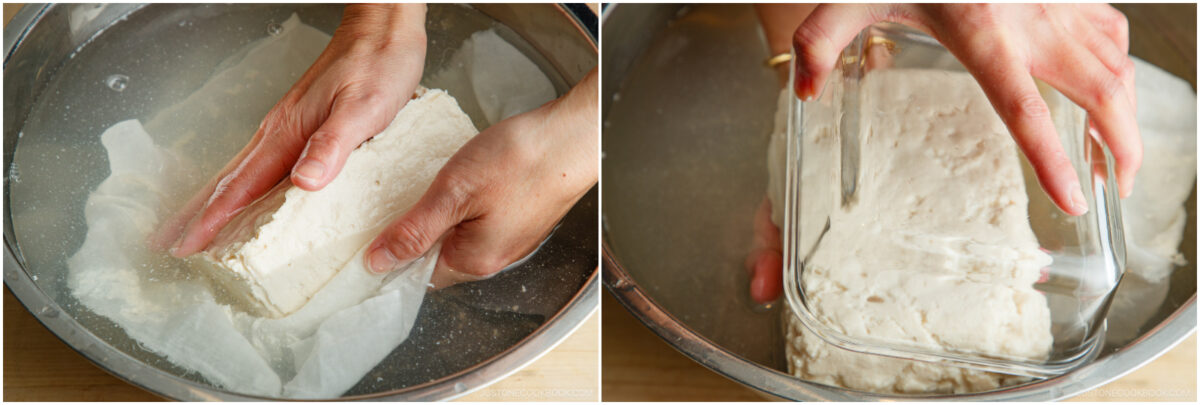
- Fill it with water. Your homemade tofu is best enjoyed about 4 hours after it's made.Nami's Tip: The tofu needs time to set fully and release excess moisture. Right after pressing, the tofu may still be warm and slightly unstable in texture. As it rests, it cools, firms up, and the flavors settle, giving you that delicate yet cohesive tofu texture. It's best consumed the same day.
To Serve
- Discard the water and it's ready to use!
To Store
- Because it has no preservatives, homemade tofu should be enjoyed the same day for the best quality. However, if you'd like to store it, transfer the tofu to a container and cover with fresh water. You can refrigerate it for up to 1–2 days, but be sure to change the water every day. You can store the soy pulp (okara) in the fridge for 2–3 days or in the freezer for up to 1 month.
Notes
- Avoid soaking the mold in water for long periods, as it can damage the wood.
- After each use, wash quickly with water and dry well in the shade.
- If mold or dark stains appear, soak the mold overnight in rice-washing water, then scrub clean with a tawashi brush.
- Do not use synthetic detergents.
- Store the mold in a cool, dry place. Do not keep it inside a plastic bag.
Did you make this recipe?
Tag @justonecookbook on Instagram so we can see your delicious creation!