
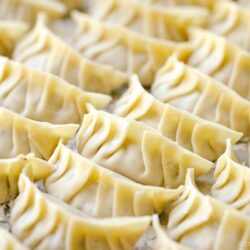
Today, let me teach you how to fold gyoza or Japanese pan-fried potstickers at home! I’ve been folding gyoza since middle school and probably can make them with my eyes closed. My mom and I spent many evenings wrapping gyoza in her kitchen and I have a fond memory of our time. I hope you get to have those kitchen moments with your family and friends. This simple task brings us together and it’s a wonderful way to connect them.
Gyoza Recipes on JOC
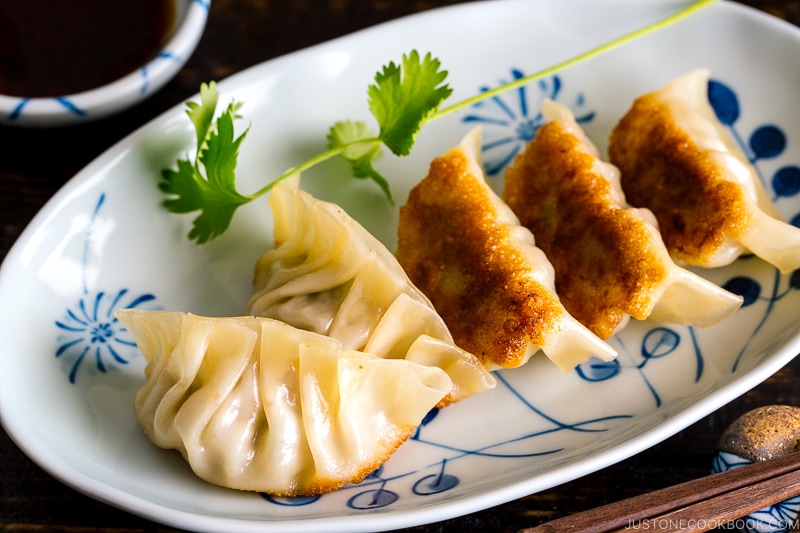
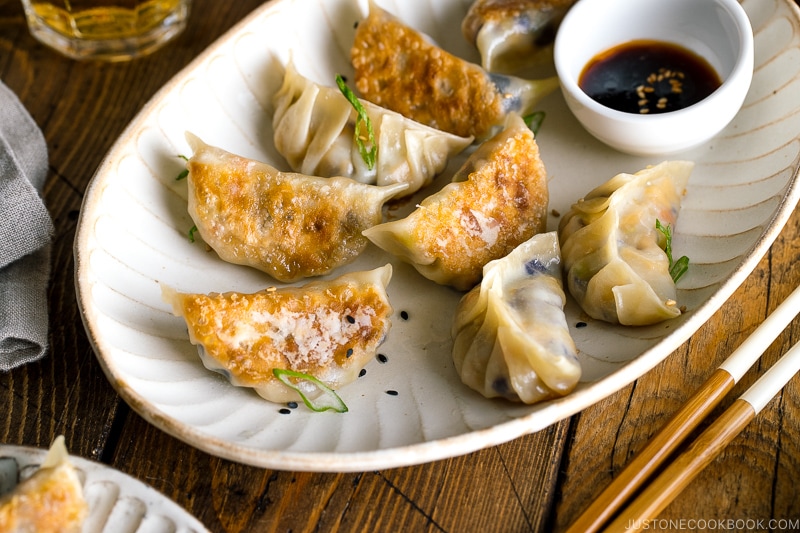
Gyoza are very popular in Japanese cooking! You can customize different gyoza fillings with pork, shrimp, and napa cabbage and season with green onions (scallions), nira (garlic chives), and ginger. They include recipes for simple dipping sauces with vinegar, soy sauce, sesame oil, miso, and/or chili oil (ra-yu or layu), to your taste.
I have several gyoza recipes (one for vegans, too) with helpful cooking tips that are popular among my readers. If you haven’t tried them yet, please check out the full recipes:
- Classic Gyoza
- Vegetable Gyoza (vegan/vegetarian)
- Napa Cabbage Gyoza
- Gyoza with Wings
- Gyoza with Miso Dipping Sauce
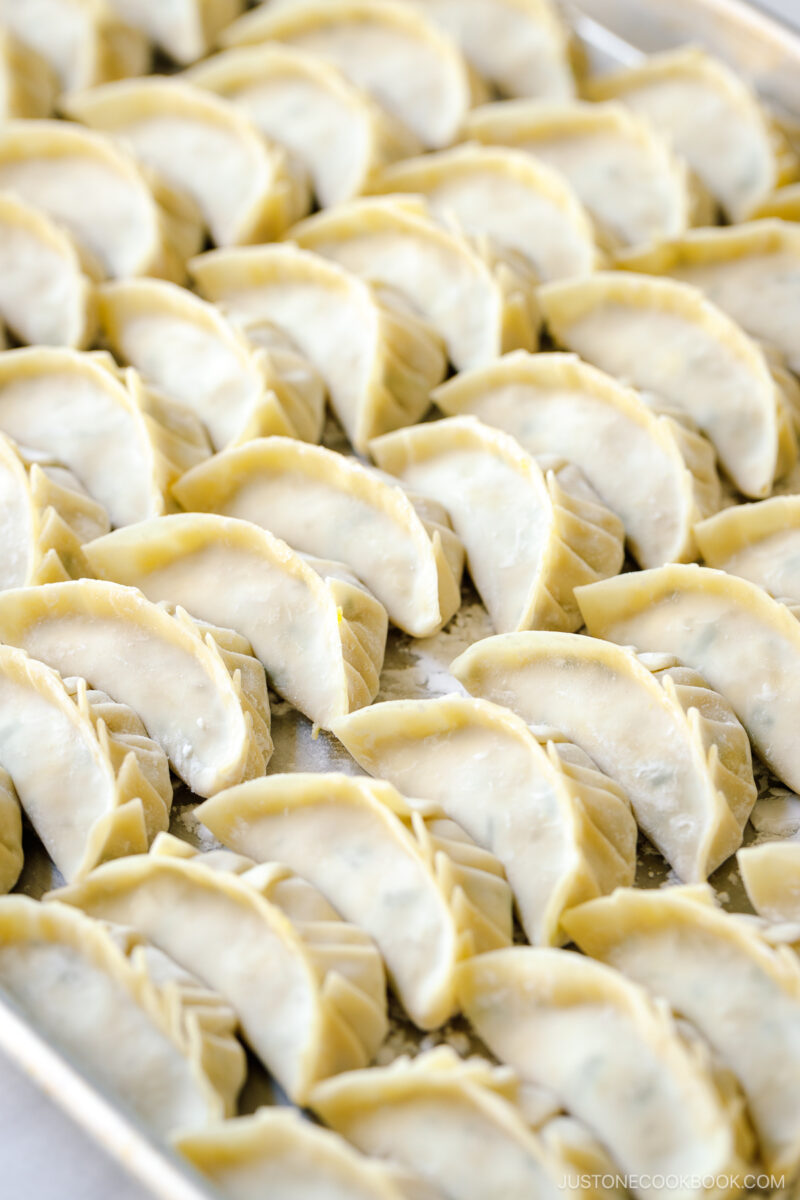
How To Fold Gyoza
While Chinese pan-fried dumplings are folded several ways, Japanese gyoza use just two methods. One is to fold pleats toward one side (method 2 in the recipe card below) and the other is toward the center (method 1). I’ve been mostly using Method 1 for over 30 years!
Method 1: Pleats toward the Center
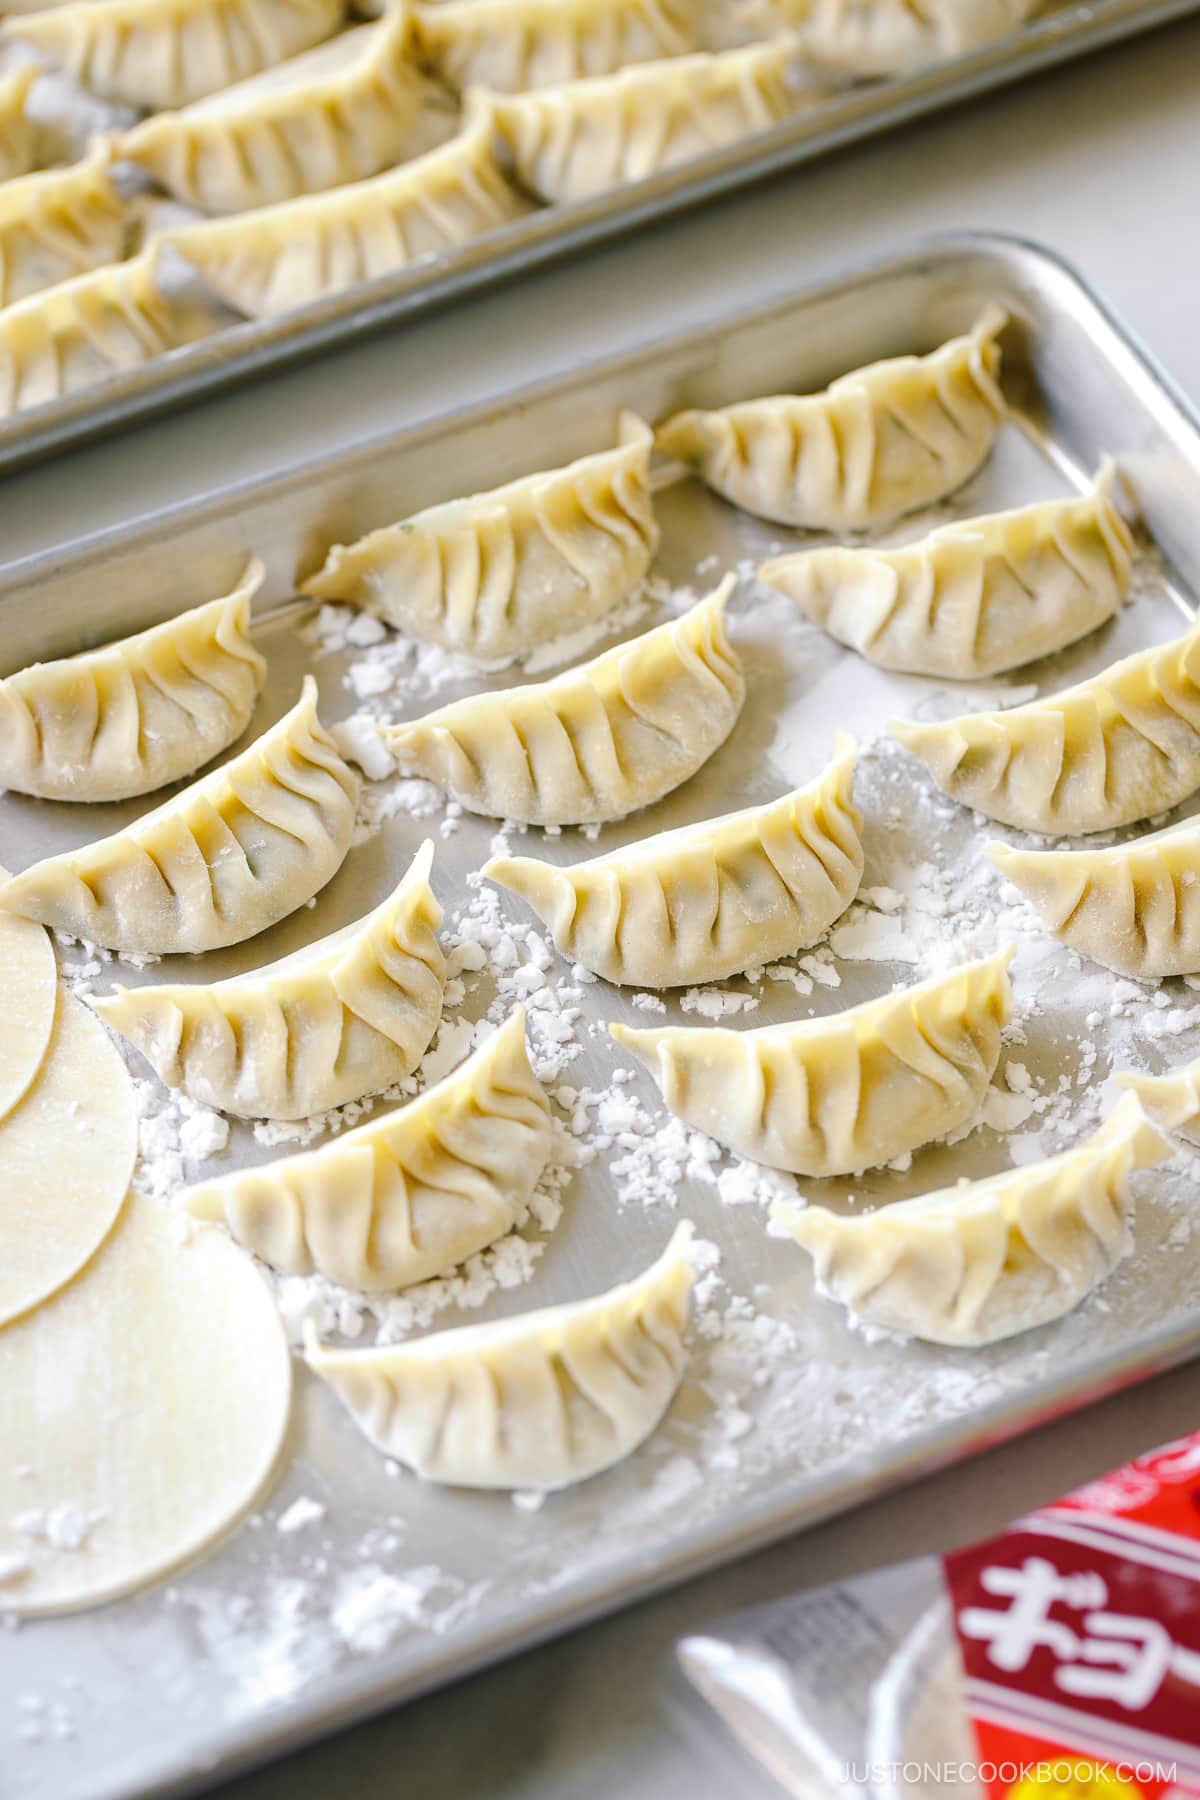
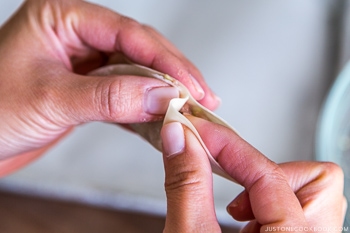
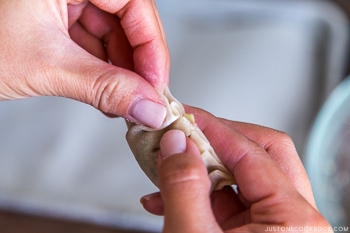
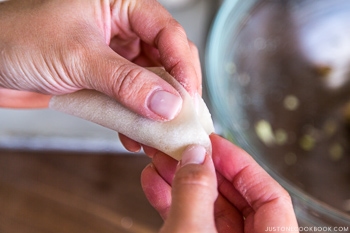
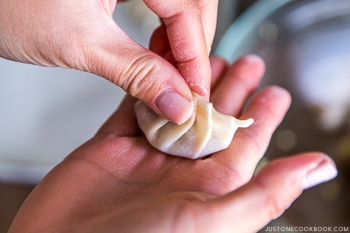
- Hold the dough wrapper in your non-dominant hand and fold the wrapper in half over the filling.
- Pinch the wrapper together at the top center with your thumb and index finger (but don’t seal yet!) to make a semi-circle or half-moon shape.
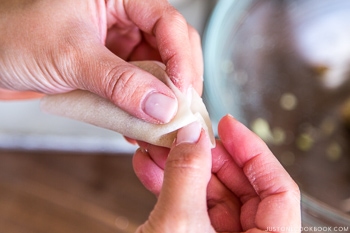
- Starting at the top, make pleats from the center toward the right.
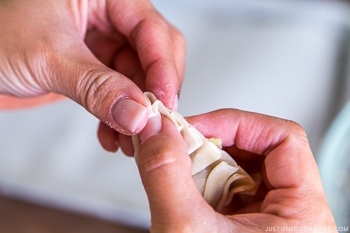
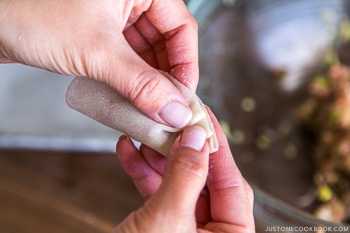
- After 3-4 pleats, continue with the left side of the gyoza. Make pleats from the center toward the left.
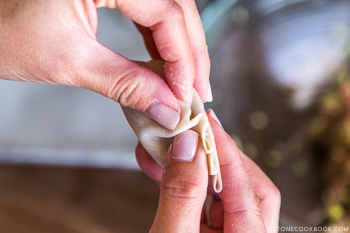
- Press each folded pleat tightly against the wrapper on the back to seal using your other thumb and index finger.
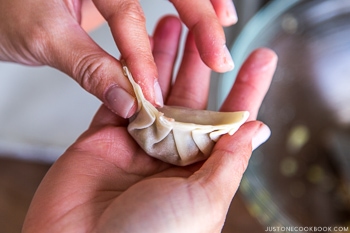
- Press the pleats and shape the gyoza.
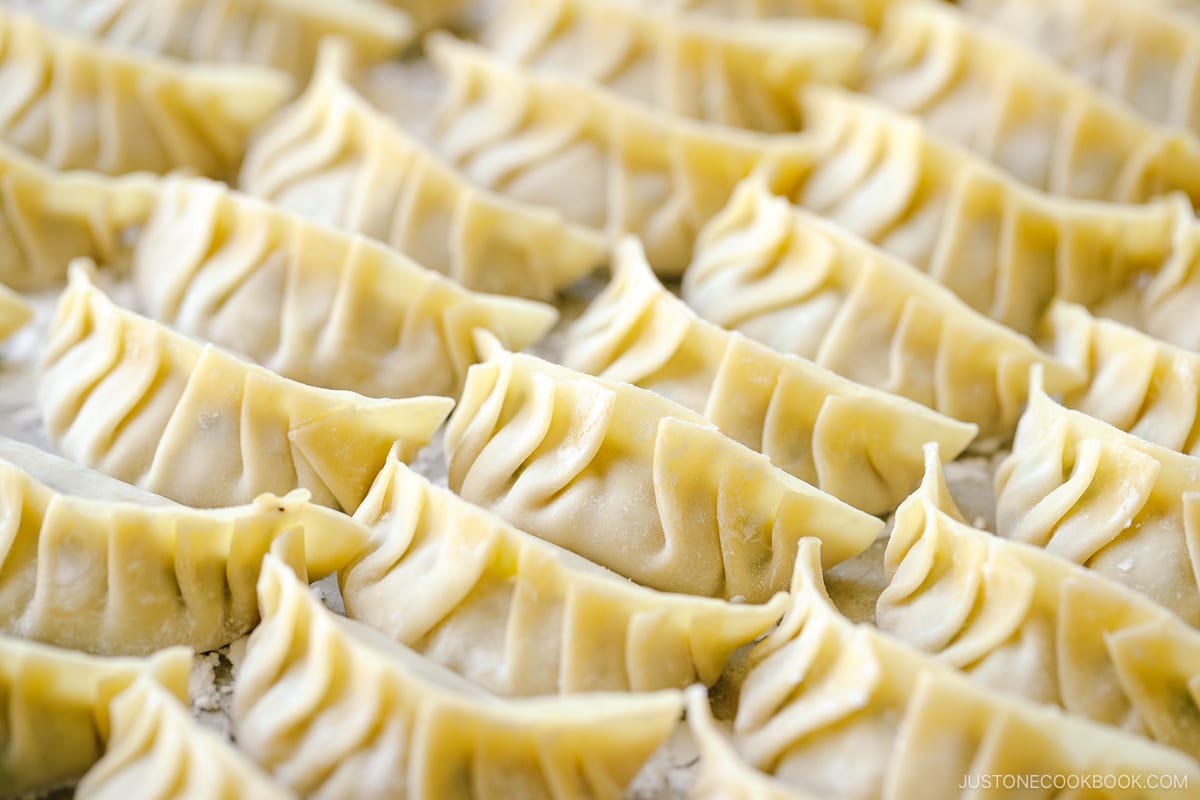
Method 2: Pleats to One Side
- Repeat step 1 above, making a half-moon fold over the filling in the middle of the wrapper.
- On the top part of the wrapper, make a pleat starting from the right and moving toward the left, on the top part of the wrapper. Use your left thumb and index finger to do this.
- Once you make each pleat, press it down with your right thumb. Move toward the left and repeat. Continue until there is no more wrapper left.
- Press the pleats and shape the gyoza.
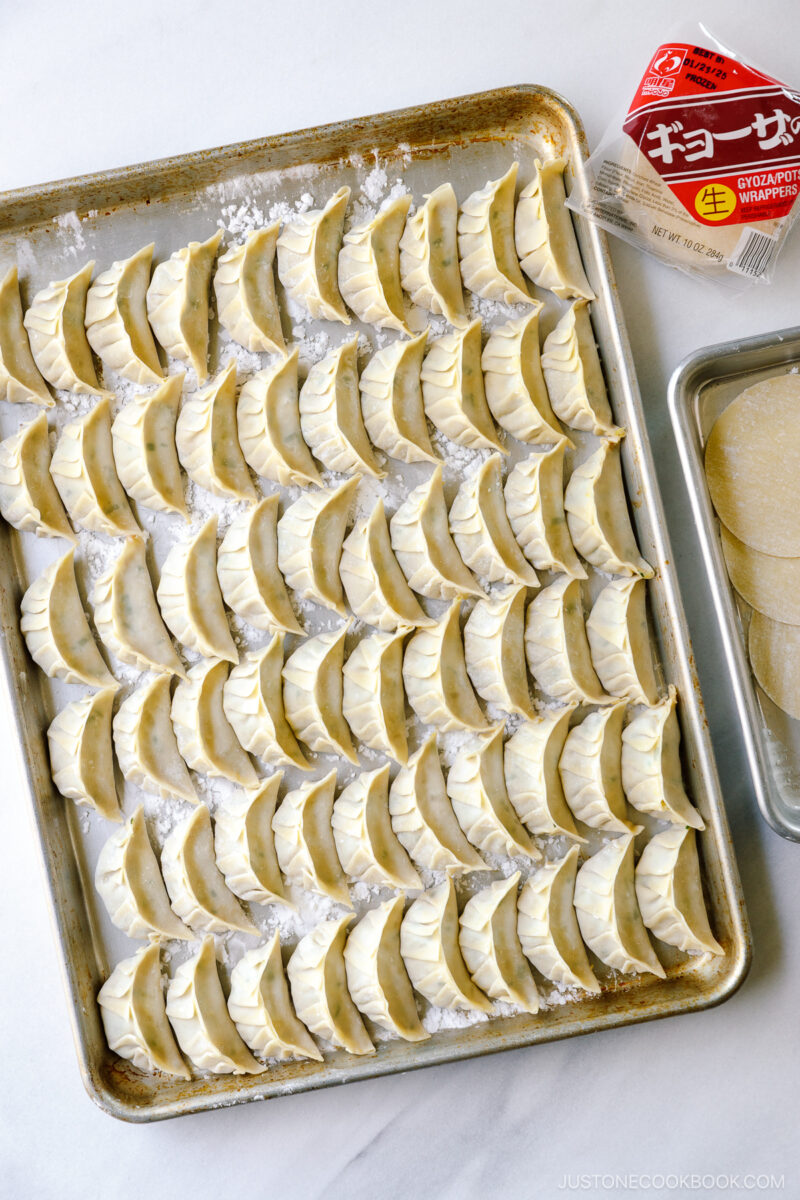
How To Store Gyoza

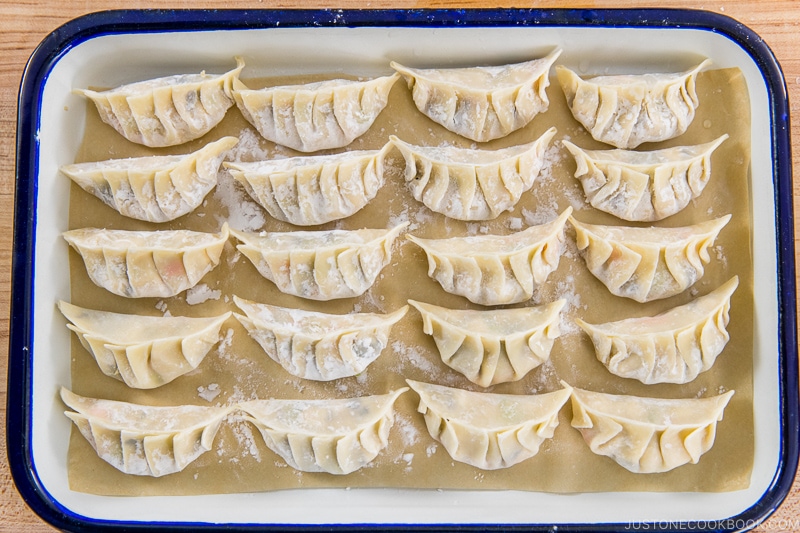
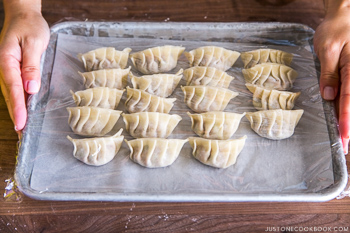
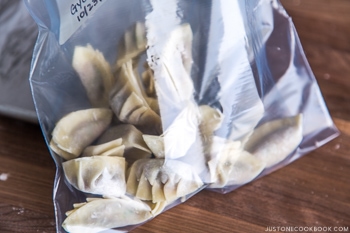
Line a baking sheet with parchment paper or sprinkle it with potato starch (or cornstarch) so that gyoza won’t stick to the baking sheet. Place the gyoza flat side down and space them out. Cover with plastic wrap. Flash-freeze until they are firm and frozen. Then, take them out from the freezer and transfer them to space-efficient resealable freezer bags. You can store them for up to 2-3 months in the freezer.
How To Make Gyoza Wrappers at Home
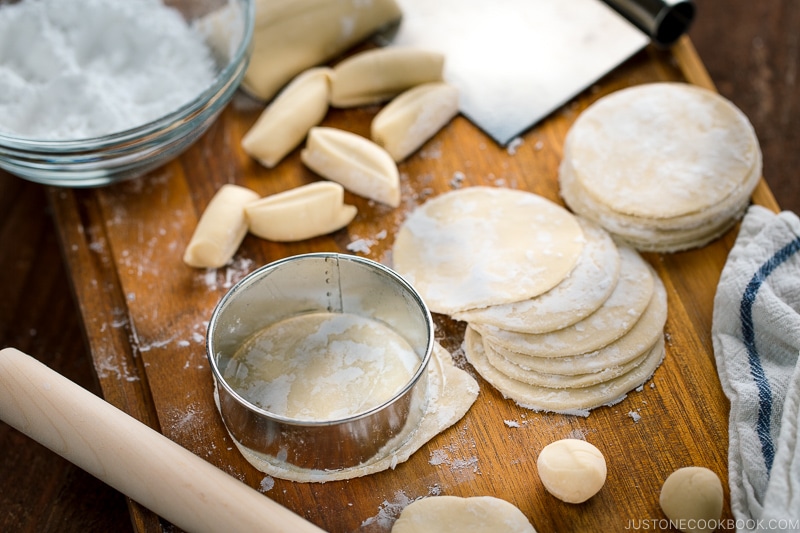
If you can’t get gyoza wrappers in Japanese or Asian grocery stores, make homemade gyoza wrappers. It’s fun and quite satisfying to be able to make your own wrappers at home with just 3 ingredients—flour, salt, and water!
Wish to learn more about Japanese cooking? Sign up for our free newsletter to receive cooking tips & recipe updates! And stay in touch with me on Facebook, Pinterest, YouTube, and Instagram.
How to Fold Gyoza
Materials
- Homemade Gyoza Filling (see my Gyoza and Vegetable Gyoza recipes)
- gyoza wrappers (store bought or make my homemade Gyoza Wrappers recipe)
- water (prepare in a small bowl)
Instructions
To Fold the Gyoza
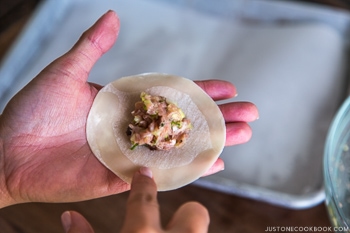
- Take a wrapper and place it in the palm of your non-dominant hand. Use a teaspoon to take a small amount of filling and put it in the center of the wrapper.
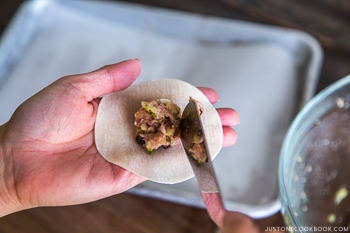
- Dip one finger in a bowl of water and draw a circle around the outer ¼ inch of the wrapper with your wet finger until it’s wet all around.
Method 1—Pleats toward the Center
- Fold the wrapper in half over the filling and pinch it in the center with your thumb and index finger (but don’t seal yet!). Using your right thumb and index finger, start making a pleat about once every ¼ inch on the top part of the wrapper from the center toward the right.
- Once you make 3–4 pleats, continue with the left side of the gyoza. Start making a pleat from the center toward the left.
- As you fold each pleat, press the folded pleat tightly against the back part of the wrapper using your other thumb and index finger.
- Press the pleats and shape the gyoza.
- Place the finished gyoza on a baking sheet lined with parchment paper. Cover the gyoza so they won‘t get dry while you‘re folding gyoza. Repeat until you run out of the filling or wrappers.
Method 2—Pleats toward One Side
- Fold the wrapper in half over the filling.
- Using your left thumb and index finger, start making a pleat about once every ¼ inch on the top part of the wrapper from the right toward the left.
- Once you make each pleat, press it down with your right thumb and move toward the left
- Continue all the way until there is no more top wrapper to pleat left.
- Press the pleats and shape the gyoza.
To Store the Gyoza
- Flash-freeze uncooked gyoza by spacing them out on a tray, freezing them until they‘re firm.

- Store the gyoza in space-efficient resealable freezer bags for up to 2–3 months in the freezer.
Did you make this recipe?
Tag @justonecookbook on Instagram so we can see your delicious creation!