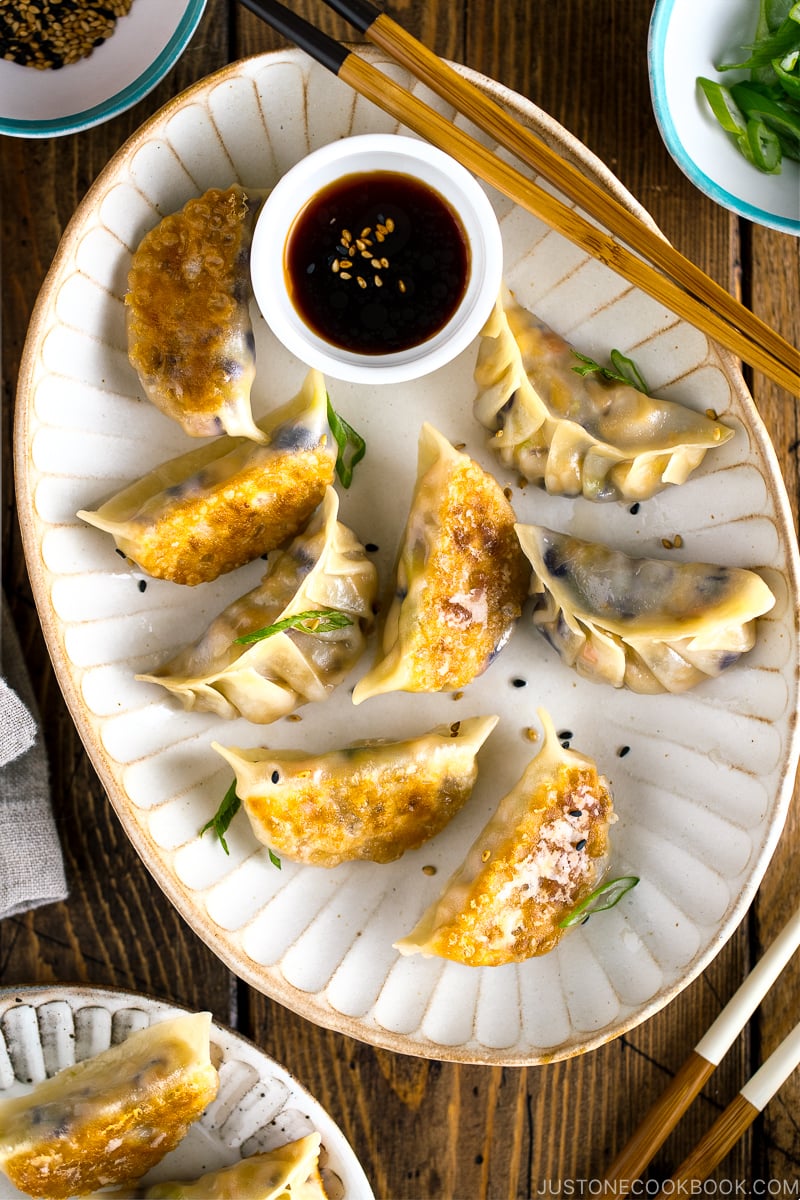
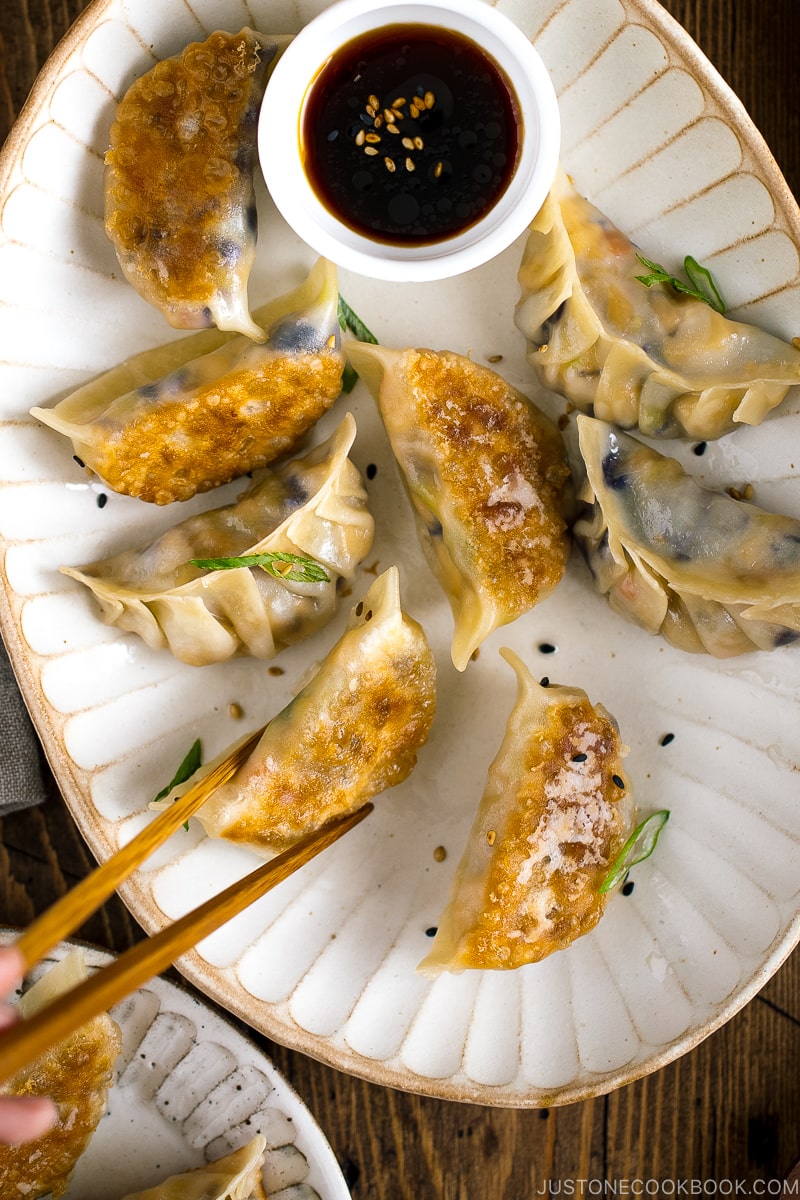
Learn to make Vegetable Gyoza at home filled with fresh tofu, cabbage, carrots, and mushrooms. These Japanese pan-fried dumplings are crispy on the bottom and juicy inside. It’ll be love at first bite! Enjoy them with tangy dipping sauce and a dash of chili oil.
I’ve received many requests for a vegetarian or vegan gyoza recipe. After a series of testing and refining, I’m proud to share this truly amazing Vegetable Gyoza (野菜の餃子) with you today. They are packed with fresh, earthy, and savory vegetables that my family devours eagerly each and every time. It will make a great addition to your dumpling party!
Table of Contents
What are Gyoza?
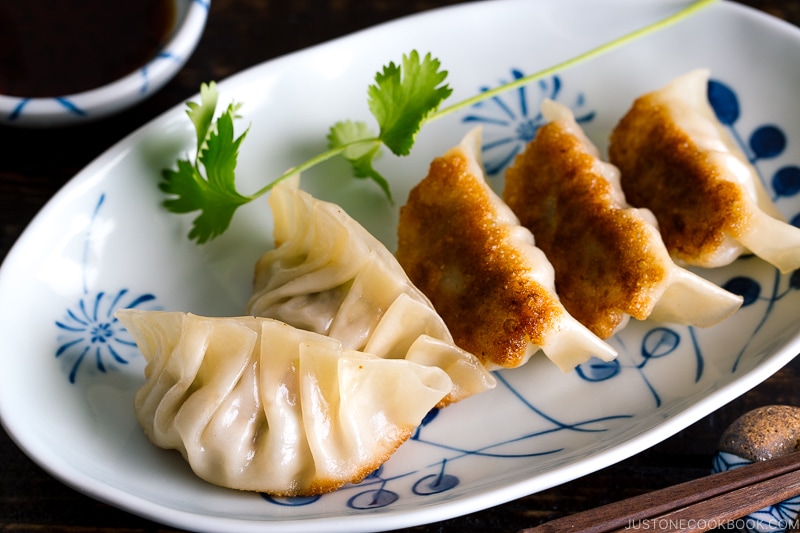
Gyoza (餃子) are Japanese pan-fried dumplings or potstickers. They originated in China but evolved to suit Japanese tastes. One difference between the two is that gyoza skin is much thinner than Chinese dumpling wrappers, making the crisp texture a big feature of the Japanese version.
Another difference is the filling. Classic gyoza is typically made with a pork and cabbage filling. However, Japanese gyoza usually contain a higher ratio of vegetables to meat compared to Chinese dumplings. If you’re interested in making the standard version, try my traditional Gyoza (Japanese potstickers) recipe.
What are Vegetable Gyoza?
There are many paths to creating vegetarian or vegan Japanese dumplings. The general rule is to use ingredients with different textures. Also, ingredients such as mushrooms can make a big difference in adding umami, so you can create a satisfying flavor, even without meat.
For the filling, I generally recommend using dense ingredients with less moisture. However, feel free to experiment with other ingredients. Also, using umami-packed seasonings is important to boost the savory flavor of the dumplings.
Why You’ll Love This Recipe
You don’t need to be vegetarian or vegan to enjoy Vegetable Gyoza!
- So delicious! – I just have to include this, because it’s true!
- A lighter filling – The delightful mix of tofu, vegetables, and mushrooms creates a light and healthy filling.
- Packed with umami – With the right combination of ingredients and seasonings, the dumplings are bursting with texture and flavor.
- A great dish for EVERYONE – It’s guaranteed to be popular for vegans/vegetarians and meat-eaters alike! You can easily add a platter of easy chicken wings or teriyaki chicken meatballs to accompany this dish.
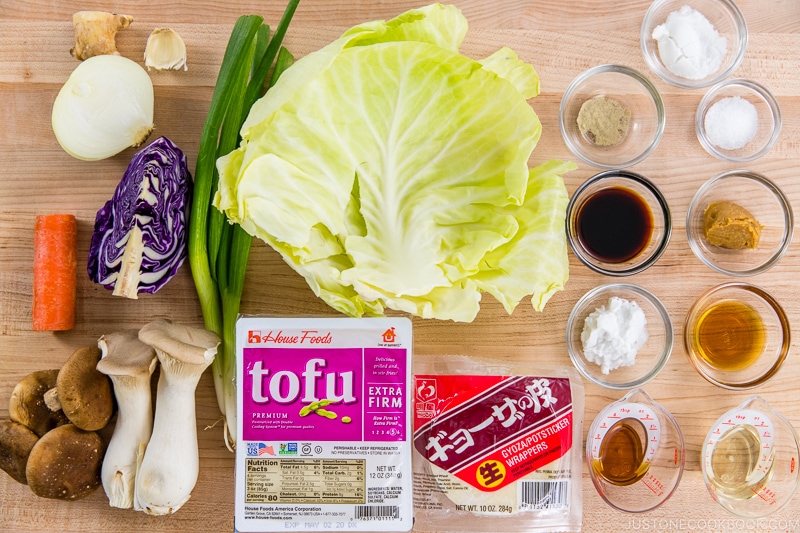
Ingredients You’ll Need
For the Gyoza
- extra firm tofu – if your tofu is not firm, press it longer to release the moisture
- cabbage – use green cabbage for taste and purple cabbage for color
- mushrooms – use shiitake mushrooms for their deep, earthy flavor and king oyster mushrooms for their meaty texture
- carrots – provides a sweet taste and bright color
- onion – brings a sweet flavor once cooked
- green onions/scallions – garlic chives (nira) are another option
- potato starch or cornstarch
- soy sauce – Japanese soy sauce add a familiar taste to the filling
- miso – don’t underestimate the flavor boost from miso paste; use saltier (darker) miso for a more robust flavor
- toasted sesame oil – just a touch adds an irreplaceable aroma and taste
- ginger – the slightly spicy zing from the fresh ginger gives a bright note
- garlic – adds pungency and aroma and of course everything tastes better with it!
- kosher salt
- white pepper powder
- gyoza wrappers – round; store-bought or make homemade Gyoza Wrappers
- water – to fold and seal the wrappers
For Frying
- neutral oil
- water
- toasted sesame oil
For the Dipping Sauce
- rice vinegar (unseasoned)
- soy sauce
- la-yu (Japanese chili oil) – optional; you can make Homemade La-yu
Use the Right Gyoza Wrappers
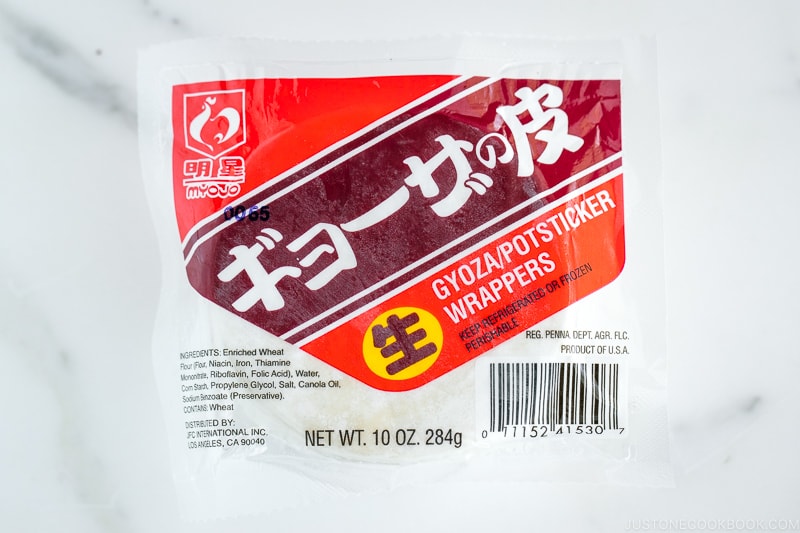
To make Japanese-style pan-fried dumplings, it’s ideal to use a Japanese brand of these round skins as they are thinner and sometimes smaller than other types.
Where to Buy: I use this Myojo brand Gyoza wrappers that I get from the refrigerator or freezer section of the Japanese grocery store. Unfortunately, they are perishable and not available online.
Frozen Gyoza Wrappers: Defrost the package in the refrigerator overnight or on the counter for 60 minutes (depending on the amount and room temperature). Do not defrost in the microwave.
Keep Gyoza Wrappers Moist: Once the package is opened, make sure to keep them covered under a damp paper towel or plastic wrap; otherwise, the edges will start to dry out and can’t be used.
Make Homemade Gyoza Wrappers
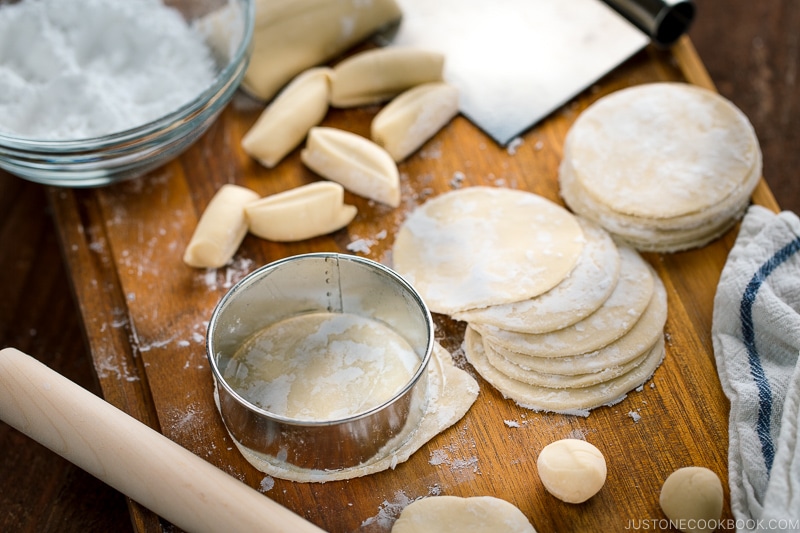
If you can’t find gyoza wrappers at the store, another option is to make gyoza wrappers from scratch. This process can be quite satisfactory. Homemade wrappers are also delicious! All you need is 3 ingredients—flour, salt, and water.
How to Make Vegetable Gyoza
- Drain the tofu and mince into small cubes.
- Mince all the vegetables with a knife or use a food processor.
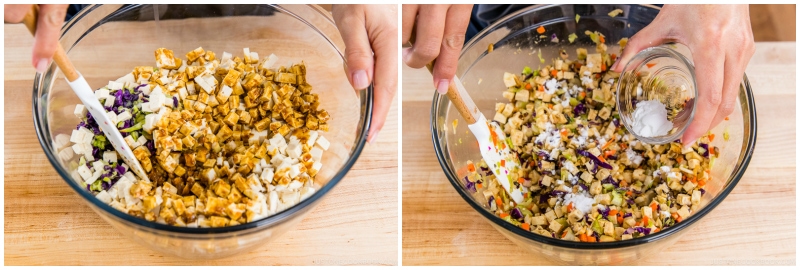
- Mix the filling. Add the minced vegetables and tofu to a large bowl. Add the minced garlic, grated ginger, and seasonings. Mix well. Add potato starch or cornstarch and mix thoroughly.
- Fold the gyoza (I’ll go over how to do this in the next section).
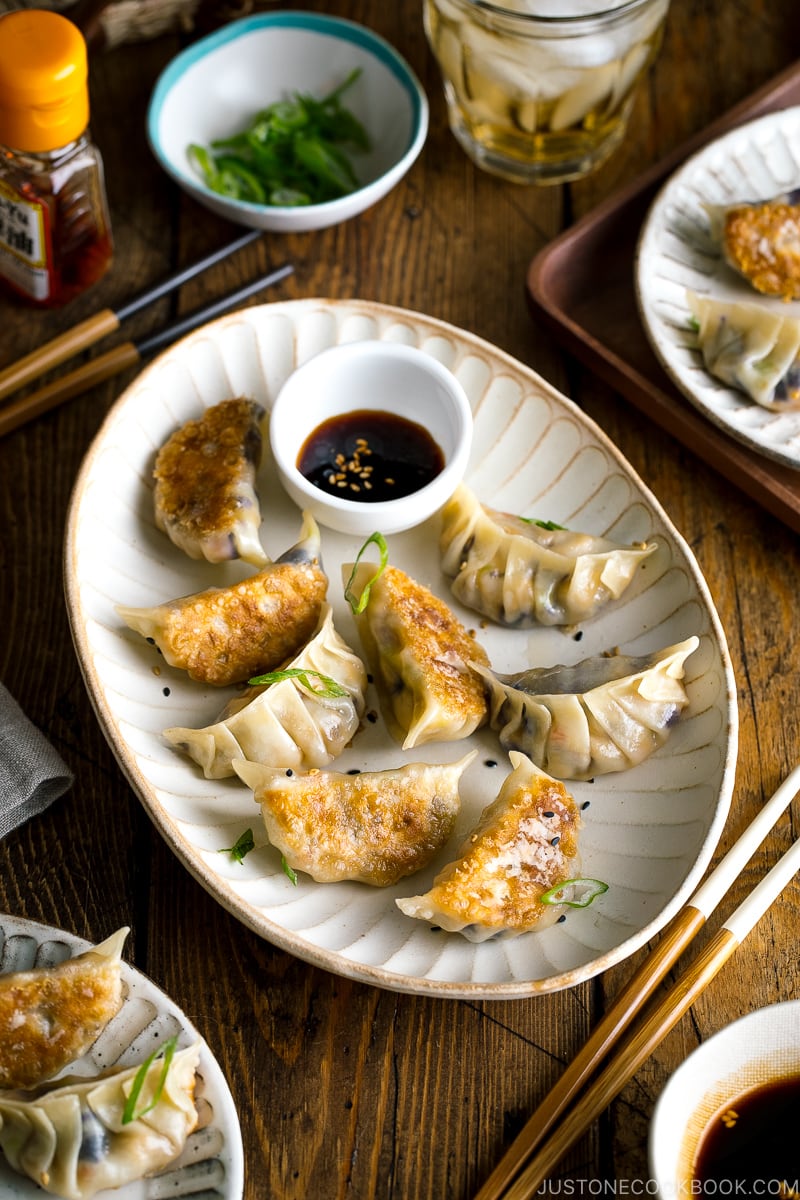
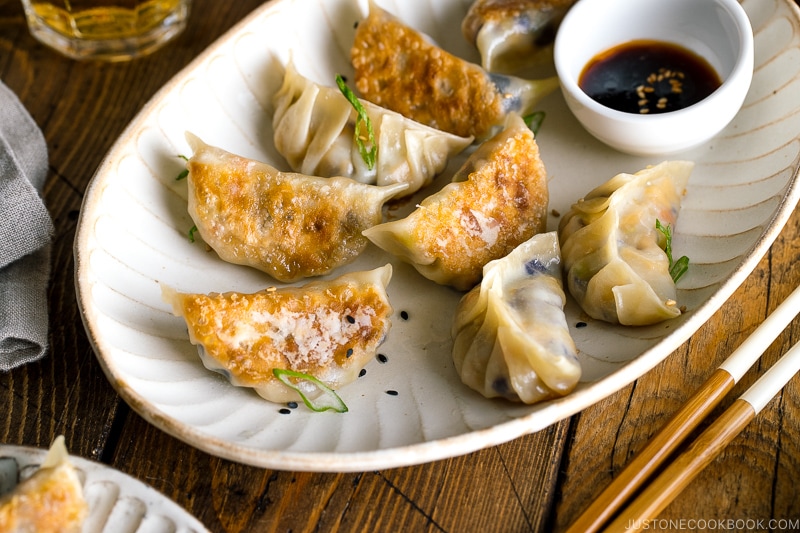
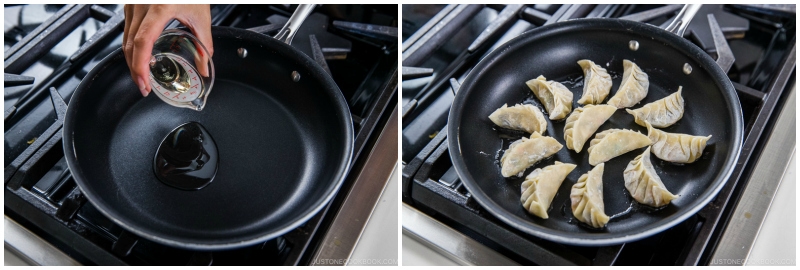
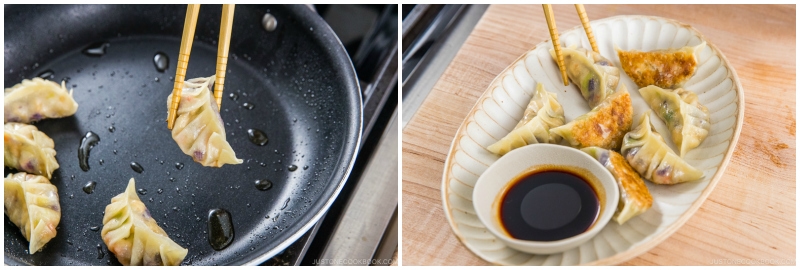
- Pan-fry the gyoza in a large, nonstick frying pan over medium heat in a single layer. Cook the gyoza in batches. When the bottoms are golden brown, add a splash of water to the pan, cover, and steam. Remove the lid and drizzle with sesame oil. Fry briefly and remove.
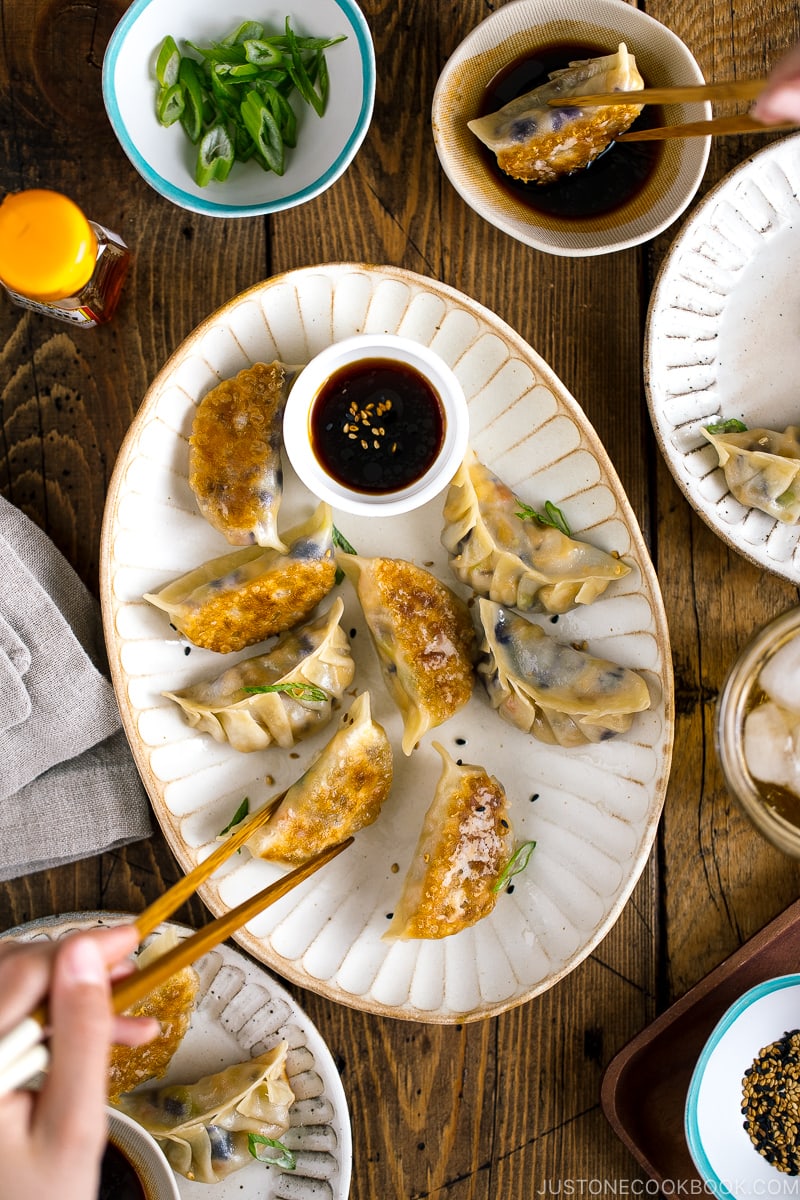
- Serve with dipping sauce and optional chili oil.
How to Fold Gyoza Wrappers
If you had never made dumplings, you’re probably concerned about how to fold them. To be honest, those beautiful pleats on gyoza are not necessary. You can just wet the skin around the skin and fold in half tightly and pan-fry. As long as the seam is closed tightly, it would work!
However, I encourage you to try pleating the gyoza when you have the time. It can be gratifying. I’ve been folding gyoza since I was small, helping my mom make thousands of gyoza. So, I can tell you that it’s all about practice. Before you know it, you’ll be able to do it even with your eyes closed.
Next, I’ll show you how I fold gyoza toward the center, which I think is easier because you can make pleats evenly. The detailed instructions are in my tutorial on how to fold gyoza wrappers, but I’ll quickly explain here.
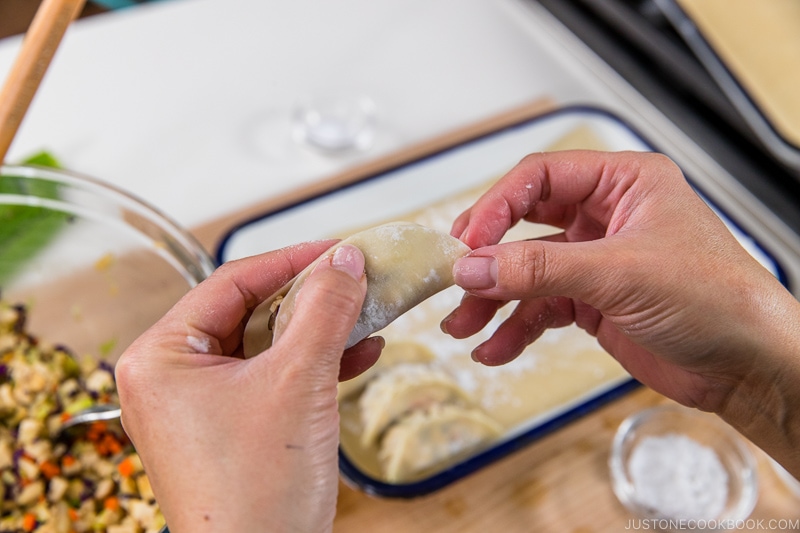
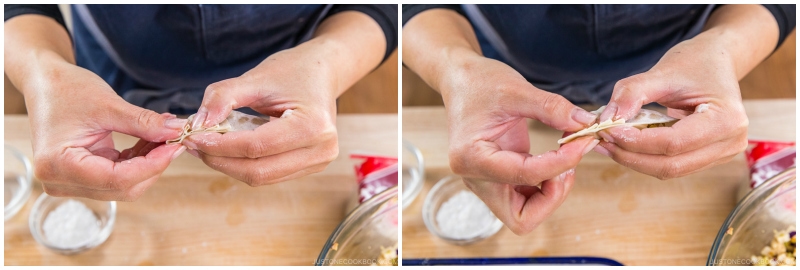
1. Wet the gyoza skin with water around the edge.
2. Fold the wrapper in half over the filling and pinch the center with your left thumb and index finger.
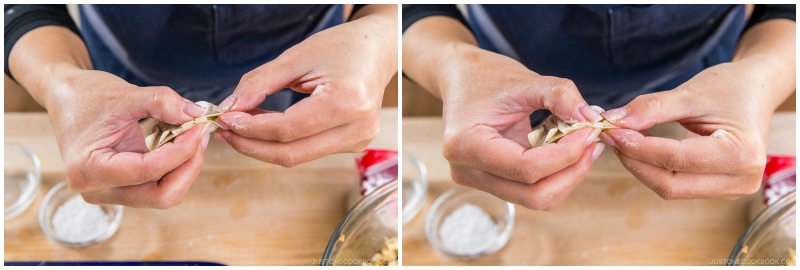
3. Hold the right top skin and make a pleat from the center toward the right side.
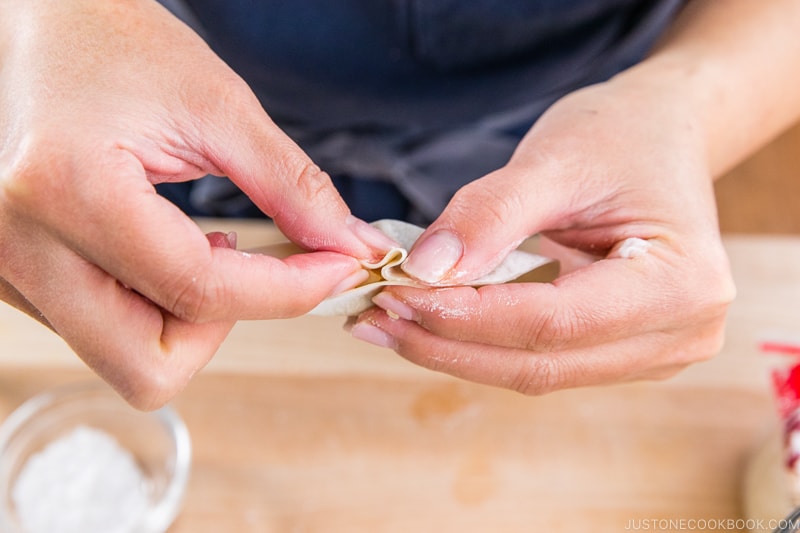
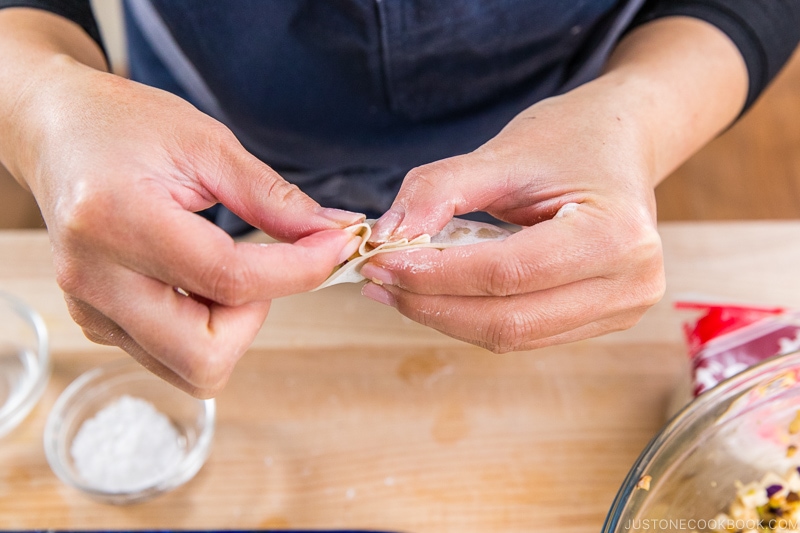
4. As you make each pleat, press it down with your left thumb. Make 3–4 pleats.
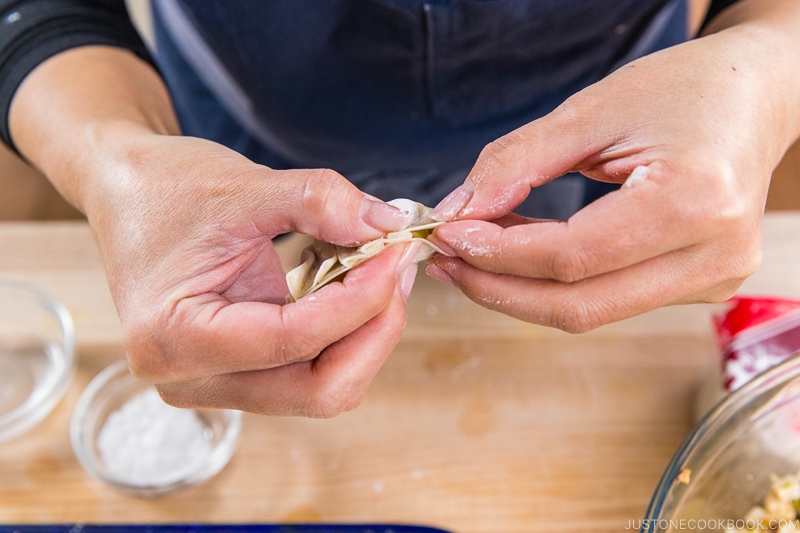
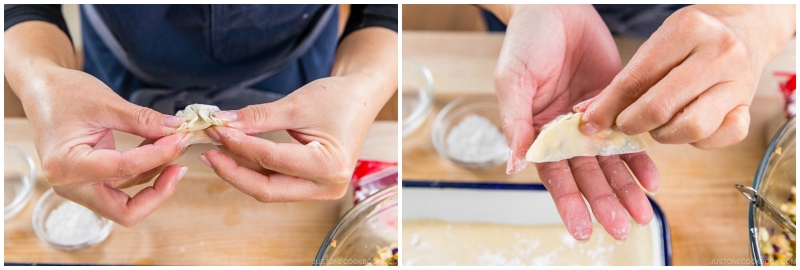
5. Repeat on the other side.
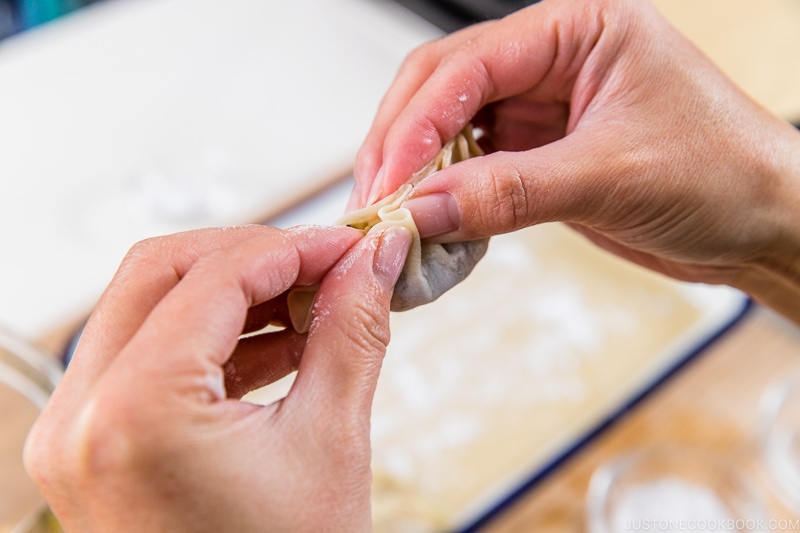
6. Press the pleats tightly (make sure there are no air pockets!), flatten the bottom, and shape the gyoza to look pretty.

5 Important Tips on Making Gyoza
1. Cut the ingredients into uniform shapes and sizes.
To evenly mix and distribute, it’s important to cut all the filling ingredients into a similar shape and size. For example, if you are cutting all ingredients into small cubes/mince, do not cut one ingredient into julienne pieces. It will make folding the dumplings easier. Also, it will help the mixture cook evenly, and it’s a good technique to apply in your cooking.
2. Do not introduce moisture in the filling.
We want to minimize the moisture in the filling as much as possible. Otherwise, the gyoza skin will absorb the liquid and tear. There are 2 ways to keep your filling relatively dry:
- Use dense vegetables, and do not use ingredients that have high moisture content.
- Use potato starch or cornstarch to help absorb the moisture (including seasonings) and bind everything together.
3. Don’t pack air pockets in the gyoza.
When you stuff the filling in the gyoza skin, try to release the air pockets by pushing out the empty space. Any air pockets will create balloons that blow out in the gyoza when you steam. It’s not a “bad” thing, but you can avoid that and it looks neater when your gyoza is completely filled up.
4. Pan-fry till nicely golden brown before steaming.
Make sure the pan and oil are hot when you put the gyoza in the pan. Let the bottoms of the gyoza cook till golden brown. This is the only time you can ensure the color of gyoza.
5. After steaming, pan-fry till crisp again.
After browning the bottoms of the gyoza, let it steam to cook the filling and skin. The big plus for vegetable gyoza is that unlike the traditional pork filling, we do not have to worry about undercooking the meat.
Once steamed, open the lid and let the water evaporate. The gyoza will look wet and soggy but will become crisp on the bottom again when fried with a bit of sesame oil for a few minutes. Give the bottoms a lengthy contact with the hot surface, and don’t touch them too much while they’re crisping.
How to Freeze and Store Gyoza (Meal Prep)
When it comes to gyoza, I always make a big batch. Why? Because gyoza freezes so well for future meals. You’ll be so glad you did it when you are running short on time. Frozen gyoza also cooks well at the last minute with a short cook time. You can fry it straight from the freezer—no defrosting needed.
So, double or triple the recipe when you make gyoza. I freeze everything except for what I need to cook for that night’s dinner.
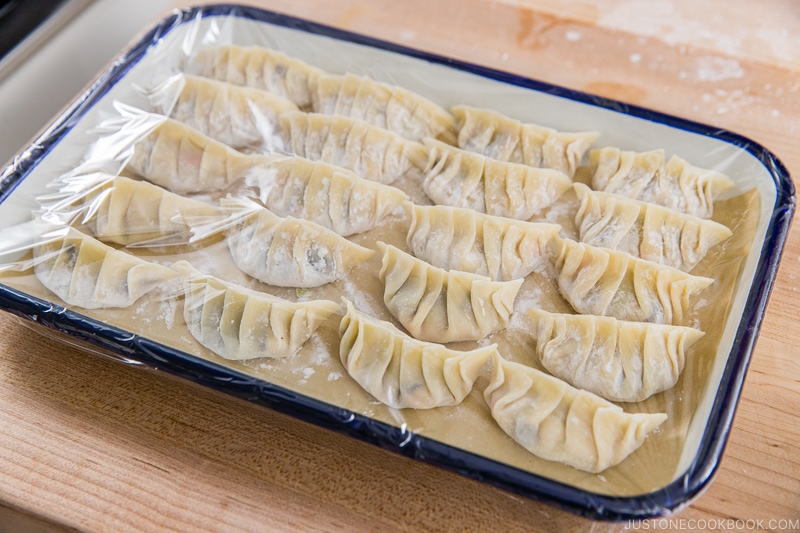
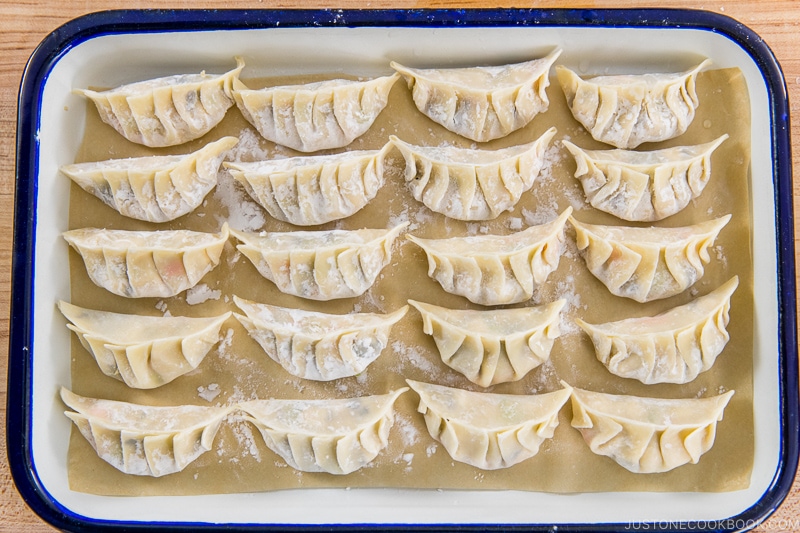
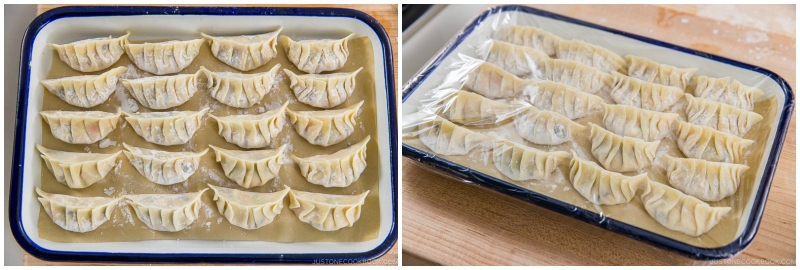
One thing to remember when freezing: Make sure to lay the gyoza flat (like the picture above) on a tray or baking sheet and “flash freeze” them in the freezer until solid (or at least the outside is frozen). Then, you can pack them in an airtight, resealable bag to freeze. That way, your gyoza won’t stick to each other in the bag.
Now that you’re equipped with some tips and techniques, I hope you enjoy making Vegetable Gyoza. It’s such a fun activity that you want to get your family members or your partner involved!
Sign up for the free Just One Cookbook newsletter delivered to your inbox! And stay in touch with me on Facebook, Pinterest, YouTube, and Instagram for all the latest updates.

Vegetable Gyoza (Vegan/Vegetarian)
Ingredients
For the Filling
- 1 package extra firm tofu (12 oz, 340 g)
- 2 leaves cabbage (5 oz, 142 g)
- ⅛ head red cabbage (3.5 oz, 100 g)
- 1 tsp Diamond Crystal kosher salt (for the cabbage)
- 2 inches carrot (2 oz, 57 g)
- ½ onion (3 oz, 85 g)
- 2 green onions/scallions (1.6 oz, 44 g)
- 4 king oyster mushrooms (eringi) (5 oz, 142 g)
- 2 shiitake mushrooms (1.75 oz, 50 g)
- 1 clove garlic
- 1 tsp ginger (grated, with juice; from 1-inch, 2.5-cm knob)
- 2 Tbsp potato starch or cornstarch
For the Seasonings
- 2 Tbsp soy sauce
- 1 Tbsp miso (I recommend awase or red miso, as they have a bolder flavor than white miso)
- 2 tsp toasted sesame oil
- 1 tsp Diamond Crystal kosher salt
- ⅛ tsp white pepper powder
For Folding the Gyoza
- 80 gyoza wrappers (approximately; buy 2 packages of Myojo brand gyoza wrappers (52 wrappers per package); or make Homemade Gyoza Wrappers)
- water (to fold and seal the wrappers)
For Frying
- neutral oil (1 Tbsp per batch)
- water (¼ cup, 60 ml per batch)
- toasted sesame oil (1 tsp per batch)
For the Dipping Sauce
- rice vinegar (unseasoned) (1 Tbsp per person)
- soy sauce (1 Tbsp per person)
- la-yu (Japanese chili oil) (optional; ⅛ tsp per person; you can make my Homemade La-yu)
Instructions
- Gather all the ingredients. Tip: You can use a food processor to chop all the vegetables like Chef David Chang did when he followed my recipe in an episode of the podcast Recipe Club.
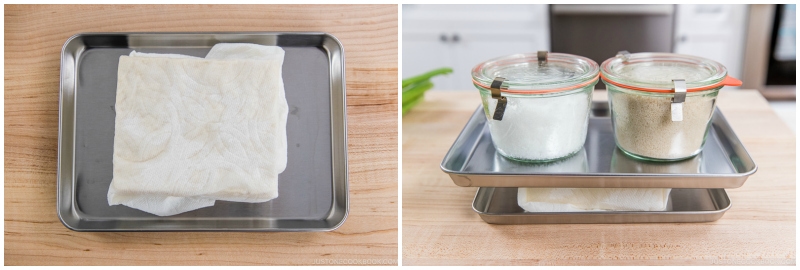
To Drain the Tofu
- Wrap 1 package extra firm tofu with a paper towel and place it on a tray/plate. Put another tray/plate on top of the tofu and press it down with a heavy object for roughly 30 minutes to 1 hour. (I pressed for 2 hours this time; my single tofu block weighed 400 g before pressing and 355 g after.) If you‘re in a hurry, you can microwave the tofu without plastic wrap for 1½ minutes (at 1000 watts) and drain the water.
To Mix the Seasonings
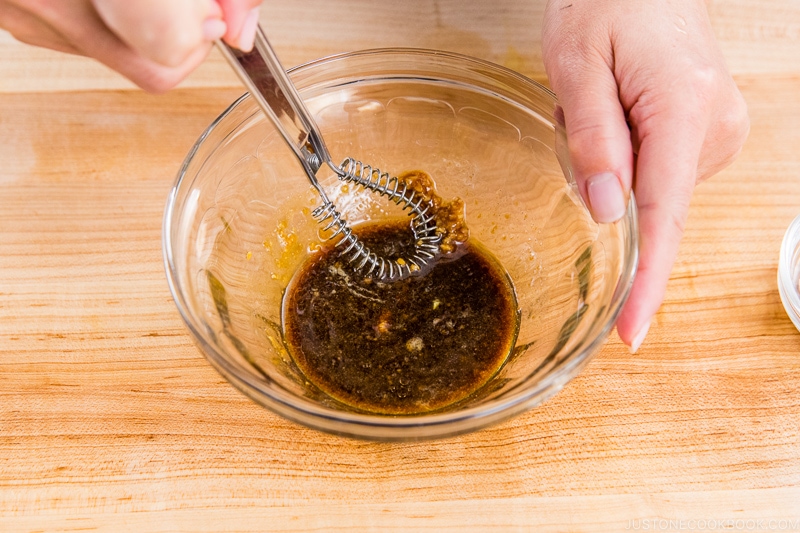
- While you're waiting for the tofu to drain, mix the seasonings. In a small bowl, add 2 Tbsp soy sauce, 2 tsp toasted sesame oil, 1 Tbsp miso, 1 tsp Diamond Crystal kosher salt, and ⅛ tsp white pepper powder.
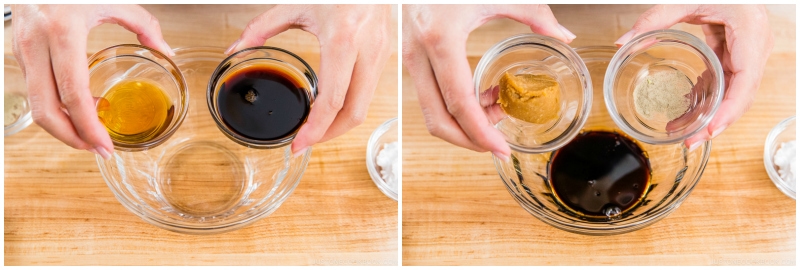
- Whisk it all together and set aside.
To Make the Filling
- Discard the tough core of 2 leaves cabbage (green). Cut the leaves into julienned pieces.
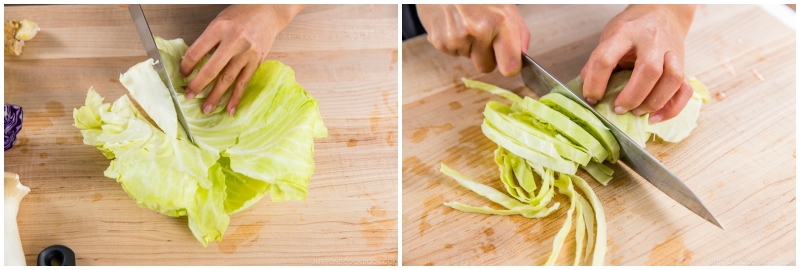
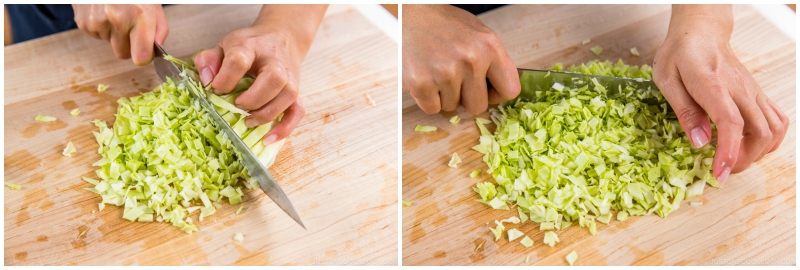
- Mince the julienned cabbage into small pieces. Tip: It‘s usually easier to tuck smaller pieces in the gyoza wrapper rather than chunkier pieces.
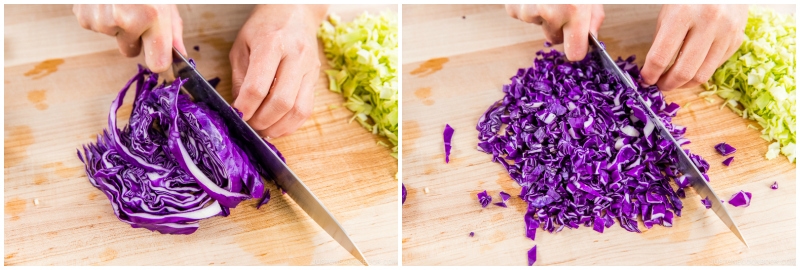
- Repeat with ⅛ head red cabbage: Discard the tough core of the red cabbage leaves and cut the leaves into julienned pieces. Then, mince into small pieces.
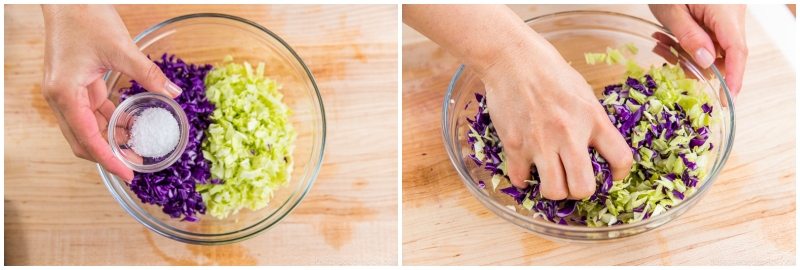
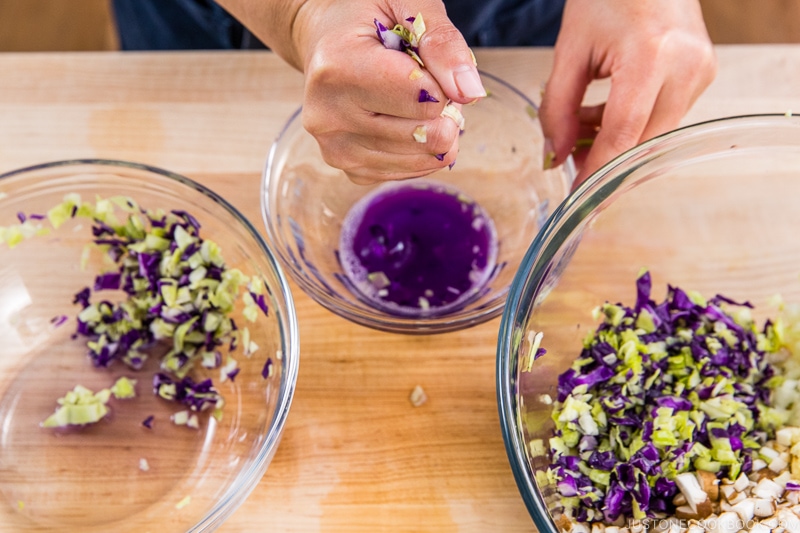
- Put the minced green and red cabbage in a bowl and add 1 tsp Diamond Crystal kosher salt. Rub the salt into the cabbage with your hands and set aside until it releases its liquid.
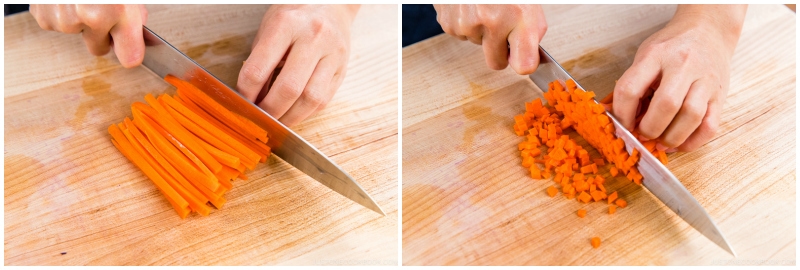
- Cut 2 inches carrot into slabs, then sticks, and mince them.
- Mince ½ onion finely: Lay the onion flat side down on the cutting board. With the knife tip pointing toward the root end, make ⅛-inch vertical slices to within ½ inch of the root end. Then, with the knife edge toward the root end, make ⅛-inch horizontal slices, again keeping the root intact. Finally, make perpendicular cuts down through the vertical slices you made.

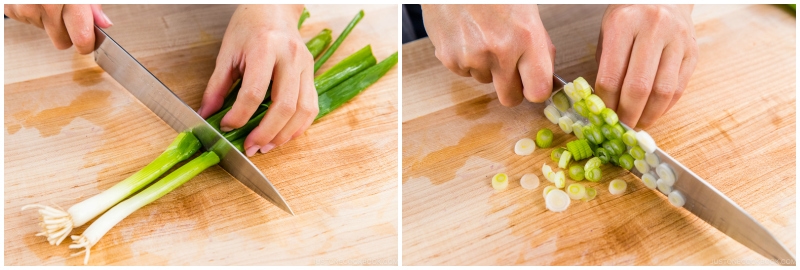
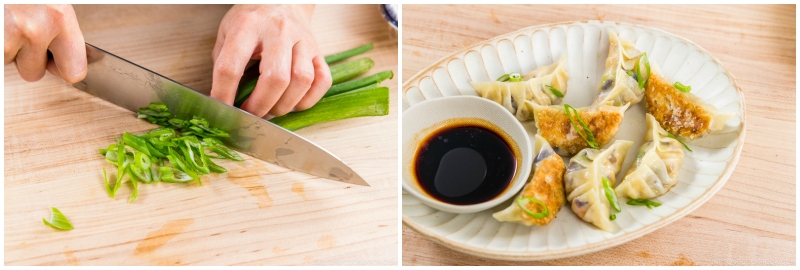
- Cut 2 green onions/scallions into white and green parts. Save the green part for garnish. Mince the white part into small pieces for the filling.
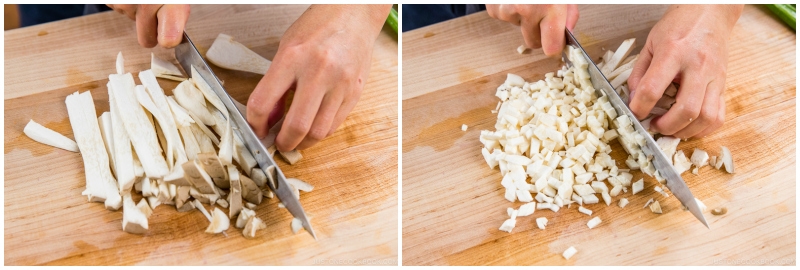
- Cut off and discard the root end of 4 king oyster mushrooms (eringi). Cut the mushrooms into sticks and then mince them.
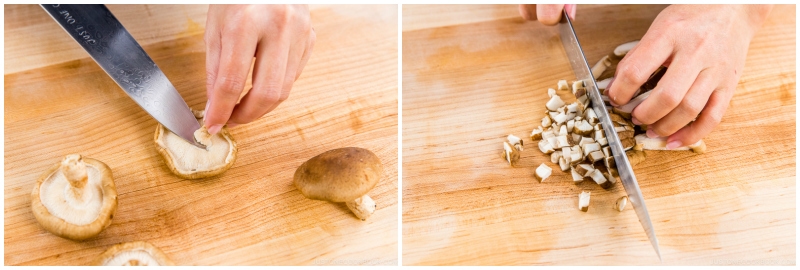
- Discard the stems of 2 shiitake mushrooms. Cut the mushroom caps into strips, and then mince them.
- To a large bowl, add the onion, two kinds of mushrooms, carrots, and white part of the green onions. Then, mince or press 1 clove garlic (I use my garlic press here) and add it to the bowl.
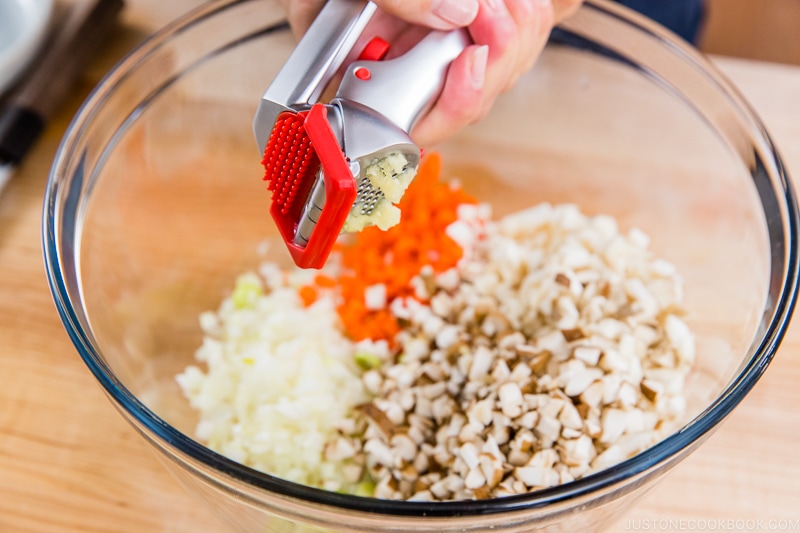
- Peel and grate the ginger (I use a ceramic grater). Measure 1 tsp ginger (grated, with juice) and add it to the filling ingredients.

- Squeeze and discard the liquid from the cabbage. Add the cabbage to the bowl with the other ingredients.
- Remove the paper towel and slice the tofu into thin slabs roughly ⅛ inch (3 mm) thickness (pencil width).
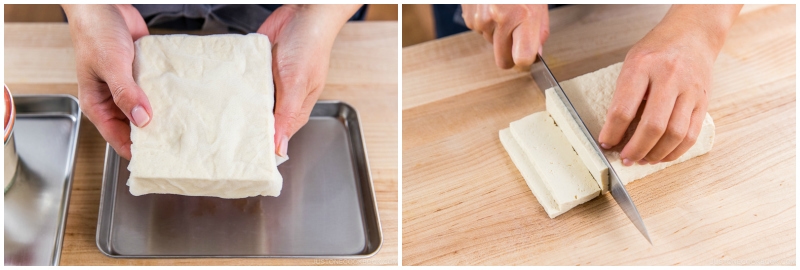
- Next, cut the tofu slabs into sticks, and then cut the sticks into cubes.
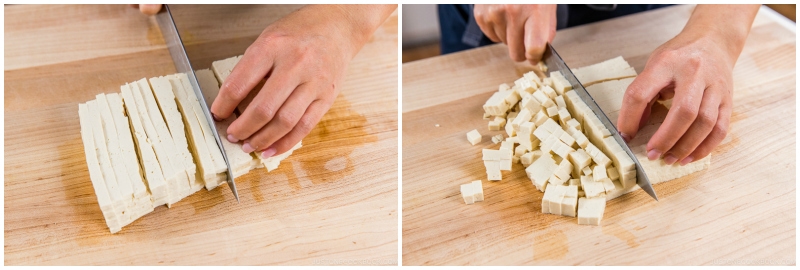
- Add the tofu cubes and the seasonings mixture to the bowl. Mix it all together. Once the ingredients are well coated with the seasonings, add 2 Tbsp potato starch or cornstarch and mix thoroughly. If the filling seems watery, add more potato starch to absorb any extra moisture.
To Fold the Gyoza
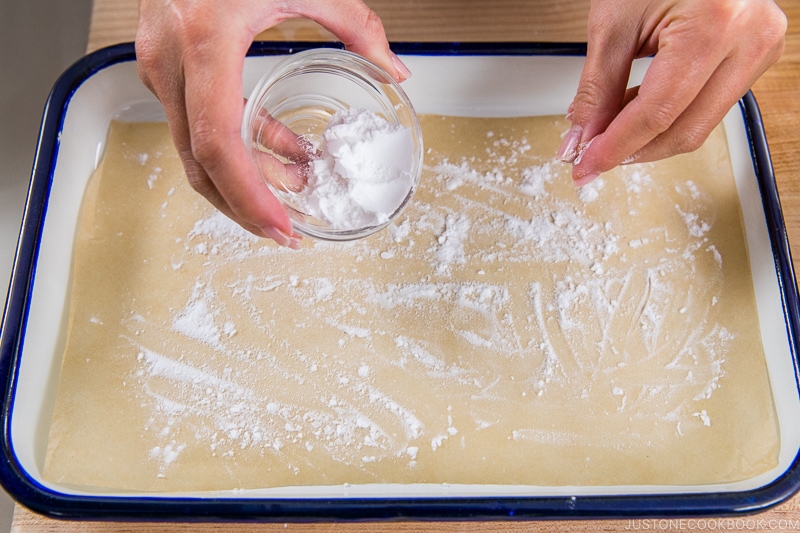
- Prepare a tray or plate with parchment paper and sprinkle some potato starch (cornstarch). This will prevent the gyoza from sticking to the paper. Gather 80 gyoza wrappers and prepare a small bowl of water.
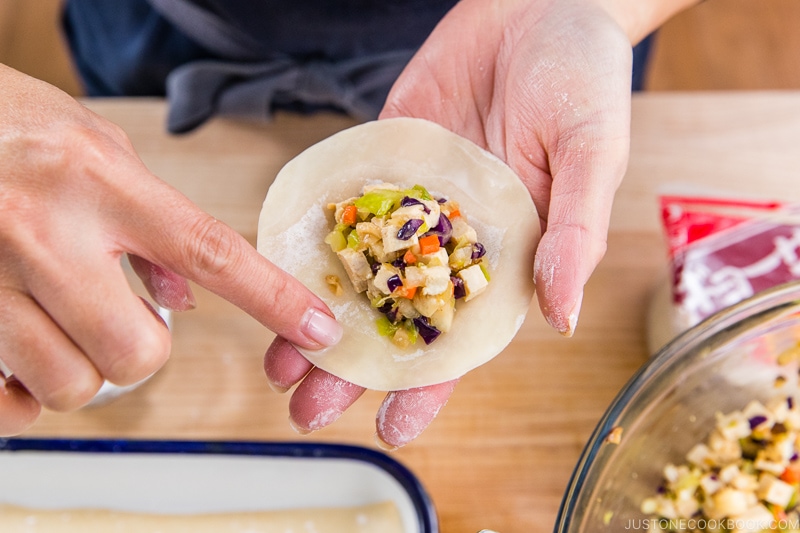
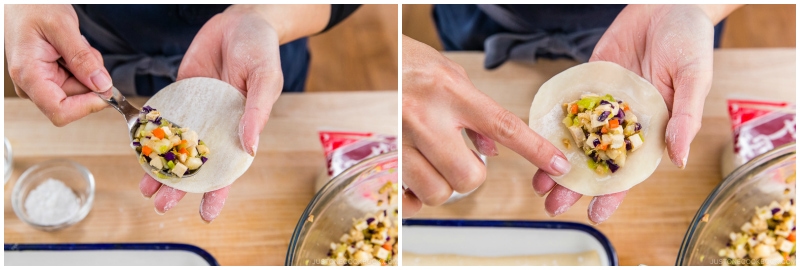
- Take a wrapper and place it in the palm of your non-dominant hand. Use a teaspoon to scoop a small amount of filling and put it in the center of the wrapper. Dip one finger in the bowl of water and draw a circle around the outer ¼ inch (6 mm) of the wrapper with your wet finger until it’s moistened all around.
- Here, I show you how to fold the gyoza with the pleats leaning toward the center. Fold the wrapper in half over the filling and pinch it in the center with your fingers, but don’t seal it yet. Using the thumb and index finger of your right hand, start making a pleat about every ¼ inch (6 mm) on the top part of the wrapper from the center toward the right side, making 3–4 pleats.
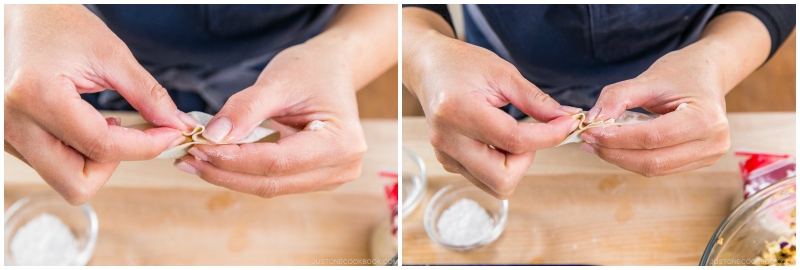
- As you fold each pleat, press the folded pleat tightly against the back part of the wrapper using your other thumb and index finger. Make 3–4 pleats.
- Continue with the left side of the gyoza. Making 3–4 pleats with your left hand, starting in the center and moving toward the left side.
- Press the pleats tightly, making sure there are no air pockets. Shape the gyoza to look pretty. Repeat folding the remaining wrappers. Tip: See my Gyoza recipe for an alternative folding method where the pleats all lean toward one side.
To Freeze Uncooked (optional)
- This recipe may make more gyoza than you wish to serve now. If you want to store some uncooked gyoza to cook later (optional), now is the time to freeze them. Before the filling starts to release moisture and make the wrappers soggy, cover the gyoza with plastic wrap and “flash freeze” them in the freezer until solid (or at least frozen on the outside). Make sure to lay out the gyoza in a single layer on a sheet pan or plate. Once the gyoza are solid, pack them in an airtight bag. Because you flash froze them, the gyoza won’t stick to each other in the bag. You can store the gyoza in the freezer for up to a month. When you‘re ready to use the gyoza, do not defrost them. Place the frozen gyoza in your frying pan and steam them for an extra 1–2 minutes.
To Cook the Gyoza
- To cook the gyoza that you just folded, heat a large nonstick frying pan over medium heat. When the pan is hot, add 1 Tbsp neutral oil. Then, place the gyoza in a single layer, flat side down and without touching each other, in a circular pattern (or place them in two rows). You will need to cook the gyoza in batches. As you can see from the photo, my large frying pan can fit about 12–13 pieces per batch.
- Cook until the bottoms of the gyoza turn golden brown, about 3 minutes. Next, add ¼ cup water to the pan.
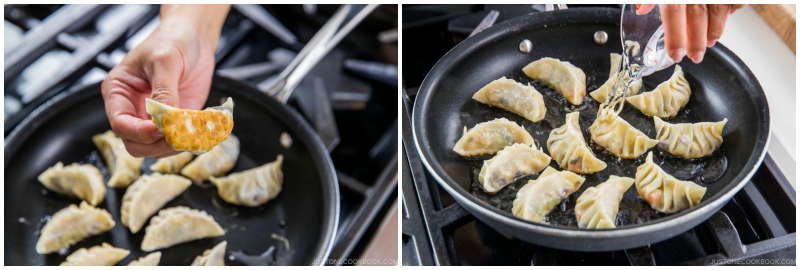
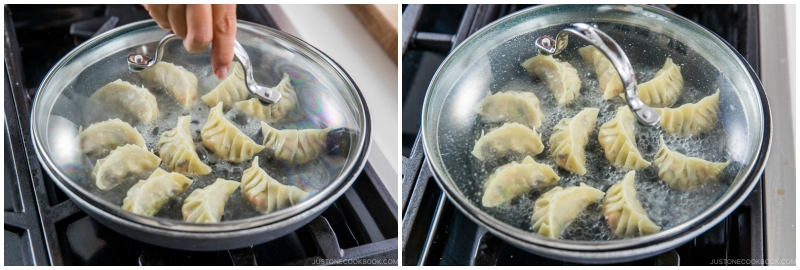
- Immediately cover with a lid and steam the gyoza for about 3 minutes or until most of the water evaporates. Tip: If you‘re cooking frozen gyoza, steam them for an extra 1–2 minutes.
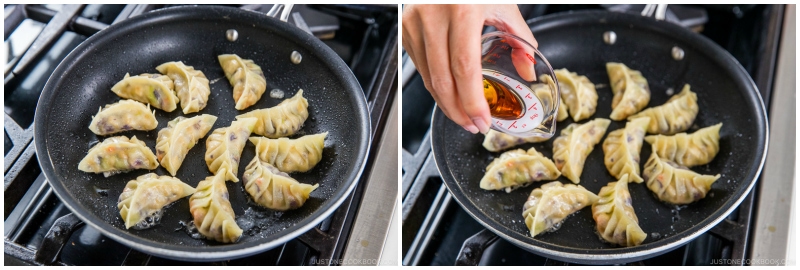
- Remove the lid to evaporate any remaining water. Drizzle 1 tsp toasted sesame oil around the gyoza in the frying pan. Cook, uncovered, until the bottom of the gyoza are golden brown and crisp.
To Serve
- Transfer the cooked gyoza to a plate. Repeat the process to cook the other batches. Serve the Vegetable Gyoza with a small bowl of dipping sauce for each person. To make the dipping sauce, combine 1 Tbsp rice vinegar (unseasoned), 1 Tbsp soy sauce, and ⅛ tsp la-yu (Japanese chili oil) in each dipping bowl and mix it all together.
- Cut the green part of a green onion for garnish, if you‘d like.
To Store
- You can keep the leftovers in an airtight container and store in the refrigerator for up to 3 days or in the freezer for a month.


So, so perfect. I upped the seasonings (not using the plain salt) and altered the veggies a little based on what I had, and these turned out better than any veggie gyoza I can remember from a restaurant. Thanks for the super clear explanation of the process.
Hi, Asher! We’re glad you loved homemade Vegetable Gyoza!
Thank you for trying Nami’s recipe and sharing your feedback with us. Happy cooking!
Hi Nami and Team, I was wondering if I can use dried mushrooms? Maybe if I rehydrate them it could work? What do you think?
Hello Lily! Thank you for trying Nami’s recipe!
You can rehydrate dried shiitake mushrooms and use them in this recipe. We hope you enjoy making homemade Gyoza!🤗
Can i halve the recipe? Greetings from Germany Dünya
Hello, Dünya. Thank you for reading Nami’s post and trying her recipe!
You can print her recipe by clicking the Print button near the top of the recipe card. We hope this helped!
so so good. did all shiitake because that’s all i had, but otherwise followed recipe. without dipping sauce you may want to season the filling a little more but i love it. awesome recipe and i’m happy to have made so many of them!
Hi Naomi! Thank you so much for trying Nami’s recipe!
We are glad you enjoyed home-made Gyoza! Happy Cooking!🤗
Thank you Naomi san
This is one of a great site for a Japanese cuisine,
God Bless
Hello, Jaime! Aww. Your kind words mean a lot to us.💞
Thank you for trying Nami’s recipes!
I’ve tried this recipe and it was perfect. Flawless seasoning, right amount of every ingredient. Loved it!
Hi Anna! Aww.🥰 Thank you so much for trying Nami’s recipe and for your kind feedback!
We are so happy to hear that you enjoyed the recipe! Happy Cooking!
Made these gyoza earlier this week and the recipe is great! The seasoning for the filling was a little bland, so next time I’m just gonna add a little more of it to the mix, but other than that they were delicious!
Hi Nick! We are glad to hear you enjoyed it.😊
Thank you so much for trying Nami’s recipe and for your feedback!
You’re so inspirational
Hi Pops! Thank you for your kind words!
We hope you enjoy Nami’s Vegetable Gyoza recipe. 😊
Hi Nami, if we cooked the Veg Gyoza and cannot finish it, can we still store them in fridge and use within the next 3 days? Thank you!
Hi Hui! Thank you for trying Nami’s recipe!
Yes, you can do that or freeze it.
We hope this helps!
I don’t have a place to purchase the king oyster mushrooms where I live. Can I substitute portobellos and chop them the appropriate size?
Hi Anita! Thank you very much for reading Nami’s post and trying her recipe!
Yes, portobello mushrooms should work. But the king oyster mushrooms have a more meaty texture, and the Gyoza texture will be a bit different.
We hope this helps!
P.S. The nutrition information lists 23 kcal per gyoza for a batch of 80 gyoza total. Does that calculation include the 1 Tbsp frying oil (what kind?) and 1 tsp sesame oil used for each batch? (For example, estimate 12 gyoza per batch. That’d be about 7 batches so 7 Tbsp frying oil and 7 tsp sesame oil?)
Hi Cassie! The nutrition information is approximate for each Gyoza, including dipping sauce. So please use it as a guide.
The oil used in this recipe is vegetable oil.🙂
We hope this helps!
We really enjoyed these vegetable gyoza! This was the first time that I’ve made gyoza. It seemed a little intimidating at first but it turned out to be a fun project! I prepped the vegetables and tofu the day before and stored them unmixed in the refrigerator. I mixed them together with the filling seasoning the following day then assembled the gyoza. It took me about 1-1/2 hours to assemble the gyoza by myself.
Although the Myojo gyoza wrapper package indicates there are ~52 wrappers per package, my two packages totaled 107 wrappers—which allowed me to use up all of the filling. I started with a loose teaspoon of filling, slightly flattened across the top of the measuring spoon. The gyoza weren’t very plump but I was able to pleat them easily. It looked like I could use more filling, so I started using more rounded teaspoonfuls going forward. It took me a little bit more time to pleat the plumper ones.
I used a classic Microplane grater/zester to grate the ginger. The ginger turned out very fine without strings. I mixed the ginger in with the filling seasoning liquid to ensure it was evenly distributed.
I used 1 Tbsp peanut oil on the first batch of 18 gyoza that I cooked and drizzled with 1 tsp toasted sesame oil. Tasted great! On the 2nd batch, I used 1.5 tsp peanut oil for 18 gyoza and 1/2 tsp sesame oil to reduce fat calories for us. Still tasted good but the gyoza bottoms stuck to the pan more easily; I used a spatula to loosen them.
Thanks for sharing this recipe! The gyoza are delicious!
Hi Cassie! Wow!🤩 Thank you very much for trying Nami’s recipe and sharing your cooking experience with us!
We are so happy to hear you enjoyed making Gyoza! And it turned out delicious!😍