

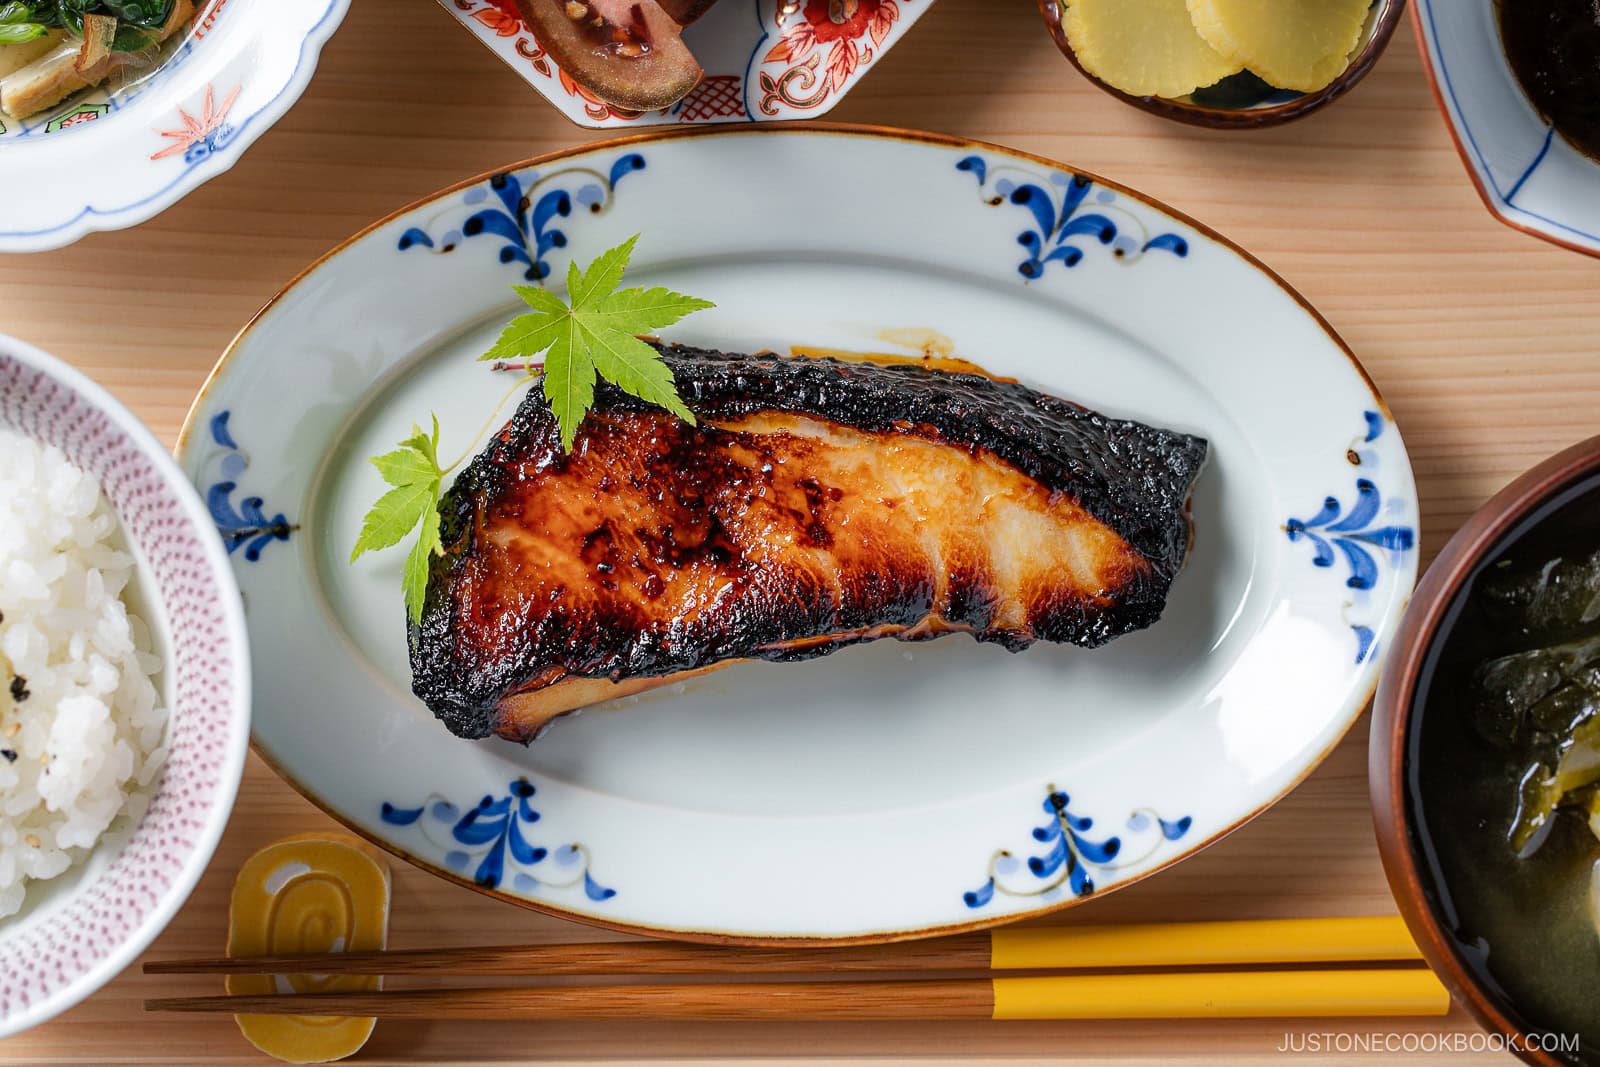
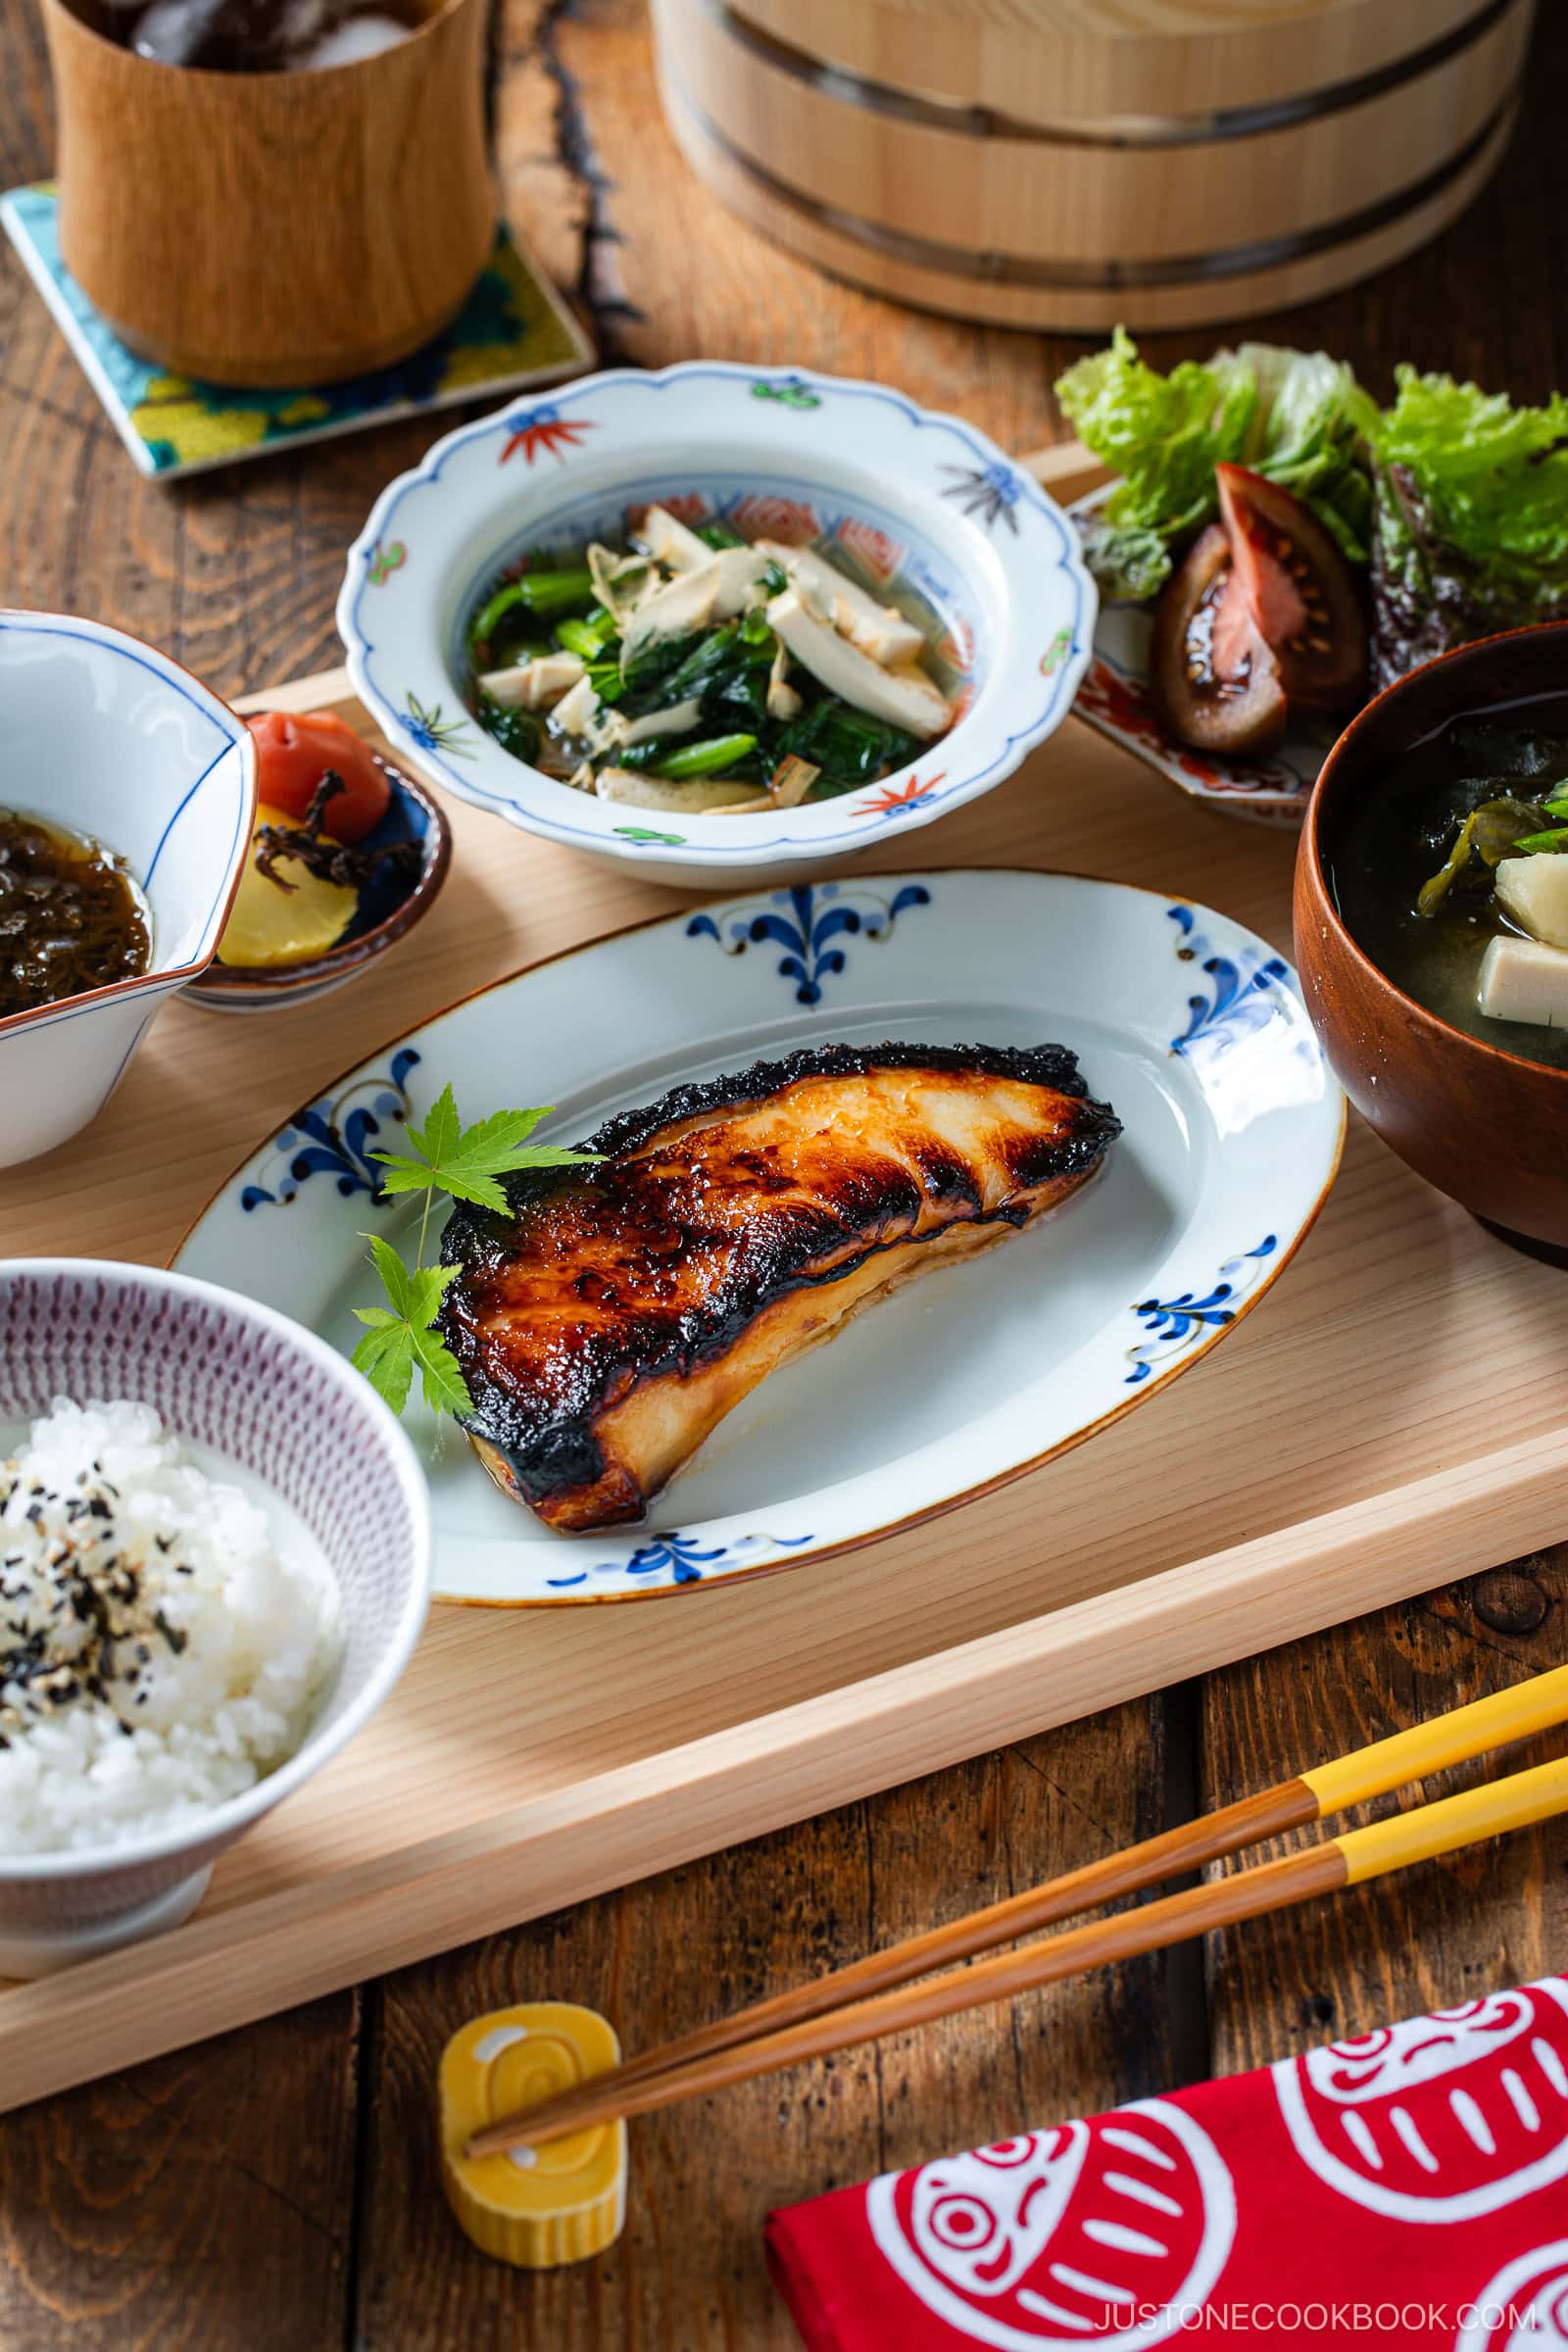
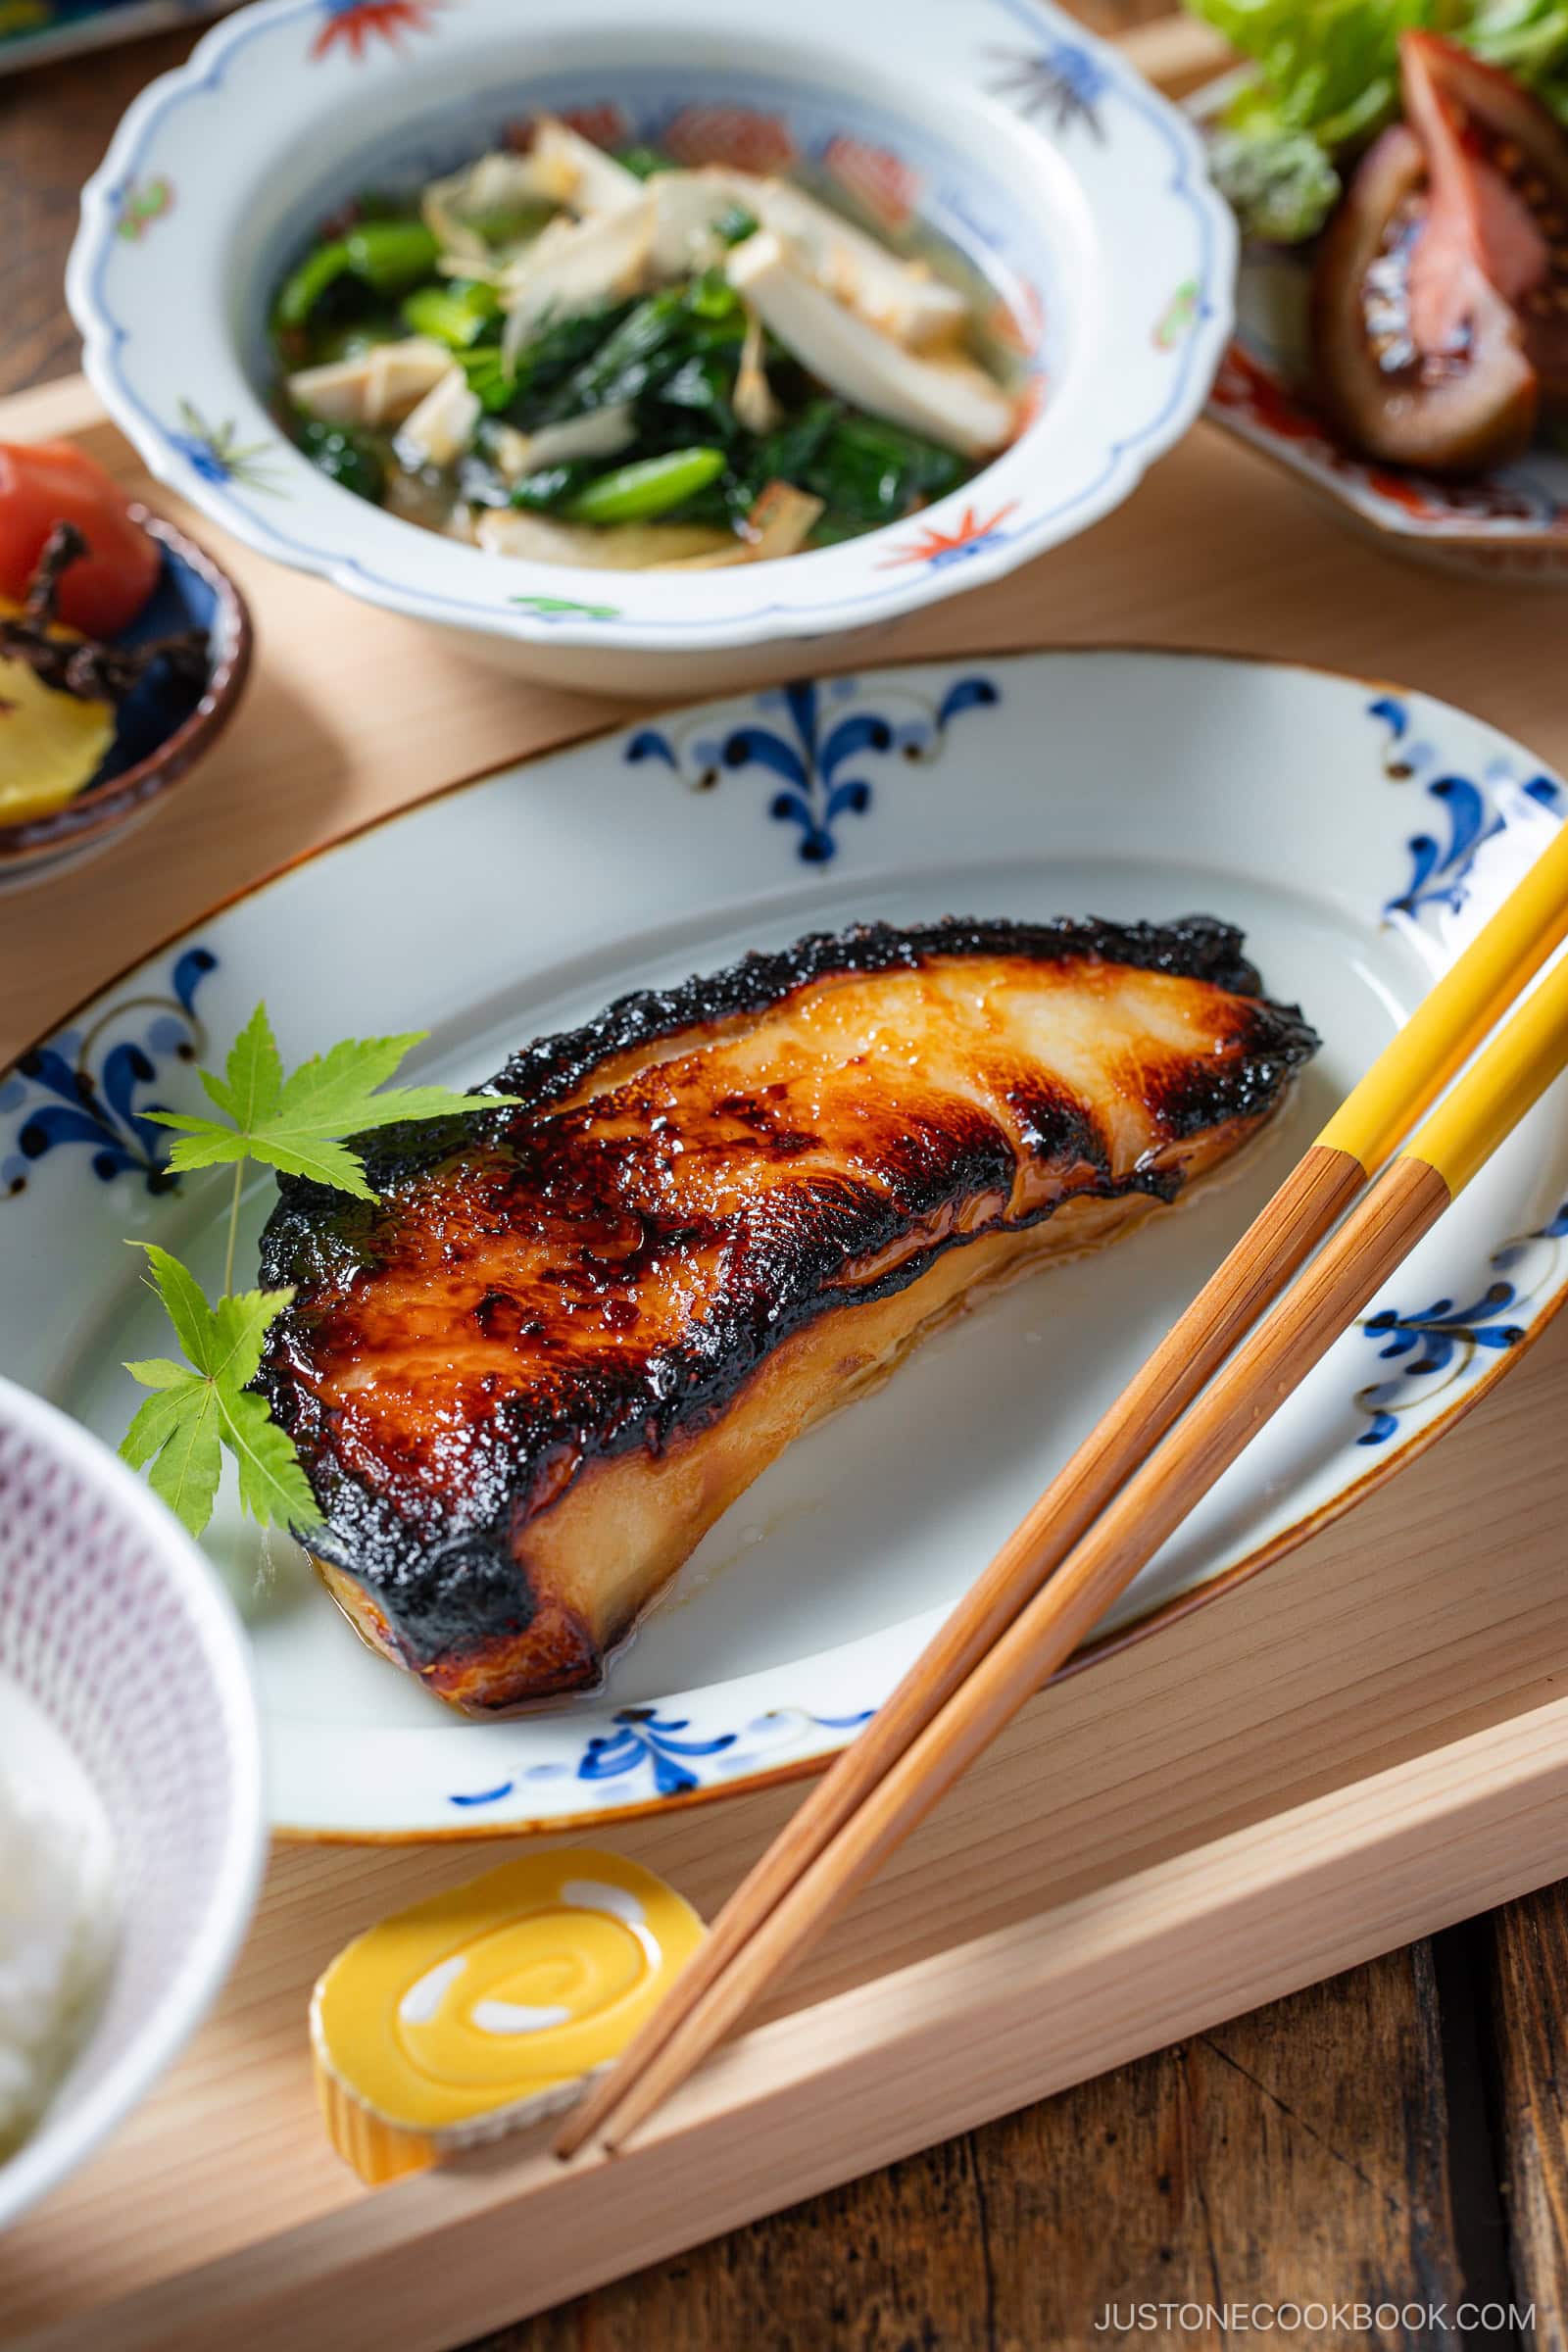
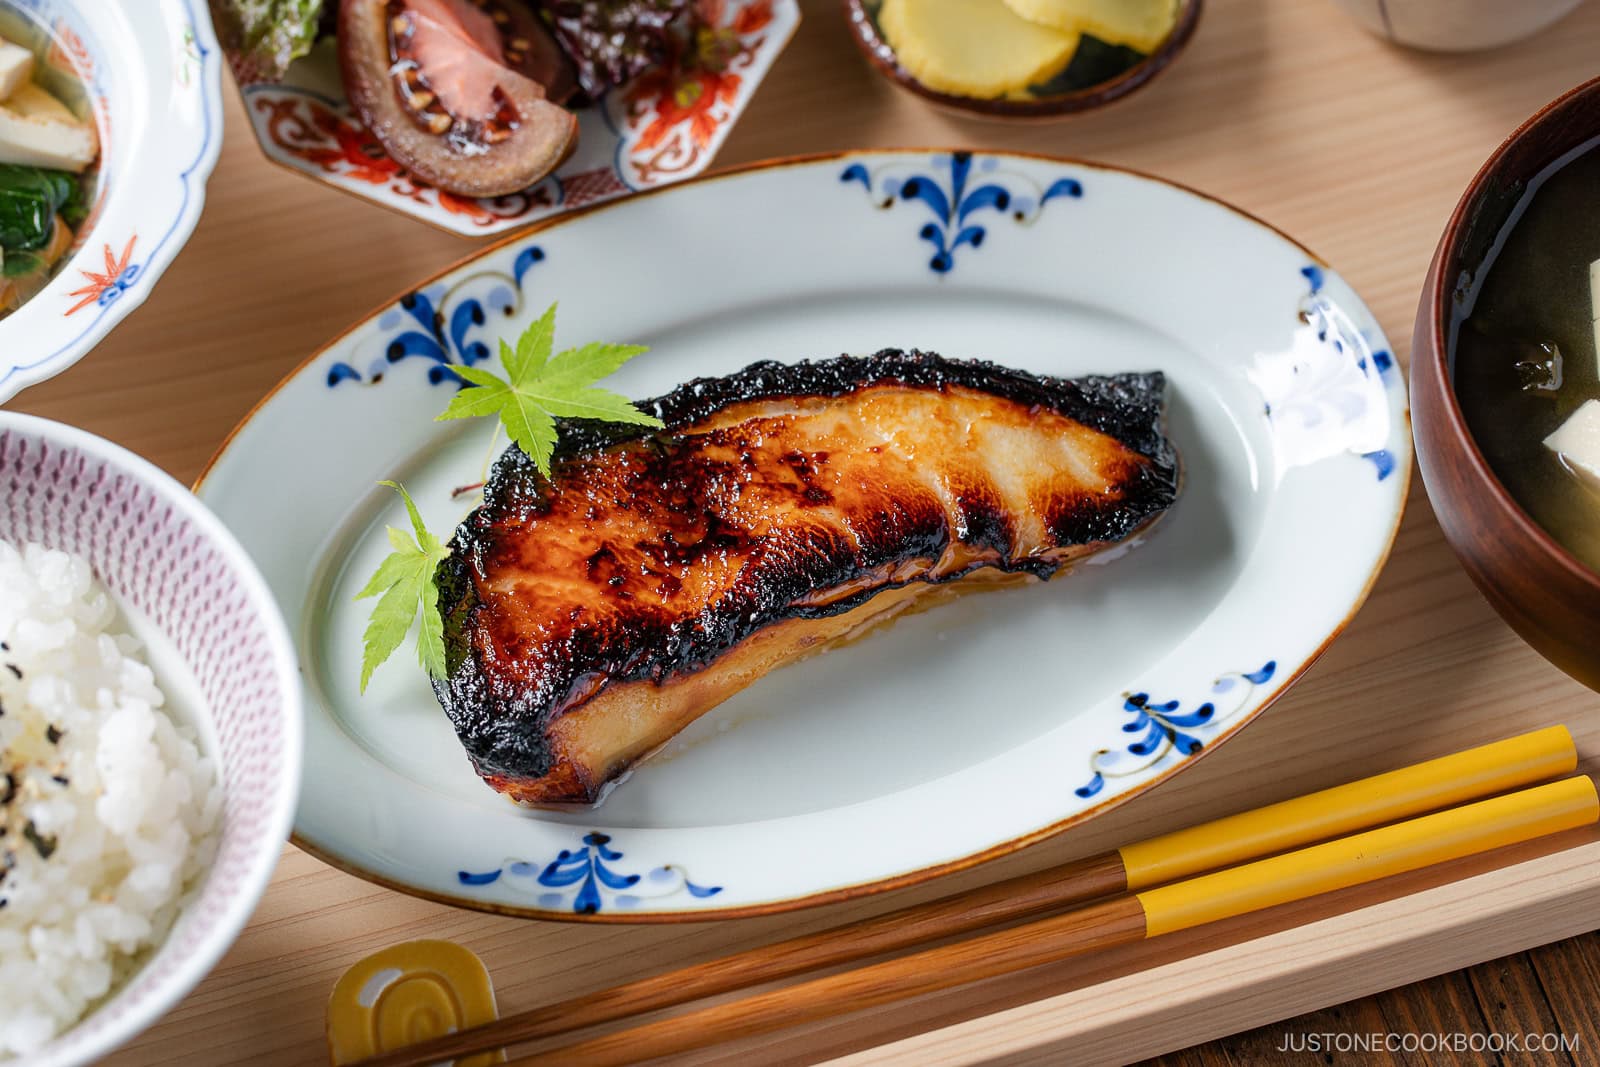
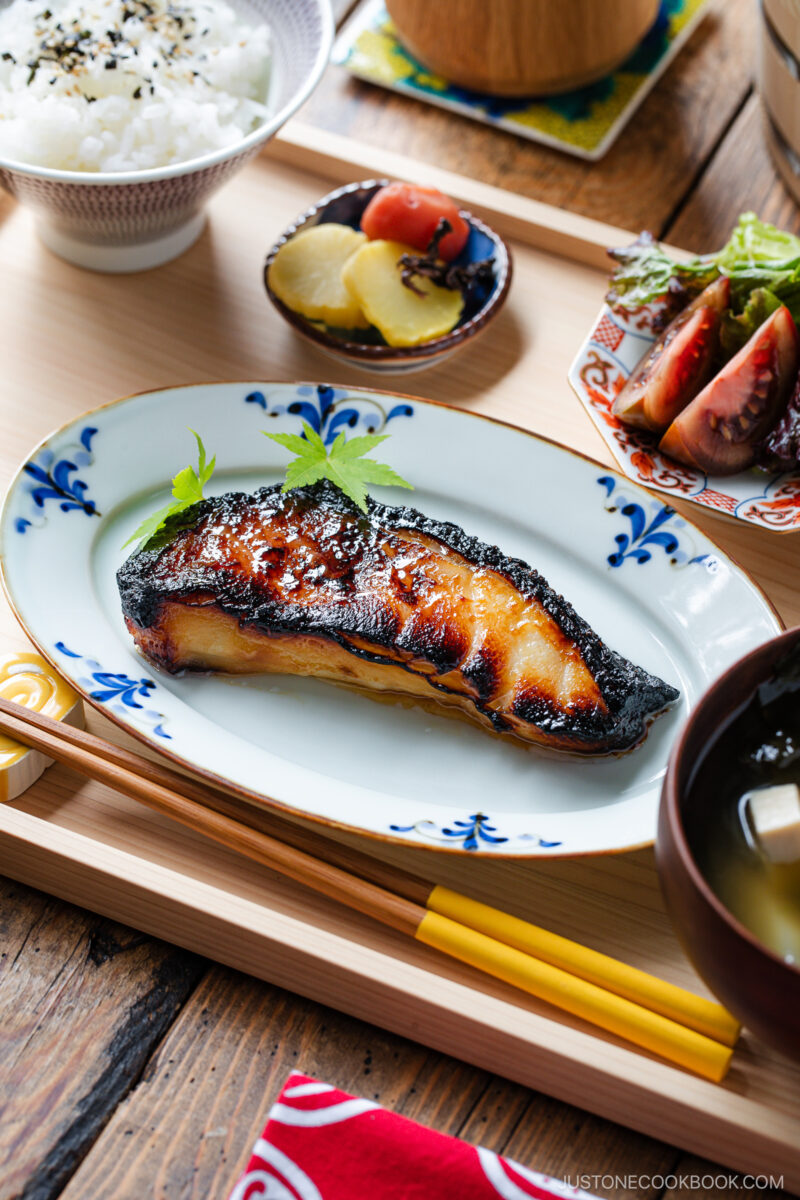
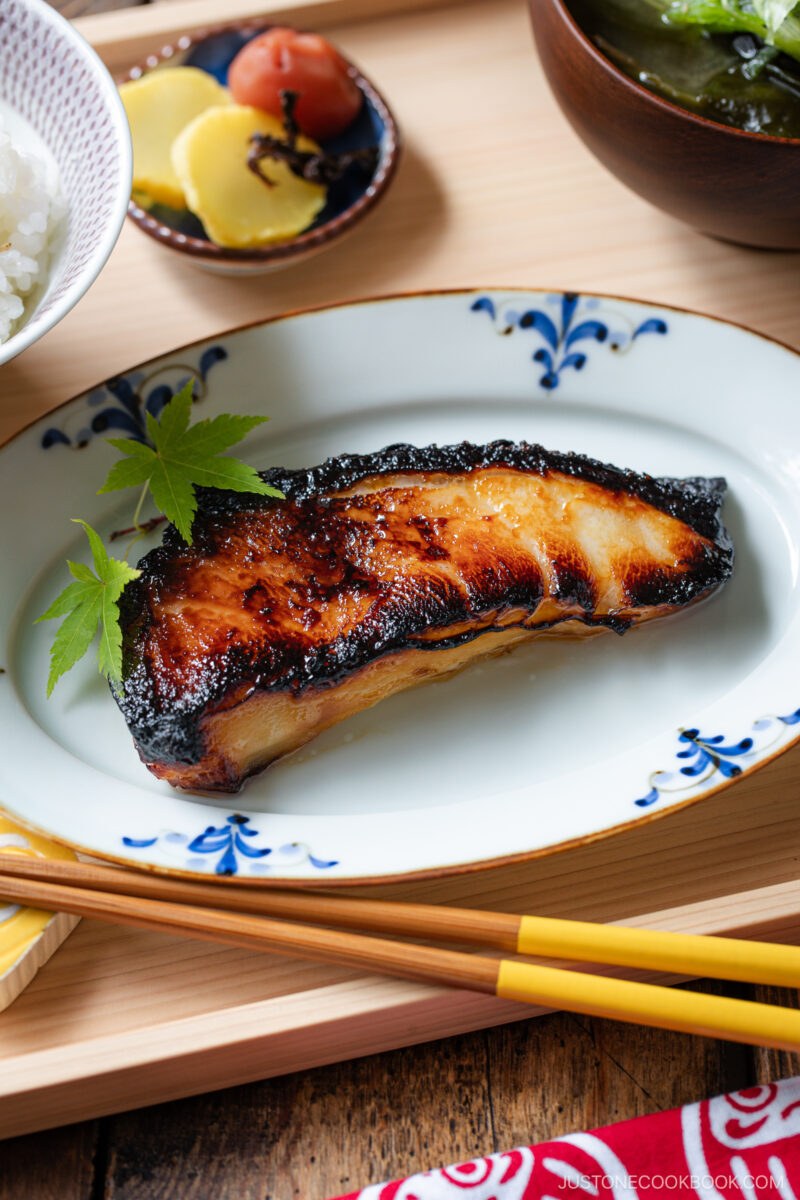
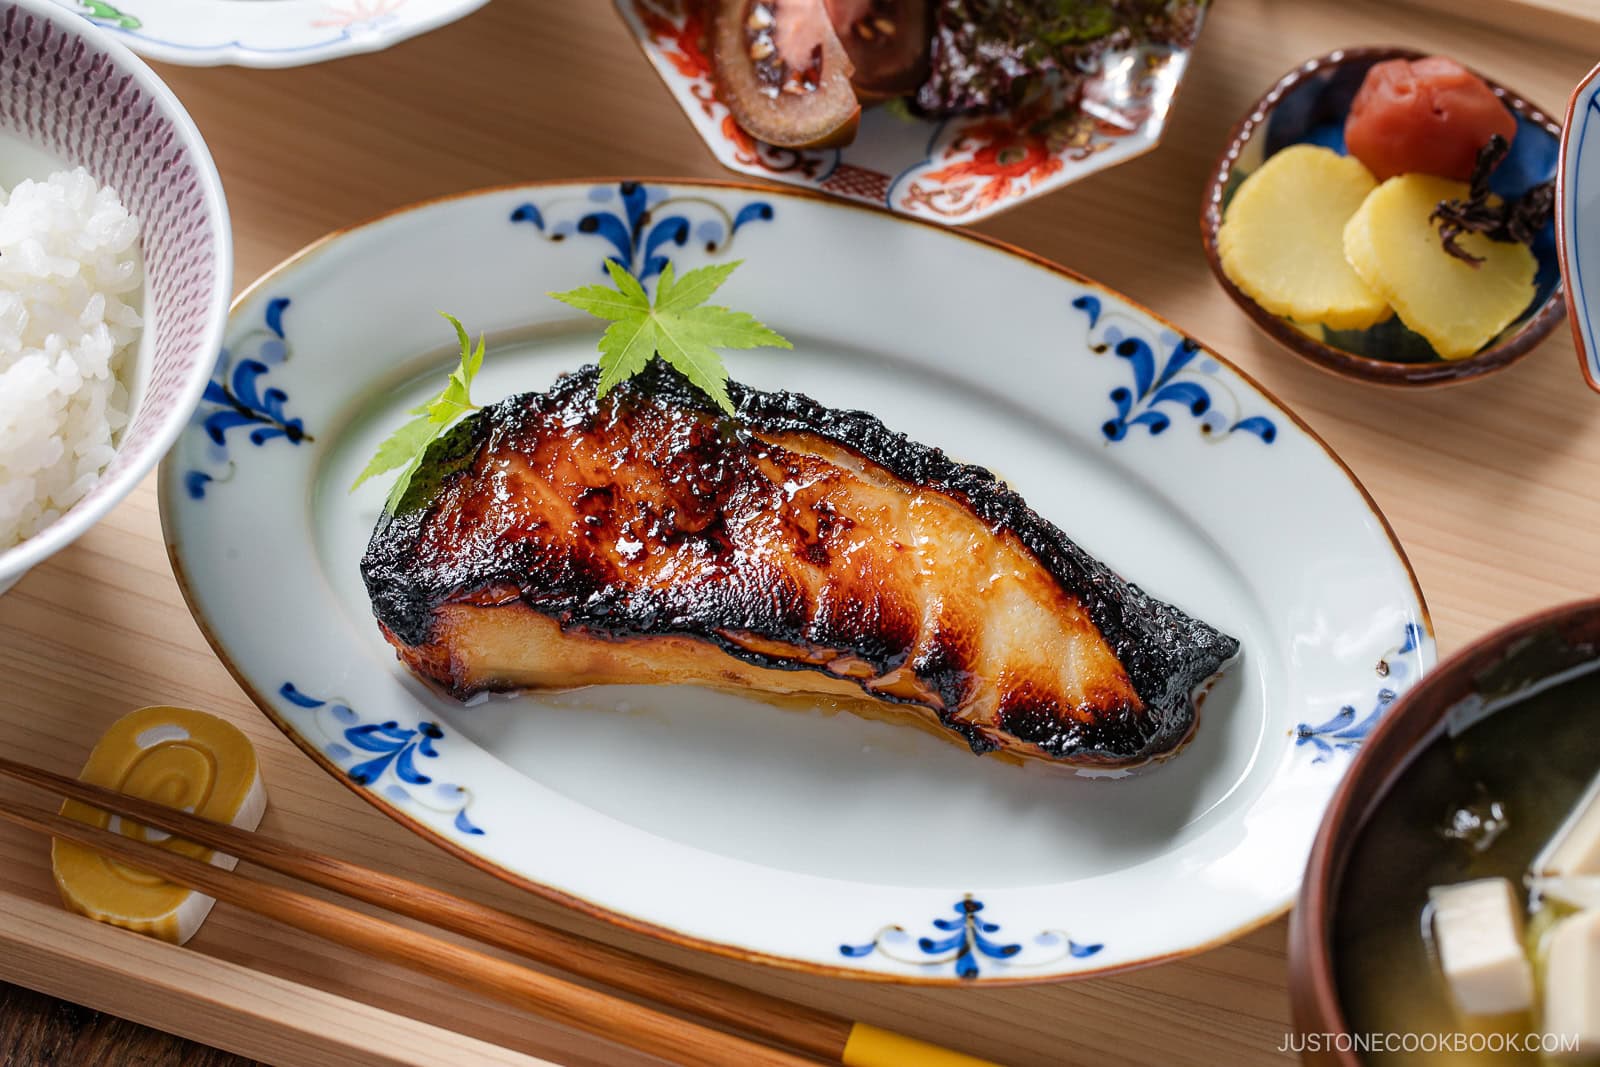
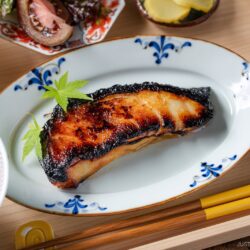
The savory-sweet flavors of Miso Sea Bass are irresistible. Marinated overnight in a miso and mirin sauce, the tender and buttery Chilean sea bass broils quickly for a restaurant-quality meal at home. I grew up enjoying miso-marinated fish in Japan, and it’s one of my favorite seafood dishes to share with my family today.
If you enjoy Japanese-style fish, try my Miso Salmon, Miso Cod, or Teriyaki Salmon recipes next!
What is Miso-Marinated Fish?
This style of miso-marinated fish is similar to Saikyo yaki (西京焼き), named after Kyoto’s famous sweet white miso. This tradition in Japanese cooking dates back centuries, when miso was used as both a seasoning and a natural preservative. Today, you’ll find miso-marinated fish served in restaurants, bento boxes, and home kitchens in Japan. For this recipe, I use Chilean sea bass (Patagonian toothfish) prized for its rich, buttery flesh.

Why I Love This Recipe
- Buttery and rich – Chilean sea bass is extremely fatty and tender, so each bite simply melts in your mouth!
- Deeply flavorful – The miso marinade absorbs completely overnight, so broiling creates a caramelized miso glaze that’s savory and sweet with a pleasant slight bitterness from the signature char.
- Meal-prep hero – Start marinating the fish the night before, then quickly broil it the next day for a restaurant-quality main dish.
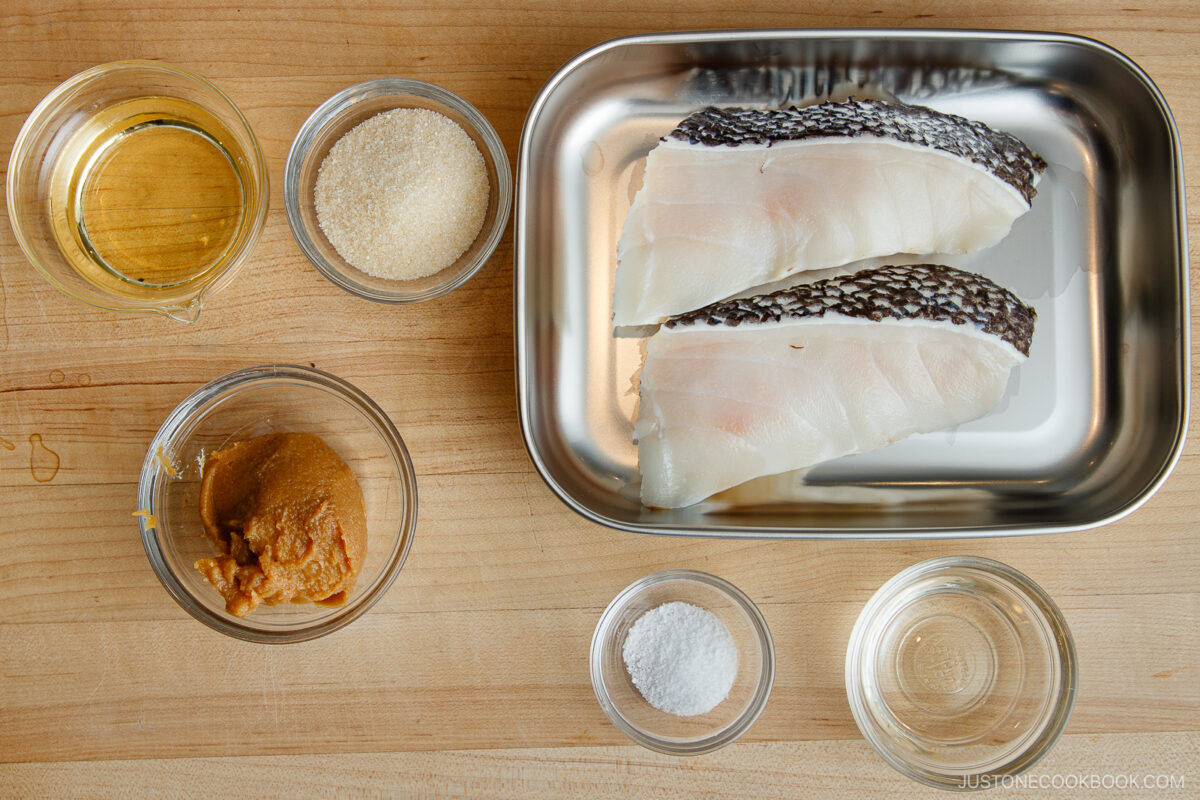
Ingredients for Miso Sea Bass
- Chilean sea bass fillets – skin on; MSC certified (see note below)
- Kosher salt
- Sake
- Miso marinade:
Find the printable recipe with measurements below.
Jump to RecipeNOTE: Chilean sea bass has faced overfishing in the past. To support sustainable fishing, please make sure to buy only from markets certified by the Marine Stewardship Council (MSC). For more information, check Monterey Bay Aquarium Seafood Watch or the Environmental Defense Fund.
Substitutions
- Sake and mirin – For this recipe, do not replace the sake and mirin with water. If you use water instead, it can spoil during the long marination and ruin the fish.
How to Make Miso Sea Bass
Preparation
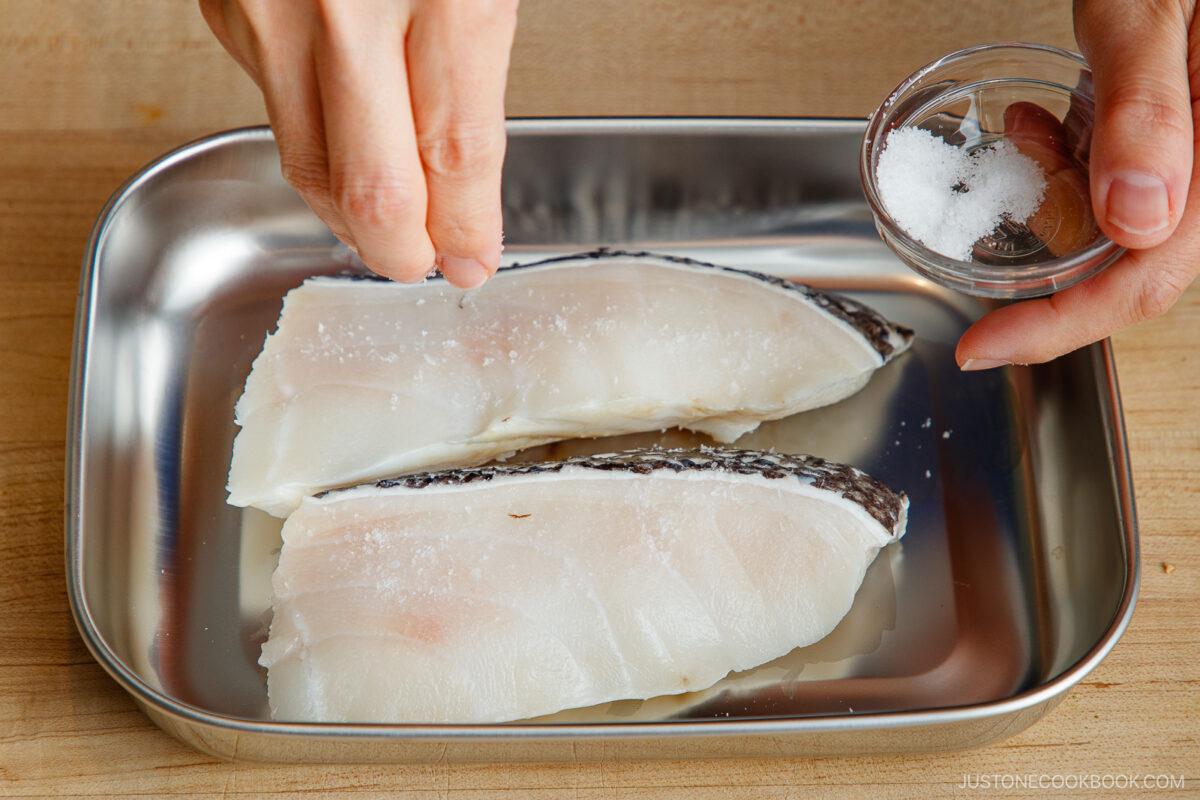
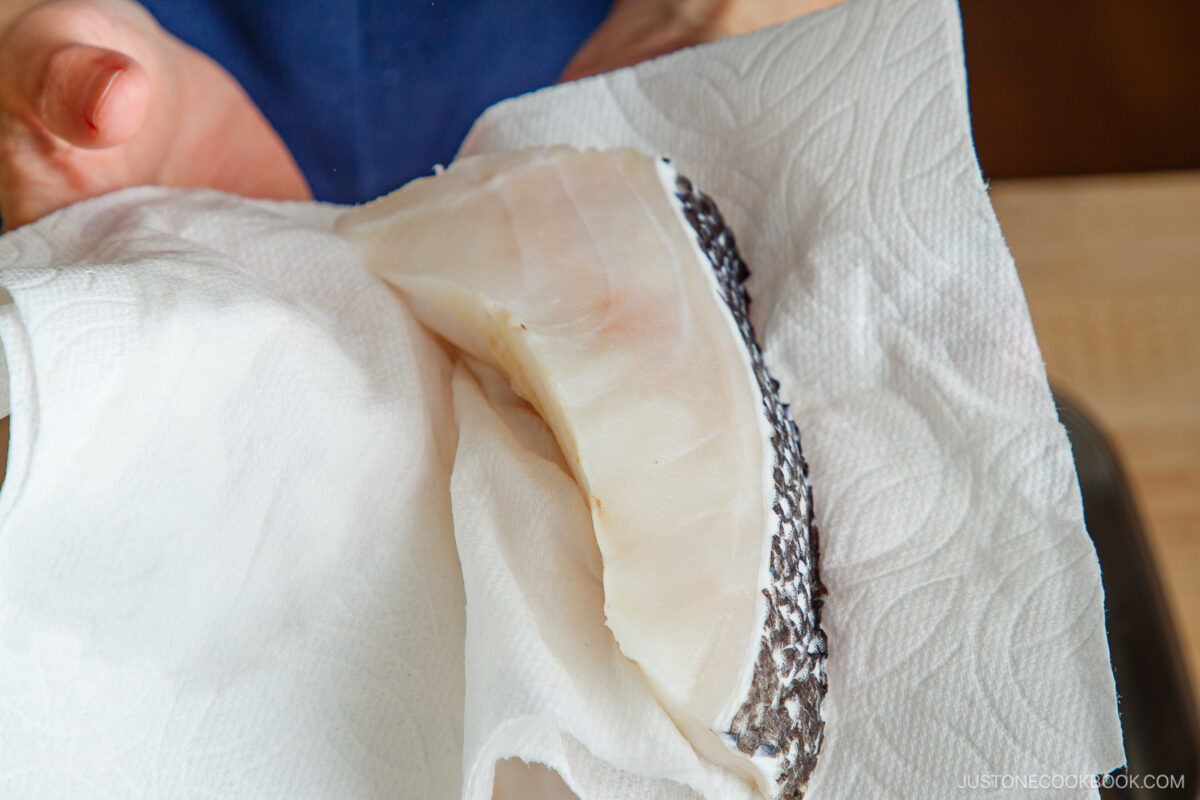
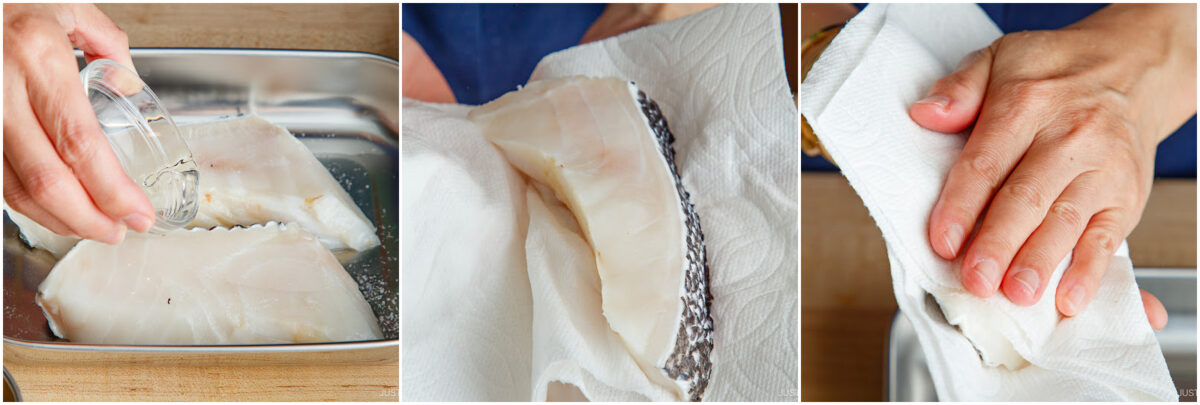
- Salt and rinse. Lightly sprinkle both sides of the fillets with kosher salt and let rest 10 minutes. Drizzle with sake, then pat dry with paper towels.
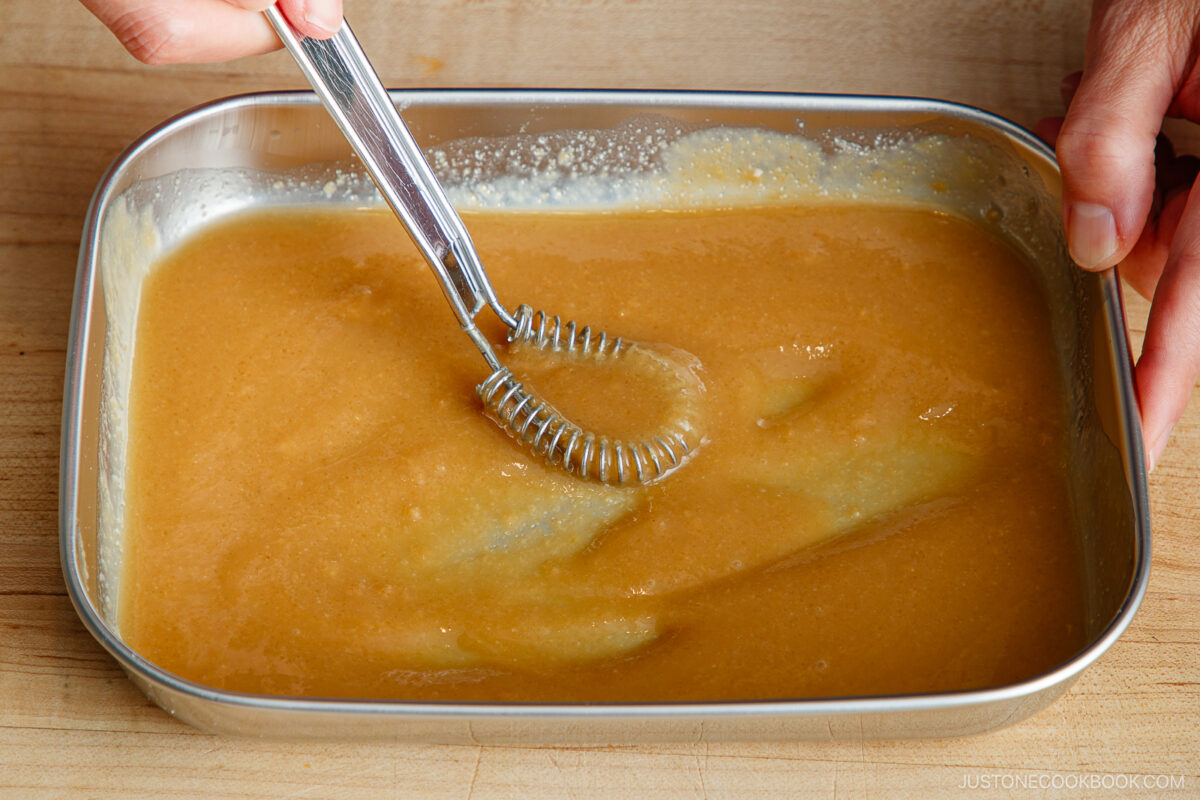
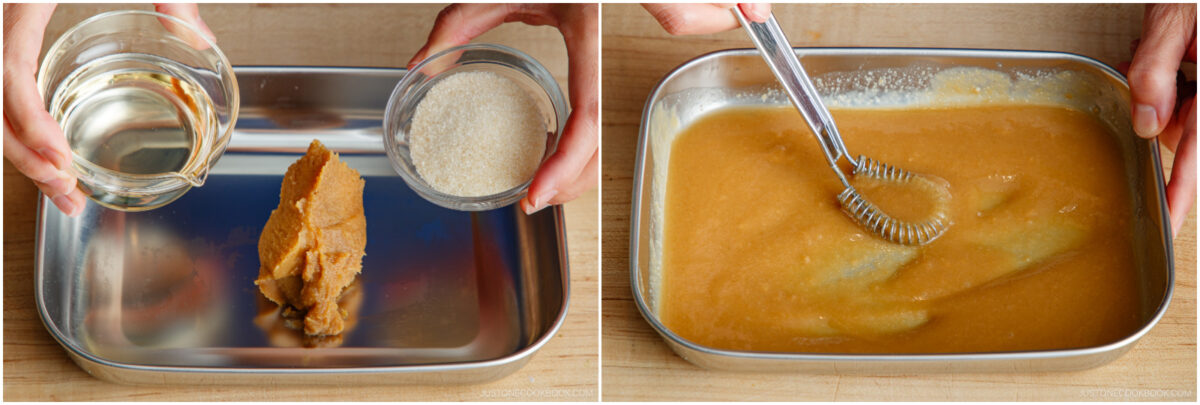
- Make marinade. Mix miso, mirin, and sugar in a container or tray until smooth.
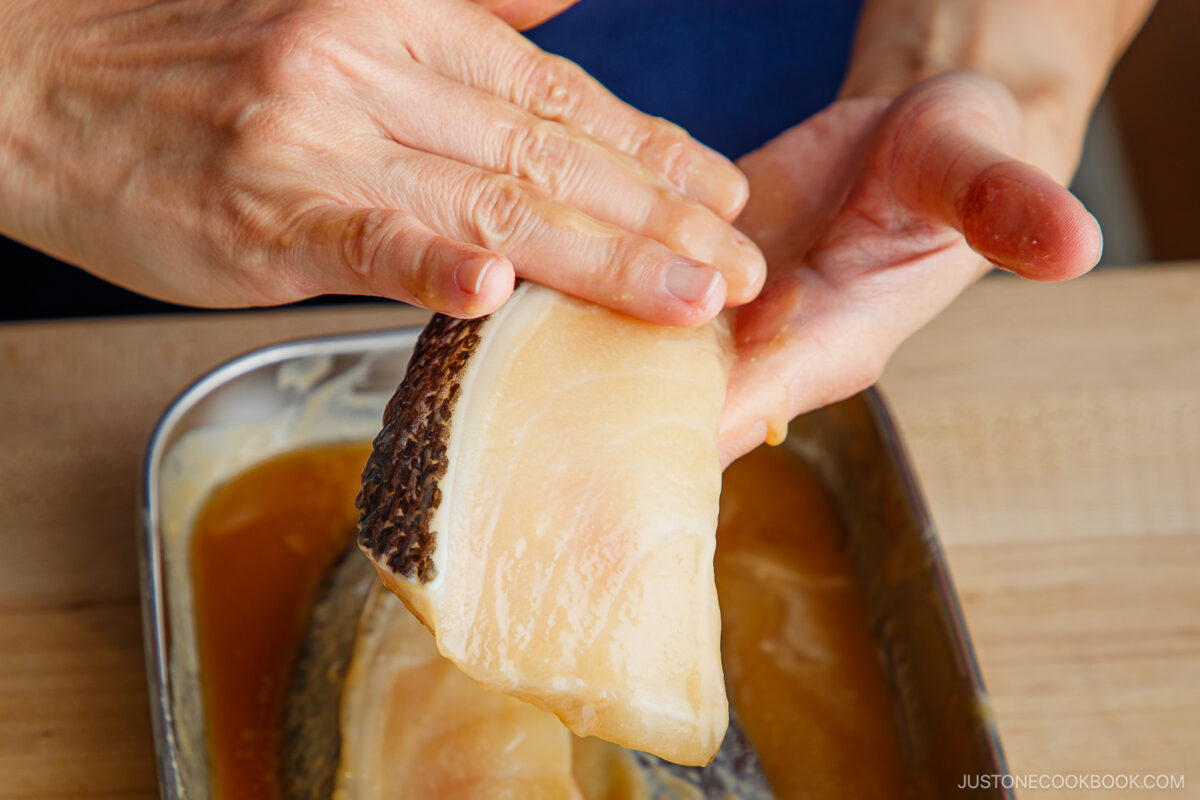
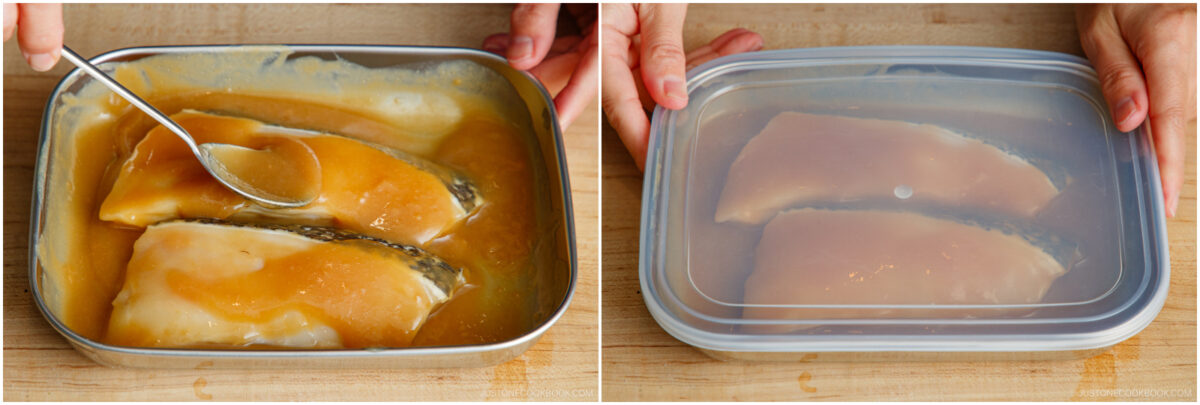
- Marinate. Coat the fish with the marinade ingredients. Cover and refrigerate overnight (8–12 hours).

Cooking
- Wipe the excess marinade completely from each piece of fish.
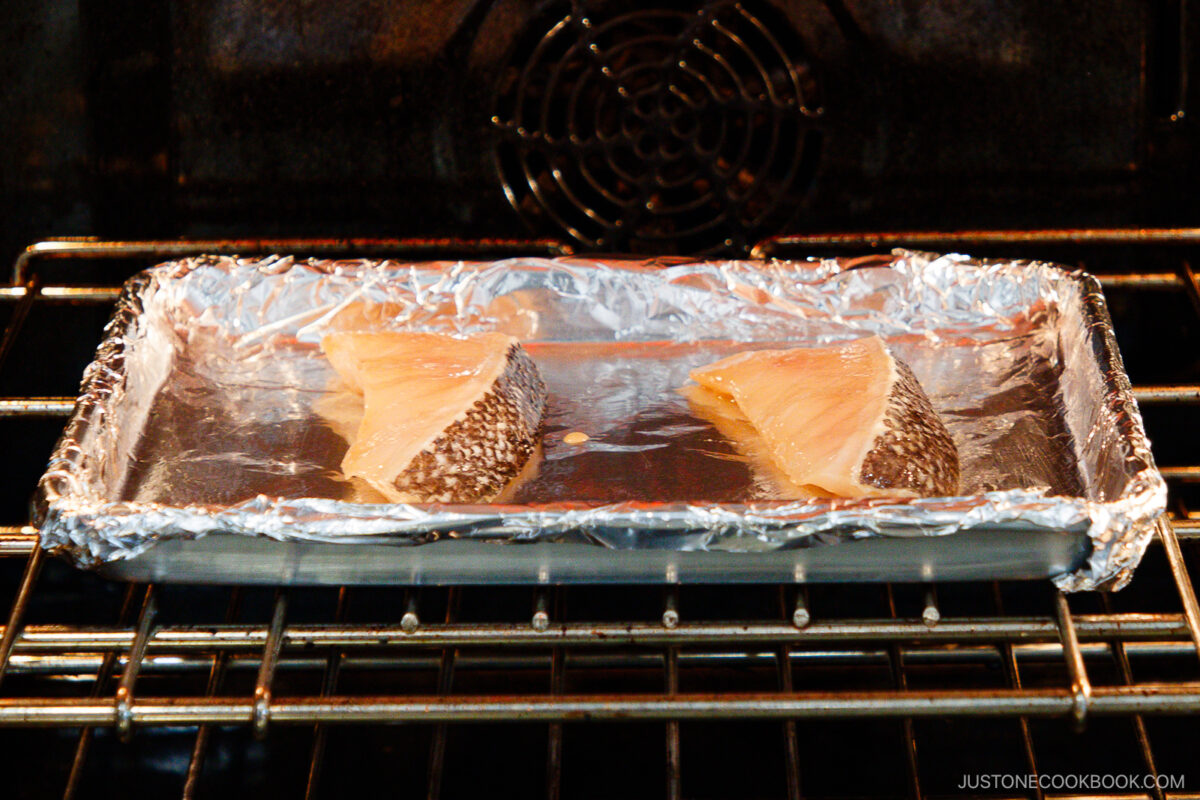
- Broil. Place skin side up on a greased, foil-lined baking sheet. Place the rack 6 inches (15 cm) away from the heat source and broil on Medium (500ºF / 260ºC) until blistered and slightly charred, about 7–8 minutes.
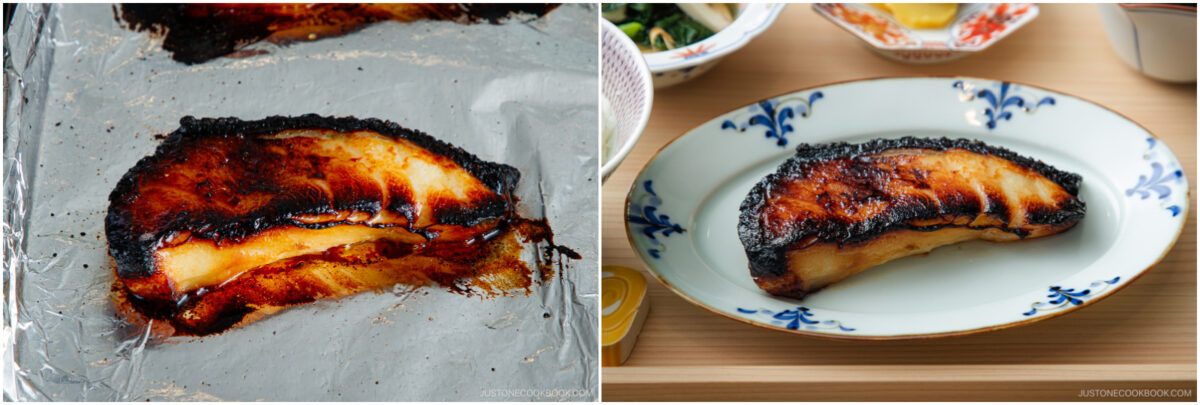
- Transfer to individual plates. Enjoy!
Nami’s Recipe Tips
- Don’t skip salting. A light salting before marinating draws out moisture and odor, firms the flesh, and enhances natural flavor.
- Always rinse with sake. This traditional step removes odor and cleans the fish before marinating.
- Marinate overnight. A long marination time develops a succulent texture in the fish. It also allows the sweet and salty flavor to absorb completely. Target 8 to 12 hours, as less than 6 hours is too short and more than 24 hours is too long.
- Wipe off all the marinade. Miso burns easily, so remove as much of the marinade as possible before broiling.
- Broil for best results. Direct heat gives the fish its signature charred edges and deep flavor. For the medium heat setting on the broiler, be sure to place the oven rack 6 inches (15 cm) away from the heat source.
Variations and Customizations
- Squeeze lemon. I often drizzle lemon on buttery fish since the acidity breaks up the grease and adds an additional taste dimension.
- Use different fish. Try striped bass, Pacific halibut, or sablefish (gindara; black cod). Each type of fish has a slightly different texture and richness but works beautifully with the miso mixture.
- Adjust sweetness. Chilean sea bass is naturally rich and fatty, so I made the sauce a bit sweeter on the side to balance the flavor. You can, of course, reduce the sugar slightly to suit your taste.
- Bake it. Skip your oven’s broiler and bake it in a pan (see recipe below).
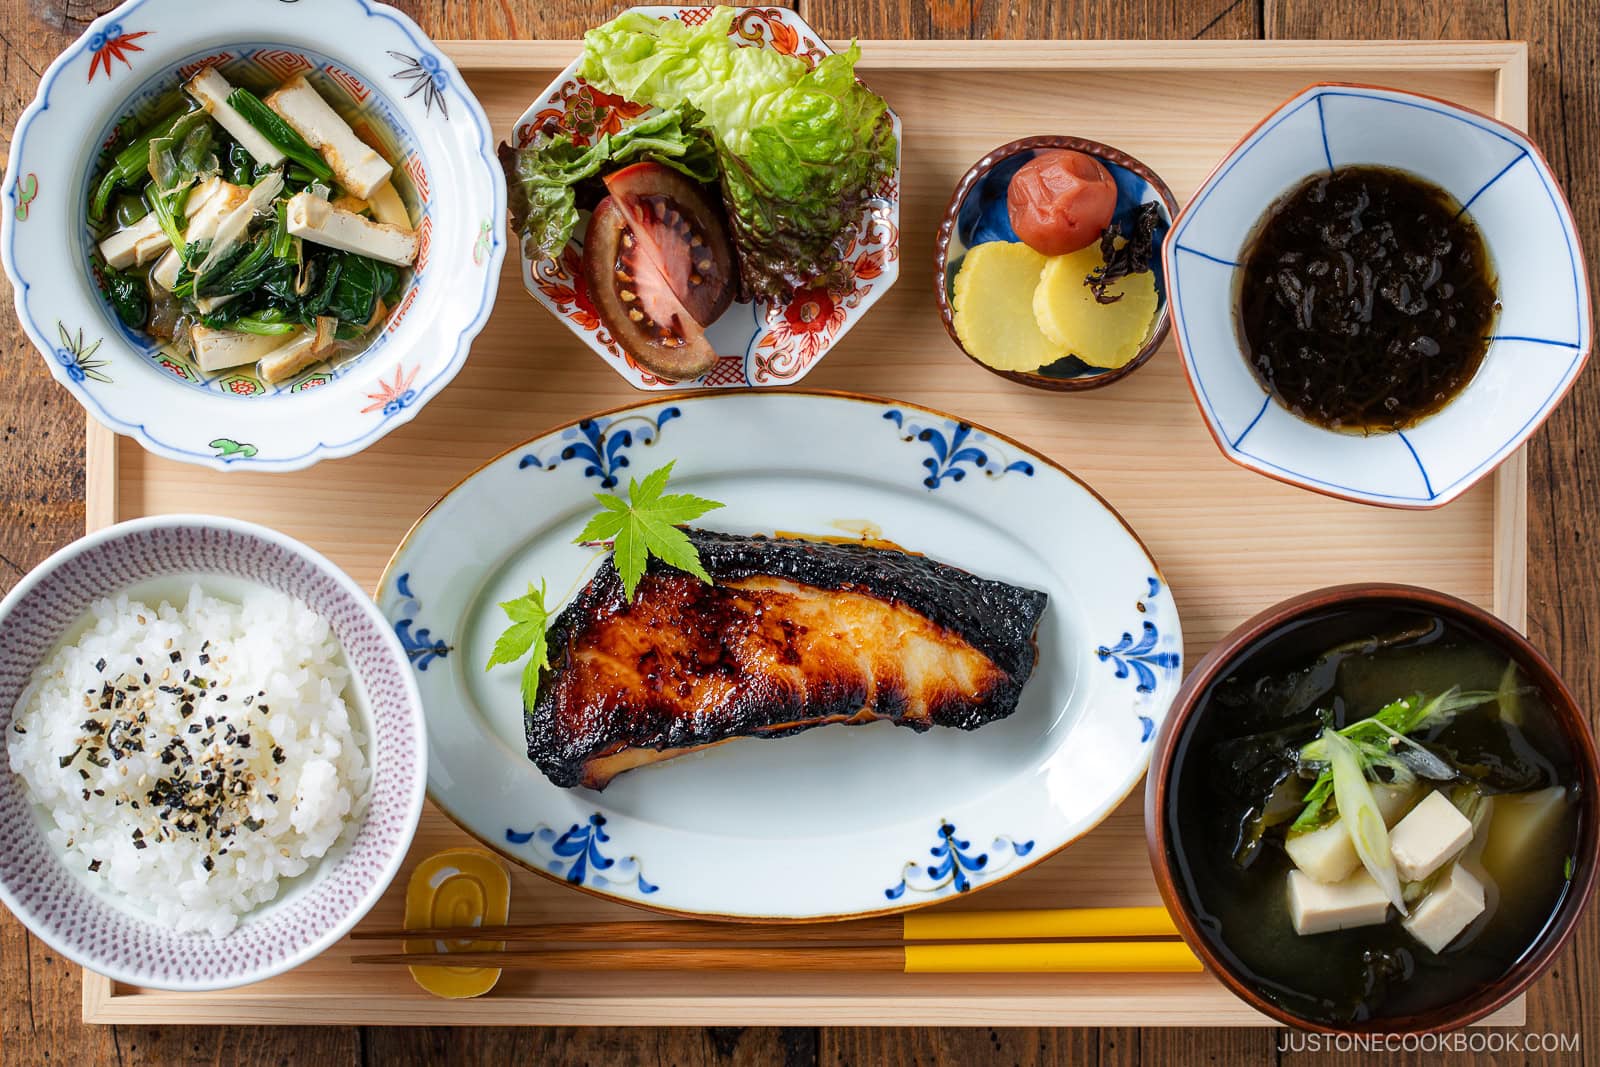
What to Serve with Miso Sea Bass
This flavorful Chilean sea bass recipe is a lovely centerpiece of a Japanese menu for an everyday family meal or on a special occasion with guests. Here are some favorite pairings:
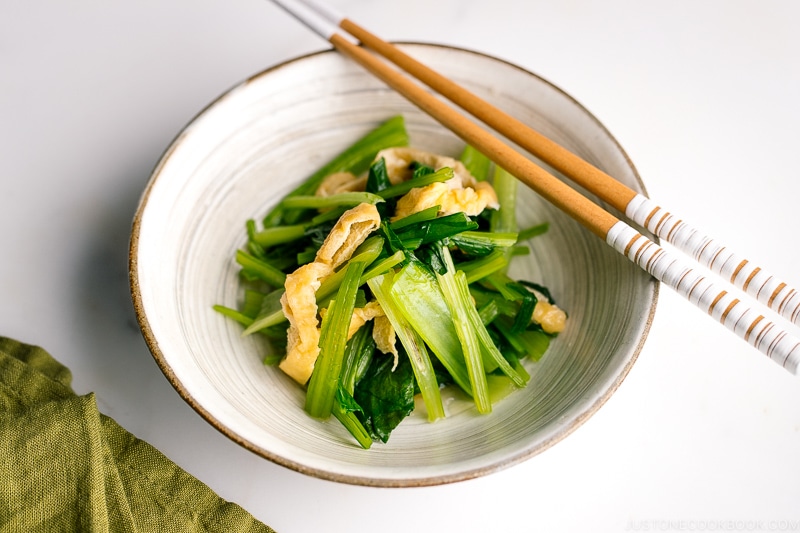
- Soup – Balance the fish’s richness with a bowl of Homemade Miso Soup.
- Side dish – Add different textures with Kimpira Gobo or Simmered Fried Tofu and Greens.
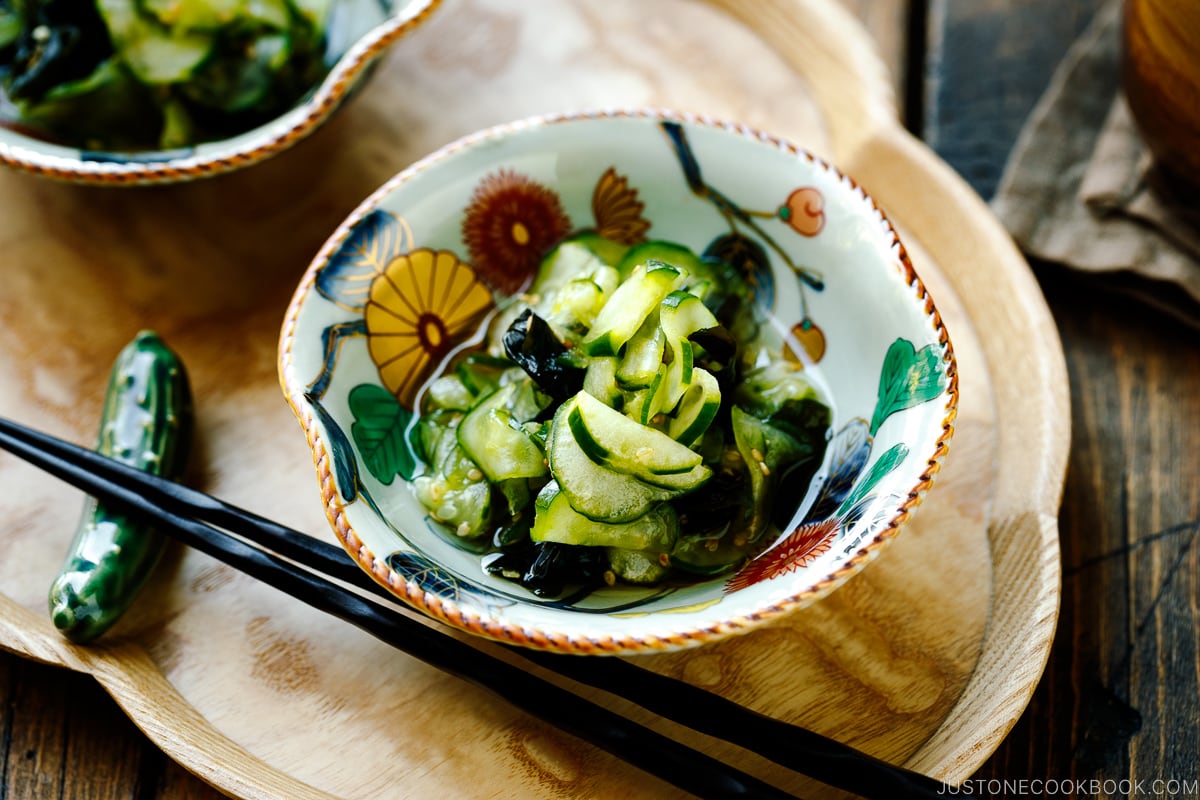
- Salad – Add a bright and refreshing flavor with Japanese Cucumber Salad or a green salad with Carrot Ginger Dressing.
- Steamed rice – Miso glazed Chilean sea bass pairs so well with plain white rice! See How to Cook Japanese Rice in a Pot on the Stove for step-by-step instructions.


Storage and Reheating Tips
To store: Keep leftovers in an airtight container in the refrigerator for up to 2 days or in the freezer for 2 weeks.
To reheat: Rewarm gently in a toaster oven or oven until heated through.
Frequently Asked Questions
Yes. This recipe works well with striped bass or Pacific halibut fillets. If you have sablefish, try my Miso Black Cod recipe.
Ideally, you should marinate the fish for 8–12 hours for the best flavor. Don’t marinate it less than 6 hours, as it’s not enough time for the flavors to absorb into the fish.
Yes. You can marinate the fish up to 24 hours (but no more than this) or freeze marinated fillets for future use.
I’d love to hear how yours turned out! 💛 Please leave a star rating and comment below to share your experience. Your feedback not only supports Just One Cookbook but also helps other home cooks discover recipes they can trust.
Miso Sea Bass
Ingredients
- 2 fillets MSC-certified Chilean sea bass (½ lb or 227 g total; or substitute striped bass or Pacific halibut)
- ¼ tsp Diamond Crystal kosher salt
- 2 Tbsp sake
Instructions
- Before You Start: Please note that this recipe requires a marination time of overnight (8–12 hours). Now, gather all the ingredients.
Day 1: To Marinate
- Lightly sprinkle both sides of 2 fillets MSC-certified Chilean sea bass with ¼ tsp Diamond Crystal kosher salt. Let rest for 10 minutes. Nami's Tip: Salting draws out excess moisture and odor, firms the flesh, and enhances the natural flavor.

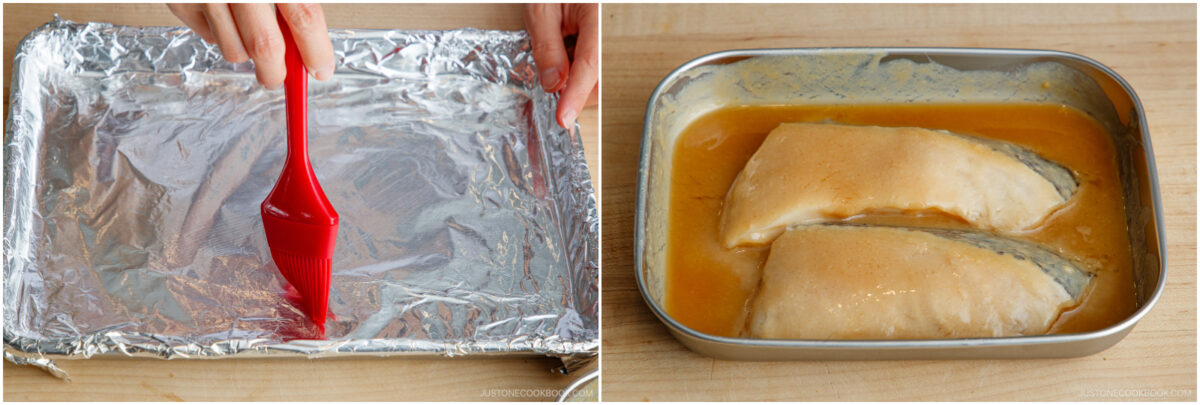
- Meanwhile, combine ¼ cup miso, ¼ cup mirin, and 1 Tbsp sugar in an airtight container that's big enough to hold the fish (I used my favorite stainless prep tray). Mix well until the sugar is completely dissolved.
- Sprinkle 2 Tbsp sake over the fish to rinse it, then pat dry with a paper towel.Nami's Tip: Rinsing with sake cleans the fish and removes odor.
- Add the fish to container. Spoon the marinade over the fillets to coat them completely. Cover and marinate overnight (8–12 hours) in the refrigerator.
Day 2: To Cook
To Broil (recommended)
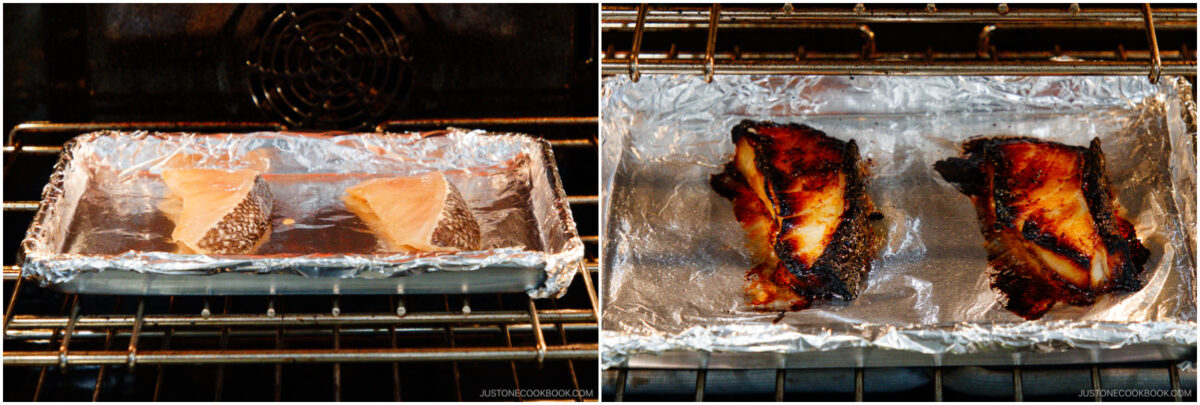
- Line a baking sheet with foil and lightly coat it with neutral oil or cooking spray. Remove the marinated fish from the refrigerator. Preheat the broiler on the Medium setting for 3 minutes. Set the oven rack in the middle position about 6 inches (15 cm) away from the top heating element. Nami's Tip: For this recipe, I use the Medium broiler setting at 500ºF (260ºC) and 6 inches (15 cm) away from the heating element. Alternatively, you could use the High setting at 550ºF (288ºC) and 8 inches (20 cm) away.
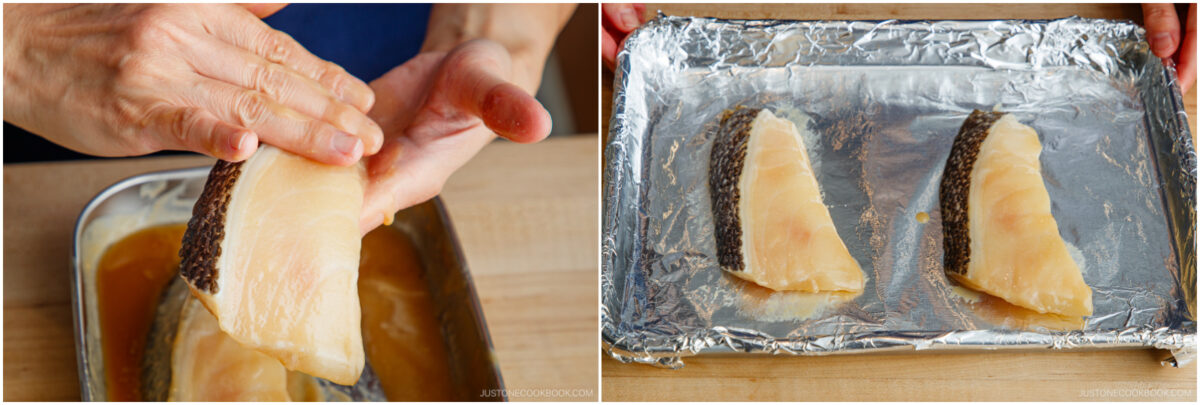
- Gently wipe off the miso marinade completely from the fish with your fingers. Do not leave any excess, as miso burns easily. Place the fish skin side up on the prepared baking sheet.
- Broil on Medium until the surface is blistered and browned, about 7–8 minutes (depending on the thickness of the fillets). You do not need to flip it. Nami's Tip: I broiled for 10 minutes this time, so you can see that my fish was well charred. For a bit less char, remove after 7–8 minutes.
To Serve
- Transfer the fish to individual plates and enjoy!
To Bake (optional)
- Preheat the oven to 425°F (218ºC) with the rack placed in the middle position. For a convection oven, reduce the temperature by 25ºF (15ºC). Line a baking sheet with parchment paper and place the fish on top, skin side up. Bake until the surface is blistered and slightly charred, about 15–20 minutes (depending on the thickness of the fillets). You do not need to flip it.
To Store
- Keep the leftovers in an airtight container and store in the refrigerator for up to 2 days or in the freezer for 2 weeks.
Nutrition
Did you make this recipe?
Tag @justonecookbook on Instagram so we can see your delicious creation!
Editor’s Note: This post was originally published on October 1, 2012. It was republished on October 8, 2025, with a slightly revised recipe and additional helpful details.