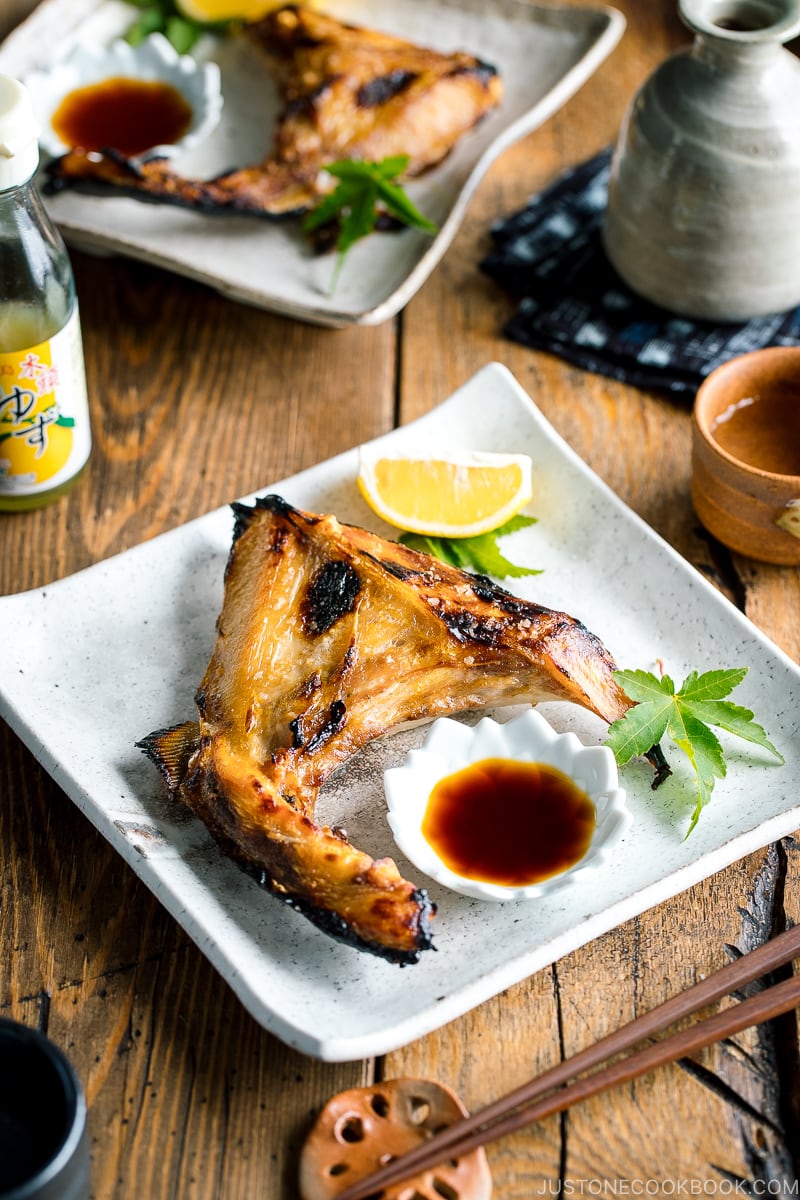
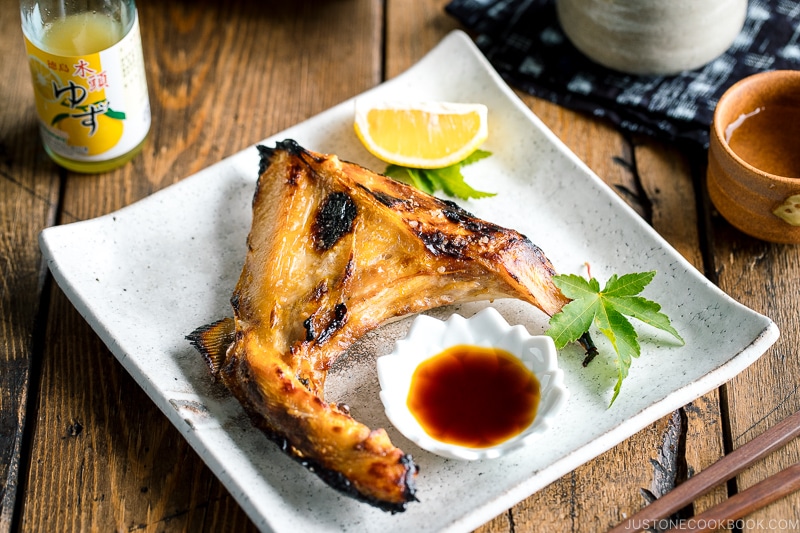
Also known as Grilled Yellowtail Collar, Hamachi Kama is a flavorful broiled fish that you will find on menus throughout Japan. You just need four ingredients and 15 minutes to make this traditional rustic dish.
Of all the types of fish we eat in Japan, hamachi (魬, はまち, ハマチ) is a favorite among home cooks and professional chefs alike. If you go to a Japanese sushi restaurant, you will most likely find negihama maki, or Yellowtail Scallion Roll, offered as a type of maki sushi. Yellowtail is another name for hamachi.
I always have hamachi on hand (fresh or frozen) because it takes no time to prepare (20 minutes), and I can make miso soup or quick side dishes at the same time. The flavor of this Hamachi Kama (Grilled Yellowtail Collar) and its easy cooking method will make it a favorite in your home, too!
Table of Contents
What is Hamachi Kama?
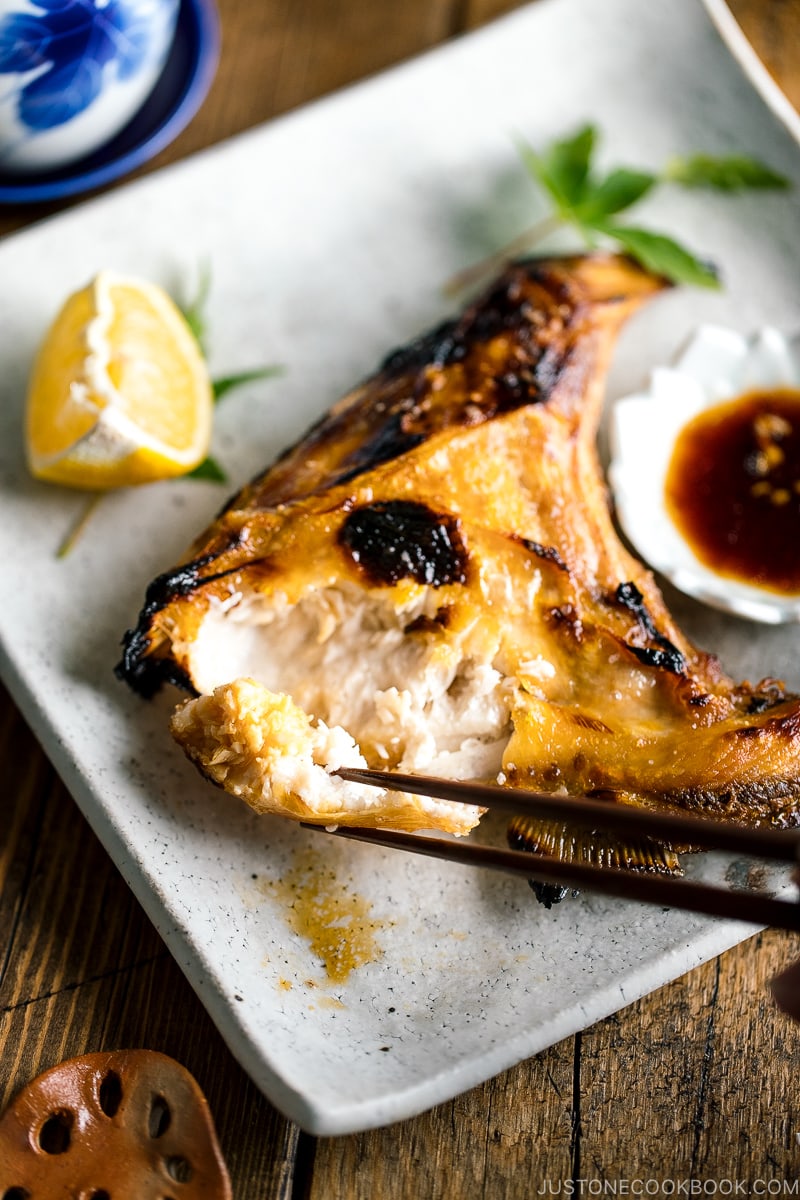
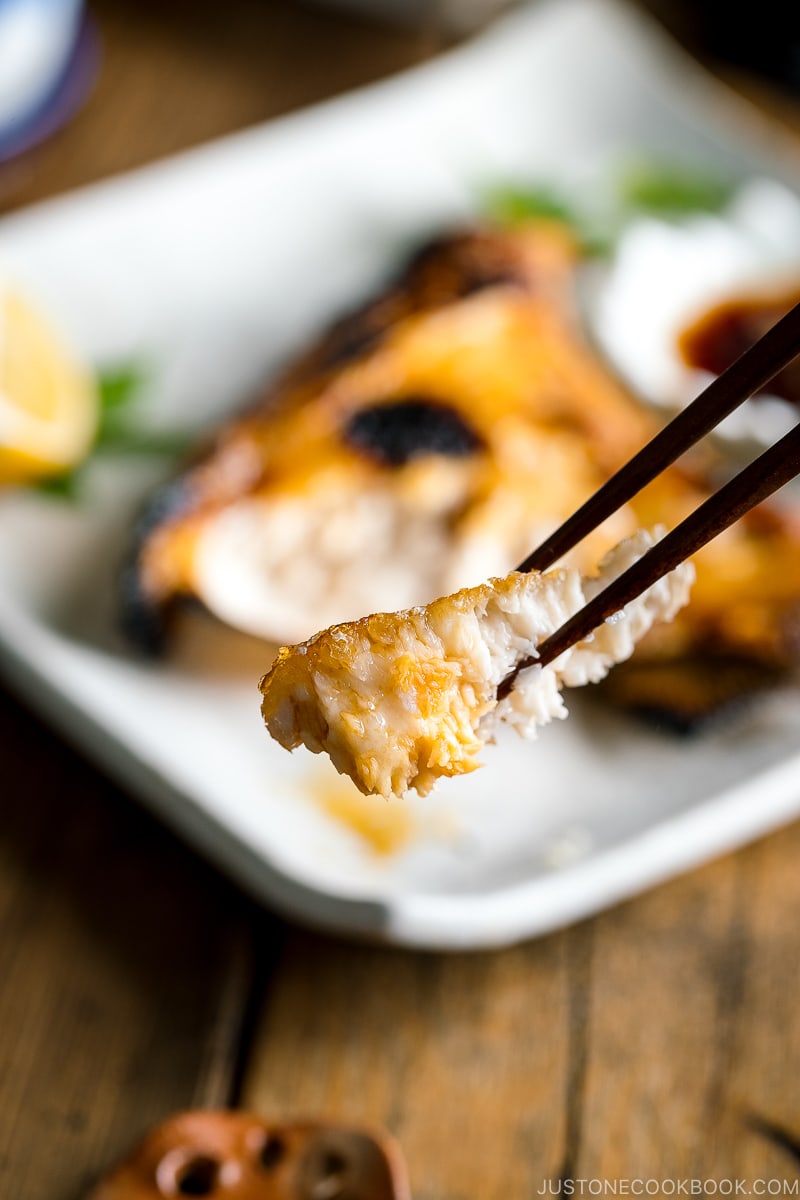
Hamachi kama (はまちのカマ) is the collar of the yellowtail located just above the gills and below the head. It is the fattiest part of the fish, making it naturally juicy, and there are two located in each yellowtail (one per side). Typically, hamachi is grilled or broiled until the skin is crisp and the inside is just cooked through. You can easily scrape the flesh off the cartilage with chopsticks.
What Is the Difference Between Hamachi and Yellowtail?
There are several names for this fish—hamachi, buri, yellowtail, or Japanese amberjack—depending on where you are. What’s the difference? It all comes down to the age and size of the fish, and different regions of Japan will also name the fish based on the way it was caught (farmed vs. wild-caught). No matter what name you see on the menu, the raw fish should have pale pink flesh with a stripe of deep red coloring.
What Does Hamachi Kama Taste Like?
The flavor of the yellowtail collar is subtle and clean. The juicy texture of the meat is comparable to mackerel, but the taste is much milder. If you’ve tried fresh hamachi sashimi, you know the flavor is delicate, rich, and slightly sweet. It pairs beautifully with citrus, which you’ll see in my recipe below.
Health Benefits of Hamachi/Yellowtail
Hamachi has a number of nutritional benefits. It’s a naturally oily fish that’s high in omega-3 fatty acids (like salmon), which are important for brain and heart health. It’s also particularly high in vitamin A, vitamin D, and calcium. Like all seafood/meat, it’s important to buy good quality (it makes a difference in the flavor, too), and only consume raw hamachi if you know it is “sashimi quality.”
3 Reasons You’ll Love this Recipe
- It’s fast – Hamachi kama takes less than thirty minutes to make, so it’s perfect for busy days. There is always at least one package of hamachi kama in our freezer, which defrosts quickly under cold, running water.
- It’s easy – There is so much natural flavor in yellowtail that you don’t need much else to make it taste delicious. Before broiling the kamachi kama, brush the pan with a little oil to prevent sticking—that’s it! No need to season it because you’ll serve it with a small dish of soy sauce and yuzu juice, like a simplified version of my homemade Ponzu Sauce.
- It saves time and money – There’s no doubt a traditional Japanese dish like this would cost more at a restaurant. It can be intimidating to try new recipes at home, especially if it involves fish or meat you haven’t cooked with. But once you see how simple and truly delicious it is, you may find yourself eating out less often.
Ingredients You’ll Need
- hamachi kama (yellowtail collar)
- kosher salt – I use Diamond Crystal brand; skip the salt if you plan to lightly dip your fish in yuzu-flavored soy sauce
- soy sauce and yuzu juice (extract) – for the dipping sauce
- lemon wedges – optional, for serving
How to Make Hamachi Kama
I recommend that you broil the fish for the best results, but you could also bake it. Here’s an overview of the instructions for making this dish.
- Preheat the broiler with the rack about 6 inches (15 cm) away from the top heating element.
- Line a baking sheet with aluminum foil.
- Place the fish skin side down on the foil. Sprinkle with salt.
- Broil on the Medium setting for 8–10 minutes until lightly blistered and browned.
- Mix the soy sauce and yuzu juice. Dip the hamachi kama lightly into the sauce to enjoy.
Where to Buy Hamachi Kama
Hamachi kama is available at most Japanese markets. Check the freezer section as well for individual packs of frozen hamachi kama. Korean grocery stores also sell them, sometimes at a cheaper price than Japanese markets. If you have access to a fresh seafood market, you can ask if they have “yellowtail collar” available.
More Japanese Grilled Fish Recipes You’ll Love
Wish to learn more about Japanese cooking? Sign up for our free newsletter to receive cooking tips & recipe updates! And stay in touch with me on Facebook, Pinterest, YouTube, and Instagram.
Hamachi Kama (Grilled Yellowtail Collar)
Ingredients
- 2 pieces hamachi kama (yellowtail collar) (11 oz, 312 g; available in Japanese markets)
- ⅛ tsp Diamond Crystal kosher salt (optional; skip if you plan to lightly dip your fish in yuzu-flavored soy sauce)
For Serving
- 1 Tbsp soy sauce
- ½ tsp yuzu juice (extract)
- 2 wedges lemon (optional)
Instructions
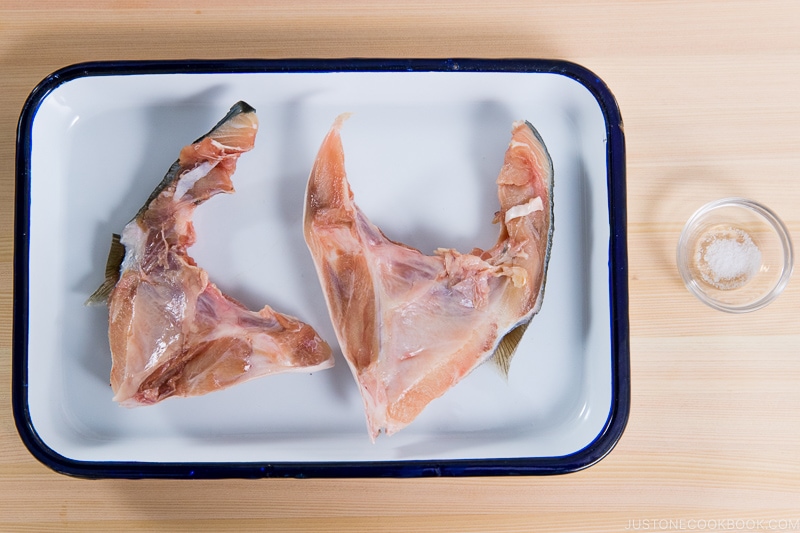
- Gather the ingredients. If the hamachi kama is frozen, thaw it beforehand by placing the fish, still in its vacuum-sealed package, in a bowl under a thin stream of cold running water for 20 minutes. Alternatively, you can put the fish in a bowl of iced water to defrost for 2 hours (takes longer but saves water), or in the refrigerator for 9 hours.
To Broil (Recommended)
- Preheat the broiler* with a rack placed about 6 inches (15 cm) away from the top heating element (in the center of the oven) for 5 minutes. When broiling, you don‘t control the temperature in the oven; instead, you control the distance between the broiler and the surface of the food. It‘s similar to using hotter and cooler zones on your grill. *Broiler setting: Low (450ºF/232ºC), Medium (500ºF/260ºC), and High (550ºF/288ºC). I usually use the Medium (6 inches away) or High (8 inches away) setting.
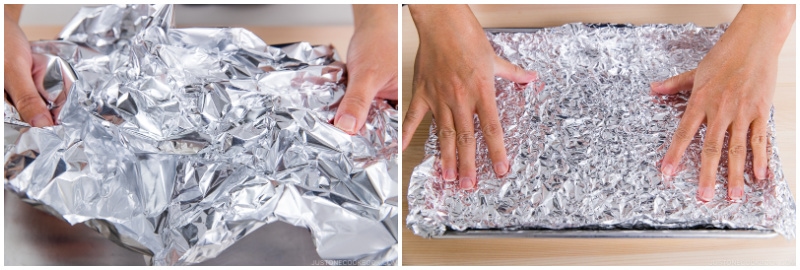
- Crinkle a sheet of aluminum foil and line the baking sheet. This helps prevent the fish skin from sticking to the foil.
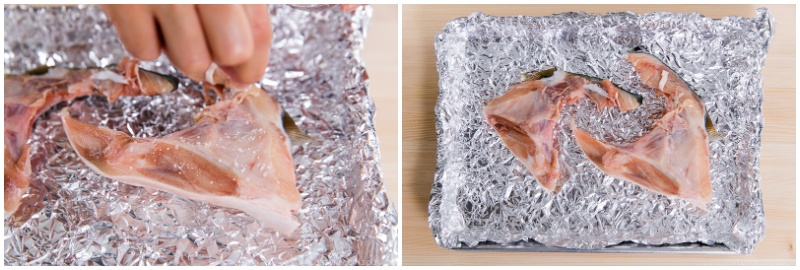
- Place 2 pieces hamachi kama (yellowtail collar) on the foil, skin side down. Sprinkle ⅛ tsp Diamond Crystal kosher salt over the fish.
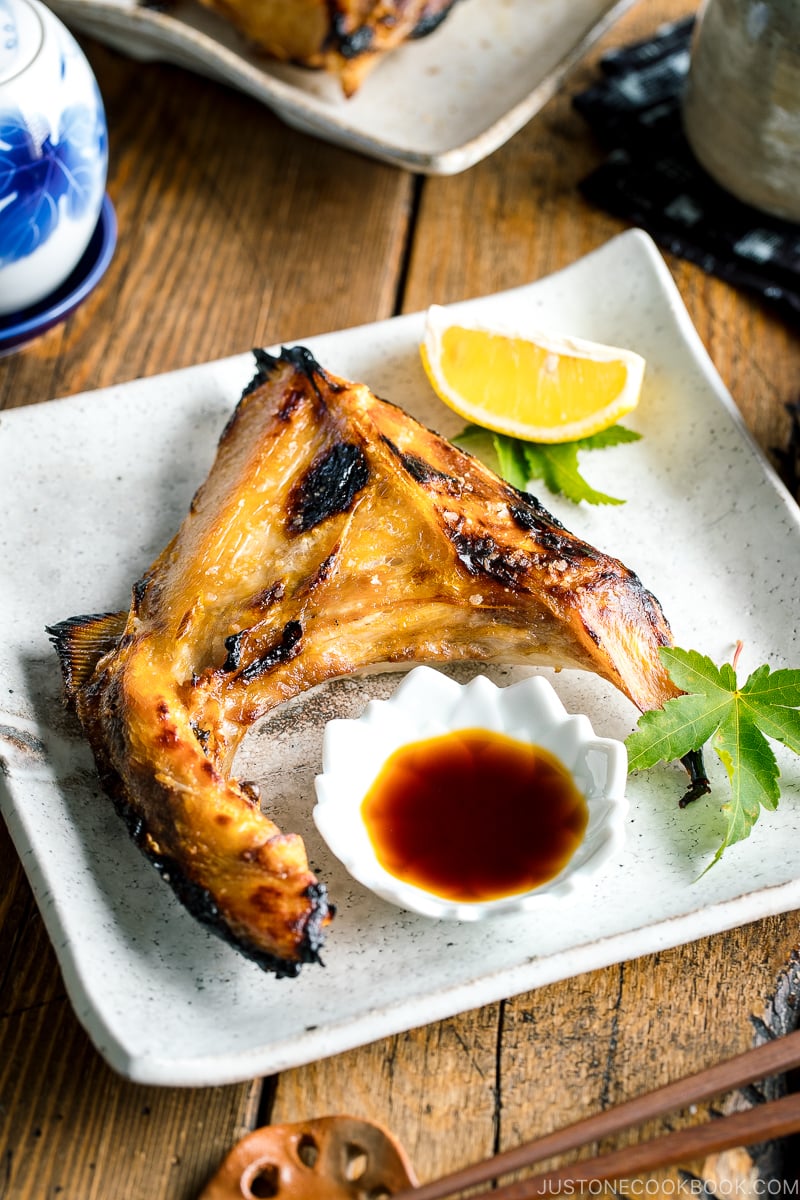
- Broil on Medium (500ºF/260°C) for 8–10 minutes until the surface is blistered and browned a bit. Please remember the cooking time varies depending on the thickness of the fish and the distance between the broiler and the food. You do not need to flip the fish. It should flake easily with chopsticks or a fork.

To Bake (optional)
- Preheat the oven to 425°F/218ºC with a rack placed in the middle and bake for 10–12 minutes, until the edges are crispy and the top is golden brown and opaque. A good rule of thumb to remember is to bake 5 minutes per ½ inch thickness (measure at the thickest part of the fish). You do not need to flip it. It should flake easily with chopsticks or a fork.
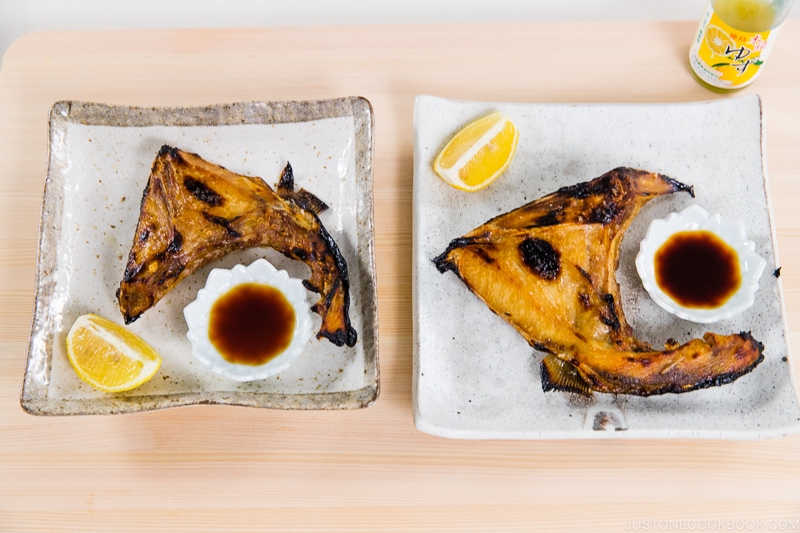
To Serve
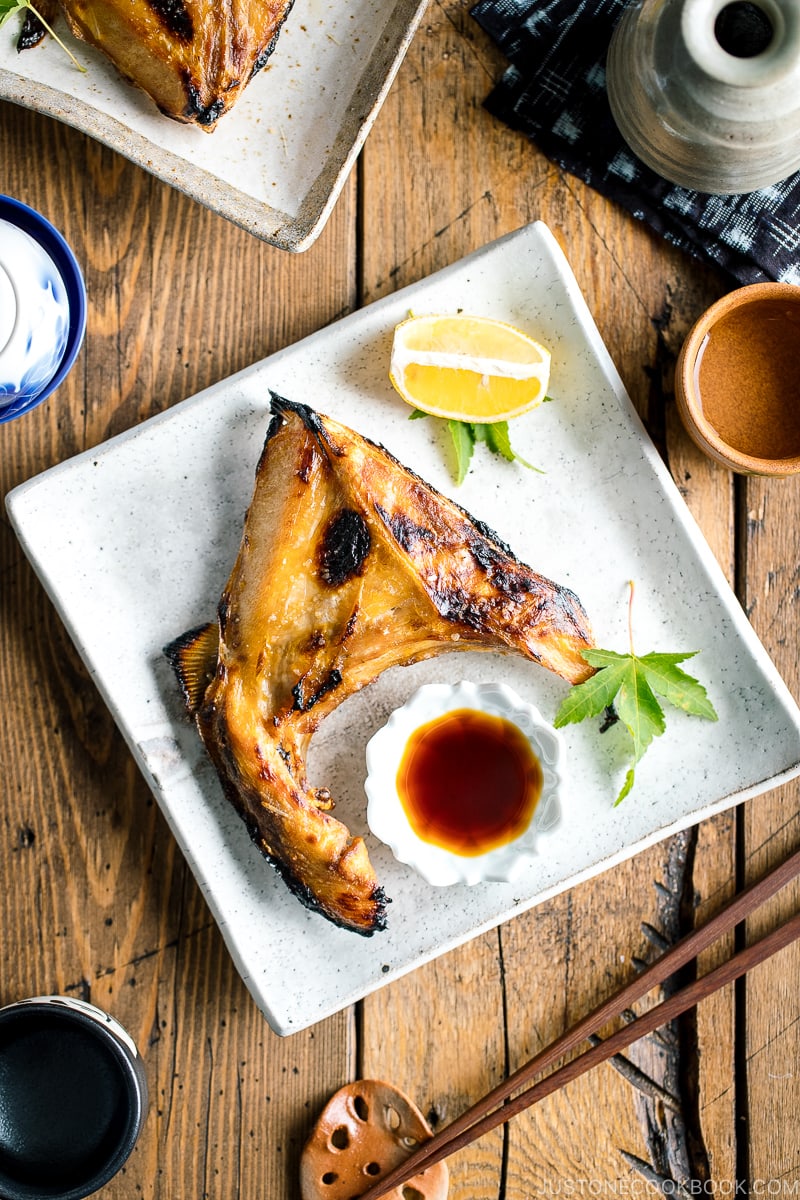
- To make the yuzu-flavored soy sauce, mix 1 Tbsp soy sauce and ½ tsp yuzu juice (extract) together and divide into individual small dipping dishes. Serve the freshly grilled fish immediately on individual plates with the dipping sauce on the side and an optional 2 wedges lemon. Squeeze the lemon over the fish and dip the Hamachi Kama lightly in the sauce to eat. Enjoy!
To Store
- You can keep the leftovers in an airtight container and store it in the refrigerator for up to 2 days or in the freezer for a month.
Notes
Nutrition
Editor’s Note: The post was originally published on January 18, 2011. The images and content were updated in October 2020.


I can’t believe that I found you! My daughter’s name is, (this is all true) Namida , however she goes by Nami.
Hamachi Kama is her favorite. I can’t wait to try this.
Hi Wendy! Oh please send my hello to your Nami! 🙂 I hope she will enjoy homemade Hamachi Kama. 🙂 xo
After sampling yellowtail in Niigata for the first time 2 years ago, I decided I needed to get more of it upon my return home! My second encounter was this dish as an appetizer at a local Japanese restaurant – and to my delight I found it both fresh and frozen at the two Asian grocery markets my wife and I frequent. It’s purely coincidental that this recipe calls for (optionally) yuzu juice – as I’ve been on a bit of a yuzu binge for the last month or so since it’s in season!
In any case – I’ve had good luck broiling the jaw as outlined here in my toaster oven. Depending on the size of the jaw, I’ve been known to drop the temperature to 375 or 350 after a few minutes, to keep the outside from getting too crispy by the time it’s fully cooked through.
Hi Brandon! It’s great that you can get the hamachi kama in your local grocery Asian stores! Much cheaper than eating at Japanese restaurants for sure! Thanks for sharing your tip on cooking the kama with us!
Just love your recipes. Great recipes and a great person to know. Thank you for all the great
recipes and lessons. Not just the great recipes you share. But the step by step pictures. Thank you so much and Mahalo.
Hi Charles! Your words are too kind. I’m happy to help! I’m just happy to share the joy of cooking Japanese food with everyone in the world. 🙂 I’m glad to hear my step by step pictures are helpful too (because it’s extra work… he he he).
The Yuzu and soy sauce mixture is ponzu sauce. you can just get ponzu sauce if you cant find Yuzu.. which not all areas keep that handy.
Hi Brena! I guess you could do that especially if you enjoy ponzu sauce.
But ponzu is often served with sashimi (white fish), and grilled fish is typically soy sauce. In this case, you will have soy sauce with just a hint of yuzu. Ponzu has more citrus taste and it includes soy sauce, citrus (it can be kabosu, sudachi etc, not just yuzu) and other ingredients. 🙂
I made this yesterday along with the Shio Koji Kabocha and it was fantastic! Really loving your blog and easy-to-follow recipes.
Hi Jenn! Yay, I’m so happy to hear you enjoyed these recipes! Thank you for taking your time to write your kind feedback. I really appreciate it! 🙂
my two cents: should probably put smoke oil on the foil. I tried this and the skin was entirely stuck to the bottom. Also cooking time for my oven set at 400 F was closer to 30 min.
Hi Bob! We eat Hamachi Kama often at home but I often transfer the fish with aluminum foil… I’m going to write a tip in the instructions. Thanks for your feedback Bob!
I will never order hamachi kama in the restaurants anymore! Thank you for the recipe!
Just one quick question, after 20mins in the oven our kama was cooked but the skin and the edges were not crispy like what you have in the photos. Will you recommend to increase the temperature and keep the same cooking time? We love the crispy bits. Thanks again!
Hi Lynn! Right? It’s so easy to make this dish and we can eat two Hamachi Kama at home with the same cost! 😉
I see. You can increase the heat. I use a toaster oven to bake my fish, and I have upper heat source that can make my skin crisp. Do you use an oven? Try increasing the heat or use broil function for 3 minutes at the end of baking. 🙂
Fantastic dish! Could not be easier to prepare. I drizzled soy syrup on mine for an upscale garnish. (soy syrup is a reduction of soy sauce and sugar)
Soy syrup! YUM! We had hamachi kama tonight too, with smoked soy sauce. That was really delicious. 🙂 This would cost so much more at Japanese restaurants. 😉
Hi! I broiled mine yesterday and I felt it was a bit dry compared to the restaurant. Do you recommend baking over broiling? I think I may have broiled too long because my collar was a little less than half a pound.
Hi Esther! I think it also depends on how far your heat source was. I usually use a toaster oven and bake at 400F for 25-30 minutes depending on the size. 😉
In general is Hamachi Kama in the fresh fish section of a Japanese grocery store or in the freezer section?
Hi Jay! In the Japanese supermarket that I go to, it’s in regular fresh fish section (but they are all packaged and wrapped) and I think they have other kinds of fish in frozen section (no Hamachi Kama in frozen section as far as I know). It might be different from each store. The store usually carries 2-4 Hamachi kama at once (might be more in the back though). Hope that helps. 🙂
Hi, do you have recommendations for how best to defrost the fish? Do you just leave it in the fridge to defrost? Leave it on the counter? Lukewarm water?
Thanks!
Hi Sara! I usually defrost overnight in the refrigerator or thaw on the counter before cooking (unless it’s hot day). If I’m in hurry, I use cold (running – but small) water to thaw it out (until fish is “flexible” then cook. I do not recommend using a microwave.
Hope this help! 🙂
Thank you so much for the advice! I made this last night and it was so easy and delicious. I made your green been shira-ae as a side. My boyfriend was a very happy camper 🙂
So happy to hear you enjoyed it! It seems like you had a nice Japanese theme dinner! 🙂 Thanks so much for your feedback!
This is the way I cook for hamachi kama 3 times a week. It is just easy and neat on the table. My family is running a sushi restaurant in San Jose. But many customers konw this fantastic dish, so my kids and I always have these gold from the hamachi. Thanks for the sharing, I will try your sauce on next time. Maybe the dish will give us more surprised.
Hi Monica! Wow 3 times a week! That would be my kids’ dream. 🙂 I’d love to try your family restaurant in SJ. Let me know which restaurant if you don’t mind!
My mom buys hamachi collar from local delivery service called “Osakana Club”. They have pretty a lot of kinds of sushi grade fish including kama at very reasonable price(much cheaper than supermarket and better quality). Try http://www.osakanaclubusa.com if they delivery kama to your area. I believe they do service around Bay Area (San Jose CA).
Hi Sarah! I know the service as some of my friends are using it. Thanks for sharing the link with us. 🙂
Thank you, Nami San! I went to the local fish market but was told no collar from big fish currently… 🙁 Will try your recipe when I find it. Wish you and your family a wonderful holiday season!
Thank you Amy! I hope you will find hamachi kama soon. Japanese supermarket usually has some all the time, but I know it can be hard to find elsewhere…
Happy Holidays to you too!
I tried your recommendation for the hamachi kama that I purchased frozen from a great Japanese market in LV and broiled 4 kamas for 25 minutes and made the sauce with some ponzu , phillipine lemon infused soy sauce with sliced and diced scallions and Japanese peppers.
Result: out of this world great!!!
As avid Japanese food eaters we thought this was as good as any sushi restaurant we ate.
Thanks for the great recipe!!
Hello Feza! Thank you so much for leaving your comment here. When I saw your comment via email, I immediately told my husband and we were very happy to hear. When I was debating whether or not I should write a post on Hamachi Kama recipe (because I thought it’s too easy to call a “recipe”), my husband convinced me to write a post on it so everyone knows how easy it is to cook/prepare. So, thank you for proving his point. 😉 I hope you enjoy my recipes and I’m so motivated now! Thank you!!! 🙂
Thank you for posting this recipe. I’m glad your husband convinced you to post this recipe. I just have one question. The fish we bought still had scales on it. Is it necessary to descale before cooking? Or is it no big deal?
Hi Joanna! Yes, you should do that, because it’s going to be very unpleasant when you end up eating the scale with delicious fish meat… 🙂
Joanna, just in case, forgot to mention how to remove scales. Use the back of a knife to scrape it off in a stroking motion and rinse the fish thoroughly. 🙂
One of my favorite go to dishes. I do usually flip my fish the last couple minutes to allow the skin to bubble up a bit. I will try it hour way next time I make this
Hi James,
Thank you for your kind feedback! We love crispy skin too.😋