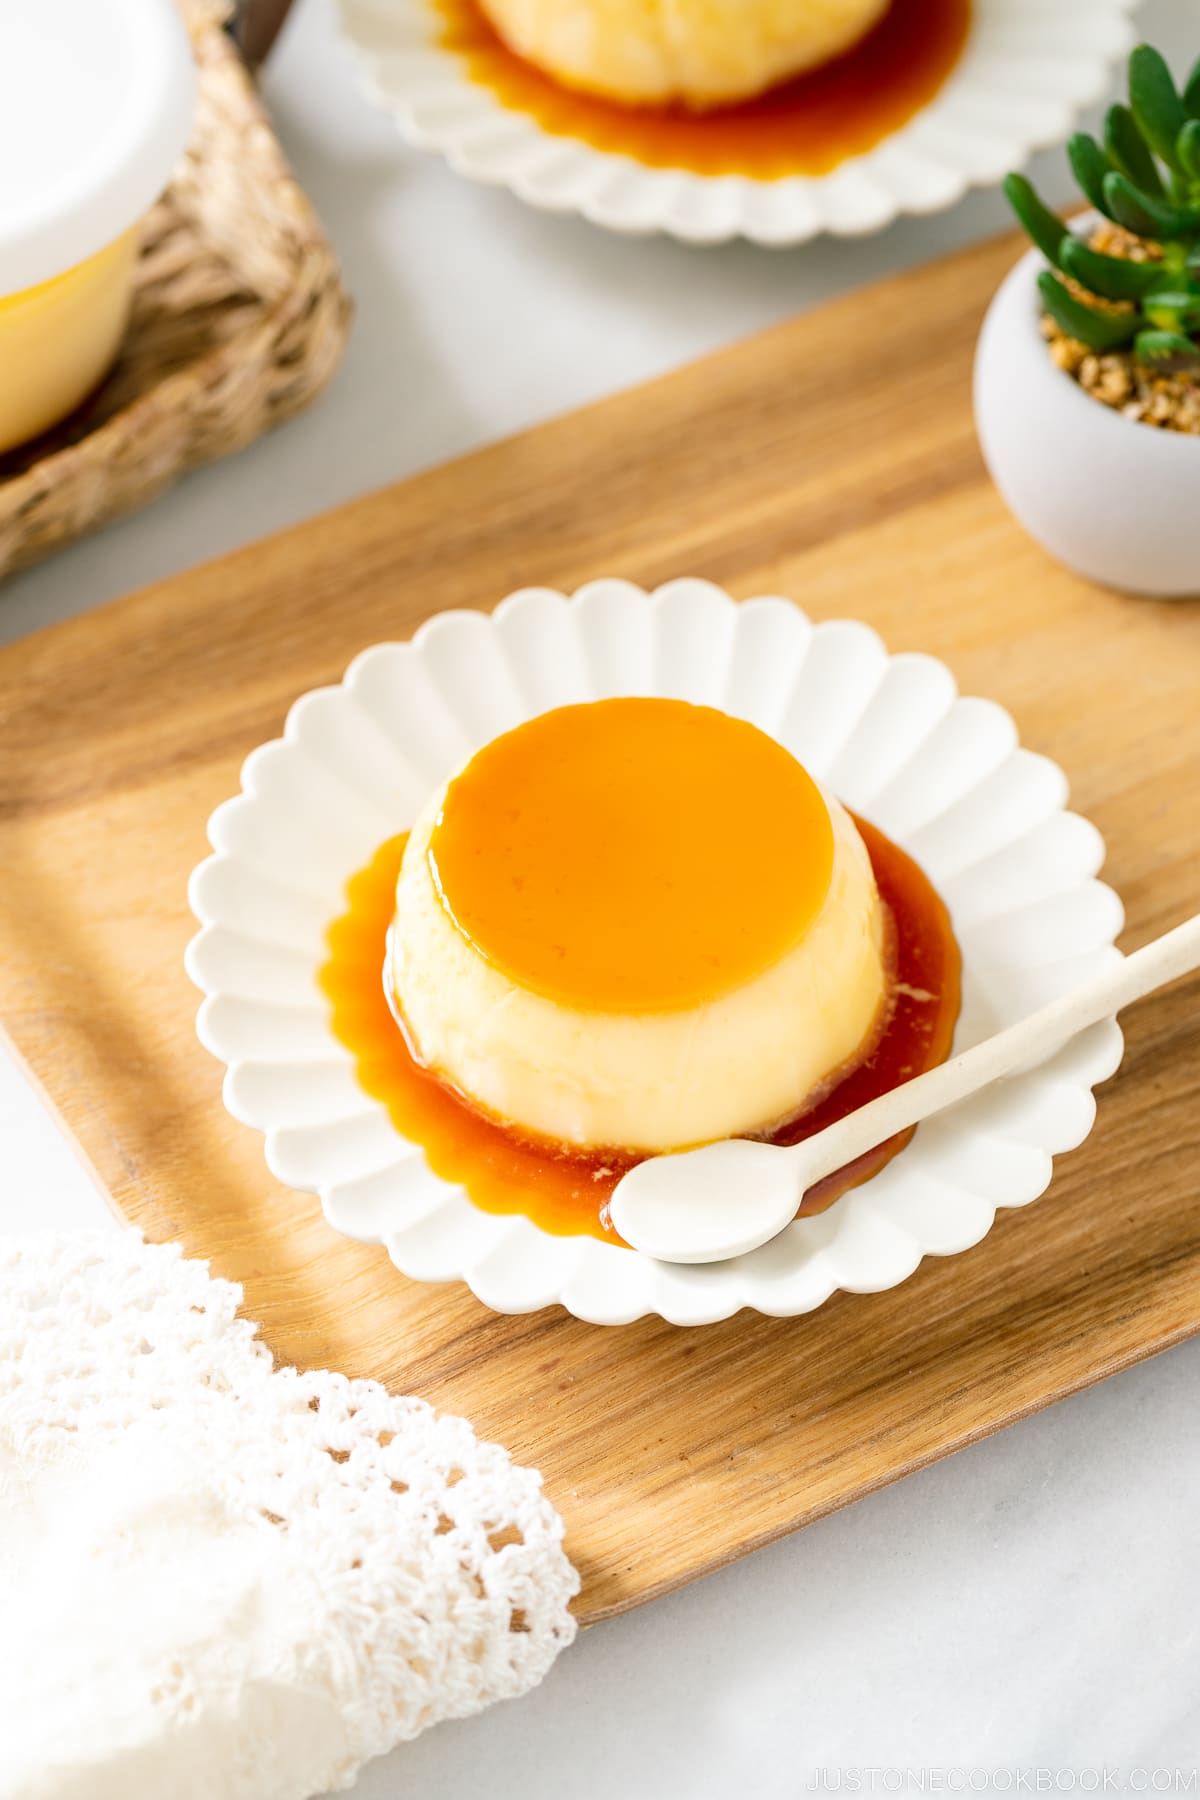
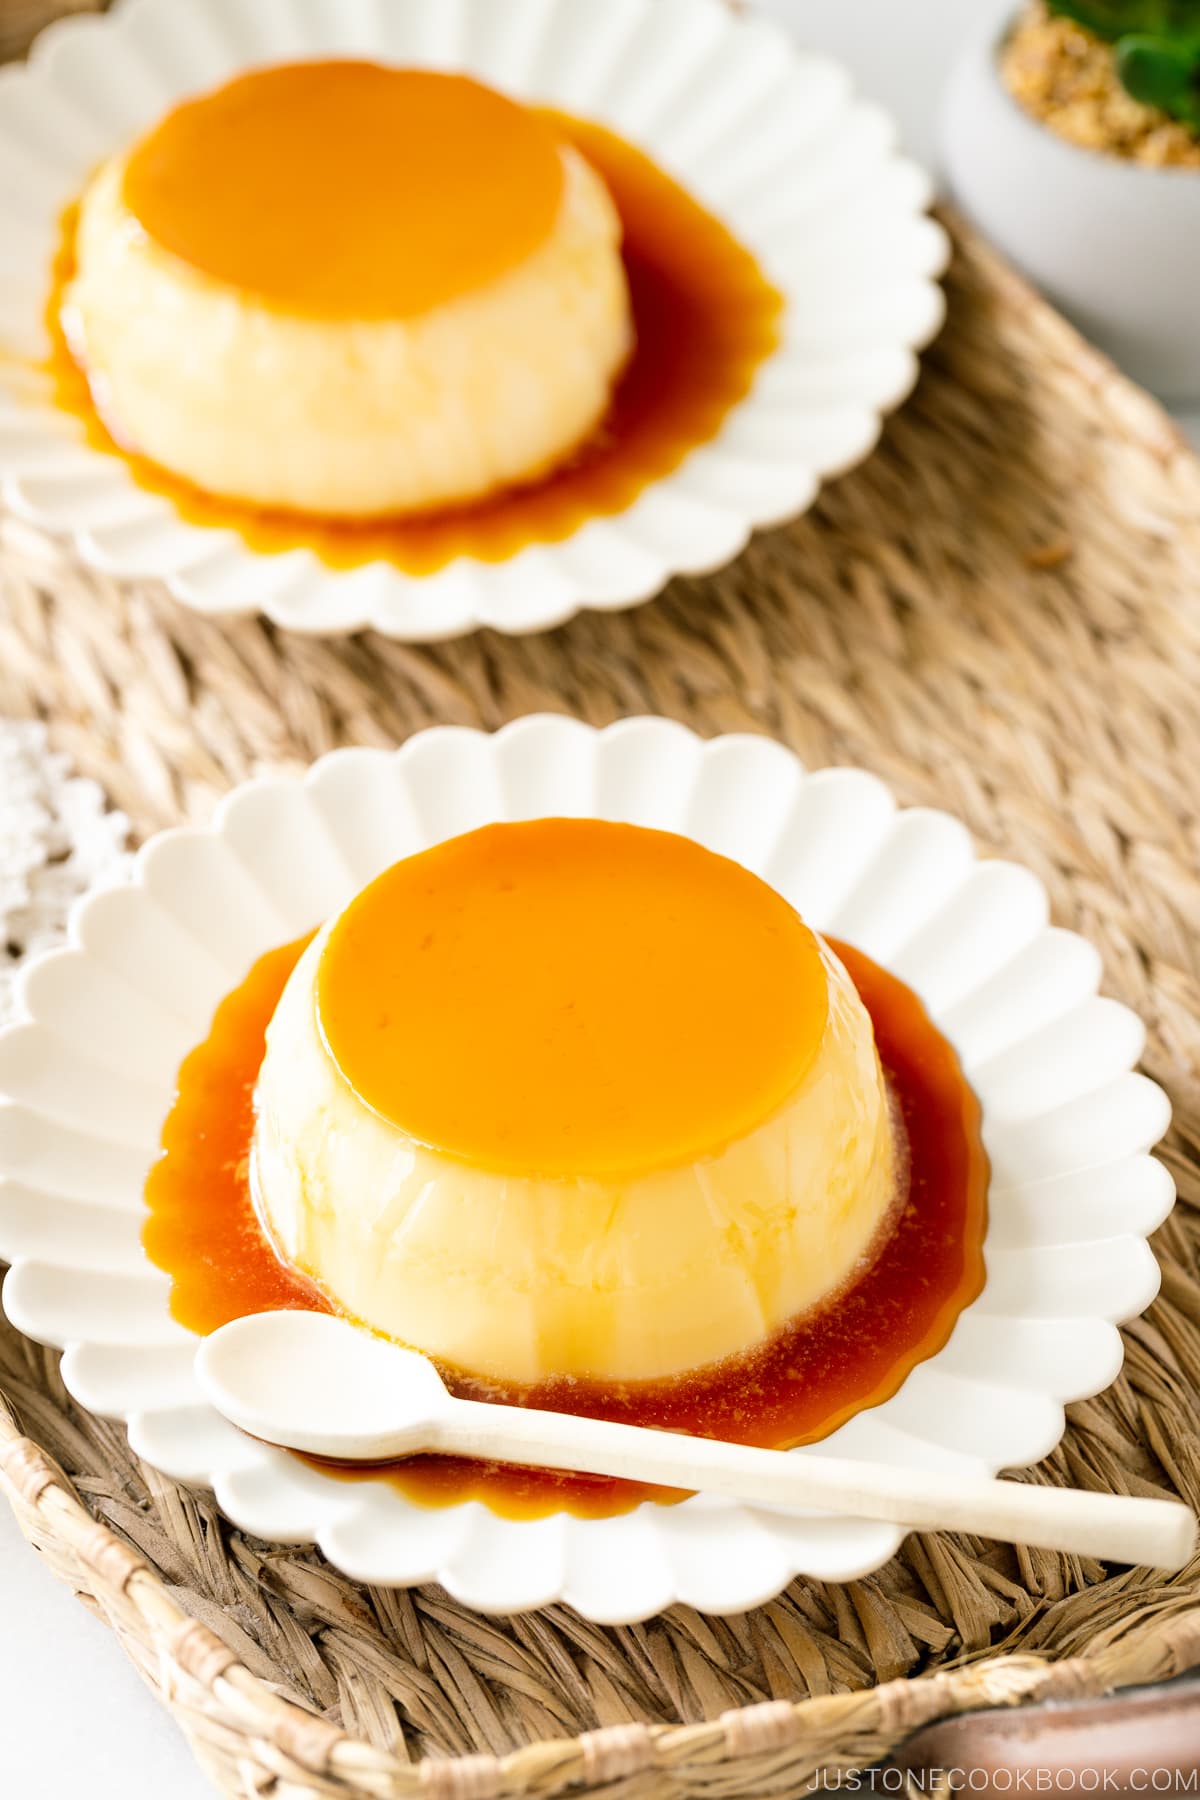
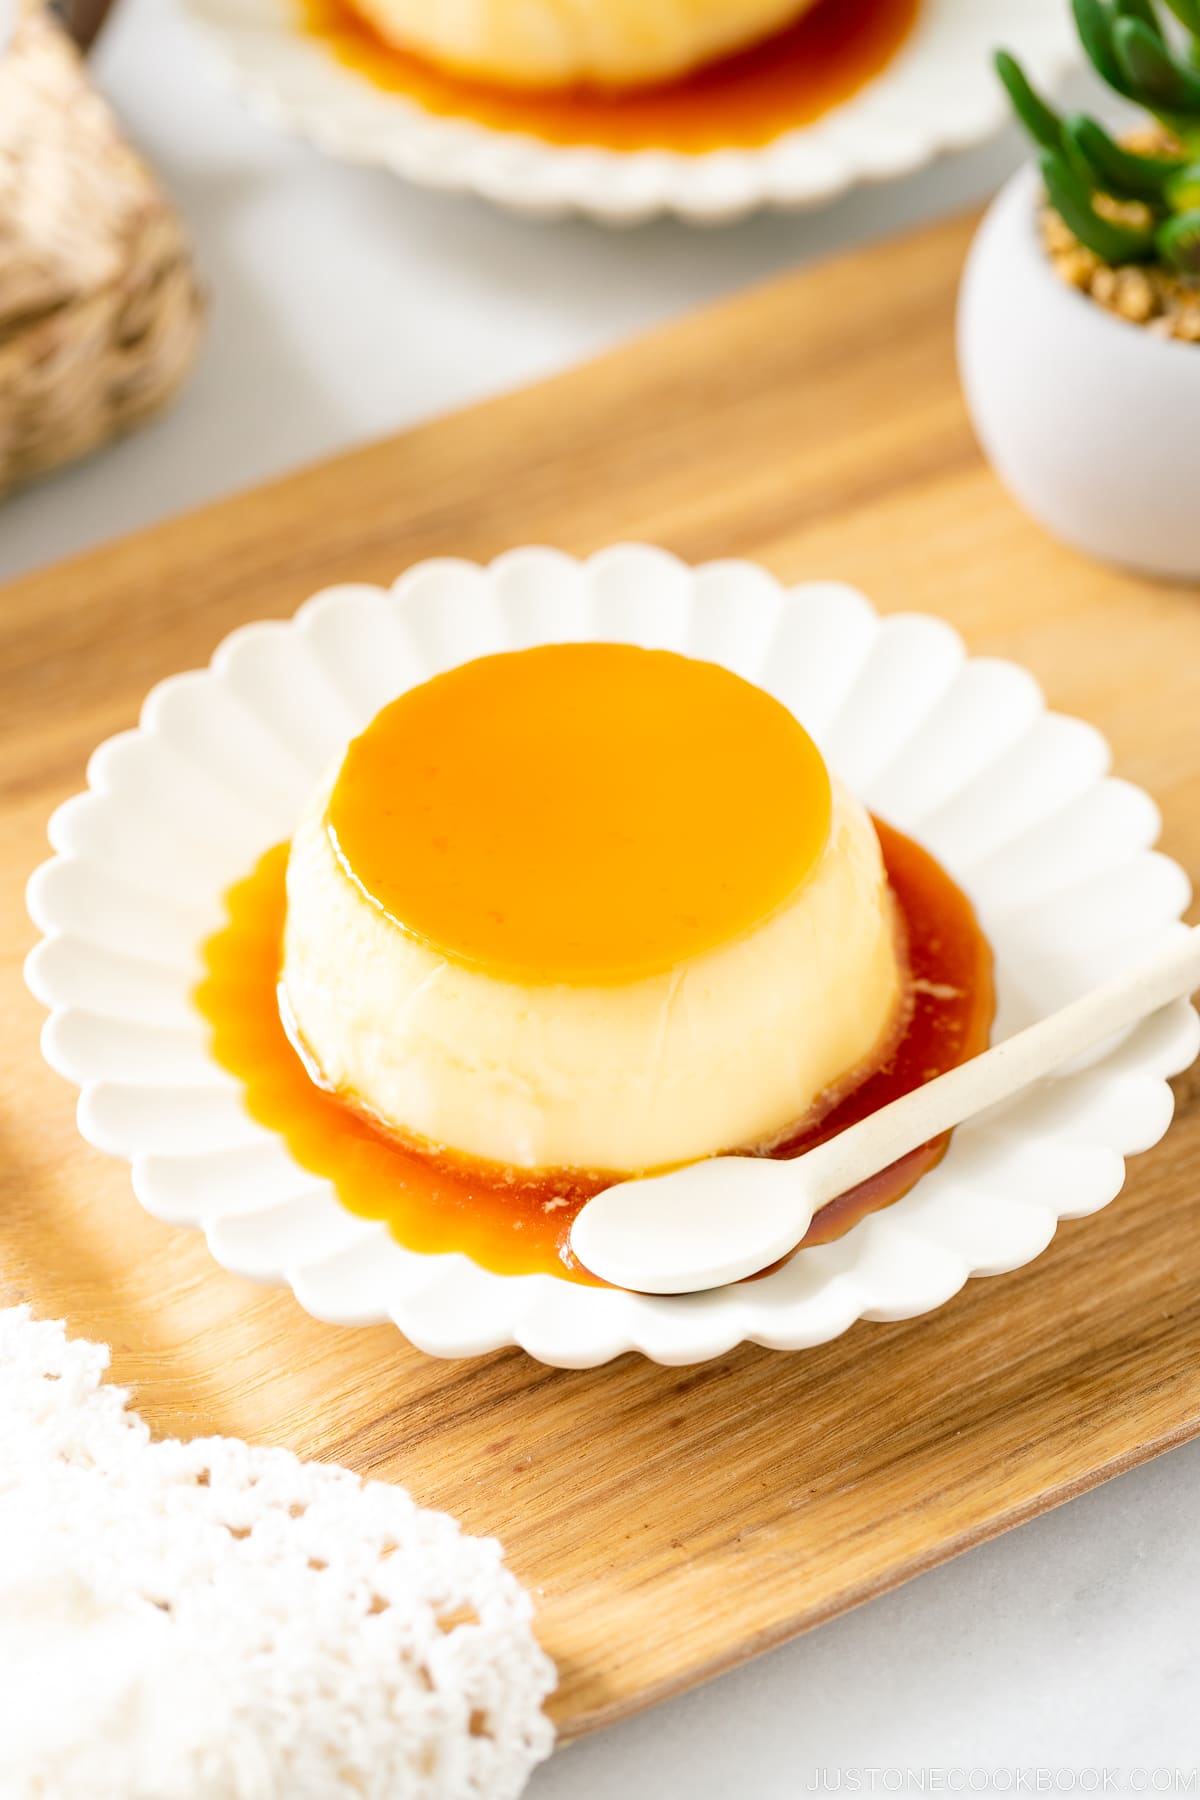
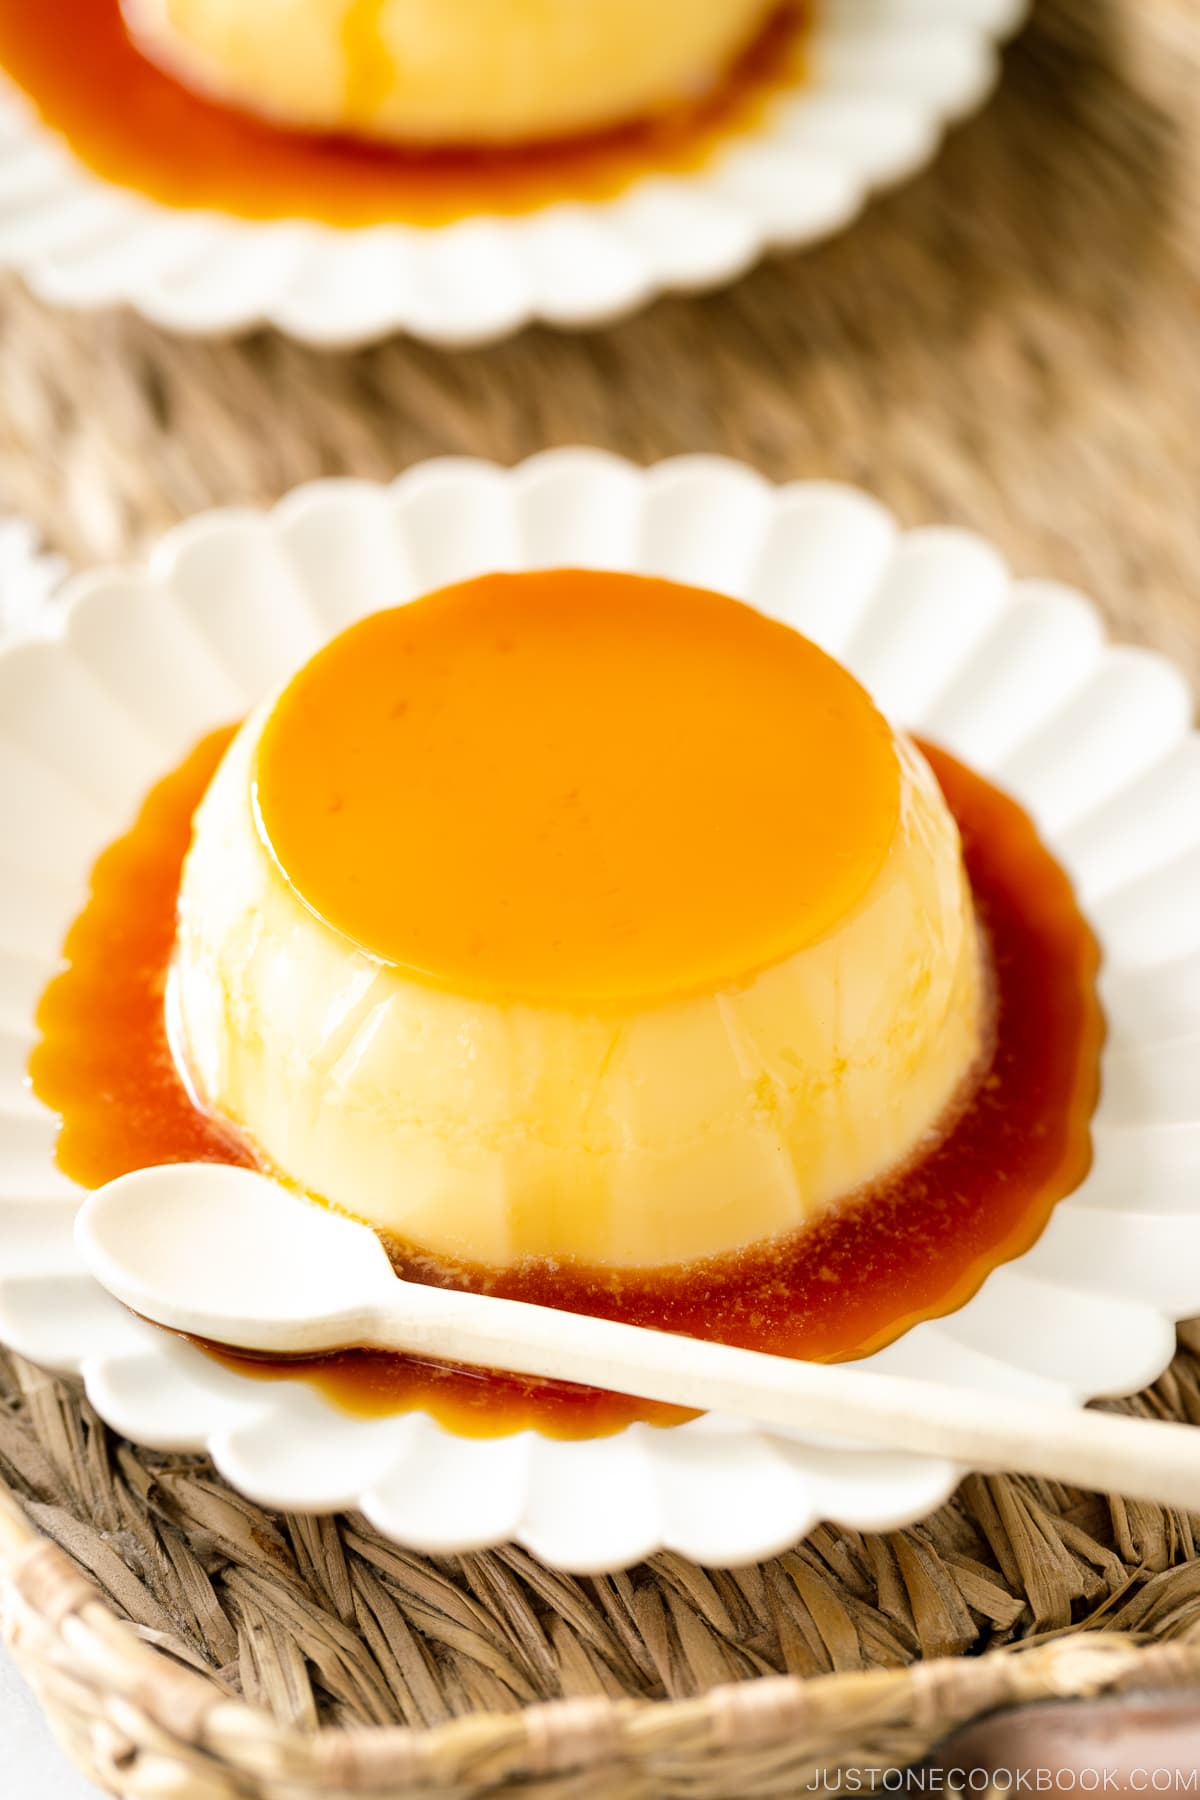
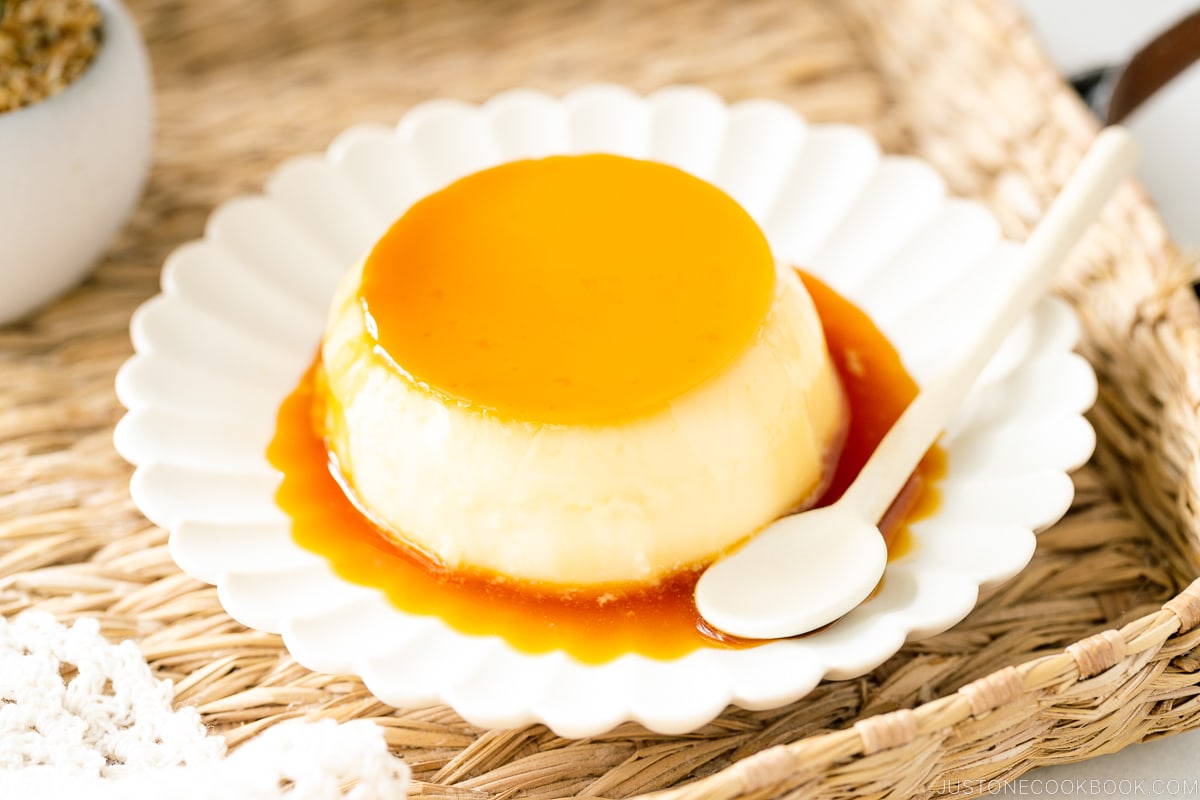
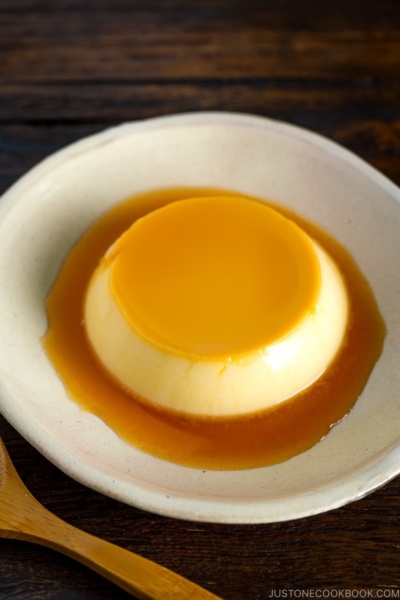
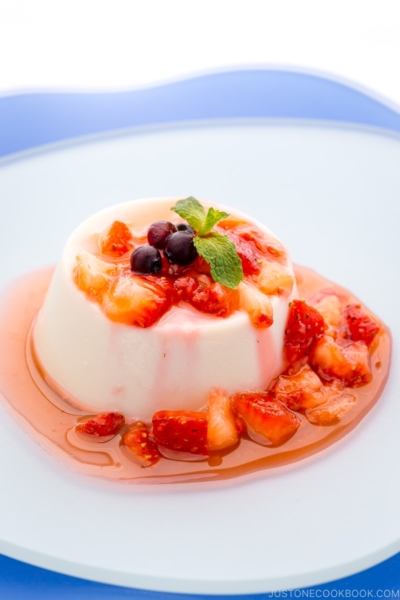
Topped with a deliciously bittersweet caramel sauce, Purin (Japanese Custard Pudding) is a popular homemade dessert. This recipe is Japan‘s take on crème caramel—also called flan or caramel pudding. Follow my tips for a foolproof caramel and a silky smooth custard.
Oh, purin, sweet custard pudding. You are deliciously smooth, creamy, silky, and rich. And I could never resist your deep bittersweet caramel topping. You are just the perfect dessert to make every kid (and adult alike) the happiest person on the planet.
Okay, I was being wax lyrical about a dessert, but the love is deep and real. Today’s recipe–Purin (プリン) aka Japanese pudding—is one of the most famous childhood desserts in Japan. Almost every Japanese person would tell you that we grew up eating purin as an afternoon snack or dessert after a meal. We even have a cartoon character that shares the name Pom Pom Purin to celebrate our adoration for the sweet treat!
The good news is it’s really easy to make Japanese custard pudding at home. It requires only 4 simple ingredients and you’ll find my best tips here. Let’s get to it!
Table of Contents
What is Purin?
Purin (プリン) is a custard dessert made from eggs, milk, and sugar, and covered with a thin layer of rich caramel sauce on top. It’s basically a Japanese take on crème caramel, also known as flan, custard pudding, or caramel pudding.
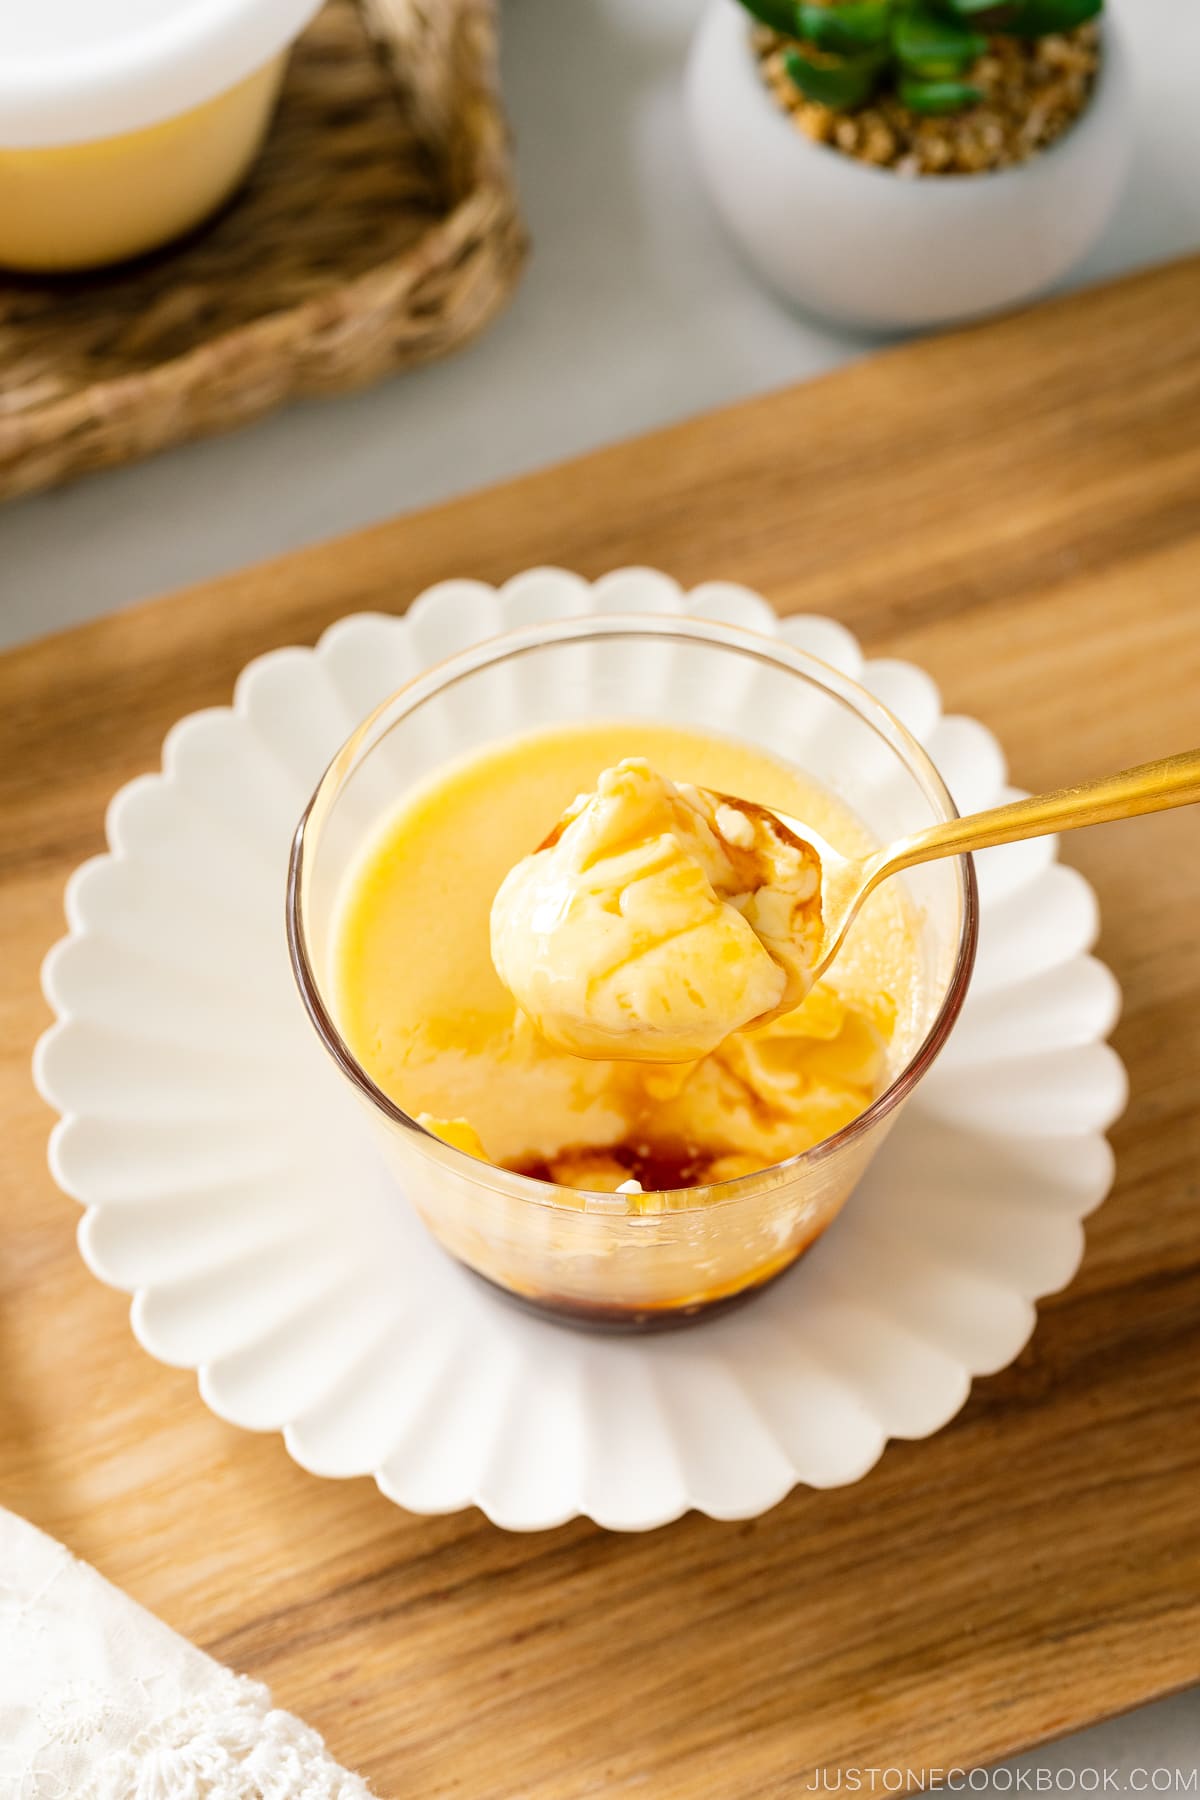
The texture of this cold custard dessert is silky and smooth, and it’s just firm enough to stand on its own, yet it jiggles when you shake it. Japanese purin will remind you of the custard part of crème brûlée, but with a more melt-in-your-mouth smoothness. The best part? The bittersweet caramel complements and rounds out the velvety custard.
You can make the pudding with various methods, which I’ll cover later in the post.
A Quick History
As you might have guessed, custard pudding originated in Europe and it is said that it was introduced to Japan in the early Meiji period (1868-1912) by the British.
The name “purin” comes from the word “pudding,” which was mentioned in a document from around 1872. It was first offered at European-style hotels and then slowly became a dessert item at yoshoku (Japanese-style Western food) restaurants. Its popularity took off in the 1960s and it has become one of Japan’s most loved desserts to enjoy.
Where to Buy Purin in Japan?
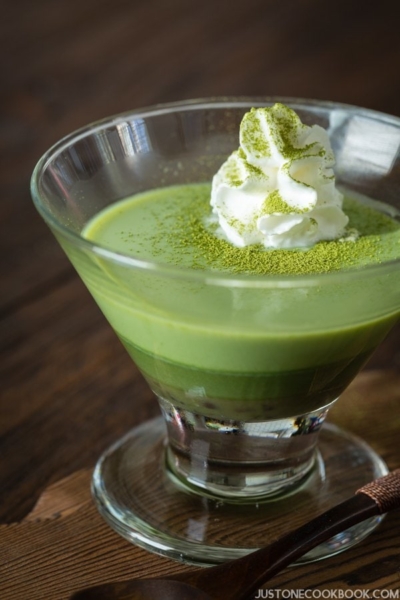
You can find purin at bakeries, pastry shops, supermarkets, and konbini (convenience stores) throughout Japan. And there are many varieties of purin to choose from. Imagine chocolate, pumpkin, matcha, black sesame, and sweet potato!
3 Types of Japanese Custard Pudding
There are three types of purin in Japan based on the cooking methods.
- Yaki Purin (焼きプリン) – Baked in a bain-marie (water bath) in the oven. A hot water bath allows this delicate dessert to cook more evenly and gently, preventing cracking, curdles, or small bubbles around the edges.
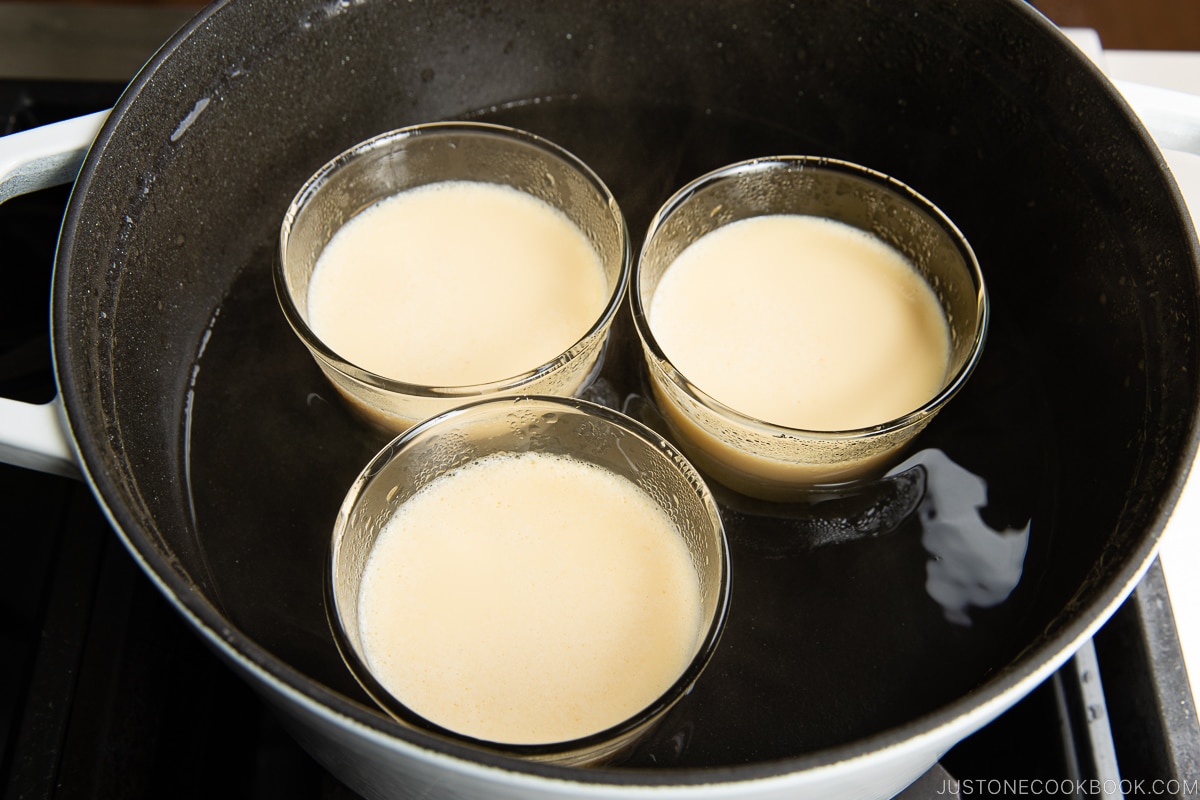
- Mushi Purin (蒸しプリン) – Cooked on a stovetop in a steamer or in a bain-marie in a pot.
- Gelatin Purin (ゼラチンプリン) – Not baked or cooked on a stovetop; the custard is solidified with gelatin! The majority of packaged purin you can get at supermarkets are mostly made this way. Have you tried the popular Pucchin Purin (プッチンプリン) by Glico? My version of the No Bake Purin recipe can be found here.
In this recipe, I’ll show you #1 and #2 methods. The easiest, foolproof method is using the oven. The heat is gentler than cooking or steaming on a stovetop, so the custard will come out silky and smooth.
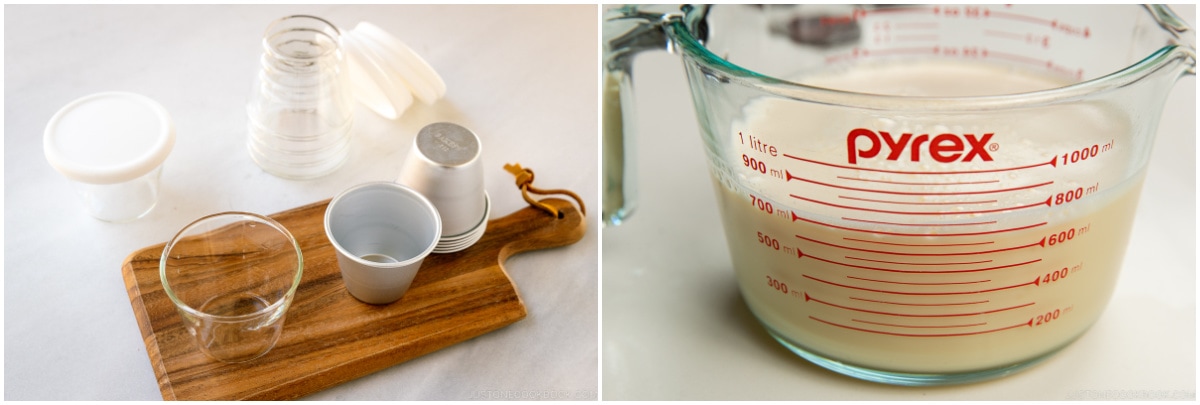
Purin Molds: Shapes and Materials
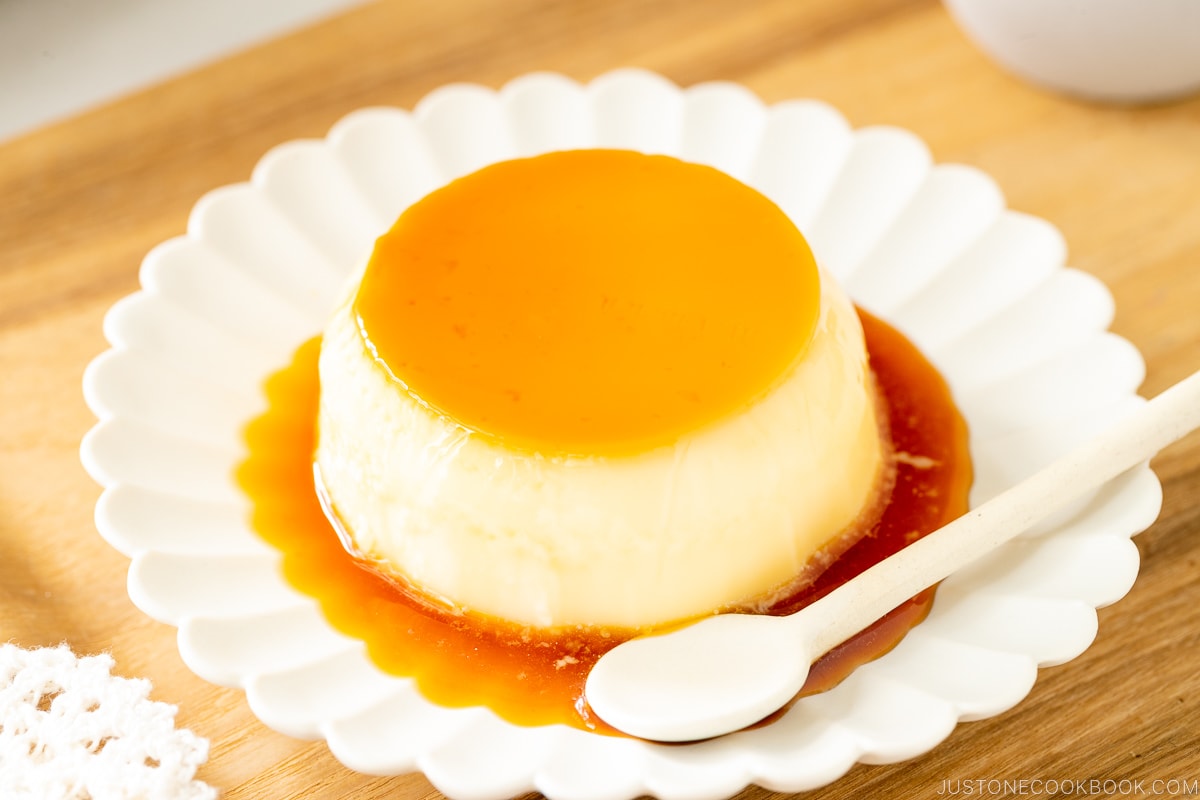
In Japan, purin molds come in a variety of shapes and sizes! I personally like a tall stylish one, but in general, purin molds have a smaller bottom with a large open surface. When the custard pudding is inverted, it sort of looks like a trapezoid shape (or Mt. Fuji shape?).
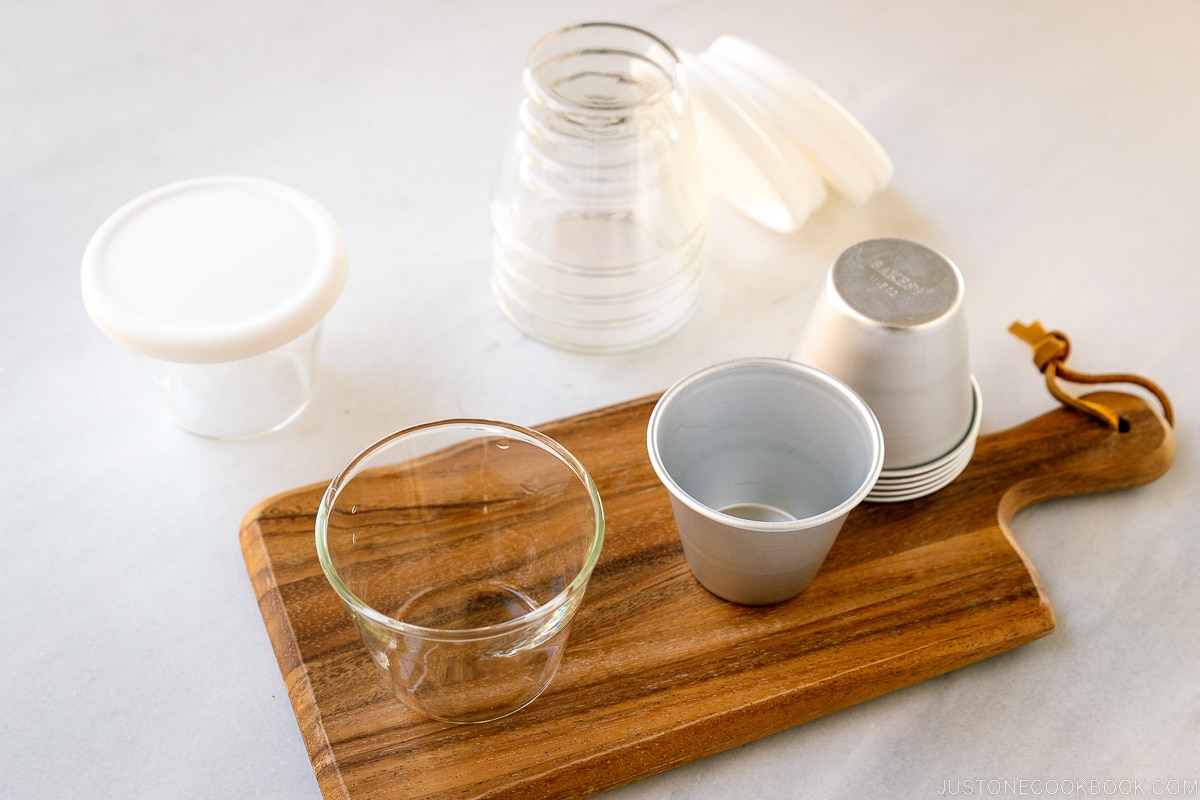
Also, it’s good to remember that the heat travels at different rates depending on the materials of molds you choose. The aluminum molds, which are often used in classic purin recipes, have high thermal conductivity. This yields a firm custard texture. Stainless steel and heat-resistant glass molds cook slowly, so the custard is softer than one made in aluminum molds. Stainless steel is durable and can be used for a long time. Plastic molds are popular, especially for gifting or bringing to a picnic or potluck.
You can definitely use standard ceramic ramekins commonly used for flan and crème caramel for this recipe. However, please note that the ceramic ramekin tends to be thicker and their shape is different, so you may need to adjust the cooking time.
Shopping Tips: A small mold (70-100 ml) is a good size for children, and a large mold (150 ml or more) is recommended for adults. When the pudding is removed from the mold, it spreads and sinks a little, so the mold should have more depth than the ideal shape you imagine.
The molds I used in this recipe are:
- Aluminum 150-ml molds (Size A)
- Glass 220-ml molds (I bought from Amazon Japan)
How to Make Purin (Japanese Custard Pudding)
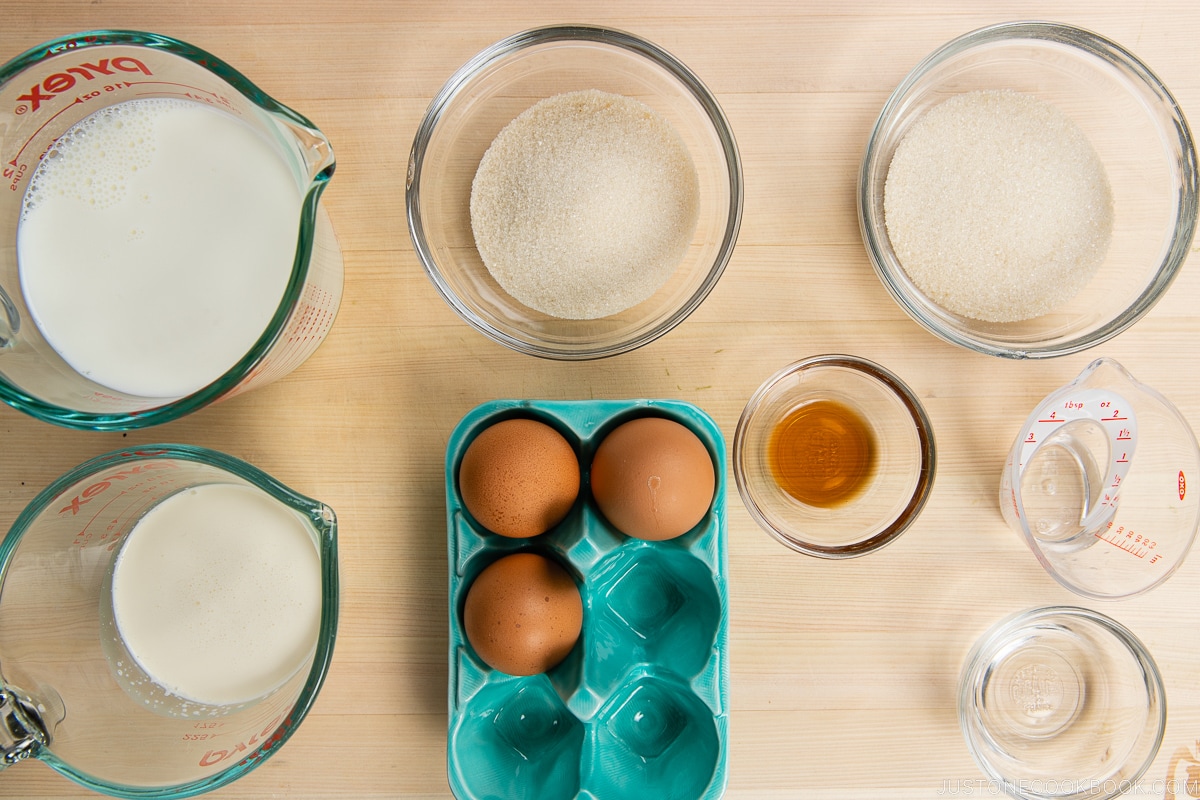
Ingredients You’ll Need
- Eggs
- Granulated sugar (I use organic granulated sugar, hence, not white)
- Whole milk
- Heavy (whipping) cream
- Vanilla (optional)
- Caramel sauce: sugar, water, and hot water
The classic Japanese purin recipe doesn’t include vanilla and heavy cream, but they are more commonly included these days for a richer and more flavorful taste.
Overview: Cooking Steps
- Make the caramel sauce with sugar and water and divide the mixture into molds.
- Heat the milk and heavy cream in the saucepan. In a bowl, whisk the eggs and sugar together. When the milk mixture is hot, right before simmering, pour it into the egg mixture and whisk it all together.
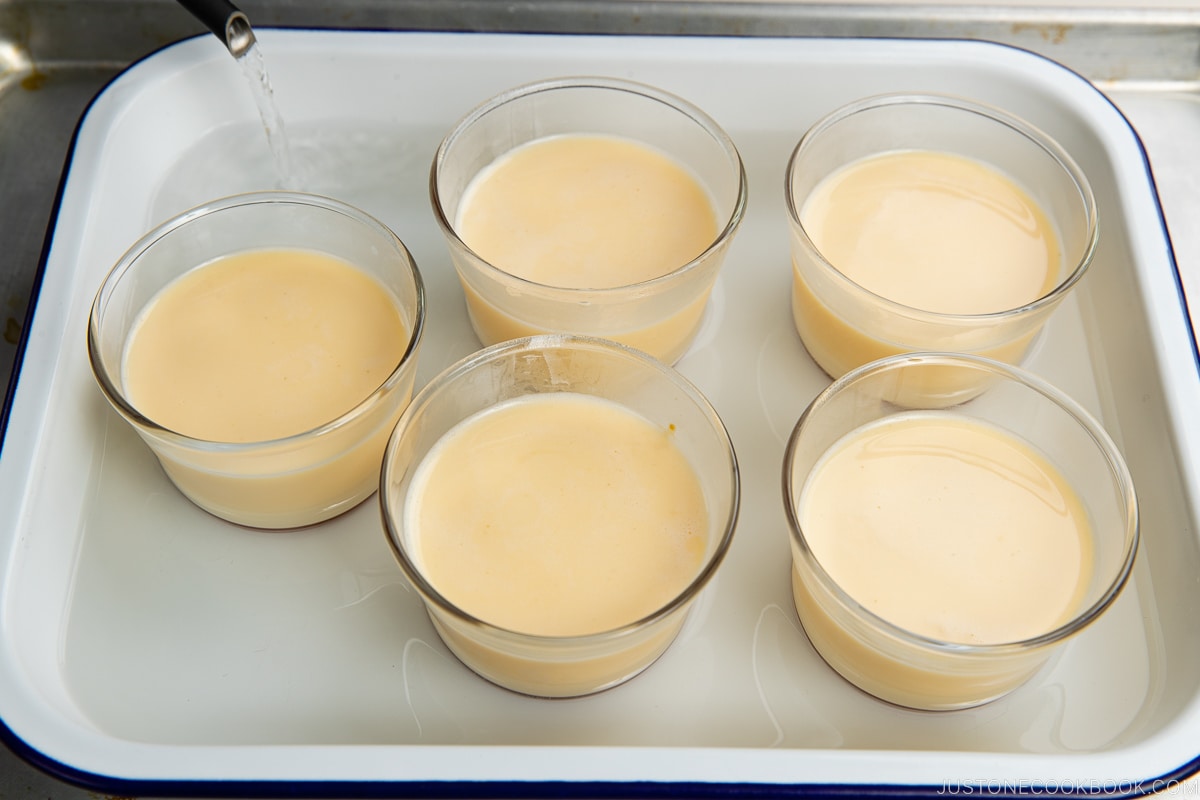
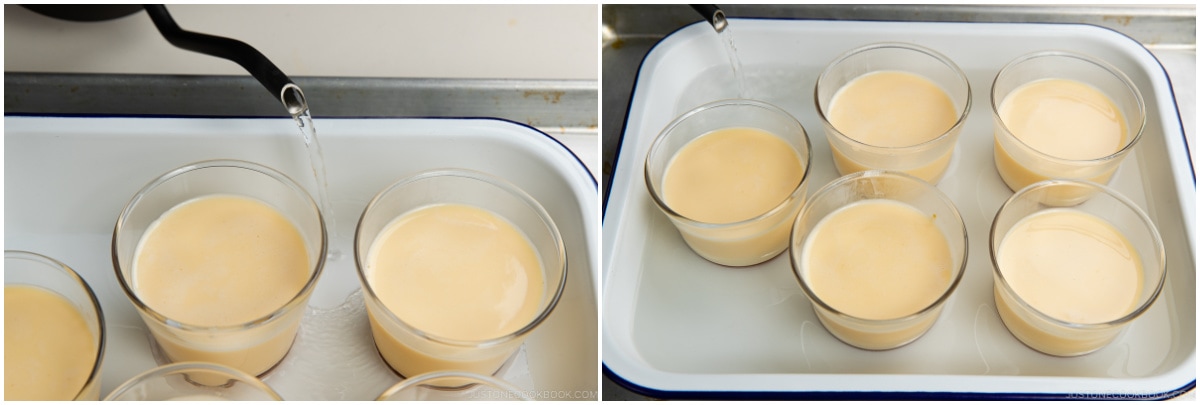
- Strain the mixture and divide it into the molds. Place the molds in a rimmed oven-safe container and add hot water to the pan to create a bain-marie.
- Bake in the oven until firm, about 30-45 minutes, depending on the mold size.
- Let cool and refrigerate.
5 Stages of Caramel Sauce Making
Purin is a relatively easy dessert to make, but if you have never made a caramel sauce before, you might want to know how it’s made and what to watch out for.
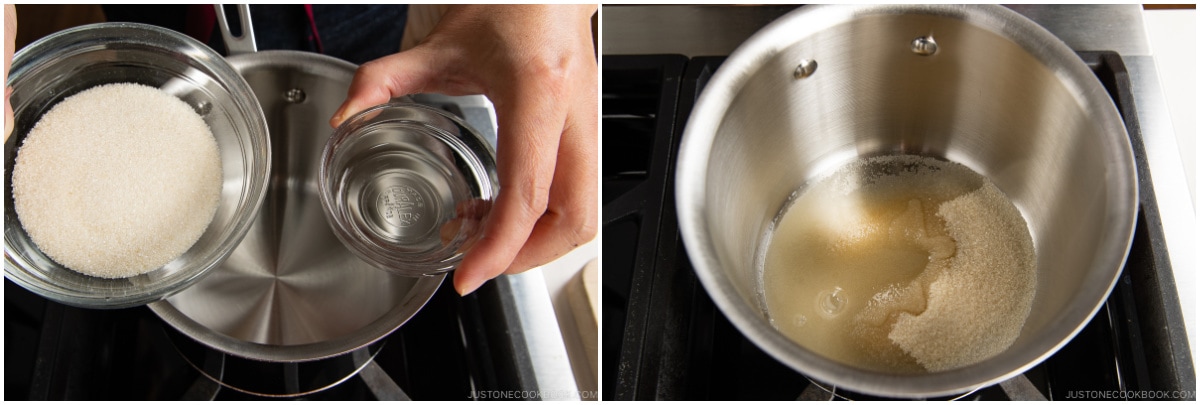
Stage 1: Let the Sugar Dissolve–Do Not Stir!
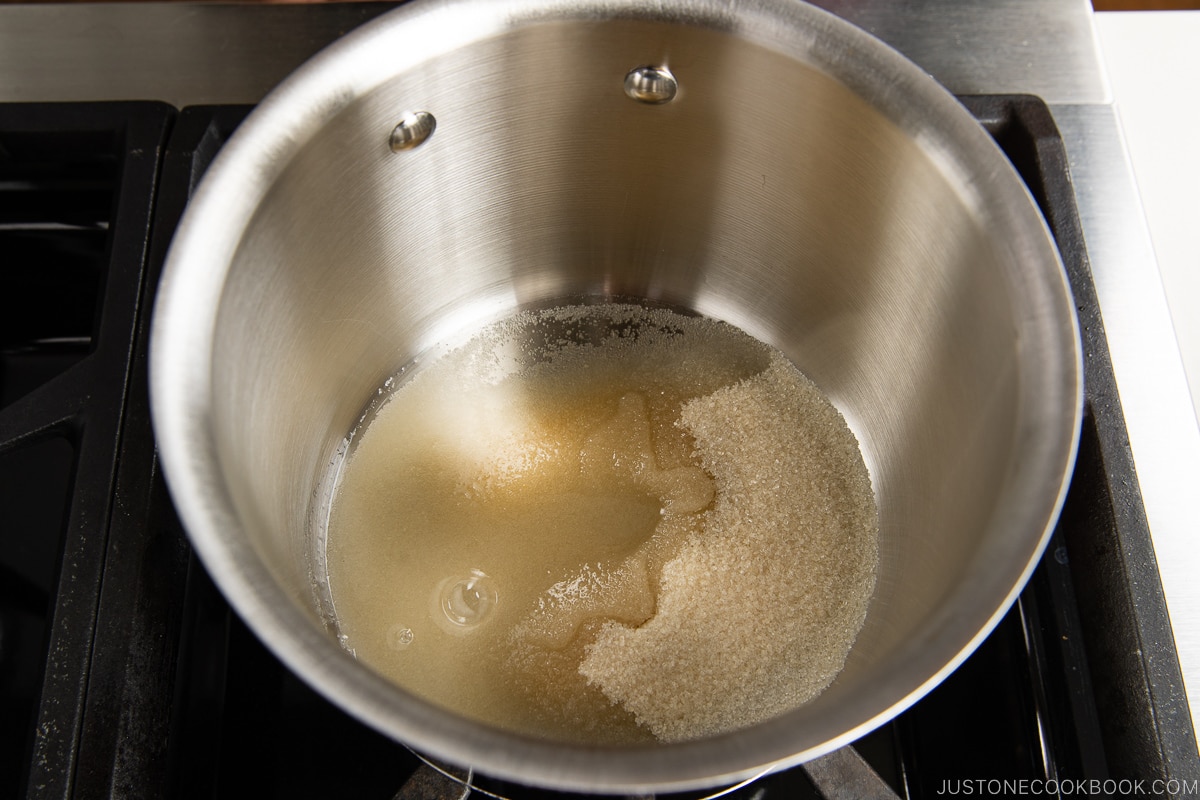
First, make sure to use a heavy-bottomed pot. Avoid a non-stick pot because it’s too thin and its color makes it hard to see the caramel color.
Looking at the sugar and water mixture in the pot, you may want to mix it up using a utensil… but don’t touch it with a utensil! You can tilt the pot occasionally, but let it be until the sugar turns liquid.
Start boiling water now in a pot or kettle, if you haven’t yet.
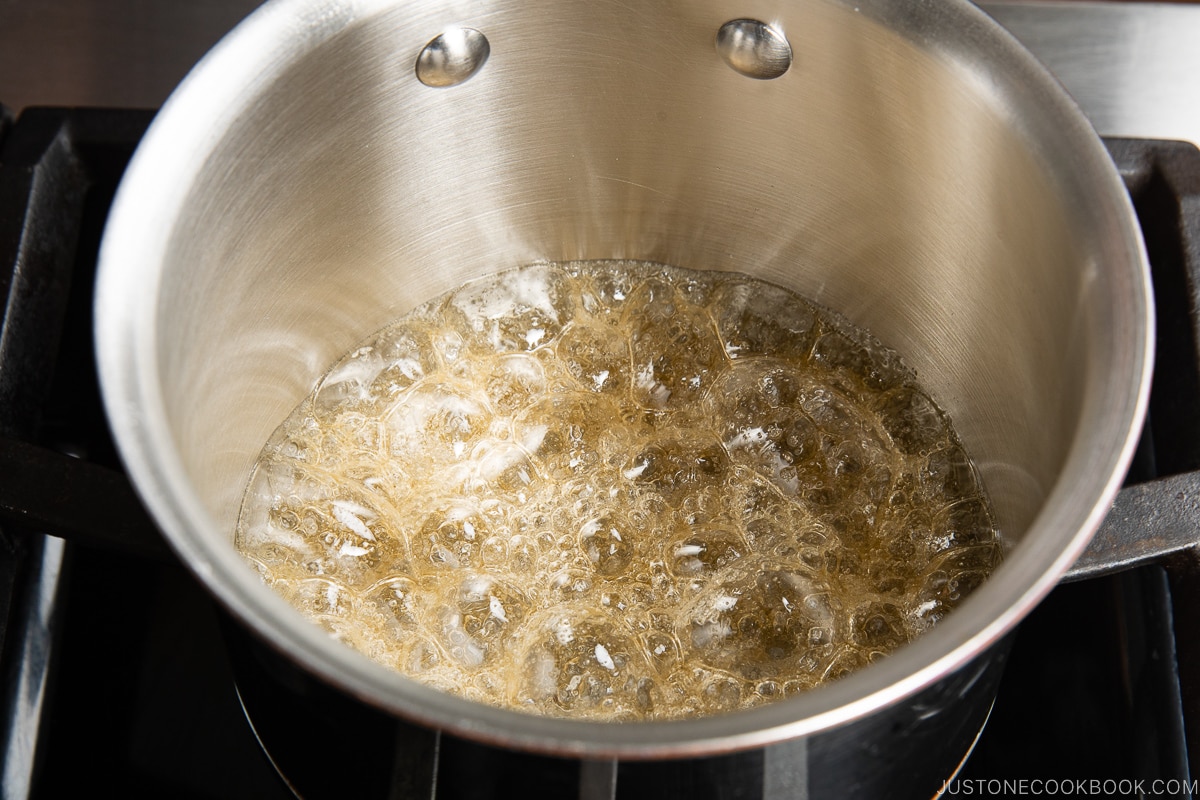
Stage 2: Small Bubbles
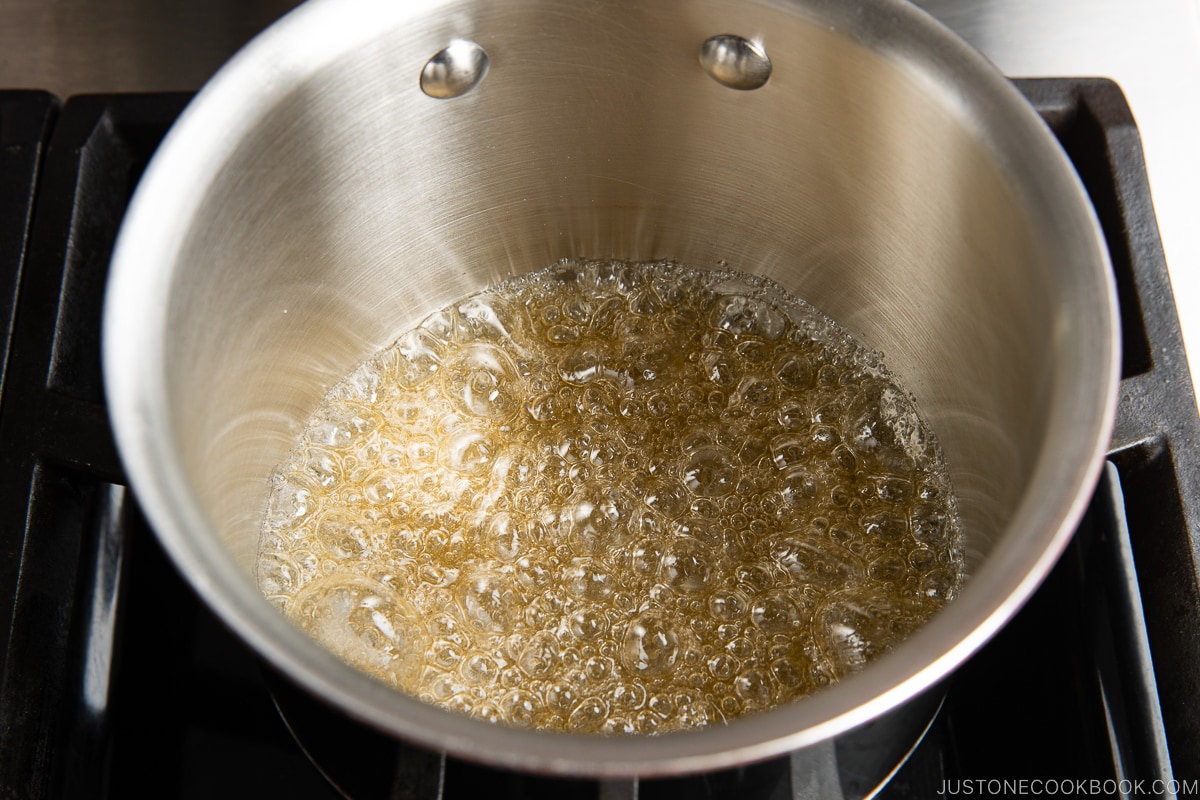
When the sugar starts to caramelize (lots of tiny bubbles) and slowly turns brown on the edges of the pan, swirl the pot to incorporate the dark-colored caramelized sugar with the light-colored one.
The reason we don’t touch the caramel is that the sugar crystallizes when you touch it with a utensil.
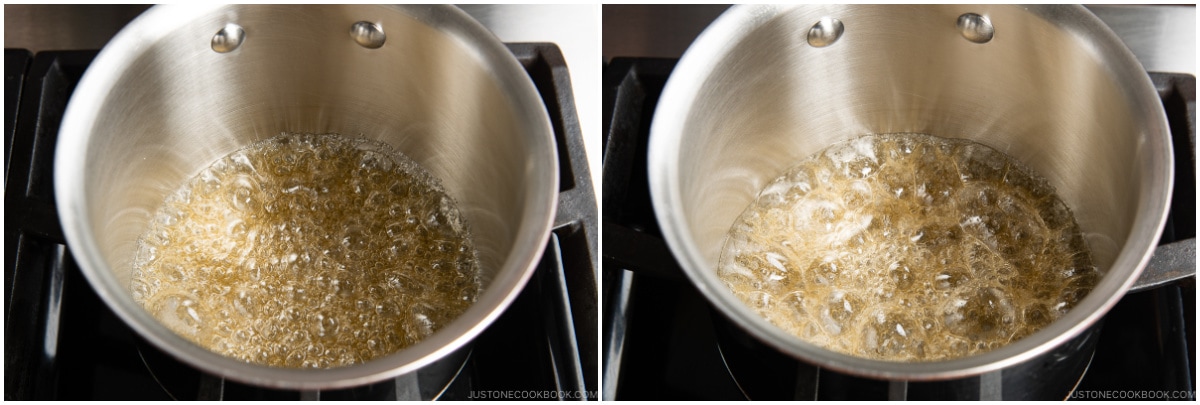
Stage 3: Big Bubbles
Now the bubbles will become larger. Continue to swirl once in a while and watch as the sugar mixture becomes more and more caramelized.
Get your hot water ready!
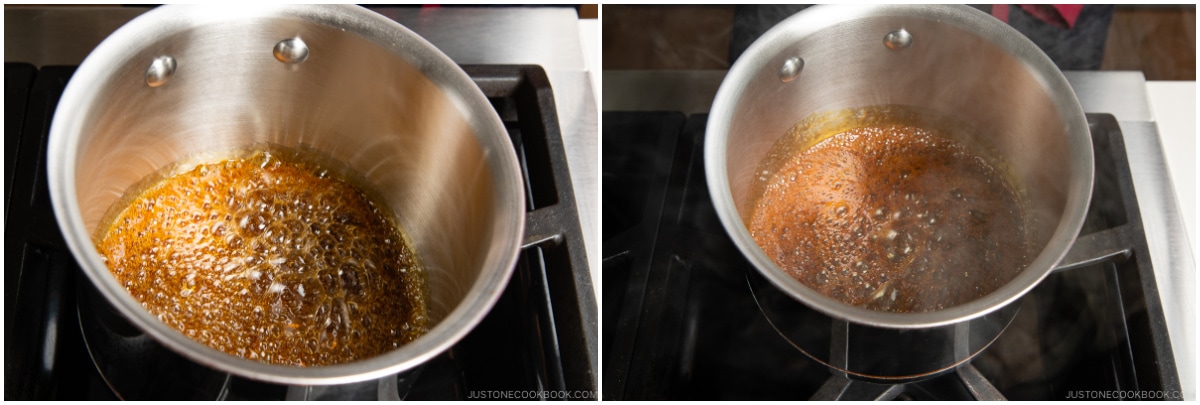
Stage 4: Finally, the Dark Caramel Stage with Smoke
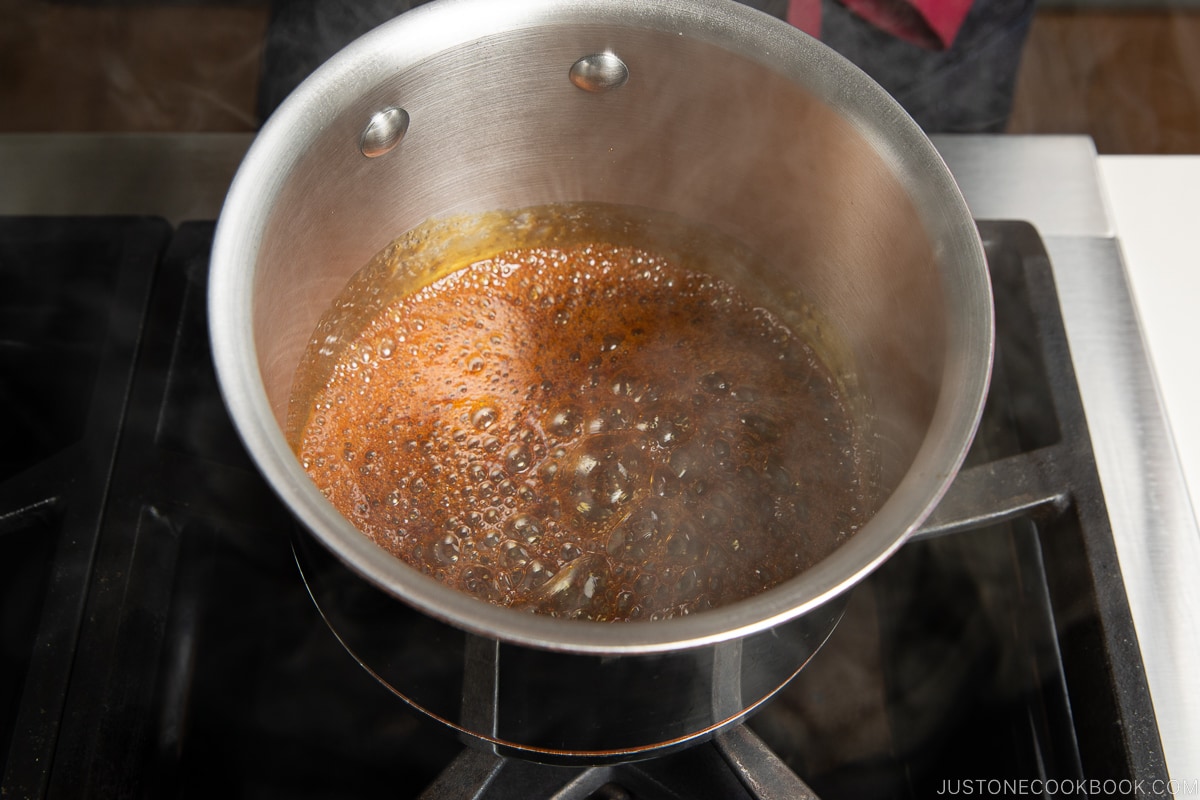
When the caramelized sugar turns darker and darker, swirl the pot to mix and watch it closely.
After the smoke rises from the caramel sauce, wait a tiny bit more until it reaches the optimal dark caramel color. Then, turn off the heat.
I like my caramel sauce to have a slightly bitter taste to balance out the sweetness in the custard. Therefore, I go for a darker, bittersweet caramel sauce. When you start making more caramel sauce, you will be able to eyeball when it reaches your desired taste. So practice a few more times!
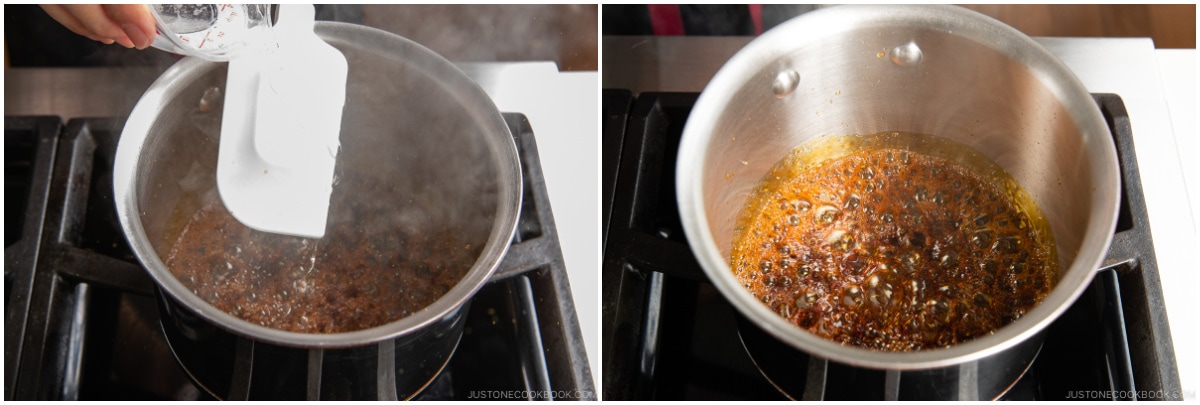
Stage 5: Add the Hot Water (Be Careful!)
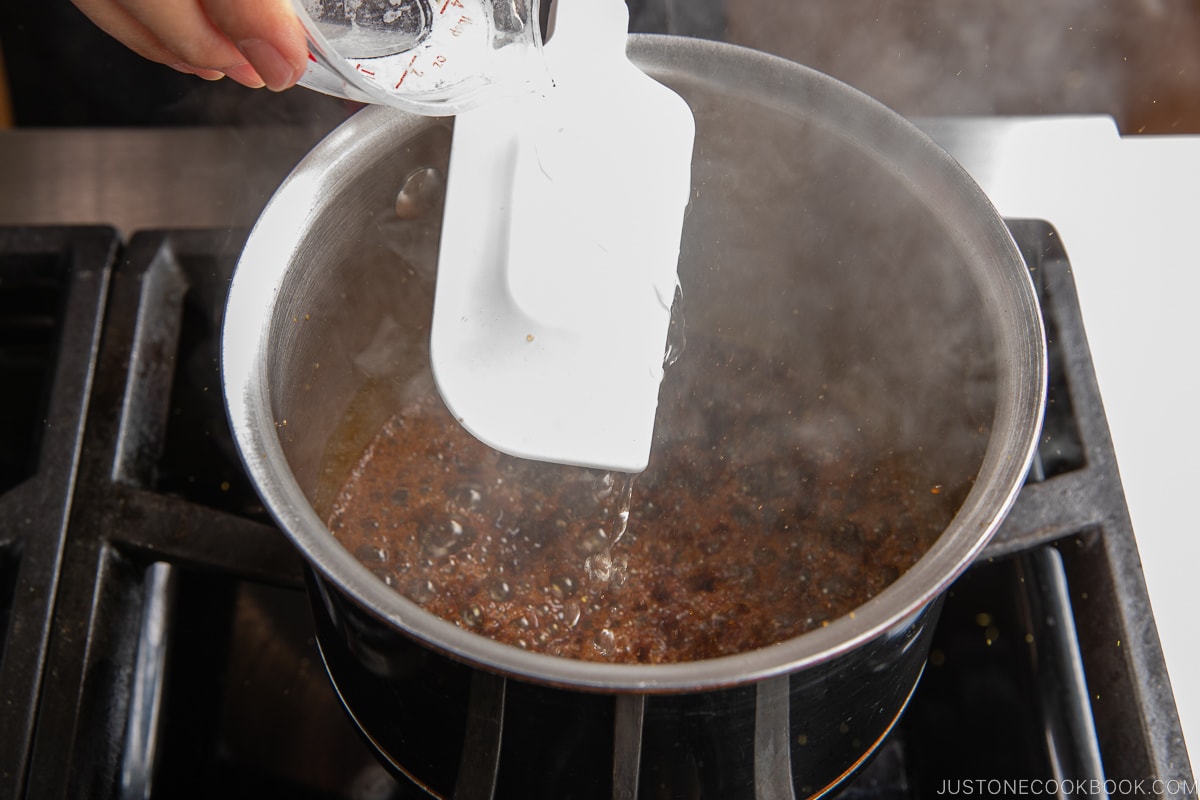
Your stove burner should be off. Drizzle a bit of the measured hot water onto a spatula (so your hand is not directly above the pot) and into the hot caramel sauce. Be careful; the caramel will sputter and splash.
Add the rest of the hot water and swirl the pot to combine. Then, immediately pour the sauce into the purin molds before the caramel hardens.
5 Tips to Make A Silky and Smooth Purin
Now, let’s move on to the custard. It’s very important to make a smooth custard for purin and I have five important tips to share.
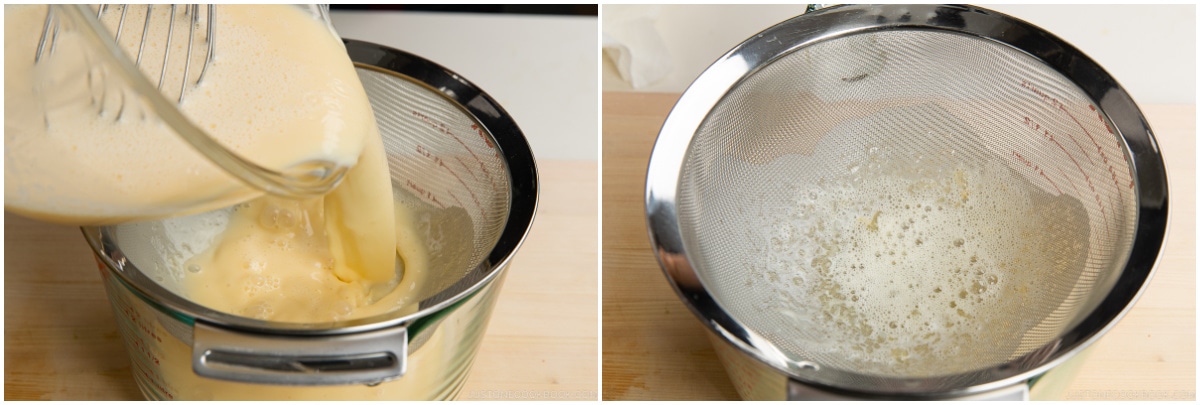
Tip #1: Strain the Custard Mixture
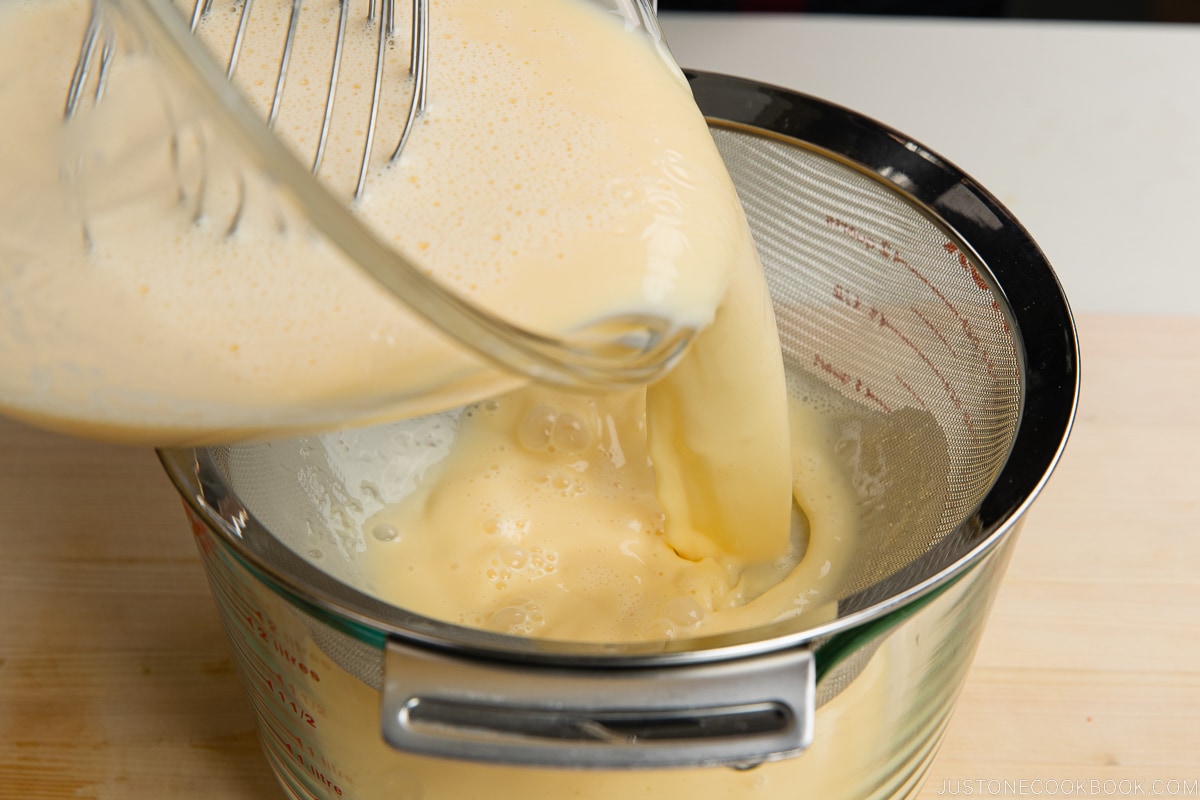
I know, this step creates two extra things to wash, but I highly recommend passing the custard through a fine-mesh strainer to achieve a super smooth texture. Even if you think you’ve whisked and incorporated the eggs really well into the milk mixture, there tend to be some lumps that are left behind. A fine-mesh strainer will catch it for you!
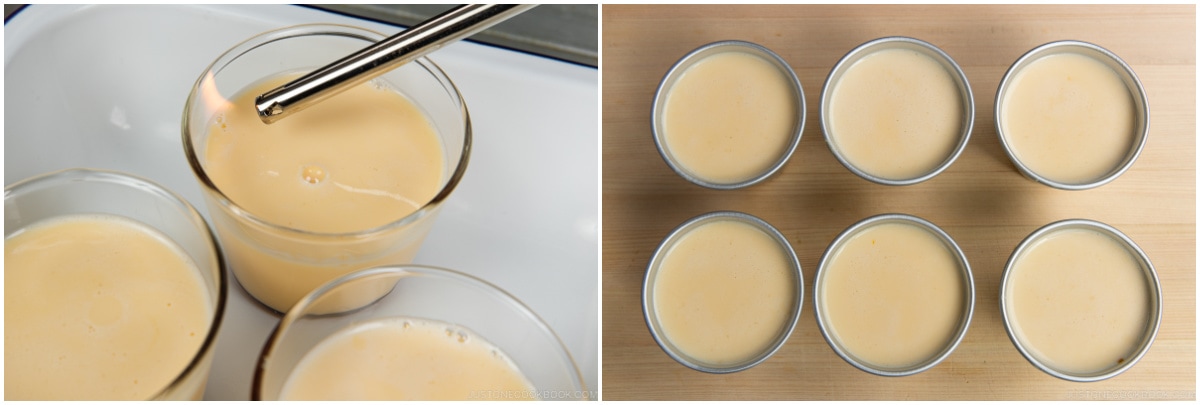
Tip #2: Remove the Air Bubbles
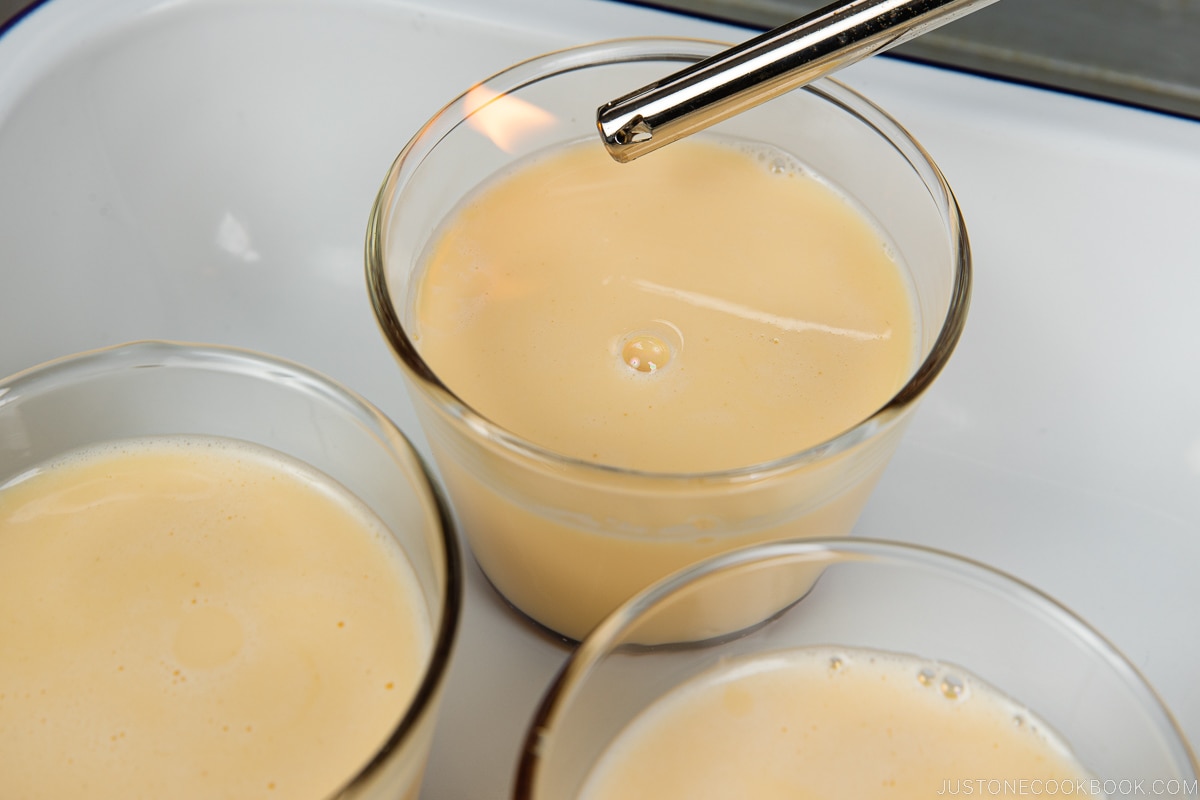
If you aim for the perfect-looking custard, try removing the air bubbles. A long-stemmed utility lighter (candle lighter) comes in handy. Quickly touch the air bubbles with the flame, and they will disappear like magic!
I used to use a spoon or toothpick to remove the air bubbles (like many recipes say), but bubbles like to move around and it takes forever! Burning off with a candle lighter is the fastest way, and this trick does wonders!
Tip #3: Cook in a Bain-Marie
Although you can steam the custard pudding in a steamer on a stovetop, I highly recommend cooking the custard in a bain-marie—whether in the oven or on a stovetop—as the thermal conductivity is very gentle.
The steaming method gets very tricky as the temperature inside the steamer gets too high and you will need to adjust the temperature by opening and closing the lid, leaving it slightly ajar.
Tip #4: Use A Gentle Heat
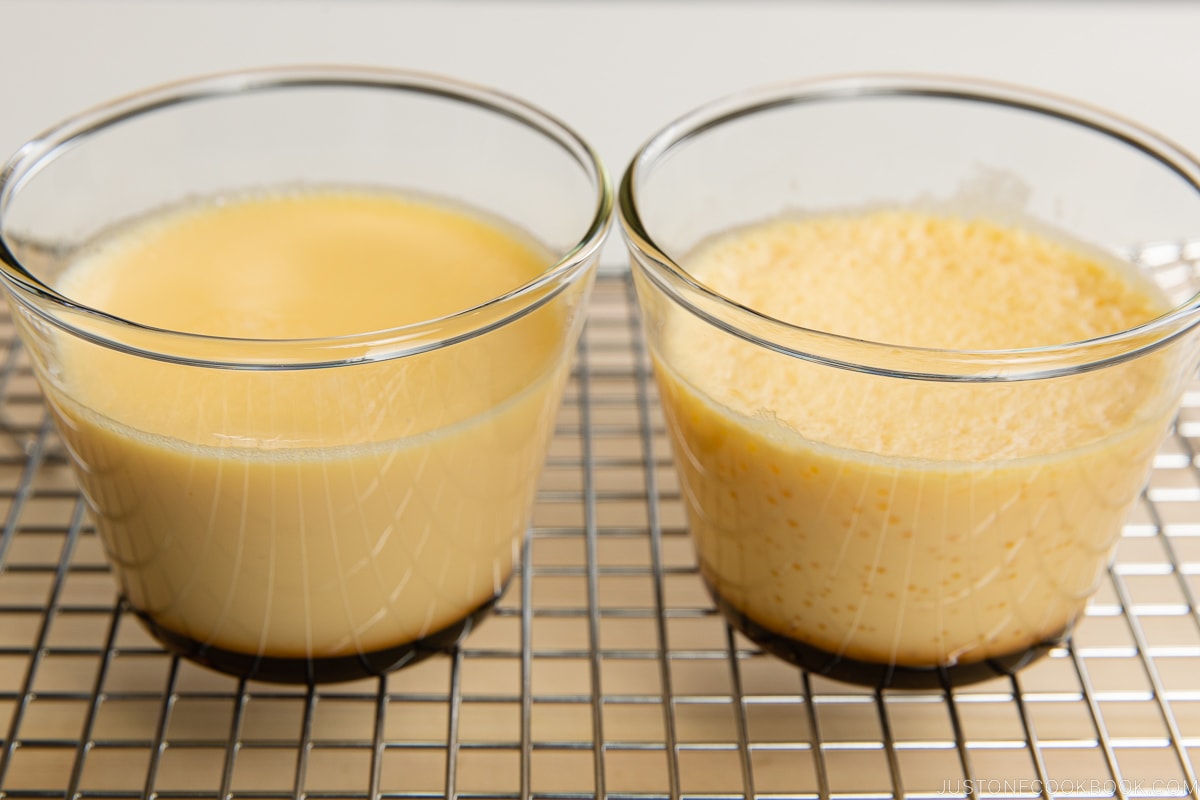
Whichever method you choose to cook your purin, remember to use gentle heat so the custard won’t be boiling.
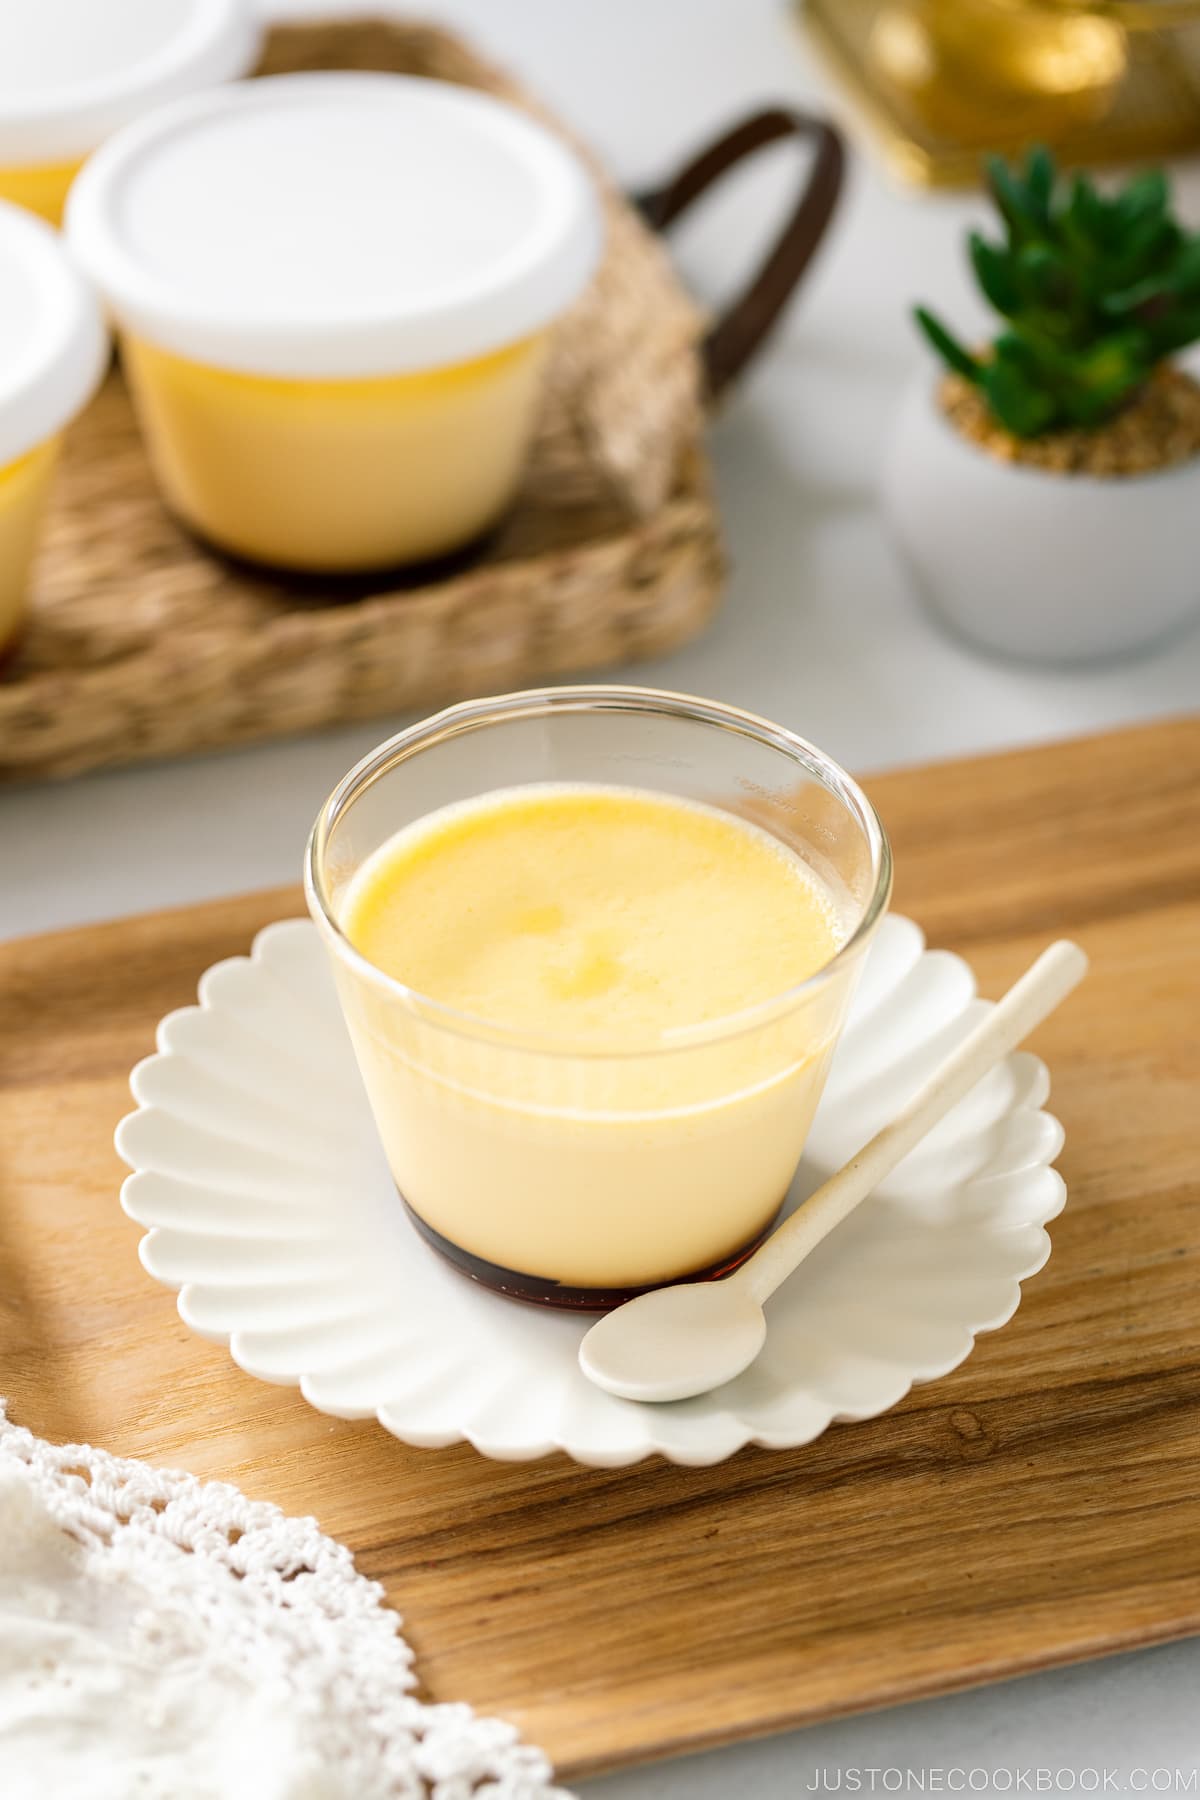
See the picture above. On the left side, the custard is perfectly cooked, with a super silky and smooth texture. On the right side, the custard wasn’t gently cooked, so you can see many honeycomb-like holes in the custard. These holes are called “su” (スがたつ, スが入る), and purin with these small holes is considered a big failure in Japan. Air bubbles form on the surface or inside the egg mixture when the temperature is too high or overheated.
Tip #5: Do Not Overcook
Probably the most important question is: How do you know when it’s cooked? Every home cook has different sizes and materials of molds and this gets extremely complicated.
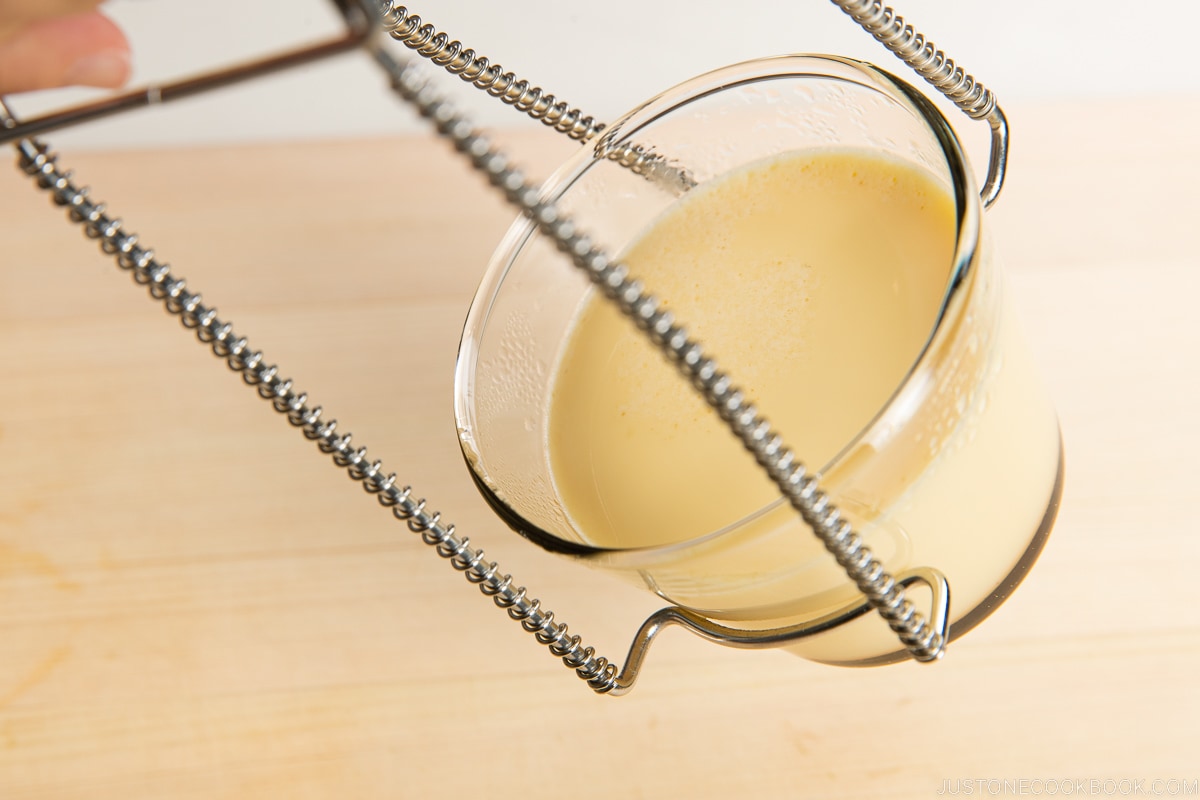
The best way to check is to tilt the mold to see the doneness. If the custard moves, then the center of the purin is not cooked through, so bake it longer. When it’s cooked, the custard won’t move. If it sags a little bit (see the above picture), it’s completely okay and normal; the remaining heat will continue to cook it until it’s firm enough.
Shopping Tip: Get this Hot Plate Gripper. This tool is extremely helpful when we take out a hot plate or bowl. I use it for chawanmushi cups, too!
FAQs
Can I use plant-based milk?
Yes, you can, but the custard won’t have the same flavor and won’t be as rich as the whole milk.
Can I reduce the sugar?
You can reduce the sugar for the custard slightly, but don’t omit it. You can definitely reduce the amount of caramel sauce.
How long can you keep purin in the refrigerator?
I’d say 3-4 days, but I recommend consuming it sooner as it contains eggs and dairy.
Can you freeze purin?
Unfortunately, you can’t freeze the baked/steamed purin; however, you can freeze my No-Bake Purin, which is made with gelatin.
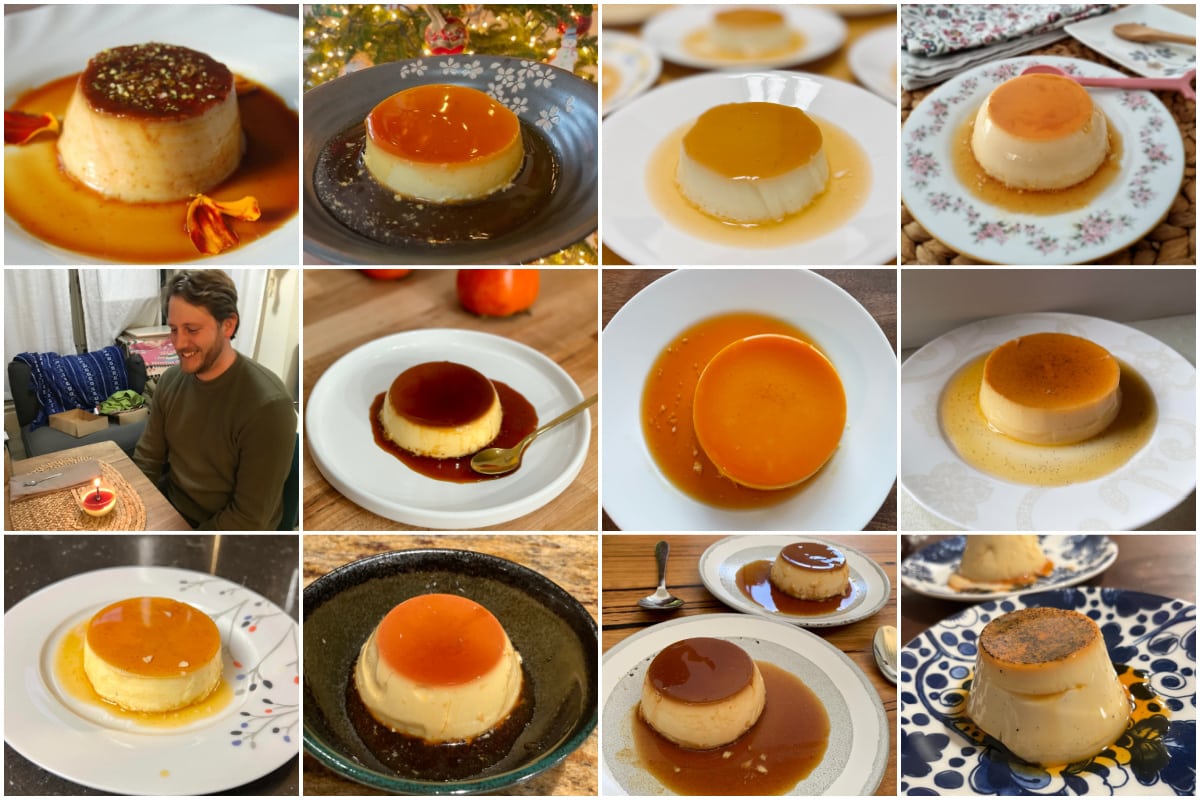
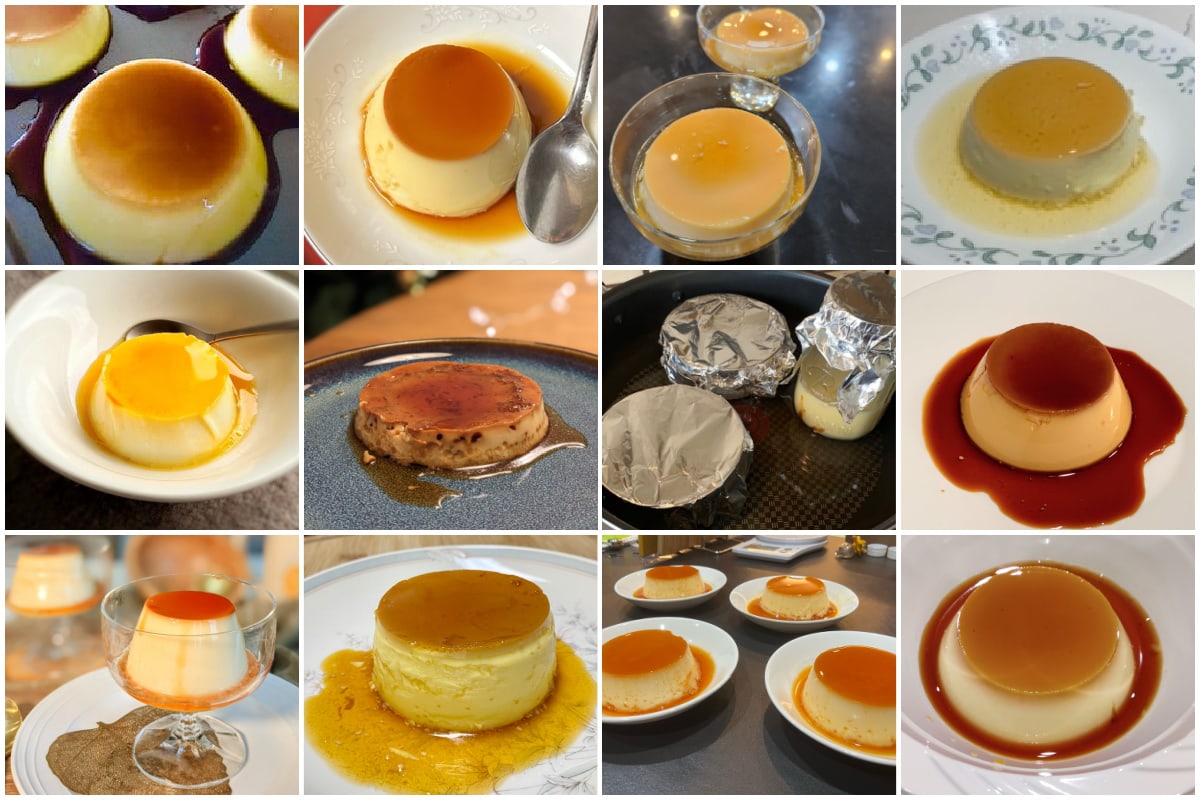
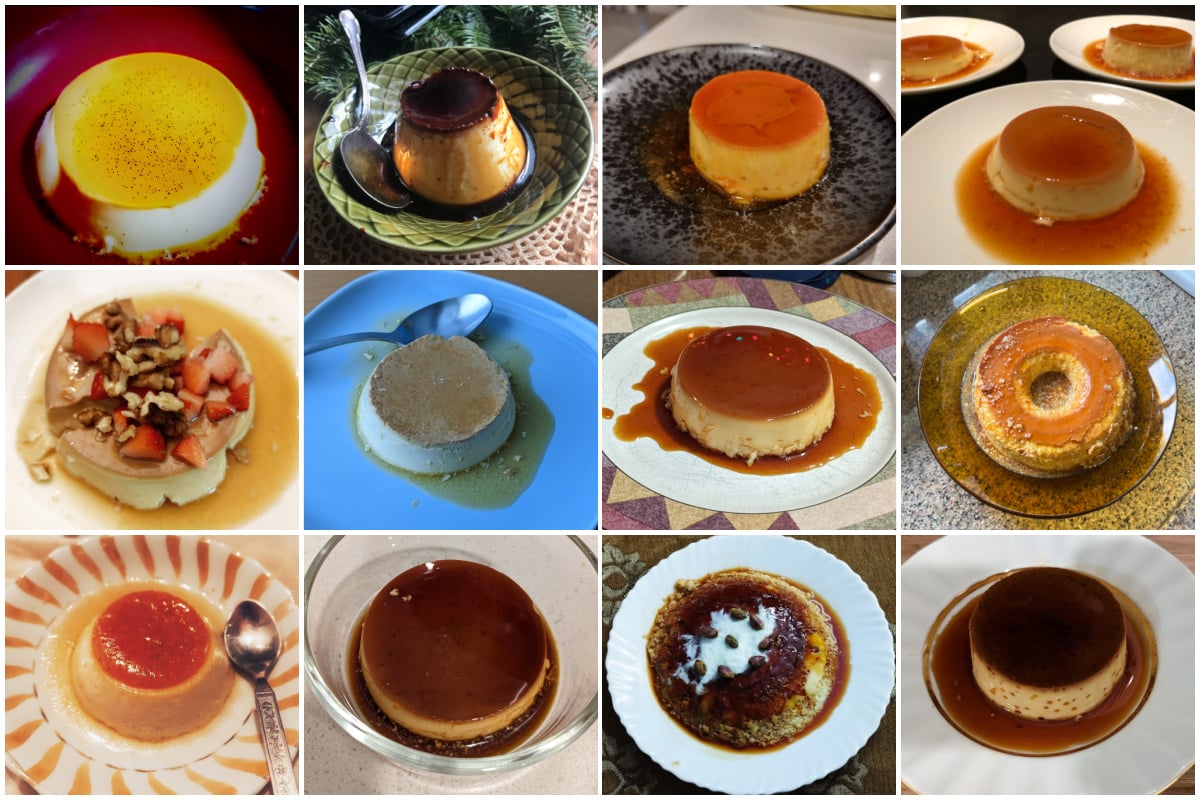
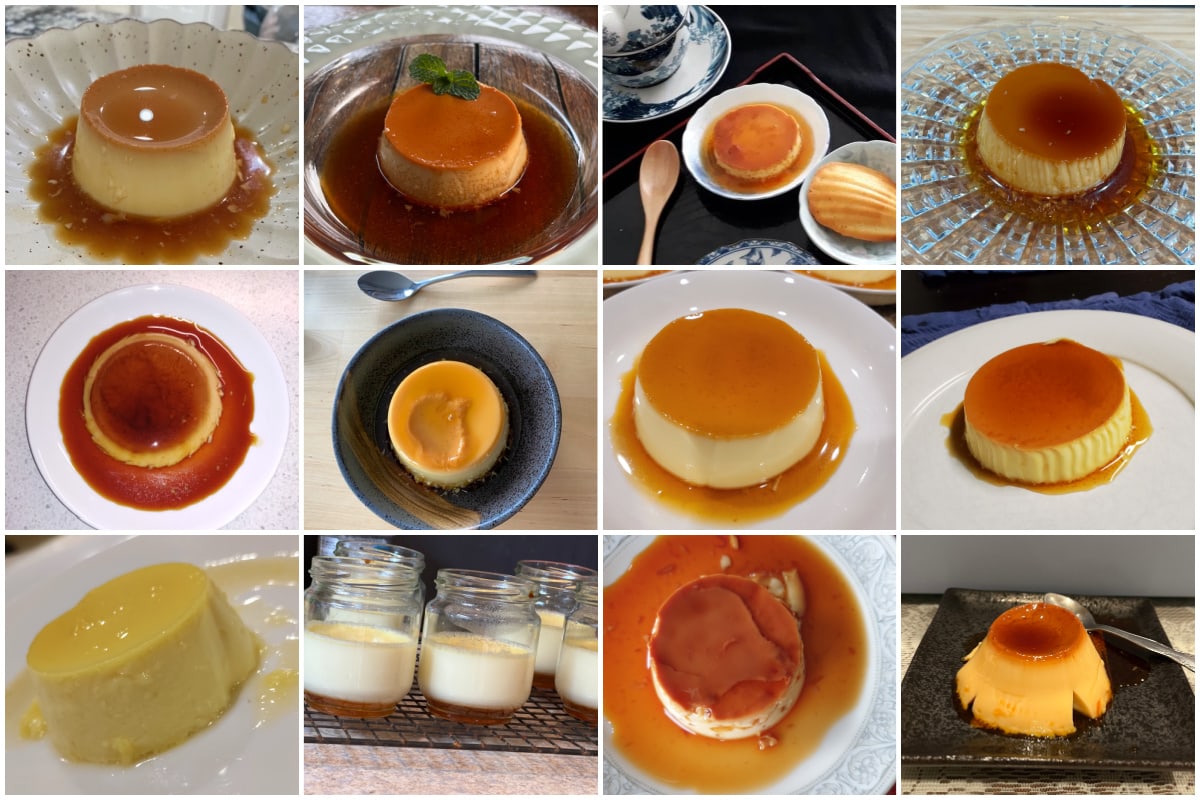
Readers’ Purin
Purin was the challenge recipe for JOC Cooking Challenge December 2022. Check out the delicious purin created by JOC readers!


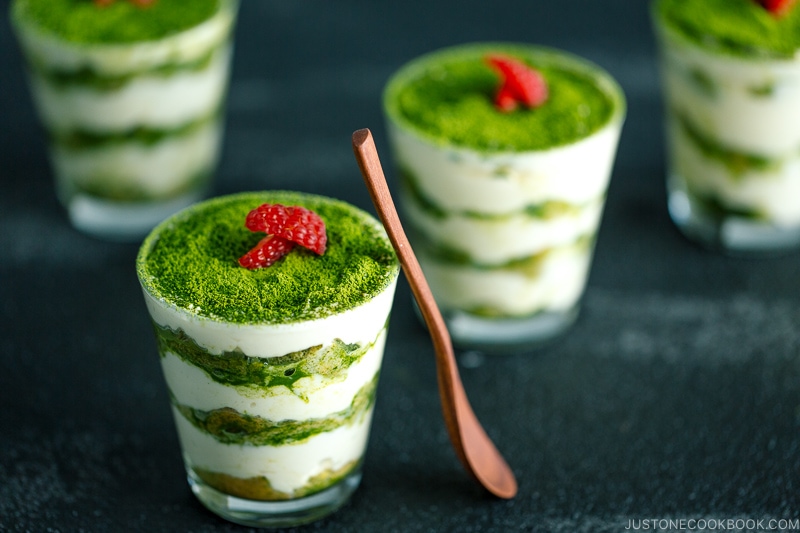
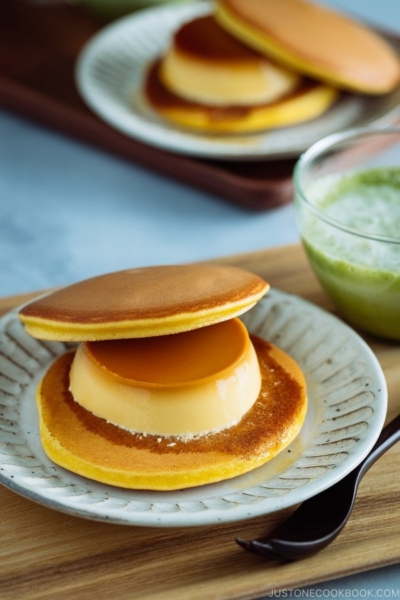
Japanese Dessert Recipes You May Enjoy
Wish to learn more about Japanese cooking? Sign up for our free newsletter to receive cooking tips & recipe updates! And stay in touch with me on Facebook, Pinterest, YouTube, and Instagram.
Purin (Japanese Custard Pudding)
Ingredients
For the Caramel Sauce
- 70 g sugar (about 5 Tbsp; use only granulated sugar)
- 1 Tbsp water (at room temperature)
- 1 Tbsp hot water
For the Custard
- 400 ml whole milk (1⅔ cups; I highly recommend whole milk for the best result)
- 100 ml heavy (whipping) cream (6 Tbsp plus 2 tsp; or use an equal amount of whole milk)
- ½ tsp pure vanilla extract (or 1 inch (2.5 cm) of vanilla bean: slice the pod lengthwise with a kitchen knife and scrape off the seeds with the tip of the knife)
- 3 large eggs (50 g each w/o shell)
- 70 g sugar (about 5 Tbsp)
For the Bain-Marie
- 3–4 cups hot water
Instructions
- Before You Start…Please note that this recipe requires 2+ hours of chilling time.
- One batch of the custard mixture makes a little less than 3 cups (720 ml), which can fill five 220-ml molds, six 150-ml molds, or seven 120-ml (4-oz) molds. If your molds are larger, use fewer of them for this recipe.
- Gather all the ingredients. Preheat the oven to 300ºF (150ºC). For a convection oven, reduce the cooking temperature by 25ºF (15ºC). Start boiling about 3–4 cups hot water of water in a kettle (or medium pot) and keep it hot. We‘ll use this hot water later for the caramel and bain-marie.
To Make the Caramel Sauce
- In a heavy-bottomed small saucepan, combine 70 g sugar (about 5 Tbsp) and 1 Tbsp water at room temperature. Avoid a nonstick pot because it‘s too thin and the inner pot color makes it hard to see the caramel color. Turn on the heat to medium low and let the sugar dissolve completely, without stirring. You can tilt the pot occasionally, but otherwise don‘t touch it until the sugar turns liquid.
- When the sugar has dissolved, increase the heat to medium to medium high. Swirl the saucepan once in a while to mix the mixture, but do not use a utensil because it will cause the sugar to crystallize. Tip: This sauce will take about 5 minutes to make, so have the hot water ready to use at that time.
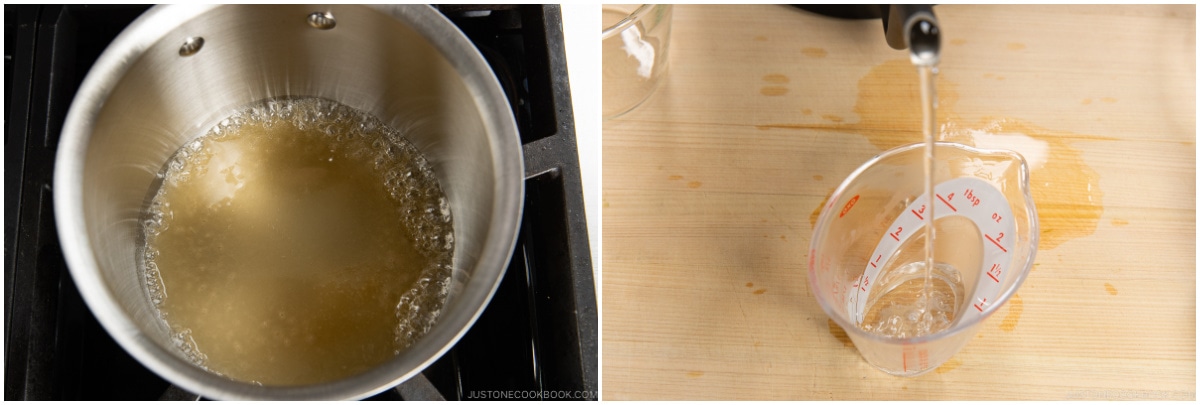
- When the sugar starts to caramelize, you will see lots of small bubbles. It will slowly turn brown on the edges of the pan. Swirl the pot to incorporate the dark-colored caramelized sugar into the light-colored sugar. Soon, the bubbles will become larger as the sugar mixture caramelizes more and turns an amber color.
- The caramelized sugar will continue to turn darker and darker. Keep swirling the pot and watch it closely. After the caramel sauce starts smoking, wait a tiny bit longer until it reaches an optimal dark caramel color. Then, turn off the heat. Tip: I like my caramel sauce to have a dark brown color with a bittersweet taste to balance out the custard‘s sweetness.
- Immediately pour a little bit of the 1 Tbsp hot water onto a spatula into the caramel pot (so your hand is not directly above the pot). The mixture will boil vigorously and sputter, so be careful not to let it splatter on you. Once this has subsided, slowly add the rest of the hot water. Swirl the saucepan to combine.
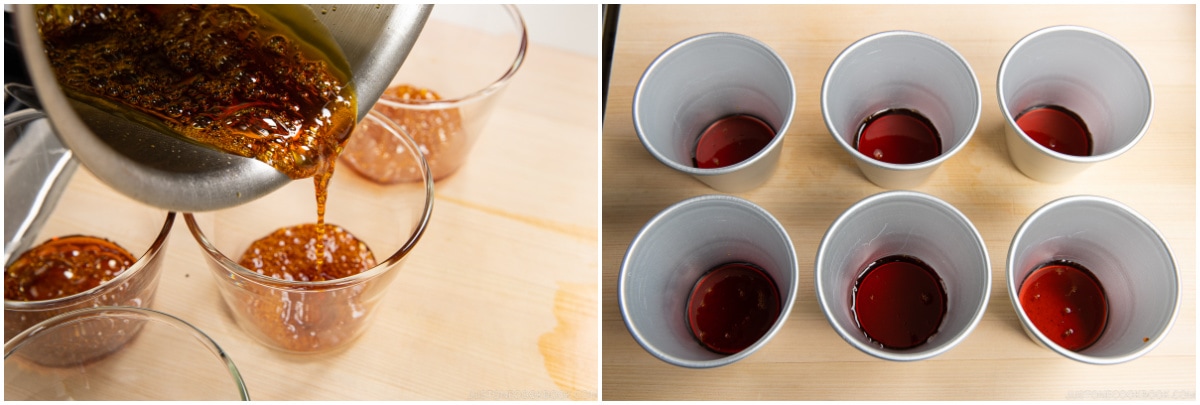
- As soon as the hot caramel sauce is done—and before it quickly cools and hardens—pour it directly from the pot into the molds. Divide the sauce equally among the molds and aim for a thin caramel layer of ⅛ inch (3 mm) or so. Set them aside. Don’t worry if your caramel hardens before it coats the entire surface. When you add the hot milk mixture later, the caramel will melt a bit and the moisture from the caramel will eventually coat the bottom of the mold. Tip: One batch of sauce is enough to cover the bottom of five 220-ml molds or six 150-ml molds. You may want to add less caramel sauce if your mold’s base is narrow, or more sauce if it’s wide (such as 120-ml/4-oz ceramic ramekins). You may have leftover sauce.
- Tip: Do you have some caramel stuck to the pot? Add milk and heat up while stirring. My kids enjoy caramel milk.
To Make the Custard
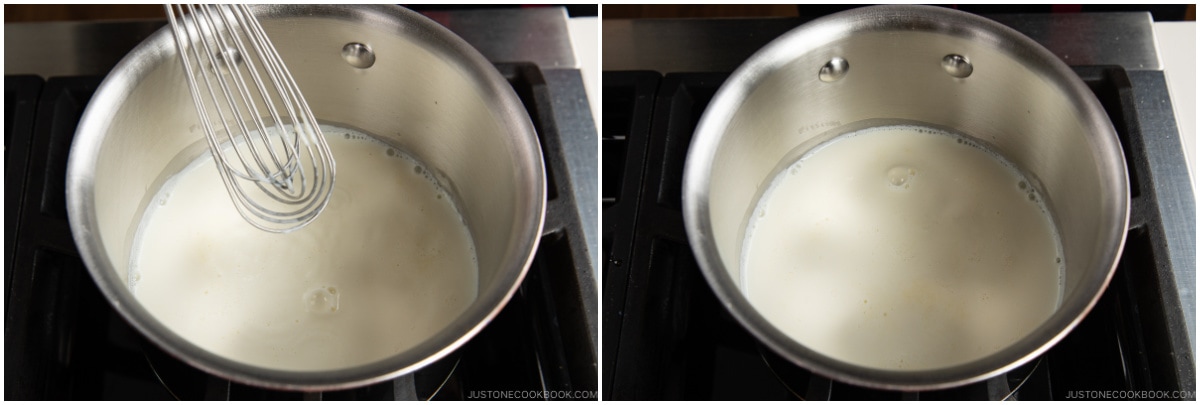
- Combine 400 ml whole milk (1⅔ cups), 100 ml heavy (whipping) cream (6 Tbsp plus 2 tsp), and ½ tsp pure vanilla extract (or the vanilla bean seeds and pod) in a small saucepan.
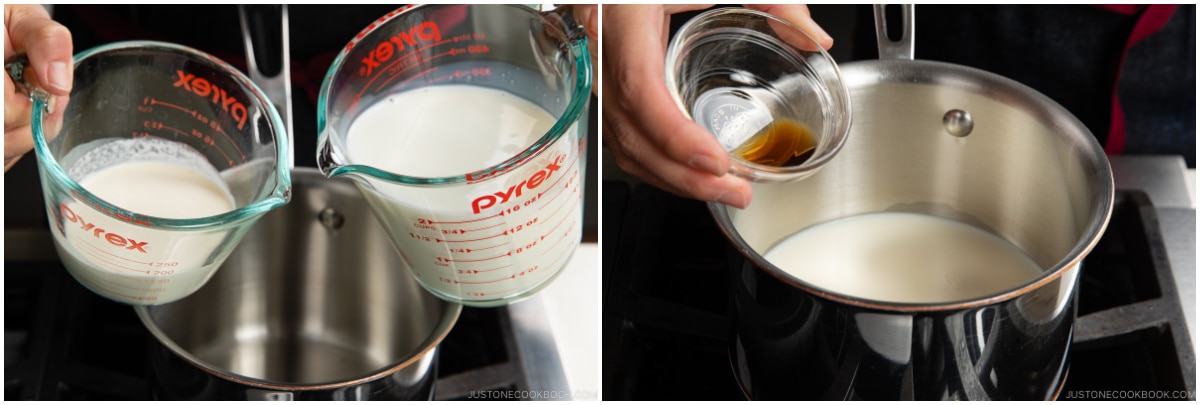
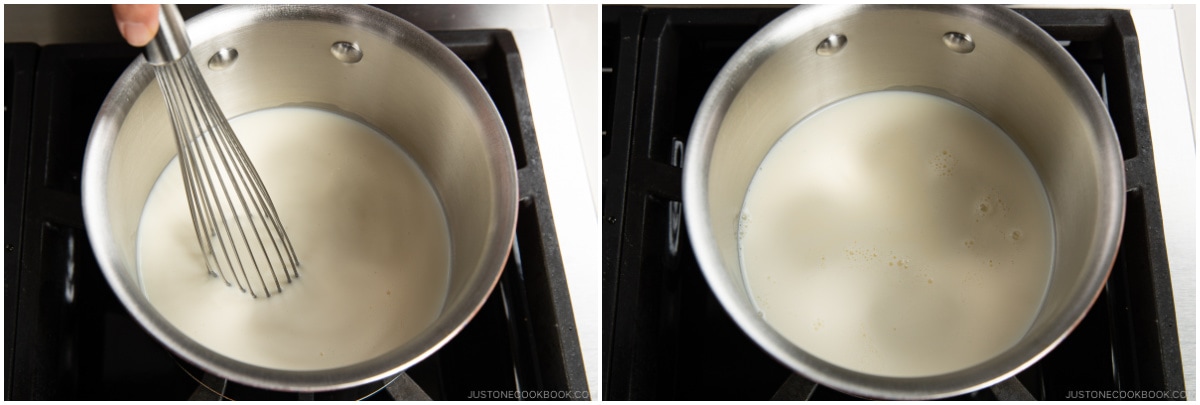
- Whisk it all together. Turn on the heat to medium low and bring the milk mixture to just a simmer.
- Meanwhile, crack 3 large eggs (50 g each w/o shell) into a large bowl and beat with a whisk until smooth.
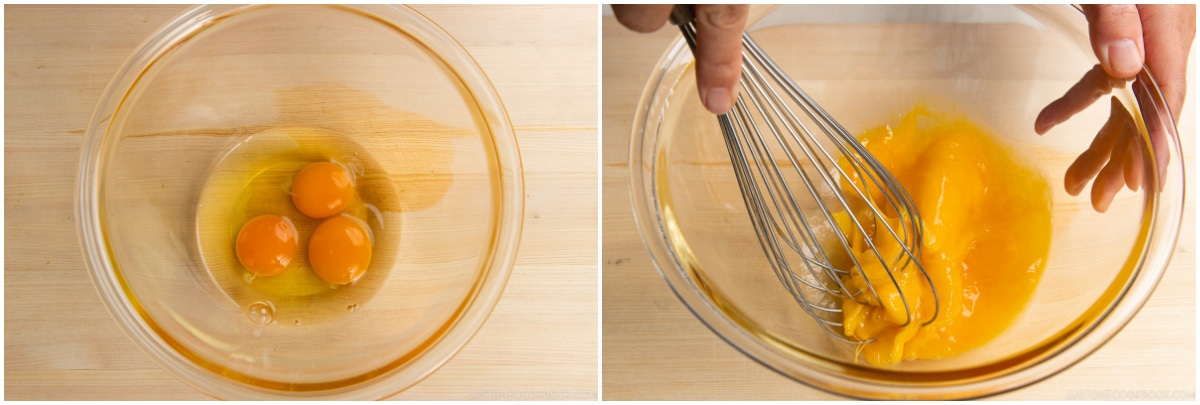
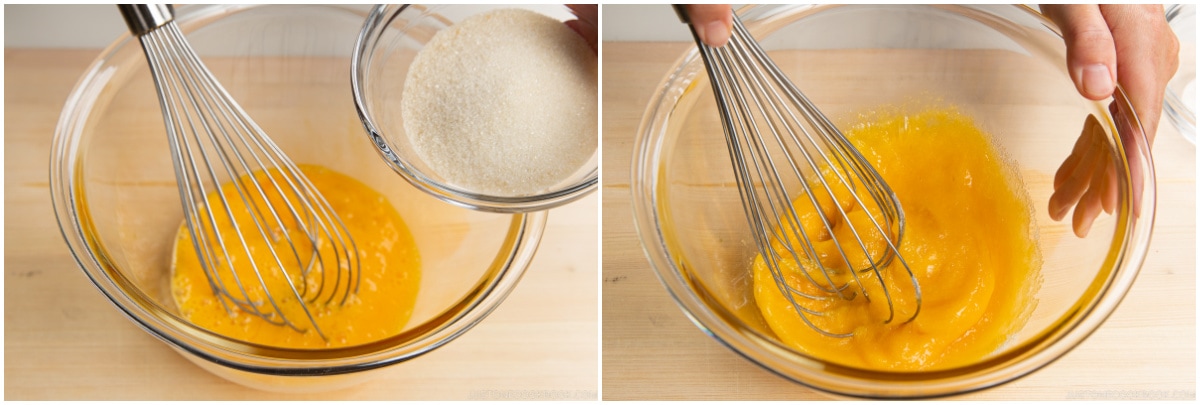
- Add 70 g sugar (about 5 Tbsp) to the eggs and mix until everything is combined.
- When small bubbles start to appear around the edges of the saucepan, turn off the heat.
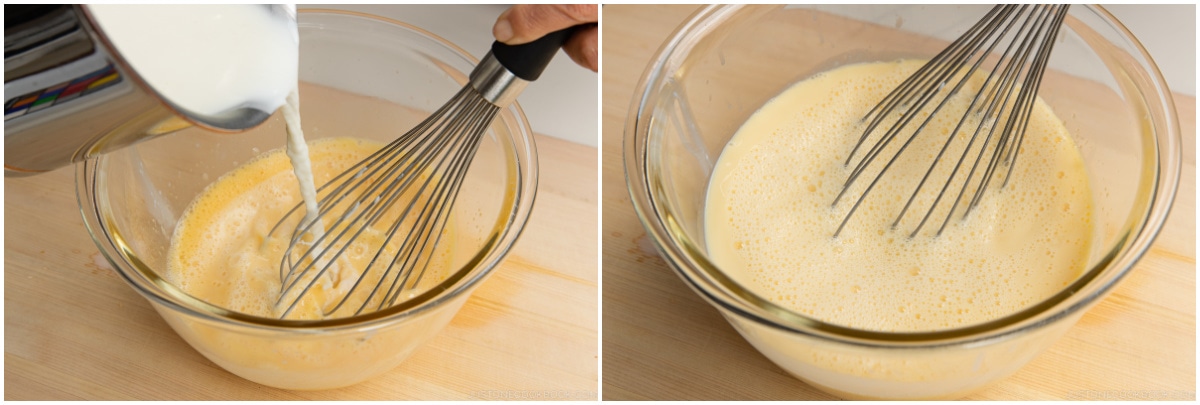
- While whisking continuously, slowly add one-third of the hot milk mixture into the egg mixture. Then, continue to add the rest of the milk mixture slowly, again whisking continuously. Mix it all together. Tip: Add the hot milk mixture slowly to keep the eggs from curdling.
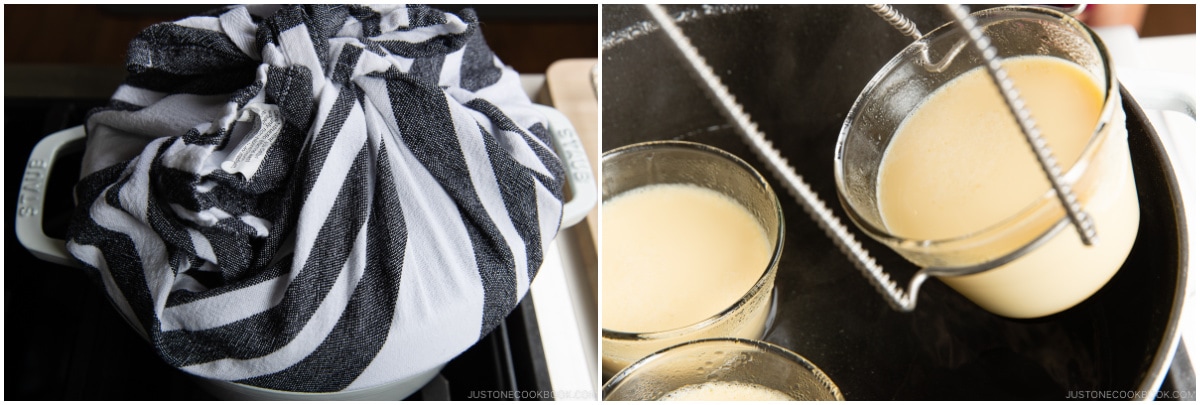
- Set a fine-mesh sieve over another bowl or liquid measuring cup with a spout. Then, strain the custard mixture through the sieve to remove any lumps.
To Fill the Molds
- Evenly divide the custard mixture among the molds with a ladle (or pour it using the measuring cup with spout).
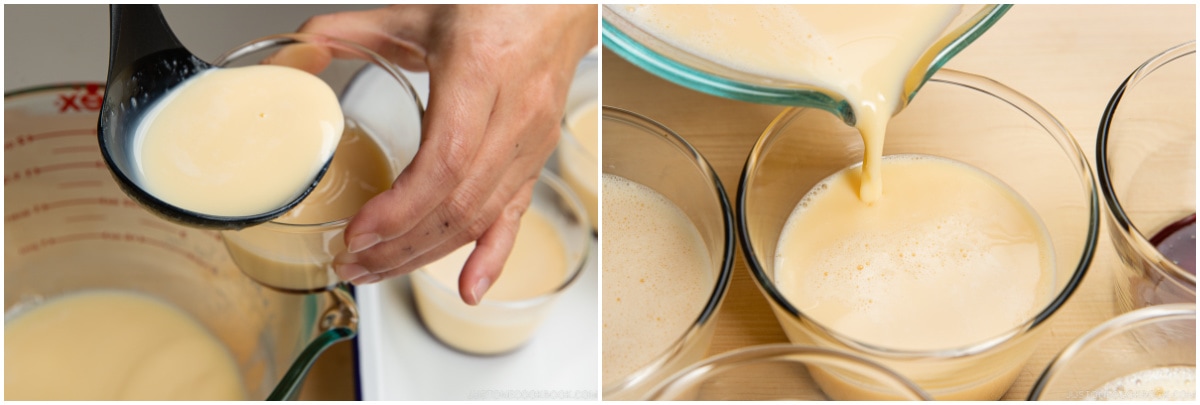
- Make sure all of your molds have an equal volume of custard so the cooking time will be the same.
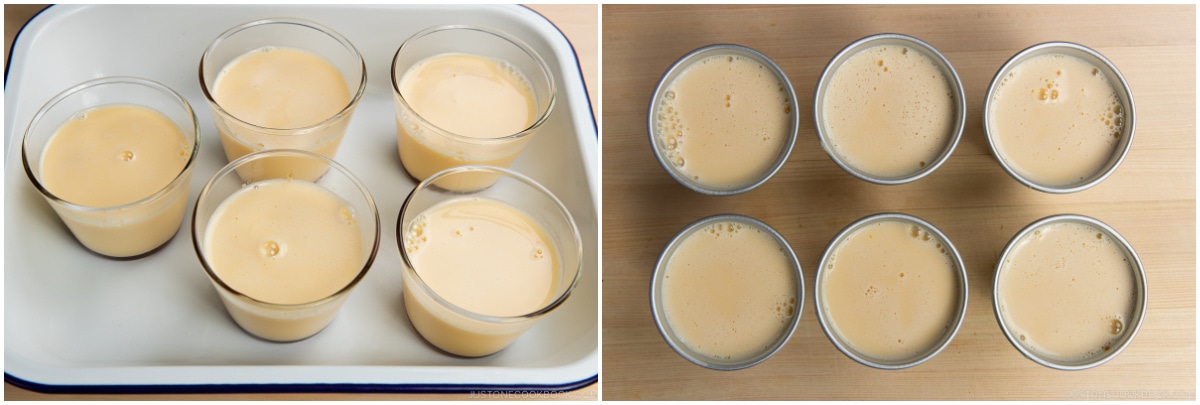
- Burn off the bubbles on the surface of the custard using a long-stemmed utility lighter (candle lighter) by quickly touching them with the flame. You could also pop them with a toothpick or scoop them off with a spoon, but those are both time-consuming methods. Compare the surface of the custard in the previous step with the surface after burning off the bubbles in the image on the right.
To Bake in the Oven (recommended)
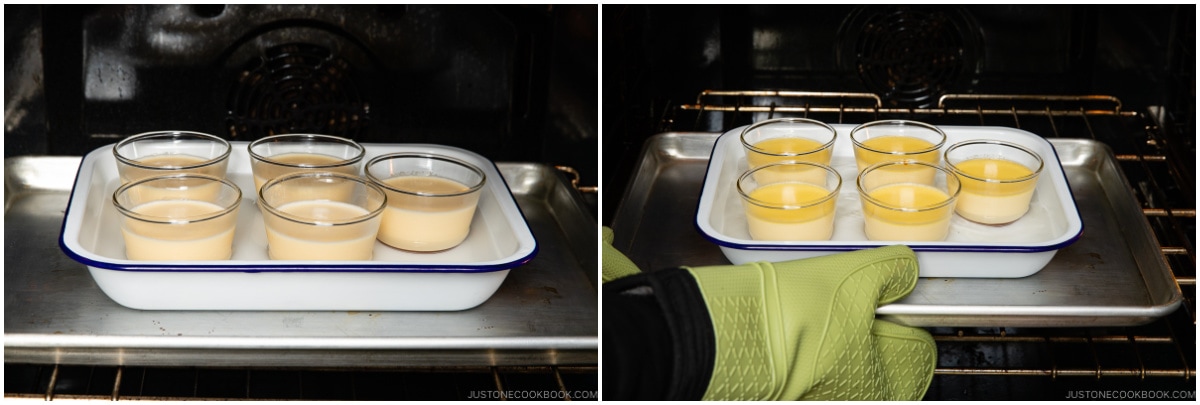
- Place the molds in a baking dish, roasting pan, or rimmed oven-safe container (I use an enamel bake pan) that's at least 2 inches (2.5 cm) deep so you can add hot water to it. Then, put the dish or pan on a baking sheet. This way, you won‘t burn your hands with the hot water as you transfer the pan to the oven. Now, make a bain-marie (hot water bath): Add hot water to the pan halfway up the sides of the molds. Tip: If the water temperature is not hot enough or you pour in too little hot water, the pudding will not set and it will take longer to cook.
- Place the baking dish or pan in the preheated oven. Bake the pudding at 300ºF (150ºC) for 35–45 minutes, or until the custard is set. Then, remove from the oven. How do you know it‘s cooked? See the next step. Tip: The baking time varies depending on the size and material of the molds. If you use larger and thicker molds than mine (like ceramic ramekins), they will need to cook for 45–60 minutes. It took 55 minutes for my seven 120-ml/4-oz ceramic ramekins.
- Check for doneness by tilting the molds. It‘s done cooking if the surface of the pudding is slightly wobbly and jiggles, but is no longer liquid and does not move.
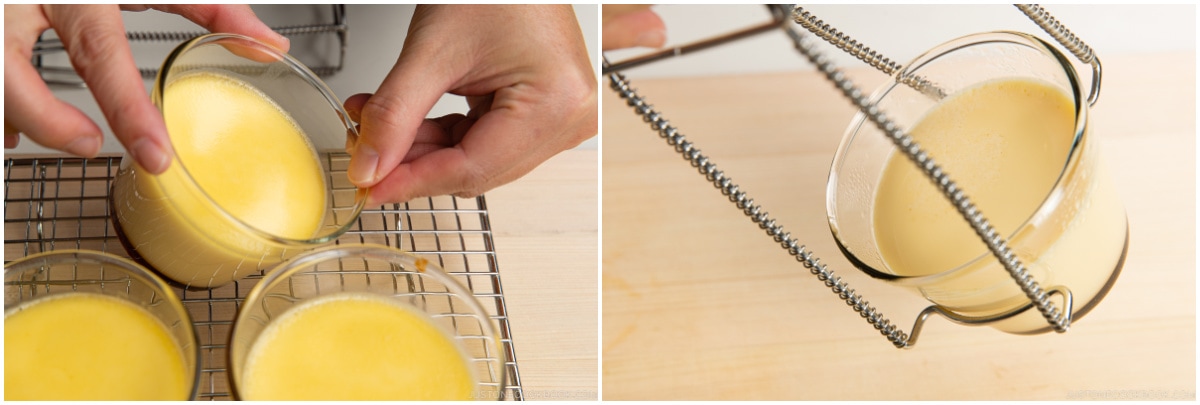
- Take out the molds from the water bath (I use a hot plate retriever). Let cool completely on a wire rack.

- Once cooled, cover the molds with plastic or aluminum foil and refrigerate for 2–3 hours.

To Cook in a Pot on the Stovetop (optional)
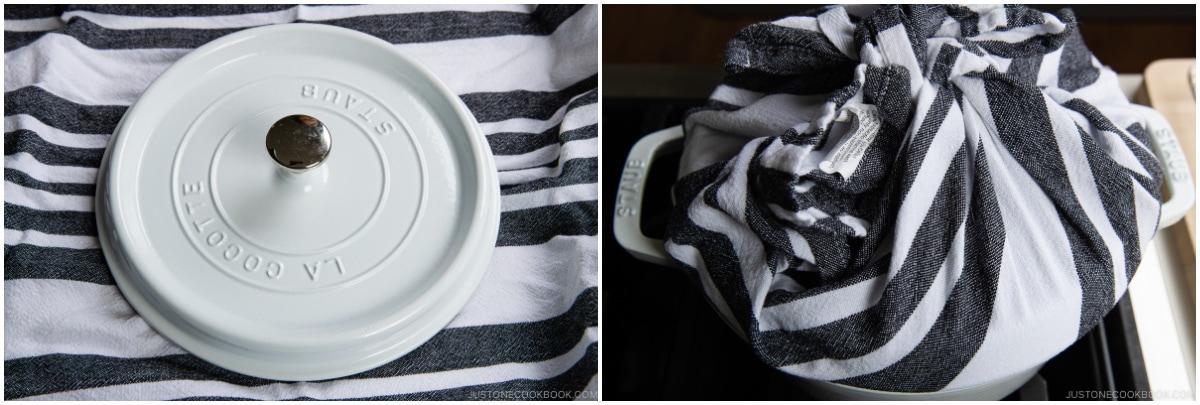
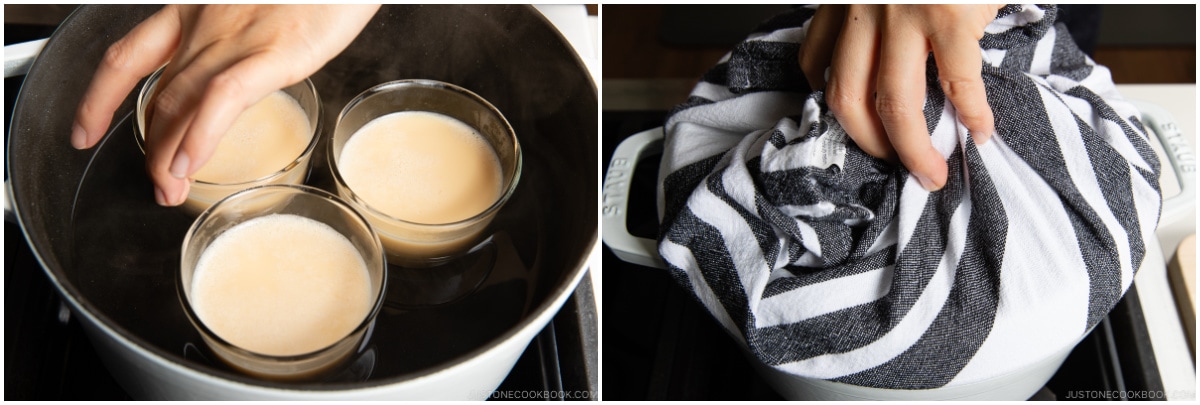
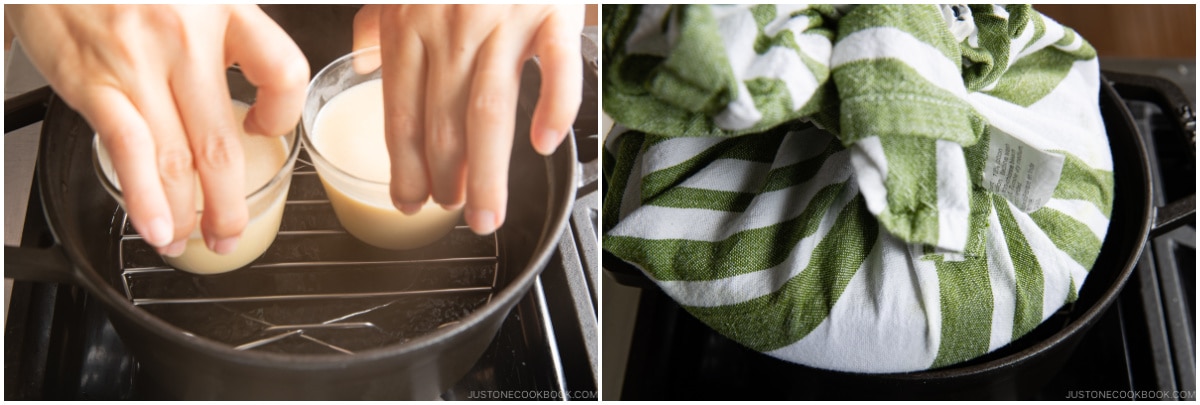
- Instead of baking in the oven, you can cook the custard in a pot on the stovetop. First, wrap the pot‘s lid with a tea towel to prevent condensation from dripping onto the custard. Next, fill the large pot with enough water to reach about halfway up the sides of the molds when you put them in later. Then, start boiling the water. Tip: Make sure there is no excess cloth hanging off the lid, which could catch on fire over the flame.
- Once the water is boiling, turn the heat to low and gently place the molds into the pot. Cover tightly with the lid and simmer gently for 10 minutes. Tip: When you cook on low heat, you will minimize any rattling sounds from the molds moving on the bottom of the pot.
- Then, without opening the lid, turn off the heat. Use the remaining heat in the covered pot to continue cooking the pudding for another 10 minutes. Then, check for doneness by tilting the molds. If the custard doesn't move, it‘s done. If the custard looks slightly liquid and loose, cook for an additional 5 minutes. Let cool completely on a wire rack. Once cooled, cover the molds with plastic or aluminum foil and refrigerate for 2–3 hours.
To Cook in a Steamer on the Stovetop (advanced)
- Place the molds in a hot steamer, leaving the lid slightly ajar to let the hot steam escape. Steam on low heat for 15–20 minutes or until cooked through. Check for doneness by tilting the molds. If the custard doesn't move, it's done. Let cool completely on a wire rack. Once cooled, cover the molds with plastic or aluminum foil and refrigerate for 2–3 hours. Tip: It's not easy to control the temperature with this cooking method. If you‘re new to making Purin, I highly recommend cooking it in the oven or in a bain-marie in a pot on the stove.
To Serve
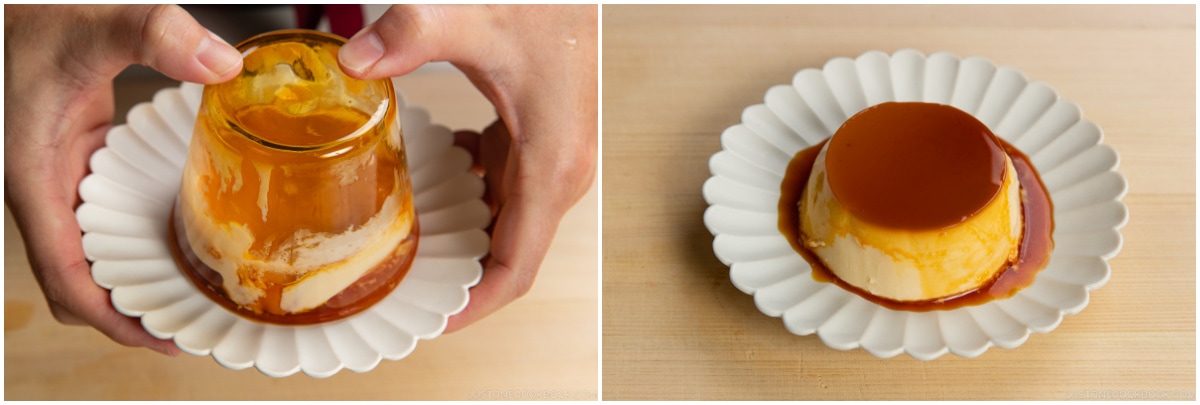
- Run a butter knife or offset spatula around the edge of the molds. Alternatively, use a spoon or finger to gently push down the edge of the purin. Place a serving plate face down on top of a mold.
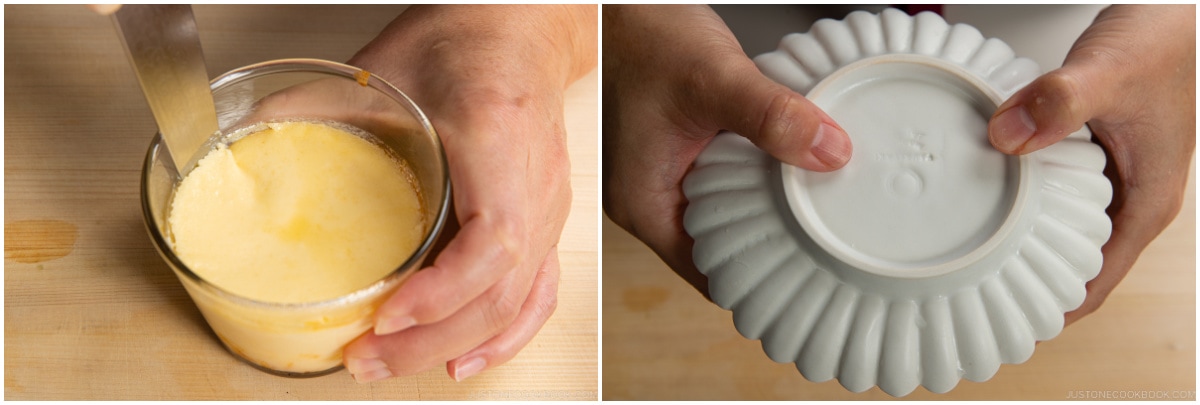
- Flip to release the purin and caramel sauce from its mold and onto the plate. If it doesn‘t unmold, shake it once to see if that helps. If not, try one more time, but this time a bit vigorously. Carefully remove the mold. Repeat with the other molds.
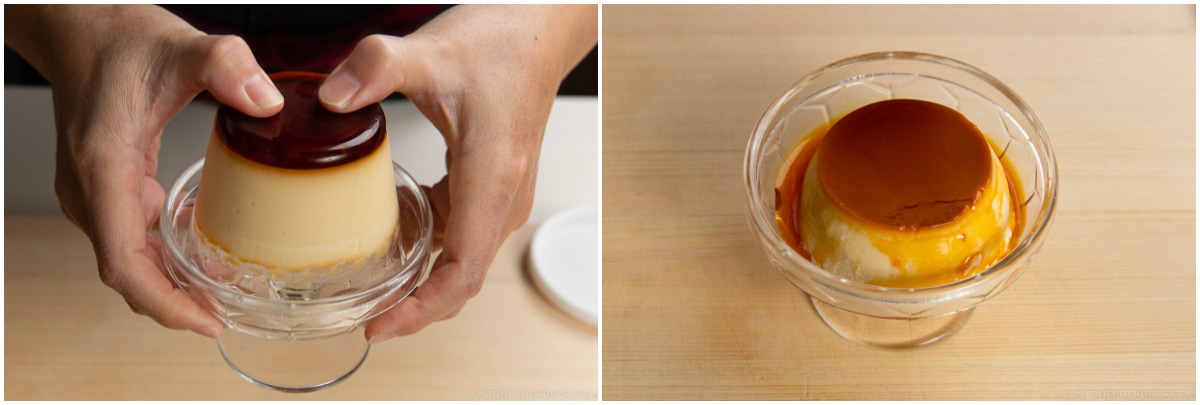
- You can also serve it in a small bowl.
To Store
- Keep the purin in their molds and store in the refrigerator for up to 3–4 days. Remove from the mold right before serving. I recommend consuming it sooner than later for the best taste.
Nutrition
Editor’s Note: This post was originally published on May 10, 2013. It has been updated with the revised recipe, new images, and updated content on November 10, 2022.


Would love to see a classic Japanese version without heavy cream one day!!
Hi Jennifer! Thank you so much for trying Nami’s recipe!
The classic version will only have Milk, Egg, and Sugar. To make it, simply replace the heavy cream in this recipe with whole milk! 😃
We hope this helps!
Can you make this with just egg yolks?
Hi Gemma! Thank you for reading Nami’s post and trying her recipe!
It is possible to make Purin using only egg yolks instead of a whole egg.
But the other ingredient amounts must be adjusted, so this recipe will not work.
Turned out sooo delicious!! I substituted lactaid milk and it came out just as good.
Hi Annie, Thank you so much for trying Nami’s recipe and for your kind feedback!
We are glad to hear that you enjoyed the homemade Purin! Happy Cooking!
I know you can do flan in a sous vide.. I wonder if you could do it with these.
Hi Ken! Thank you for reading Nami’s post and trying her recipe!
We have not tried this recipe in sous vide and are unsure of the results.
Please let us know if you give it a try.🙂
I am 68 years old and you taught me somethings just reading two of your recipes. I am really impressed with your knowledge and ability to teach.
Hi Margo! Aww thank you so much for your kind words. I’m really happy to hear my recipes are helpful and thank you for your sweet feedback, Margo! 🙂 xo
It is lovely…and perfectly not too sweet. I was out of vanilla so used some lemon oil for flavor
Hi Anna! I’m so happy to hear you enjoyed this recipe. Thank you for your kind feedback! xo
Hi Nami!
I’ve been really enjoying your recipes lately. 😊 I made your curry udon yesterday (successfully!) and fresh udon noodles (not so successfully! my mom told me I needed to add more water and knead for longer, whoops. 😅 But I had store-bought noodles for back-up). I’m also excited to try your recipes for oyakodon and steamed vegetables with miso-sesame sauce soon. 💕
Anyway, I would like to make this purin but I’m wondering if I can use 2% milk? That’s usually what we have at home. Should I buy full-fat?
Hi Mariyam! Thank you so much for trying my recipes and I’m so glad you enjoyed them. 🙂 You can use 2% milk, but less rich taste. Hope you enjoy the recipe!
I made this recipe and I managed in a few tries! My friends and family loved it!
Hi Beebee! Thank you so much for trying this recipe! Glad to hear it worked out for you! 🙂
KEEP ON WRITING MORE RECIPIS AND SHARE WITH ME I ENJOY YOUR FOOD
Thank you so much! 🙂
Hi Nami..:)
I tried out this recipe and it really worked out well..:)
Thank you so much..:)
Hi Namita! Thank you so much for trying this recipe! I’m so glad you enjoyed this recipe! 🙂
Hi Nami!
I always wanted to make this custard pudding and lately I found your recipe and brought the finished pudding to a potluck event. It was wonderful! Thank you for sharing this with us!
Much love!
-Rene
Hi Rene! I’m so glad the custard pudding was successful and thank you so much for letting me know. So happy you enjoyed it! xo 🙂
I made this last evening. I couldn’t believe how easy this was! Delicious – everyone in my family enjoyed it.
Hi Charlotte! Thank you so much for trying this recipe! Glad you liked it. You can only make small amount at a time, but it’s pretty easy to prepare while you’re cooking for a meal and serve this as dessert. Thank you for your feedback! 🙂
So I saw this, and thought “hm, I’ve seen this before, sold at the local Mitsuwa for like $1 per serving. Figured I’d give it a shot.
1. It was VERY easy to make, as advertised!
2. I made it for Mother’s Day, and the mom liked it a lot! (BTW, Happy Mother’s Day, Nami!)
3. My father, who worked on boats back in the day, mentioned a similar concoction that he learned to make while as a seaman, but he lost the method… until I demonstrated it for him. 😀
The result!
https://www.facebook.com/photo.php?fbid=10151418304448531&l=70d3b1bb9d
Hi David! So happy to hear your family enjoyed this pudding. So easy right? 🙂 Thanks for the facebook link – I just shared it on facebook. 🙂
It’s nice to know that your father knew this method, too! Thank you so much for the kind words. xo
I just made these, and they’re great! Thanks for the recipe, great as usual.
Hi Rae! Thank you for trying this recipe already! I’m so glad you liked it! Thanks for the feedback!
Thanks for sharing this recipe! The custard reminds me a little of the filling in Chinese egg tarts (ironic because when I was little, I would only eat the filling and not the crust of the tarts). I’ve been thinking of making something sweet and delicious this weekend, and this might just be it!
Also, I hope you have a lovely Mother’s Day and a great time with your family!! Maybe they’ll cook something for you this weekend? =)
Hi Kimmi! Thank you for your kind words! We’ll have a nice brunch plan in a restaurant. Looking forward to it. Hope you enjoy this custard pudding! 🙂
I made this recipe but instead of using a pot on the stove, I used my instant pot to steam the pudding. I just set to steam on low for 10 minutes, and then left in the pot for another 10 minutes before letting to cool. The timing for the caramel was difficult and I got a burnt taste so I will try again tomorrow.
Hi Susie!
WOW!🤩 Thank you for trying this recipe using the instant pot!
We appreciate your input and kind feedback! Thank you!