


This post may contain affiliate links. Please read my disclosure policy.
Recipe Highlights
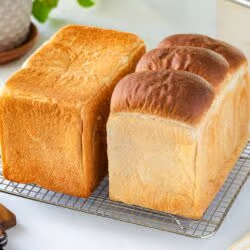
Growing up in Japan, I ate shokupan (食パン) for breakfast almost every morning. Unlike brioche, which relies on eggs and significantly more butter, shokupan is lighter and more delicate, with a subtly sweet, milky flavor. This pillowy-soft Pullman loaf is sometimes called Hokkaido milk bread outside of Japan, named after the region’s famous dairy ingredients.
Here’s why I keep coming back to this recipe:
- Approachable for any skill level – I break the process into clear, manageable steps so even beginner bakers can bake with confidence.
- 1 hour active / 3 hours inactive time – You only need about a 4-hour window, and most of the time is completely hands-off.
- Use everyday ingredients – That milky and slightly sweet flavor comes from simple pantry and fridge staples.
- Your stand mixer makes it easy – My method is designed for smooth, hands-free kneading with minimal effort.
- Incredibly fluffy every time – Even without tangzhong or yudane (湯種), you can achieve a tender, pull-apart texture with a soft, delicate crumb.
If you love working with dough, try my Black Sesame Milk Bread, Curry Bread (Kare Pan), and Melon Pan next!

Why I Updated This Recipe
If you’ve made my shokupan before, you’ll notice the ingredient amounts are about 10% larger. Here’s why.
- The loaf pan size. Most shokupan loaf pans available in the US are too small for authentic Japanese milk bread or sandwiches (sando). For years, the only option was importing one from Japan—and that always bothered me. So we created one ourselves! The JOC Goods Japanese Shokupan Loaf Pan is the authentic bakery size, now shipping domestically and internationally from the US. This recipe is sized specifically for this loaf pan.


- The technique. Once again, I worked with my baking instructor, Mariko Fujimoto, to refine the kneading process and added more detailed guidance for a more reliable, consistent loaf.
- Still using a smaller loaf pan? See the ingredient amount (10% less) in my previous shokupan recipe (pdf) in the recipe card Notes. Follow the new instructions—the improved technique works for any size.

What is Shokupan?
Bread first arrived in Japan with Portuguese traders in 1543, which is why the Japanese word for bread, pan (パン), comes from the Portuguese pão. But for centuries, bread was not widely eaten in Japan.
In the late 1800s, the British introduced a round-topped white loaf. After World War II, American forces brought the flat-topped Pullman loaf to Japan.
Japanese bakers adapted both styles to suit the local palate, and shokupan was born. Today, it’s a staple found in bakeries, supermarkets, and convenience stores throughout Japan—and for many Japanese people, just as essential as rice.


Ingredients for Shokupan
(Baker’s percentages in parentheses)
- Water (71%) – Water temperature matters; see my tips below
- Sugar (6%)
- Diamond Crystal kosher salt (2%)
- Honey (3%)
- Instant yeast (2%) – I use bread machine yeast or SAF instant yeast. Avoid yeast that has been stored in the fridge or freezer for more than 6 months. When in doubt, test-proof it first.
- Bread flour (100%) – I do not recommend organic flour. I use King Arthur bread flour. Its higher protein content (12.7%) helps create the structure and texture I want for shokupan.
- Nonfat dry milk powder or skim milk powder (6%) – I use Bob’s Red Mill nonfat dry milk powder. Shokupan is traditionally made with skim milk powder (34% protein). In the US, skim milk powder can be difficult to find, so nonfat dry milk powder (18% protein) is the closest substitute and works very well here.
- Unsalted butter (7%)
Find the printable recipe with measurements below.
Jump to Recipe
Equipment You’ll Need
- Japanese shokupan loaf pan with lid (1.5 loaf size) – The one from JOC Goods makes the bakery-size loaf sold in Japan. Many Pullman loaf pans sold online are much smaller. Before baking, make sure to read my How to Season and Care Shokupan Loaf Pan.
- Stand mixer – This recipe was designed using the KitchenAid Artisan Series stand mixer (5 QT, 350W) with a dough hook. You can also use the professional series by doubling the recipe and using two loaf pans.
- Digital scale – Always weigh ingredients for bread making. A high-precision digital scale (5 kg / 0.1 g) gives the best results and saves time and ingredients.
- Instant-read thermometer – Helpful for checking dough temperature to make sure you’re on the right track. You can also use it for meat doneness and deep frying.

How to Make Shokupan (Japanese Milk Bread)
Here’s the 5-step process overview for the shokupan recipe. I highly recommend reading the recipe card below for details:
- Make & knead the dough. Combine water, sugar, honey, and yeast, then mix with flour, salt, and milk powder. Knead in stages, adding butter only after the gluten has developed, until the dough passes the Windowpane Test.
- First rise (bulk fermentation). Shape the dough into a smooth ball and let it double in size in a warm place, about 45 minutes to 1 hour depending on your kitchen.
- Divide & bench rest. Deflate the dough and divide it into 3 equal pieces. Shape each into a round boule and rest for 15 minutes so the gluten relaxes before final shaping.
- Shape & fill the loaf pan. Roll each piece into a flat rectangle, fold, and roll into a tight log, and then arrange all three logs, seam-side down, in the greased loaf pan.
- Final rise (final proof). Let the dough rise to 75–90% of the pan’s height.
- Bake at 385–425°F—with the lid on for a flat top, or open for a rounded top. Cool completely before slicing.


Nami’s Recipe Tips
These simple tips will help you make Shokupan perfectly every time.
Kneading
- Control your water temperature – Friction from high-speed kneading raises the dough temperature, so adjust your starting water temperature to match your kitchen. Use lukewarm water in a cool kitchen, cold water in a moderate kitchen, and refrigerator-cold water in a warm kitchen. Your goal is 79–82ºF (26–28ºC) when kneading is completed.
- Add butter at the right time – Always wait until the dough is smooth and clears the sides of the bowl before adding butter. Fat coats the flour and blocks gluten from developing, so adding it too early leads to a dense, crumbly loaf.
- Watch for gluten breakdown – If the dough suddenly turns slack and gooey, the gluten has collapsed from overheating and cannot be saved. Stop the mixer the moment the dough clings to the hook and clear the bowl—that’s your sign to move on to the Windowpane Test. Don’t rely on the timer.
- Do the Windowpane Test – Tear off a small piece of dough and stretch it gently into a square. If it forms a thin, translucent membrane without tearing, your gluten is ready. If it breaks, knead for one more minute and test again.


Proofing
- Create a warm spot for proofing – The ideal proofing temperature is 86–100°F (30–38°C). If your oven has no proof setting, see the Notes section in the recipe card for easy alternatives.
- Avoid extreme heat and direct sunlight – Below 86°F (30°C), fermentation slows or stalls. Above 104°F (40°C), the dough turns slack and loses structure. Direct sunlight overheats the surface and dries it out.
- Use a straight-sided glass bowl – The straight sides encourage the dough to rise upward, making it easy to see when it has truly doubled. Clear glass also lets you watch the fermentation bubbles. I use this straight-sided glass bowl.

Shaping
- Go easy on the flour when shaping – Use no more than 2 tsp of bread flour for the entire shaping process. Too much flour prevents the dough from gripping the surface and can dry out the loaf.
- Keep the surface smooth and taut – Drag the dough toward you on a non-floured surface. The friction pulls the skin tight and traps the gas that keeps the bread plump.
- Apply the same tension to each log – Consistent tension across all 3 pieces means they rise at the same rate, giving you an even, level loaf.
- Handle the dough gently – Slow, deliberate movements only. Pulling or tearing during shaping damages the gluten structure and undoes all that careful kneading.
Baking
- Lower the oven temperature before baking – Preheat to 425°F (220°C), then lower to 385–410°F (195–210°C) just before the loaf goes in. The initial blast of heat gives the dough a strong oven spring.
- Position the rack carefully – Place the rack so the top of the loaf pan sits 6–7 inches (15–18 cm) from the top heating element. Too close and the top will overbrown before the inside is done.
- Slam the loaf pan immediately after baking – As soon as the loaf pan comes out of the oven, slam it firmly on the counter 1–2 times. This releases trapped steam so the sides don’t wilt or cave in.
- Cool completely before slicing – Wait the full 2–3 hours. Slicing while the loaf is still warm lets moisture escape, which dries out the bread and ruins that signature soft texture.


FAQ
General: Do I need to use the yudane or tangzhong method for shokupan?
No—and here’s why I don’t.
Both methods involve precooking a small portion of flour, which causes the starch to gelatinize. This gives the bread a chewier, mochi-mochi texture and keeps it moist longer. The trade-off: the dough is stickier, harder to knead, and doesn’t rise as high.
Most English-language shokupan recipes online use this method, so it may seem like the standard—but it’s not how bakeries and home bakers in Japan traditionally make shokupan. It’s simply another variation.
My recipe is straightforward, easy, and reliable. Starting from scratch, I can make a fantastic shokupan in 4 hours—something I can bake once a week without hesitation.
General: Can I knead Japanese milk bread dough by hand?
Yes, but it’s challenging. Shokupan dough is wetter and stickier than regular bread dough, which makes it harder to develop the gluten properly by hand. A stand mixer is more reliable.
If you prefer hand kneading, I’ve linked a helpful video in the recipe card. The most important rule: resist adding more flour, even when the dough feels too sticky to handle.
Technique: Why is adjusting water temperature so important?
Water temperature is the one variable you can easily control before mixing begins. Why? High-speed kneading generates significant friction heat, which raises your dough temperature fast.
Use this as a starting point based on your kitchen temperature:
- Very cold kitchen → room-temp water, 68–76°F (20–24°C)
- Cool kitchen → slightly cool water, 65–68°F (18–20°C)
- Moderate kitchen → cold water, 61–65°F (16–18°C)
- Warm to hot kitchen → very cold water, 54–61°F (12–16°C)
Bake a few loaves, check your dough temperature after kneading, and adjust up or down by a few degrees until you consistently hit 79–82°F (26–28°C).
Want to go deeper? See the next two FAQs on DDT and the formula.
Technique: What is DDT and how do you hit the target?
Note: This section covers advanced technique. If the water temperature chart in the previous FAQ works for you, feel free to skip ahead.
DDT (Desired Dough Temperature) is the target temperature your dough should reach immediately after kneading. For shokupan, that range is 79–82°F (26–28°C).
Hitting this range gives the yeast the best conditions for a consistent rise and flavor. Too warm and the gluten breaks down. Too cool and the fermentation slows.
In my own baking, I aim for 80°F (27°C)—the lower end of the range—to leave a small buffer before the dough gets too warm.
The water temperature chart in the previous FAQ is a great starting point. But if you want to calculate your exact water temperature every time, use the DDT formula. I’ll show you how I got my numbers in the next FAQ.
Technique: How do you use the DDT formula?
Note: This section covers an advanced technique. If the water temperature chart in the previous FAQ works for you, feel free to skip ahead.
Professional bakers calculate exact water temperature using this formula:
(DDT × 3) − room temp − flour temp − friction factor = water temperature
Understanding the Formula Variables
While the math looks intimidating, the formula becomes simple once you know what each number represents.
- DDT is your target dough temperature. I aim for 80°F (27°C) to leave a small buffer before the dough gets too warm.
- Room temperature is the kitchen temperature during baking time. Measure it with a thermometer for accuracy.
- Flour temperature usually matches your kitchen if stored at room temperature. I keep mine in a cool pantry at a consistent 68°F (20°C).
- Friction factor (FF) is the heat your mixer generates during kneading. For shokupan on a KitchenAid Artisan Series, my FF is 36°F (20°C).
Step-by-Step Example Calculations
You can see exactly how this works in practice by using DDT 80°F / flour temp 68°F / friction factor 36°F:
Fahrenheit:
- Very cold kitchen (room 59°F): (80 × 3) − 59 − 68 − 36 = 77°F
- Cool kitchen (room 68°F): (80 × 3) − 68 − 68 − 36 = 68°F
- Moderate kitchen (room 75°F): (80 × 3) − 75 − 68 − 36 = 61°F
- Warm to hot kitchen (room 82°F): (80 × 3) − 82 − 68 − 36 = 54°F
Celsius:
- Very cold kitchen (room 15°C): (27 × 3) − 15 − 20 − 20 = 26°C
- Cool kitchen (room 20°C): (27 × 3) − 20 − 20 − 20 = 21°C
- Moderate kitchen (room 24°C): (27 × 3) − 24 − 20 − 20 = 17°C
- Warm to hot kitchen (room 28°C): (27 × 3) − 28 − 20 − 20 = 13°C
How to Calculate Your Own Friction Factor
Every mixer and kitchen is different, but you can easily find your own friction factor by tracking a few quick numbers:
- Record your room, flour, and water temperatures before mixing.
- Knead the dough as usual.
- Take the dough temperature immediately after kneading.
- Plug in: (DDT × 3) − room temp − flour temp − water temp = FF
- Repeat for 2–3 loaves and average the results.
My FF test results
KitchenAid Artisan Series 5-Qt / San Francisco kitchen:
- Test 1: 33°F (room 75°F / water 67°F / flour 68°F / dough 81°F)
- Test 2: 39°F (room 68°F / water 68°F / flour 68°F / dough 81°F)
- Test 3: 37°F (room 70°F / water 68°F / flour 68°F / dough 81°F)
- Average: ~36°F (20°C)
Use my figures as a starting point until you calculate your own.
A note on consistency
The formula gives you a precise starting point, but no two kitchens are the same. Check your dough temperature after kneading every time. After a few loaves, you’ll know exactly what works in your kitchen.
Troubleshooting: Why is my dough too sticky to handle?
Shokupan dough is wetter than most bread doughs—some stickiness is completely normal. If it’s still very sticky after kneading, it likely needs more time. Keep going longer than you would with regular bread dough.
Troubleshooting: Why won’t my dough pass the Windowpane Test?
If the dough tears instead of stretching into a thin, translucent membrane, the gluten isn’t fully developed. Here are the most likely causes:
- Under-kneaded – Knead for 1 more minute on Speed 6 and test again. Repeat until it passes.
- Butter added too early – Always wait until the dough is smooth and clears the bowl before adding butter. Fat blocks gluten from forming.
- Dough too cold – Cold dough is stiff and resists stretching. It may simply need extra kneading time.
Troubleshooting: Why is my dough slack and gooey?
If the dough suddenly turns slack and gooey, the gluten has collapsed from overheating—and it cannot be saved.
High-speed kneading generates significant friction heat. Once the dough exceeds 82°F (28°C), the gluten bonds snap and cannot re-link.
To prevent it next time:
- Start with cooler water—see the DDT FAQ above.
- Stop the mixer the moment the dough clings to the hook and clears the bowl. That’s your cue for the Windowpane Test.
- Stay with your mixer during high-speed kneading. The dough can overheat quickly.
Troubleshooting: Why does my dough lose its smooth skin during shaping?
The smooth skin is fragile—once it breaks, it’s hard to recover. Here are the most likely causes:
- Dough sticking to the work surface – If the dough sticks, lift it gently with a dough scraper. Never pull it—pulling breaks the skin.
- Too much flour on the work surface – Excess flour prevents the dough from gripping properly during tension pulling, making it harder to form a smooth, taut skin.
- Skipped or shortened bench rest – If the dough springs back while rolling, it needs more rest. Cover and wait 2–3 minutes before trying again. Never force it.
- Rolling too tightly – Roll the log slowly with gentle, even tension. Too much force ruptures the skin.
Troubleshooting: Why isn’t my dough rising?
There are a few common culprits. Check these before troubleshooting further:
- Old yeast – Never use yeast older than 6 months. When in doubt, start with a fresh packet.
- Mismeasured ingredients –Too much salt, sugar, or flour inhibits yeast. Always weigh with a digital scale.
- Dough dried out – Cover tightly with plastic wrap. A surface crust prevents the dough from rising.
- Dough too cold or too hot – Yeast is most active at 86–95°F (30–35°C). See the warm environment tip above.
Troubleshooting: Why are my dough pieces rising unevenly in the loaf pan?
Uneven rising means one or two pieces are taller than the others before baking. Here are the most likely causes:
- Uneven tension during shaping – Apply the same tension to all 3 logs. A tighter roll rises faster.
- Uneven dough weight – Always weigh each piece on a digital scale. Unequal pieces rise at different rates.
- One piece placed later than the others – Work quickly when shaping, or the first log in the loaf pan will have a head start.
- Uneven proofing environment – Place the loaf pan in the center of your warm spot, away from direct heat sources.
Troubleshooting: Why does my Japanese milk bread loaf have a coarse crumb?
A coarse crumb looks rough and sponge-like, with a strong yeast smell and a loaf that didn’t rise well. Here are the most likely causes:
- Over-proofed during bulk fermentation – The dough rose too fast, often because the kitchen was too warm. Monitor the dough closely, especially in summer.
- Dough temperature too high – If the dough gets too warm during kneading, it weakens or kills the yeast. Use cooler water in warm weather and refrigerate your flour and mixing bowl if needed.
- Over-kneaded – Once the dough is smooth, shiny, and passes the Windowpane Test, stop. Continuing breaks down the gluten, leaving the dough slack with no structure.

Troubleshooting: Why is my loaf dense and heavy?
A dense, heavy loaf usually means the dough didn’t develop or rise properly. Here are the most likely causes:
- Under-kneaded – The gluten wasn’t strong enough to trap the gas. Always knead until the dough passes the Windowpane Test.
- Old or inactive yeast – Use yeast within 6 months and store it in the freezer. Old yeast won’t generate enough gas to lift the dough.
- Under-proofed – The dough needs to fully double during bulk fermentation. Give it more time in a warm spot.
- Too much flour – Always weigh with a digital scale. Never scoop.
- Butter added too early – Always wait until the dough clears the bowl before adding butter.
Troubleshooting: Why is my crumb gummy or undercooked?
A gummy crumb means the inside didn’t set properly during baking. Here are the most likely causes:
- Under-baked – The internal temperature should reach 190–200°F (88–93°C). If the crust looks golden but the inside is gummy, bake longer. Every oven runs differently—use an instant-read thermometer to check.
- Sliced too soon – Cool completely for 2–3 hours before slicing. Cutting in too early releases steam and leaves the crumb gummy.
- Over-proofed – Over-proofed dough can collapse slightly in the oven, leaving a dense, gummy interior.
- Oven temperature too low – Use an oven thermometer to verify your oven’s actual temperature.
Troubleshooting: Why did my loaf collapse after baking?
A collapsing loaf is almost always caused by over-proofing. Here are the most likely causes:
- Over-proofed during the final proof – The gluten structure was too weak to hold its shape in the oven. Stop the final proof at 75–80% for flat-top and 85–90% for round-top.
- Sides caved in after removing from the pan – Slam the loaf pan firmly on the counter 1–2 times immediately after baking. This releases trapped steam before it weakens the sides.
- Oven temperature too low – The crust didn’t set fast enough to support the loaf. Verify your oven temperature with an oven thermometer.
Variations
There are fun and delicious variations on shokupan that you can try and I suggest a few of them here.
- Make it vegan. Swap the honey for maple syrup or agave, the milk powder for coconut milk powder—do not use soy milk powder, as it inhibits the rise—and use Miyoko’s unsalted vegan butter for a delicious plant-based loaf.
- Choose your shape. This recipe makes two classic styles: a flat-top loaf baked with the lid on for clean, uniform slices, or a round-top loaf baked open for a rustic, domed finish.


- Mix in your favorite add-ins. Fold golden raisins or chocolate chips gently into the dough at the end of kneading. Raisins add natural sweetness, chocolate chips make it indulgent, and black sesame adds a nutty, earthy twist.
- Try Black Sesame Milk Bread. This nutty, earthy loaf is perfect for Japanese Mixed Sandwiches.


Different Ways to Enjoy Japanese Milk Bread
Japanese milk bread is incredibly versatile. Here are some of my favorite ways to enjoy it, from breakfast through dessert.
- Simple breakfast toast – Score the slice with a diamond pattern, toast it, and top with butter and jam. For something special, try Ogura Toast—Nagoya’s iconic breakfast with butter, sweet red bean paste, and whipped cream.
- Pizza Toast – Japanese Pizza Toast with homemade sauce, ham, and cheese was my son’s favorite after-school snack.
- Sandwiches (Sando) – Shokupan is the star of Egg Sando, Katsu Sando, and Fruit Sando.
- Sweet treats and desserts – Don’t throw out those sandwich crusts! Turn them into crispy Shokupan Crust Rusks coated in butter and sugar, or use leftover shokupan for sweet, custardy Pan Pudding with caramel sauce.


Storage Tips
To store: Store the whole loaf in a plastic bag in a cool place out of direct sunlight and slice as needed—good for 1–2 days. Do not refrigerate as cold air dries the bread out. For anything beyond 2 days, slice and freeze for up to a month; best within the first 2 weeks.

I’d love to hear how yours turned out! 💛 Please leave a star rating and comment below to share your experience. Your feedback not only supports Just One Cookbook but also helps other home cooks discover recipes they can trust.
Shokupan (Japanese Milk Bread)
Equipment
- Instant-read thermometer, (optional, but highly recommend)
Ingredients
For 1 Rectangular Shokupan Loaf (1.5 kin size)
- 275 g water (determine water temp; see Step 1)
- 22 g sugar
- 11 g honey
- 8 g instant yeast (I use bread machine yeast or SAF instant yeast; see Notes below for substitutes and yeast troubleshooting)
- 385 g bread flour (I use King Arthur; do not recommend organic—see Notes below)
- 8 g Diamond Crystal kosher salt
- 22 g skim milk powder or nonfat dry milk powder (I use Bob’s Red Mill; for vegan, see Notes)
- 28 g unsalted butter (at room temp in winter and cold in summer; for vegan, see Notes)
For Greasing
- ½ tsp neutral oil (for the bowl)
- 10 g unsalted butter (for the loaf pan)
Instructions
To Prep and Find the Ideal Water Temperature
- Gather all your ingredients and weigh them with a digital scale—accuracy is the secret to consistent bread. Water temperature is the one variable you can control before mixing begins. High-speed kneading generates significant friction heat—so starting with cooler water helps keep your dough from overheating. Use this as a starting point based on your kitchen temperature:Very cold kitchen → room-temp water, 68–76°F (20–24°C)Cool kitchen → slightly cool water, 65–68°F (18–20°C)Moderate kitchen → cold water, 61–65°F (16–18°C)Warm to hot kitchen → very cold water, 54–61°F (12–16°C)Bake a few loaves, check your dough temperature after kneading, and adjust water temperature up or down by a few degrees until you consistently hit 79–82°F (26–28°C).In my San Francisco kitchen, I typically use filtered tap water between 67–68°F (18–20°C)—a good starting point to reach the ideal final dough temperature.

To Make the Dough
- In a large glass bowl, combine 275 g water, 22 g sugar, and 11 g honey.Nami’s Tip: I recommend using a large, straight-sided glass bowl for proofing. The straight sides encourage the dough to rise upward rather than outward, while the clear glass allows you to monitor the fermentation bubbles and easily track when the dough has truly doubled in size.

- Whisk in 8 g instant yeast and set aside. Note: If substituting with active dry yeast, combine it with warm water (100–110°F / 38–43°C) and set it in a warm place for 10 minutes until foamy. If no foam appears, your yeast is likely inactive—start fresh to avoid a heavy, dense loaf.

- To the bowl of a stand mixer, add 385 g bread flour, 8 g Diamond Crystal kosher salt, and 22 g skim milk powder or nonfat dry milk powder. Mix until well-combined, then form a well in the center of the dry ingredients.

- Pour the yeast mixture into the well, scraping out every last drop. Fit the stand mixer with the dough hook and lock the bowl into place.Note: Set the empty glass bowl aside—you’ll use it to proof the dough later.

To Knead the Dough
- Knead on SPEED 2 for 2–3 minutes, until a shaggy dough forms. Ensure all the flour is fully incorporated and no dry patches remain.

- Increase to SPEED 4 and knead for 4 minutes. The dough should begin to transition from shaggy to smooth, but will still look slightly rough and bumpy at this stage.

- Increase to SPEED 6 and knead for 3 minutes, or until the dough clears the sides of the bowl. Don't leave your mixer! The machine will shake and may “walk” across the counter. Keep both hands on the mixer at all times to hold it steady.At this stage, the dough should look noticeably smoother and show clear signs of gluten development, though it won’t be fully elastic yet.

- Add 28 g unsalted butter (cut into small cubes for faster incorporation). Nami’s Tip: Check your dough temperature before adding butter—it should be below 79°F/26°C. In summer, use cold butter to help keep the dough cool and prevent overheating (cold butter can bring the dough temp down to ~77°F/25°C); use room temperature in winter.Why add butter last? Butter coats the flour and slows gluten development, so always wait until the dough is smooth and pulls cleanly from the bowl before adding it—this is the secret to shokupan's pillowy, pull-apart texture.

To Kneed in Butter
- Knead on SPEED 2 for 2 minutes, or until no butter streaks remain in the dough.

- *READ BEFORE NEXT STAGE*Watch for the visual cue: If the dough comes together into one piece and clings to the hook, leaving the bowl completely clean, perform the Windowpane Test immediately. The goal is a smooth, strong, elastic dough.Watch closely for friction heat! If the dough exceeds 82°F (28°C), the gluten will collapse into a slack, gooey mess that cannot be saved. To avoid this, stop the mixer the moment you see the visual cue.
To Continue Kneading
- Increase to SPEED 6 and knead for 2–3 minutes. Don't leave your mixer! The machine will shake and may “walk” across the counter. Keep both hands on the mixer at all times to hold it steady.

- At the 2-minute mark, stop and lift the hook. If the dough comes together into one piece and clings to the hook, you are ready for the Windowpane Test. Otherwise, keep kneading on SPEED 6.

- At the 3-minute mark, stop and lift the hook. If the dough clings to the hook, do the Windowpane Test. If the dough doesn’t cling, knead for additional 30–60 seconds and check.Nami’s Tip: See the FAQ if your dough is slack and gooey or if it’s taking too long to pass the windowpane test. My dough usually clings to the hook around the 2–3 minute mark.

To Perform the Windowpane Test
- Tear off a small piece of dough and gently stretch it into a square. Pass if it forms a thin, translucent membrane without tearing. Fail if it breaks; continue kneading on SPEED 6 for 1 more minute and re-test.

To Relax and Finish
- Knead on SPEED 4 for 1–2 minutes. This “relaxes” the dough and smooths the surface after the high-speed work. Nami's Tip: If you're afraid of overkneading, skip the full 1–2 minutes—but do knead gently for just a few seconds before finishing.

- When you lift the hook, the dough should gather in one piece, separating easily from the bowl. The dough should feel soft and smooth with a shiny, silky finish. Remove the dough from the hook. Nami’s Tip: Check the dough temperature. Insert an instant-read thermometer into the center of the dough. It should read 79–82°F (26–28°C). If it's too warm, rest the dough in the fridge for 15 minutes.

To Prep and Transfer
- Lightly dust your work surface. Thinly coat the reserved bowl with ½ tsp neutral oil. Wipe off any excess oil from the bowl and your fingers with a paper towel. Nami’s Tip: I fill my flour duster with 2 tsp bread flour for dusting. Don’t use more than this, or you’ll risk a dry loaf.

- Use a flexible dough scraper to transfer the dough to your work surface. Fold the dough over itself so the smooth side faces up. Tuck the edges underneath to form a smooth oval, then scoop it up with both hands—keeping the smooth side up at all times.

To Slam and Fold
- Slam and Fold: Hold the dough by the far edge and slam the smooth side firmly onto the work surface—bang!Fold the bottom edge up and away from you, then tuck the sides underneath to form a smooth, rounded shape. Scoop it up with both hands, keeping the smooth side up at all times.

- Repetition: Repeat the slam, fold, and tuck 5 times total, until the dough forms a taut, smooth ball.

- Tension Pulling: Cup both hands around the dough and gently drag it toward you, tucking the bottom under to create surface tension. Rotate the dough slightly and repeat until it is perfectly smooth and taut.

- Final Step: Gently pick up the dough, transfer it to the greased bowl, and cover with plastic.

The First Rise (Bulk Fermentation)
- Place the bowl in a warm spot until the dough doubles in size. This typically takes 45–60 minutes, though it may take up to 1.5 hours in a cool kitchen.Nami's Tip: Halfway through, if the dough looks flat, gently reshape it into a tall dome without deflating the air.

To Do the Finger Test
- Dust a little flour on the dough and poke the center with your index finger. If the indentation remains or springs back very slowly, the dough is ready. If it springs back immediately or feels tight, let it proof longer and test again.

To Deflate the Dough
- Turn the bowl upside down to release the dough onto your work surface. Gently press down with your fingers to deflate the air.Nami's Tip: Keep track of the smooth side—place it facing down at this stage.

To Divide the Dough
- Gather the edges into the center and place the dough on the digital scale. Weigh the total, then use the dough scraper to divide it into 3 equal pieces.

- If a piece is too large, pinch or cut a bit from the edge and press it onto the cut edge of the smaller piece, keeping the smooth surface intact.

To Shape into a Boule
- Hold the dough smooth side up. Using both hands, gently pull the dough down on two opposite sides to begin rounding. Rotate 90 degrees and repeat on the remaining sides to complete the smooth boule.

- Place the dough on a non-floured surface. Drag it 2 inches (5 cm) toward you, rotate a quarter turn, and drag again—6 times total—until smooth and taut (see video). Apply the same tension to each piece to ensure an even rise. Repeat with the remaining pieces. Nami's Tip: You need the friction of a non-floured surface to pull the skin tight. If it slides too easily, it won’t get taut.

The Bench Rest
- Cover the dough balls with a lightly misted tea towel and rest for 15 minutes. The dough should feel much softer and more pliable afterward.Nami’s Tip: Wring out your damp towel well before covering. A heavy, wet towel can weigh down the dough and ruin its shape.

To Prepare the Loaf Pan
- Grease the shokupan loaf pan and lid with 10 g unsalted butter (room temp). Apply a thin, even coating, paying extra attention to the corners.

To Roll Out the Dough
- Take out one dough ball, keeping the others covered. Lightly flour the work surface and top of the dough—just enough to prevent sticking. Place the rolling pin in the center of the dough and press down.Nami's Tip: Use flour sparingly. If the dough slides rather than grips the surface while rolling, you’ve used too much flour.

- Roll from the center toward the top edge and the bottom edge. This is to release the gas. Nami’s Tip: If the dough springs back or shrinks, it needs more rest. Cover and wait 2–3 minutes. Never force it—forcing the dough can cause the log to unravel or tear during baking.

- Use the heel of your hand to flatten any thick edges and press out any air bubbles.

- Pick up the dough, rotate it 90 degrees, and flip it over. It should lie horizontally in front of you like a rounded rectangle. Gently lift the edges to release tension and let the dough relax.Nami’s Tip: When you flip it, the “smooth side” is now facing down.

- Starting from the center, roll the dough away and back toward you to an even thickness. Square off the corners to form a 7 x 9 inches (18 x 23 cm) vertical rectangle.

To Shape the Dough Logs
- Fold the dough in thirds lengthwise, like a letter. Bring one side to the center, then overlap it with the other side. Press and seal the edges with your fingers to ensure an even thickness. Nami's Tip: If the dough sticks to the surface, lift it gently—never pull, or the delicate surface may tear.

- Place the rolling pin in the center and press it down. Roll the dough away and back toward you, pressing out any trapped air bubbles.

- Fold the two upper corners down to meet at the center, forming a pointed tip. Starting from the tip, roll the dough slowly toward you, pulling gently to create a smooth, taut surface (but not too tight).Nami's Tip: Apply the same tension to each log. Consistent tension ensures the pieces rise at the same rate, resulting in a level, perfectly even loaf.

- Pinch the seam to seal tightly. Place the dough log seam-side down under the damp towel. Repeat with the remaining pieces.Nami's Tip: Keep track of which piece you rolled last.

To Fill the Shokupan Loaf Pan
- Place the first and second dough logs seam-side down at opposite ends of the loaf pan. Ensure the swirl face inward and the sides are touching the walls.

- Place the last dough log seam-side down between the first two. The swirl can face either way. Gently press the tops so they rise at the same rate. If one looks much taller than the others, give it an extra gentle pat down to even out the height.

The Final Rise (Final Proof)
- Cover the loaf pan with plastic wrap and proof in a warm place for about 1 hour, or until the dough reaches. Note: If proofing in the oven, remove the loaf pan 20–30 minutes early to allow time to preheat.Flat-topped: 75–80% of the loaf pan's height. The gap allows room for oven spring—if the dough is too high, you won't be able to close the lid, or it may overflow and get stuck.

- Round-topped: 85–90% of the loaf pan’s height, or until it touches the plastic wrap.

To Preheat the Oven
- Preheat to 425°F (220°C). For a convection oven, reduce by 25°F (15°C). Position the rack so the top of the loaf pan is 6–7 inches (15–18 cm) away from the top heating element.
To Bake
- Remove the plastic wrap.Flat-topped: If the dough has risen past 80%, switch to round-topped—the lid may get stuck. Otherwise, close the lid. Lower the oven to 410°F (210°C) and bake for 25–30 minutes. Round-topped: Spritz the surface with water. Lower the oven to 385°F (195°C) and bake for 25–30 minutes.

To Release and Cool
- Slam the loaf pan firmly on the counter 1–2 times immediately after removing it from the oven. This releases trapped steam so the sides don’t cave in. Follow the next steps quickly so the bottom doesn’t get soggy from residual steam.For the flat-topped loaf, carefully open the lid. If stuck, slam the loaf pan again. Still stuck? Return it to the oven for 2–3 minutes; the heat will help the lid release. Next time, stop the proof at 75% for more room.

- Turn the loaf pan on its side over a wire rack and shake firmly until the loaf slides out. Cool completely for 2–3 hours before slicing. Slicing while hot lets moisture escape, which dries out the bread and ruins the soft textureNami's Tip: Do not wash your shokupan loaf pan! Simply wipe it down with a dry paper towel to remove grease or crumbs. If you must rinse it, dry it immediately and re-season it. Never soak it or leave it wet.

To Store
- Store a whole loaf you’ll eat within 1–2 days in a plastic bag in a cool place and slice as needed. Do not refrigerate, as cold air dries the bread out. For anything longer, slice and freeze it for up to a month, though it is best enjoyed within the first 2 weeks.

To Serve
- Slice the cooled bread with a bread knife. Enjoy it toasted with butter, jam, or honey, or use soft, untoasted slices for classic Japanese-style sandwiches.

Notes
- KitchenAid Classic (275W): Do not double the recipe; the motor is not powerful enough for the heavy dough.
- Professional Series (Spiral Hook): You must double the recipe to engage the hook. Knead 1.5x longer at each step (please use this as guidance).
- Other Brands: Follow the standard steps until the dough passes the windowpane test.
- Hand Kneading: Watch this video for the hand kneading technique.
- Large Straight-Sided Bowl (optional)
- Flour Duster (optional)
- Flexible Dough Scraper (optional)
- Rolling Pin (optional)
- Instant Yeast: Avoid yeast stored for more than 6 months. Once opened, store in an airtight container in the freezer. When in doubt, proof it in warm water first—if it doesn’t foam after 10 minutes, discard and start fresh. To substitute active dry yeast, use 25% more. Note: Avoid using organic flour, as it can inhibit yeast activity.
- Bread Flour: Use King Arthur conventional (12.7% protein). Higher protein helps create the structure and texture I want for shokupan. Avoid organic flour, as inconsistent protein levels affect gluten development.
- Milk Powder: Use skim or nonfat dry milk powder. For vegan, use coconut milk powder; avoid soy milk powder as it inhibits the rise.
- Butter: Use unsalted only. For vegan, Miyoko’s brand is recommended.
- Oven: Place bowls of boiling water in the corners of the oven with the dough in the center (or a pan of boiling water on the lower rack).
- Microwave: Boil a cup of water, then place your covered dough inside next to the cup and close the door.
- Instant Pot: Lightly oil the insert, add the covered dough, and use the Yogurt (Low) setting.
- Countertop: Find the warmest spot in your kitchen, away from drafts and direct sunlight. Cover the dough tightly with plastic wrap.
Nutrition
The nutrition facts shown are generated by an online calculator and are estimates only. Please consult a professional nutritionist for specific dietary needs.
Did you make this recipe?
Tag @justonecookbook on Instagram so we can see your delicious creation!
Editor’s Note: This post was originally published on June 1, 2022, and updated with additional tips and guidance on December 20, 2024. On May 17, 2026, the recipe was revised with 10% more ingredients and republished with new images.