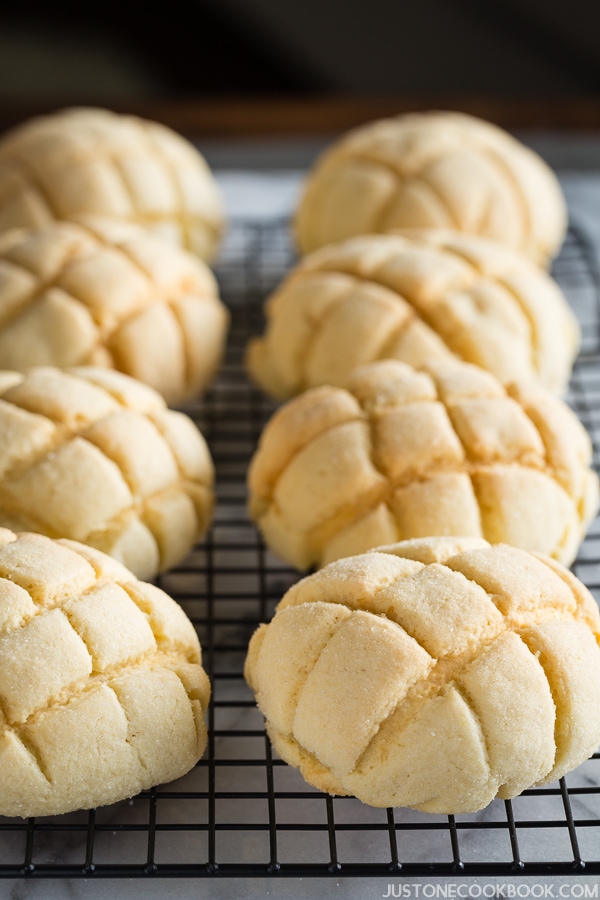
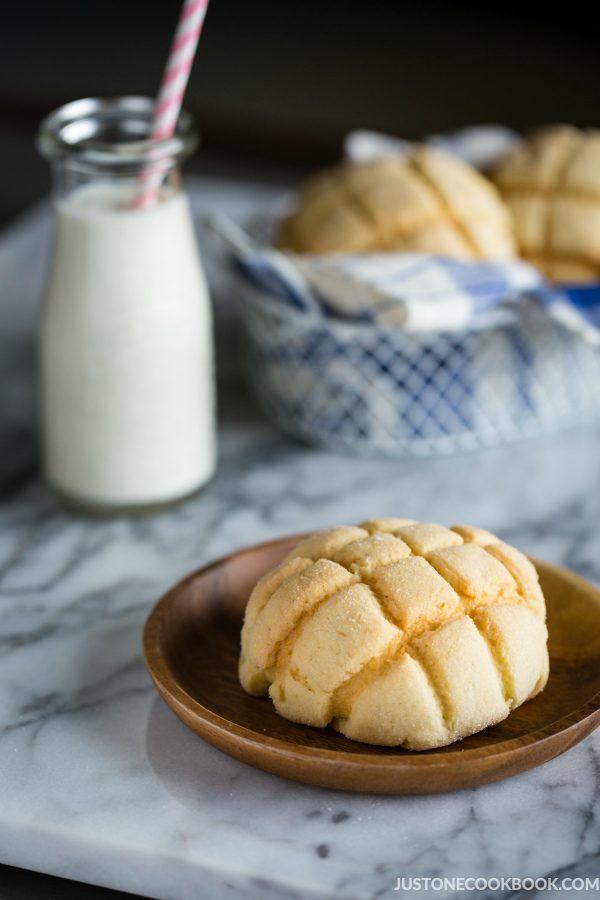
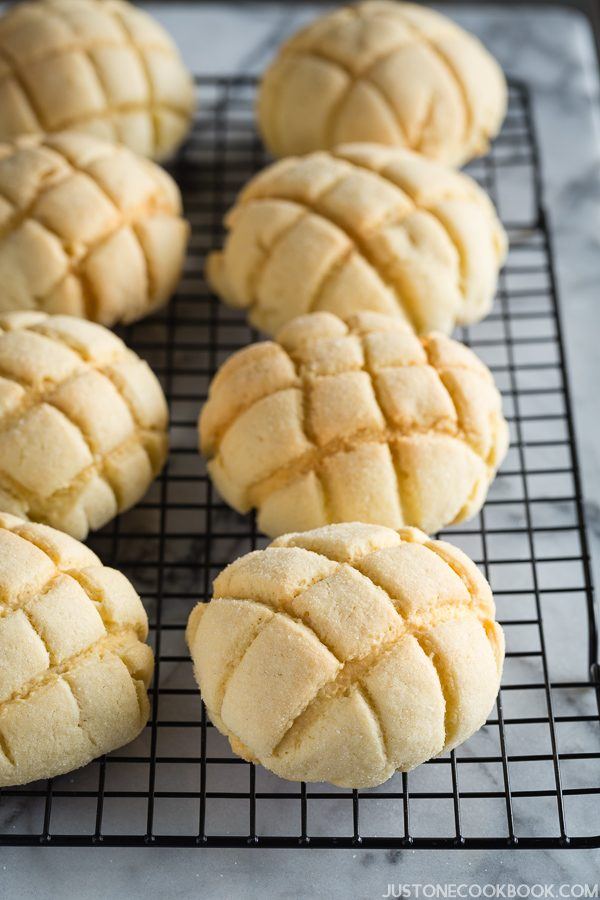
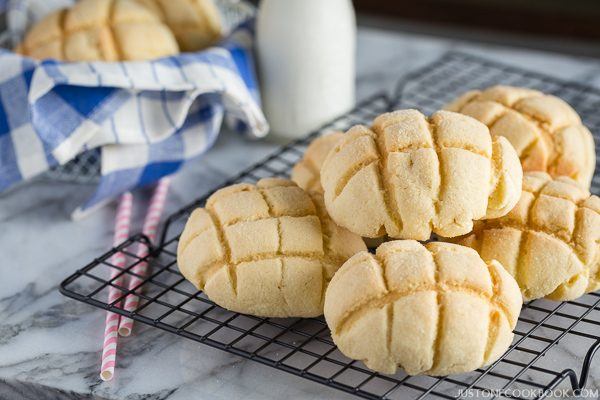
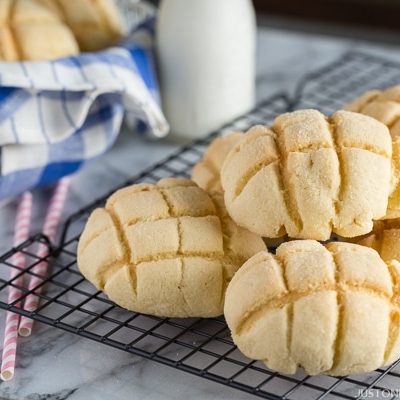
Learn how to make freshly baked Melon Pan in your own kitchen! This classic Japanese sweet bread is covered in a thin and crisp cookie (biscuit) crust with a signature gridline pattern on top. Knead it either by hand or with a stand mixer.
Do you think about the foods that you used to enjoy in your childhood and still long for them once in a while? Japanese sweet bread, or what we call kashi pan (菓子パン), has a special spot in my heart, especially my favorite Anpan (あんパン) and these Melon Pan (メロンパン).
Living abroad, there are not too many Japanese bakeries that sell freshly baked sweet breads; therefore I had to learn to make them myself. Today I’ll show you how to make Melon Pan with both the hand-kneading method as well as the stand mixer method.
What is Melon Pan?
Melon Pan is sweet bread covered in a thin layer of crisp biscuit crust with a crisscross pattern on top. The Japanese word for bread is pan (パン), which came from the Portuguese word for bread.
Now why is it called melon? Traditionally, the bread does not include melon or its flavor. So why did it end up with this name?
There are a few different theories for the origin of this sweet bread’s name, but there’s still no conclusive theory even today.
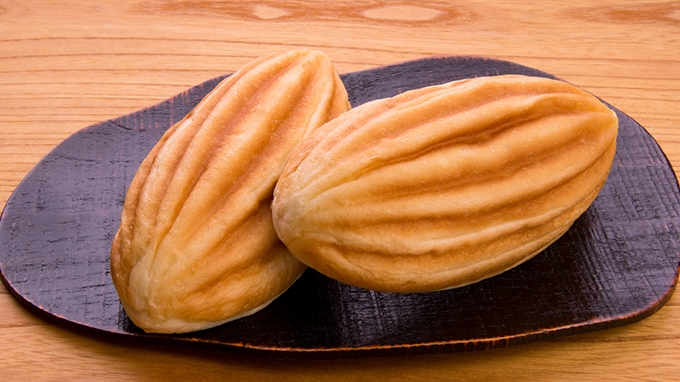
Some say that the original melon pan was invented during the Meiji Era. The bread resembled an oriental melon (マクワウリ) with parallel lines on the crust and was filled with sweet white bean paste called shiroan inside. During that time, the oriental melon was sold as “melon” so they started to call this “Melon Pan.”
In Taisho Era, a similar round bread with biscuit/cookie crust was introduced to western and southern western Japan (Osaka and Hiroshima area), and they named it “Sunrise (サンライズ)” bread.
Later on, this round Sunrise bread started to be sold as Melon Pan throughout Japan, as the appearance resembles a muskmelon, which was (and still is) a highly prized fruit.
Today, if you visit the Kansai area, the football shape bread you see above with white bean paste filling is what they call Melon Pan. They still refer to the round bread with biscuit crust Sunrise bread. Our local Andersen bakery that started in Hiroshima also calls their Melon Pan “Sunrise”. In Shikoku Island, it’s called “Koppepan (コッペパン)”.
Other theories on the origin of the name say the word “melon” comes from “meringue (メリンゲ)”, which is placed on top of the bread dough before being baked.
Maybe we’ll find out the name’s origin one day. Who knew this is quite a mysterious bread?!
How to Make Melon Pan
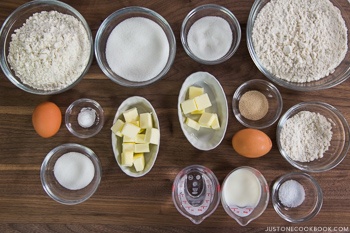
The Ingredients You’ll Need
For the Bread Dough
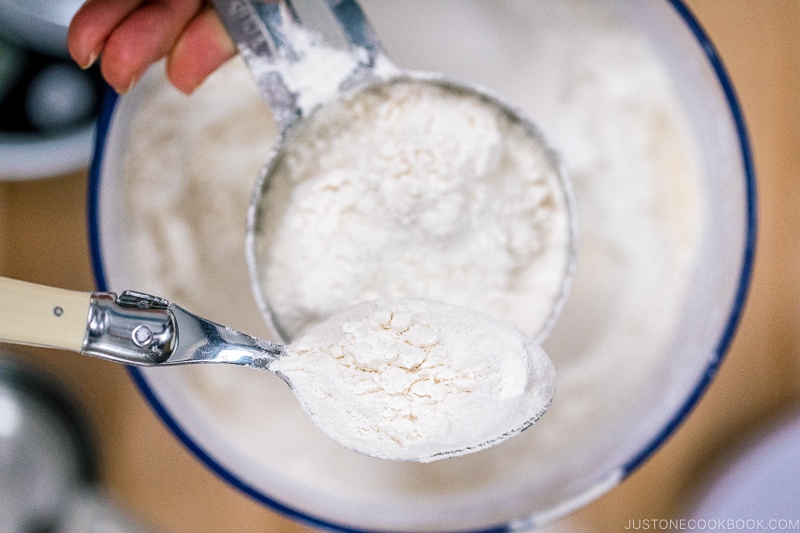
- Bread flour – Weigh your flour using a kitchen scale or use the “fluff and sprinkle“ method and level it off.
- Cake flour – Learn more about cake flour and how you can make it using all-purpose flour and cornstarch.
- Kosher salt
- Granulated sugar
- Instant yeast
- Large egg
- Whole milk – I highly recommend using fullfat milk for this recipe.
- Water
- Unsalted butter
For the Biscuit Dough
- Unsalted butter
- Granulated sugar
- Large egg
- Cake flour
- Baking powder
Hand Kneading Method
Stand Mixer Method
Variations of Melon Pan
There are some varieties that include chocolate chips, cocoa powder, or even matcha, and some bakeries put custard (cream) inside the bun.
In recent years, a lot of bakeries started to add real pureed melon or melon syrup (from either real melon or the green melon syrup we use for shaved ice) in the dough to add “melon” flavors or color. However, for today’s recipe, I made my version with classic ingredients.
Bread Similar to Melon Pan in the World
Does your country have similar bread to Melon Pan?
- Pineapple Bun – Hong Kong, Taiwan, China. We buy this bread from a Chinese bakery and it’s delicious! The biscuit/cookie crust is not as crispy or firm as Melon Pan, so it flakes very easily. Pineapple buns are softer and fluffier than Melon Pan.
- Soboro Bread – Korea
- Rotiboy (Mexican coffee bun) – Malaysia
- Conchas (Mexican sweet bread) – Mexico
Wish to learn more about Japanese cooking? Sign up for our free newsletter to receive cooking tips & recipe updates! And stay in touch with me on Facebook, Pinterest, YouTube, and Instagram.
Melon Pan
Video
Ingredients
For the Bread Dough
- 1¾ cups bread flour (1¾ cups + 2 Tbsp, to be precise; plus more for dusting; weigh your flour or use the “fluff and sprinkle“ method and level it off)
- 3½ Tbsp cake flour (weigh your flour; you can make Homemade Cake Flour)
- 1 tsp Diamond Crystal kosher salt
- 3 Tbsp granulated sugar
- 1¼ tsp instant yeast (for active dry yeast, see Notes)
- 1 large egg (50 g each w/o shell) (beaten)
- 3 Tbsp whole milk (3 Tbsp + 1 tsp, to be precise; at 86ºF/30ºC)
- 3 Tbsp water (3 Tbsp + 1 tsp, to be precise; at 86ºF/30ºC)
- 2½ Tbsp unsalted butter (cubed; at room temperature)
For the Biscuit Dough
- ¼ cup unsalted butter (½ stick or 4 Tbsp; cubed; at room temperature)
- ½ cup granulated sugar
- 1 large egg (50 g each w/o shell) (beaten)
- 1⅔ cups cake flour (weigh your flour; you can make Homemade Cake Flour)
- ½ tsp baking powder
For the Topping
- 2 Tbsp granulated sugar
Instructions
- Before You Start: I highly encourage you to weigh your ingredients using a kitchen scale for this recipe. Click on the “Metric" button at the top of the recipe to convert the ingredient measurements to metric. If you‘re using a cup measurement, please follow the “fluff and sprinkle“ method: Fluff your flour with a spoon, sprinkle the flour into your measuring cup, and level it off. Otherwise, you may scoop more flour than you need.

- Gather all the ingredients. I have 2 videos to help you with this recipe: The hand-kneading method and the stand mixer method. Once you‘ve made the bread dough and biscuit dough—either by hand or using a stand mixer—proceed to Steps 3–5.

★ For the Hand-Kneading Method (Steps 1 & 2) ★
Step 1: To Make the Bread Dough
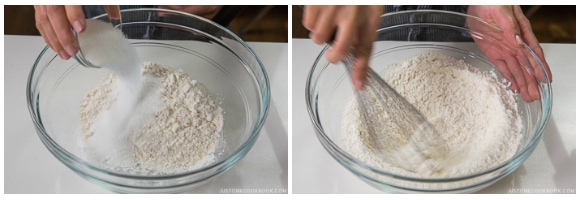
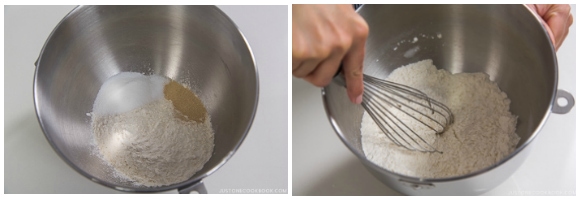
- Mix: To a large bowl, add the first four dry ingredients for the bread dough—1¾ cups bread flour, 3½ Tbsp cake flour, 1 tsp Diamond Crystal kosher salt, and 3 Tbsp granulated sugar. Whisk to combine.

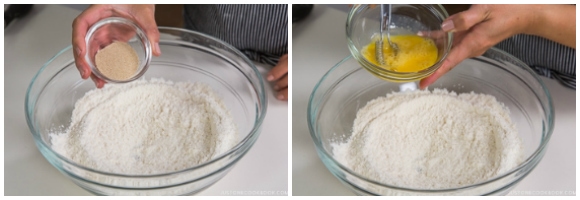
- Next, add 1¼ tsp instant yeast to the bowl and whisk to combine. Then, add 1 large egg (50 g each w/o shell), beaten.
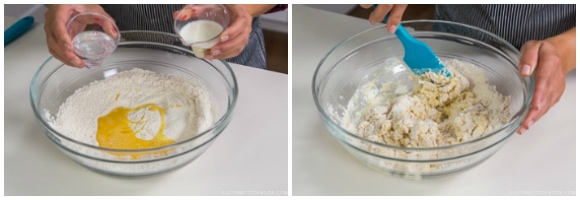
- Add 3 Tbsp whole milk and 3 Tbsp water, both at 86ºF (30ºC). Using a silicone spatula or your fingertips, gently mix the ingredients together until combined. Tip: I highly recommend using whole milk instead of reduced-fat milk.
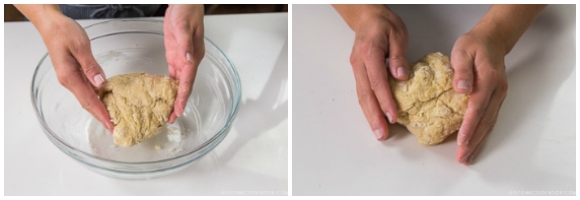
- In the beginning, the dough will feel very sticky and wet, but keep mixing until it forms a loose, sticky ball. This step should take about 2 minutes. Also, use the dough ball to pick up any flour on the sides of the mixing bowl. Transfer the dough from the bowl to a work surface lightly dusted with bread flour.
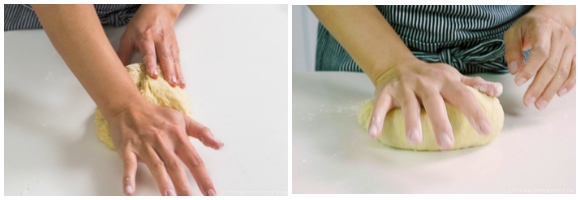
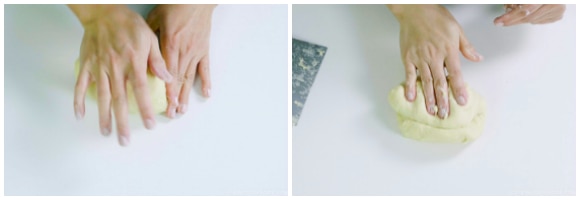
- Knead: To knead the dough, press the heels of your hands into the dough, pushing forward slightly. Fold down the top half of the dough back toward you. Then, rock forward on the lower part of your palm to press it flat and away from you.
- Rotate the dough clockwise slightly, fold the dough down in half, and rock into it again with the lower part of your palm. Knead the dough to lengthen and stretch the gluten strands to make the dough more elastic. Repeat this rotate, fold, and knead process for 5 minutes or so. Tip: Lightly dust your hands with bread flour to keep the dough from sticking too much. If it's still too sticky to knead, sprinkle a tiny bit of bread flour on top and work it into the dough. Add only the minimum necessary to keep the dough from sticking to your hands, as adding too much flour will make the dough dry and hard. Aim for a moist, soft dough that is smooth and pliable and holds a ball shape.
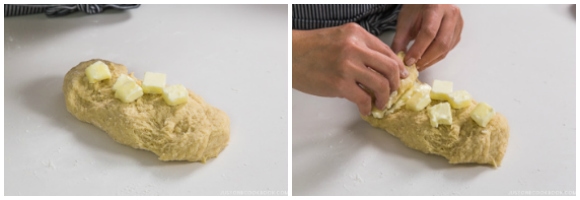
- Add the Butter: After kneading for 5 minutes, the dough will get more elastic. Next, press and stretch the dough until it‘s a flat log about 10 inches (25 cm) long. Put the small cubes of 2½ Tbsp unsalted butter (at room temperature) all over the top of the dough. Roll up the dough, tucking in the butter. Then, continue to knead as before.
- Your hands, the dough, and the work surface will get greasy and messy in the beginning. Don‘t panic; the dough will eventually absorb the butter as you continue to knead. I recommend using a metal or silicone dough scraper once in a while to collect the dough stuck on the work surface. Keep kneading.
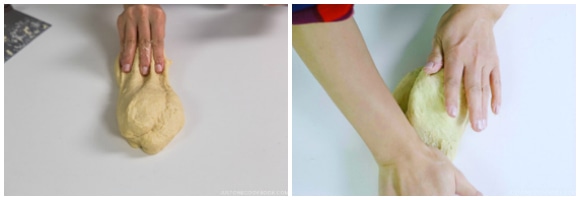
- Slam and Fold: Once the dough becomes very smooth and easy to work with, “slam and fold“ the dough to further develop its gluten (elasticity). First, hold one end of the dough and slam the other end onto the work surface. Bang! Next, fold the bottom end up and over away from you. Then, knead the dough with the lower part of your palm. Pick up the dough, turn it 90 degrees, then repeat this slam-and-fold process. Continue for 10 minutes or until the dough is smooth, supple, and silky. Tip: Don’t let go of the dough when you are banging it onto the work surface and don’t let it rest for too long between turns.
- The Windowpane Test: When the dough feels silky and smooth, it‘s time for the windowpane test to see if the dough‘s gluten is well developed. Either pull on a part of the dough or tear off a small piece. Hold the dough in both hands and gently pull it into a square with your fingers. It should be very elastic, smooth, and shiny. If it‘s strong enough to stretch to a super-thin membrane without tearing and light can pass through the center, your dough passes the test. If the dough tears easily or doesn‘t stretch, the gluten isn’t quite ready yet. Knead it again for another 2 minutes and test again.
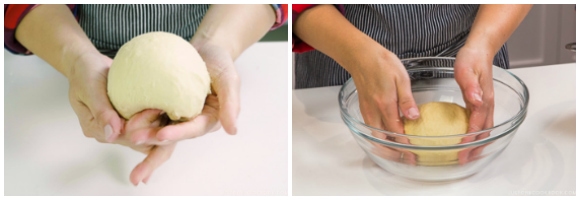
- Form the dough into a ball by pulling and tucking all edges toward the bottom and pinching them together. Place the dough in a bowl with the seam side down.
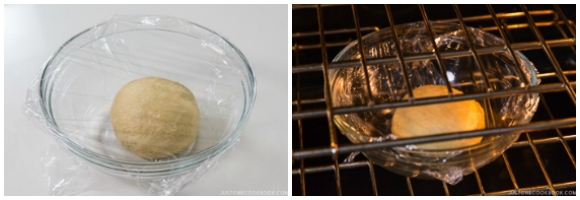
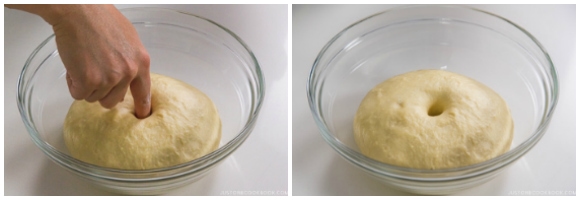
- Bulk Fermentation: Cover the bowl with plastic wrap and let the dough rise in a warm place until it has doubled in size, about 1–2 hours. I use the Proof setting (100ºF/38ºC) in my oven. Tip: If you live in a cooler environment and your oven doesn't have a Proof setting, place small baking dishes of boiling water at the four corners on the lower-middle rack. Then, place your dough in a bowl in the center of the rack and close the door. The steam and heat from the boiling water will create a warm environment for bulk fermentation. If you live in a warmer environment, you may not need to do this; your proof time also may be shorter.


Step 2: To Make the Biscuit Dough
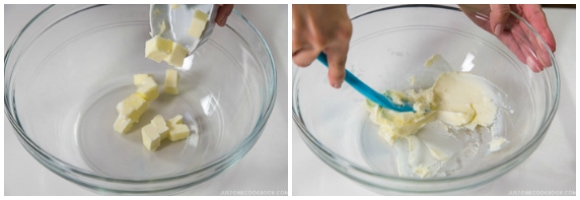
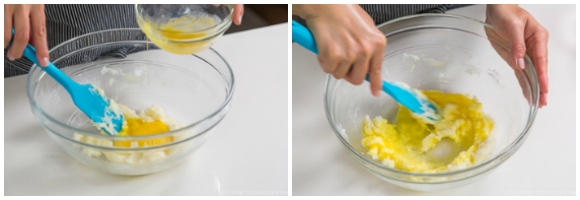
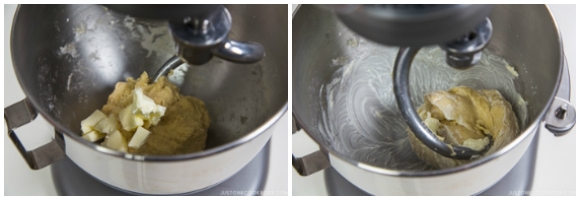
- Mix: To a large bowl, add the small cubes of ¼ cup unsalted butter (at room temperature) and mash it with the silicone spatula until it becomes smooth.
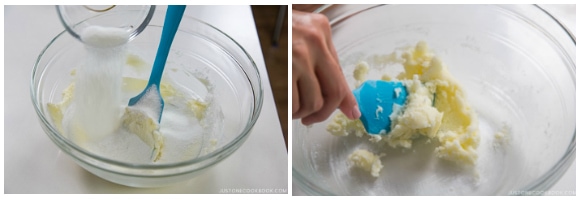
- Add ½ cup granulated sugar to the butter. Mix with the silicone spatula until well blended.
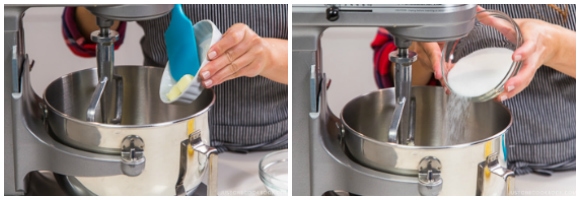
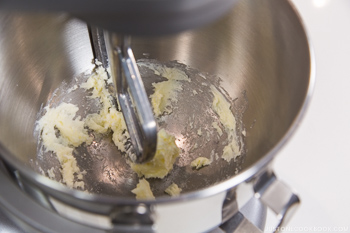
- Slowly add a very small amount of 1 large egg (50 g each w/o shell), beaten, to the bowl and blend well with the butter mixture. Then, add another small amount of the beaten egg and blend. Continue until all the egg is well incorporated.
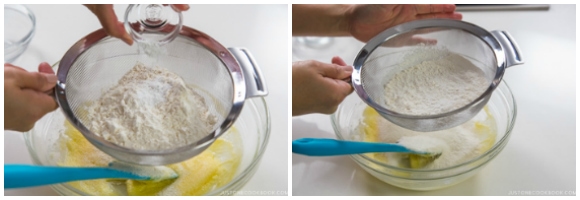
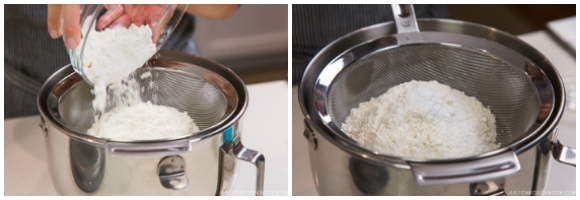
- Sift 1⅔ cups cake flour and ½ tsp baking powder into the mixture.
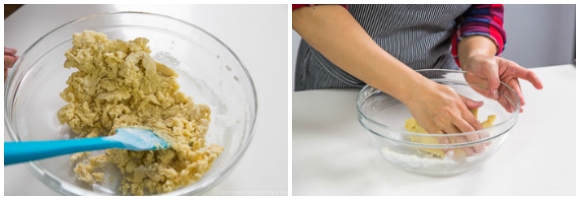
- Using the silicone spatula, mix well until the dry ingredients are just incorporated. Collect the dough with your hands and roll it into a ball.
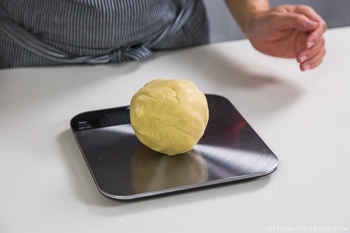
- Divide: Weigh the biscuit dough on a scale. The total dough weight for 10 melon pan should be around 400–410 g. Remember this weight, as you’ll need it later to measure one-tenth portions of the dough.
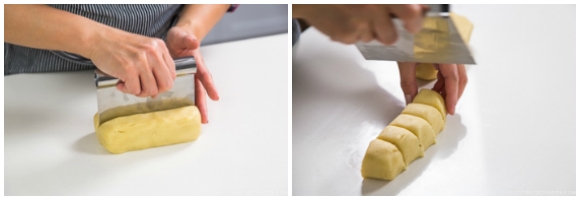
- Roughly cut the dough into 10 pieces for 10 melon pan.
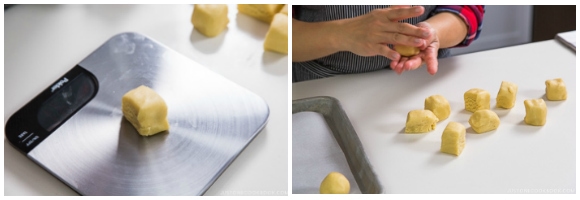
- Divide the total dough weight by 10 (for 10 melon pan) to get the target weight of each dough piece (in my case, 40–41 g). Weigh the biggest piece first. Pinch off some dough if it‘s heavier than the target weight, then weigh again. Repeat until the dough piece reaches the target weight. Repeat with the other dough pieces, pinching off a bit of dough from a larger piece or adding some to a smaller piece by stuffing some dough inside.
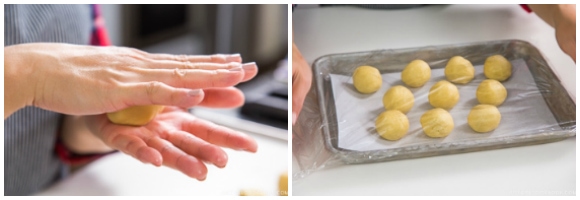
- Pre-Shape: Roll the 10 pieces of biscuit dough into 10 balls. Place them on a baking sheet lined with a silicone baking mat or parchment paper. Cover with plastic wrap and rest in the refrigerator for 10 minutes until it hardens a bit so it‘s easier to handle. Then, proceed to Step 3: To Divide and Pre-Shape the Bread Dough.
★ For the Stand Mixer Method (Steps 1 & 2) ★
Step 1: To Make the Bread Dough
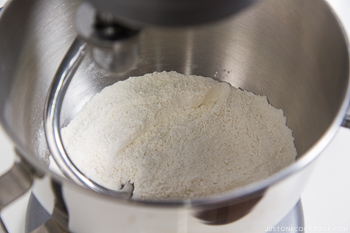
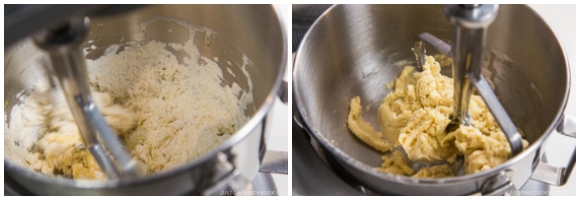
- Mix: In a stand mixer bowl, combine the dry ingredients for the bread dough—1¾ cups bread flour, 3½ Tbsp cake flour, 1 tsp Diamond Crystal kosher salt, 3 Tbsp granulated sugar, and 1¼ tsp instant yeast. Mix together with a hand whisk.
- Set the mixer bowl on the stand mixer fitted with a dough hook attachment.
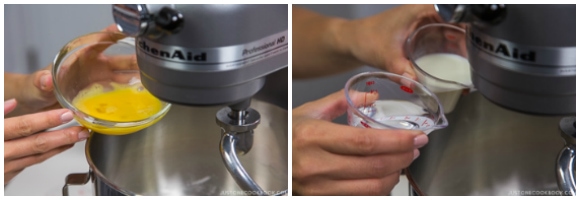
- Add 1 large egg (50 g each w/o shell), beaten, to the dry ingredients. Then, add the 3 Tbsp whole milk and 3 Tbsp water, both at 86ºF (30ºC). Tip: I highly recommend using whole milk instead of reduced-fat milk.
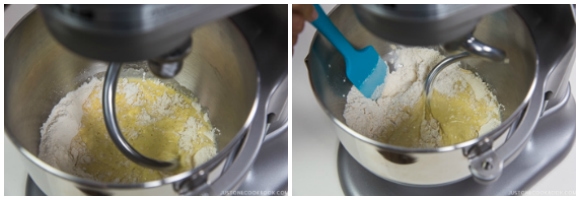
- Start the mixer on low speed (Speed 2) to combine the ingredients. Use a silicone spatula to scrape the sides and bottom of the bowl a couple of times.
- Continue to mix until the dough clings to the hook and cleans the sides of the bowl.
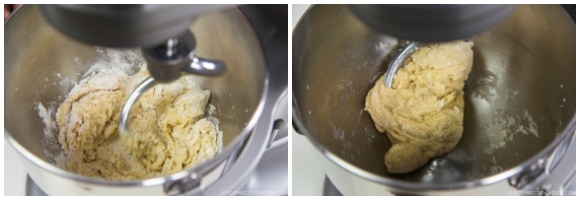
- Add the Butter and Knead: Once the dough starts to come together, add the small cubes of 2½ Tbsp unsalted butter (at room temperature). Continue to stir on low speed until the butter is incorporated and no streaks remain. Then, increase the speed to medium (Speed 4 or 6) and knead until the dough is silky, smooth, and elastic.
- The Windowpane Test: When the dough gets silky and smooth, stop the mixer and use the windowpane test to see if the dough's gluten is well developed. Either pull on a part of the dough or tear off a small piece. Hold the dough in both hands and gently pull it into a square with your fingers. It should be very elastic, smooth, and shiny. If it's strong enough to stretch to a super-thin membrane without tearing and light can pass through the center, your dough passes the test. If the dough tears easily or doesn't stretch, the gluten isn’t quite ready yet. Knead the dough for another 2 minutes and test again.
- Form the dough into a ball by pulling and tucking all edges toward the bottom and pinching them together. Place the dough in a bowl with the seam side down.
- Bulk Fermentation: Cover the bowl with plastic wrap and let the dough rise in a warm place until it has doubled in size, about 1–2 hours. I use the Proof setting (100ºF/38ºC) in my oven. Tip: If you live in a cooler environment and your oven doesn't have a Proof setting, place small baking dishes of boiling water at the four corners on the lower-middle rack. Then, place your dough in a bowl in the center of the rack and close the door. The steam and heat from the boiling water will create a warm environment for bulk fermentation. If you live in a warmer environment, you may not need to do this; your proof time also may be shorter.
Step 2: To Make the Biscuit Dough
- Mix: Set a clean mixer bowl on the stand mixer fitted with a paddle attachment. Add the small cubes of ¼ cup unsalted butter (at room temperature) and ½ cup granulated sugar to the mixer bowl.
- Stir the butter and sugar on medium low (Speed 4) until well blended and smooth.
- Slowly add a very small amount of 1 large egg (50 g each w/o shell), beaten, to the bowl and blend well with the butter mixture. Then, add another small amount of the beaten egg and blend. Continue until all the egg is well incorporated.
- Sift 1⅔ cups cake flour and ½ tsp baking powder into the mixture.
- Mix well until the dry ingredients are just incorporated, then stop the mixer. Take out the dough and form it into a ball with your hands.
- Divide: Weigh the biscuit dough on a scale. The total dough weight for 10 melon pan should be around 400–410 g. Remember this weight, as you’ll need it later to measure one-tenth portions of the dough.
- For 10 melon pan, roughly cut the dough into 10 pieces.
- Divide the total dough weight by 10 (for 10 melon pan) to get the target weight of each dough piece (in my case, 40–41 g). Weigh the biggest piece first. Pinch off some dough if it‘s heavier than the target weight, then weigh again. Repeat until the dough piece reaches the target weight. Repeat with the other dough pieces, pinching off a bit of dough from a larger piece or adding some to a smaller piece by stuffing it inside.
- Pre-Shape: Roll the 10 pieces of biscuit dough into 10 balls. Place them on a baking sheet lined with a silicone baking mat or parchment paper. Cover with plastic wrap and rest in the refrigerator for 10 minutes until it hardens a bit so it‘s easier to handle. Then, proceed to Step 3: To Divide and Pre-Shape the Bread Dough.

★ For Both Hand-Kneading and Stand Mixer Methods (Steps 3, 4, & 5) ★
Step 3: To Divide and Pre-Shape the Bread Dough
- The Finger Test: Once the dough has doubled in size, dust your index finger with flour and use it to poke the center of the dough. If the hole does not close up when you remove your finger, then the dough is ready for the next step. If the dough closes up immediately, then proof the dough a little longer.
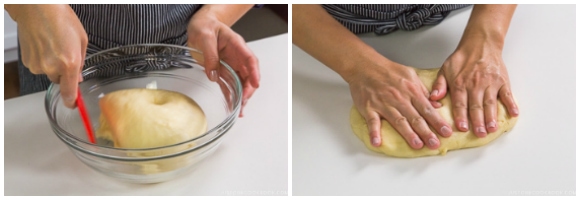
- Deflate and Roll: Remove the dough from the bowl with a silicone scraper and transfer to a lightly floured work surface. Press the dough with your hands to release any gas in the dough and deflate it.
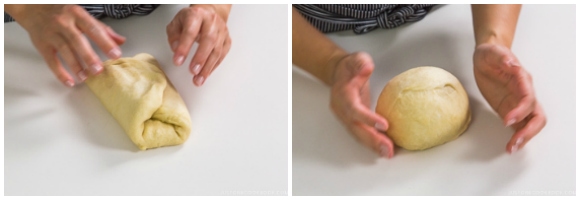
- Fold in the sides of the dough in thirds, and then fold the bottom and top in thirds. Flip over to keep the seam side down. Roll the dough into a ball. To close the seam line, rotate the dough clockwise with both hands while the seam line is touching the work surface.
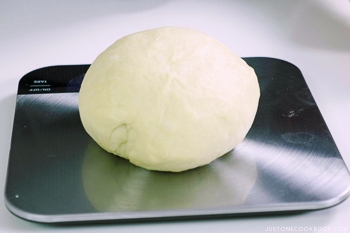
- Divide: Measure the total weight of the bread dough. It should weigh around 460–470 g for 10 melon pan. Remember the weight, as you’ll need it later to measure one-tenth portions of the dough.
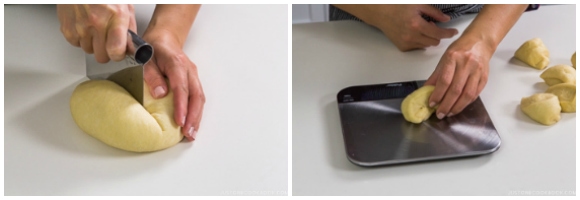
- Using a dough scraper, roughly cut the dough into 10 equal pieces for 10 melon pan. Divide the total dough weight by 10 (for 10 melon pan) to determine the target weight of each dough piece (in my case, 46–47 g). Weigh the biggest piece first. Pinch off some dough if it‘s heavier than the target weight, then weigh again. Repeat until the dough piece reaches the target weight.
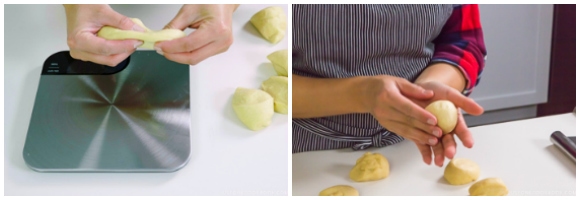
- Repeat with the other dough pieces, pinching off a bit of dough from a larger piece or adding some dough to a smaller piece by stuffing it inside. Knead to combine well. Pre-shape each dough piece into a nice round ball, pulling from all the sides and tuck the edges into the bottom. Place the dough on the palm of your non-dominant hand, and rotate it with your dominant hand, keeping the seam side on the bottom.
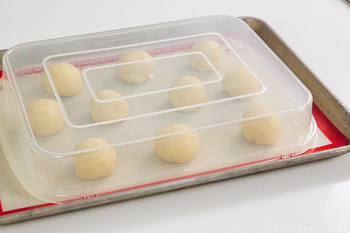
- Rest: Put the dough on a baking sheet lined with parchment paper or a silicone baking mat. Cover the dough with plastic wrap (I use a portable cupcake holder lid) to prevent it from drying. Rest the dough for 15 minutes at room temperature.
Step 4: To Shape the Melon Pan
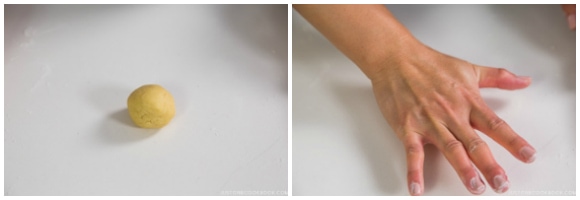
- Roll the Biscuit Dough: While the bread dough is resting, shape the biscuit dough. Put one ball of the biscuit dough on a lightly floured work surface and flatten it with your hand.
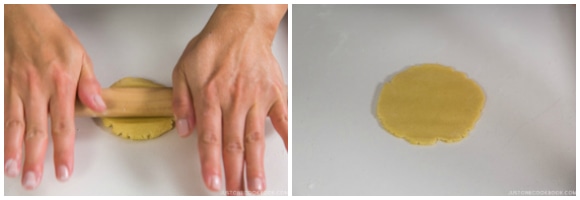
- Using a rolling pin, roll it out into a 4-inch (10–12 cm) flat circle. Set aside. Continue to roll out the rest of the biscuit dough pieces.
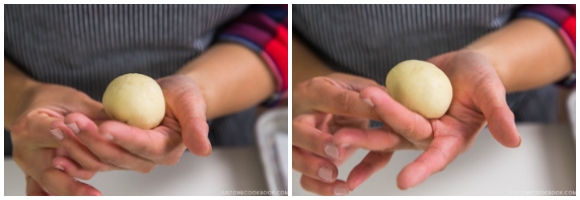
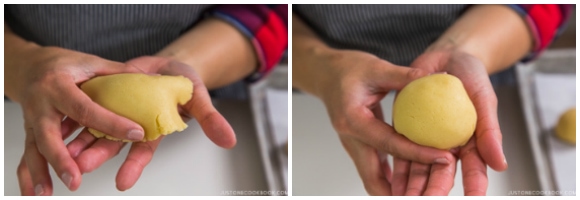
- Shape the Bread Dough: After 15 minutes of resting, the bread dough is ready to shape. First, flatten a ball of bread dough with your hand. Then, fold the top and bottom in thirds.
- Then fold in the left and right sides in thirds. Pinch both ends together to shape the dough into a ball.
- Pull the dough from all sides towards the seam on the bottom. Place the bread dough on the palm of your non-dominant hand and rotate it with your dominant hand a few times, keeping the seam side on the bottom. Set aside. Repeat to shape the remaining balls of bread dough.
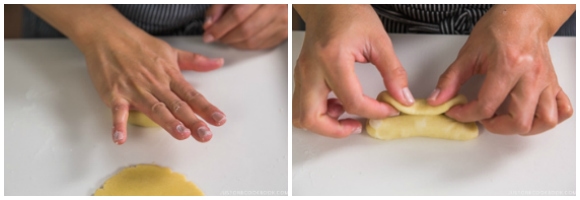
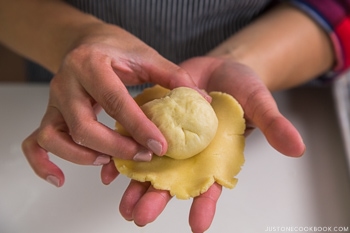
- Assemble the Melon Pan: To shape the melon pan, place a biscuit dough circle on your palm and put the bread dough ball in the middle, seam side up.
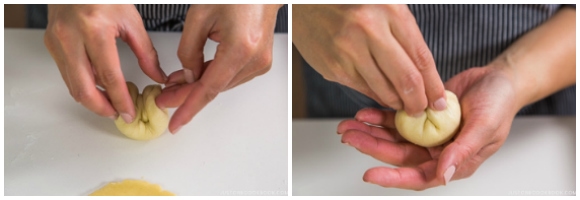
- Then flip them over together to show the biscuit dough on top. Gently pull all sides of the biscuit dough down to wrap around the bread dough. Don’t cover the base of the bread dough ball with the biscuit dough. Set aside and repeat to shape the rest of the melon pan dough.
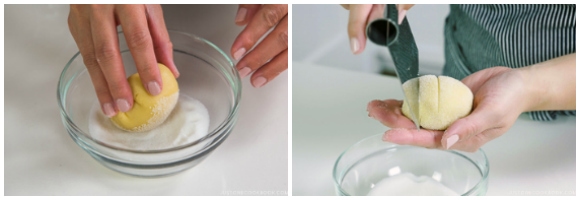
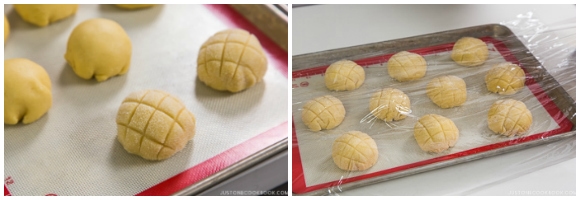
- Add the Sugar Topping and Score: Put 2 Tbsp granulated sugar for the topping in a small bowl. Dip to coat the biscuit dough in the sugar and remove the excess sugar. Using a dough scraper or knife, gently score the biscuit dough in a crisscross pattern, about ⅛ inch (3 mm) deep. I scored 3 lines horizontally and 3 lines vertically. Repeat with the rest of the melon pan dough.
- Place the melon pan dough on the baking sheet, seam side down. Cover the dough with plastic wrap to prevent it from drying.
- Final Proof: Let the dough rise in a warm place until it increases one-and-a-half (1½) times in size, for about 50 minutes. I used the Proof setting (100ºF/38ºC) in my oven.
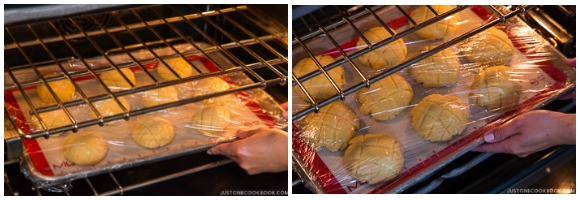
- Preheat the Oven: When the dough has risen halfway, preheat the oven to 350ºF (180ºC). Make sure to set the oven rack in the middle position. Note: If you are using the oven for final proofing, you have to transfer the dough to a different warm place so you can preheat the oven.
Step 5: To Bake the Melon Pan
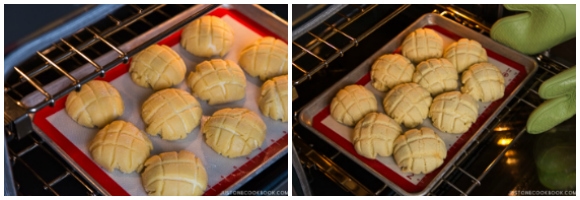
- When the oven is preheated well, remove the plastic wrap and place the baking sheet with the melon pan dough in the oven. Bake at 350ºF (180ºC) for 13-15 minutes, or until the biscuit crust is a light golden brown. Toward the end of baking, if the melon pan are not browning evenly, rotate the tray once so that the crust gets an even color. Do not overbake, or the melon pan will be dry.
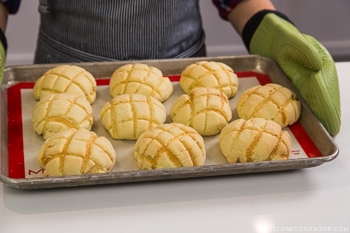
- Once the melon pan are done baking, remove them from the oven and transfer to a wire rack. Let it cool for 5 minutes, and enjoy!
To Store
- Once the bread is cooled completely, individually wrap it in plastic to prevent drying. Then, put it in an airtight container or bag and refrigerate for up to 3 days, or freeze for up to a month. Defrost overnight in the refrigerator or microwave to warm up inside. Then, bake it in the oven at 350ºF (180ºC) until crispy on the outside.


I love this melon pan recipe so much! I’ve made it a few times and gifted some to my coworkers. Many thought this bread was a softer, pillowy version of the conchas they’re used to eating. Thank you Nami and JOC team for always coming up with such great recipes.
Hello there! Wow! Perfect Melon Pan! 🤩 Thank you so much for trying Nami’s recipe and for your kind feedback!
We’re glad to hear that everyone enjoyed the Japanese version of Conchas! (We love Conchas.😋)
Happy Baking!
Hi Namiko-san!
Would I be able to make the dough for the bread and keep it in the refrigerator until I am ready to make the melonpan?”用意したパン生地は焼く時まで冷蔵庫で保存可能ですか?(I had my mom translate this in case this might help with my question).
ありがとう!
Hello, Aika! Thank you for experimenting with Nami’s recipe!
We have never done it, although we have seen bread being refrigerated (up to 16 hours) before final proofing.
We hope this was helpful!😊
Excellent recipe! I have adapted this to include strawberry, chocolate, and matcha melonpan. Thank you for the easy to follow instructions 🙂
Hello, Christina! Thank you for experimenting with Nami’s recipe! It sounds fantastic!
Thank you for sharing your ideas. Happy Baking!☺️
WOW I’ve made this thrice now and it is a favorite among me and my family. So good and soft, a true comfort food. My only issue is that it is a pain to make, not difficult it just takes a lot of time. Over 5 hours from starting to taking that first bite, it is worth it though when you’re really craving a sweet dessert.
Hi Max! We are so happy to hear you and your family enjoyed the homemade Melon Pan!
Thank you so much for taking the time to read Nami’s post and trying her recipe!
Thank you so much for sharing your knowledge and recipes! We have made your the stand mixer version of this recipe and our Melon Pans have cracks on top (they appear during the cooking in the oven). Do you have any idea why this could be? Thank you so much in advance!
Hi Anthony! Thank you for trying Nami’s recipe!
Here are a few things you might want to check:
1) Make sure to keep the seam side on the bottom (Melon pan’s bottom) when you cover it with biscuit dough.
2) Refrigerator the biscuit dough for 10 minutes until it hardens a bit. (However, avoid it gets really cold)
3) If you live in a warmer place, you may not need to proof for 50 min (step 10) after placing the biscuit dough.
4) Make sure Melon Pan is not over-baked. (every oven is different, so please shorten the baking time if need it.)
We hope these tips are helpful for your next try! 🙂
Thank you for the recipe! I made it exactly as instructed with the weight measurements and it was incredible.
Hi Gigi! Aww.🥰 Nami and all of us at JOC are so happy to hear your Melon Pan came out so well!
Thank you very much for trying Nami’s recipe and for your kind feedback.
Happy Baking!
Ive tried this recipe so mamy times with both measurements but the bread dough is always so hard. It always ends up to sticky and I end up making miracles to get it working to at least a manageable consistency. I’ve always ended up making the bread but that part of the bread dough makes it so time consuming to fix.
Any tips?
Hi Kin, Thank you very much for reading Nami’s post and trying her recipe!
When the bread dough gets sticky, what do you do? Lightly dusting your hands with flour to keep the dough from sticking too much will help but if you add too much flour, the dough will get hard. Also, over-kneading dough results in a hard texture.
You can also try a different brand of bread flour to see if it makes difference.
We hope this helps!
I don’t think you actually need to do the mixing of bread flour and cake flour. The primary difference between them is protein percentage. Bread flour is 12.7% and cake flour is 9%. At the proportions you’re mixing them, you’re just making all purpose flour. You can just use 250g of all purpose flour and get identical results
Hi Anurag! Thank you very much for reading Nami’s post!
100% all-purpose flour can be used for making Melon Pan, but it will have a different texture.
Nami carefully matched her flour protein level to the amount of liquid called for and created the ideal hydration and a perfectly risen Melon Pan.
We hope this helps!
This recipe is auful. It wasnt sticky it was super dry. I had to add about 2tsp more milk to get it right. The only difference was I used all purpuse flour and I added 1 tsp of cornstarch. it wasnt smooth it was super clumpy and hard. I triple checked all my measurements were right and idk what happened
Hi Isabella! We are sorry to hear your Melon Pan didn’t turn out right this time.
Did you use Bread flour but replace the cake flour with All-purpose flour and cornstarch?
If so, please make sure to sift 3-5 times after replacing the cornstarch amount. Also, please check this post: https://www.justonecookbook.com/cake-flour/
As you may know, The higher protein content flour develops more gluten and also absorbs more liquid. It results in a different texture.
Protein content:
Cake flour: 8% (less gluten)
All-purpose/plain flour: 10-13%
Bread flour: 14-16% (more gluten)
We hope this helps!
Hello, thank you so much for this recipe, I tried it for the time and it turned out really good, soft, and yummy!!
Hi Melissa! Beautiful Melon Pan!!! 😍
Thank you very much for trying Nami’s recipe and sharing your Melon Pan photo!
They taste amazing and they’re fun to make they’re just time consuming. I’ve made it five times but every time I make them the dough always ends up very shaggy but it comes out okay
Hi Kira! We are so happy to hear you enjoyed making Melon Pan, and it tasted amazing!
Thank you very much for trying Nami’s recipe and for your kind feedback.😊