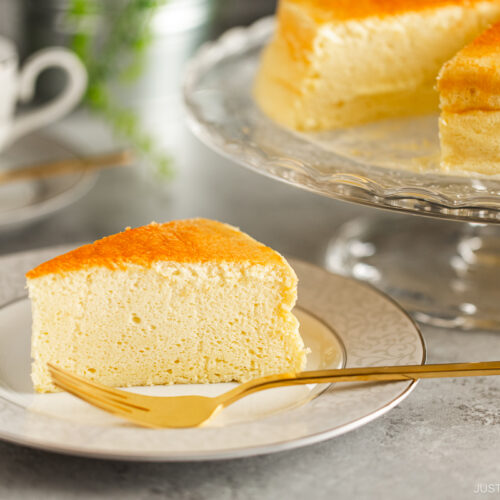
Jiggly and fluffy Japanese Cheesecake is a crowd-pleasing dessert that everyone loves! I’ll guide you through each step of this recipe and share my best tips so you can whip up a creamy, dreamy soufflé cheesecake that’s light and airy as a cloud.
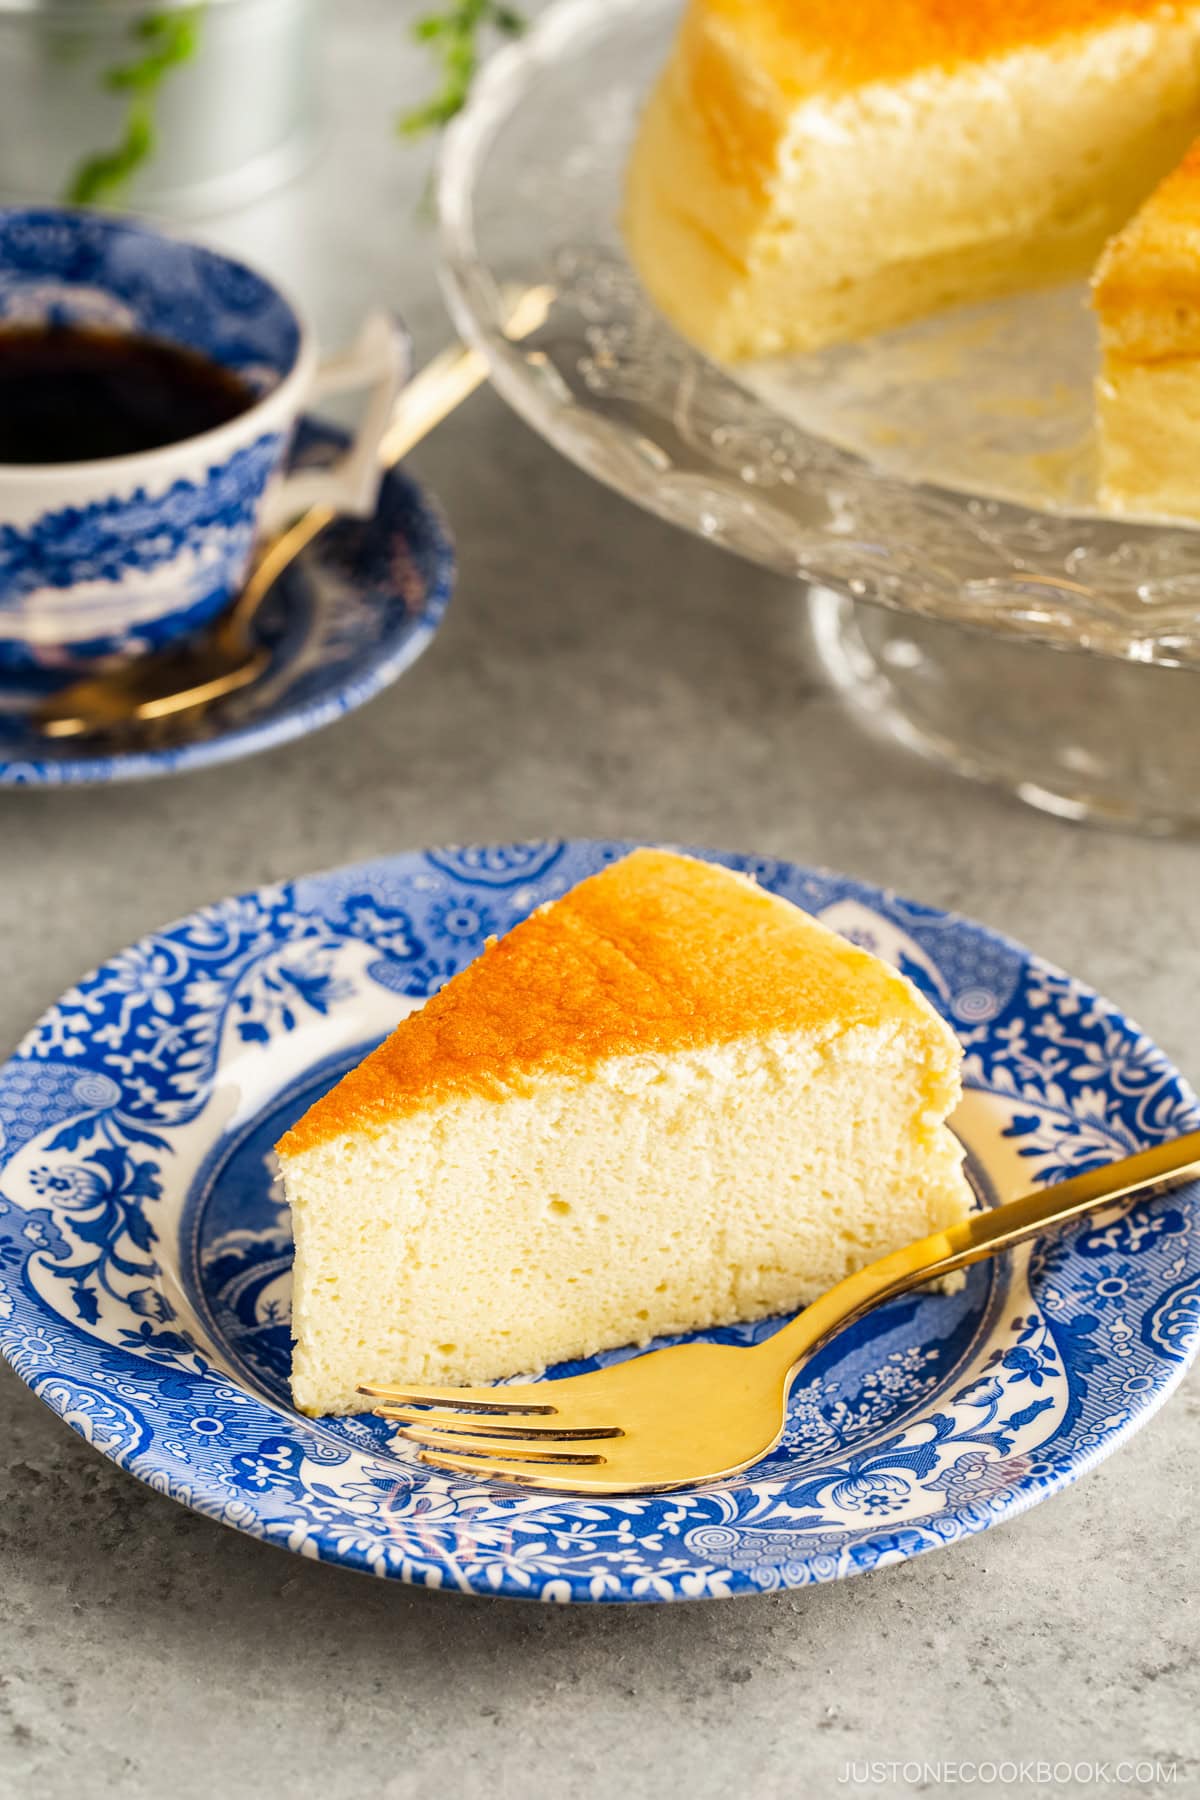
Japanese Cheesecake, known as soufflé cheesecake in Japan, is a heavenly dessert that’s taken the food world by storm. I’ve made it countless times for parties or potlucks, and it never fails to impress! I’ll guide you through my Japanese cheesecake recipe step-by-step so you can make this ultra-creamy and airy cake at home, too.
For more amazing cheese-based desserts, try my Basque Burnt Cheesecake, Baked Cheese Tarts, and Matcha Basque Cheesecake recipes next!
What is Japanese Cheesecake?
Japanese cheesecake, also known worldwide as Japanese cotton cheesecake or jiggly cake, was first created by pastry chef Yasui Juichi (安井寿一) at the Plaza Hotel in Osaka. To achieve the signature light and fluffy texture, his recipe incorporates whipped egg whites into the batter that’s baked in a water bath. In Japan, we call it soufflé cheesecake (スフレチーズケーキ).
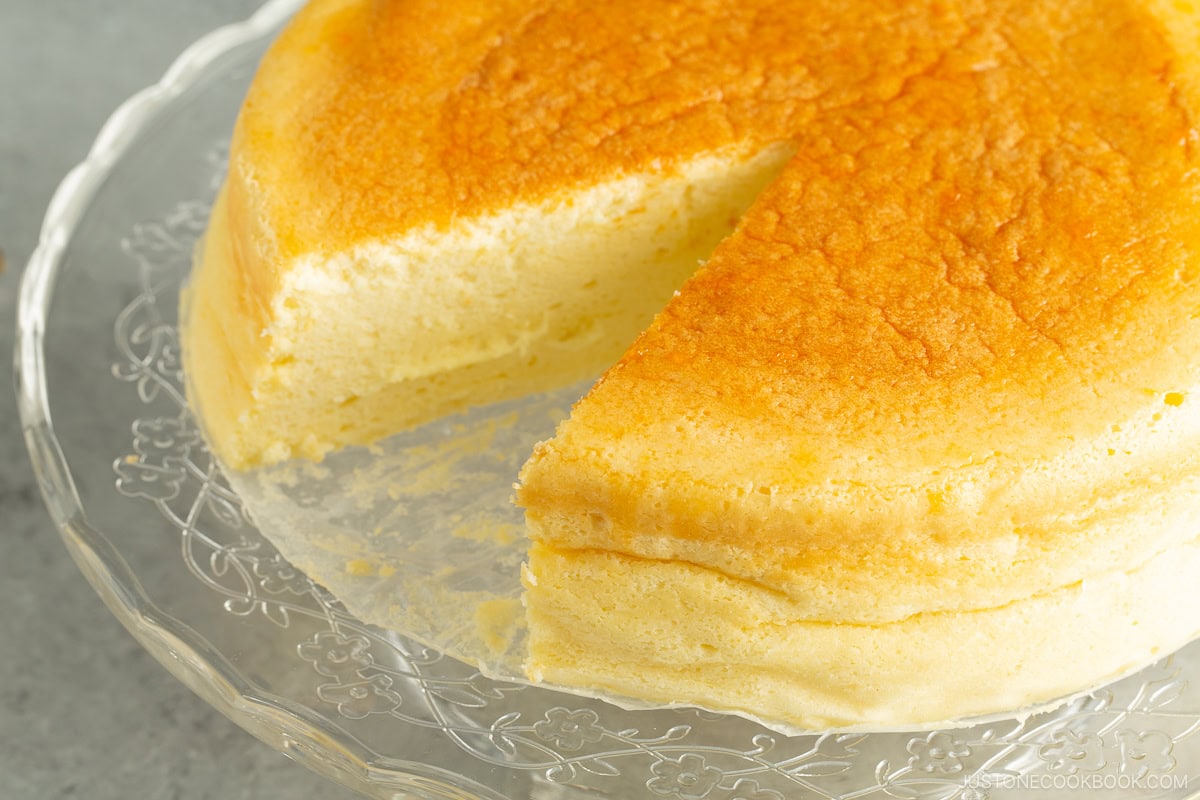
Table of Contents
- What is Japanese Cheesecake?
- Why You’ll Love This Recipe
- Ingredients for Japanese Cheesecake
- Key Kitchen Tools
- How to Make Japanese Cheesecake
- Nami’s Recipe Tips
- Serving Tips
- Variations and Customizations
- What to Serve with Japanese Cheesecake
- Storage Tips
- Frequently Asked Questions
- More Japanese Dessert Recipes You’ll Love
Why You’ll Love This Recipe
- Incredible texture and taste. Combining elements of a rich, velvety custard and a pillowy, cottony sponge cake with a slightly tart flavor, this dessert hits all the right notes.
- It’s a fluffy and lightly sweet cheesecake that’s popular even among those who typically don’t enjoy regular cheesecake like sweet and heavy New York-style cheesecake. You might find yourself indulging in an extra slice!
- Detailed instructions to guarantee success. Many of my readers have successfully made this recipe. Be sure to read through all my tips below—you’re going to love the result!
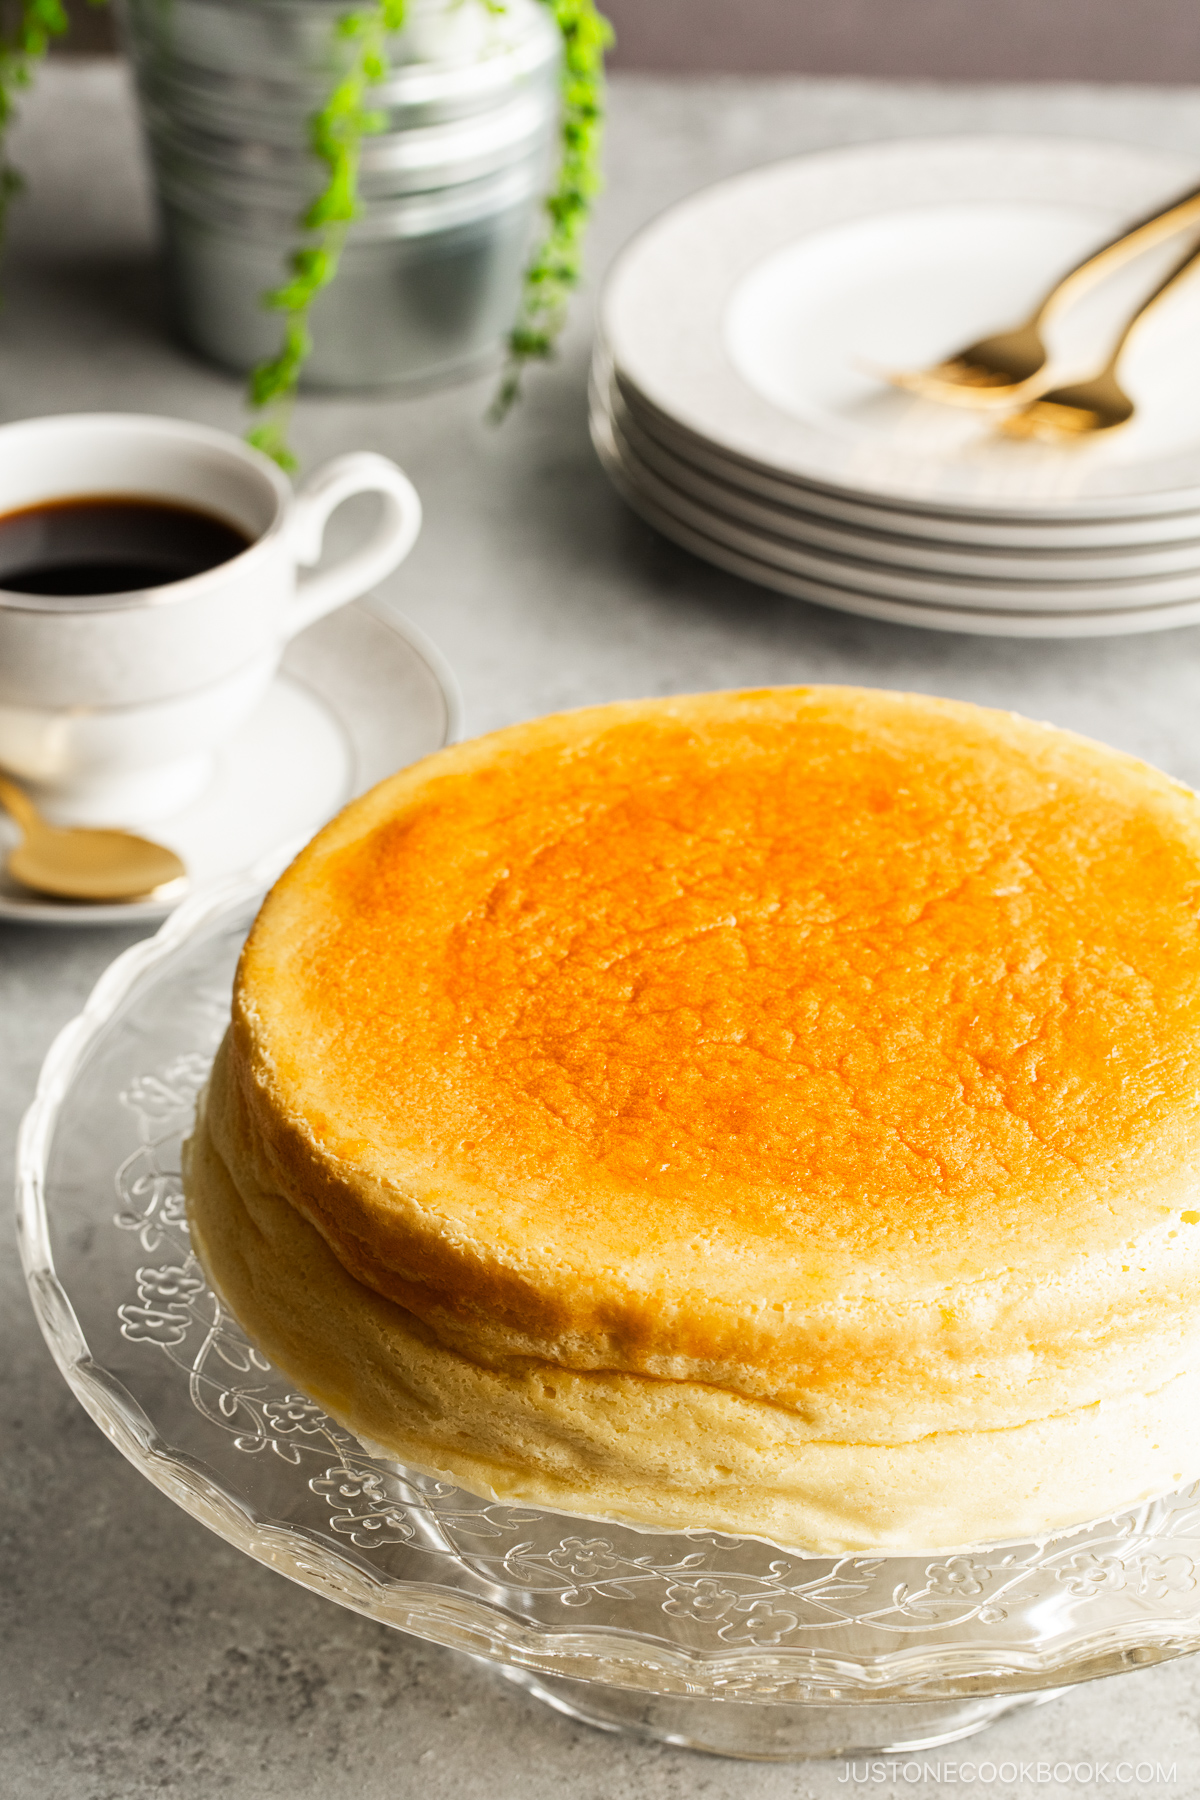
Ingredients for Japanese Cheesecake
- Cream cheese
- Large eggs – separated; for the batter and the meringue
- Unsalted butter – divided; for the batter and greasing the pans
- Heavy (whipping) cream
- Granulated sugar – divided; for the batter and the meringue
- Cake flour
- Lemon zest + lemon juice
- Apricot jam
Find the printable recipe with measurements below.
Jump to RecipeSubstitutions
- Cake flour – Cake flour has lower protein content and less gluten than all-purpose flour. It gives delicate pastries a fine crumb and tender structure. Please do not substitute all-purpose flour, which will make the texture dense and tough. If you don’t have cake flour, you can make your own with all-purpose flour and cornstarch. See how in the recipe card below.
- Heavy (whipping) cream – Heavy cream or heavy whipping cream is the richest type of liquid cream with a fat content of at least 36%. You can also go light and use whole milk in this recipe.
- Cream cheese – For the best result, please use the full-fat type. I buy two 8-oz boxes of Philadelphia Original Cream Cheese and use one full box plus 2.5 oz from the second box. Please do not use the round container type or the reduced fat (lite) type. If you wish to lighten the recipe, you can substitute whole milk for the heavy cream.
Key Kitchen Tools
- 9 x 4-inch (23 x 10-cm) cake pan
- Parchment paper (and a 9-inch round parchment cake liner)
- Saucepan and large bowl (or a double boiler)
- Silicone spatula
- Fine-mesh strainer
- Large mixing bowl (for the batter)
- Stand mixer with whisk attachment (or an electric mixer)
- Stand mixer bowl or large mixing bowl (for the egg whites)
- Hand whisk
- Large baking sheet (for the bain-marie)
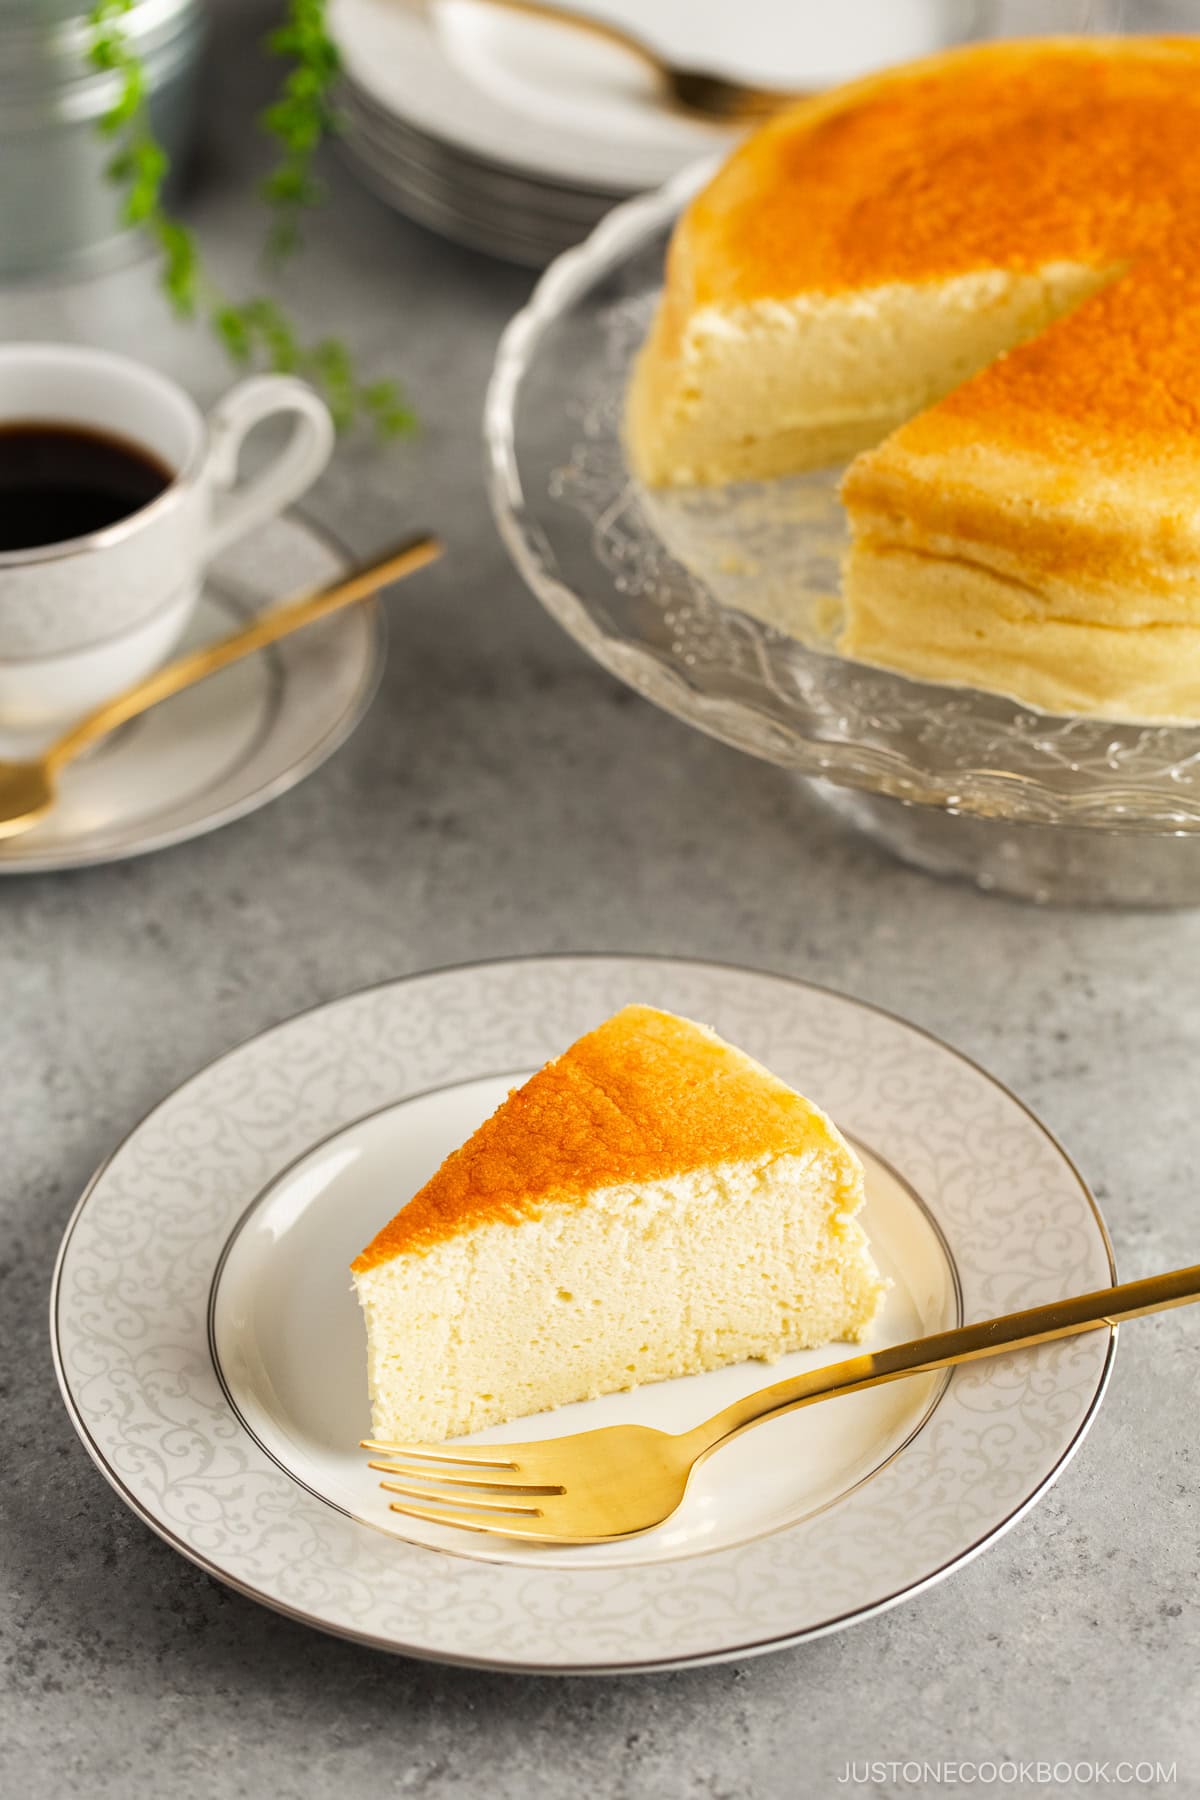
How to Make Japanese Cheesecake
Preparation
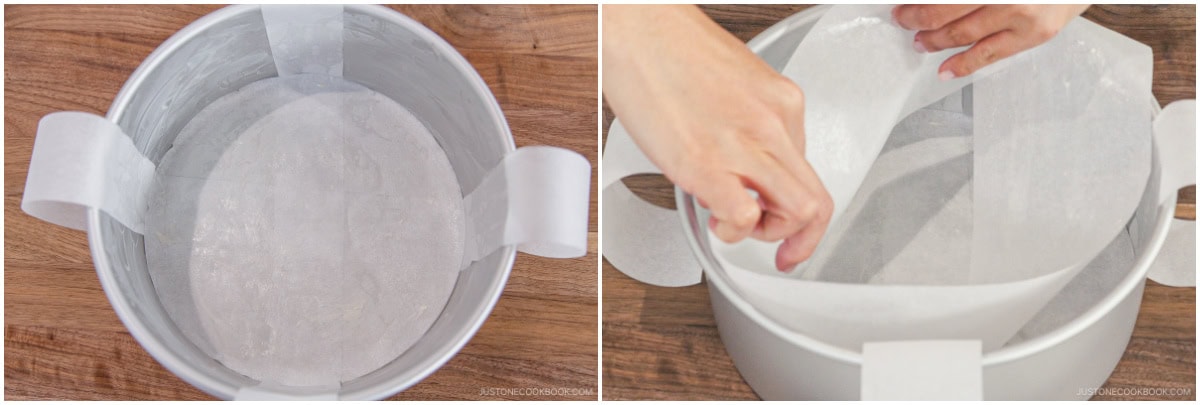
Step 1 – Line the pan, preheat the oven, and prepare the double boiler. Grease the cake pan and line it with parchment paper, including two crisscrossed straps you’ll use the lift out the cake. Turn on the oven to 350ºF (180ºC) to preheat. Meanwhile, bring a medium saucepan with 2 inches (5 cm) of water to a simmer.
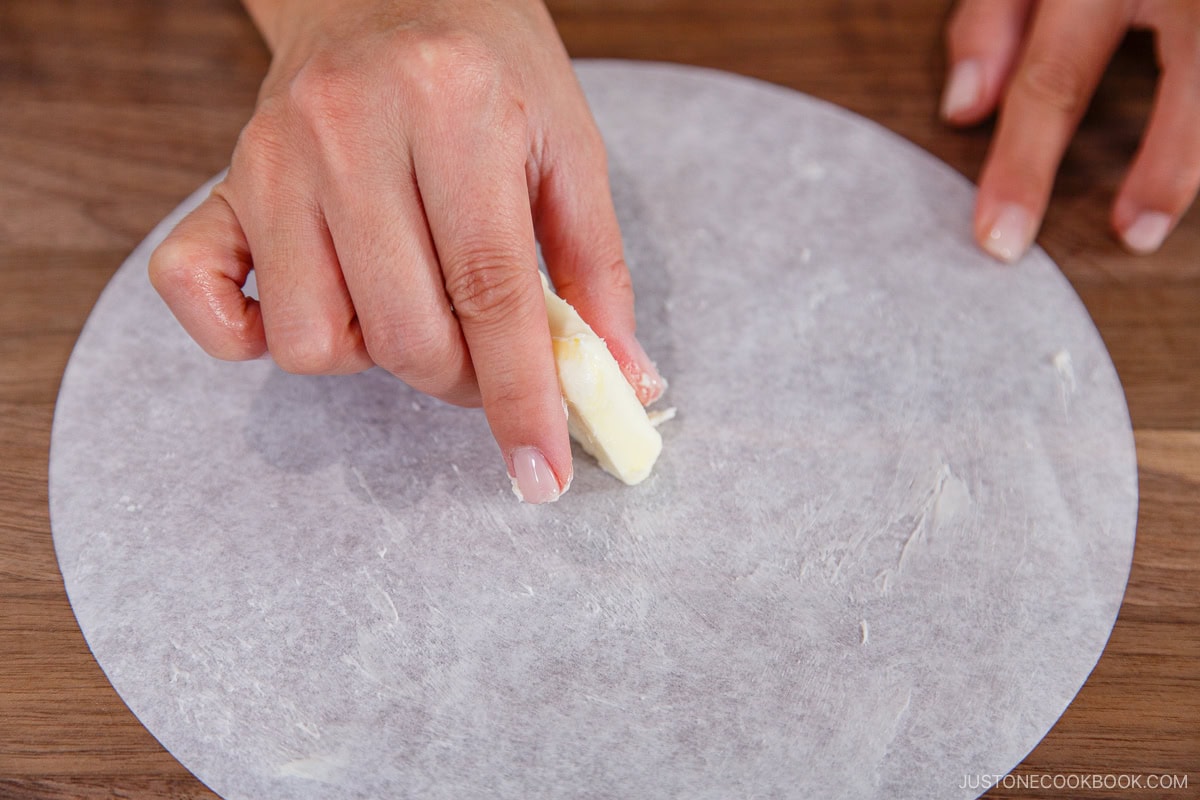
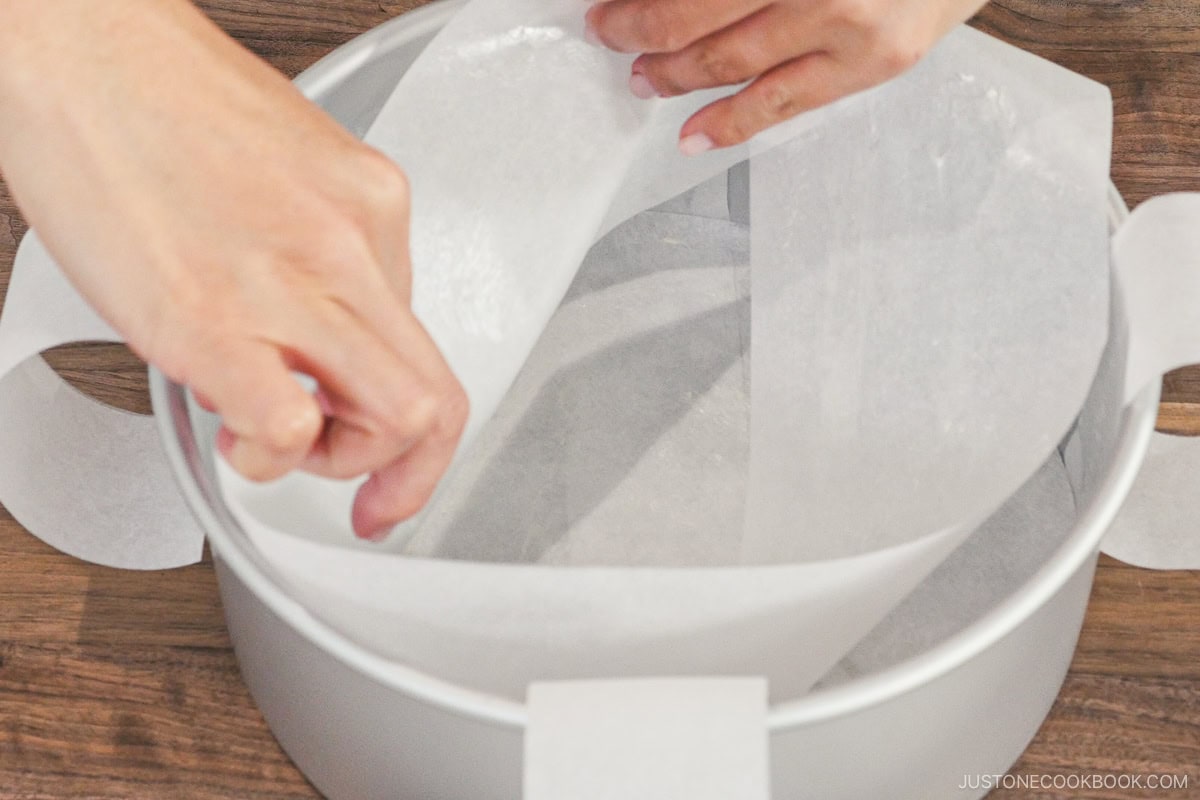
Step 2 – Make the cake batter. Combine the cream cheese, butter, heavy cream, and sugar in a large bowl resting over the simmering water. Mash until melted and blended, then remove from the heat. Whisk in the egg yolks and the sifted cake flour. Pass the batter through a fine-mesh strainer, then blend in the lemon zest and juice.
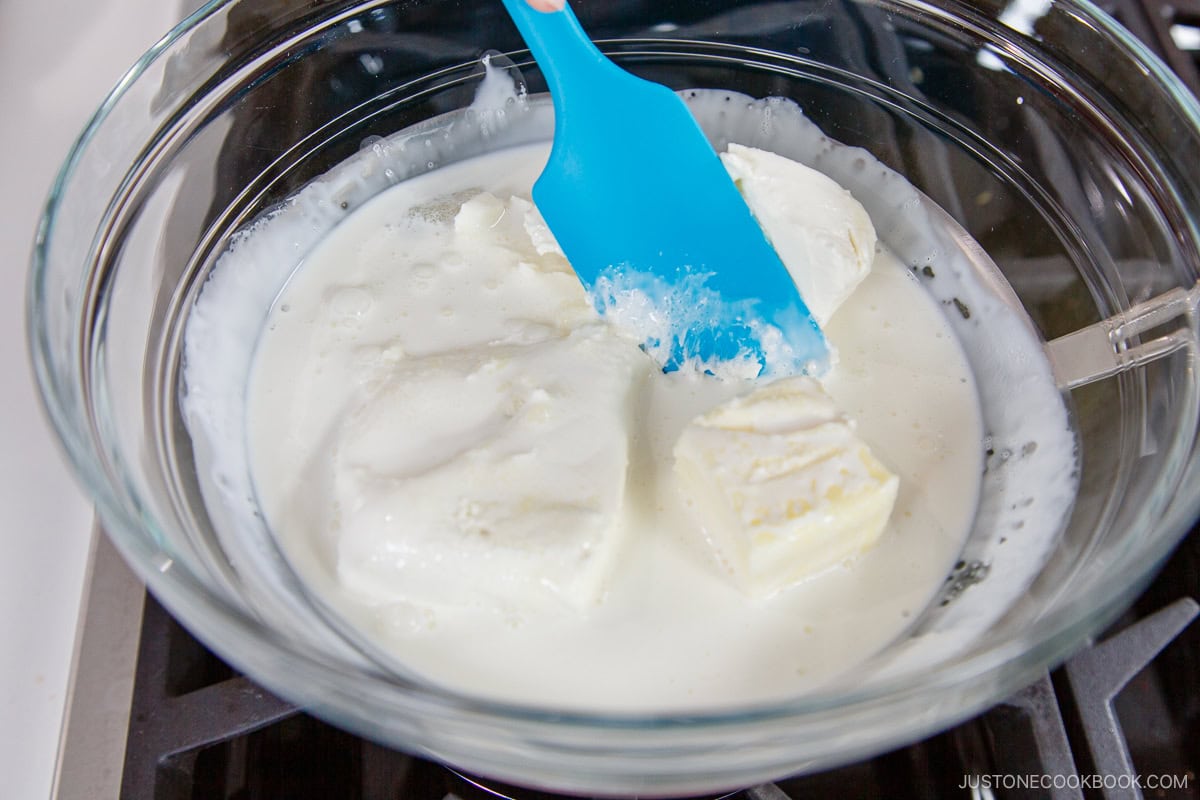
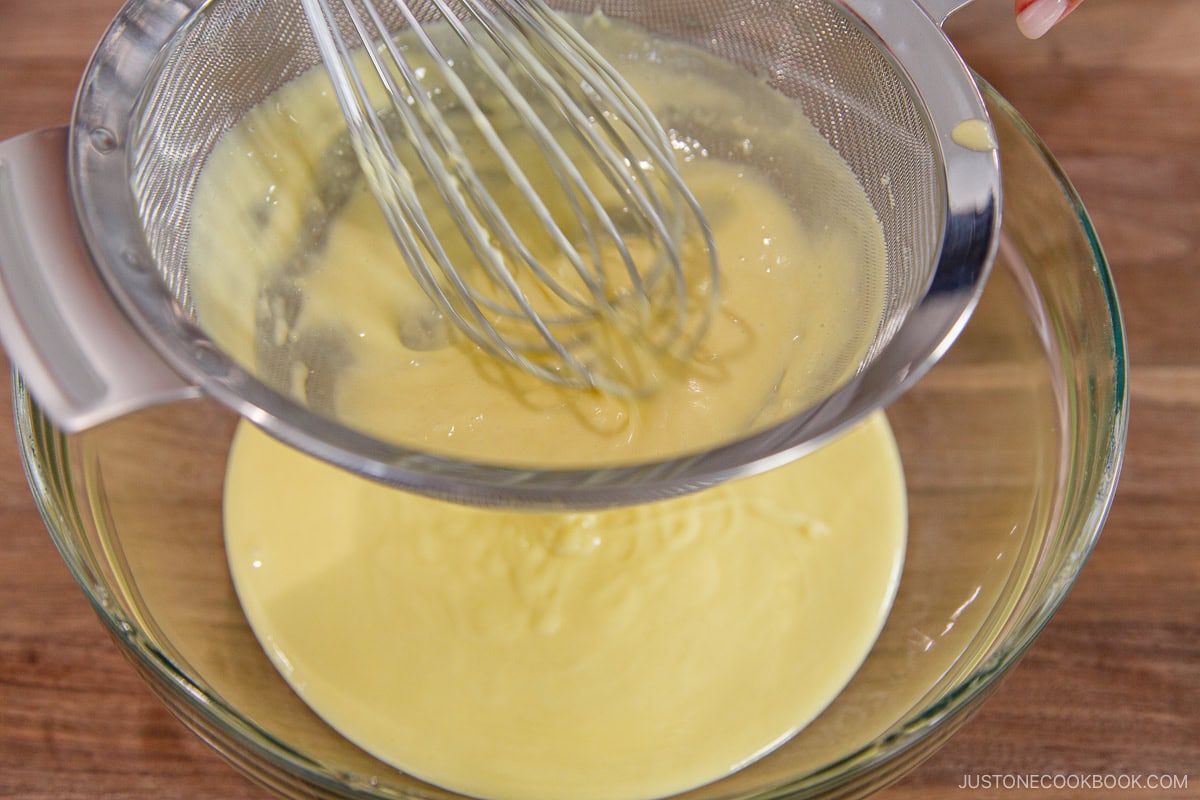
Step 3 – Set up the bain-marie. Put the baking sheet inside the preheating oven and pour in hot water until it is halfway up the sides or ½ inch deep. Close the oven door.
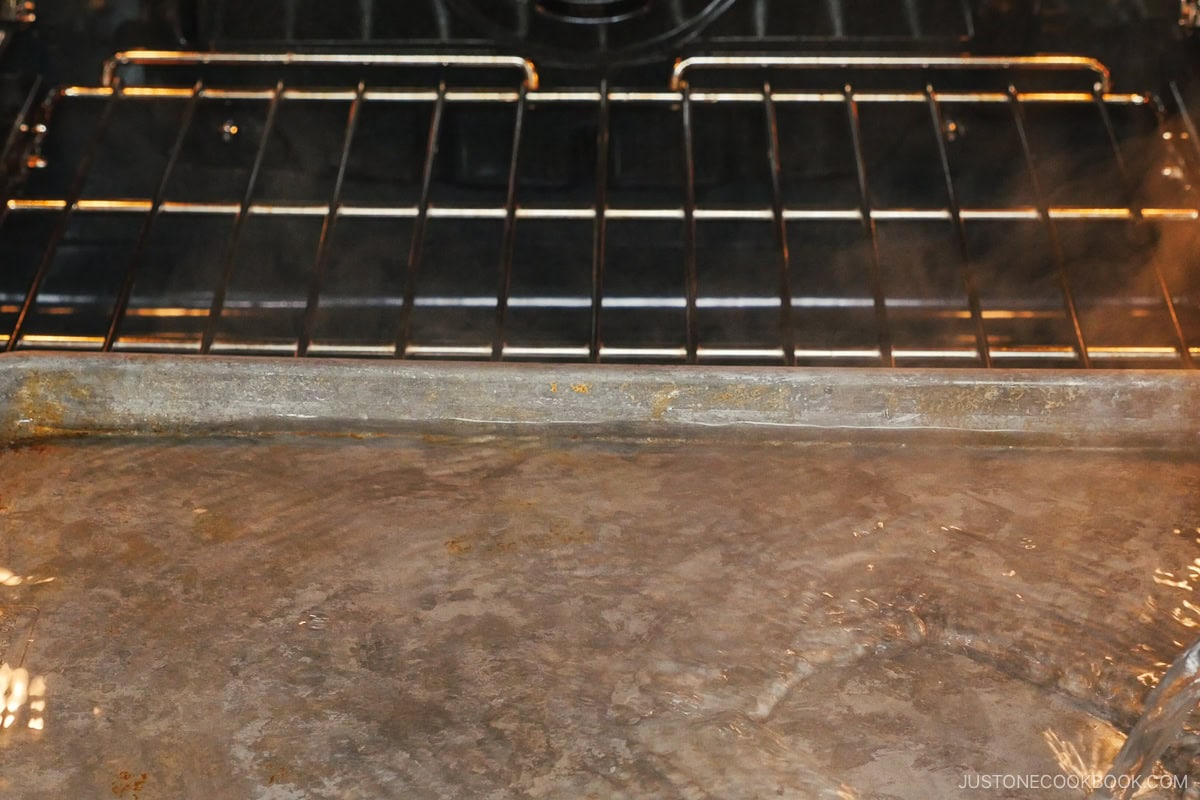
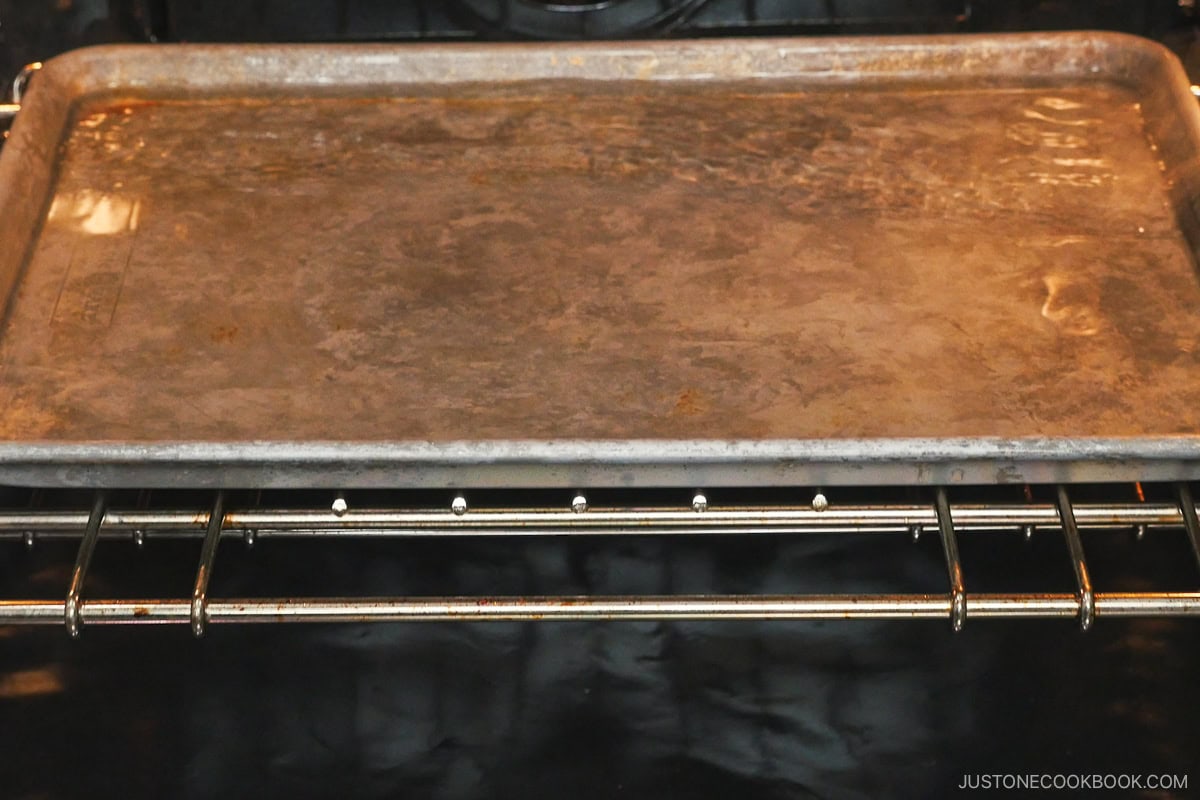
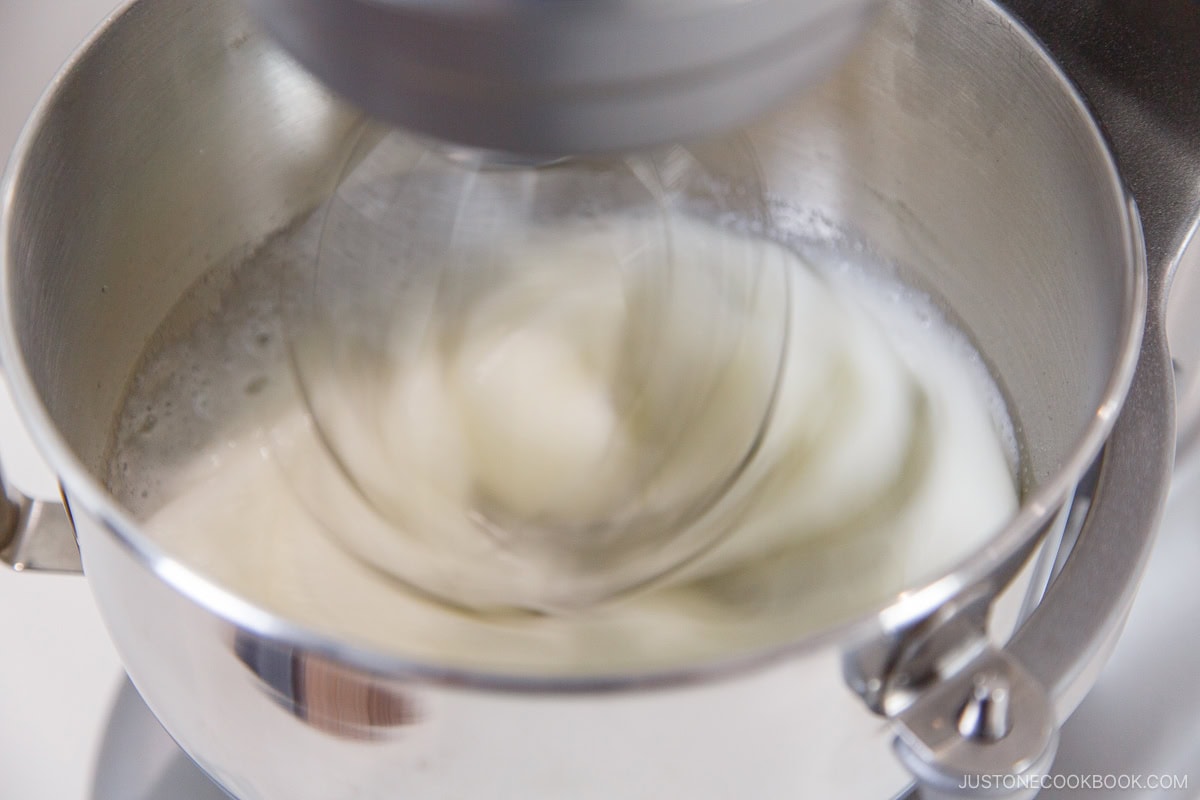
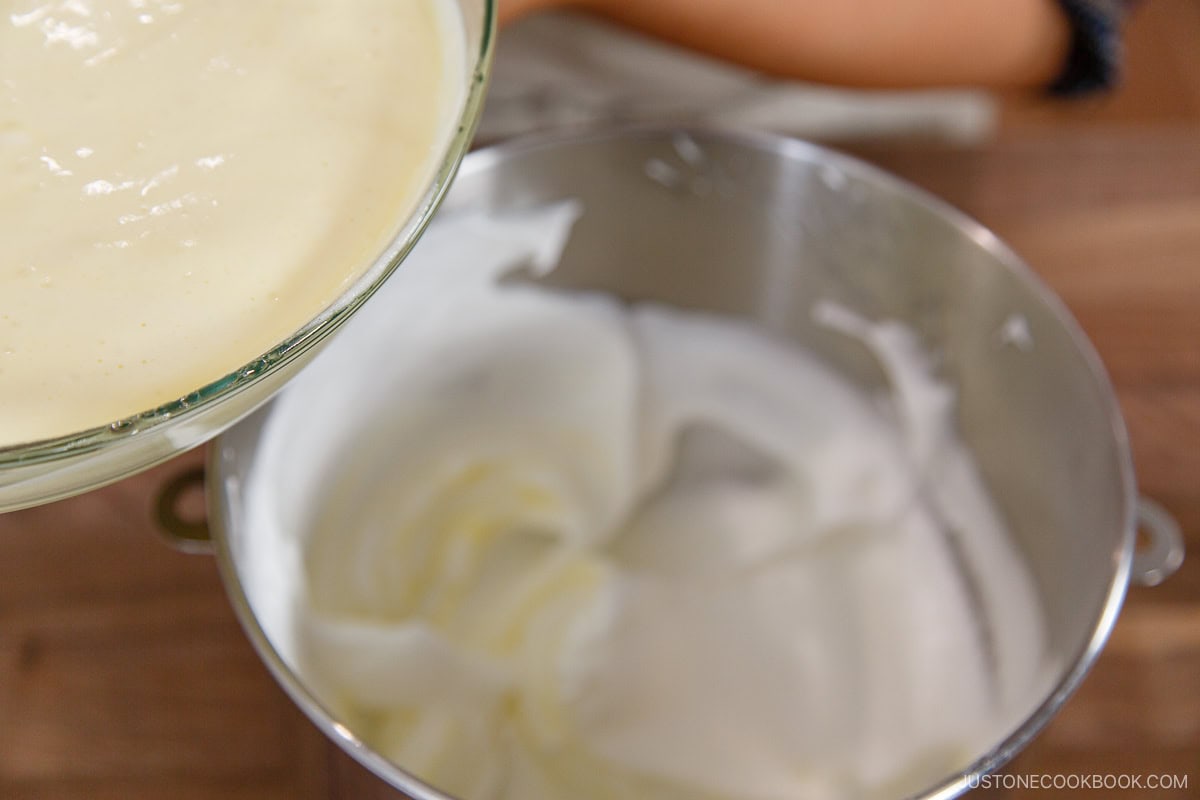
Step 4 – Beat and incorporate the egg whites. Whisk the chilled whites on medium speed until they become opaque and foamy. Slowly add the sugar, one-third at a time, then beat at high speed until you have firm peaks. Use a hand whisk to gently fold the meringue into the cream cheese mixture, one-third at a time, until incorporated.
Baking
Step 5 – Pour the batter into the cake pan. Pour the batter into the cake pan in one go. Tap the pan a few times on the kitchen counter to release any air pockets in the batter.
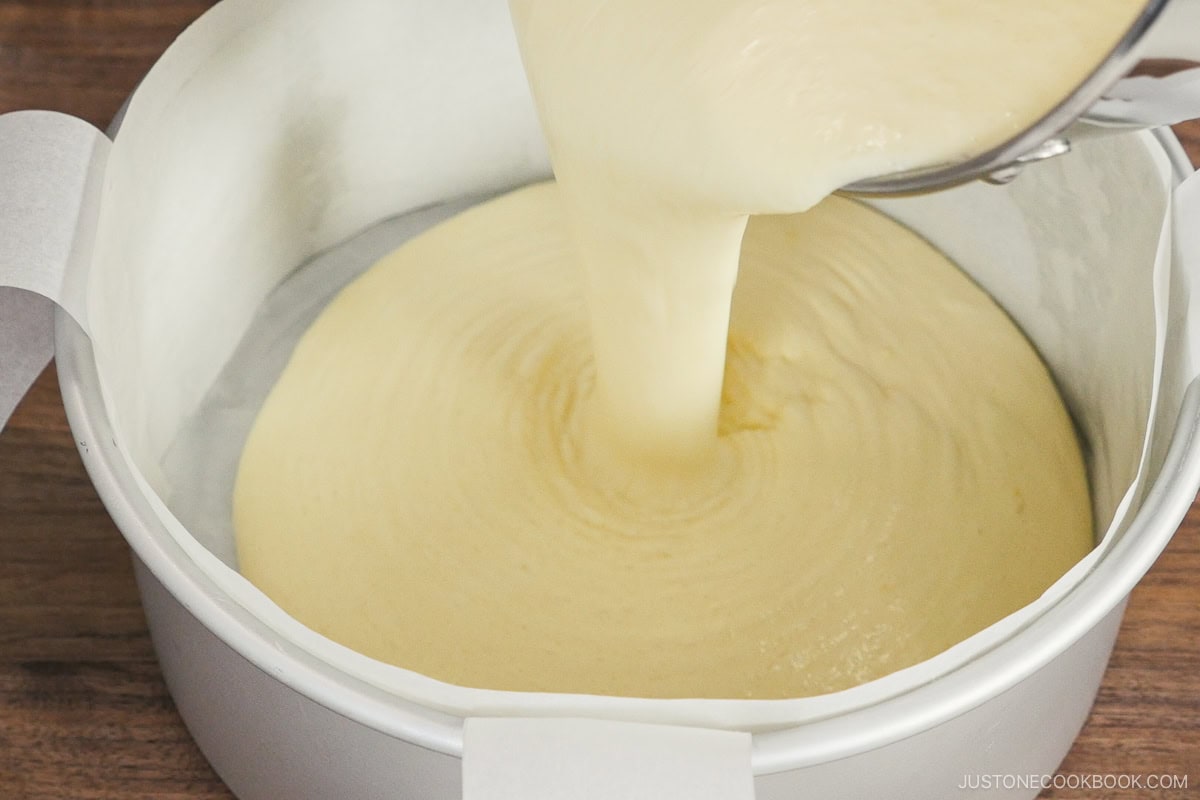
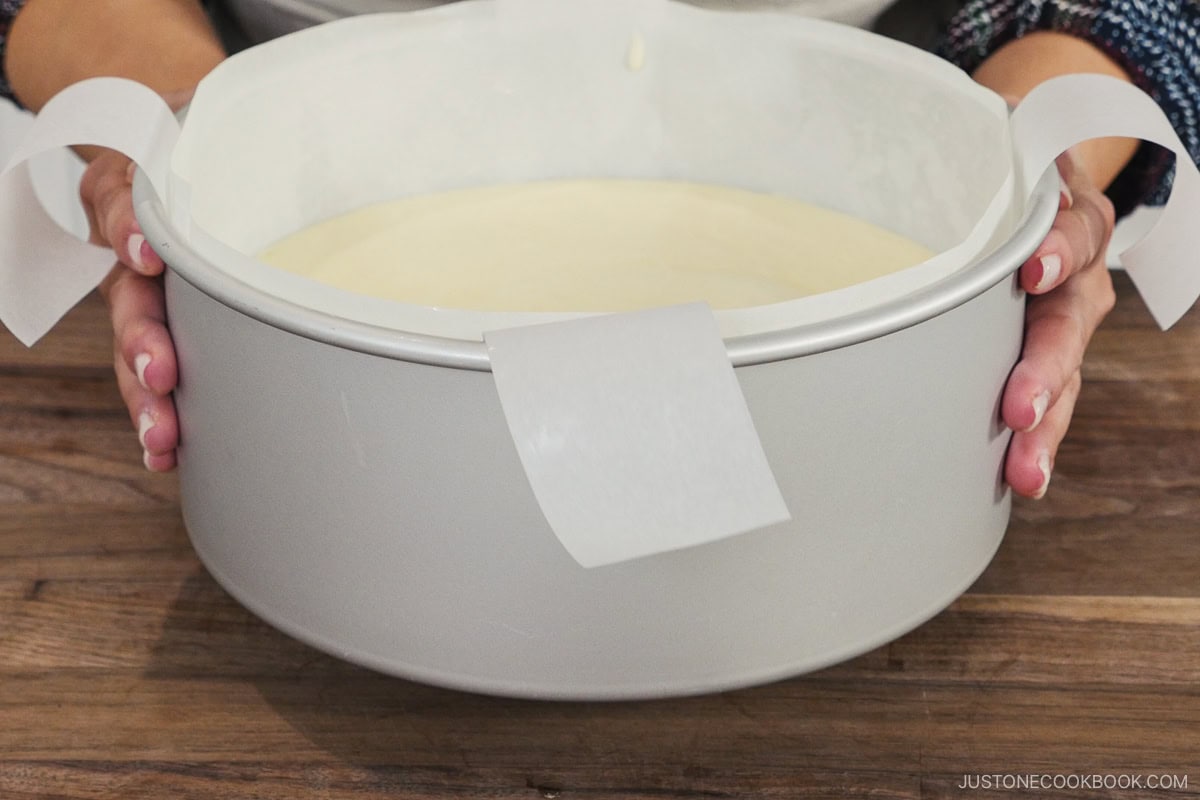
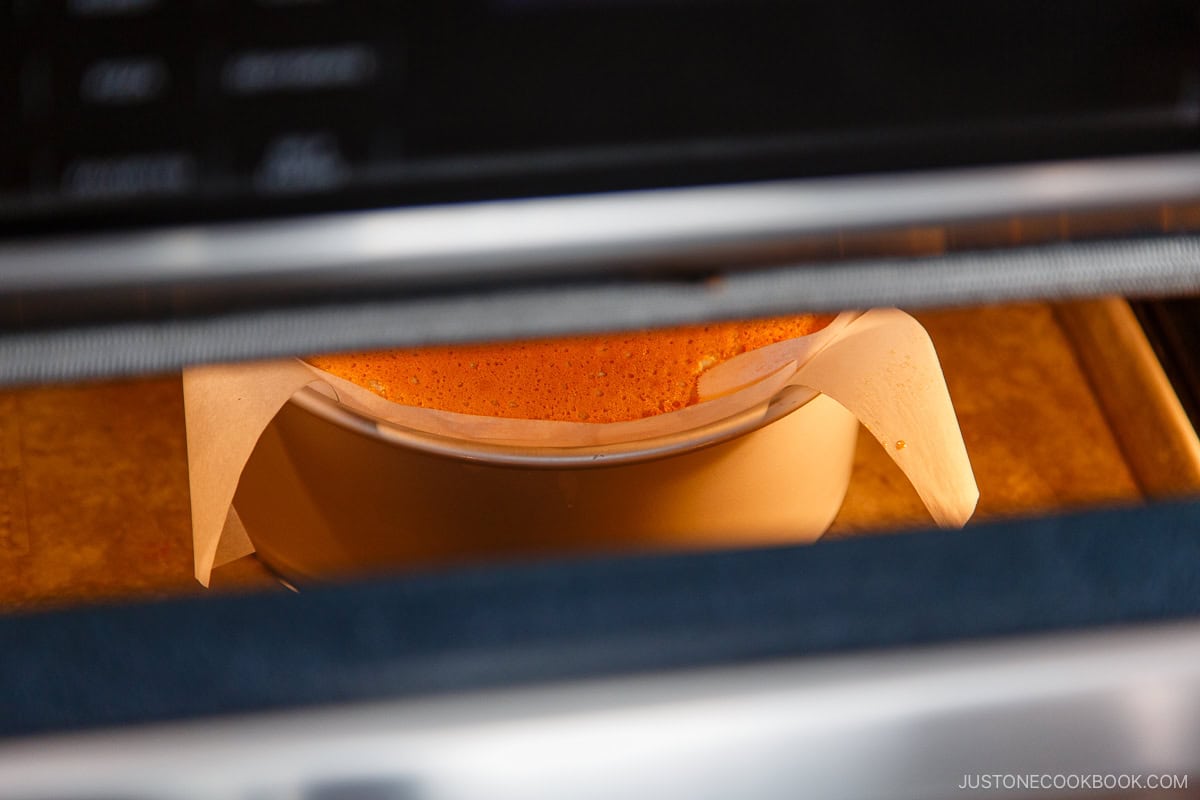
Step 6 – Bake the cheesecake in the water bath. Place the cake pan in the bain-marie. Reduce the oven temperature to 320ºF (160ºC) and bake for 70–75 minutes. Then, reduce the temperature to 300ºF (150ºC) and bake until the top is golden brown. The cake is done when an inserted skewer comes out without a wet batter.
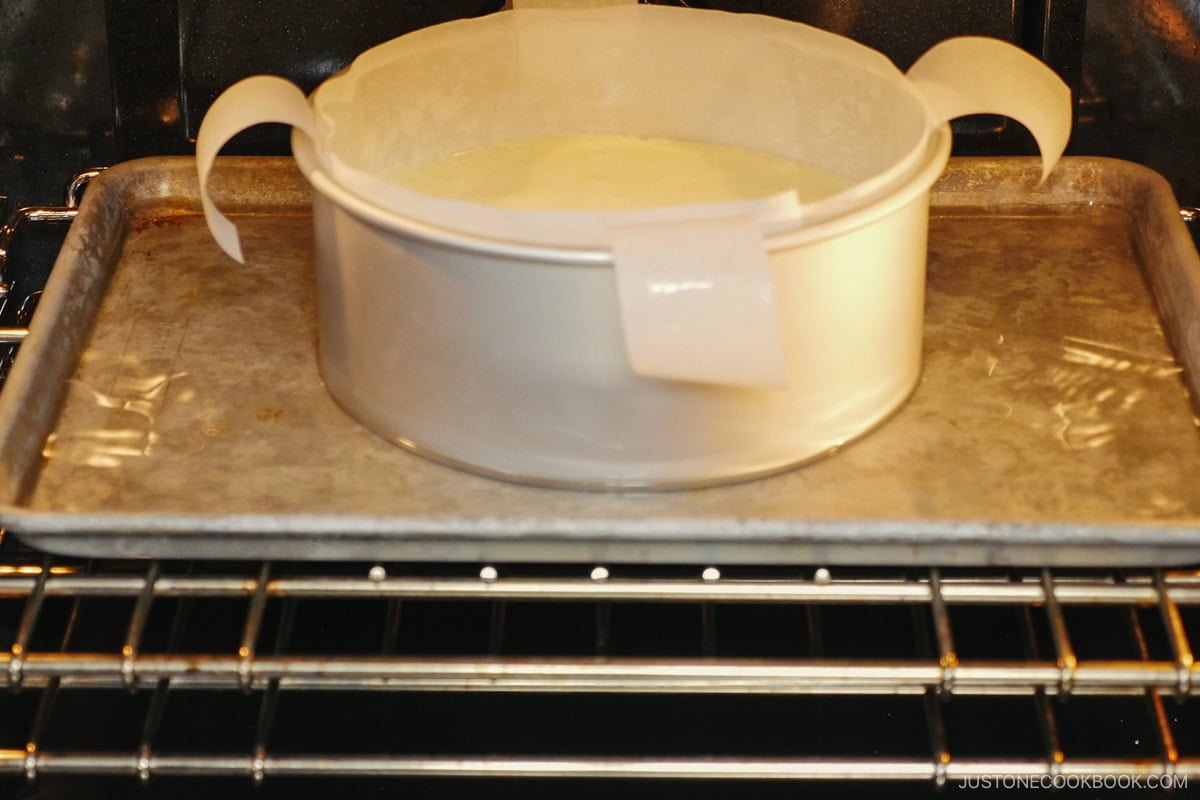
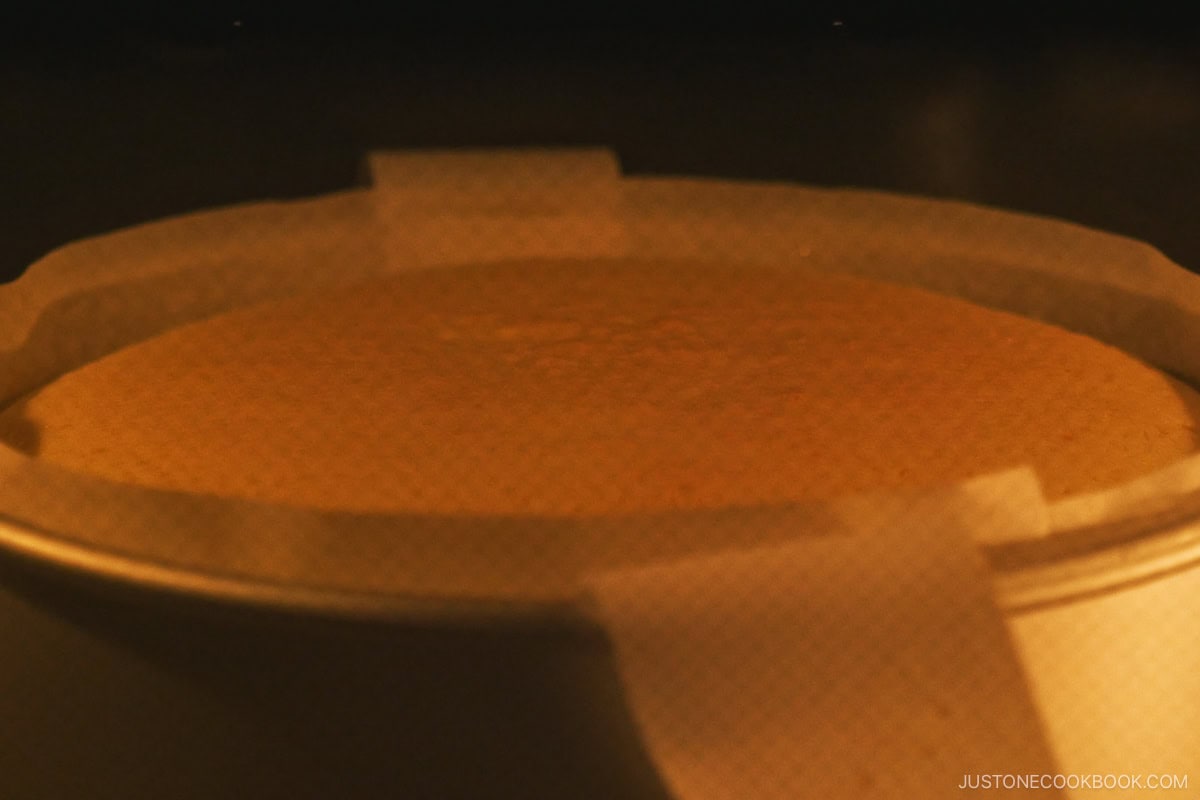
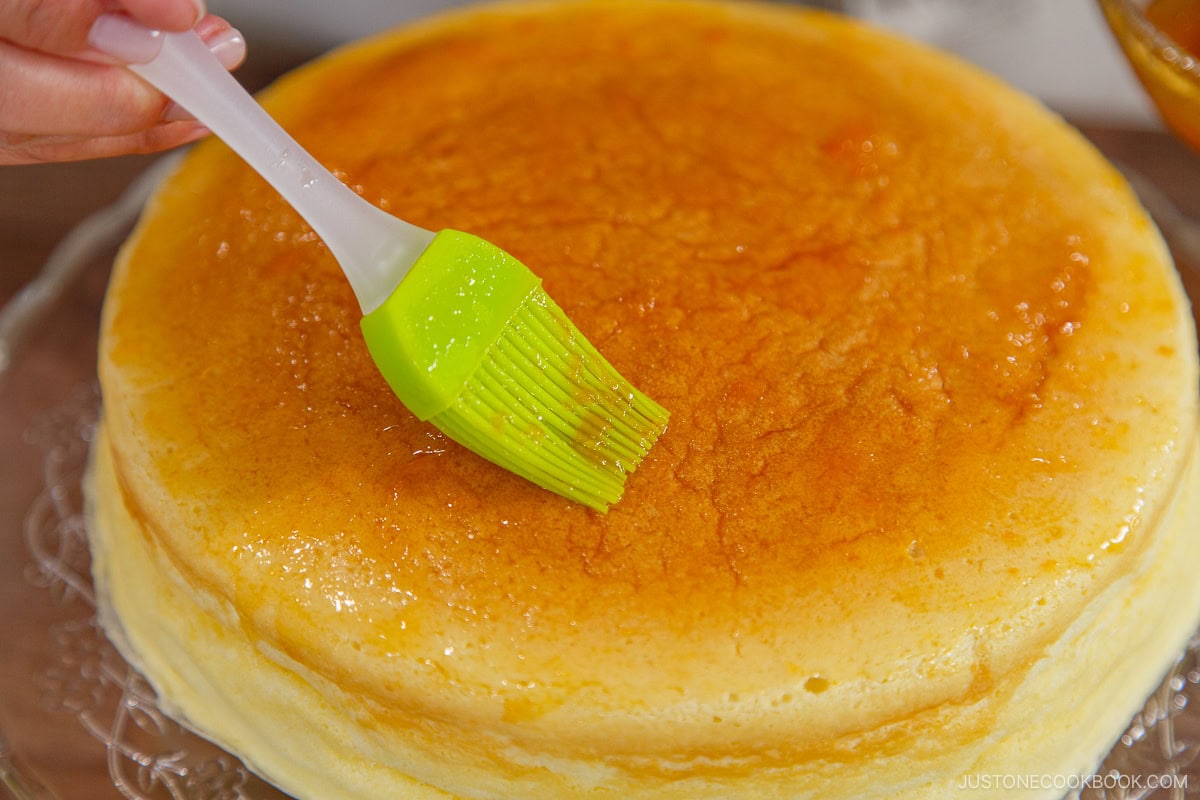
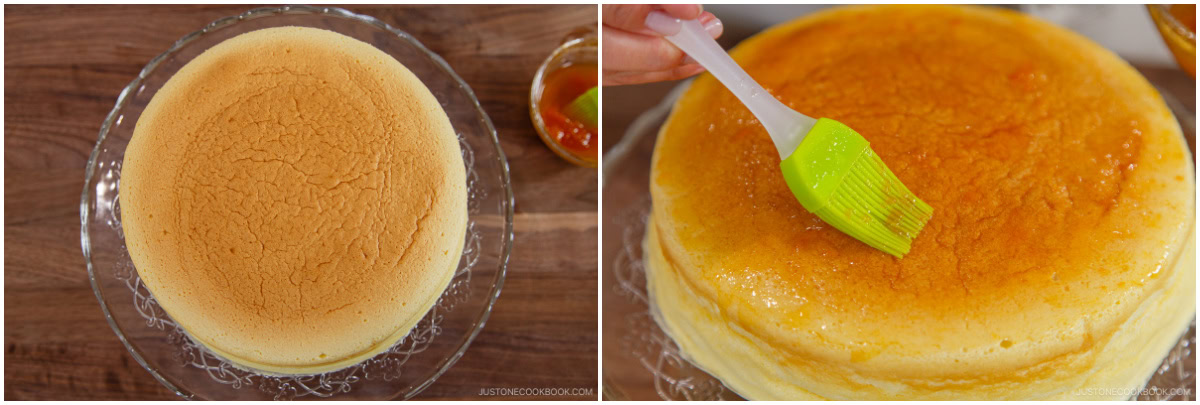
Step 7 – Cool in the oven, then at room temperature. Turn off the heat and leave the cake inside the oven with the door slightly ajar for 15–20 minutes. Remove the pan from the oven and lift out the cake with the two parchment paper straps. Brush the top with apricot jam glaze. Cool to room temperature for 1–2 hours.
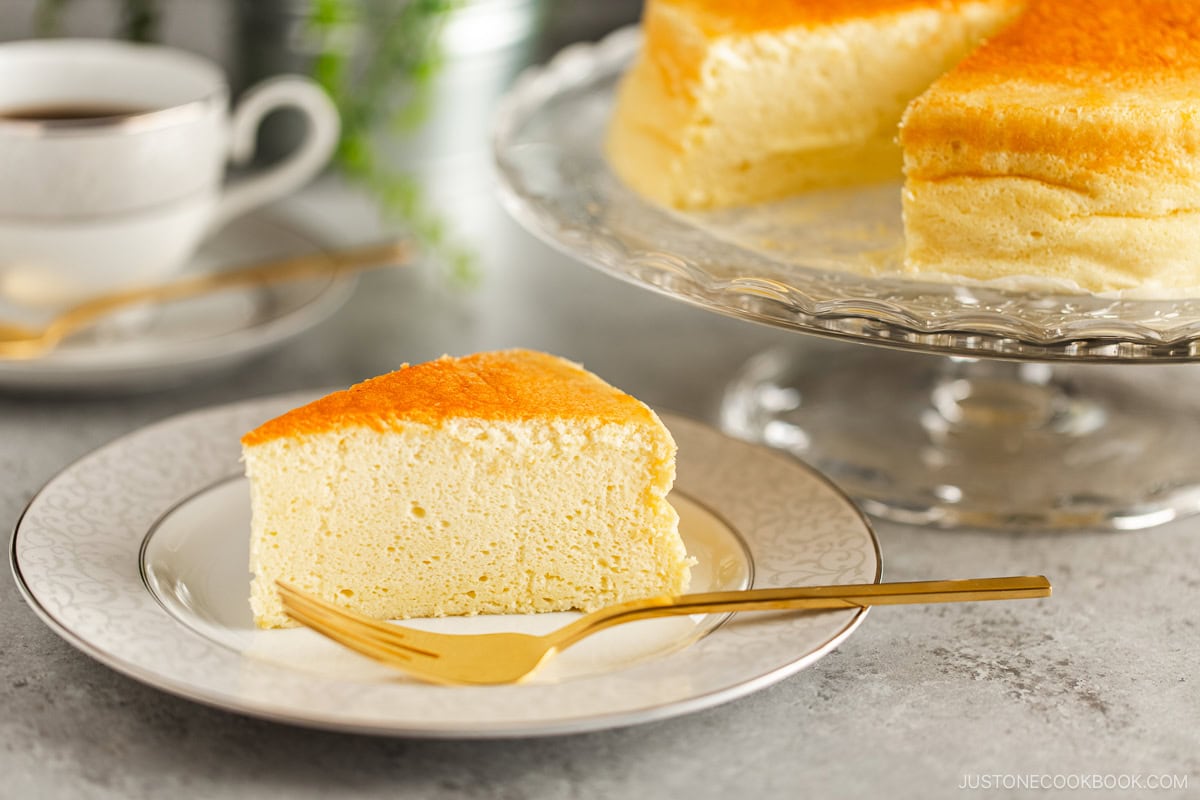
Step 8 – Chill in the refrigerator and serve. Finally, wrap it loosely with plastic wrap or cover it with a lid to protect it from drying out or absorbing fridge odors. Chill in the fridge for 4–6 hours (or overnight). Take out the cheesecake 10–15 minutes before serving. Slice with a sharp knife and enjoy!
Nami’s Recipe Tips
Prep Tips
- Measure all the ingredients before you begin – Timing is very important for this recipe, so you must prepare everything ahead of time. That way, the ingredients are ready to go when you need them. Any missteps can alter the batter and meringue quality.
- Weigh your flour – I highly encourage you to weigh your ingredients with a kitchen scale, using the recipe’s Metric button to convert the measurements to weights. If you don’t have a scale, you will need to fluff your flour with a spoon and sprinkle it into your measuring cup so you don’t scoop more than you need.
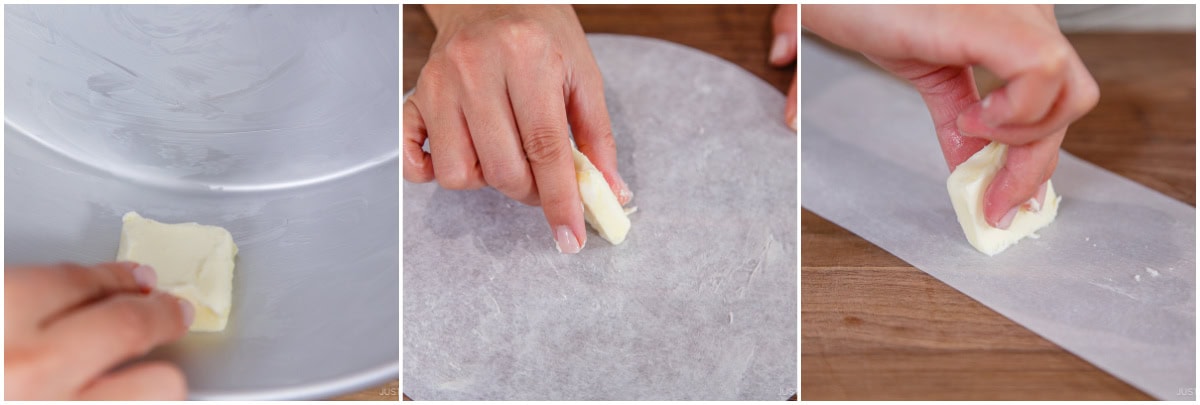
- Grease the pan and parchment paper – This helps the parchment paper stick to pan. You will also need to grease any part of the paper that will touch the batter. If the cake sticks to the paper while rising, it will pull on the cake and end up cracking it.
- Set up a double boiler – The steam from the simmering water will warm up the cream cheese, heavy cream, and egg yolks in the bowl so you don’t have to bring them to room temperature before mixing! I love this speedy method as I often forget to remove the ingredients from the refrigerator ahead of time.
Mixing Tips
- Use cold egg whites – In Japan, we use chilled egg whites for a refined texture. I notice that American recipes call for room temperature whites to achieve volume. Maybe we look at things differently? Some recipes call for cream of tartar, but I do not use it here because it is not a common product in Japan.
- Use a clean, dry, and cold mixing bowl – Make sure there is no oil or water in the bowl when you beat the egg whites. I avoid plastic bowls because even clean ones may hold oily residue that will keep the whites from whisking properly. Also, use a bowl that’s wide enough so the beaters don’t get buried in the meringue. Finally, I highly recommend chilling the bowl in the fridge until you need it.
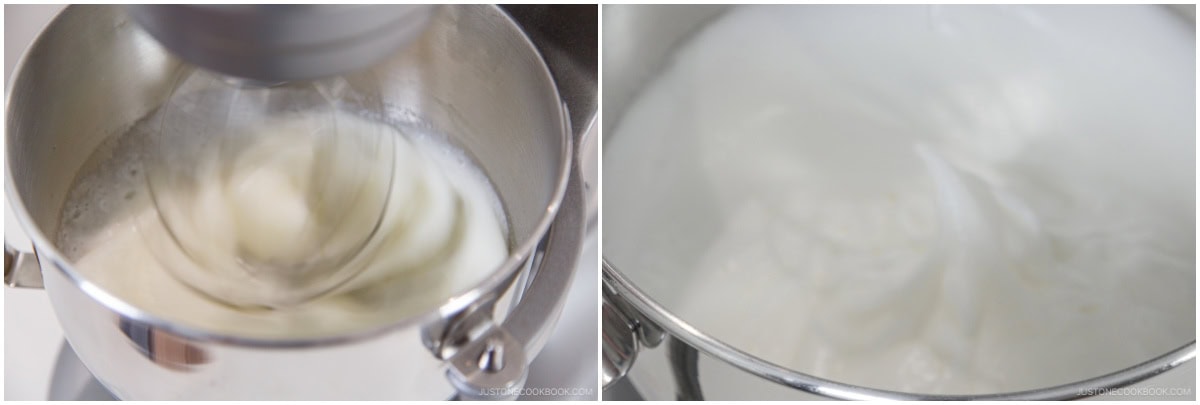
- Beat the egg whites to firm peaks – This is the trickiest and most important part of making Japanese cheesecake. There are three stages of meringue—soft peaks, firm peaks, and stiff peaks. I aim for firm peaks where the meringue clings to the whisk when you turn it over and holds its shape fairly well, but the tip of the peak folds back on itself. Meringue adds small air pockets to the cake’s structure so it stays airy and fluffy.
- Fold in the meringue with a hand whisk – I learned that a whisk does a better job than a silicone spatula to gently fold the meringue into the cream cheese mixture. By not breaking the small air bubbles, the cake can rise higher without collapsing.
Baking Tips
- Bake in bain-marie – A bain-marie (ban mah-REE) is the French term for a water bath. The hot water creates a gentle and uniform heat around the cake and provides moisture inside the oven. We use this essential technique to cook delicate foods like soufflé and custards.
- Bake at two different oven temperatures – This is probably the second most important factor for a successful result. If the temperature is too high or the heat source is too close, the cake will rise too fast, the structure will break, and the cake will crack. I preheat the oven to 350ºF (180ºC), reduce to 320ºF (160ºC) when I start baking, then lower it further to 300ºF (150ºC) toward the end of baking.
Cooling/Chilling Tips
- Cool it slowly in the oven – Once it’s done, turn off the heat and leave the cake in the oven with the door ajar for a while. Gradual cooling prevents a sudden change in temperature that could shrink or collapse the cake. Eventually, you want the cake to come down to half the height, from 4 inches (tallest point) to 2 inches.
- Use parchment straps to unmold the cake – The crisscrossed straps makes it easy to lift the cheesecake from the pan. It’s easiest if you have a second pair of hands to help; my daughter often assists me. With this easy method, I never worry that the jiggly soufflé cake will collapse.
- Cool to room temperature, then chill overnight – Cooling the cake first helps prevent condensation from forming in the refrigerator. To develop the perfect balance of flavors and the famously airy and creamy texture, I highly recommend chilling the cake in the fridge for 4–6 hours or overnight loosely wrapped in plastic or covered with a lid to protect it from drying out or absorbing odors.
Serving Tips
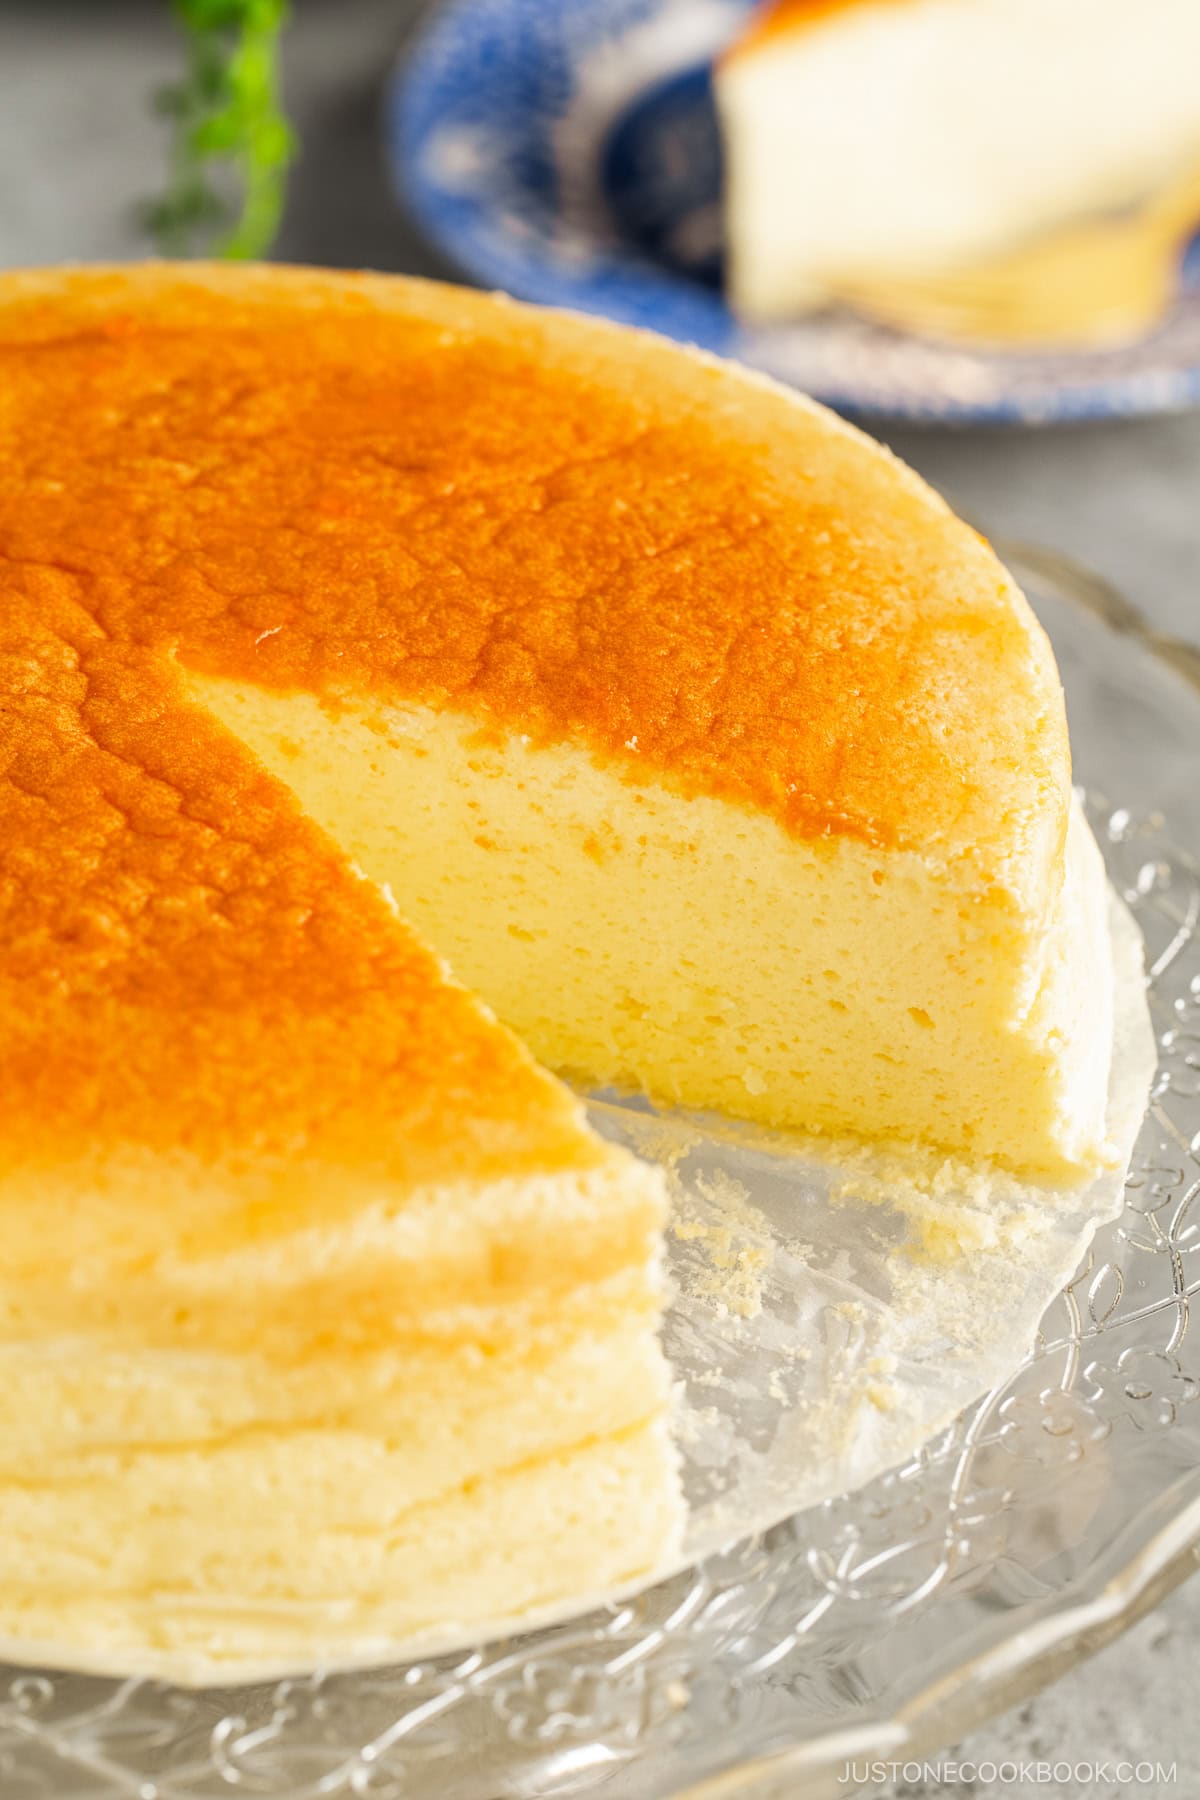
- Remove from the fridge 10–15 minutes before serving – Cold cheesecake is dense, and if you prefer a softer texture, this allows the flavors to mellow and the texture to become even fluffier.
- Warm up a sharp knife before each slice – Dip a clean, sharp knife in warm water and wipe it clean between slices to ensure neat and tidy cuts, as soufflé cheesecake can be quite delicate.
Variations and Customizations
You can make Japanese cheesecake in different flavors! Here, I suggest a few classic and elegant variations that would add a distinctly Japanese taste to your sweet creation.
- Matcha Soufflé Cheesecake: Add matcha powder to the batter, dust the top with additional green tea powder, and serve with sweet red bean paste and whipped cream.
- Yuzu Soufflé Cheesecake: Add yuzu juice and zest to the batter for a citrus aroma and tang, and serve with yuzu marmalade and candied yuzu peel.
- Hojicha Soufflé Cheesecake: Add hojicha powder to the batter for a nutty, roasted flavor, dust the top with more hojicha powder, and serve with whipped cream.
- Black Sesame Soufflé Cheesecake: Mix black sesame paste (kuro nerigoma) into the batter for a nutty and slightly savory flavor and garnish with whipped cream and toasted black sesame seeds.
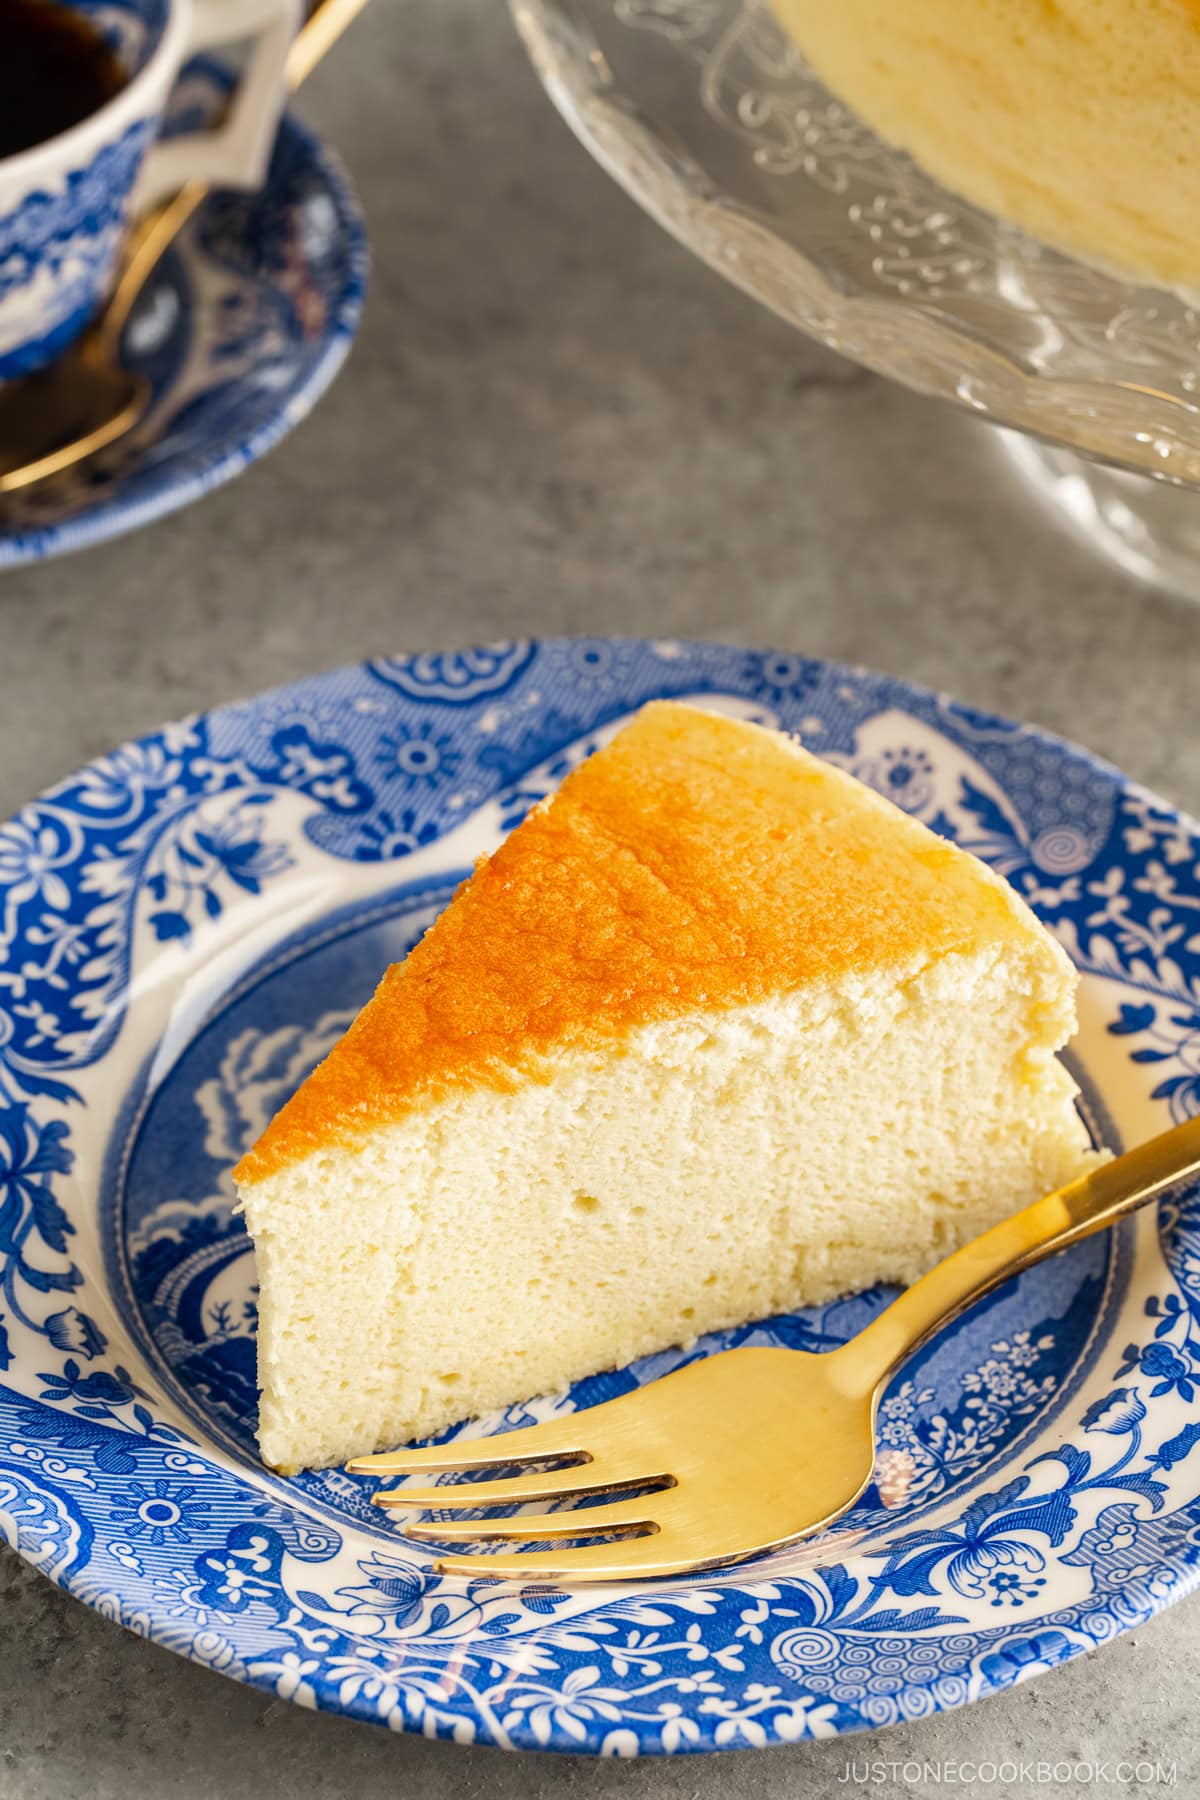
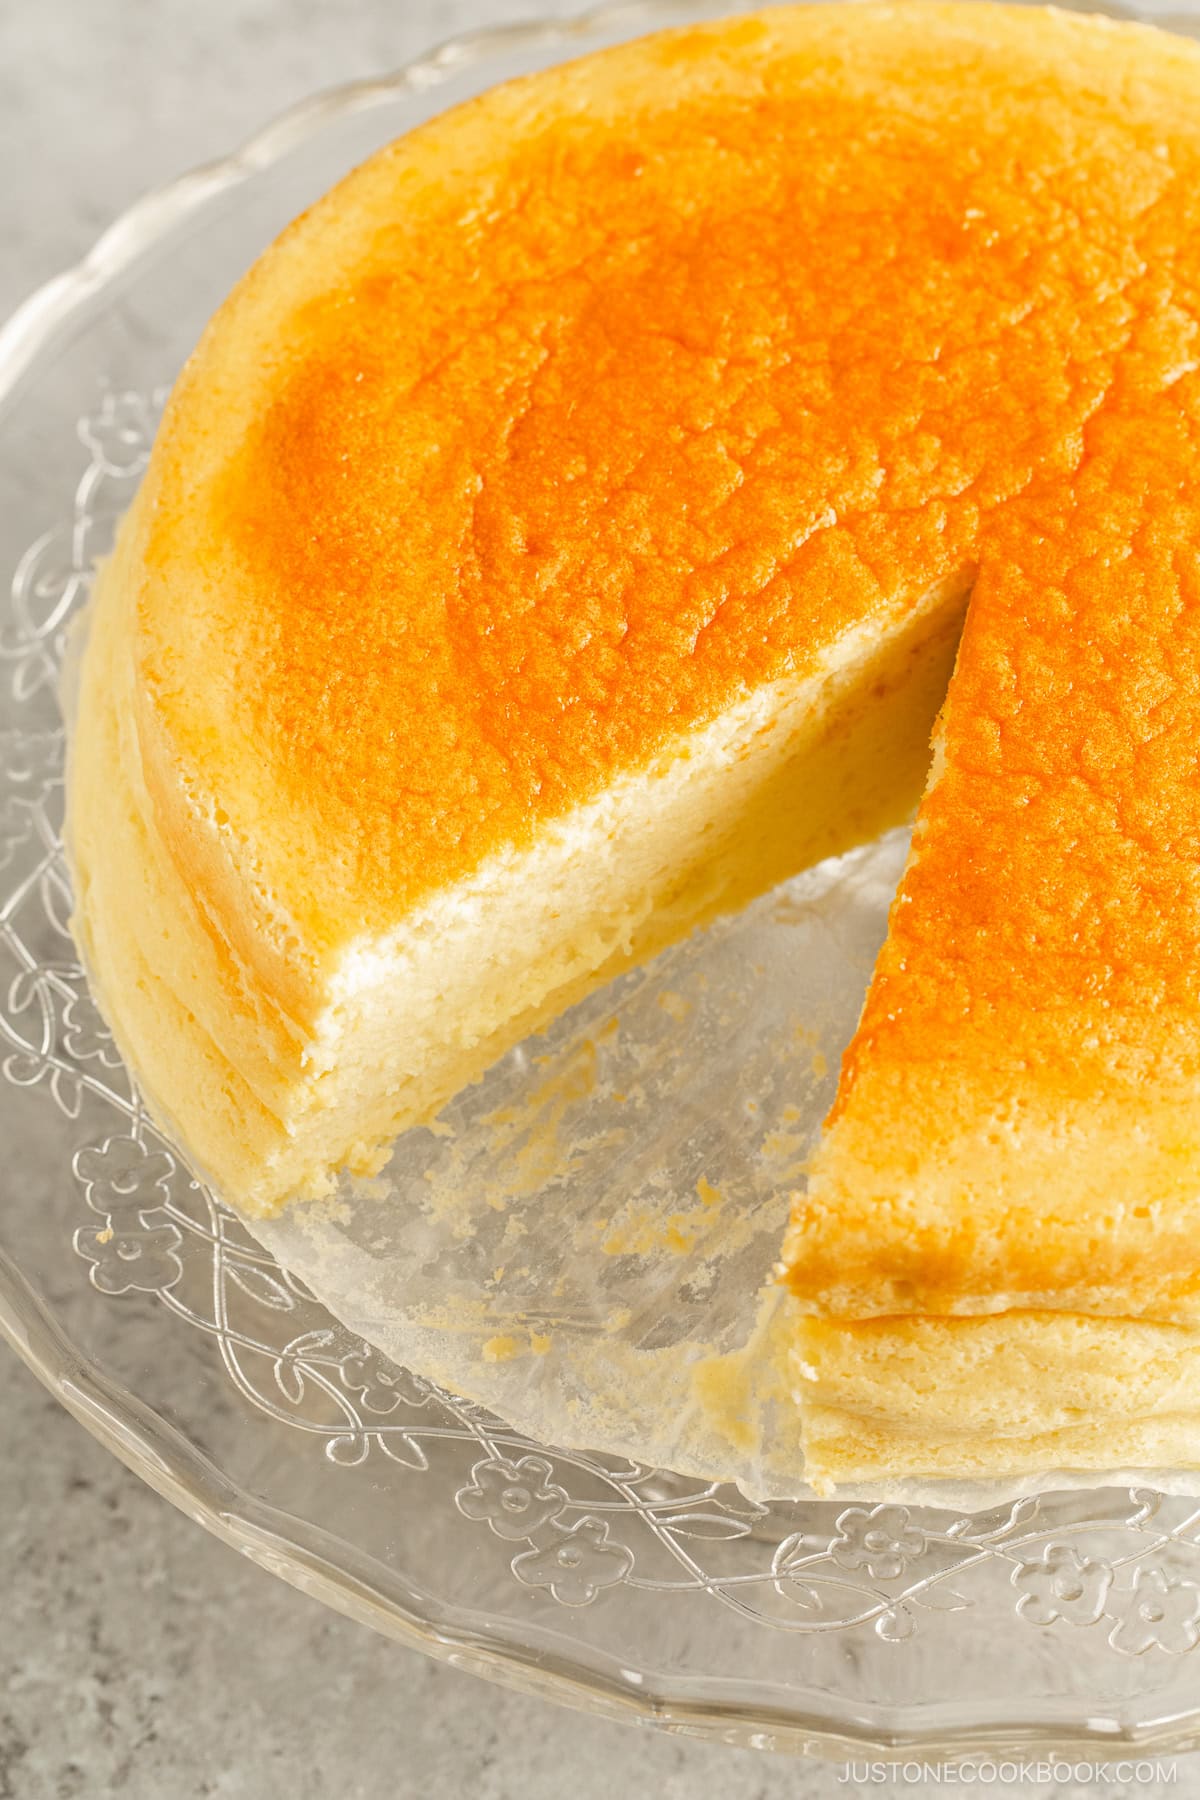
What to Serve with Japanese Cheesecake
This soufflé cheesecake is delicious served with berries on the side and other toppings. Here are my suggestions for foods to pair with this heavenly dessert.
- With a sauce – Strawberry Sauce (Strawberry Compote) goes so well with this cheesecake.
- With fruit preserves or curd – Try it with a dollop of lemon curd or Yuzu Marmalade.
- With fresh fruit and whipped cream – The classic combination! See how I make fresh whipped cream in my Japanese Strawberry Shortcake recipe.
- With a hot or iced beverage – I love serving Japanese iced coffee or Royal Milk Tea with this dessert.
Storage Tips
To store: You can store the cheesecake in the refrigerator for up to 3–4 days or in the freezer for 3–4 weeks. Thaw the cake overnight in the refrigerator.
Frequently Asked Questions
There are a few possible reasons for this. First, you may have underbeaten or overbeaten the egg whites. Firm peaks will create air pockets that give structure to the cake so it stays light and fluffy. Without them, the cake will deflate as soon as the temperature drops. For firm peaks, look for meringue that clings to the whisk and holds its shape fairly well, but with a tip of the peak that folds back on itself. Fold this meringue into your cheese mixture very gently so you don’t break the air bubbles. I found that a hand whisk works best for this job.
Second, you may have taken the cheesecake out of the oven too soon, causing a sudden change in temperature that can shrink or collapse the cake. To avoid this, leave the cheesecake in the oven once it’s done baking. Turn off the heat and let it cool down gradually with the door ajar, about 15–20 minutes. You want the cake to slowly reduce to half the height eventually, from 4 inches at the tallest point down to 2 inches.
Finally, make sure you handle the cake delicately when you remove it from the pan. Using parchment paper straps to gently lift the cake is my favorite method. Your cheesecake could collapse if you try to flip over the cake to unmold it.
It’s possible that your cake cracked because your oven temperature was too high or the heat source was too close to the cake. This makes the cake to rise too fast, break its structure, and crack. I recommend confirming your oven’s actual temperature using a digital oven thermometer, as the display temperature may not be accurate.
Also, if the cheesecake stuck to the parchment paper while rising, the paper may have pulled on the cake and cracked it. To avoid this in the future, be sure to grease the parchment paper that touches the cake batter so it doesn’t stick.
Heavy cream or heavy whipping cream is the richest type of liquid cream with a fat content of at least 36%. You can also go light and use whole milk in this recipe. Please do not use low-fat or nonfat milk, as they lack the richness needed for this recipe.
I often receive questions about sugar whether you can use a substitute or reduce the amount of sugar. The amount of sugar affects the baking results, so I recommend to follow the recipe first before adapting so you will know what works and what does not. I use regular white granulated sugar for my baking unless stated otherwise.
Cake flour contributes to the light texture of the pastry crust. Therefore, I don’t recommend using all-purpose flour. If you don’t have cake flour, you can make your own with just two ingredients. Measure 1 cup of all-purpose flour and remove 2 tablespoons of it. Then, add 2 tablespoons of cornstarch. Sift 3–5 times and it’s ready-to-use cake flour.
More Japanese Dessert Recipes You’ll Love
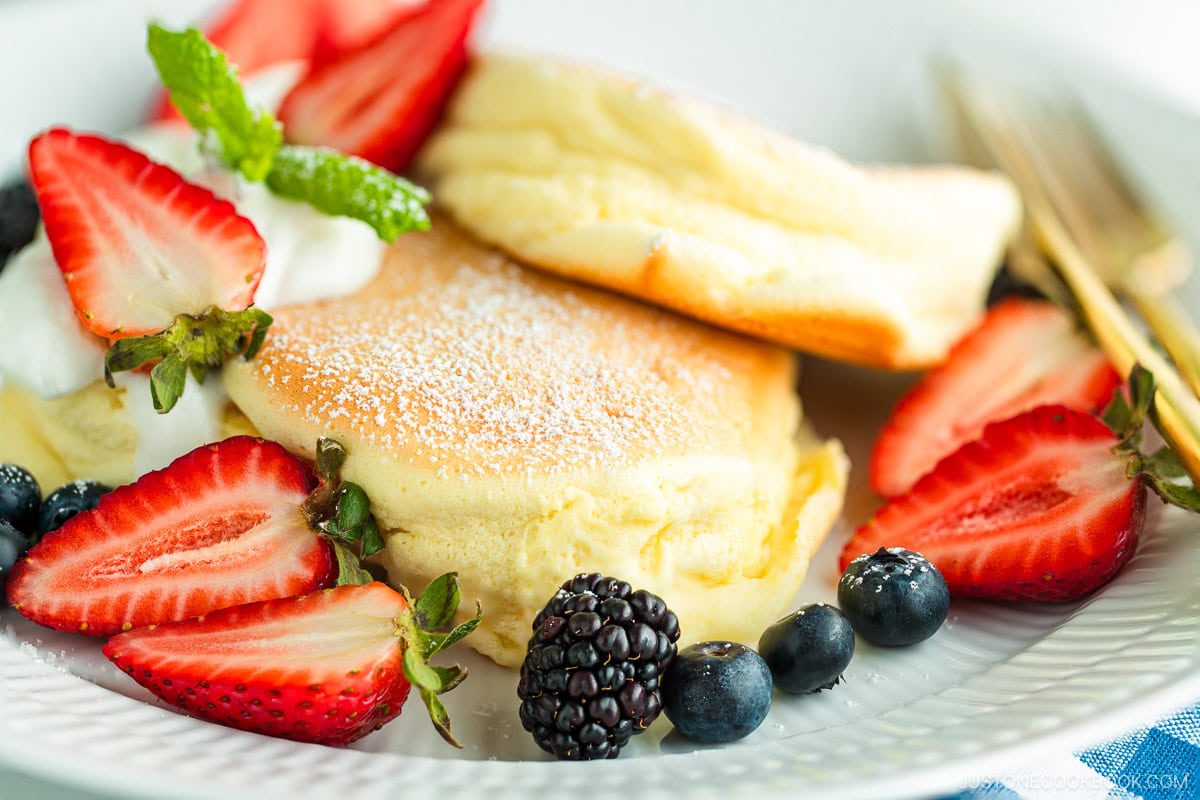
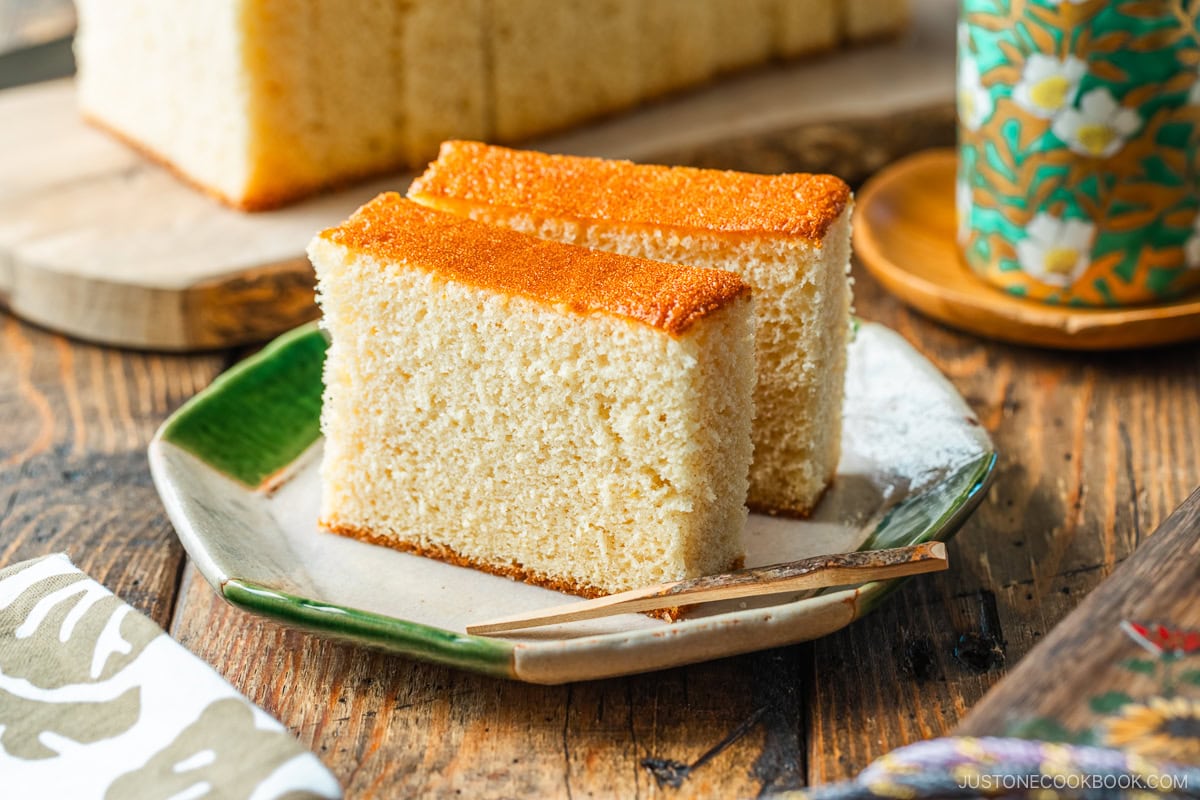
If you love this cheesecake recipe, you’re in for a treat with these other irresistible Japanese desserts:
Japanese Cheesecake
Video
Ingredients
- 1 Tbsp unsalted butter (for greasing the pan and parchment paper)
- 6 large eggs (50 g each w/o shell) (10.6 oz, 300 g without shell; separated)
- 10.6 oz cream cheese (I use full-fat Philadelphia Original Cream Cheese; 1 block is 8 oz)
- 4 Tbsp unsalted butter
- 200 ml heavy (whipping) cream (¾ cup + 4 tsp; you can substitute whole milk)
- 4½ Tbsp sugar (for the cream cheese mixture)
- ⅔ cup cake flour (please weigh your flour; for weights, click the Metric button; or learn how to measure flour with a measuring cup; click the ingredient link for how to make cake flour at home)
- ½ lemon (large; for the zest and juice)
- 2 Tbsp lemon juice (from the ½ large lemon)
- ½ cup sugar (for the egg whites)
- 2 Tbsp apricot jam (for the glaze)
- 2 tsp hot water (for the glaze)
Instructions
Before You Start
- Please note that this recipe requires a cooling time of approximately 1–2 hours and a chilling time of at least 4–6 hours (or overnight) after baking to achieve the perfect creamy yet light texture and balanced flavor. I encourage you to read the blog post for more detailed information that I shared about this recipe.
To Prepare the Cake Pan
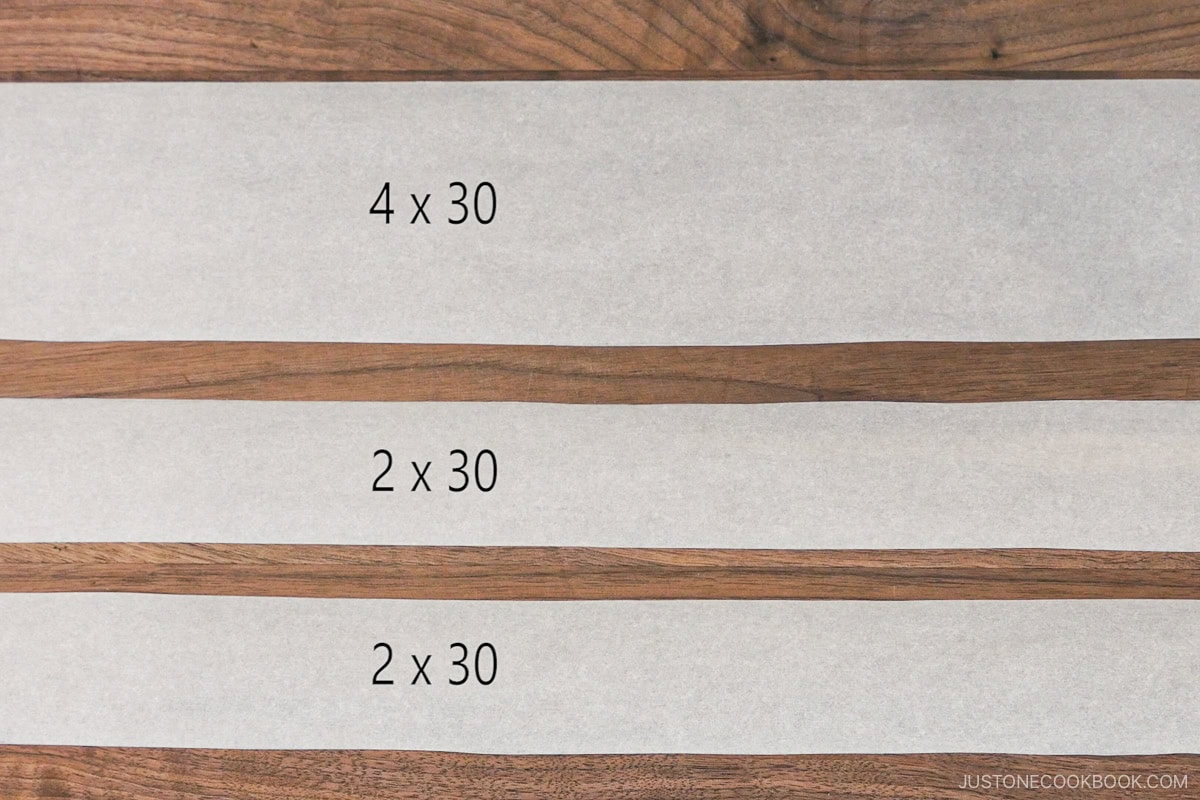
- Use a 9-inch (23-cm) cake pan that is 4 inches (10 cm) high. Cut parchment paper to line the bottom and sides of the cake pan. Cut one circle 9 inches (23 cm) in diameter for the bottom and one rectangular strip 4 x 30 inches (10 x 76 cm) for the sides of the cake pan. In addition, cut two strips of paper 2 x 30 inches (5 x 76 cm) each. We will use these as “straps” to lift the baked cake from the pan.
- With 1 Tbsp unsalted butter, grease the cake pan and the parchment paper on one side (for the bottom and the sides so the greased sides will touch the cake batter). You don‘t need to use all the butter.
- Crisscross the two parchment paper straps on the bottom of the cake pan so they form an “X.” Allow the excess paper to hang over the sides. Then, line the bottom and sides with the parchment paper so the greased sides will touch the cake pan. The greased side of the paper circle should face down, and the greased side of the rectangular strip should face toward the pan.
To Preheat the Oven and Prepare a Double Boiler
- Preheat the oven to 350ºF (180ºC). For a convection oven, reduce the temperature by 25ºF (15ºC). Note: You will be baking at 320ºF (160ºC). However, we’ll preheat a bit higher because your oven will lose some heat when you open it to place the cheesecake inside.
- Prepare a double boiler: Set a medium saucepan filled with 2 inches (5 cm) of water over high heat and bring it to a simmer, then cover and reduce the heat to maintain a steady simmer.
To Gather the Ingredients
- Gather all the ingredients. It is very important to measure all your ingredients before starting. Separate 6 large eggs (50 g each w/o shell) into yolks and whites and place the egg whites back in the refrigerator. I highly encourage you to weigh your ingredients using a kitchen scale. For weights, click the Metric button above to convert the measurements to metric. If you don't have a scale, here's how to measure flour with a measuring cup: Fluff the flour with a spoon, sprinkle it into the measuring cup, and level it off. Otherwise, you may scoop more than you need.
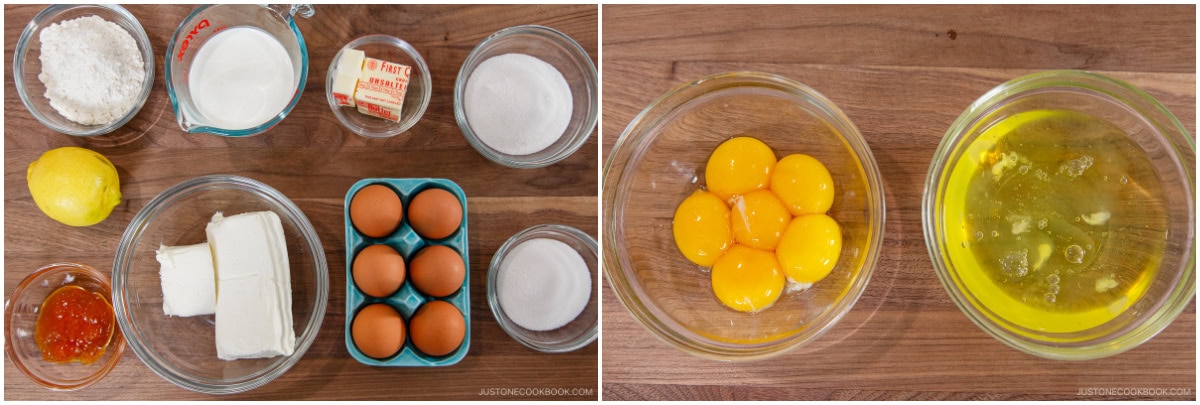
To Make the Cake Batter
- In a large bowl, add 10.6 oz cream cheese, 4 Tbsp unsalted butter, 200 ml heavy (whipping) cream, and 4½ Tbsp sugar. Rest the bowl on the saucepan above the simmering water. Tip: The double boiler will warm up and soften the cream cheese and butter, so you don't need to bring these ingredients to room temperature ahead of time.
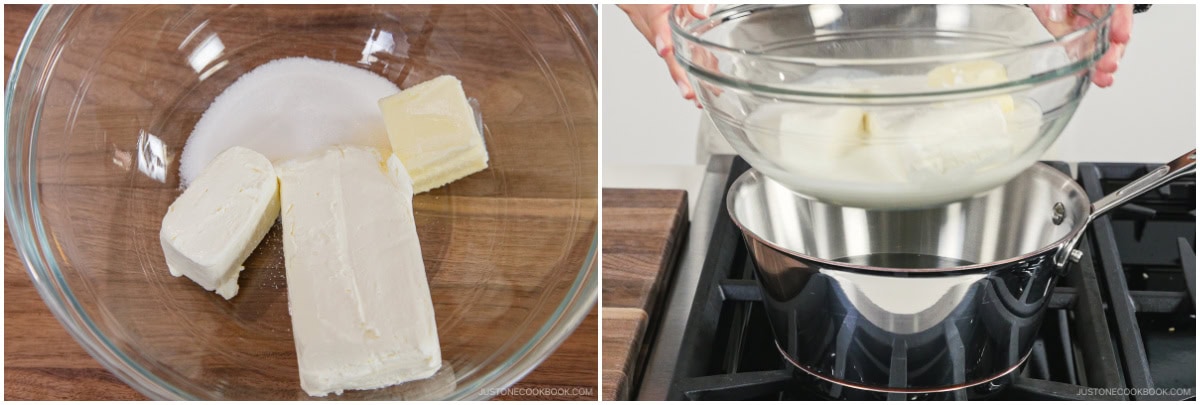
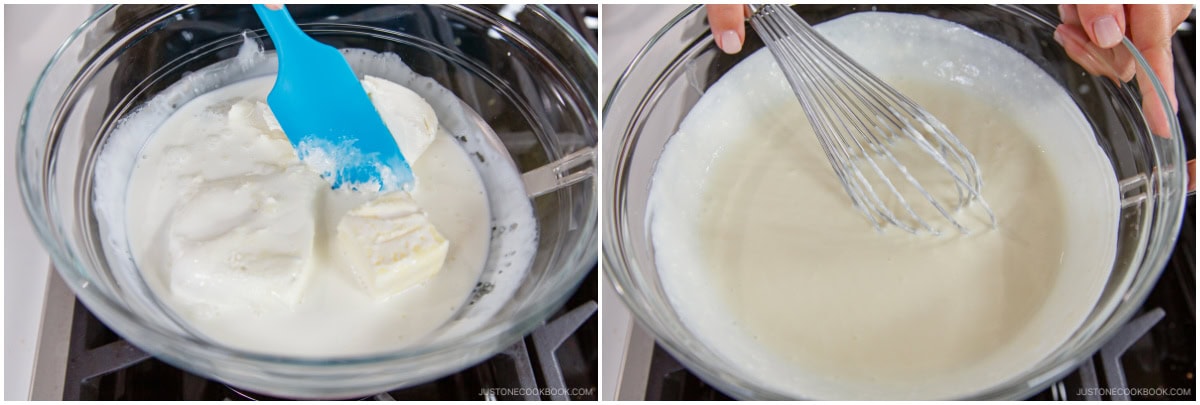
- Mash the cream cheese and butter with a silicone spatula. Once they are softened, use a hand whisk to blend everything together. Remove the bowl from the heat.
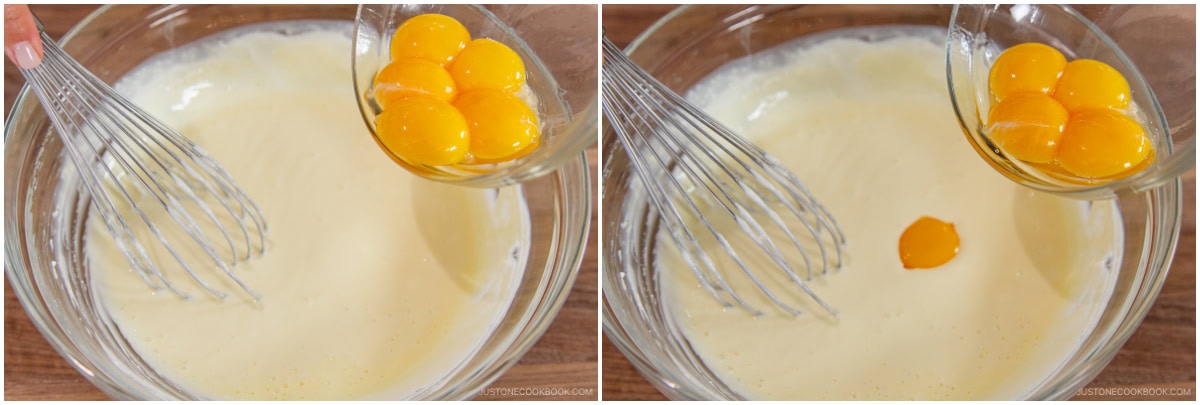
- Whisk the egg yolks, one at a time, into the warm cream cheese mixture. Make sure each yolk is blended well with the cream cheese mixture before adding the next one.
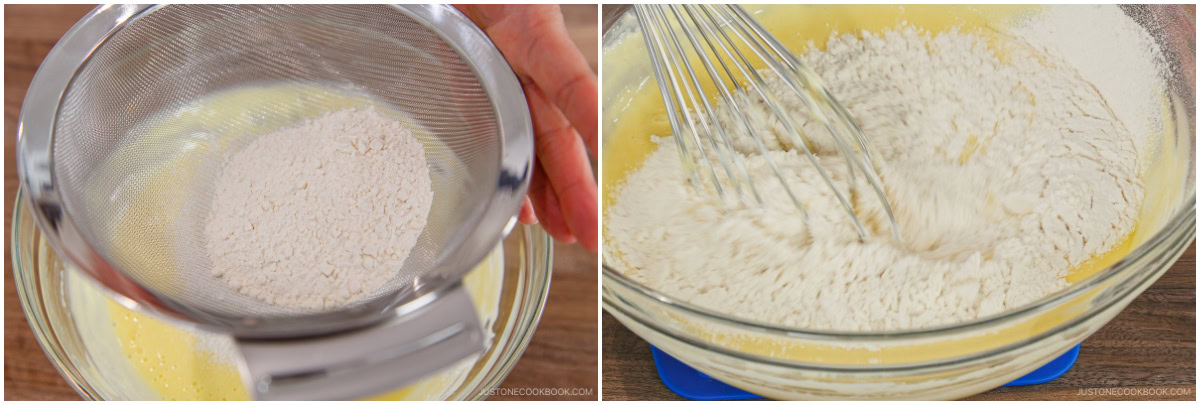
- Using a fine-mesh strainer, sift ⅔ cup cake flour into the batter. Whisk and blend together.
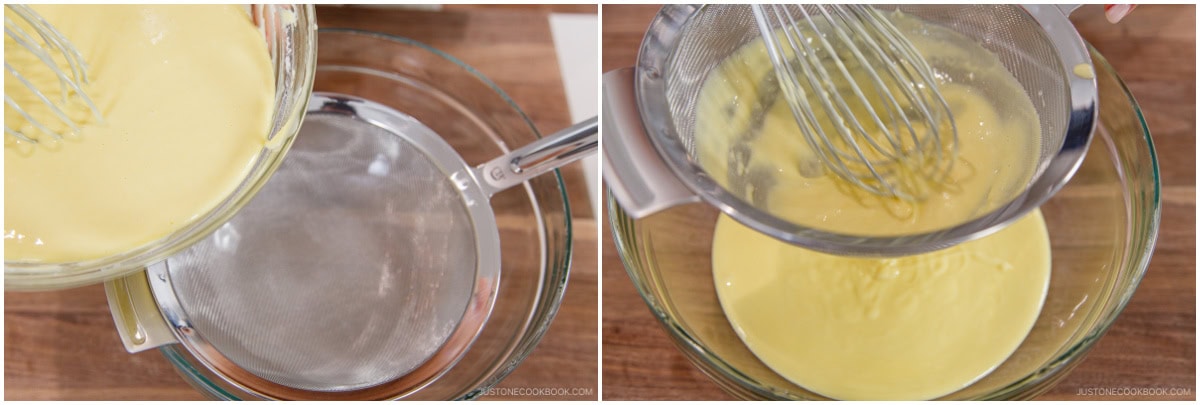
- Then, pass the batter through the same fine-mesh strainer into a clean large bowl. This creates a silky texture for the batter.
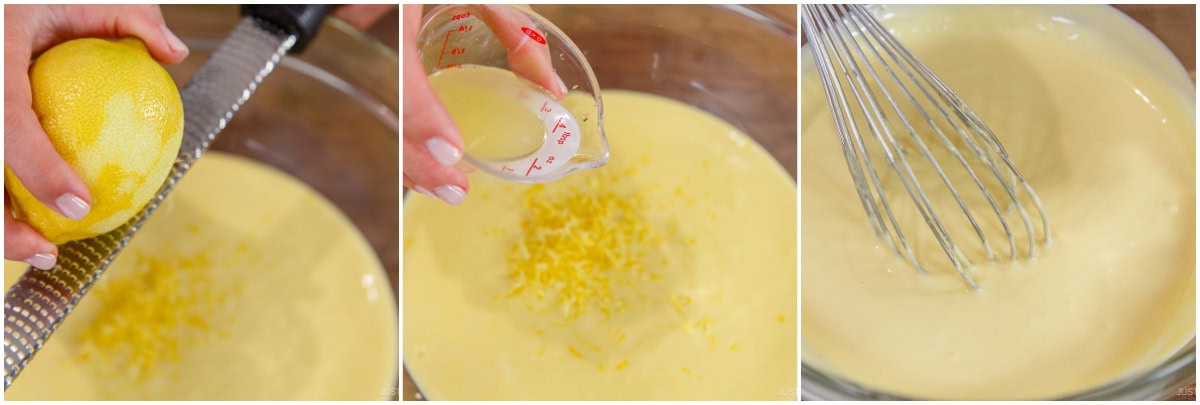
- Add the zest of ½ lemon into the batter. Make sure you only zest the flavorful yellow part and not the bitter white pith. Into a separate small bowl, squeeze the juice from the lemon. Measure 2 Tbsp lemon juice and add it to the batter. Whisk well to blend and set aside.
To Set Up the Bain-Marie (Water Bath)
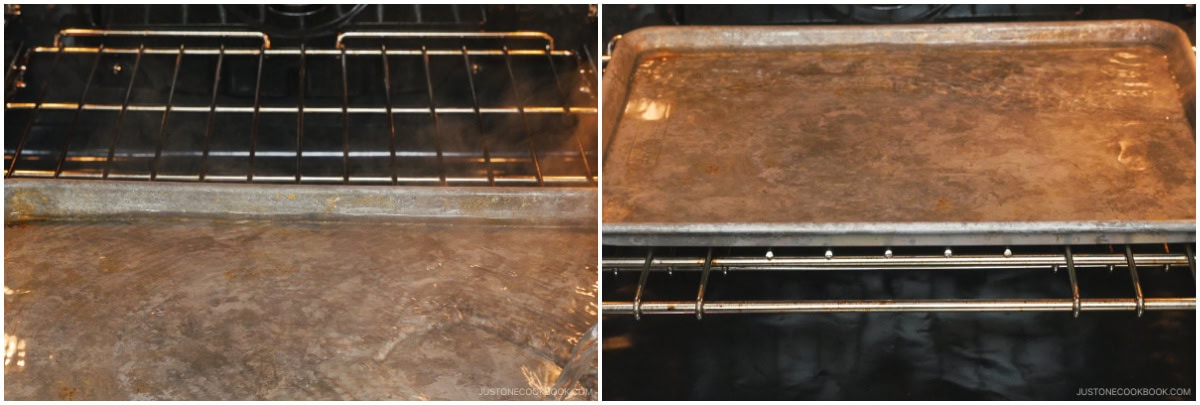
- Put a large baking sheet inside the preheating oven and pour in hot water until it is halfway up the sides or ½ inch deep. Close the oven door.
To Beat and Incorporate the Egg Whites
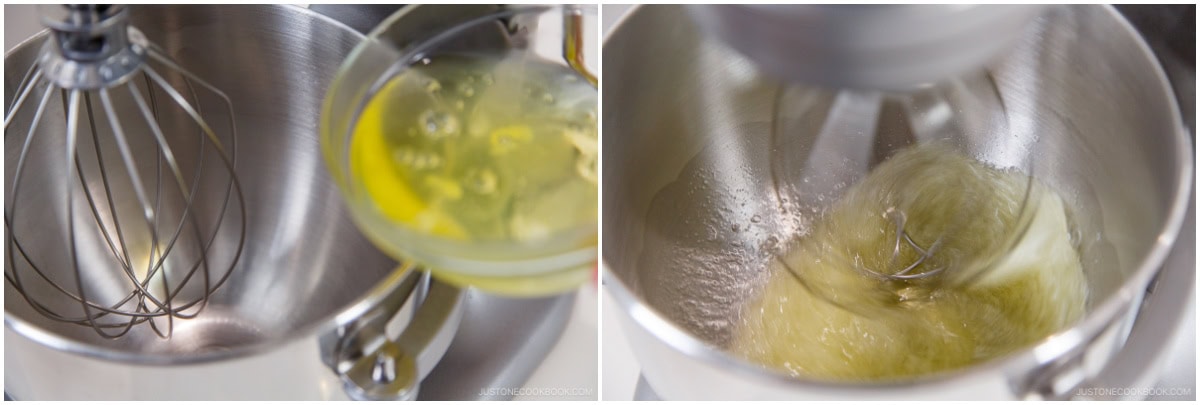
- Add the cold egg whites into the dry, clean mixing bowl of a stand mixer. Make sure there is no oil or water in the bowl. If you have space in your refrigerator, I highly recommend keeping the mixing bowl cold until you’re ready to use it. Start whisking on medium speed (Speed 4) until the egg whites become opaque, foamy, and bubbly, about 2 minutes. Then, slowly add ½ cup sugar, one-third of it at a time, while the mixer runs.
- Once you’ve added all the sugar, increase the mixer speed to high (Speed 8–9) and beat the egg whites until you have firm peaks. When you lift the whisk and turn it over, the egg whites should cling to the whisk and hold their shape fairly well, but the tip of the peak should fold back on itself.
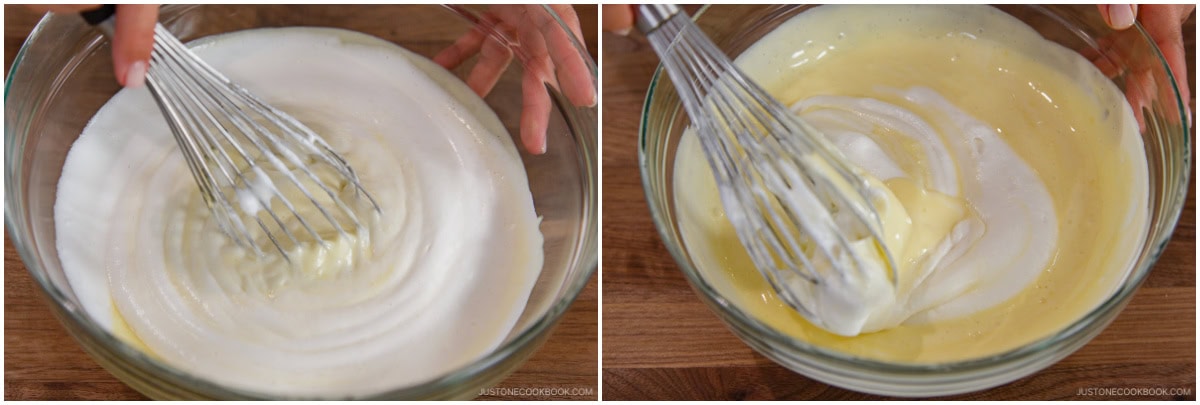
- Using a hand whisk, mix one-third of the egg whites into the cream cheese mixture until incorporated. Then, gently fold another one-third into the mixture.
- Lastly, pour the mixture back into the mixer bowl with the last one-third of the egg whites still in it. Fold very gently until just combined.
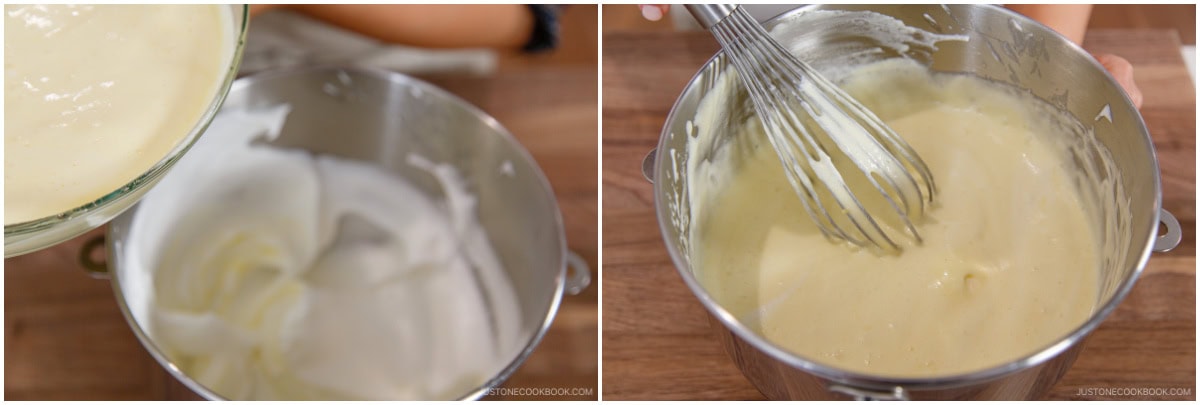
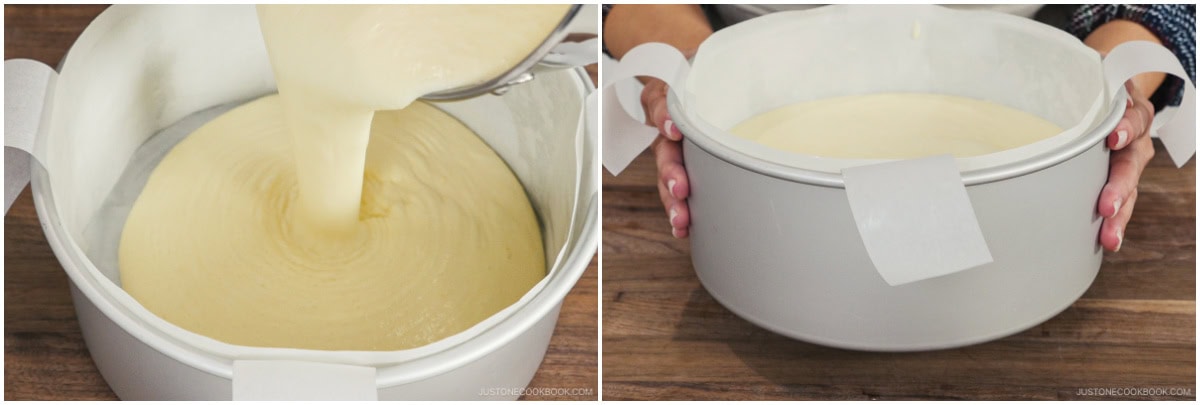
- Pour the batter into the cake pan all at once, avoiding air pockets while pouring. Tap the cake pan a few times on the kitchen counter to release any air pockets in the batter.
To Bake the Cheesecake
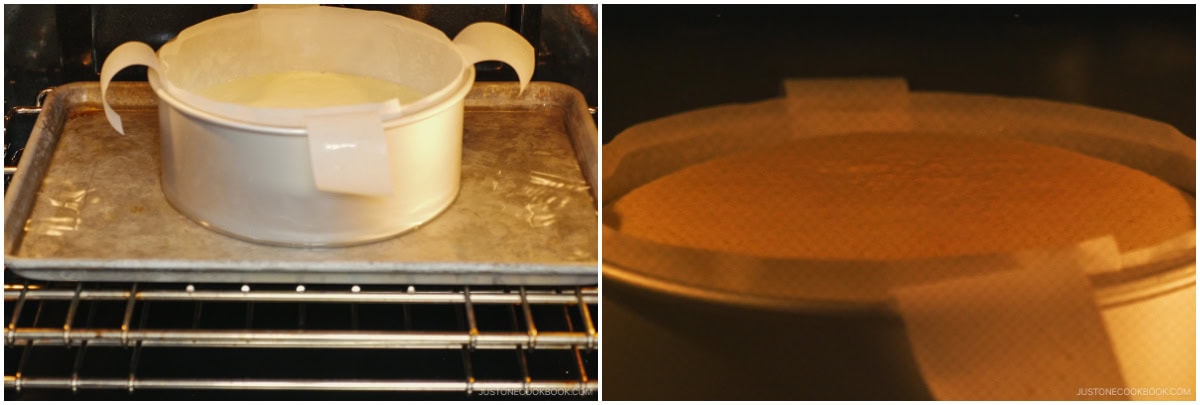
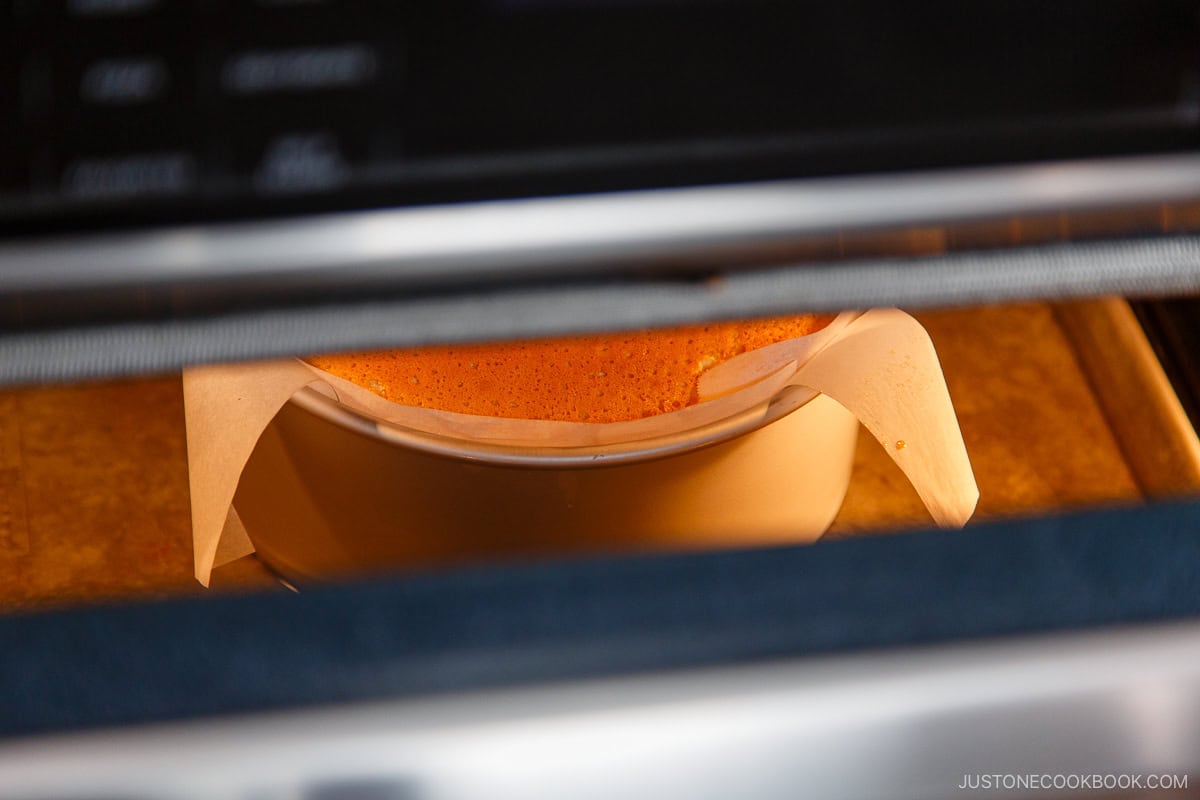
- Open the oven and place the cake pan onto the baking sheet with the bain-marie. Reduce the oven temperature to 320ºF (160ºC)—25ºF (15ºC) lower for a convection oven—and bake for 70–75 minutes. Then, reduce the oven temperature to 300ºF (150ºC) and bake for another 10 minutes, or until the top is golden brown. To test for doneness, open the oven door slightly and insert a skewer into the cake. If the skewer comes out without wet batter, it‘s done. Leave the cake inside the oven.
To Cool
- Turn off the oven and leave the oven door slightly ajar for 15–20 minutes with the cake inside so it cools gradually. If you immediately remove the cake pan to the kitchen counter, the sudden change in temperature could cause the soufflé cheesecake to collapse. While cooling in the oven, you want the cake to slowly shrink down to half its height, from roughly 4 inches to 2 inches high. After 15–20 minutes, remove the cake pan from the oven.
- Gently lift out the cheesecake from the pan using the two parchment paper straps (with help from another set of hands). Place the cake on a plate.
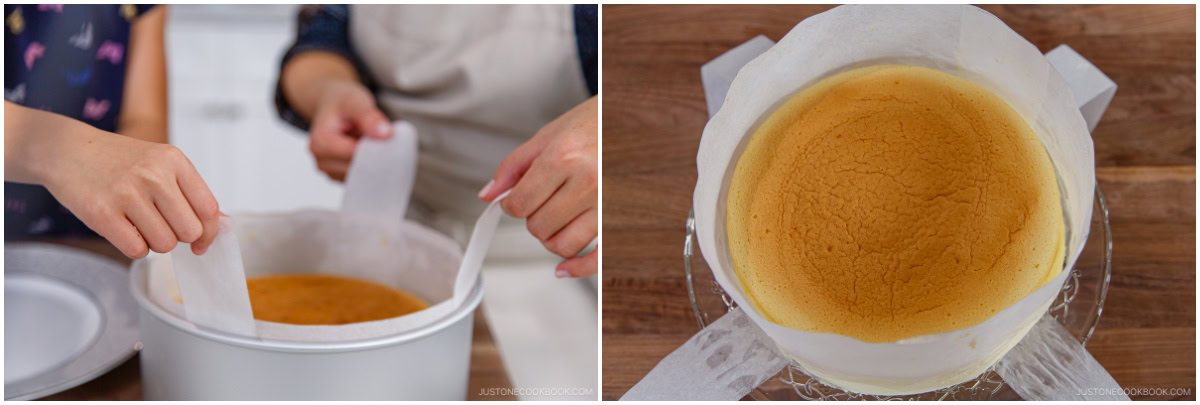
- Remove the parchment paper from around the sides (but leave the bottom paper). Combine 2 Tbsp apricot jam and 2 tsp hot water in a small bowl. Brush the apricot glaze over the top of the cheesecake. Let cool to room temperature.
To Serve
- Allow the cheesecake to cool completely in the refrigerator for at least 4–6 hours or overnight. Chilled cheesecake has a creamy yet light texture, with a perfectly balanced flavor.If you prefer a softer texture, take the cheesecake out of the fridge about 10–15 minutes before serving. This allows the flavors to mellow and the texture to become even fluffier.
To Slice
- Use a clean, sharp knife dipped in warm water and wipe clean between slices to ensure neat and tidy cuts, as soufflé cheesecake can be quite delicate.

To Store
- You can store the cake in the refrigerator for up to 3–4 days or in the freezer for 3–4 weeks. Thaw the cake overnight in the refrigerator. The cold cheesecake is dense, so leave it on the counter until just chilled before serving.
Notes
- Make sure your beaters and mixing bowl are clean and dry. A speck of oil, water, or egg yolk on either one can minimize the volume of the beaten egg whites.
- Avoid plastic bowls—even clean ones may hold oily residue that can affect the successful whipping of the egg whites.
- Use a bowl that’s wide enough to keep the beaters from being buried in the egg whites.
Nutrition
Editor’s Note: This post was originally published on December 11, 2016. It was republished with more helpful tips and information on December 11, 2024.


Hi Nami.
Firstly, I am loving your recipes and videos. 🙂 as well as you IG posts.
I am planning on making the Japanese Cheesecake tomorrow, I have all the ingredients ready but just realised my cake tin is one of those that has the removable bottom,(like the one you use for the burnt cheesecake) will this still be ok to use with the bain-marie?
Hi Graham! Thank you for reading Nami’s post and trying her recipe!
Nami and all of us at JOC are so happy to hear you’re enjoying her recipes and videos. Thank you also for following us on Instagram!
As for the removable bottom cake pan, you can cover the entire bottom with aluminum foil to prevent water from leaking in. Just make sure the foil is wrapped snugly around the pan so there aren’t any gaps.
Hope this helps!
First time making a cake from scratch and this cheesecake turned out great twice in a row! I substituted for monkfruit sugar and it tastes delicious!
Was thinking a smaller pan would be more suitable for our small family. How would I adjust ingredients for a 6in pan?
Hello, Amy! Thank you for trying Nami’s recipe! We are glad to hear you enjoyed her recipe!
To make this in a 6-inch pan, try halving the recipe and adjusting the baking time. Hopefully, this helps! 🤗
hello! would this cake work in a 19cm × 10cm pan? or should I use my 25cm x 7cm instead since I don’t have 23cm x 10cm at disposal right now? thank youuu ❤️
Hello, Jade. Thank you for trying Nami’s recipe.
19cm is around 7 inches, and you will have enough batter to make a little taller cake. If you use 25cm, try 1.5 times the batter from this recipe.
Regarding baking time, you can use the same oven temperature but bake for a few minutes longer to see how it goes.
We hope this works well for you!
Hello i have a 25cm x 7cm cake pan, can j use the recipe as is pr i would have to halve it?
Hello, there! Thank you for trying Nami’s recipe.
If you’re using a round cake pan, yours is slightly larger than Nami’s, so it’ll work, but the cake will be a little flat. It might be a good idea to prepare 1.5 cake batter. We hope this helps!
Hi,
I want to try making this recipe. Seems like there were instructions to adjust the ingredients and baking time for smaller cake pans but I am unable to find it. Can I those instructions please be re-posted in the comments?
Thank you so much
Jen
Hi Jen, Thank you for trying Nami’s recipe!
We do have pan size instructions for the chiffon cake, but we don’t recall including them for this particular recipe. That said, as long as you maintain the same ingredient ratios, you should be able to adjust the quantity to fit your pan size. Hope this helps!
I want to make half the recipe in a 6 inch pan. Do you have any suggestions on the baking time?
Thanks
Hello, Jen! Thank you for trying Nami’s recipe.
We have not experimented with a 6-inch pan and are unsure about the precise baking time. Start with 55 minutes and keep an eye on it. Please let us know how things go!
Hi,
I tried making the cheesecake but it didn’t rise much. I want to confirm about the egg whites. In the video, it says soft peaks, but in instructions it says firm peak.i am wondering if I have under or overbeaten the egg whites.
Thank you very much.
Jen
Perfect!! 👌🏻🤤
Hello there! Thank you for trying Nami’s recipe!
We are glad to hear you enjoyed the cake! Happy Baking!
“tip: weight your flour”. Only gives volume measurement for flour.
???
Oh there is a metric button
Hello, Kukua. We’re delighted you found the button!😃
Thank you for trying Nami’s recipe!
Has anyone tried doing the majority of the baking at 320f, versus preheating at 350f and turning the temperature down. We made this last night and just tested it for dessert tonight—I found it dry and didn’t care for the texture at all. I followed the directions to the letter, but mine did not jiggle at all when I removed it from the oven. I used the minimal baking times, but it seems over baked ?
Hi, Michelle! Thank you for trying Nami’s recipe.
If you have not already done so, we recommend checking the internal temperature of your oven. Adjustments may be necessary to ensure that your display is accurate. We hope your cake jiggles on the next try!
For anyone who may be curious, I made this in a rice cooker and it turned out perfectly! (Two full cycles)
Thank you for an amazing recipe!
Hello, Keena! Thank you for testing Nami’s recipe!
We are glad to know that this recipe also worked well in a rice cooker! Thank you for sharing your experience!
My favourite out of the cakes I have tried so far from here. I may be lazy regarding sifting flour or having an actual waterbath (I put another tray with water in the oven to help steam, but I don’t trust my baking form to keep the water out).
The big part taste wise is that you actually can taste the lemon a bit complemented by the thin layer of water/apricot jam.
It is light enough to keep eating it and good enough to jump through the hoops to make it.
Hi Pips! Thank you for trying Nami’s recipe!
We are glad to hear you enjoyed the Japanese Cheesecake! Happy Baking!
The recipe calls for 2/3 cup of flour, but no indication of the weight in grams. Being that you recommend weighing the ingredients, this information would be useful.
Hello, Kris! Thank you for trying Nami’s recipe.
To view the ingredient list with weight, please select the Metric box at the top of the recipe card. We hope this helps!
Hello! do you have instructions on how to store it for the next day? Cool completely and wrap in cling wrap?
Hi, Bailey! Thank you for trying out Nami’s recipe.
Yes. Allow it to cool fully, then wrap it in plastic wrap or foil to keep it moist and store it in the refrigerator.
We hope this helped! 🤗
Hello, I’ve made this many times and loved it. Thank you so much for the recipe! I was wondering if you ever tried with a shortbread or graham cracker crust and whether there’s anything to consider when adding that.
Hello, Jasper. Thank you for trying Nami’s recipe.
We have never tried it previously for this cake and are unsure of the results. If you try it, please let us know how it goes!