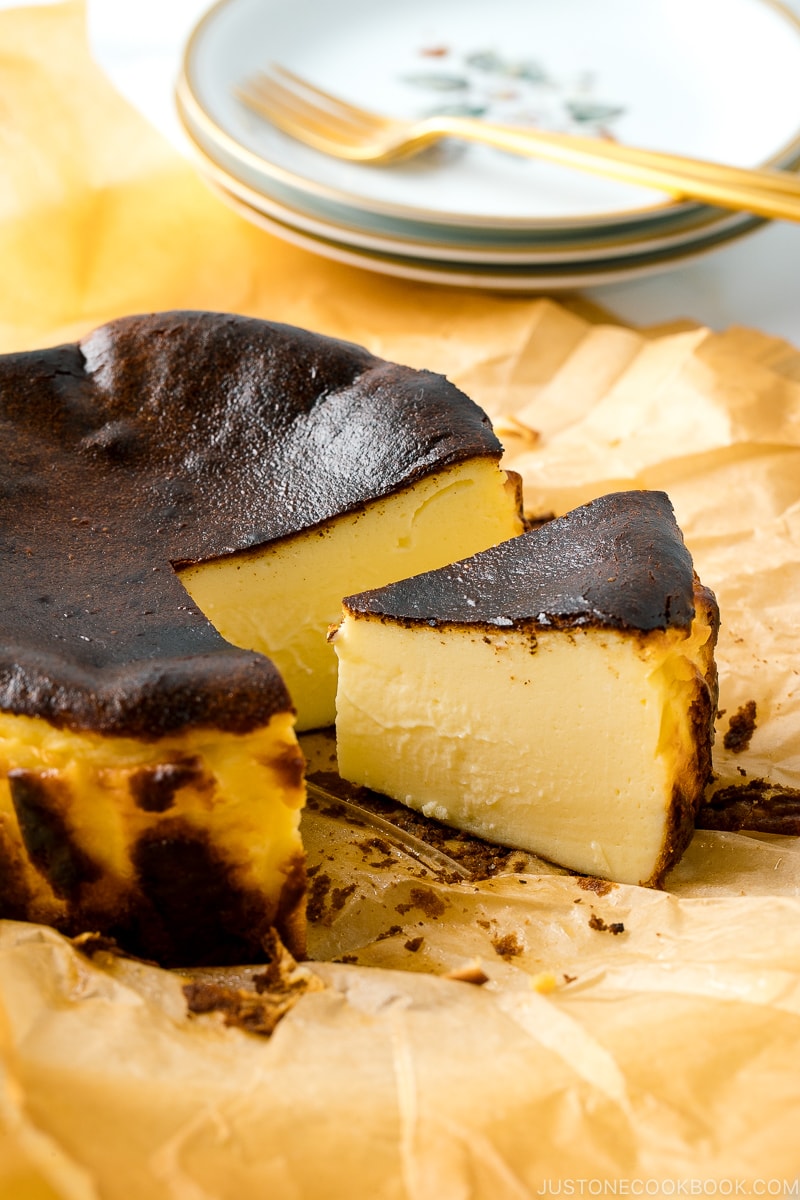
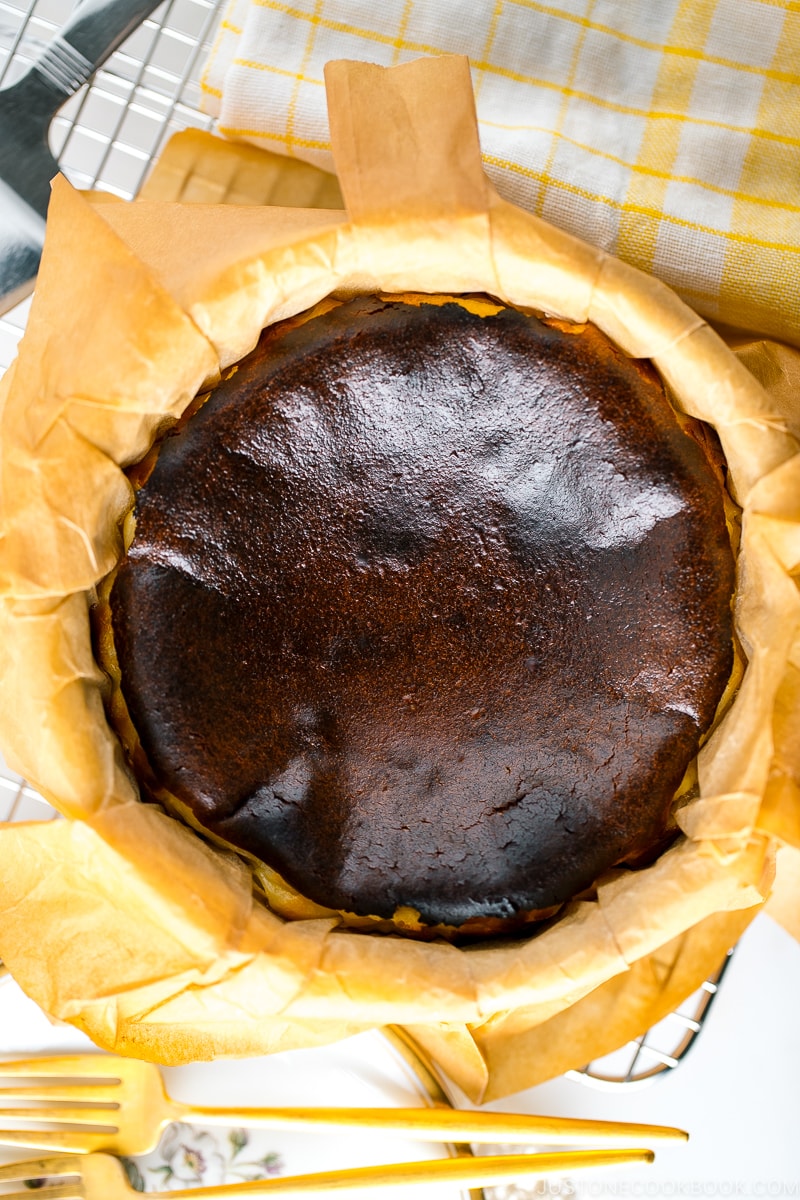
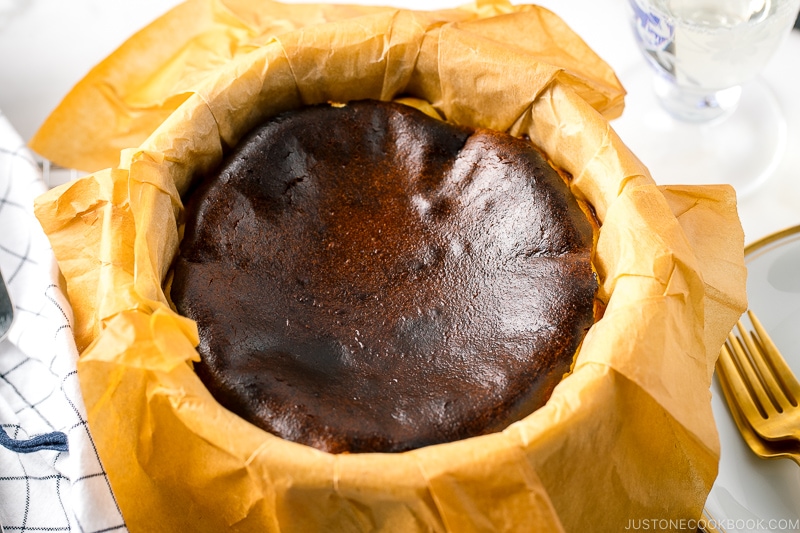
Creamy on the inside and caramelized on the outside, this Basque Burnt Cheesecake is easier than it looks to make at home. Baked at a high temperature, the cheesecake’s iconic rich dark top is a showstopper! Follow my tips and tricks for a foolproof recipe.
I learned about Basque Burnt Cheesecake when I was back in Japan over the summer of 2019. It seemed like every Japanese Instagrammer I followed was sharing their version of this cheesecake. I made a mental note to find out more about the craze, but 2 years went by, and it had totally slipped off my radar.
Thanks to my friend Sophia, I finally had a chance to eat the famed cheesecake this summer. She adapted her Basque burnt cheesecake from this recipe and kindly shared it with us. Her cheesecake was beautiful! It had the perfect burnished, deep brown top, with the dreamy creaminess and a slight ooze in the middle.
Since then, I’ve made more than 10 different basque burnt cheesecake, fiddling between slightly different methods and ratios. Among the methods, I also made “Japanese-style” Basque Burnt cheesecake which was actually preferred by my family and some friends. This Burnt Basque Cheesecake recipe is what’s considered typical Basque cheesecake, and next week I’ll share the Japanese-style recipe.
What is Basque Burnt Cheesecake?
Originates in the Basque region of Spain (hence the name), Basque cheesecake (also known as Tarta de Queso) was created in 1990 by chef Santiago Rivera of a restaurant called La Viña in San Sebastián. If you’re interested, read this article or this article that explains how this cake was invented and became popular.
Besides its obvious “burnt” look, here are some of the characteristics of this cheesecake:
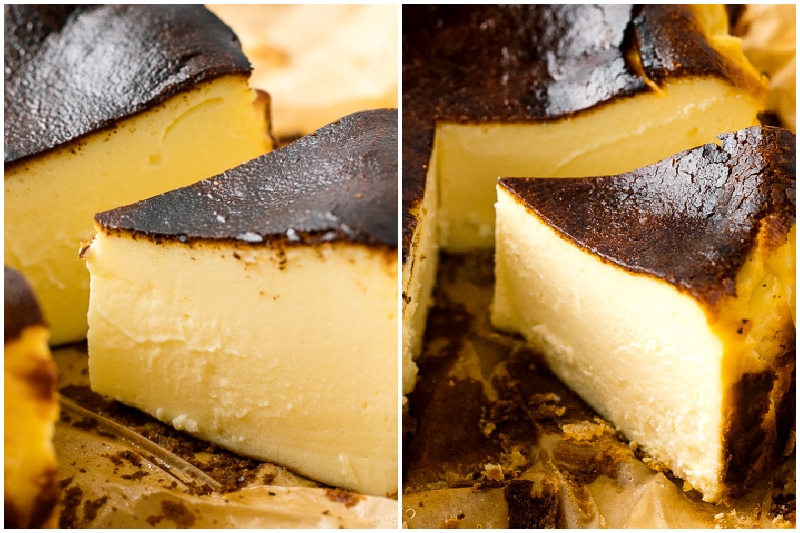
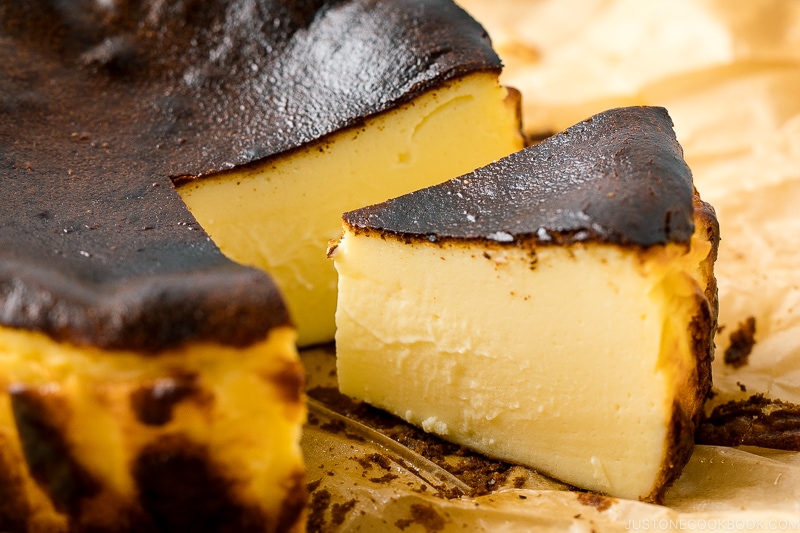
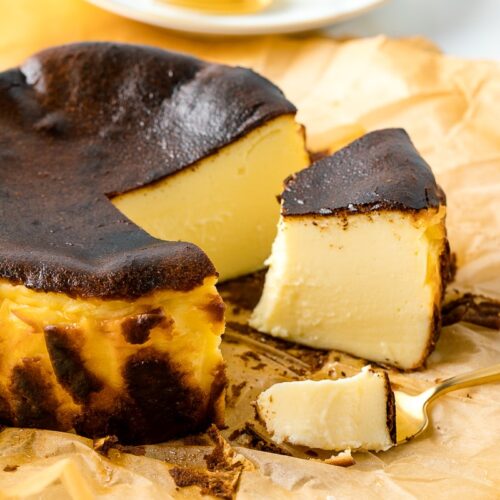
- Texture: Creamy in the middle, firmer cheesecake texture on the exterior. Unlike American cheesecake, it does not have a crust.
- Flavor: Simply put, it tastes like a caramelized cheesecake in one bite. It has a good balance of bitterness from the burnt exterior and sweetness from the creamy custardy interior.
- Difficulty: This is absolutely the easiest cheesecake I’ve ever made. I told Mr. JOC that a man who had never baked in his life can impress loved ones with this cheesecake!
- Baking: The cheesecake is finished baking in half the time compared to regular cheesecake! Bake at a higher temperature to achieve that rich, dark caramelized exterior surface, yet the center of the cheesecake is still jiggly.
- Time: Mix ingredients, bake for 30-35 minutes, and chill. Fast and easy!
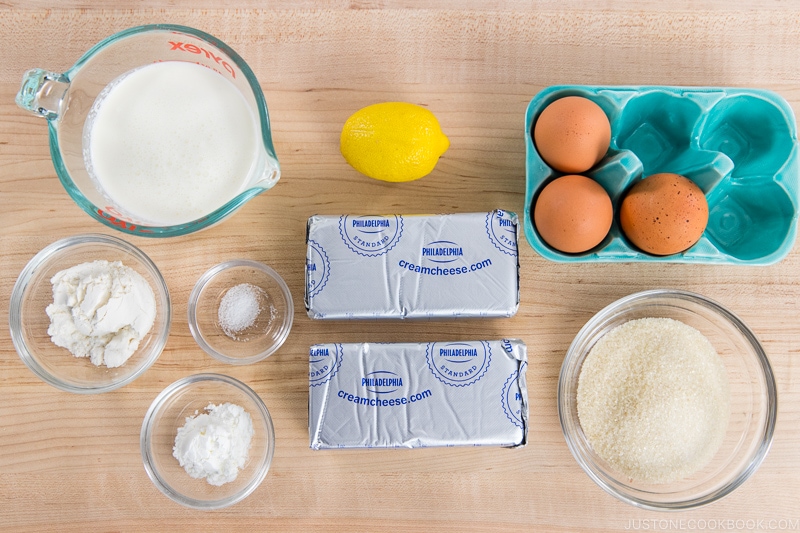
Ingredients You Need
If you look up this recipe online, you will realize that most recipes are pretty simple and straightforward. They all have the following ingredients, with slightly different ratios according to the baker’s take.
- Cream cheese (Philadelphia, NOT whipped cream cheese or reduced-fat)
- Sugar (Standard granulated sugar, I used organic cane sugar)
- Eggs (Large eggs, 50 g each without shell)
- Heavy (whipping) cream (36-38% fat)
- Flour (I used cake flour)
Some people would also add vanilla, lemon juice, and salt, and that’s it.
Overview: How to Make Basque Burnt Cheesecake
The full printable/written recipe with step-by-step pictures is below.
- Preheat the oven for at least 30 minutes. Also bring the cream cheese, eggs, and heavy cream to room temp.
- Gradually mix all the ingredients, one at a time, in a large bowl.
- Pour the batter into a cake pan and bake for 30-35 minutes.
- Let cool completely at room temperature (about 2-3 hours).
- Chill in the fridge, and enjoy!
Just 3 Tools You Need
1. 6-inch (15-cm) Round Cake Pan
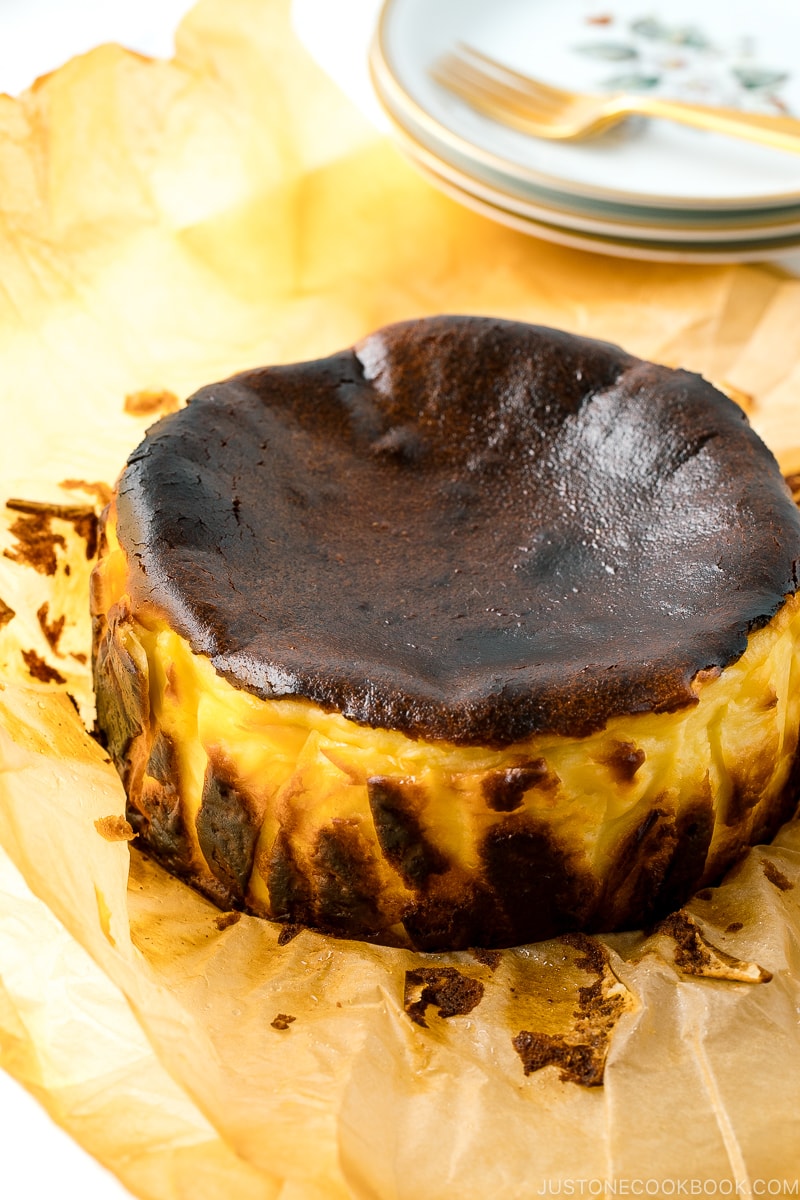
As it’s a relatively heavy dessert (2 blocks of cream cheese in this tiny cake!), I find this 3-inch deep 6-inch round cake pan with removable bottom perfect for 6 people.
- A taller cake looks more elegant and pretty when you think about the per-serving size.
- It’s easier to sustain/control the creaminess when it’s small and tall (a flat cake will cook too fast).
- Recommend baking multiple cheesecakes if you’re baking it for more than 6 servings.
- If your cake pan is 2-inch deep, you need the parchment paper to stay up to sustain the cake batter.
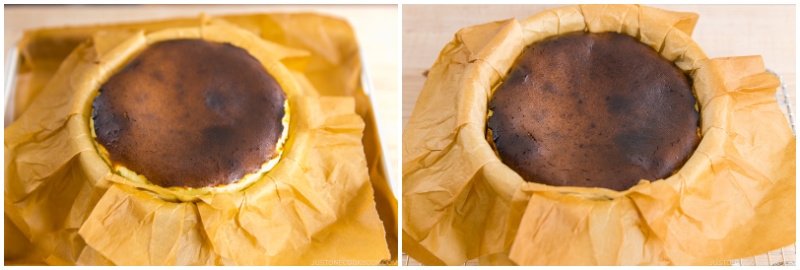
The baked cheesecake will rise above the cake pan rim. As such, it is important to use a cake pan at least 3-inches deep.
Why a small cake pan?
You’ll find a lot of recipes use springform pan, which you could use. However, a larger size pan (say 8-inch or 9-inch round) will create a short and shallow cheesecake. It will not produce the same rich and lusciousness, especially if you wish to achieve a melty molten-like texture in the center.
Multiply the recipe by 1.5 to accommodate for a 3-inch deep 7-inch round pan, or multiply the recipe by 2 to accommodate for a 3-inch deep 8-inch round pan.
2. Parchment Paper
Be sure to use parchment paper, not wax paper. Some parchment paper is wide (like one from Costco) but typical parchment paper is not wide enough, so use two sheets to cover the shorter side of parchment paper.
3. Silicone Spatula
You can make this dessert with a good-old silicone spatula and a large bowl. The original cheesecake at La Viña was made with just a spoon! Of course, you can use a stand mixer, electric mixer, or blender, if you have one.
This is an excellent recipe for any beginner to try. You can do this!
Doneness: Creamy vs. Dense
One of the unique features of this Basque Burnt Cheesecake is the doneness. You can totally customize it according to your preference, whether it’s creamy, or creamy with an oozy ‘raw’ center, or a firmer texture, like the regular cheesecake.
To achieve a creamy texture:
- Bake at a normal time in the oven.
- The cheesecake filling will firm up as it cools to create a creamy yet firm texture. You can serve once it’s at room temperature.
- If you chill, take out 30 minutes prior to serving.
To achieve a firmer texture:
- Bake a bit longer time in the oven.
- Chill in the fridge for a longer time.
- Take out 10 minutes before serving or serve it cold.
To achieve a “raw” creamy texture:
- Bake the cheesecake for a lesser amount of time.
- Chill overnight. To slice a cake nicely, refrigeration is necessary.
Read These Helpful Tips Before Making
I have some tips to share from my trials and errors. Initially, I really wanted to make this recipe work using a conventional oven (no fan). However, after testing many times, I realize it would be challenging to achieve the ideal ‘burnt’ look using the no fan oven. As soon as I started using the convection oven (with a fan), I was able to attain the nice glossy brown top right away.
To Preheat the Oven
- IMPORTANT: Preheat the oven for a long, long time so the oven is HOT.
- Use the convection bake (oven with fan) if you have one. If you only have the conventional (regular) bake option, bring the rack higher. Heat rises so the upper oven is supposed to be hotter. However, if your oven is top heating, make sure the parchment paper is not touching the heating element/ceiling.
To Prepare The Cake Pan
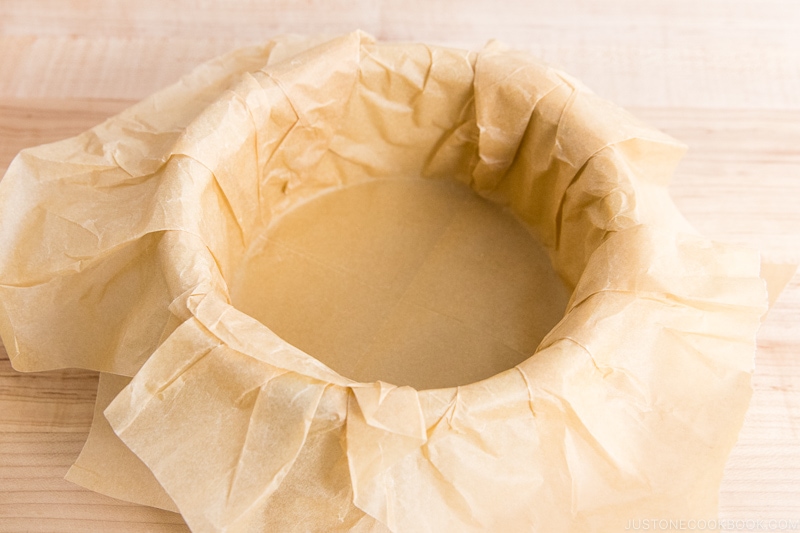
- Line your cake pan with parchment paper. Don’t skip this.
- Unless your parchment paper is wide/large, double line it to ensure that there aren’t any unlined parts.
- In my recipe, I show you how I line my cake pan.
- Depending on the position of the oven rack, you can keep the excess parchment paper up or fold down, or trimmed. I fold down mine as I use a 3-inch deep cake pan that can support the height of the cake.
To Prepare the Ingredients
- Make sure cream cheese, eggs, and heavy cream are at room temperature. Room temperature ingredients blend together very easily, creating a smooth batter. A smooth batter will yield a uniformly textured baked good. Cold ingredients do not incorporate together as easily.
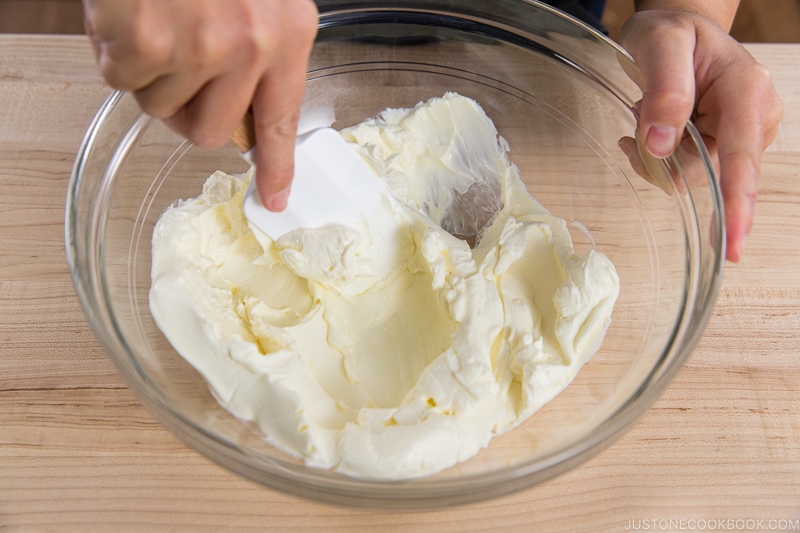
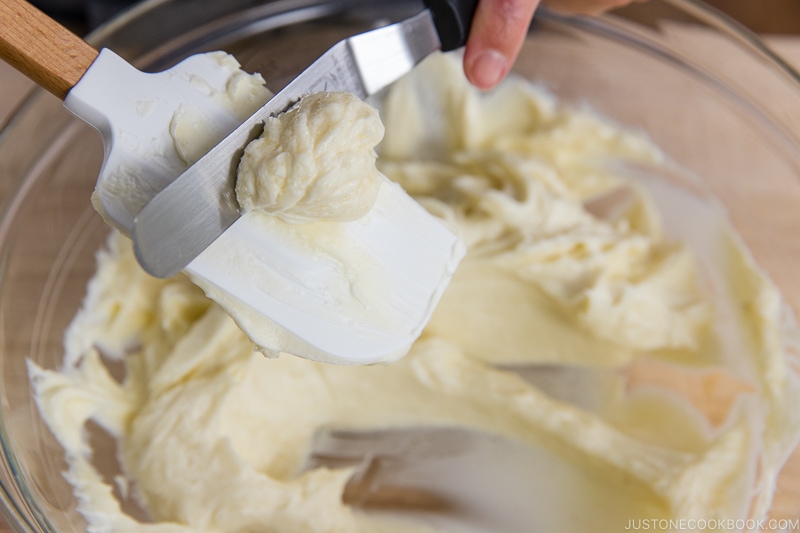
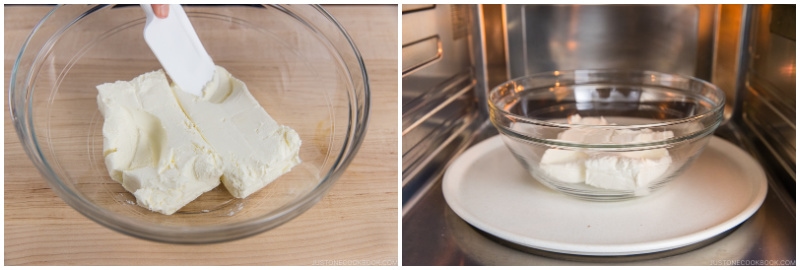
- When you press down the cream cheese with a spatula against your bowl, it should smoosh easily without resistance. Alternatively, you can microwave the cold cream cheese with half power (50% power) for 45 seconds. To avoid heating up cream cheese by accident, microwave it in 15-second increments and press the center of the cream cheese to check softness.
- After multiple testings, I find 100 g (½ cup) sugar is perfect for this cake.
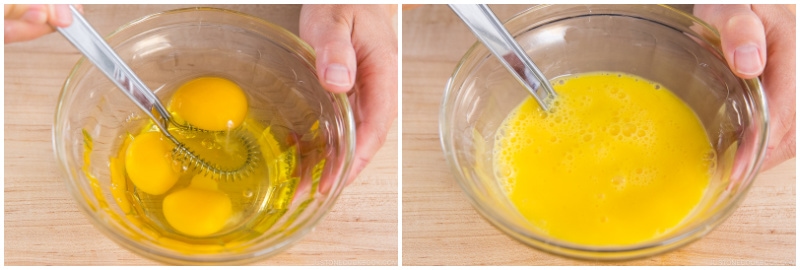
- Crack eggs into another bowl and whisk well (instead of adding to the cream cheese one at a time). I find this extremely helpful to blend in nicely with cream cheese.
- For the flour, I use cake flour because it has less gluten and I typically use cake flour when making cakes. I assume all-purpose flour will be fine. Since I don’t want to introduce more gluten to the batter, I substitute some of the flour with cornstarch, making the cake lighter and less chewy. Flour or starch binds moisture in the cheesecake and holds the structure, but you do not want to introduce too much (it becomes firm). If you want to make it gluten-free, you can substitute the flour with rice flour.
- American heavy (whipping) cream is 38 % fat.
- I like adding lemon juice for lightening up the cake and salt to intensifying the flavor. The Japanese don’t add vanilla extract to cheesecakes and don’t mind the eggy-taste; however, from the feedback I received in the past, the majority seem to prefer adding vanilla. Please do so, if you prefer.
To Make The Batter
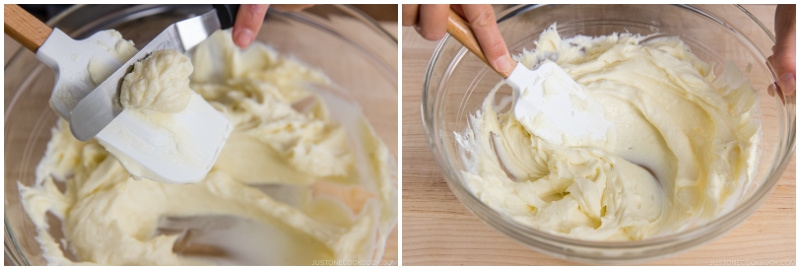
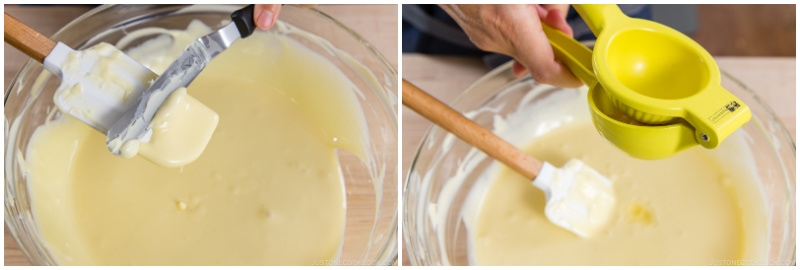
- IMPORTANT: It’s easier to prevent creating lumps than getting rid of them. Therefore, when you add each ingredient, blend everything completely and thoroughly before adding the next. Press the spatula down in a rubbing motion to remove cream cheese lumps. Further steps go, the batter gets more liquid, which means it’s harder to get rid of lumps. So if you see any lumps, get rid of them as soon as possible.
- IMPORTANT: Scrape off the batter from the spatula with a knife or offset spatula frequently. When you scrape off the chunk of cream cheese from the spatula, this ends up with a big lump in the batter!
- If you only use a silicone spatula, the batter is super smooth, and there are not many air bubbles in the batter. You can tap the cake pan filled with the batter a few times on the countertop and run a skewer in the batter and pop them before baking.
To Bake
- It’s a fact: every oven is different, and this can ultimately influence the result of the cheesecake. Even if you follow my recipe to the T, you may not get the exact same texture as mine. I’ve used: convection (fan), middle rack, top, and bottom heat to finalize the best method for the cheesecake. Please use your judgment and close observation as you bake.
- Put the cake pan into the oven FAST. Don’t lose the hot air!
- Observe the color of the top surface while you check on your baking time. Sometimes, you may have to give up on the color as you can’t keep baking. Sometimes you have to reduce the oven temperature because your cake burns too fast. Like I said earlier, every oven is different, so test and adapt.
- I recommend NOT opening the oven (which loses heat) at all, and don’t worry about turning the cake pan. Avoid any hot spots and find an even heating spot so the entire cake gets cooked at a consistent temperature.
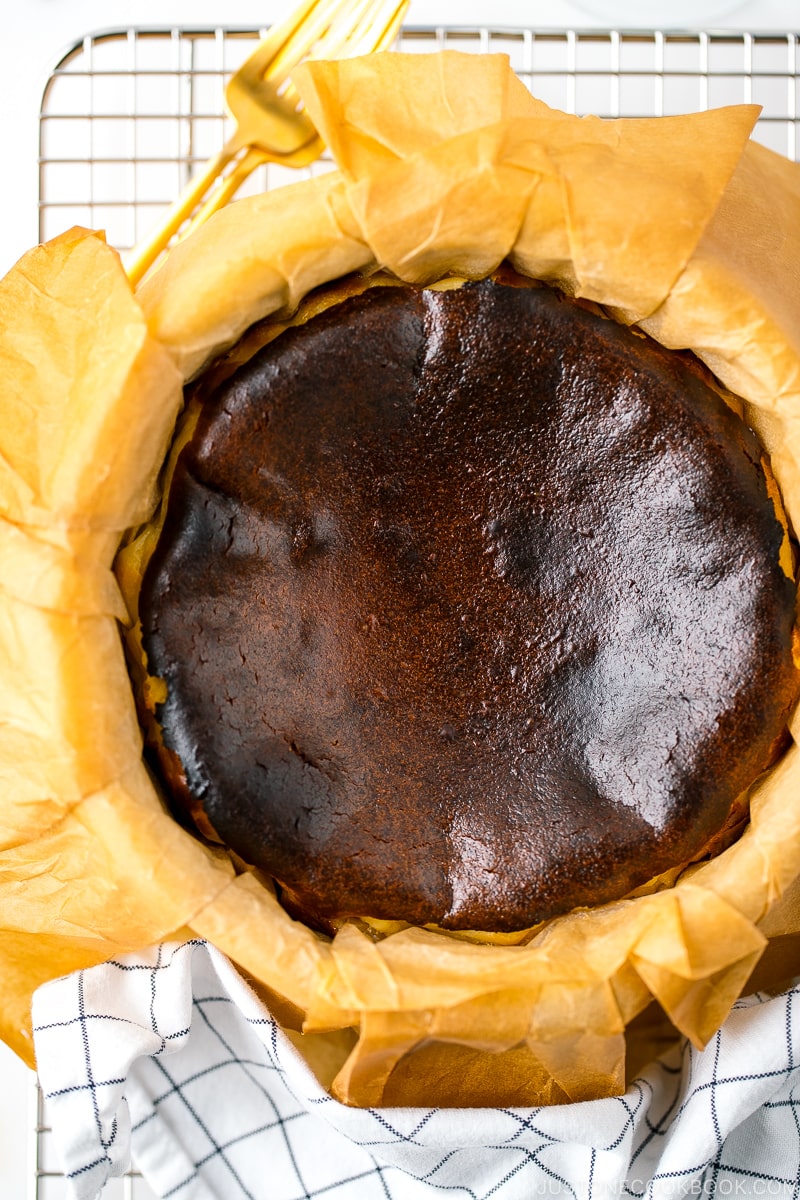
- Once your cheesecake achieves a dark surface on top, immediately take it out of the oven. Give the cake a jiggle to test: it should still be wobbly in the middle.
- NEVER overcook the cheesecake by extending the baking time (even if the top doesn’t turn dark after 30-35 minutes). Overcooked filling resembles curdled eggs, and you can’t fix it.

To Cool
- Let the cheesecake rest and set as it sinks down. It will continue to slowly bake and solidify with residual heat.
- Refrigerate only after the cake is at room temperature. The hot/warm cake will spoil other foods in the fridge.
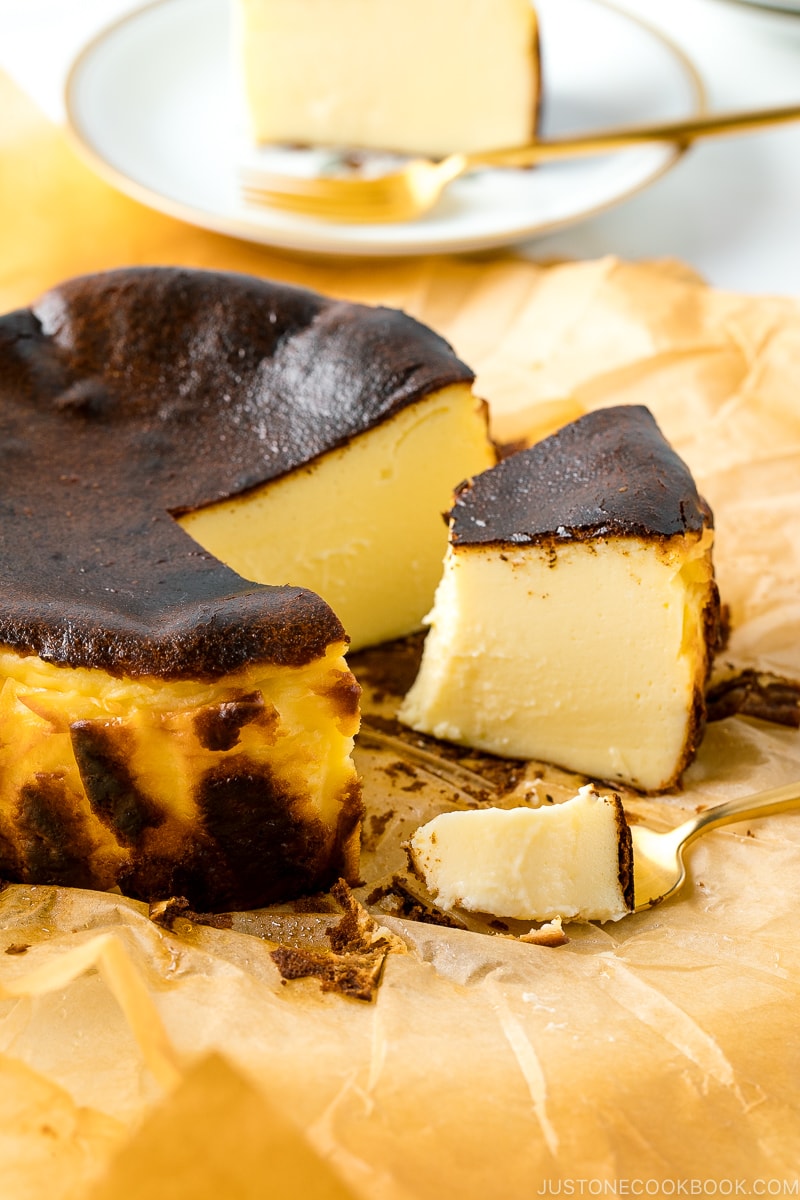
To Serve
- Serve it at room temperature for a softer, custardy filling, or take out the cheesecake from the fridge for 30 minutes before serving, or serve it cold for a firm filling.
- Warm your knife with hot water. I fill a tall mug cup with boiling water and dunk the knife before each slice. Bring a towel or paper towel to quickly wipe the knife.
- Cut in one slice motion and pull out the knife so each slice of the cake has a clean cut.
- If your cake is chilled/cold, may I suggest warming it up a little in the microwave? We thought it brings out the flavor of the cream cheese and it’s actually very delicious!
- Basque cheesecake is best to enjoyed plain, so no fresh berries, compote, or chocolate sauce but you can serve it however you like it.
FAQs
I can’t get the top to burn nicely. What can I do?
I can relate, and I really struggled with my oven too. What helped me are:
- Use the convection oven (as I mentioned earlier).
- Preheat at a higher temperature. I’ve tried preheating my oven to the hottest 550ºF (290ºC) for a long time, and it seemed to help.
- Bake at a higher temperature.
- Bake at a higher rack as heat rises so the upper oven is supposed to be hotter. However, if your oven is top heating, make sure the parchment paper is not touching the heating element/ceiling.
Can I use a bigger cake pan size?
You can multiply the recipe by 1.5 to accommodate for a 3-inch deep 7-inch round pan, or multiply the recipe by 2 to accommodate for a 3-inch deep 8-inch round pan. You will need to increase the baking time, but since I’ve never tried it, I am not sure how long you will need to bake. As I mentioned in the post, I still recommend this 6-inch cake and bake two cake pans if you want to increase the serving size. It will take slightly longer to bake as you have multiple cake pans in the oven.
My cake cracks on top. What can I do?
When I made my cake batter with a stand mixer or a hand-held whisk, the cake batter seemed to rise higher, sometimes unevenly, and then collapsed, which created some cracks. It seemed inevitable as more air bubbles were trapped inside. I’ve tried tapping the cake pan, popping the air bubbles, and resting the batter before baking, which seemed to help a little.
Since I switched to using only the spatula, I had no issue with cracking at all. When I am mixing/blending the ingredients, I don’t see many air bubbles too, so you may want to try using a spatula if these cracks bother you.
How can I achieve a smooth, shiny surface? Mine looks bubbly.
I baked a few cheesecakes with tiny bubbles on the surface before. I’m sure the batter in your cake pan had tiny bubbles before baking it too, or they rose while baking. Follow the same method I shared in the previous Q&A.
Why my cheesecake has a gooey, raw texture in the middle?
I assume you get the gooey texture even after you chill the cake. Then you have to bake the cake for a little longer next time. My oven doesn’t work the same way as yours, and I can only provide suggested baking time or baking temperature using my own oven.

Pair the Cheesecake with Sparkling Sake
One of the more unique celebratory drinks we like to introduce our friends to is sparkling sake. It is quite popular in Japan and slowly getting more popular in the US.
If you haven’t tried sparkling sake before, the taste profile for sparkling sake is nothing like traditional sake. It’s sweet, fruity, and really gentle on the palate. It also has a much lower ABV than traditional sake (5% ABV similar to a beer).
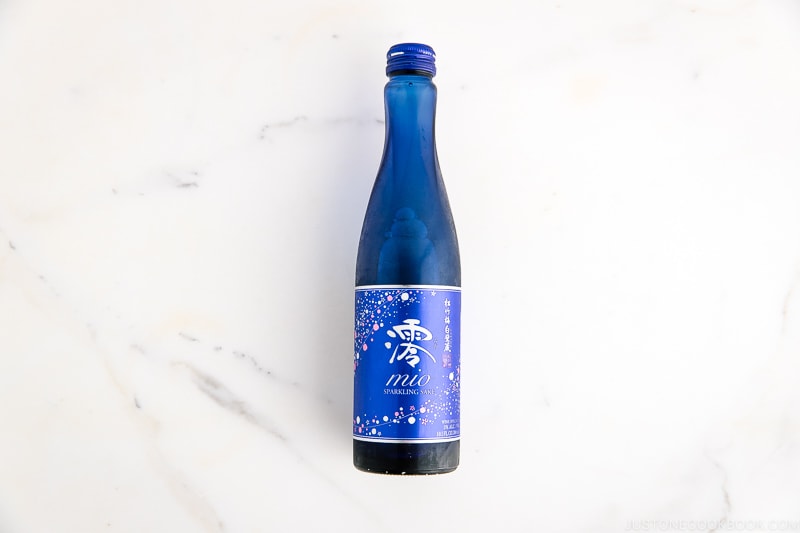
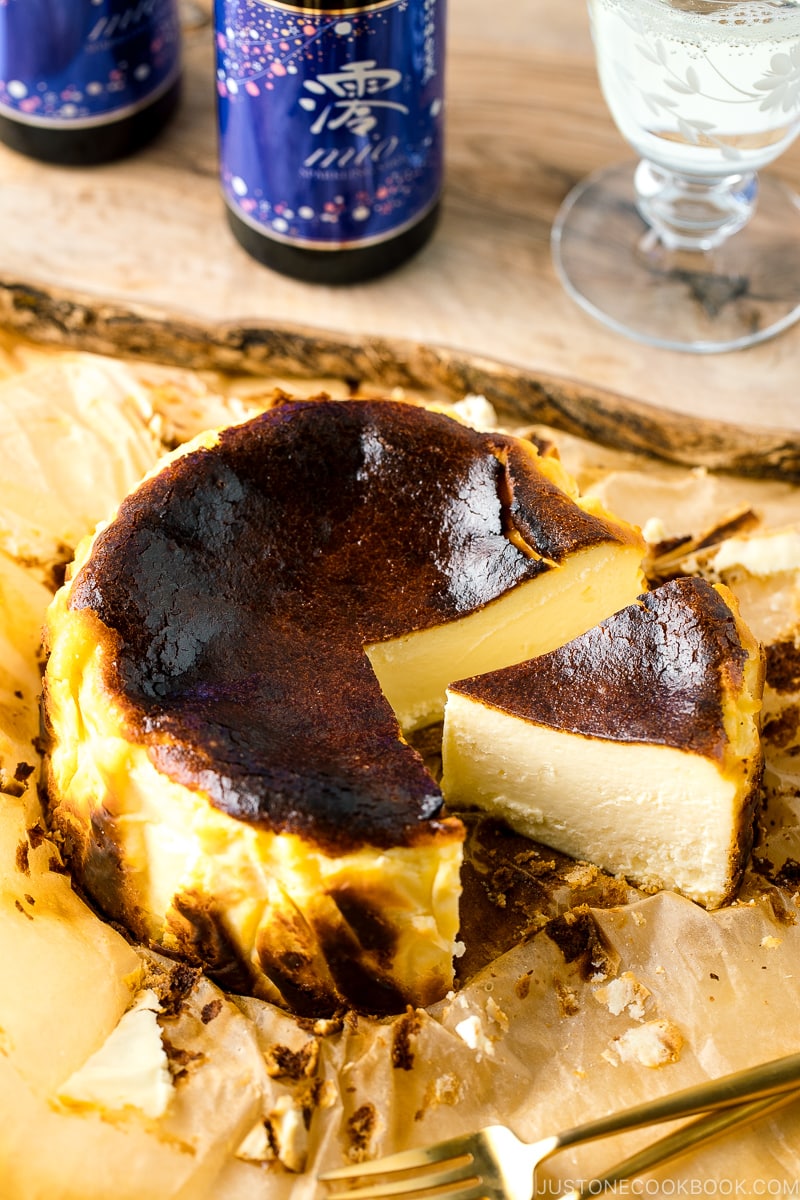
We would recommend enjoying this cheesecake with a glass of sweet wine and we paired it with our favorite Mio Sparkling Sake (part of Sho Chiku Bai Shirakabegura series). The sweetness and the bright notes of the sparking sake complemented the sweet and caramel flavor of the cheesecake really well. The addition of tiny bubbles adding just a bit of texture accentuates the creamy texture as you sip on this delightful drink.
When we introduce our friends to Mio Sparkling Sake, many of them surprised by what a fun and delicious drink it is. If you’re looking for a new celebratory drink to try and like sake’s depth of flavors, give Mio sparkling sake a try!
Where to Buy Mio
You can find Mio Sparkling Sake in your local Asian supermarkets and wine stores. You can also purchase them from Takara Sake (21 years old and over only).

Love Cheesecakes? You’ll Love These Recipes!
Wish to learn more about Japanese cooking? Sign up for our free newsletter to receive cooking tips & recipe updates! And stay in touch with me on Facebook, Pinterest, YouTube, and Instagram.
Basque Burnt Cheesecake
Ingredients
- 1 lb cream cheese (226 g x 2 blocks for 1 6-inch cake; I used Philadelphia brand; at room temperature)
- ½ cup sugar
- 3 large eggs (50 g each w/o shell) (at room temperature)
- 1 Tbsp lemon juice
- 2 Tbsp cake flour (or use all-purpose flour; use rice flour for gluten-free; measure using the “fluff and sprinkle“ method and level it off)
- 2 tsp cornstarch (or substitute with potato starch or cake flour)
- ⅛ tsp Diamond Crystal kosher salt
- 1 cup heavy (whipping) cream (at room temperature)
Instructions
Before You Start…
- Please note that this cake requires 2–3 hours of cooling time. You can serve it either at room temperature or chilled in the refrigerator for an additional 4 hours.
- Gather all the ingredients.

To Preheat the Oven
- Preheat a convection oven (with fan) to 450ºF (230ºC). If you don’t have an oven with a fan, preheat a conventional oven to 475ºF (245ºC). If your oven doesn’t heat up very well, you can preheat it to the hottest oven temperature (mine is 550ºF (290ºC)) for 30–60 minutes, then turn it down to the target temperature. As for the oven rack, I used the middle position in my convection oven (the fan circulates the air, so the middle rack is ideal). If you use a conventional oven, move the rack slightly higher as heat rises and the temperature toward the top of the oven is higher. However, keep in mind that a 3-inch deep cake pan needs extra space for rising.
To Prepare the Cake Pan
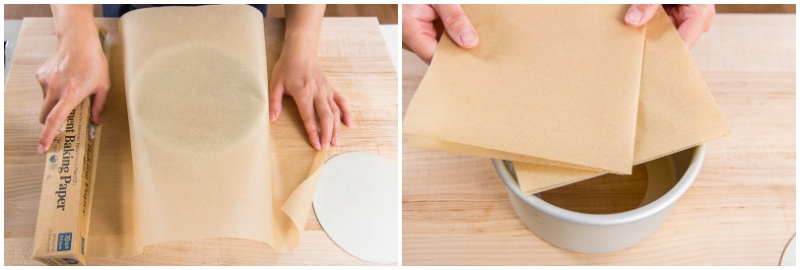
- Prepare two rectangular sheets of parchment paper long enough to hang over the sides of one 6-inch (15-cm) round cake pan by 2 inches (5 cm). Place them crisscross to maximize the coverage on all sides. (You can use just one sheet per cake pan if your parchment paper is extra wide.) Fold them twice into quarters, like a paper napkin.

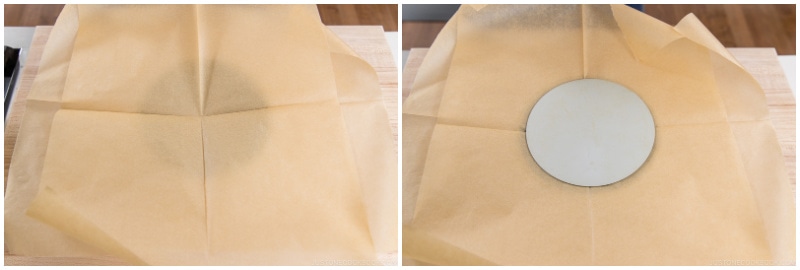
- Open the folded sheets and place them crisscross as before. Find the center point of the crisscrossed sheets. Where the creases intersect will also indicate the center of the cake pan. Center the parchment sheets over the cake pan ring, then center the removable bottom on top of the sheets.
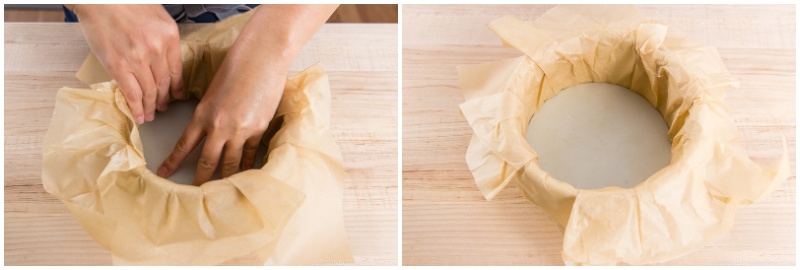
- Press down the removable bottom and the parchment sheets into the cake pan, creasing the paper against the bottom and inside of the pan to fit snugly. Press and crease the paper edges down around the outside of the cake pan, too.
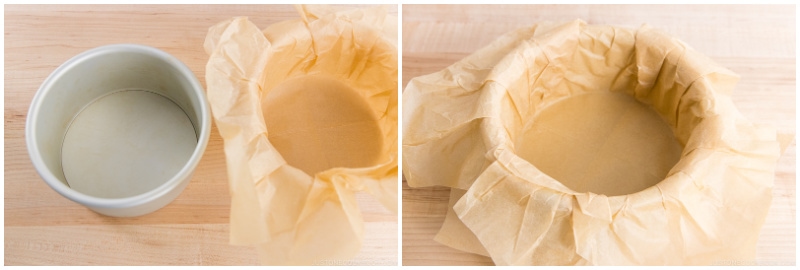
- Gently take out both the removable bottom and the parchment sheets, which are now molded into the shape of the pan. Place the removable bottom back into the cake pan (as it should be). Then, fit the molded parchment paper back into the cake pan on top of the removable bottom. Press the paper down to fit snugly. (If you‘re doubling the recipe, repeat this process with a second cake pan.)
To Make the Batter
- Place 1 lb cream cheese in a large bowl. Make sure the cream cheese is at room temperature. If not, microwave the cold cream cheese at half power (50%) for 45 seconds, or microwave it in 15-second increments until it‘s at room temperature.
★ Hand Mixing Method
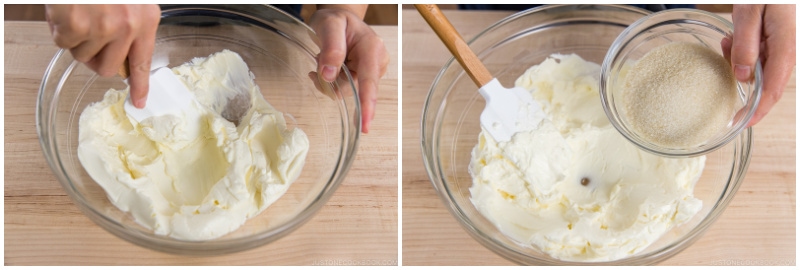
- Press down on the cream cheese with a spatula to soften it. Then, add ½ cup sugar. (For the blender method, scroll down to the next section.)
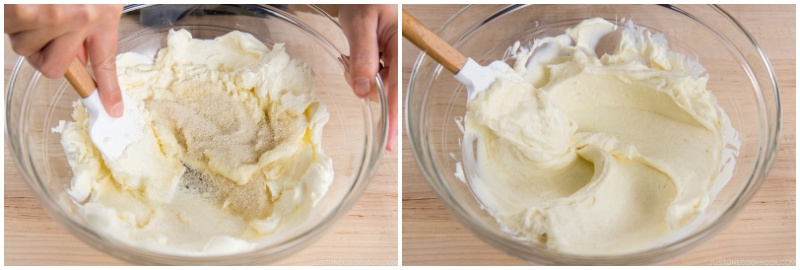
- Combine the cream cheese with the sugar by rubbing the mixture against the sides of the bowl with the spatula. The cream cheese will become fluffy and smooth as the sugar granules dissolve.
- Scrape both the bowl and spatula often to ensure that the ingredients are well incorporated and there are no lumps.
- Crack 3 large eggs (50 g each w/o shell) in another bowl and whisk well.
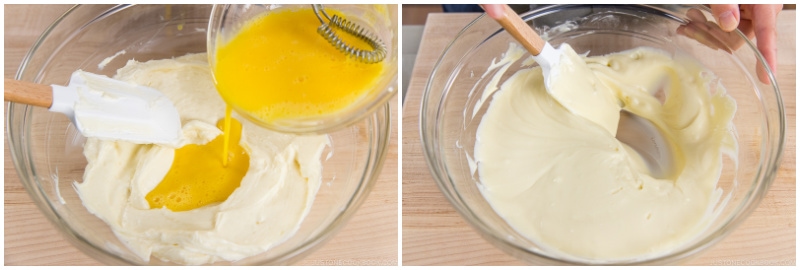
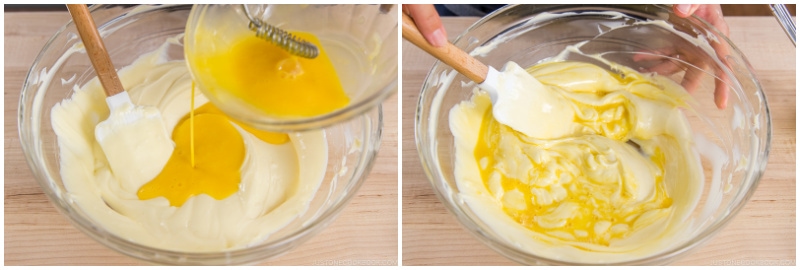
- Slowly and gradually add the beaten eggs to the cream cheese mixture, one-third at a time. Make sure the batter is smooth and with no lumps before adding more egg.
- After each addition, blend the eggs with the cream cheese THOROUGHLY and COMPLETELY.
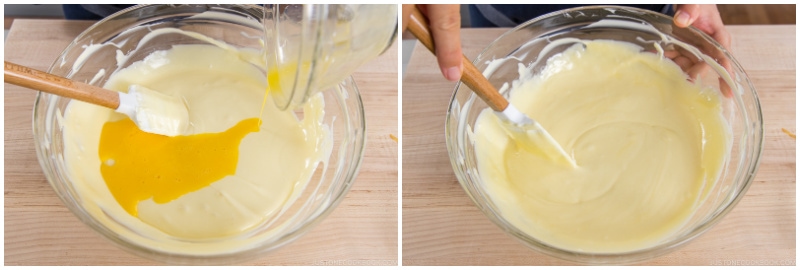
- Add the rest of the egg and blend well.
- Scrape the batter from the sides of the bowl and spatula, making sure there are no lumps in the batter. Then, add 1 Tbsp lemon juice and mix thoroughly.
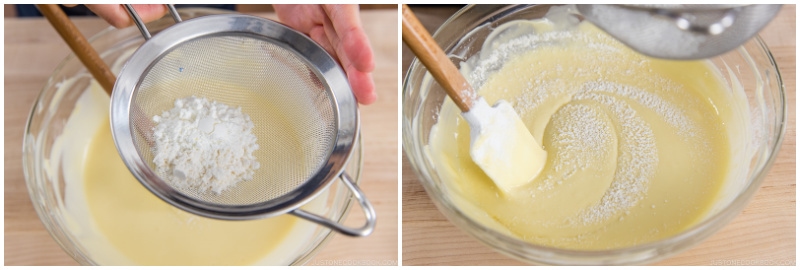
- Next, add 2 Tbsp cake flour and 2 tsp cornstarch to a sieve. Holding the sieve in one hand, sift a little bit of the flour and cornstarch into the cream cheese mixture while you stir with a spatula. Incorporate the ingredients well before adding more. Keep sifting and blending until you‘ve added all the flour mixture. Take your time doing this. You don’t want any lumps.
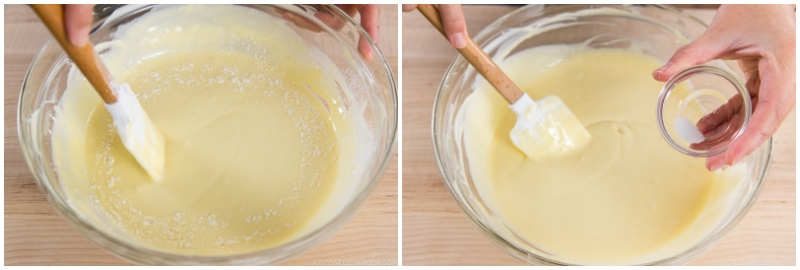
- Add ⅛ tsp Diamond Crystal kosher salt and blend together. Make sure at this stage (before adding the heavy cream–more liquid) that there are no lumps.
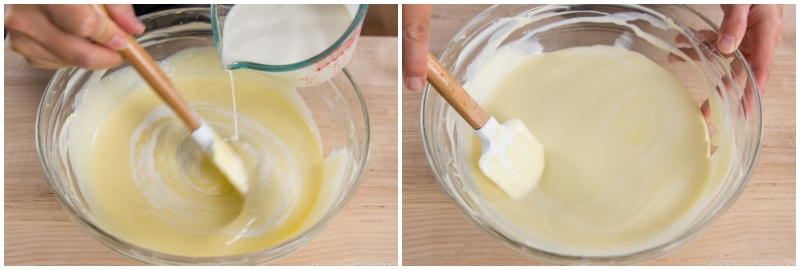
- Gradually add 1 cup heavy (whipping) cream while you stir. Mix until it’s all combined.
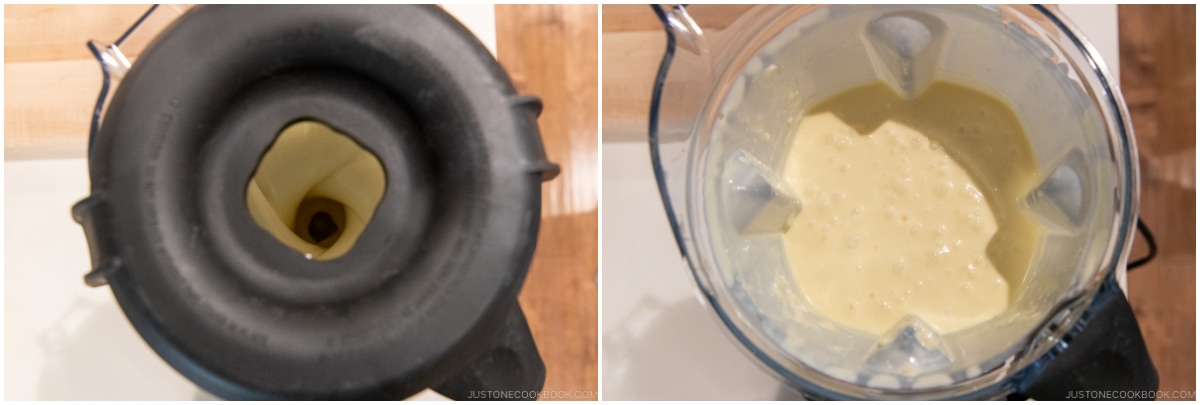
★ Blender Method
- Put all the ingredients for the cake batter in a blender (I use my Vitamix): 1 lb cream cheese, ½ cup sugar, 3 large eggs (50 g each w/o shell), 1 Tbsp lemon juice, 2 Tbsp cake flour, 2 tsp cornstarch, ⅛ tsp Diamond Crystal kosher salt, and 1 cup heavy (whipping) cream. Blend until very smooth, about 2 minutes. Then, let this mixture rest for 15 minutes to let the air bubbles in the batter settle, or else the cake may crack.

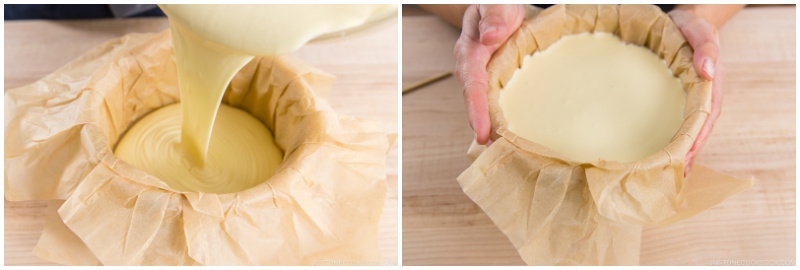
To Pour the Batter into the Pan
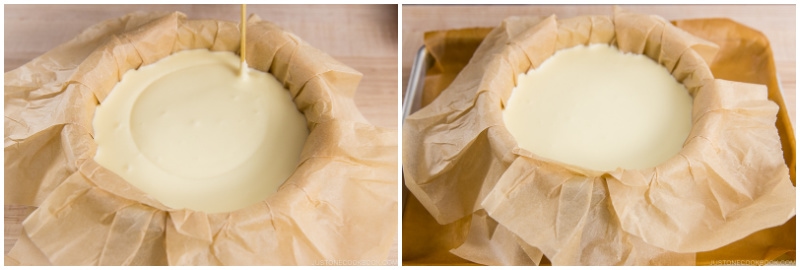
- Pour the cake batter into the prepared pan in one go (avoid stop-and-go) so you don‘t create any air pockets. Tap the cake pan on the countertop a few times to eliminate air pockets.
- With a bamboo skewer or toothpick, pop the air bubbles if there are any. Then, run the skewer through the batter to remove any bubbles. Since the cheesecake may overflow during baking, place the cake pan on a baking sheet, just in case. Mine never did, but I still use a baking sheet as it helps to transfer the cake pan to and from the oven.
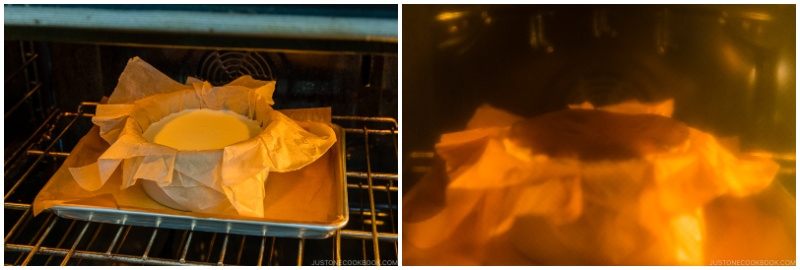
To Bake
- Transfer the baking sheet with the cake pan to the oven and bake at 450ºF (230ºC) for a convection oven or 475ºF (245ºC) for a conventional oven. Bake until the top is dark amber/brown and the center is still very jiggly, about 30–35 minutes (please keep an eye on your cheesecake because every oven is different). The top of my cheesecake starts becoming dark at the 30-minute mark, then gets dark brown within 5 minutes. If you love a “gooey“ or “oozy“ texture, then you may bake for less time than I suggested, but you must chill your cake well to firm it up before serving. NEVER extend the bake time and thus overcook the cake, even if the top hasn‘t turned dark. The filling will curdle and you can‘t fix it. If the top doesn‘t darken within 30–35 minutes, you will probably need to adjust the oven temperature (or oven rack or preheating time) the next time you make it.
To Cool
- Take out the cake when the surface is a dark, burnt color. The cake should wobble when you gently shake the pan. Let the cheesecake cool in the pan on a wire rack until it reaches room temperature, about 2–3 hours. Don’t put it on the countertop directly, and make sure the air can circulate under the cake pan. You can place it on top of your gas range burner grate, if it‘s not in use.
To Chill
- You can serve the cake either chilled or at room temperature (which we like, too). For a chilled or firmer cheesecake, cover the cake in the pan with a tea towel (don‘t use plastic, as condensation may drip onto the cake), and place in the refrigerator for 4 hours.
To Serve
- Remove the cheesecake from the cake pan and carefully peel back the parchment paper. If you have chilled the cake, let it stand at room temperature for at least 30 minutes or up to 2 hours before serving.
To Store
- You can store the cheesecake in the refrigerator for up to 3 days.


Hi Nami! I just wanted to say that I am grateful to come across your recipe as this is exactly how I wanted my cheesecake to turn out. I used the exact same baking tin as yours (6×3 inch) but I wanted to know will I have to adjust the ingredients if I was to use a 6×4 inch tin? It’s an inch deeper than the normal one so I am not sure. Thank you!
Hi, Araf! We’re so glad you enjoyed Nami’s recipe!🥰
If you’re making the same size cake, a 6×4 could work fine. However, if you want to make it larger (a taller cake), you will need to tweak the recipe to accommodate the extra height.🙂
hi Naomi! I have made cheesecake three times using this recipe, it is really delicious and really love it!!! I want to try to make 4 inch next time, can you please let me know how I can adjust the recipe with 4inch pan? Thanks in advance!!!!
Hi, Grace! Thank you for trying Nam’s recipe.
The scale factor is 0.44. So, multiply all of the ingredients by 0.44 to make cake batter for your 4″ round cake pan. The oven temperature will be the same, and you might consider adjusting the baking time slightly. We hope this helps!
Its so good i love it! I underbaked it so it gave it that ooozyness~ i also made the matcha but i like this one more. The matcha had a smoother texture tho.
Hello, Anne! Aww. We’re glad to hear you tried both Matcha and this one!
Thank you for trying Nami’s recipes and sharing your feedback with us.
Your cake looks fantastic!
Hi Namiko… I’d like to attempt this. Noticed there is 15ml of lemon juice. Can you taste the lemon in the cake? Is it possible to get a more lemony taste as we prefer that?
Thabks!
Hi, Audrey! Thanks for reading Nami’s post and trying her recipe.
The cake has a slight lemon taste that is not too strong. If you like, we recommend adding lemon zest. Try 1 tablespoon and see if you enjoy a stronger lemon taste.
We hope this helps!
Hi Nami,
Thank you for sharing such a detailed recipe. Love all your recipes.
I am going to try baking the basque burnt cheesecake. However, my convection oven can only do bottom or top one at a time instead of bottom and top. May I know whether I still can bake it with my oven?
Thank you.
Hello Ven! Thank you for your kind feedback about Nami’s recipes.
We’re pleased to hear you like her recipes.☺️
Yes. You may use a convection oven for this recipe. If the top of the cheesecake does not begin to darken at the 30-minute mark, turn to the top oven burner setting.
We hope you enjoy your cake!
Hello Naomi, thank you so much for sharing. Glad to hear from you. I hope you would have more baking recipes. I am a beginner but I can bake successfully with your recipes.
Ah, so it was okay to just use bottom heat for entire 30 minute in the oven? How long for the top oven? I was told before that to use bottom heat for 10minutes then change to top heat for 20 minutes but I have not tried it.
Thank you Naomi 🙂
Hello, Ven. Does your convection oven include a fan? If so, we recommend you use it.
Every oven works differently, and you may need to make modifications, but try using the bottom heat for the first 30 minutes and then switching to the top for the last 5 minutes.
Please see Nami’s advice in this post for more texture options. We hope this helped!🤗
Yes, I think with fan. Thanks a lot Naomi. I am going to try it. Hope it works well.
We hope it works for you, too!
Hi Nami, May I know how to store the cheese cake in the fridge after it has cooled down? Do I need to put a plastics wrap over the cake with the tin? Thank you for sharing.
Hi Doris! Thank you so much for trying Nami’s recipe!
The ideal method is to cover the cake in the pan with a tea towel. For more detail, please check “To chill” section at the end of the recipe. 🙂
Happy Baking!
Ok thank you! Can’t wait to taste it soon!
This recipe is terrific! Easy, quick and just delicious!
Hi Karen! Aww. We are so happy to hear you enjoyed the recipe!
Thank you so much for trying Nami’s recipe and for your kind feedback.
Happy Cooking!
hi nami! have made this recipe various times and its a hit all the time. can we replace the sugar with maple syrup? If yes what is the ratio that we should go for ?
Hi Temperance, Thank you so much for reading Nami’s post and trying her recipe!
We’ve never substituted sugar with maple syrup before. However, most baking recipes may be altered with an equivalent quantity. However, you may need to reduce the recipe’s liquid by roughly 2 tablespoons.
We hope this helps!
This recipe is easy to follow and very detailed. I made this with my 4 year old and the results were good! I have never been so happy to see a ‘burnt’ cake! The taste is very rich and the texture is like a ‘Japanese souffle cheesecake’ but richer and lesser Ingredients and steps. Thank you!
Hi Amanda! Nami and everyone at JOC are overjoyed to hear you enjoyed your first Basque Burnt Cheesecake and that Nami’s instructions were simple to follow!
Thank you so much for your thoughtful feedback. Happy Baking!
This came out perfectly with the detailed instructions! However, curious if anyone has tried adding pumpkin puree?
Hi Robert! Thank you for reading Nami’s post and trying the recipe!
We haven’t heard about it yet, but it sounds delicious!
Please let us know how it goes if you give it a try!
Happy Baking!
Please can you help? My pan is 8″. How would this size pan affect the cooking time? I guess it can be done, hopefully. Thanks!
Hi Nancy! Thank you for trying Nami’s recipe!
If you’re using a 3-inch deep 8-inch round pan, multiply the recipe by 2 and bake it for a few minutes longer.
We hope this was helpful! 🙂
My first attempt on the cheesecake today. I follow the recipe throughout, paying attention to the amount ingredients’s and the steps.
The final product is exceptionally awesome.
My family simply adore the cheesecake.
It is so good , that my wife decided to bring it to her work place and offer to her co workers.
Hello Benzo! Stunning Basque Burnt Cheesecake! Excellent work! 🤩
We appreciate you sharing the picture, and thank you very much for trying Nami’s recipe. The outcome makes us quite happy.
Cheers to baking! 🥂
Hi there. Is the baking time the same, if i were to put in 2 x 6inch cake pan at the same time ?
Hi Benzo! We recommend adding 5–10 minutes, but please check the cake and adjust the time as needed. We hope this helps!