
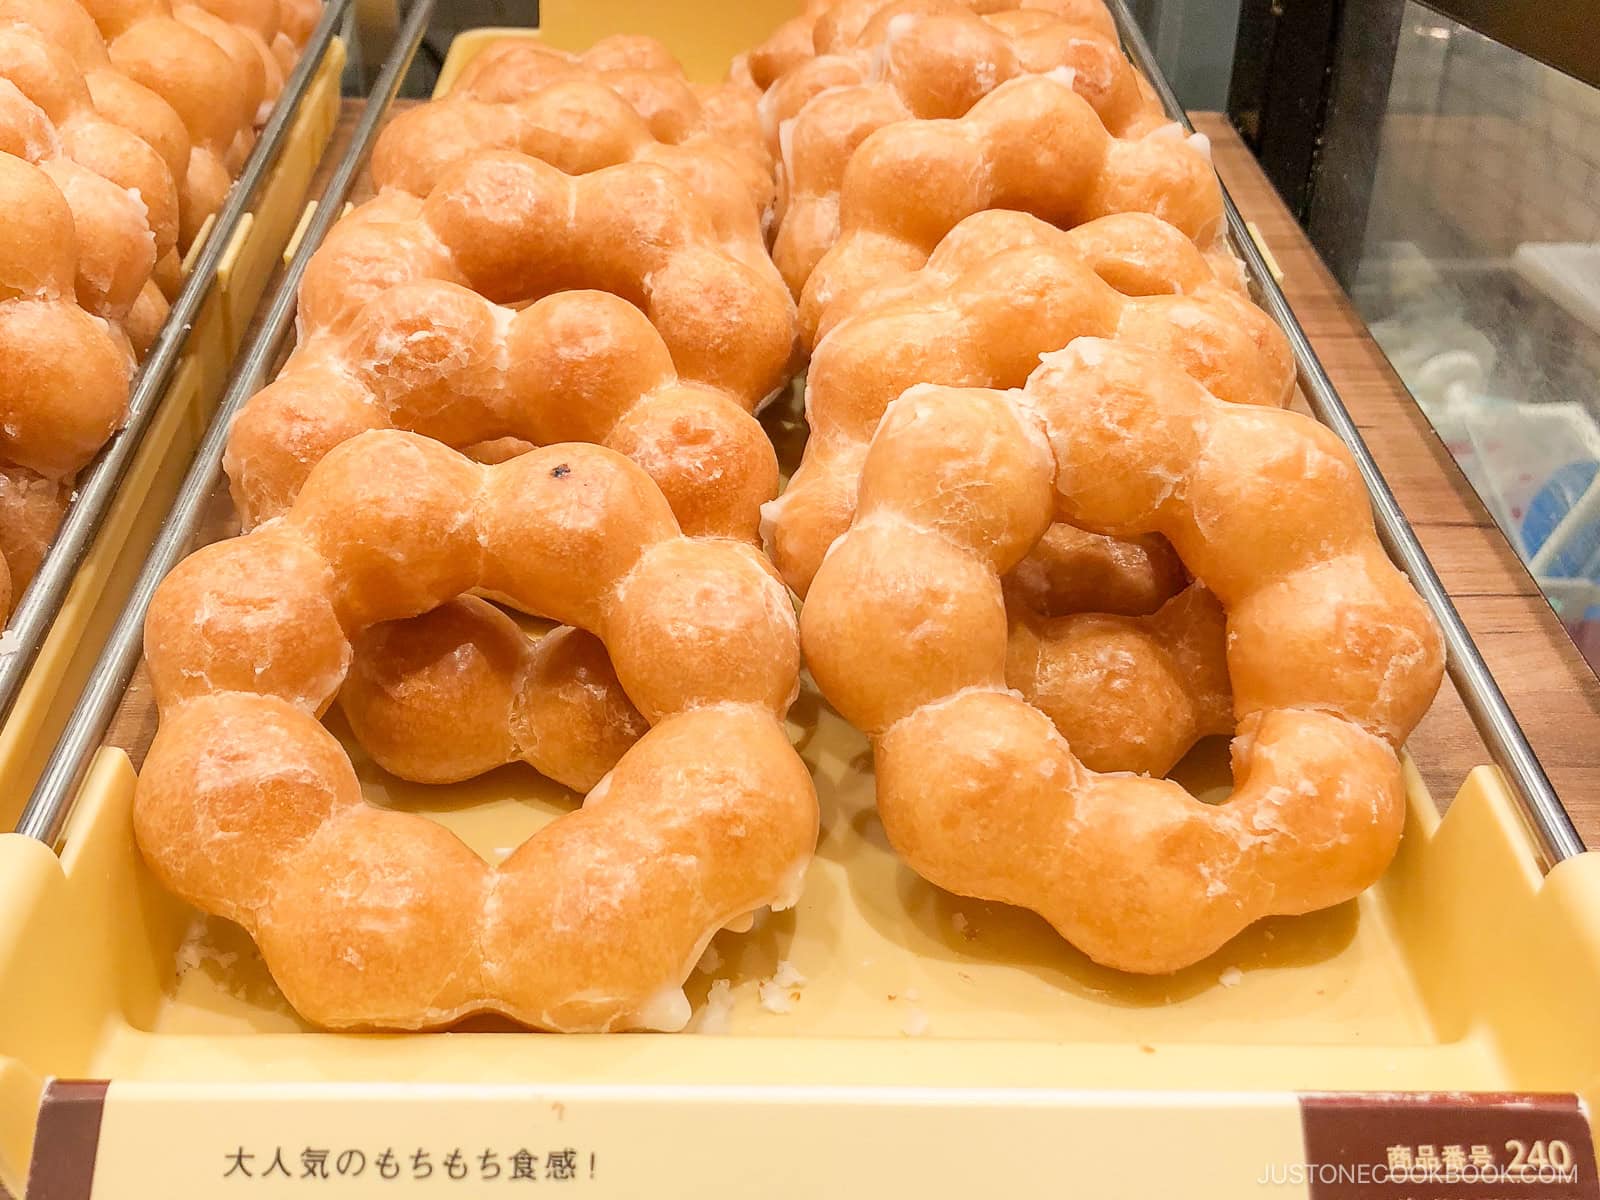
The Pon de Ring Donut (ポンデリング) from the Mister Donut chain in Japan is a popular sweet treat with a quirky shape like a baby’s teething ring. They are airy, bouncy, and chewy, and my family is crazy about them. That’s why I challenged myself to develop this copycat recipe that anyone can make at home. I’m happy with the results, and I think you will be, too!
If you’re craving more tasty snacks, try my Dorayaki, Mitarashi Dango, and Taiyaki recipes next!
What is a Pon de Ring vs. Mochi Donut?
Pon de ring (ポンデリング) is Mister Donut’s signature fried treat of dough balls connected in a circle. The name loosely comes from pão de queijo, a savory Brazilian cheese ball. Airy and bouncy pon de ring is made of tapioca flour and wheat flour, unlike the dense and chewier mochi donut made from glutinous rice flour (mochiko). Pon de ring are popular in Japan, where Mister Donut is the largest donut chain. Mochi donuts originated in Hawaii and are not sold in Japan.

Why I Love This Recipe
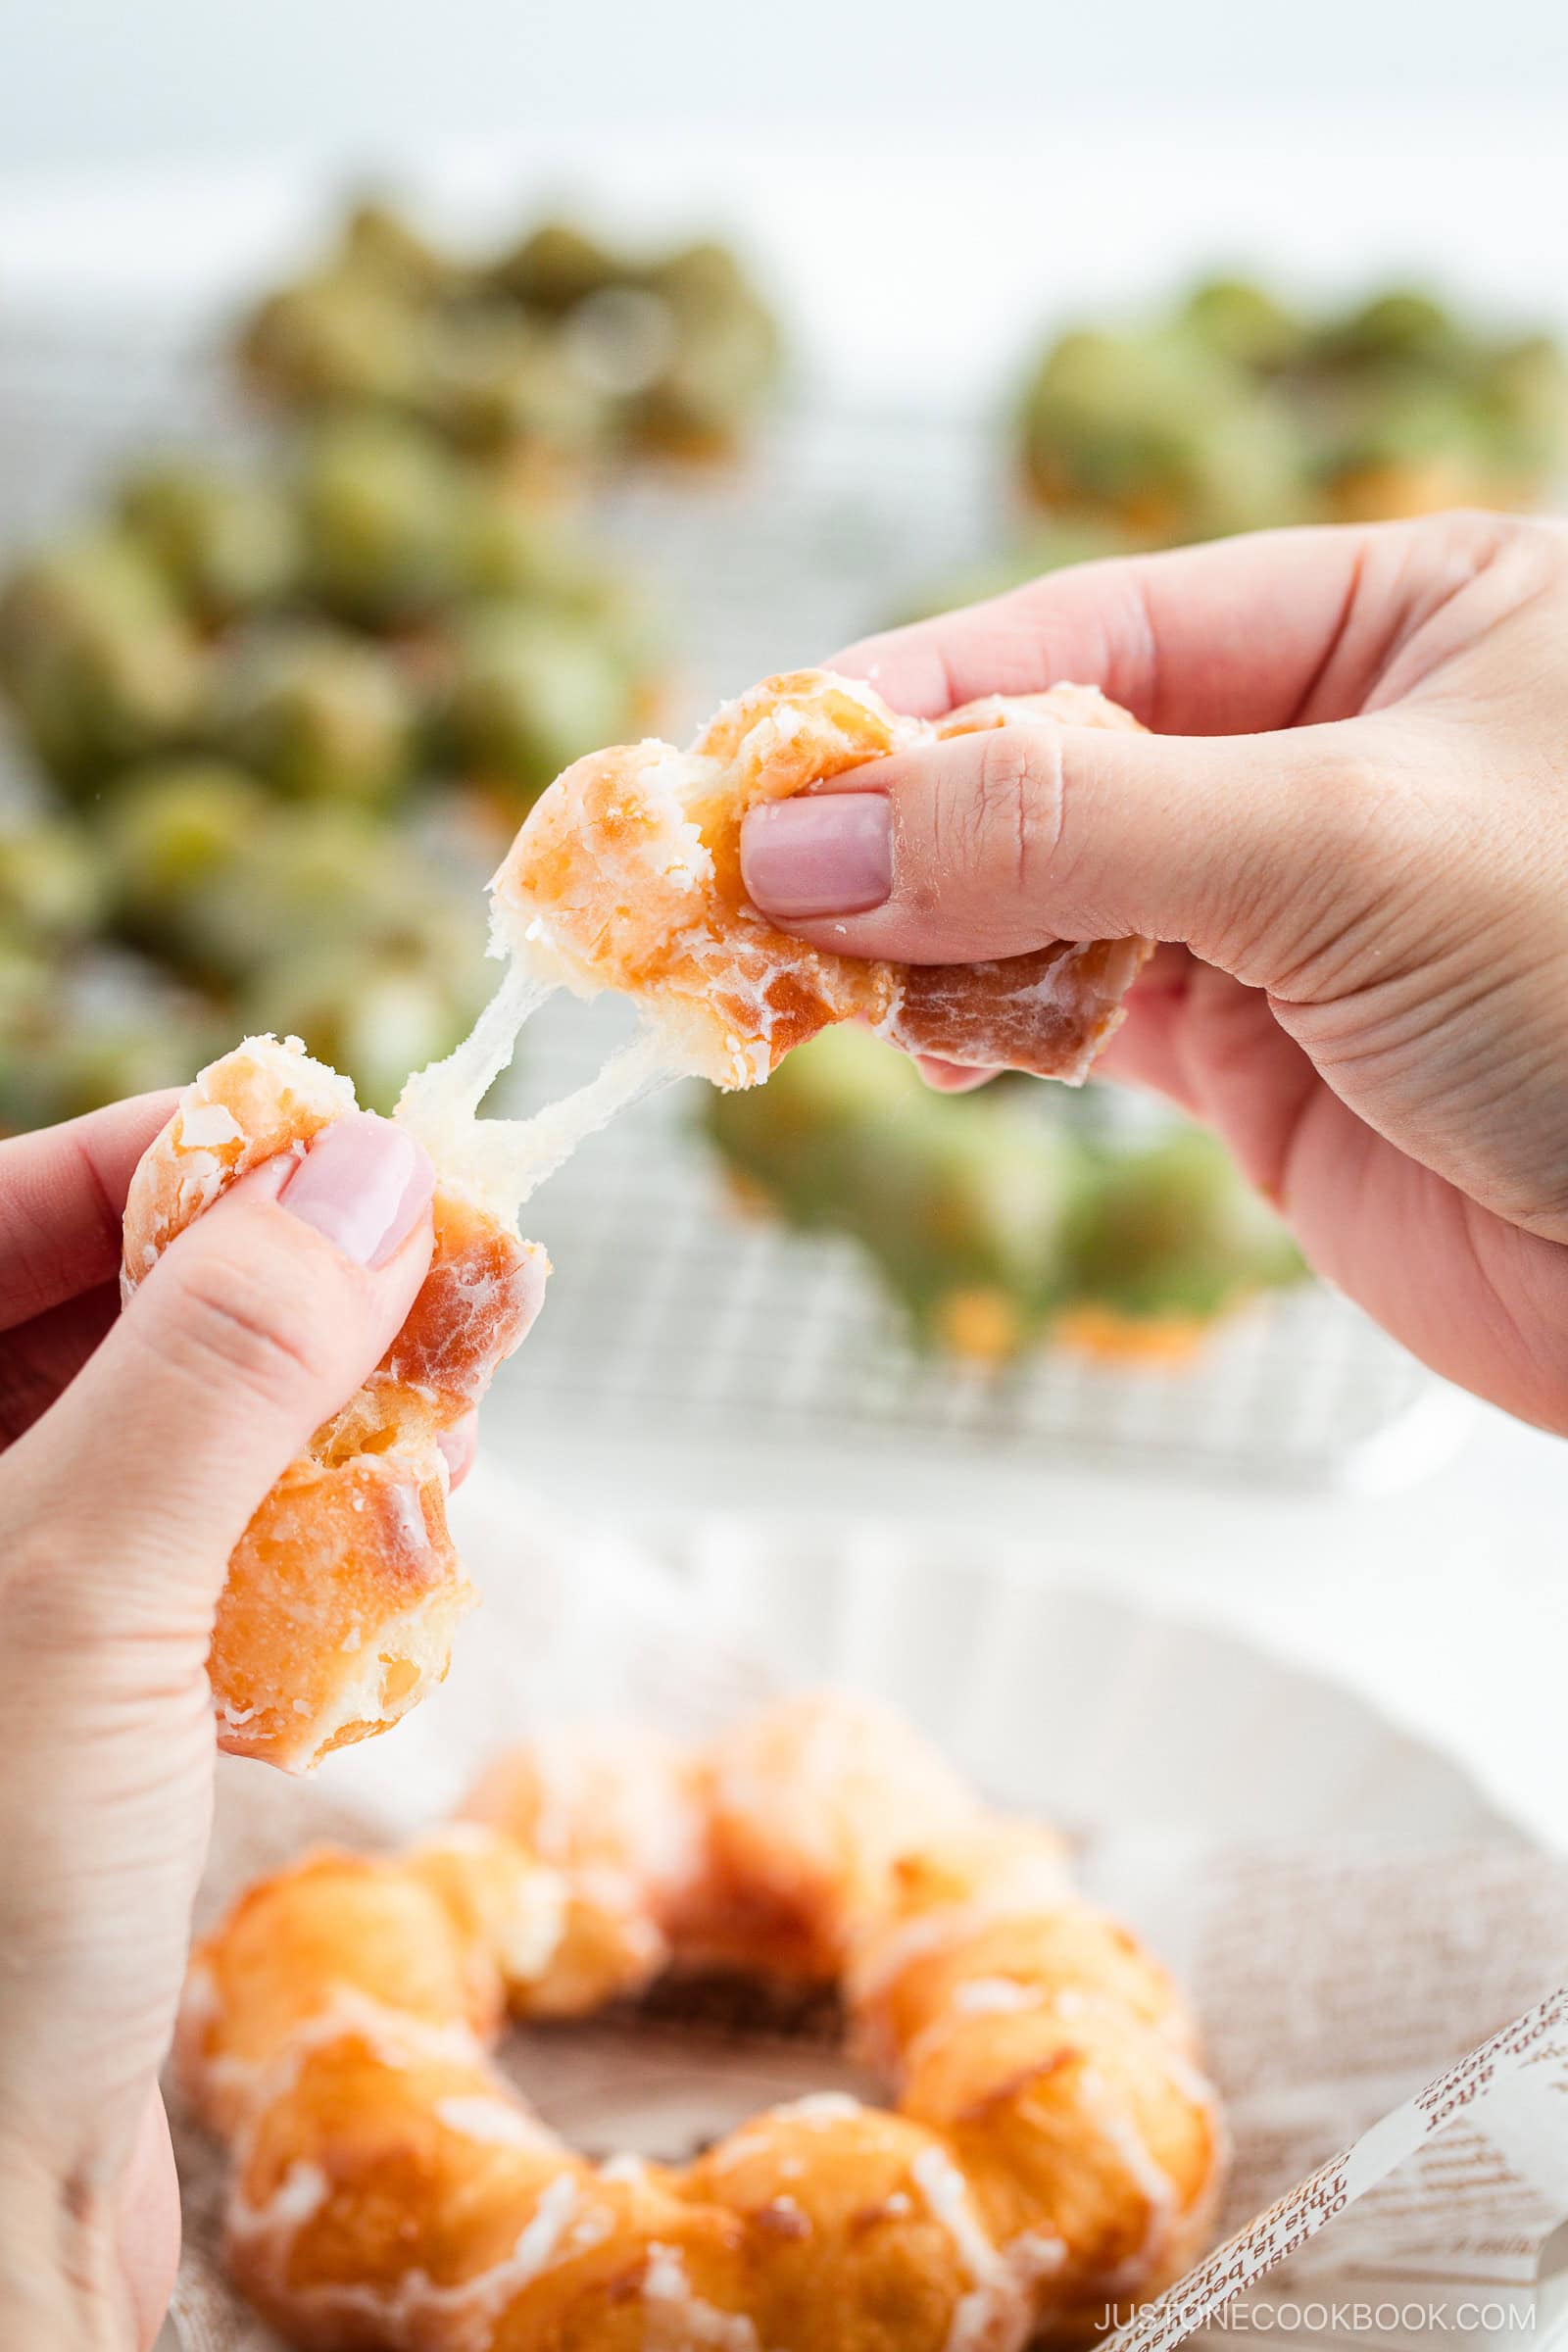
- It’s airy, soft, and bouncy: I use the perfect blend of flours to achieve a delightful texture.
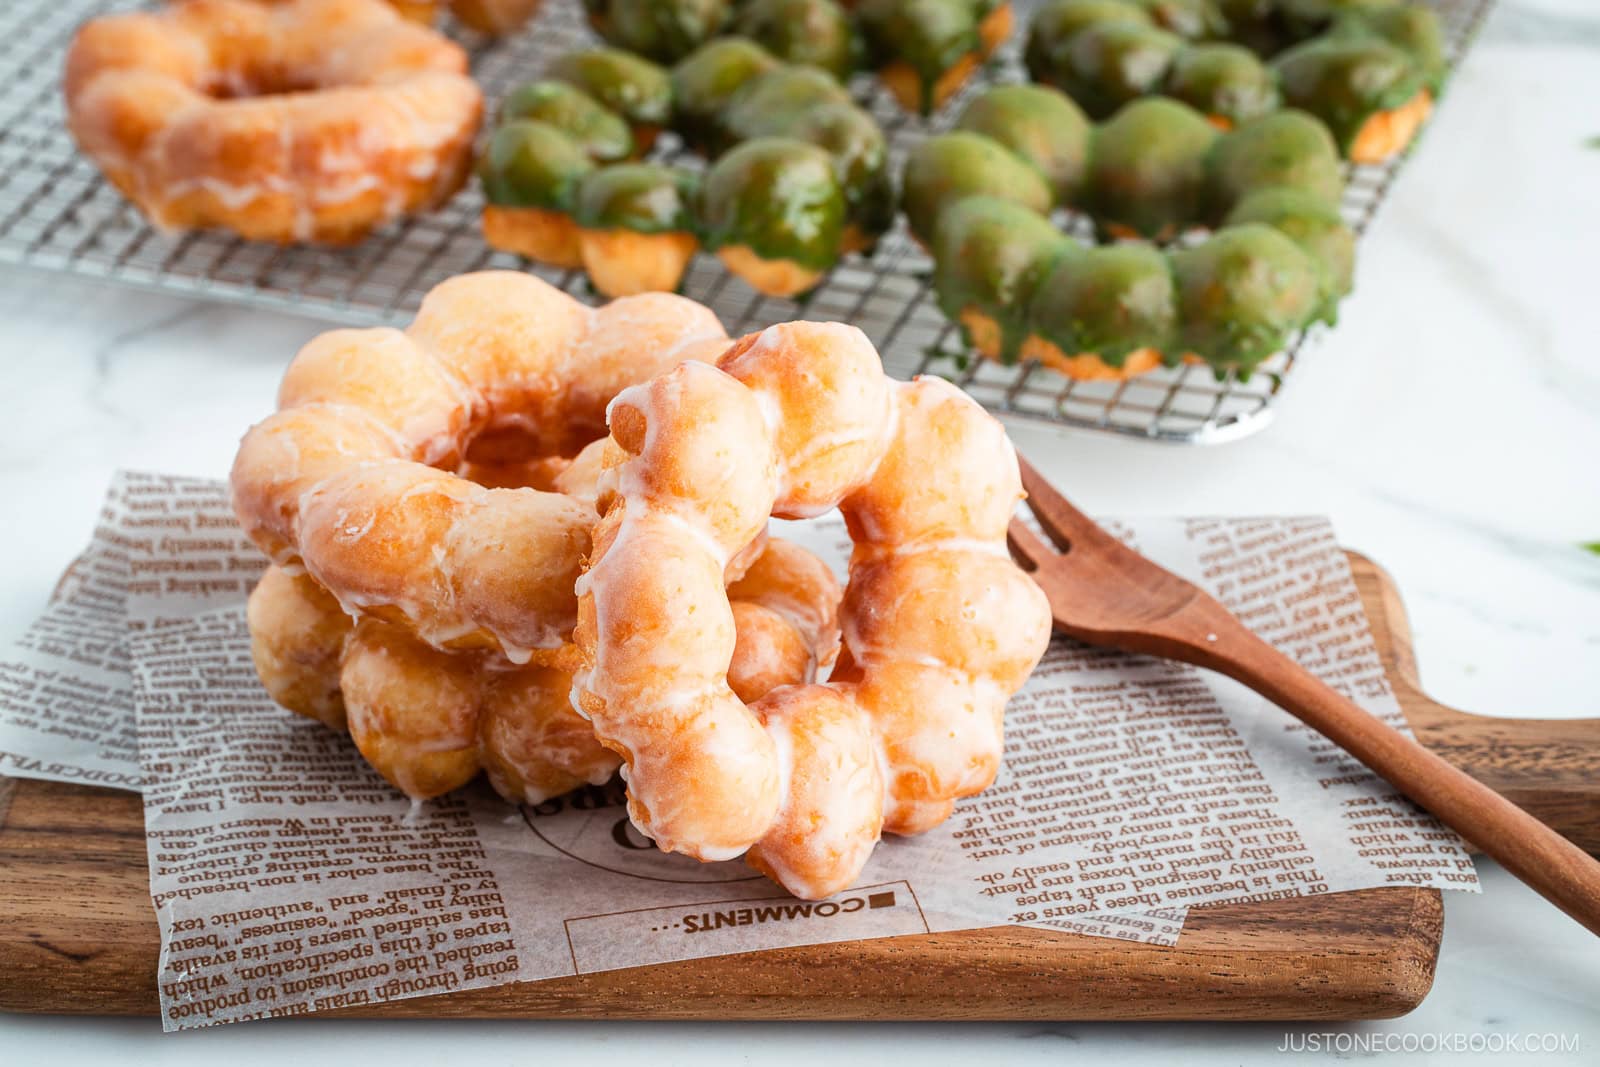
- They have a unique, chewy texture: We describe this irresistible texture in Japanese as mochi-mochi (モチモチしてる) or mocchiri (モッチリしている) even though it’s not made of glutinous rice flour.
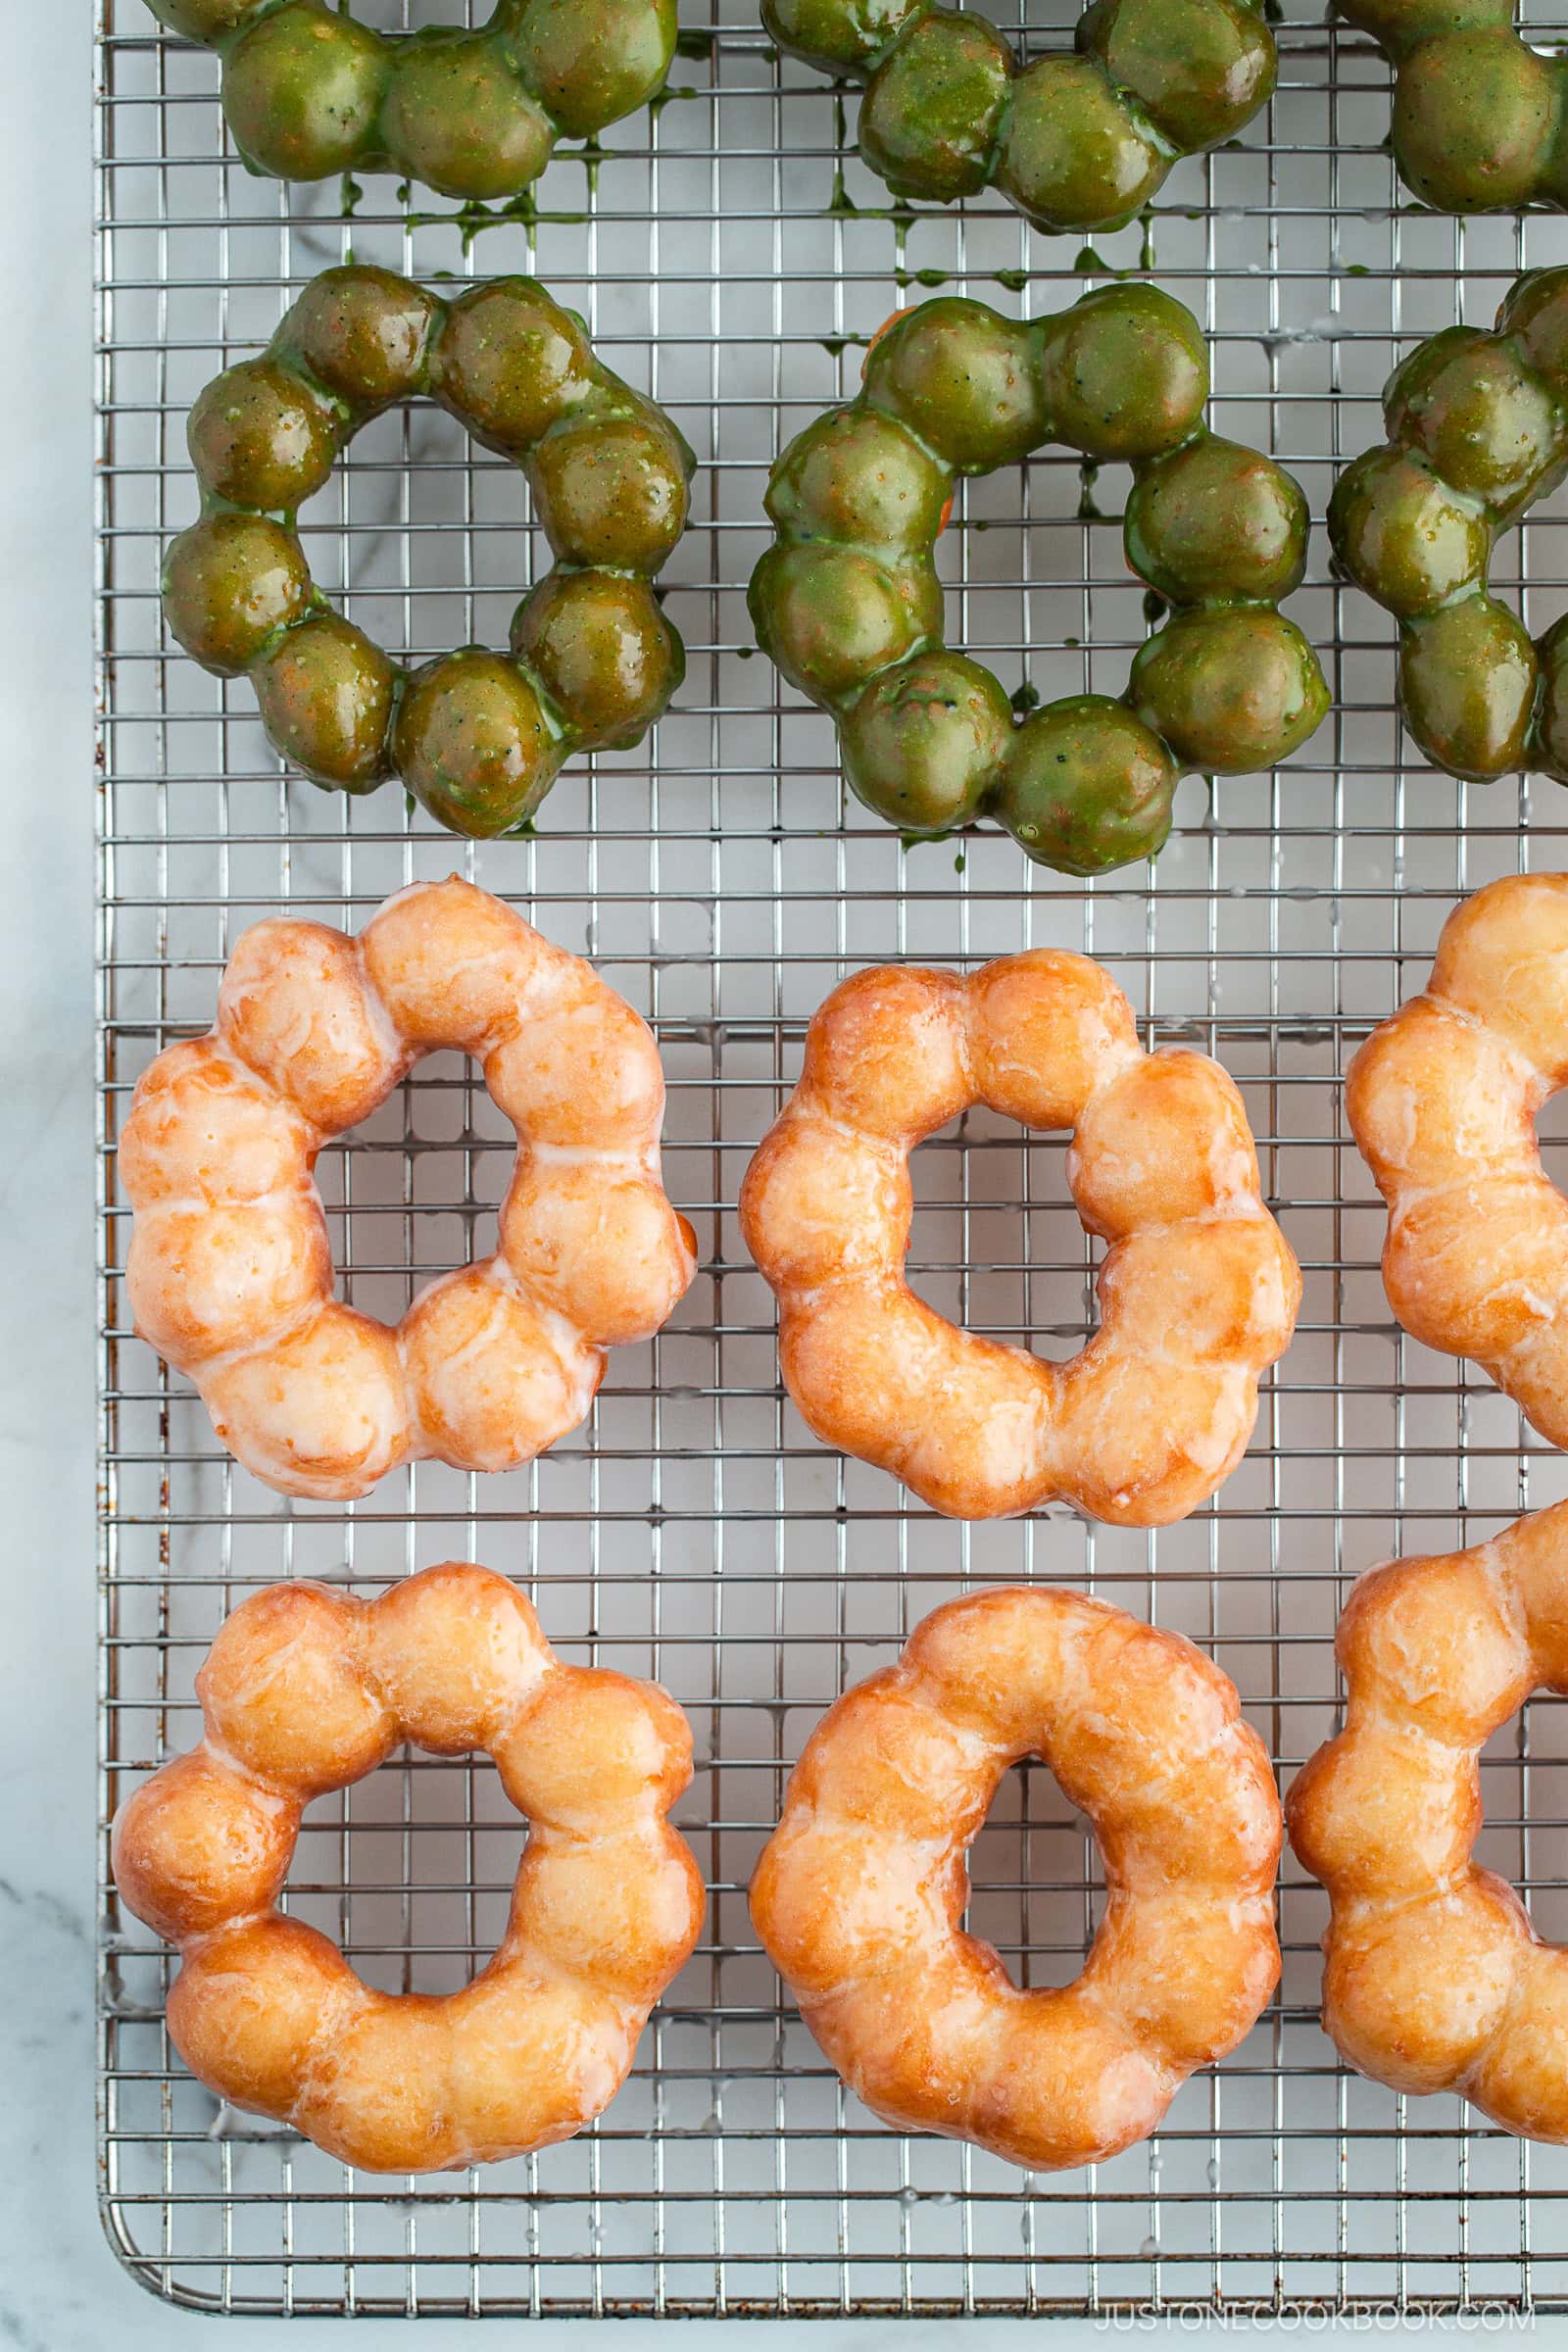
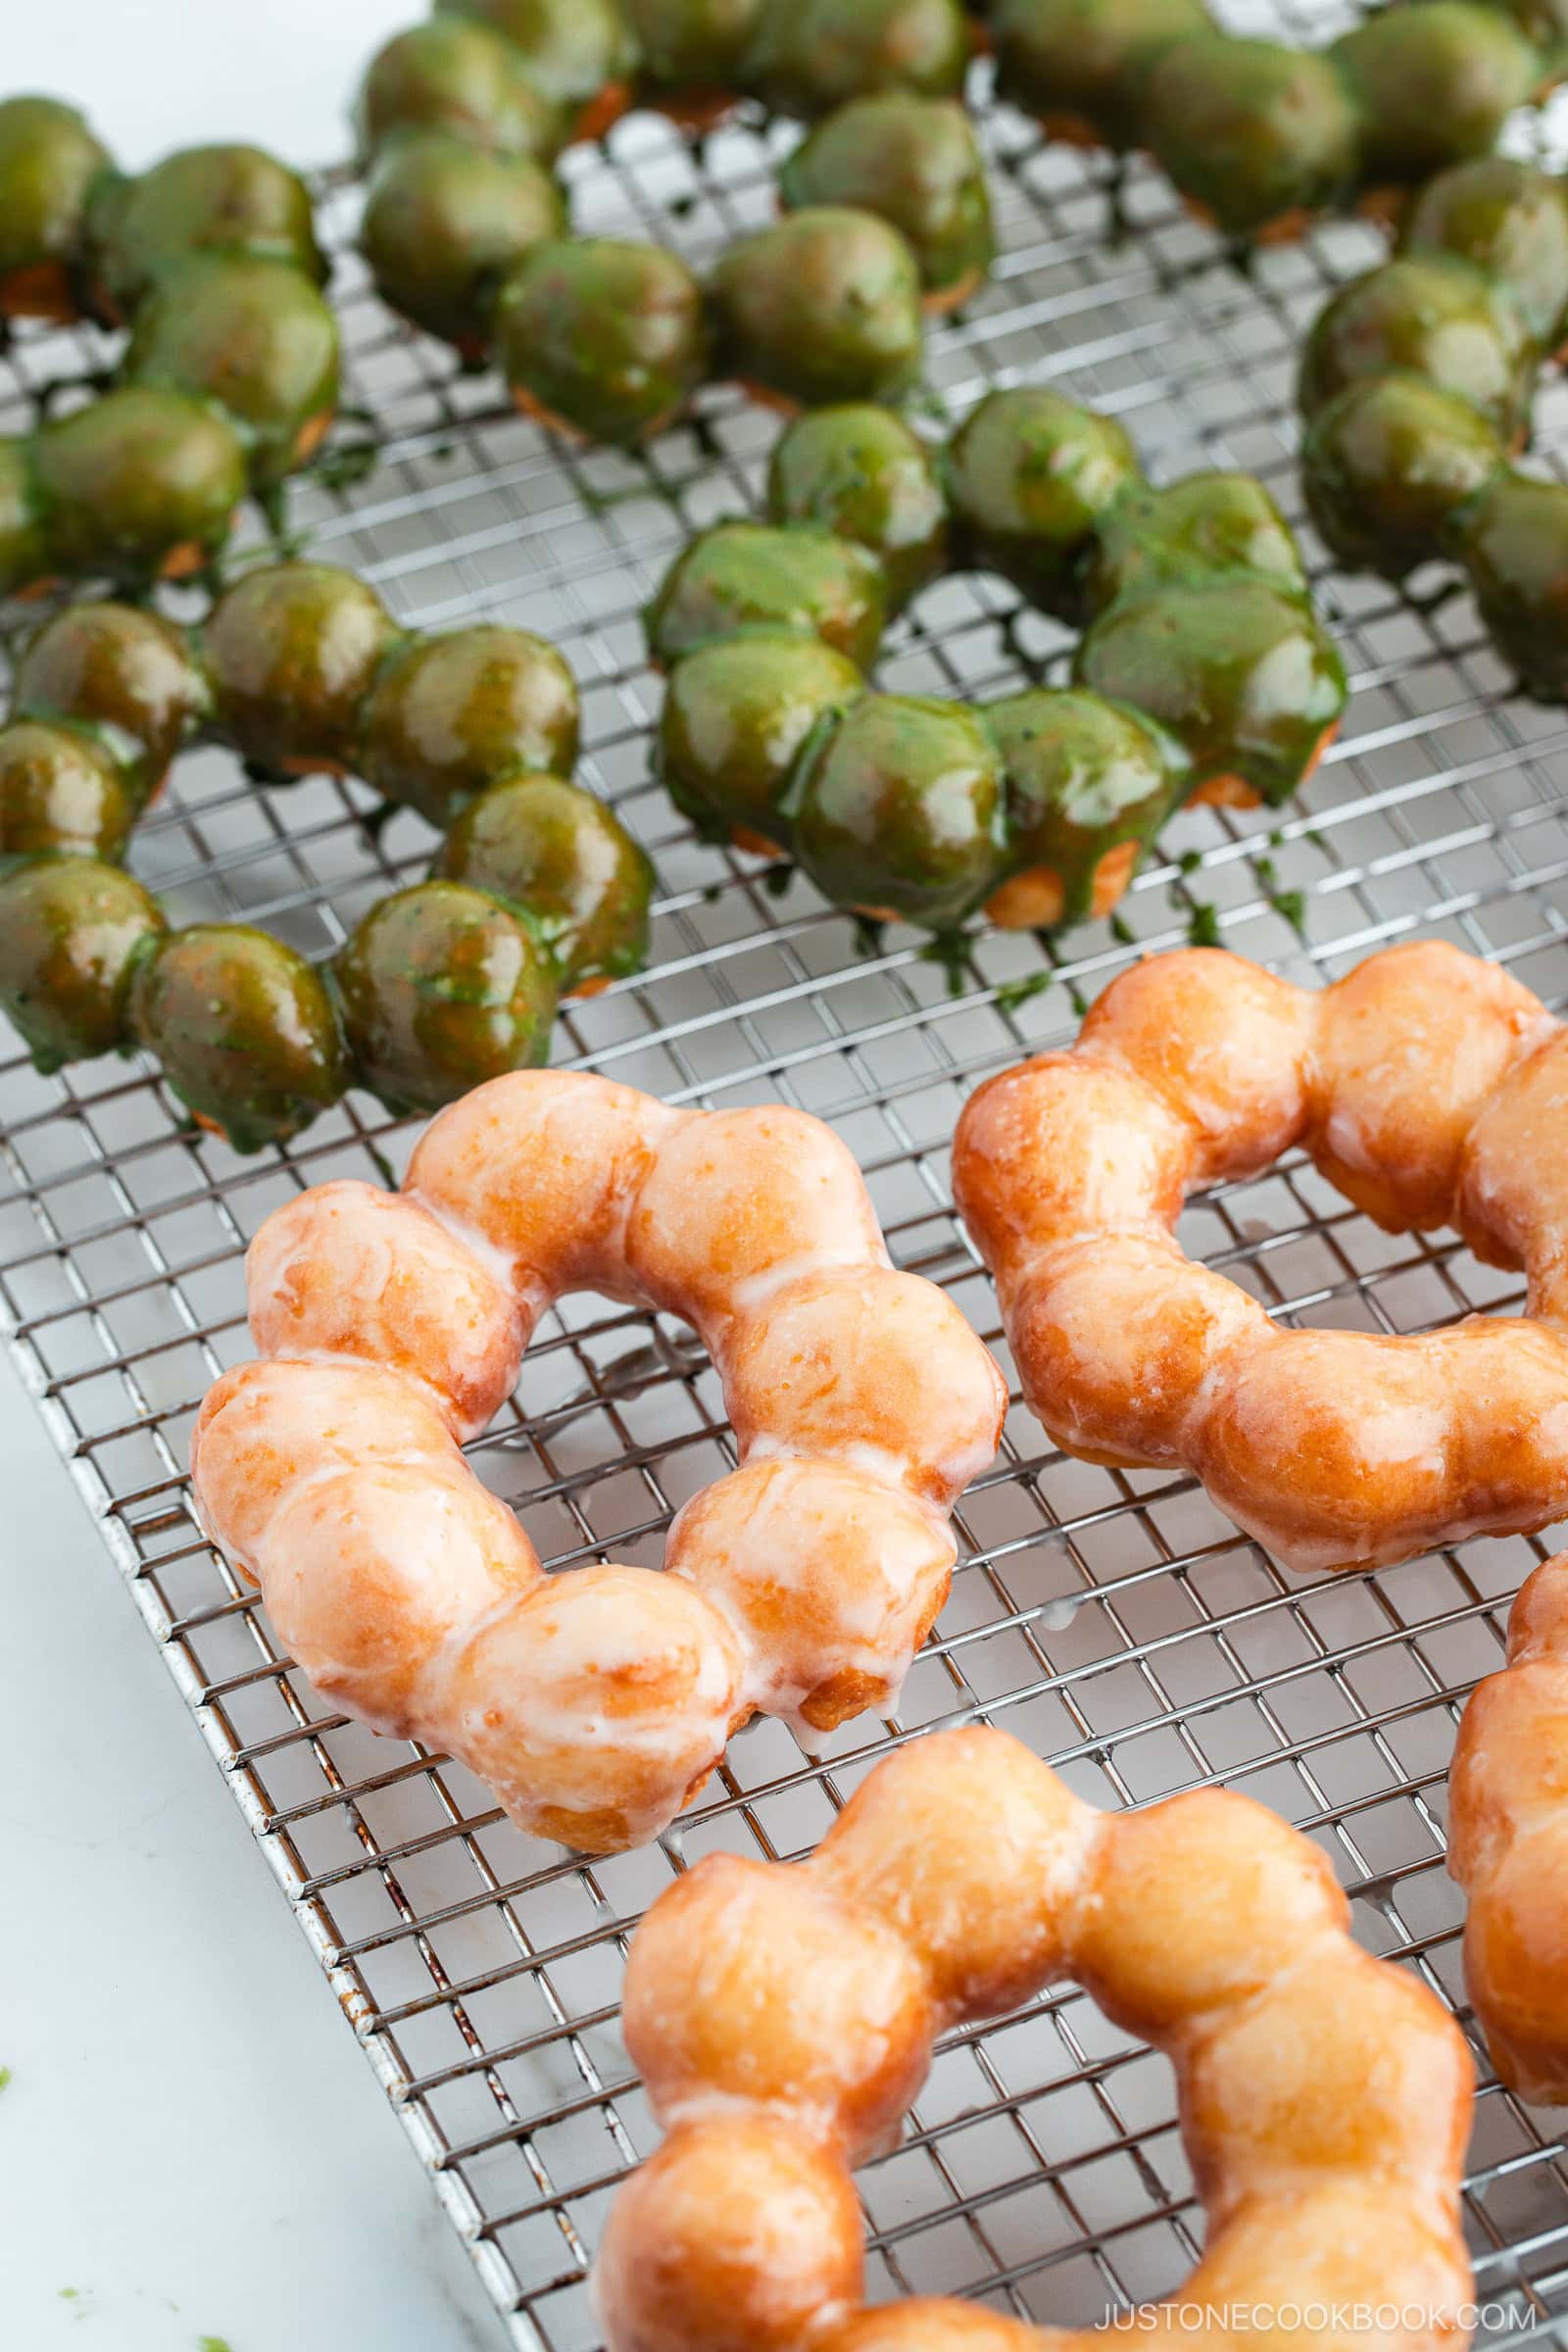
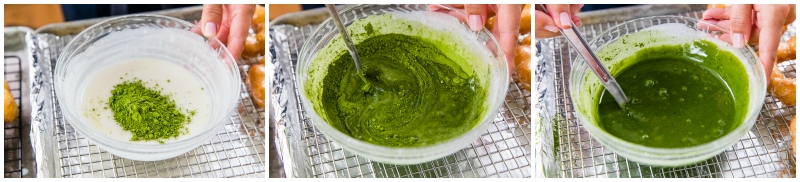
- Simple and delicious glaze: The classic glaze and matcha glaze are so delicious and easy to make with my instructions below.
Ingredients for Pon de Ring Donut Recipe
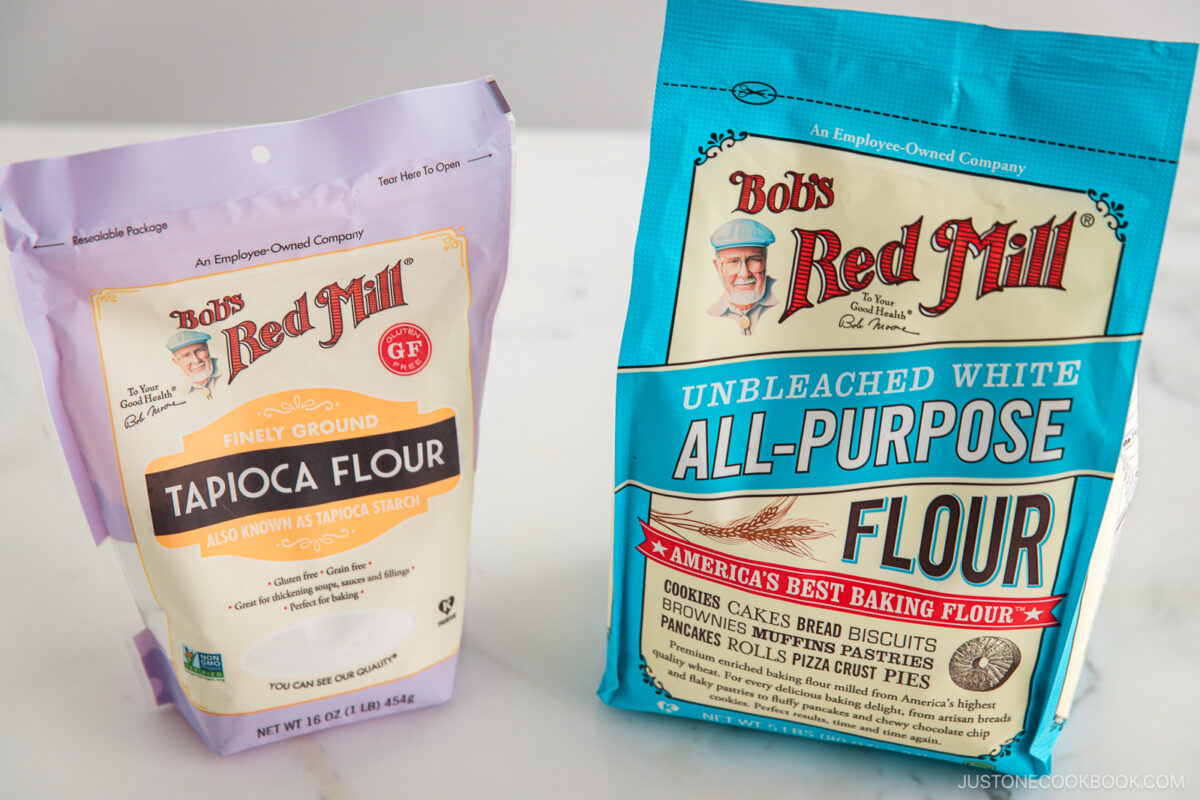
- Tapioca flour
- All-purpose flour (plain flour)
- Unsalted butter
- Large eggs
- Whole milk – heated to 110ºF (43ºC)
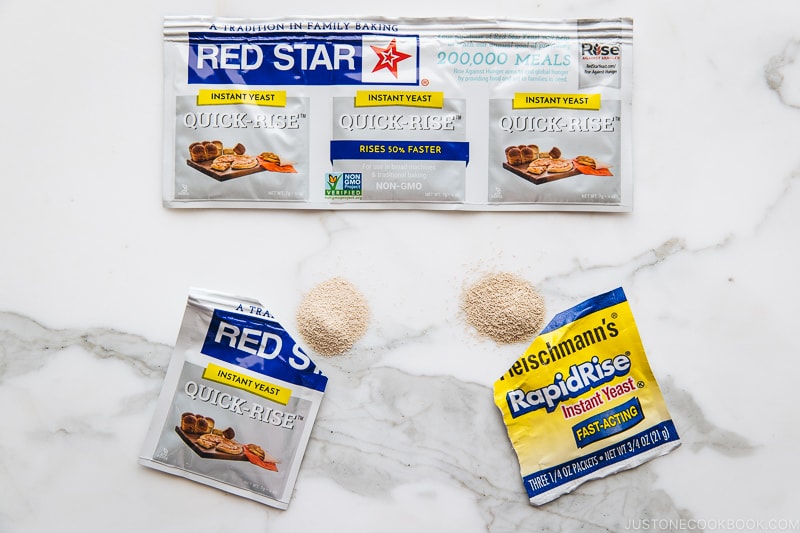
- Instant yeast
- Granulated sugar
- Pure vanilla extract
- Kosher salt
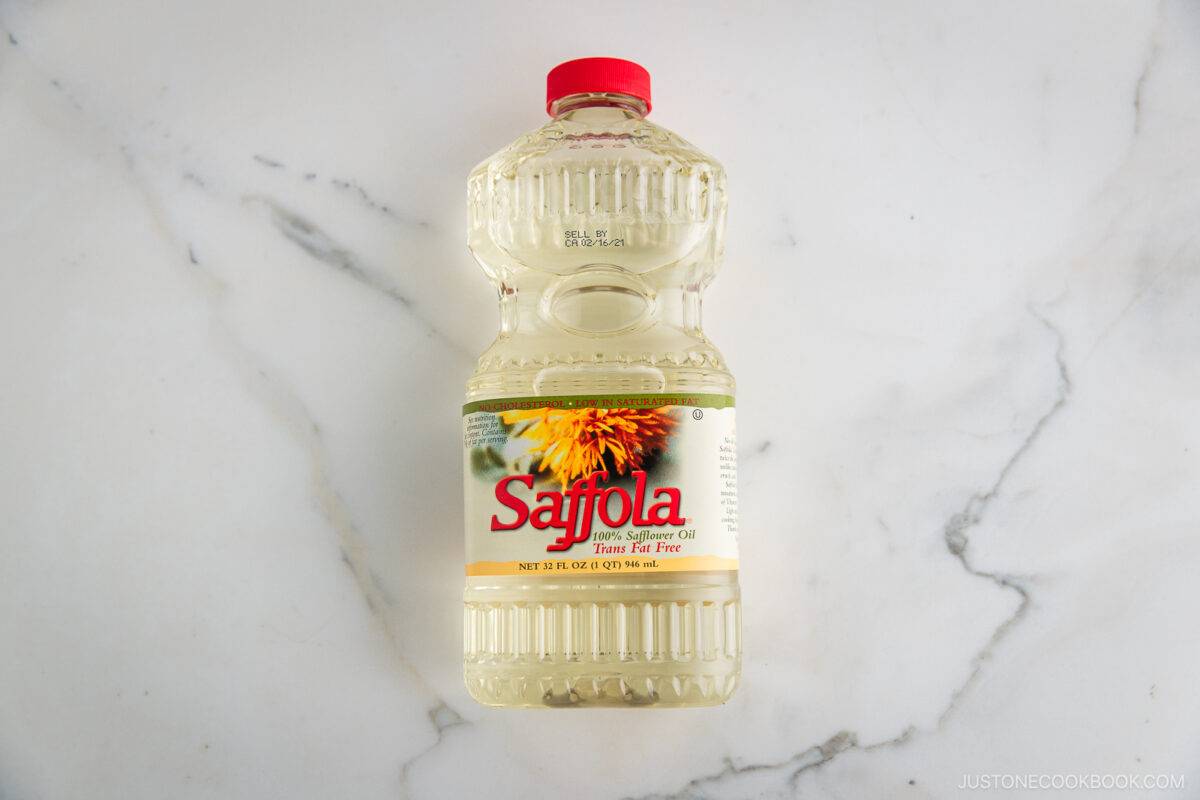
- Safflower oil – for deep-frying
- Glaze:
- confectioners’ sugar
- whole milk
- pure vanilla extract
- matcha green tea powder (optional)
Find the printable recipe with measurements below.
Jump to RecipeSubstitutions
- Tapioca flour and plain flour: I tested many different types of flour, and the right proportion of these two kinds produced the correct texture. Since this is not a mochi donut recipe, please do not substitute glutinous rice flour (mochiko flour) or bread flour, as the donuts will become dense and heavy.
- Whole milk: Use whole milk for the best results; I do not recommend low-fat or skim milk.
- Instant yeast: I use instant yeast (called quick or rapid-rise yeast) for convenience. You can add it right into the dough, but here I hydrate it in warm milk to give it a good start and make it very active. You can substitute active dry yeast one-for-one, but it takes more time to rise, so please add 10–15 minutes to the total time for proofing.
- Safflower oil: This is the best neutral-flavored oil for frying donuts. In my experience, vegetable oil and canola oil leave an unwanted taste. We learned that Mister Donut uses lard, possibly in combination with vegetable shortening, but I wanted to avoid these saturated fats.
Key Equipment
- Stand mixer with flat beater attachment
- Pastry card or dough scraper
- Digital kitchen scale
- Dutch oven or other heavy-bottomed pot that fits 4 cups (1 QT) of oil.
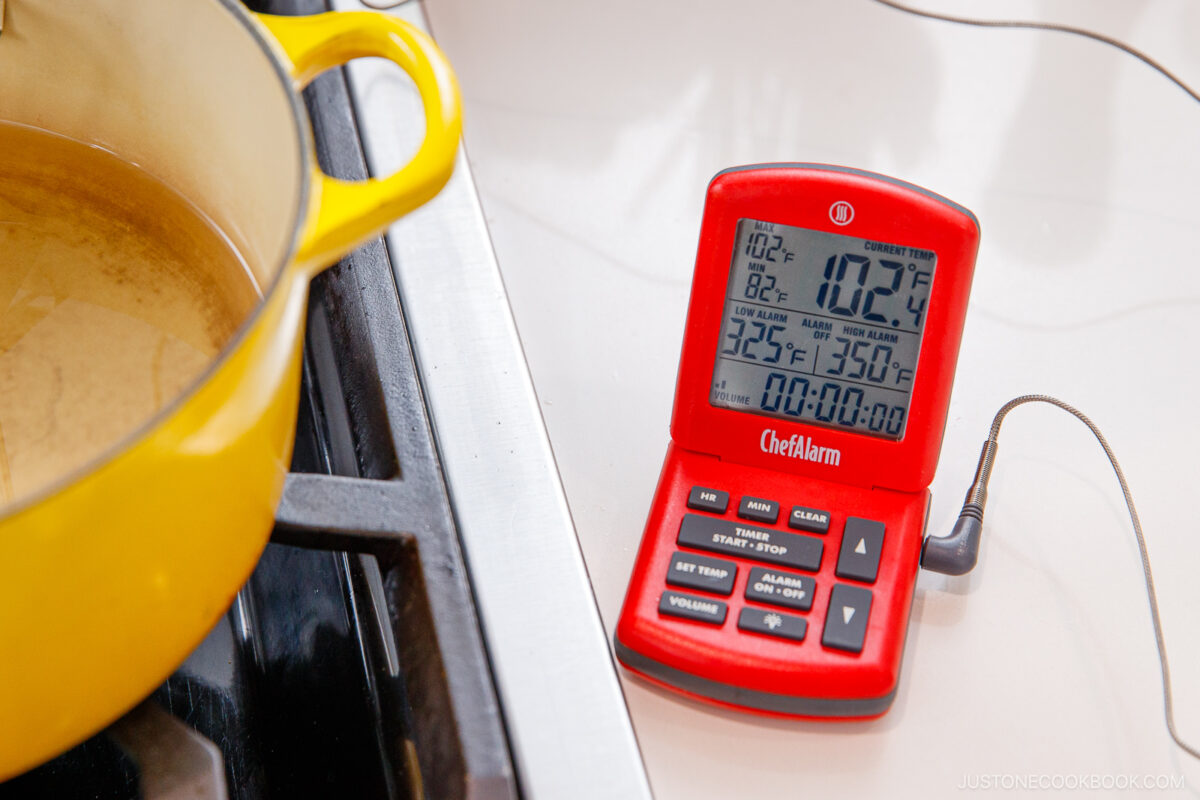
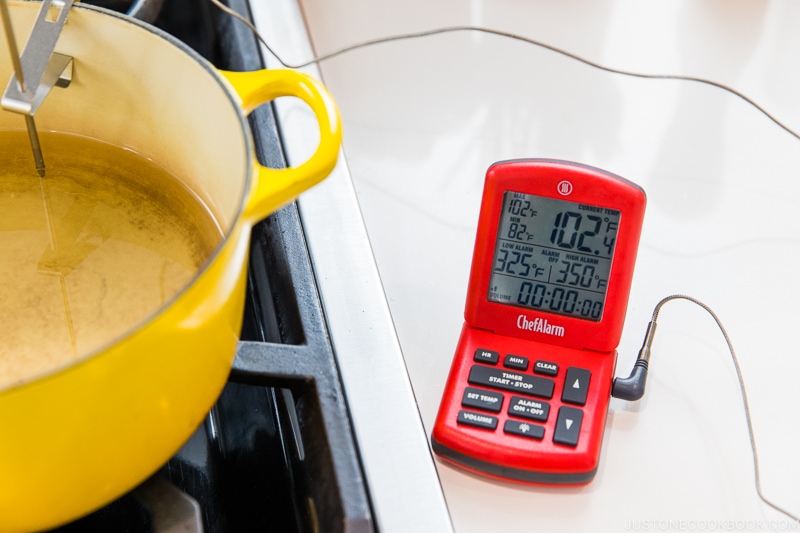
- Instant-read thermometer – I used ChefAlarm® Cooking Alarm Thermometer and Timer
How to Make Pon de Ring Donuts
Dough
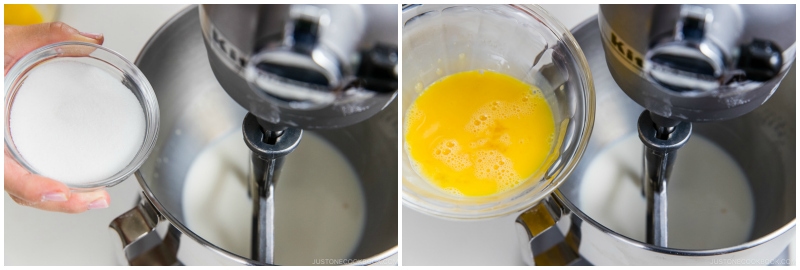
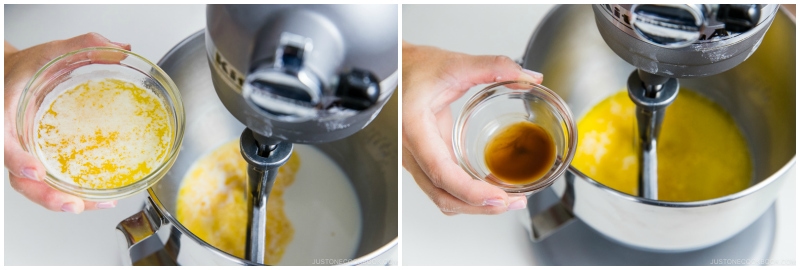
Step 1 – Mix the wet ingredients. Add the milk, yeast, and a bit of sugar in a stand mixer bowl. Set aside for 5–10 minutes. Add the rest of the sugar, egg, melted butter and vanilla extract and beat on low speed to combine.
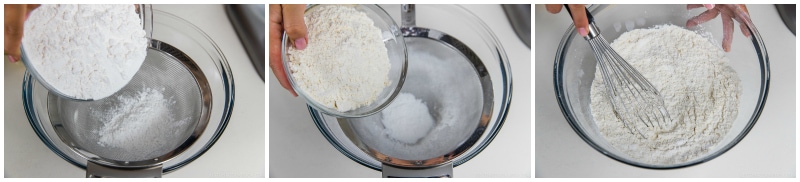
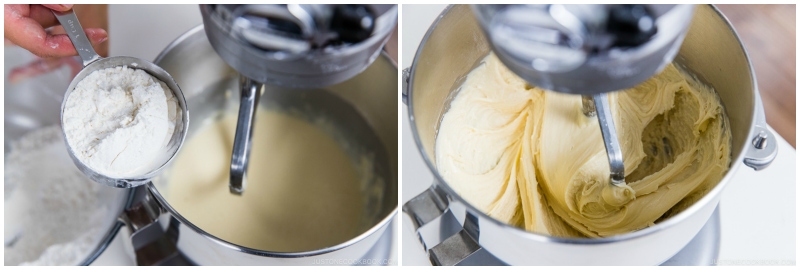
Step 2 – Add the flours. Sift together the tapioca and plain flours, then add half of it to the wet ingredients at low speed until combined. Add the salt and gradually stir in the remaining flour.
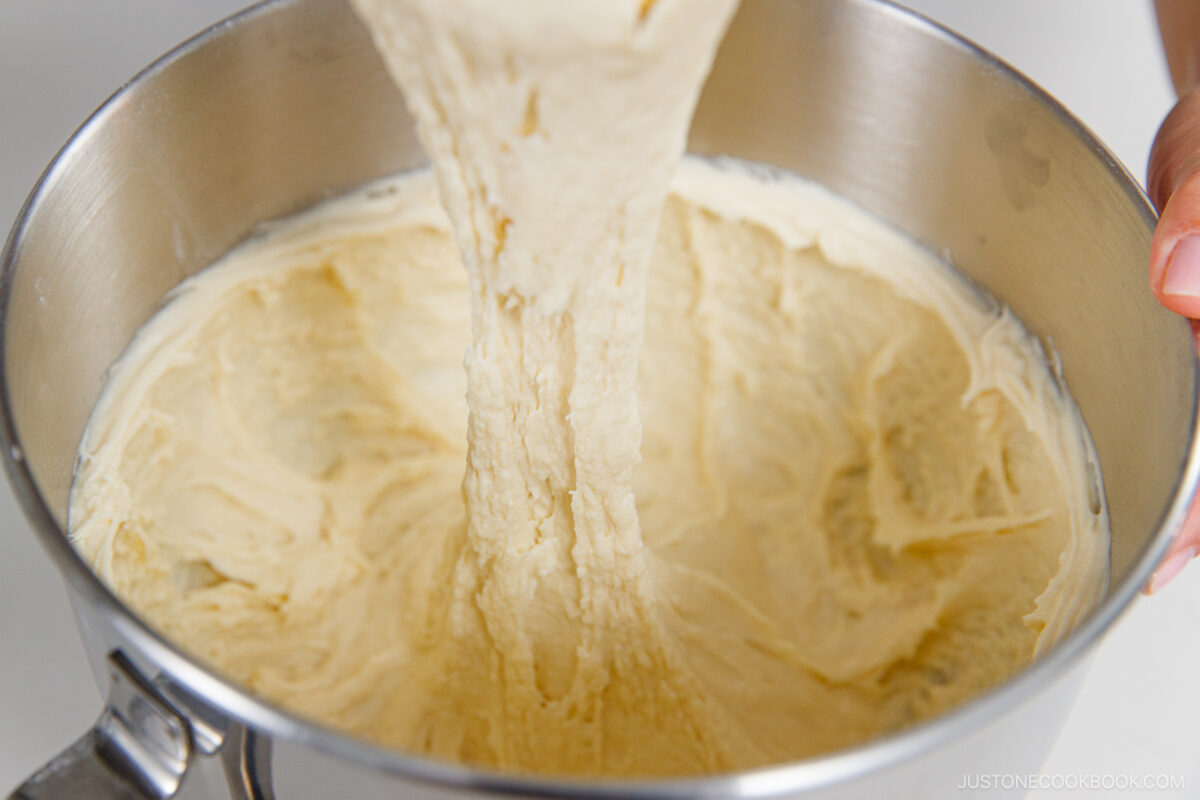
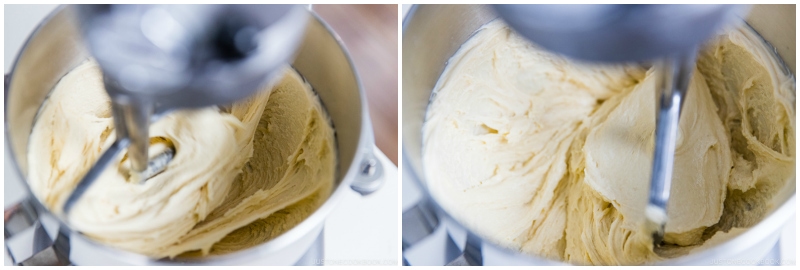
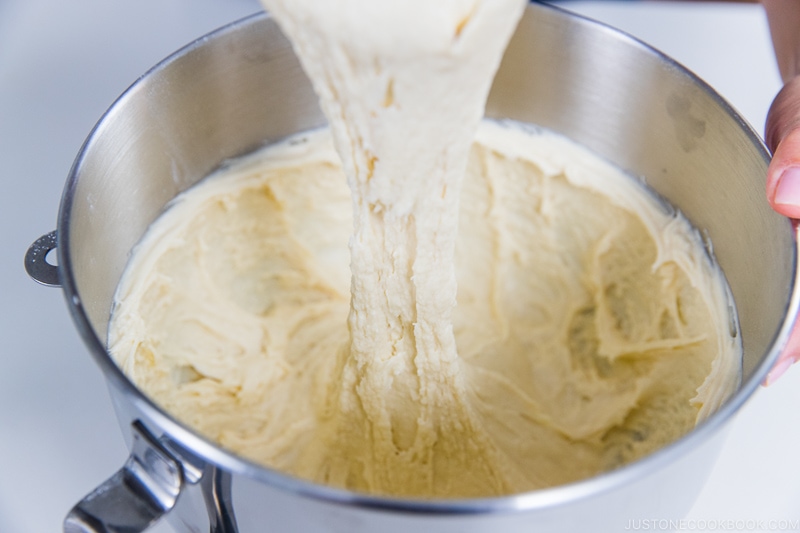
Step 3 – Knead and proof. Mix at medium-high speed until smooth and elastic. Form the sticky dough into a smooth ball and proof in a large greased bowl until doubled.
Assemble
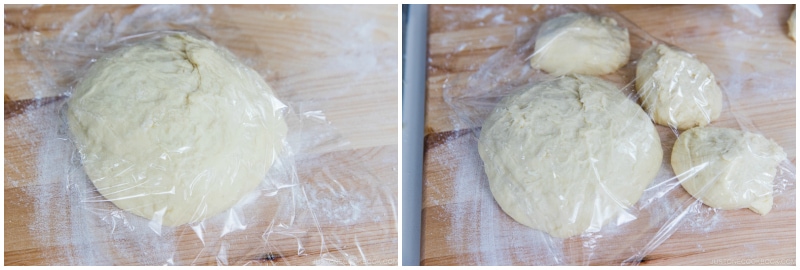
Step 4 – Make the dough balls. Divide the dough with a dough scraper into eight pieces. Cut and roll each piece into 24 small balls.
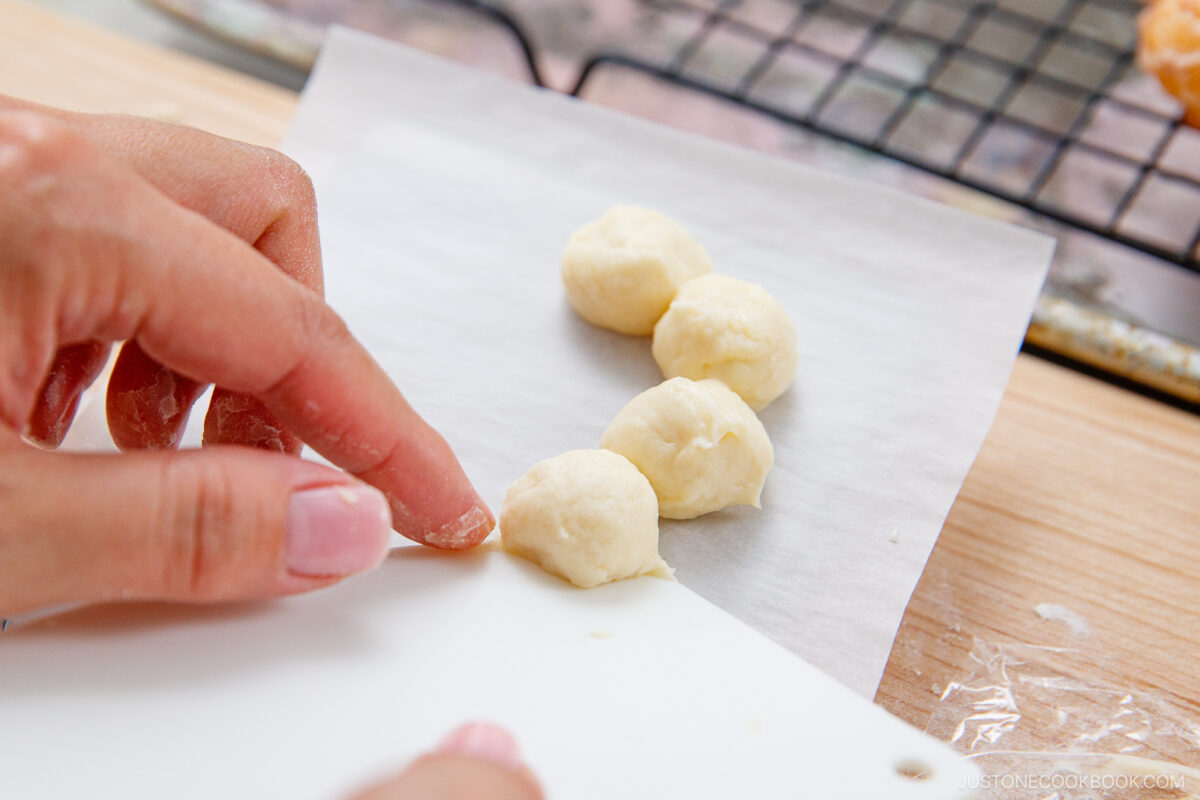
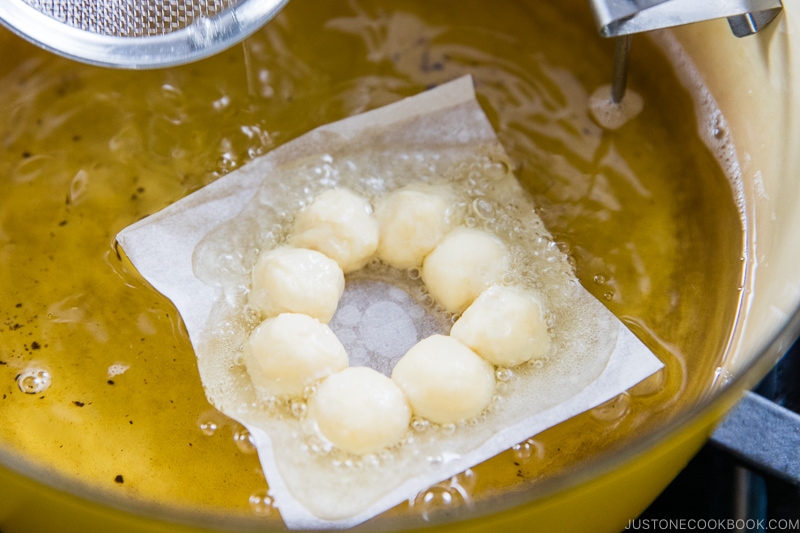
Step 5 – Form the donuts. Use one small square of parchment paper to hold each donut. Form a ring with 8 dough balls. Dab water where they attach. Cover and rest for 15–20 minutes.

Cooking
Step 6 – Preheat the oil. Heat it to 350ºF (177ºC) in a Dutch oven. Line a baking sheet with a paper towel and another with parchment paper and place a wire rack on top. Meanwhile, prepare the classic glaze.
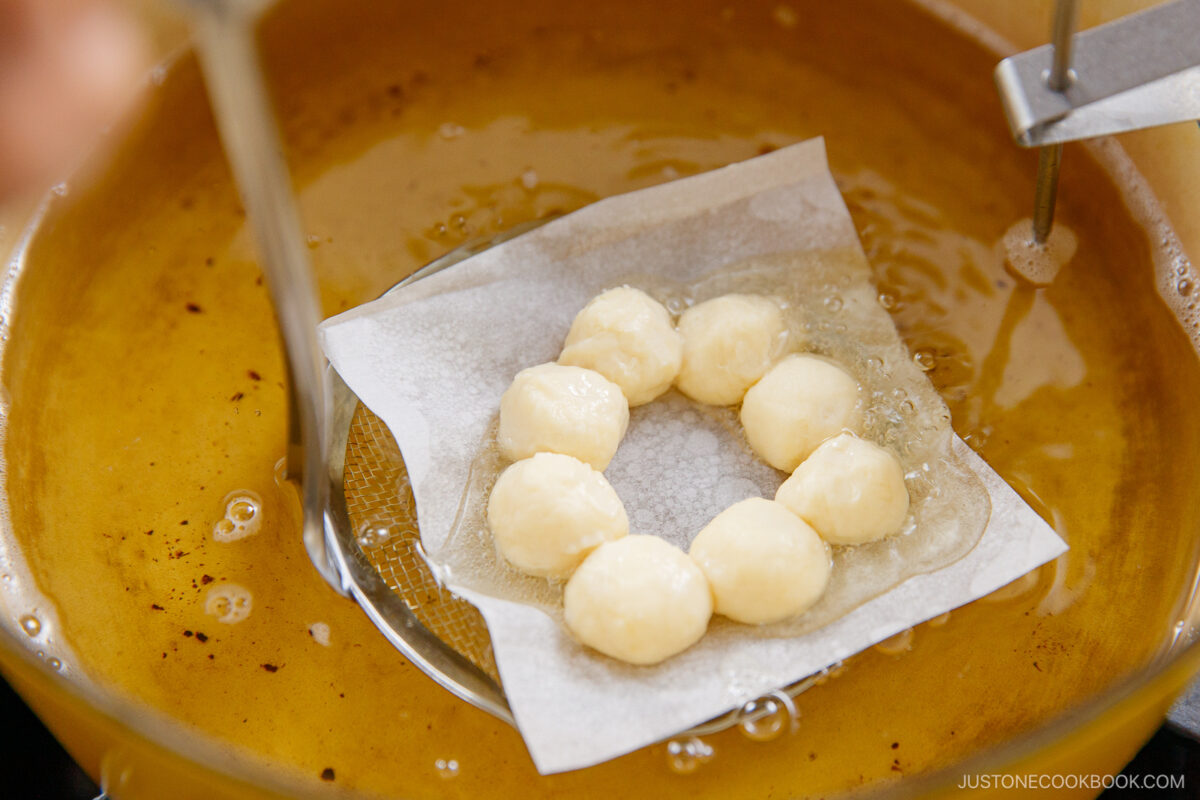
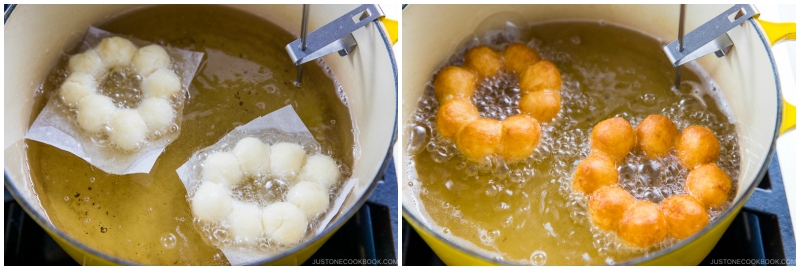
Step 7 – Fry. Place a donut on its parchment square in the oil. I fry two at a time. Fry the first side for 75 seconds. Then flip, remove the paper, and fry the other side for 45 seconds until golden brown.
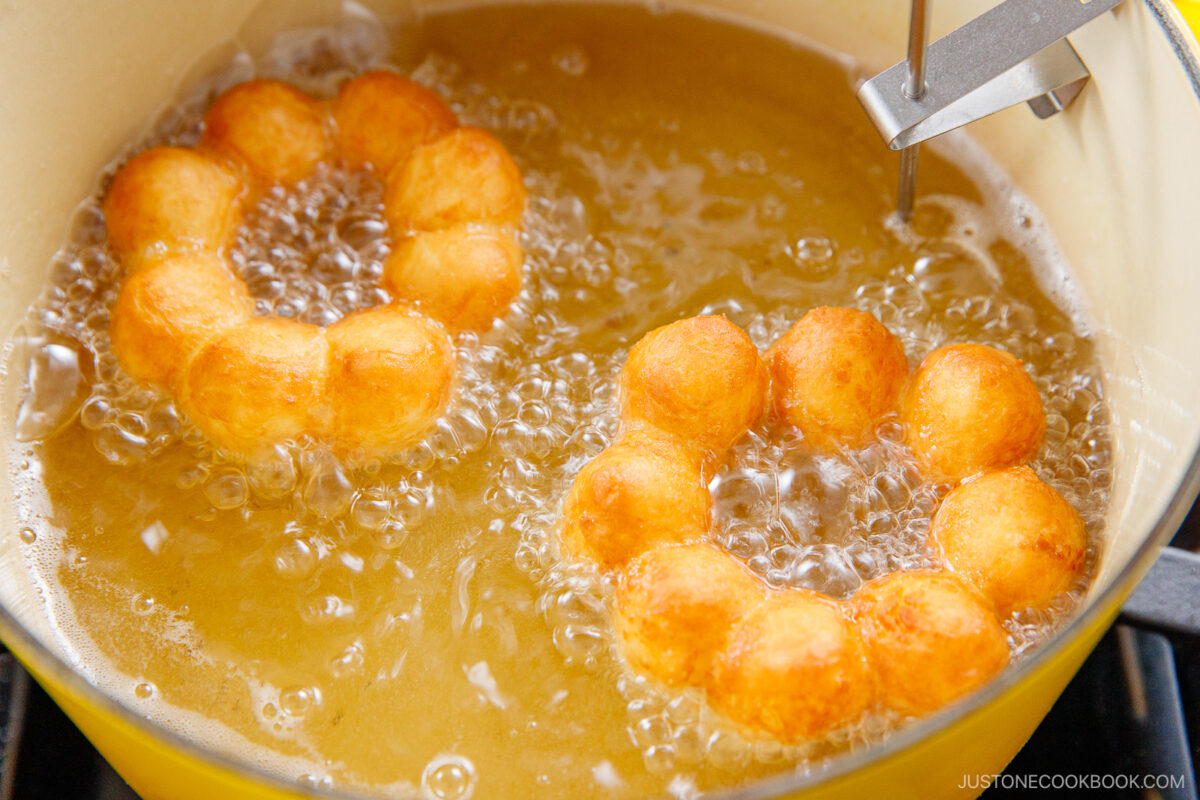
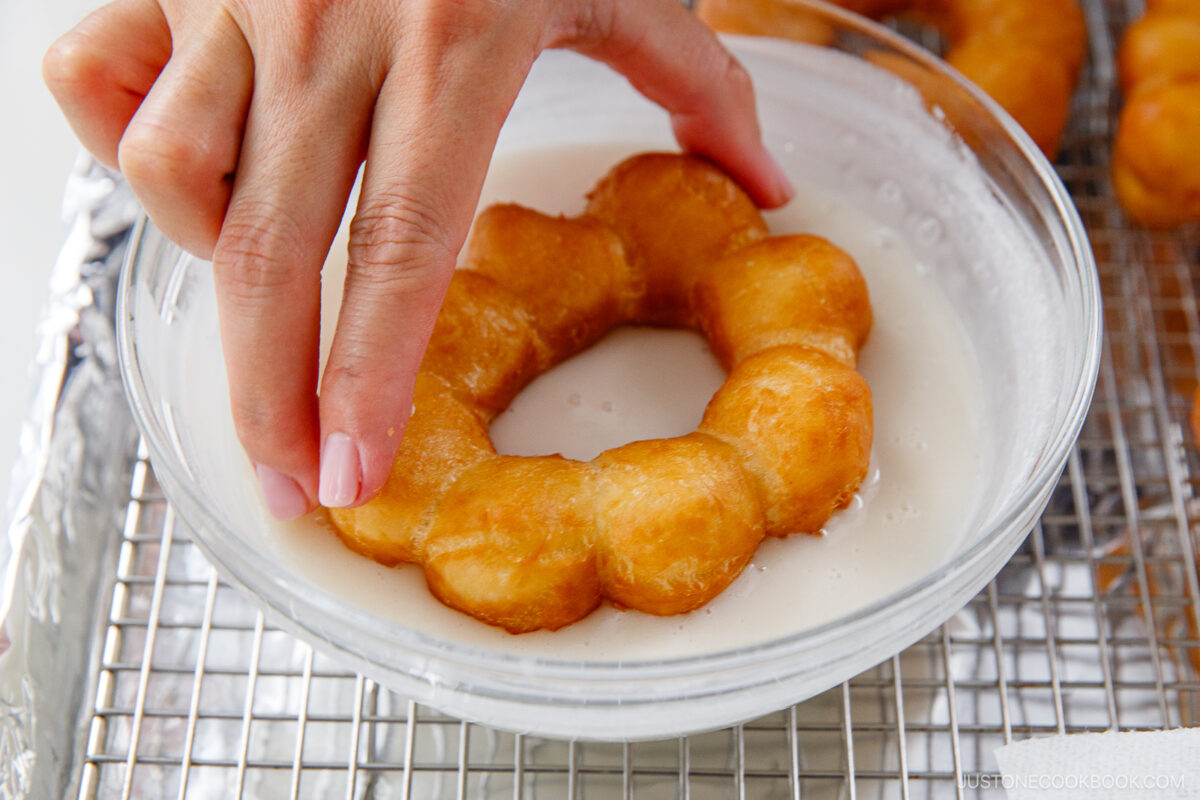
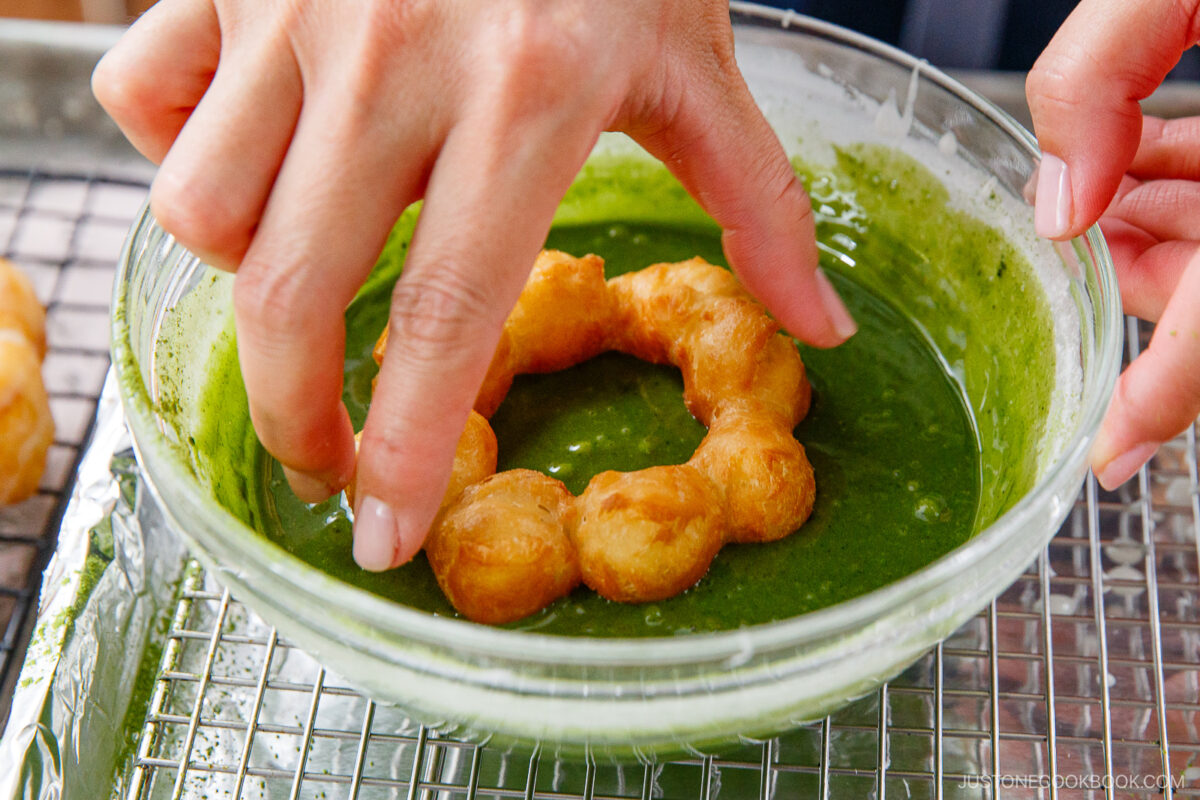
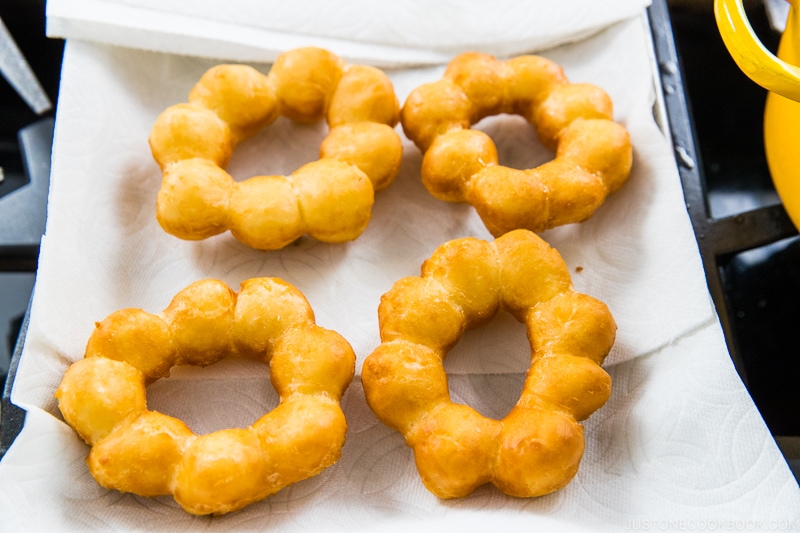
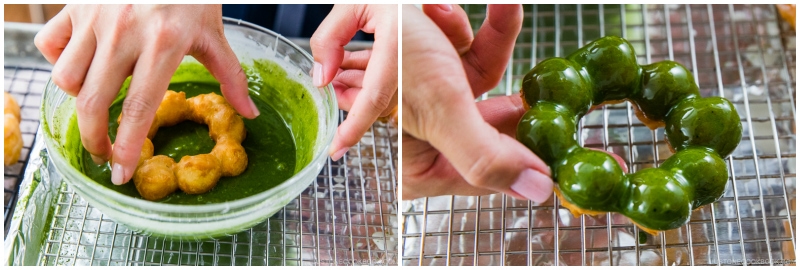
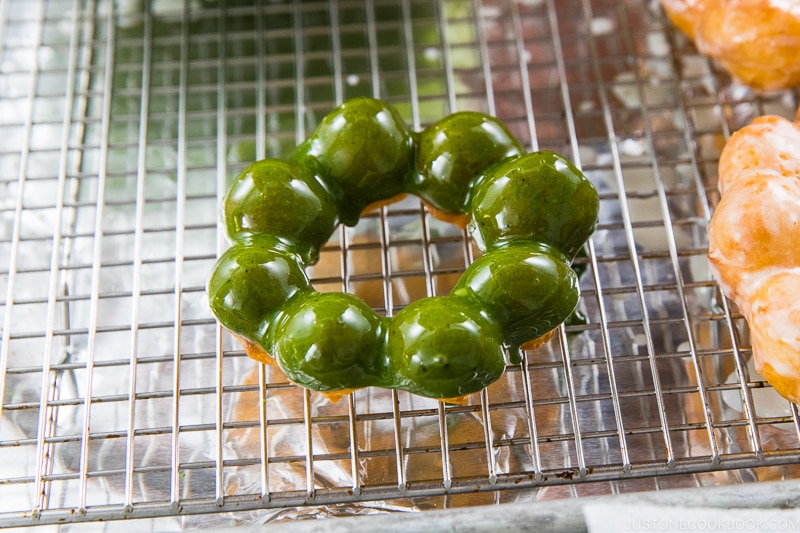
Step 8 – Glaze and cool. Transfer to the paper towel to drain oil. While still hot, coat completely in glaze and place on the wire rack for 30 minutes to set. I dip half in classic glaze, then mix in the matcha powder and dip the rest.
Nami’s Recipe Tips
- Knead well to activate the gluten – I highly recommend using a stand mixer for this job. We need to develop strong gluten in the dough to get that chewy final texture, and it’s a lot more work and prep time to achieve that with hand kneading.
- Don’t add extra flour – With so much tapioca flour, the dough will be soft and sticky, but try not to add additional flour. I prepared an extra 2 Tbsp of plain flour to dust on my work surface and hands, but I didn’t use it all.
- Deep-fry at the optimal temperature – Maintain a target oil temperature of 325ºF (168ºC) to 350ºF (177ºC). When the oil is too hot, the donuts will brown too fast and get very crispy. When it’s too low, the donuts absorb more oil.
- Drain the fried donuts on paper towels – From my countless recipe testings, I learned that draining the excess oil on paper towels works better than a wire rack. You can transfer them later to a wire rack to glaze and cool.
- Glaze while the donuts are hot – You MUST glaze the donuts when they are hot! The residual heat spreads the glaze beautifully when you flip over the donuts.
- Find a partner to help – The donuts will cool too much if you wait until you finish frying all the donuts to glaze them. Since deep-frying and glazing at the same time can get hectic, find a helper for this step.
Variations and Customizations
- Try other flavors. Get creative with glazes and coatings like brown sugar, strawberry glaze, chocolate glaze, and white chocolate glaze.
- Add nuts. Sprinkle the just-dipped donuts with chopped nuts or candied almonds.
- Fill it with cream. Split the donut into two halves and add fresh whipped cream inside with a piping bag.
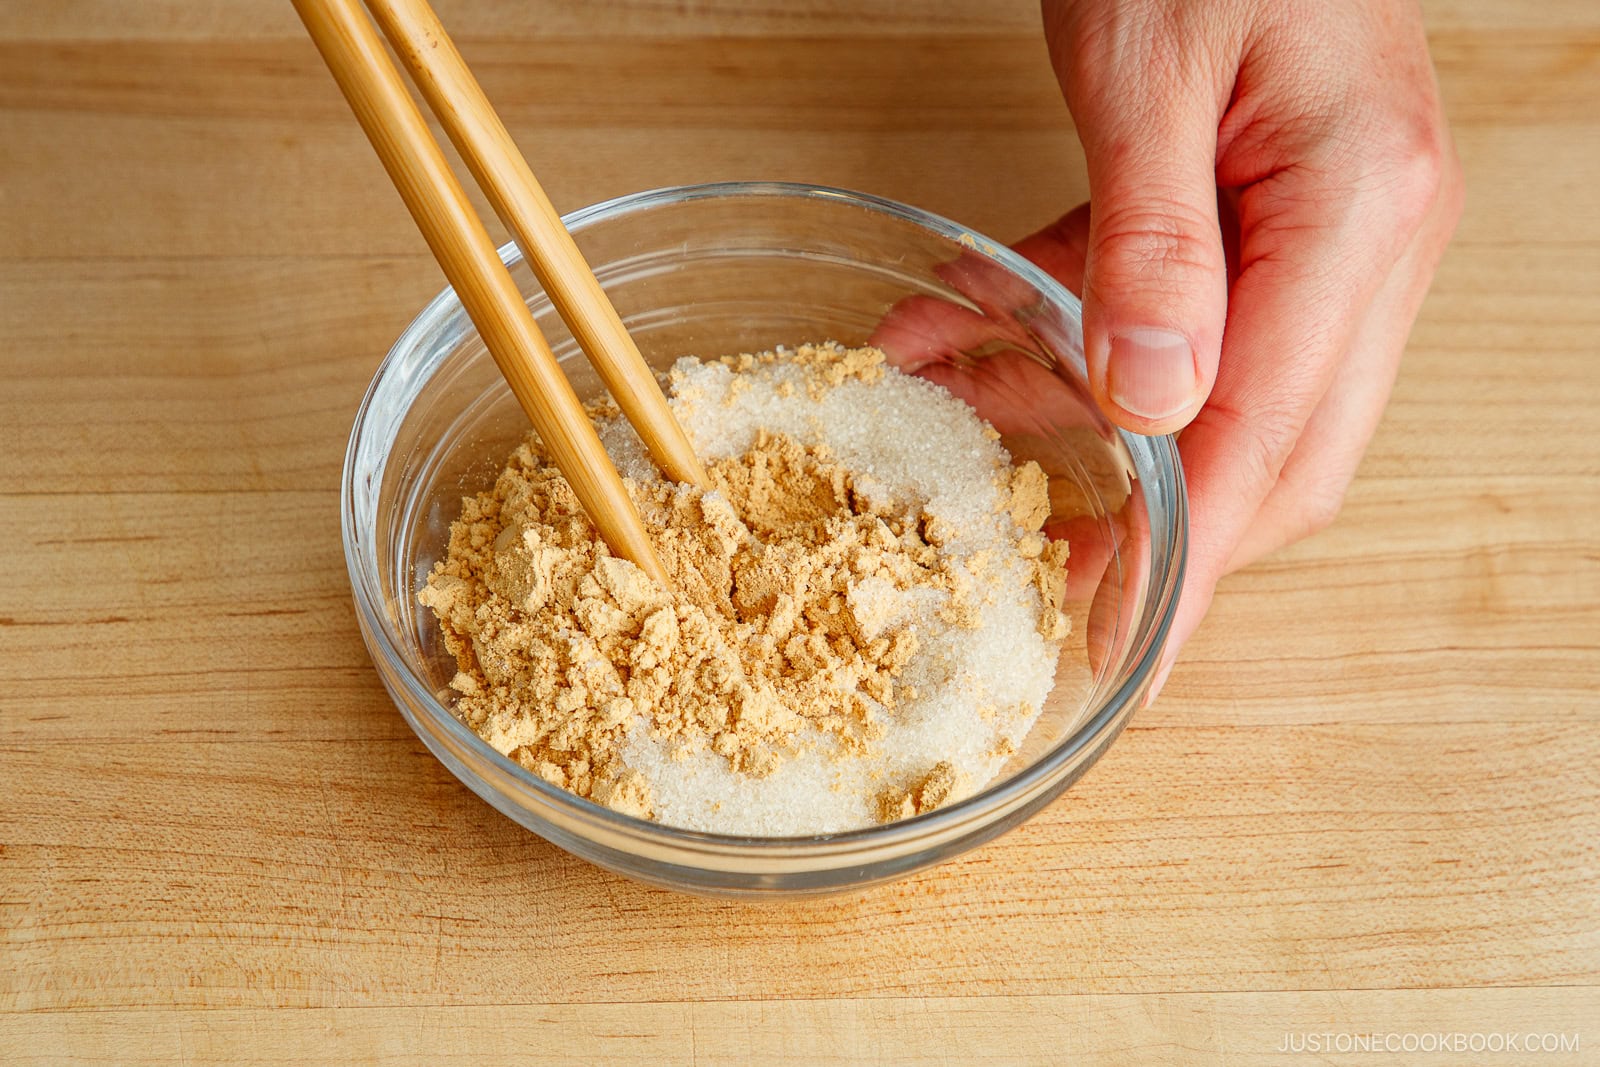
- Coat with kinako. Break it up into individual balls, heat in the microwave until warm, and generously coat with a mixture of kinako (roasted soybean flour) and sugar.
Storage Tips
To store: Enjoy the donuts the same day you make them. You can keep them in an airtight container at room temperature for a day.
To reheat: Reheat in the microwave for 15–20 seconds before eating.
Frequently Asked Questions
I don’t recommend making this pon de ring donut recipe in advance, as they are best eaten the day you fry them.
Pon de Ring Donut
Ingredients
- 6 Tbsp unsalted butter
- 2 large eggs (50 g each w/o shell)
- 1 cup whole milk (heated to 110ºF or 43ºC, slightly warmer than body temperature; do not use low-fat or skim milk)
- 1 tsp instant yeast
- ¼ cup granulated sugar
- 1 tsp pure vanilla extract
- 320 g tapioca flour (2½ cups + 2½ Tbsp; please weigh your flour; if you don't have a kitchen scale, see how to measure flour with a measuring cup)
- 180 g all-purpose flour (plain flour) (1¼ cups + 1 Tbsp; please weigh your flour; or learn how to measure flour with a measuring cup)
- ½ tsp Diamond Crystal kosher salt
- 4 cups safflower oil (for deep-frying; see Notes for the amount of oil to use)
For the Glaze
- 2 cups confectioners’ sugar
- ¼ cup whole milk
- ½ tsp pure vanilla extract
- 1 Tbsp matcha (ceremoial or culinary grade) (optional)
Instructions
- Gather and measure all the ingredients. I strongly encourage you to use a kitchen scale to weigh the flours. Prepare 24 squares of parchment paper measuring 4 x 4 inches (10 x 10 cm). I DO NOT double or triple this recipe. Make in batches, if needed.
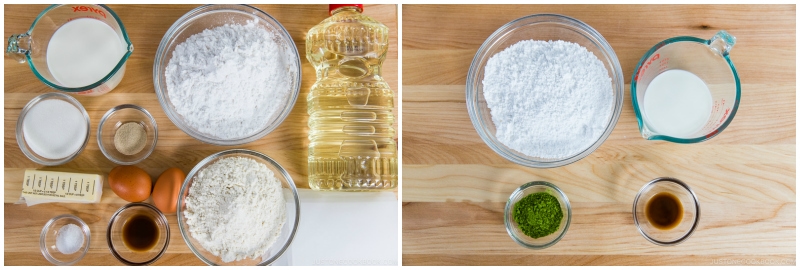
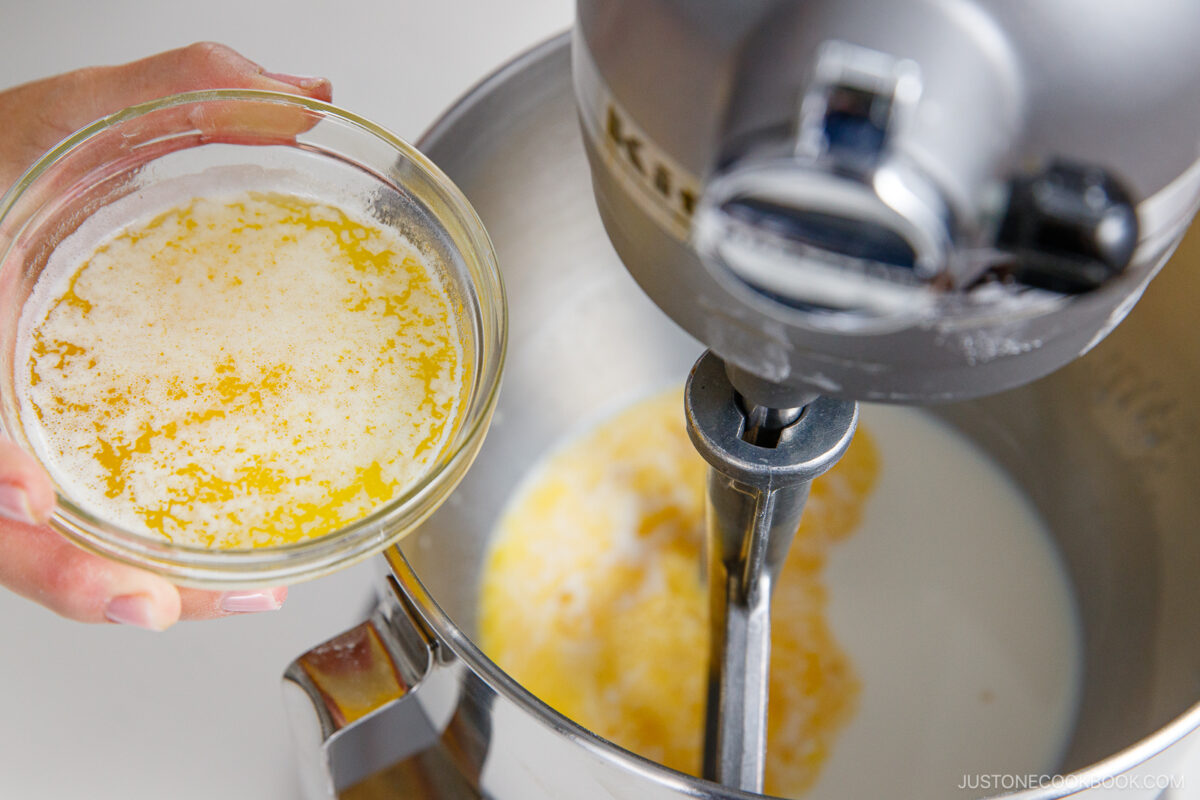
- Melt 6 Tbsp unsalted butter in the microwave or in a saucepan on the stove and let it cool slightly. Crack 2 large eggs (50 g each w/o shell) in a bowl and beat them with a whisk. Set aside.

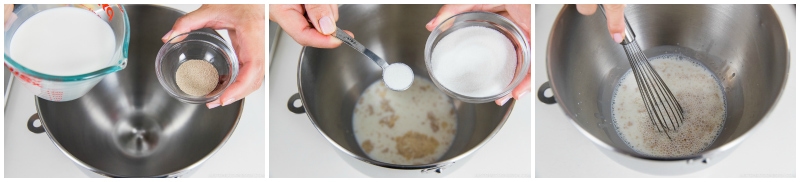
- Combine 1 cup whole milk (110ºF or 43ºC—slightly warmer than body temperature) and 1 tsp instant yeast in the bowl of a stand mixer (or large mixing bowl). Then, take ½ tsp sugar from the ¼ cup granulated sugar you measured earlier and add it to the milk and yeast. Whisk the mixture well. Set aside for 5–10 minutes. Note: If you wonder why I hydrated the instant yeast, please read the post.
- Sift 320 g tapioca flour (2½ cups + 2½ Tbsp) and 180 g all-purpose flour (plain flour) (1¼ cups + 1 Tbsp) through a fine-mesh sieve into another large mixing bowl. Whisk to combine and set aside.
To Mix the Ingredients
- Fit the stand mixer with a flat beater attachment. Add the rest of the sugar and the beaten egg to the milk mixture.
- Add the melted butter and 1 tsp pure vanilla extract to the milk mixture.
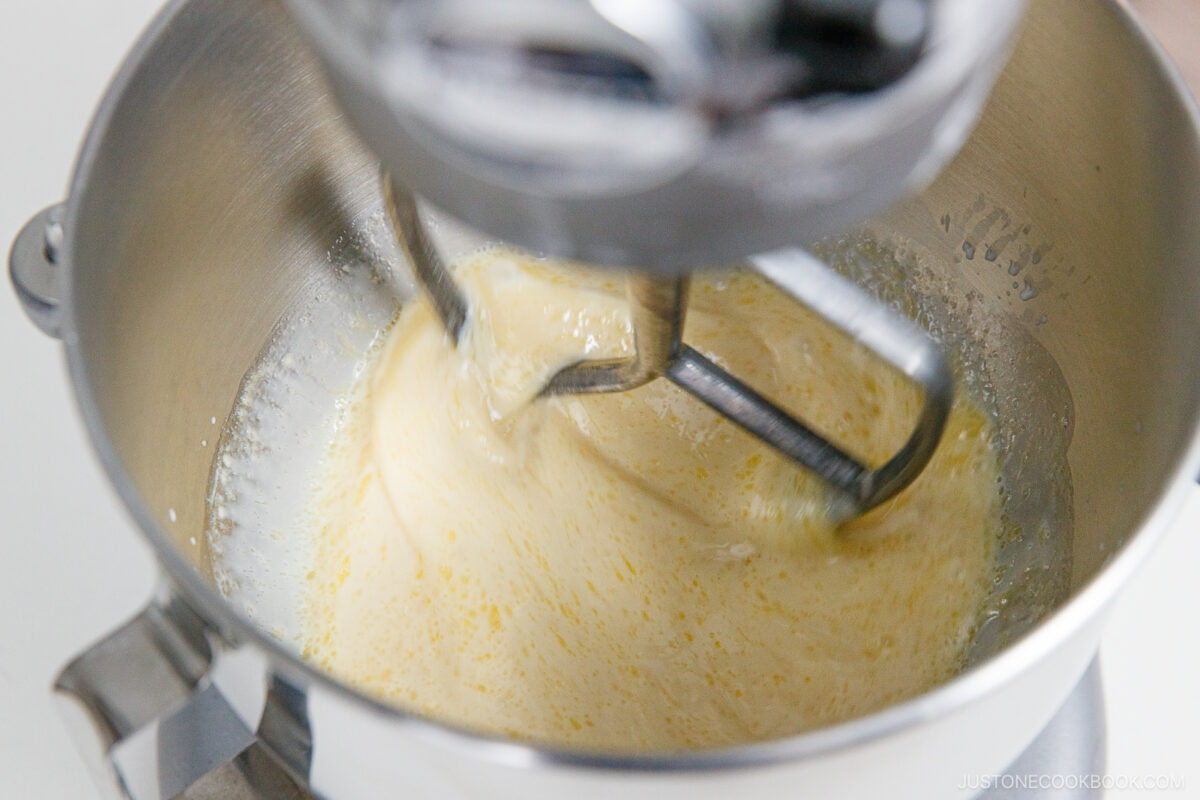
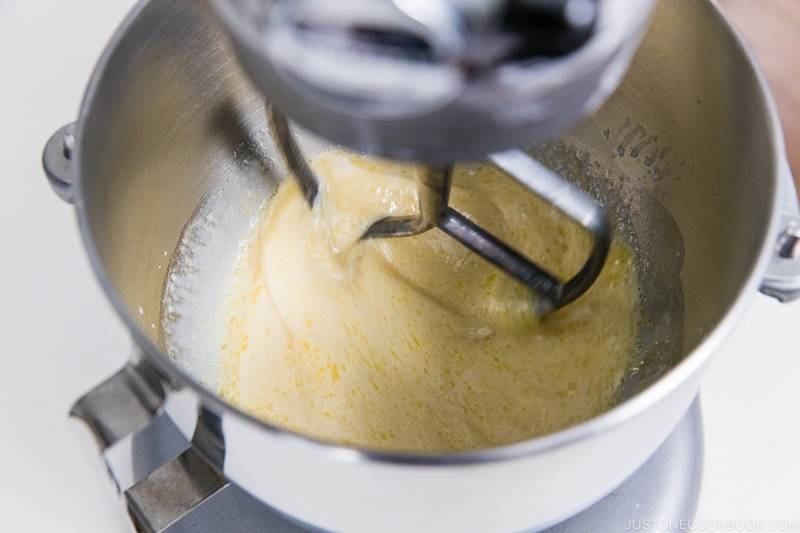
- Stir on low speed (Speed 2 on my KitchenAid Professional HD stand mixer) for 1 minute to combine. You could also stir it with a wooden spoon.
- Add roughly 2 cups of the flour mixture and stir on low speed (Speed 2) until well combined.
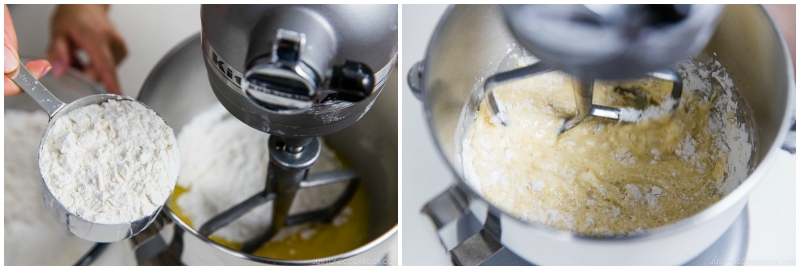
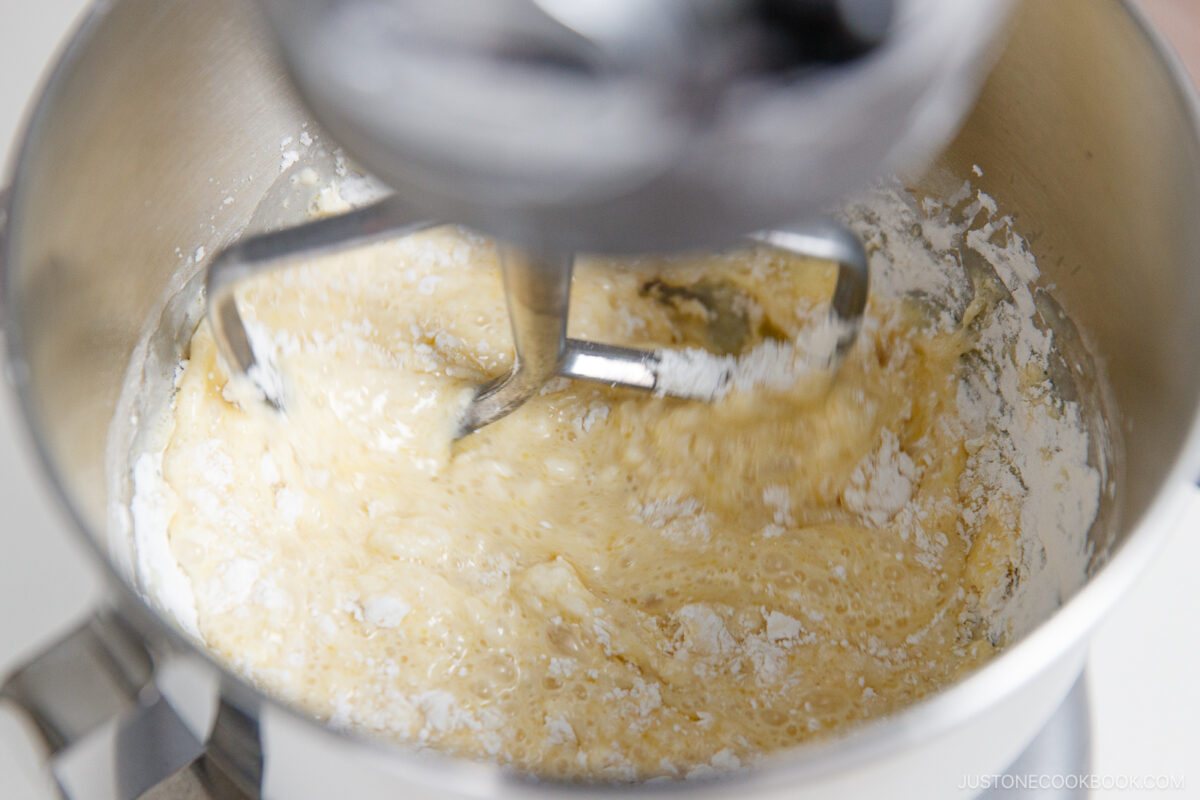
- Keep the stand mixer running on low speed and add ½ tsp Diamond Crystal kosher salt and the remaining flour mixture, one scoop at a time. The dough mixture will thicken. Set aside the mixing bowl that the flour was in for the next step (you‘ll put the dough in it).
To Knead the Dough
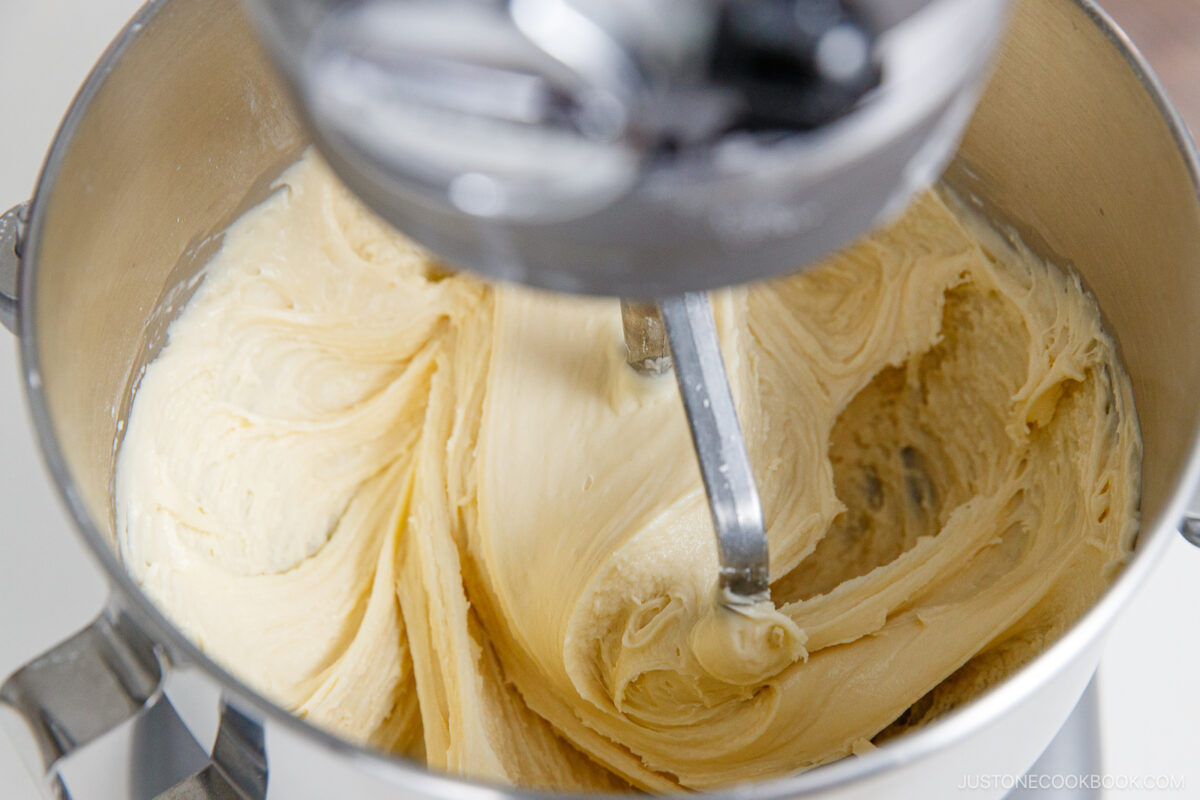
- Now, knead the dough at medium-high speed (Speed 6) for 3–4 minutes, or until smooth and elastic. This is a wet and sticky dough, so do not add more flour. Tip: Kneading develops the structure of the dough by folding and stretching the gluten strands. Hand Kneading: Knead by hand for 5–6 minutes. It’s hard to knead this wet dough by hand. You can add 1–2 tablespoons of flour if it’s too wet to handle, but do not add any more than that.
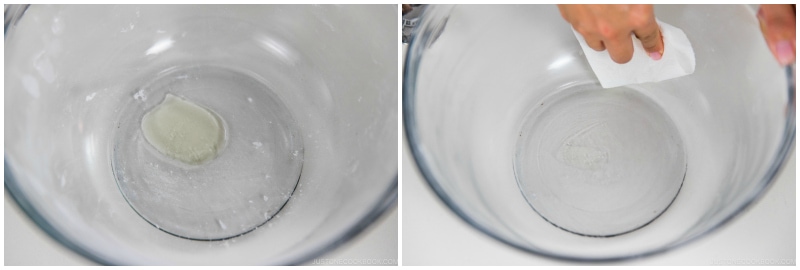
- While the mixer is kneading the dough, add a little oil to the large mixing bowl that held the flour mixture and grease it with a paper towel.
- Stop the mixer after 3–4 minutes or when the dough is smooth. It should be sticky and stretchy when you remove the flat beater from the mixer.
To Proof the Dough (Bulk Fermentation)
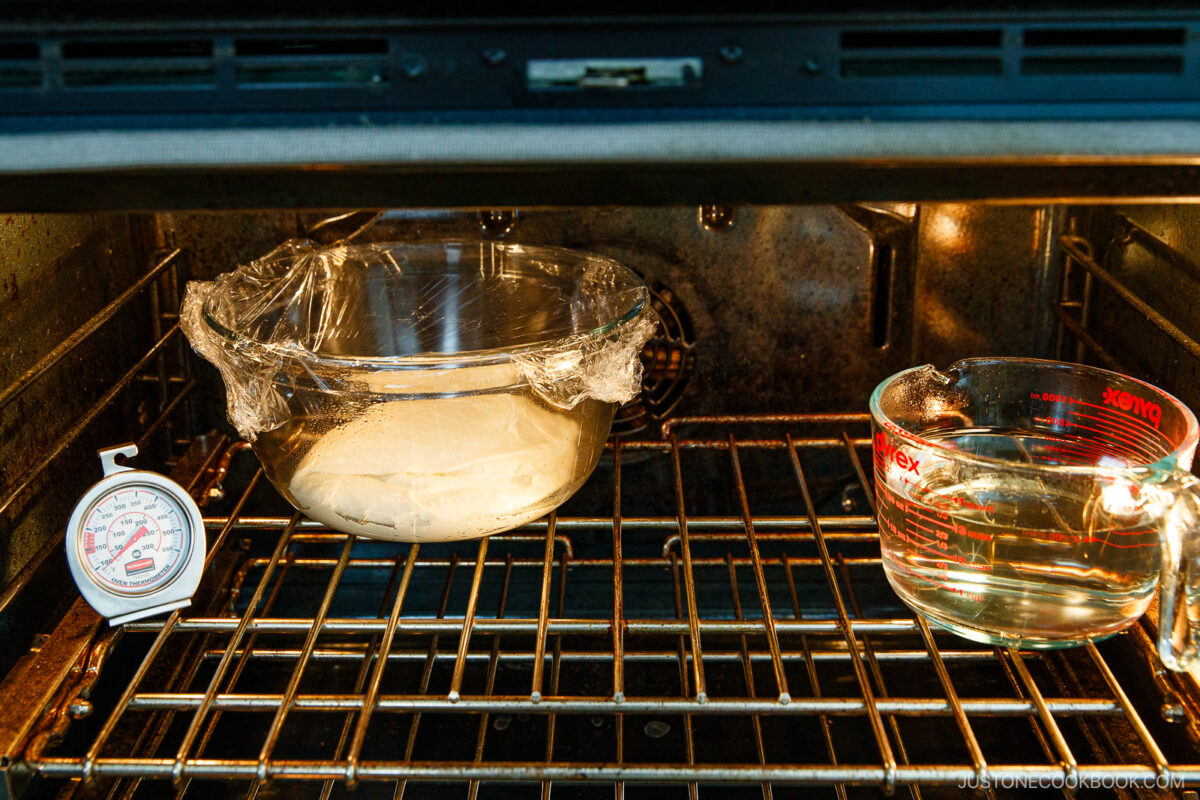
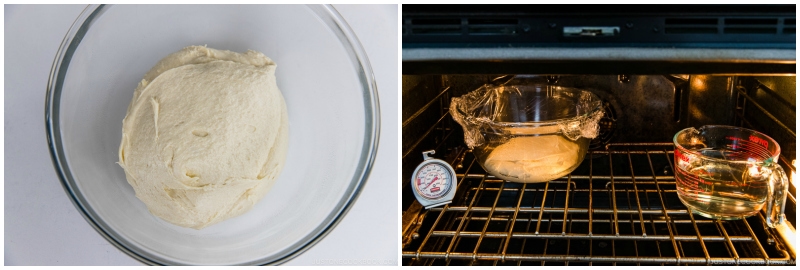
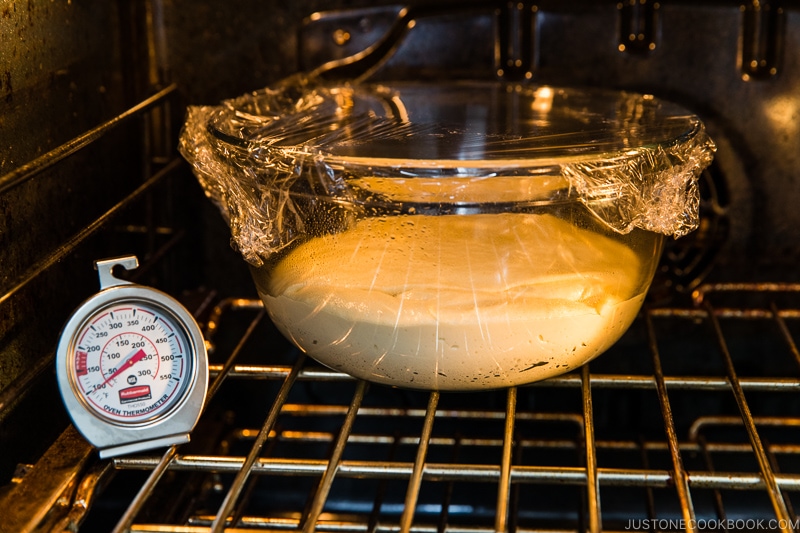
- Scrape down the dough from the sides of the bowl with a dough scraper or pastry card. Collect it into one big mass, then gently transfer it to the greased bowl. The key is to make a smooth surface on the dough so that it rises well. Loosely cover the bowl with plastic wrap (or a clean shower cap) and place it in a warm environment to rise until doubled, about 70–80 minutes. I use the Proof setting of my oven at 100ºF (38ºC). I place a bowl of warm/hot water inside the oven, but away from the dough, to keep the environment moist. Tip: Make sure the proof temperature is not too high. If the dough gets too warm, it will ferment too quickly (or overferment) and impair the flavor.
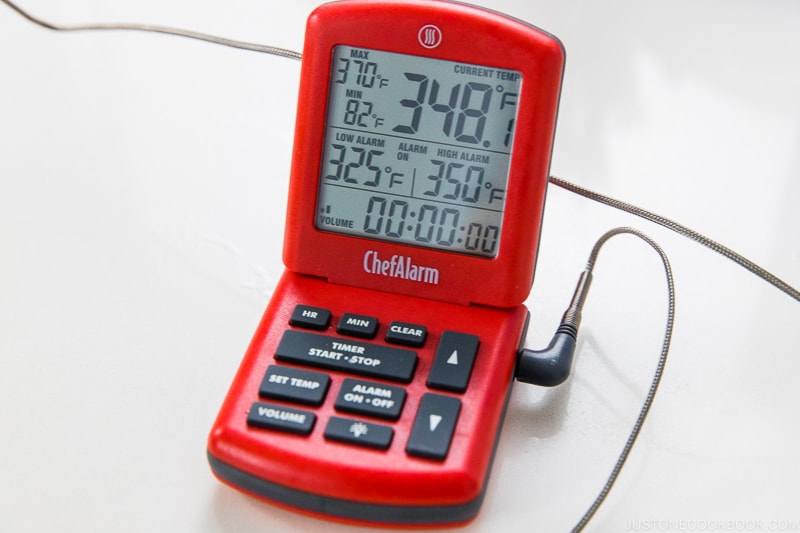
- After 70–80 minutes, pour 4 cups safflower oil into a Dutch oven or heavy-bottomed pot (see Notes for how much oil to use). Set up a cooking thermometer, if you have one. Set the alarm to a low of 325ºF (168ºC) and a high of 350ºF (177ºC). Tip: I use ThermoWork’s ChefAlarm. A clip attaches the probe to the side of the Dutch oven, holding it securely in place.
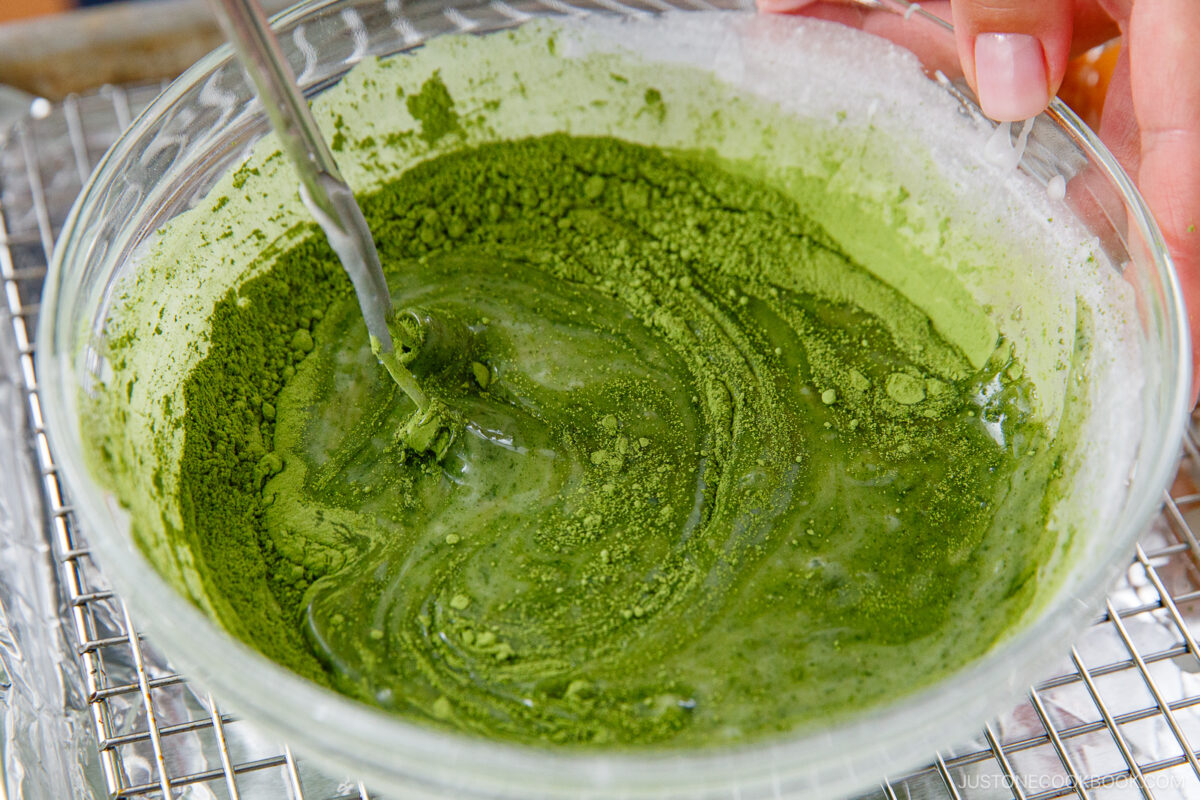
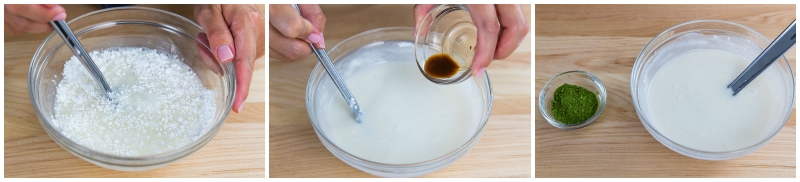
- In a medium bowl, combine 2 cups confectioners’ sugar, ¼ cup whole milk, and ½ tsp pure vanilla extract. Whisk it really well until there are no lumps of powdered sugar. Keep the matcha powder to the side for now.
- The image shows that the dough has doubled in size after 75 minutes of proofing.
To Roll the Dough Balls
- Prepare 1–2 Tbsp of all-purpose flour and put it at the corner of your work surface. Lightly flour the work surface and your hands.
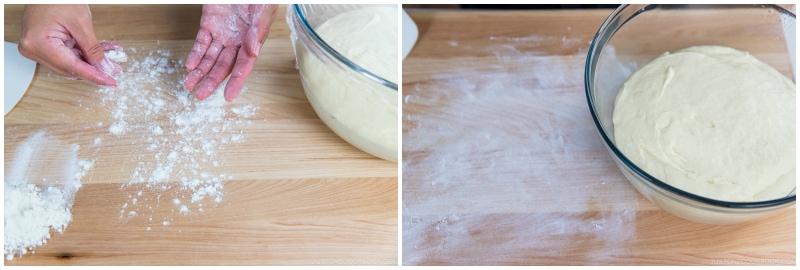
- Transfer the dough with the dough scraper to the lightly floured surface. Sprinkle some flour on top of the dough and press it down with your hands to release any air bubbles.
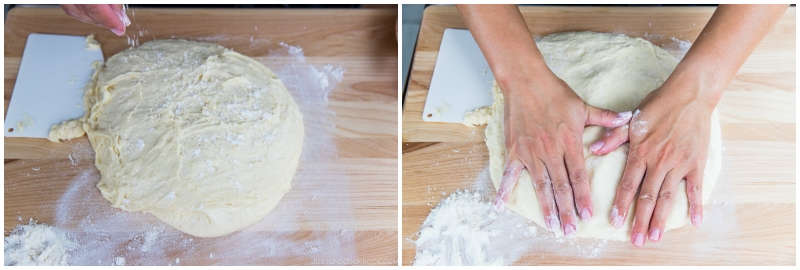
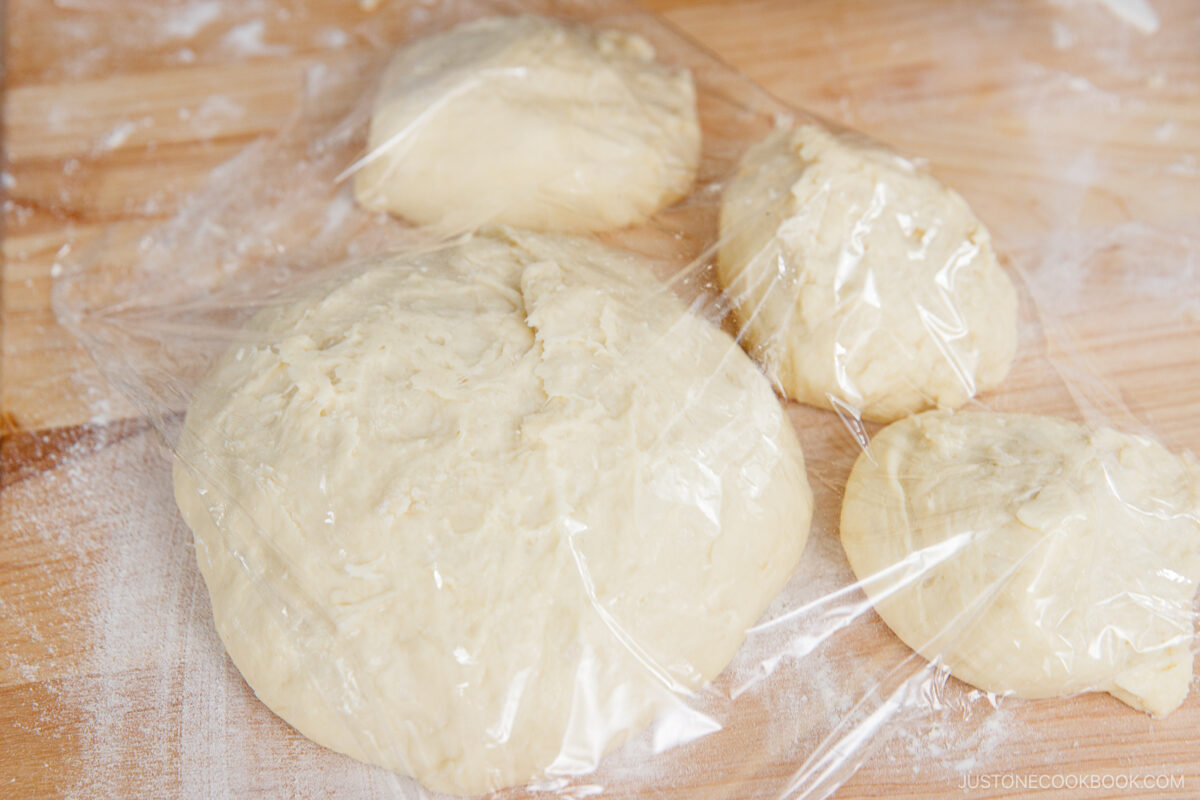
- Use the dough scraper to form the dough into a rough log shape. Cut the log into two equal pieces.
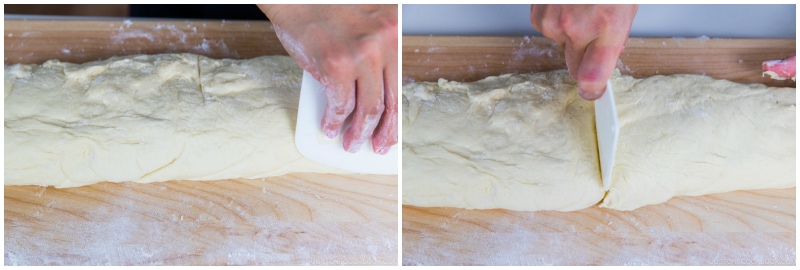
- Set one piece of dough on your work surface. Shape the other piece into a ball and cover with plastic wrap. Cut the piece on your work surface into quarters and roll them into balls. Work with one dough ball at a time, and keep the other balls under plastic wrap so they don‘t dry out.
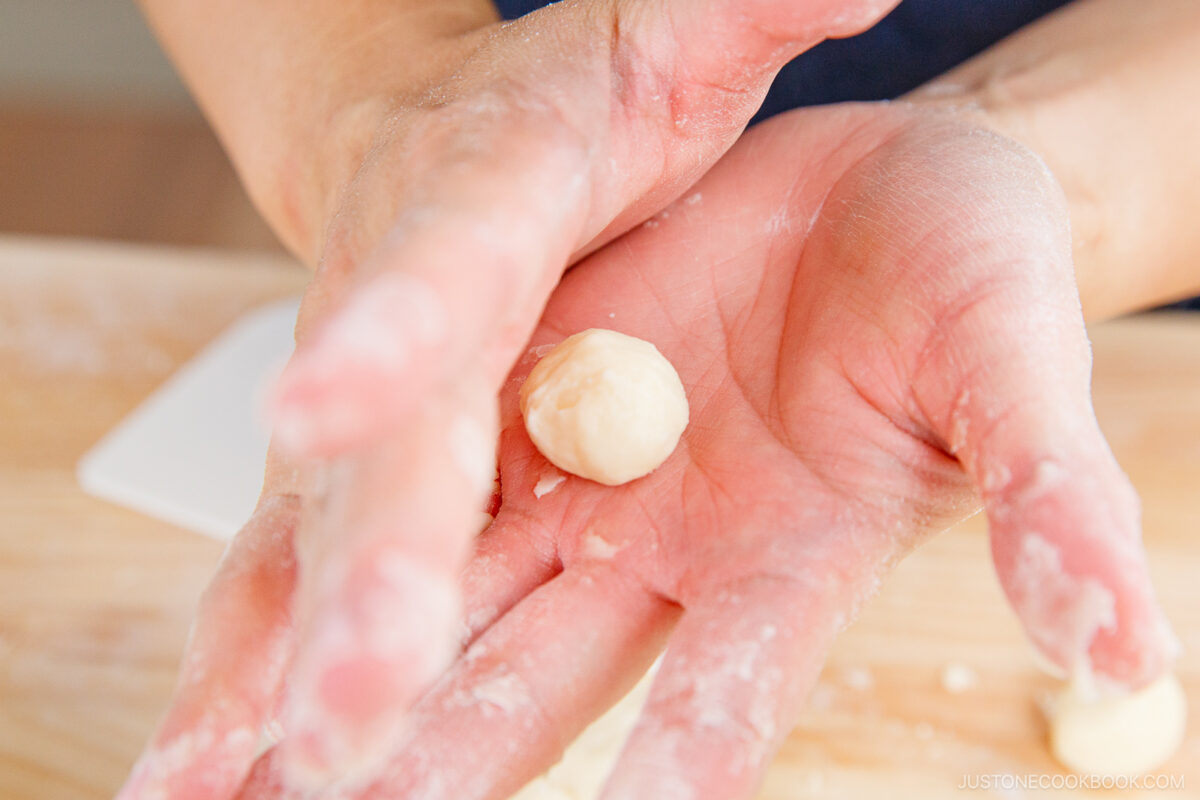
- Each dough ball will make roughly 3 Pon de Ring donuts. Using the dough scraper, cut the first dough ball into 24 small balls. Each ball should be ½–¾ inch (1.5 cm) in diameter and weigh 5 grams.
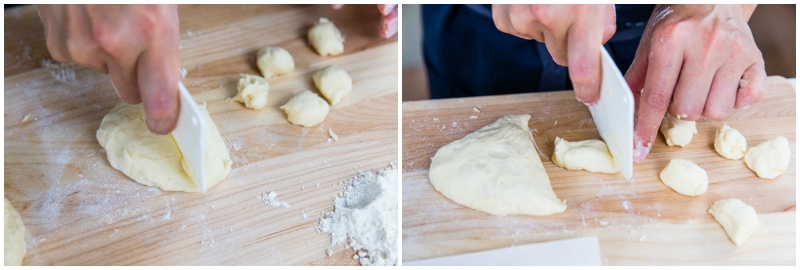
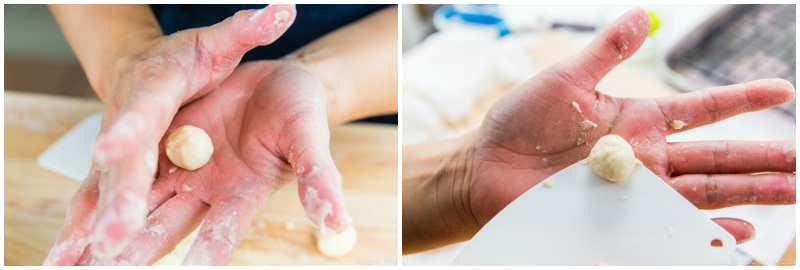
- Roll each ball between your hands, but try not to spend too much time. Overkneaded dough often results in a hard crust and a dense, dry interior. Since the dough is very sticky, the dough scraper is very helpful for picking up each piece of dough.
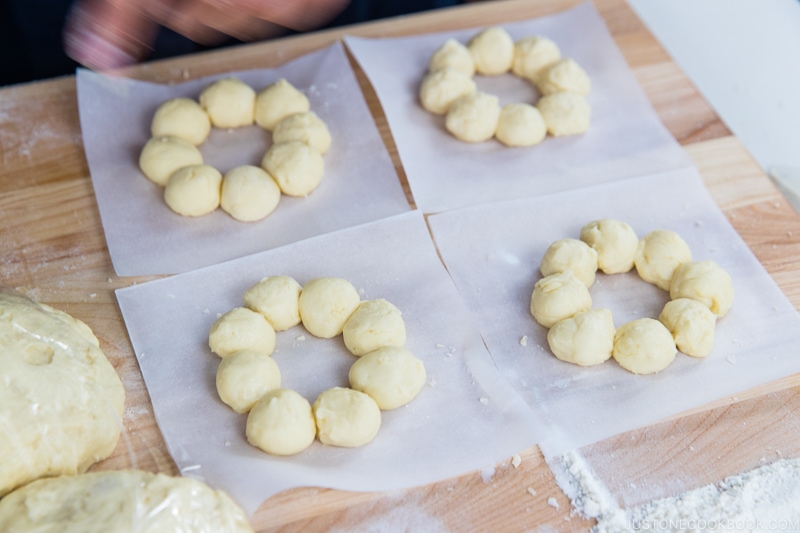
To Form the Donut Rings
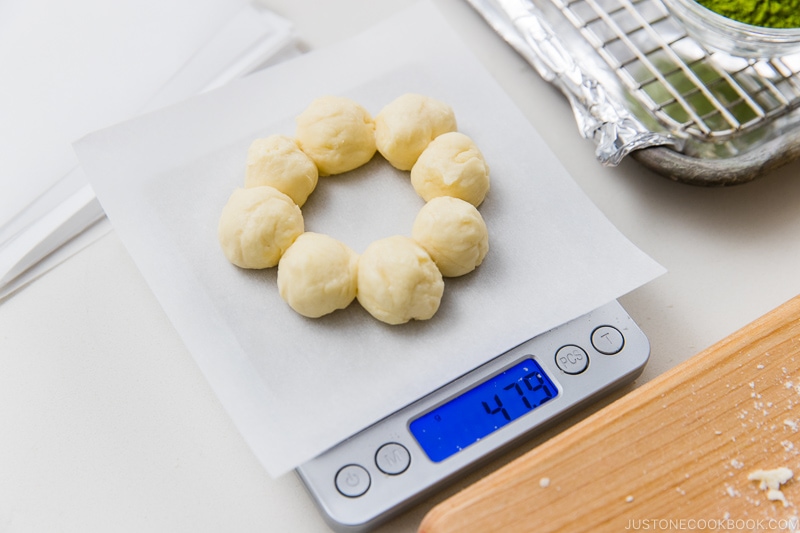
- Now, form the donuts. You will need 8 balls to make each Pon de Ring donut. Use the dough scraper to transfer one ball at a time to a parchment square, forming a ring as you go. Make sure the balls are connected.
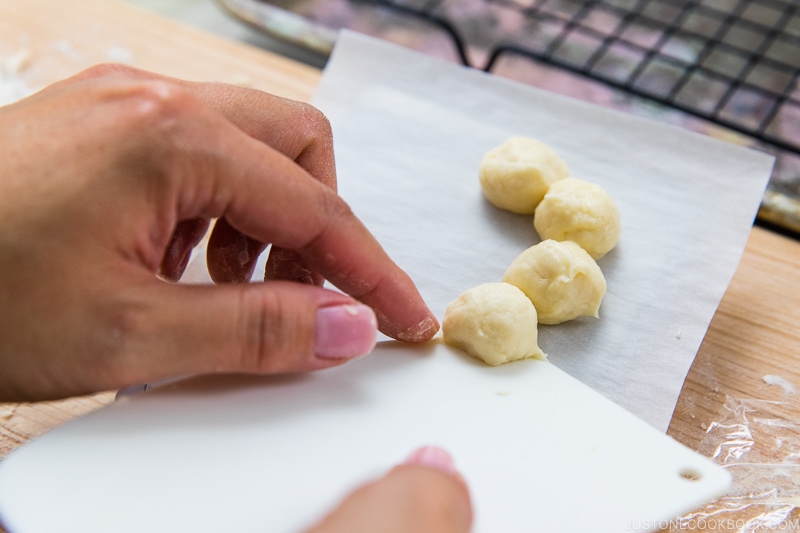
- Each Pon de Ring should weigh about 40 grams (8 balls at 5 g each).
- Continue forming the rest of the donut rings.
- Dab a bit of water with a pastry brush where each ball attaches to the neighboring one. This will keep the balls from separating in the hot oil. Cover the donuts with a damp paper towel or light cloth (make sure it’s not heavy) and let them rest to proof for 15–20 minutes. Tip: If you are taking a long time, it’s very helpful to work with a partner or keep the donuts in the refrigerator to slow down the proofing so the dough doesn't overproof.

To Fry
- When you’re finishing up with the last batch of dough, start heating the oil in the Dutch oven to 350ºF (177ºC). Line one baking sheet with a paper towel. Line a second baking sheet with parchment paper and put a wire rack on top.
- Pick up one parchment square with a donut ring on top. Using your hand or fine-mesh skimmer (the kind that has a flat mesh), carefully place the donut with the parchment paper into the hot oil.
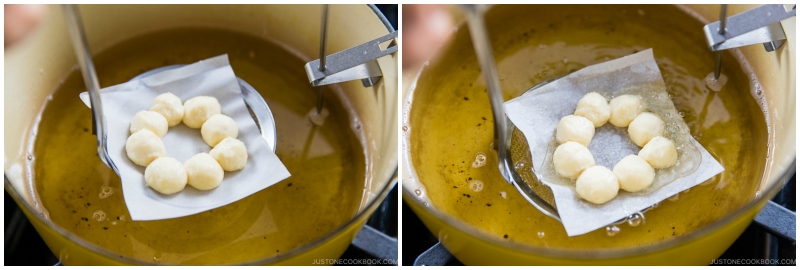
- Let go of the donut and paper and set a timer for 1 minute 15 seconds for the first side. Tip: Only add enough donuts for a 5–10 degree drop in temperature. I only fry 2 donuts at a time. If the oil cools down too much, the donuts won’t fry properly.
- When the timer beeps, flip the donuts quickly using chopsticks or tongs. Fry the second side for 45 seconds; set a timer. Using tongs or chopsticks, carefully remove the parchment square from the donut and discard.
- When the 45-second timer beeps, scoop up the donuts with the skimmer or tongs and drain the oil well. Then, transfer to the paper towel to drain any extra oil. Glaze the donuts while you continue frying the remaining donuts (see the next step).
To Glaze
- While the donuts are still hot, dip each one into the glaze, making sure to coat both sides well. Tip: Don't wait until you fry all the donuts. Deep-frying and glazing at the same time gets hectic, so find a partner for this step.
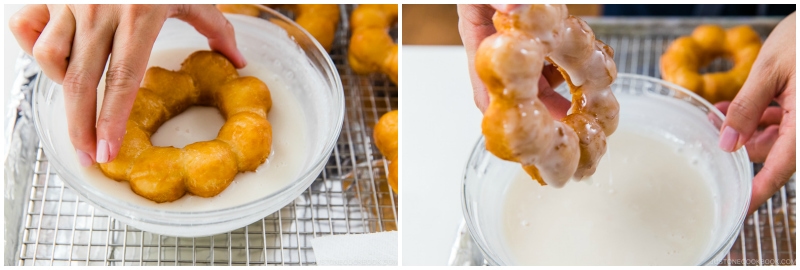
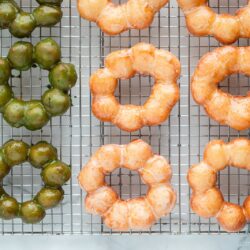
- Place the glazed donuts onto the prepared rack to allow the excess glaze to drip down. The glaze will set and harden on the donuts after 30 minutes.

- After glazing 12 donuts, you can add 1 Tbsp matcha (ceremoial or culinary grade) to the leftover glaze. Whisk really well to combine.
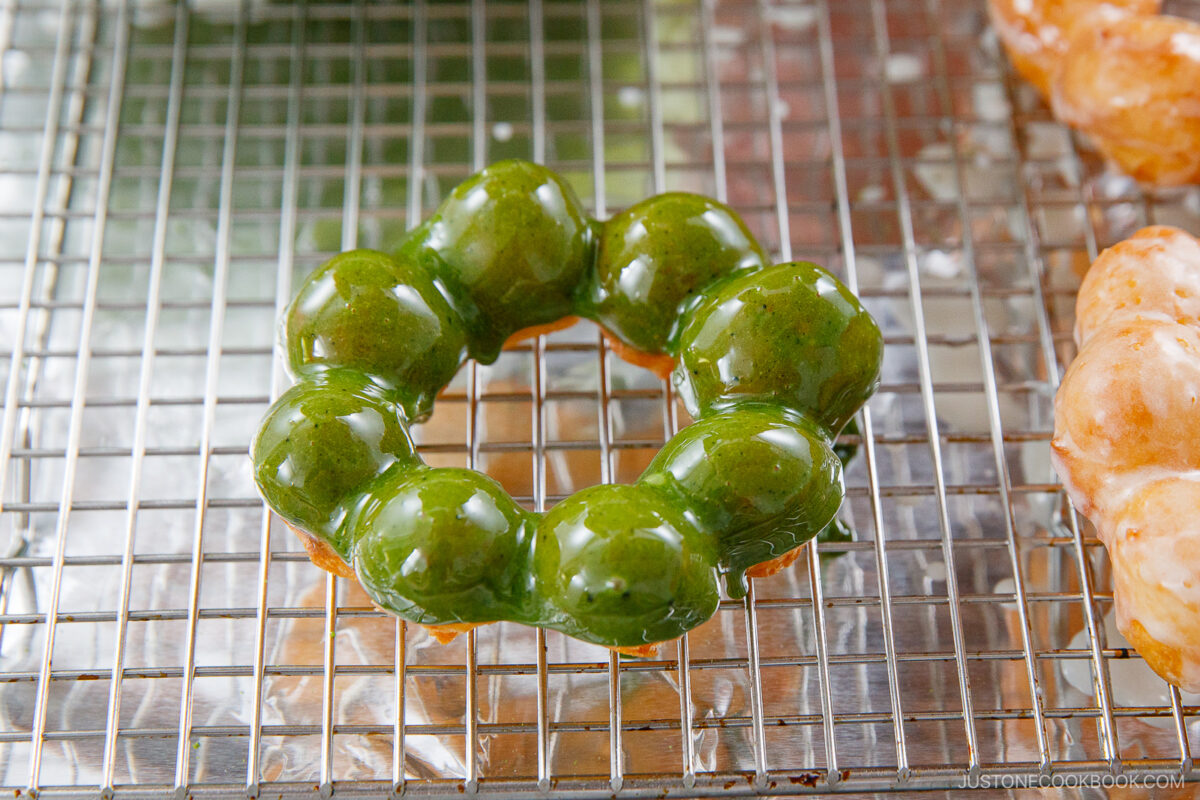
- Dip the other donuts into the matcha glaze. Place them onto the rack to allow the excess glaze to drip down. The glaze will set after 30 minutes.
To Serve
- Just like any other deep-fried food, it’s best to eat the donuts while they are warm. Enjoy!
To Store
- Enjoy the donuts on the same day you made them. You can keep them at room temperature for a day in an airtight container. Reheat in the microwave for 15–20 seconds before eating.
Notes
- Oil: Avoid using vegetable oil (read my post). Please adjust the amount of the oil based on how wide and tall your pot is. My Dutch oven is 3.5 QT and I used 1 QT (1000 ml, 4 cups) of safflower oil. The Dutch oven is heavy and thick, and it conducts and retains heat very efficiently. The high sides also help prevent splatters during frying. What to do with leftover oil? Please read this post.
- Helpful Tools: Stand mixer, dough scraper/pastry card, kitchen scale, thermometer, Dutch oven or heavy-bottomed pot. Please read the post.
Nutrition
Did you make this recipe?
Tag @justonecookbook on Instagram so we can see your delicious creation!
Editor’s Note: This post was originally published on September 30, 2019. It was republished with more helpful information on April 17, 2025.