Recipe Highlights
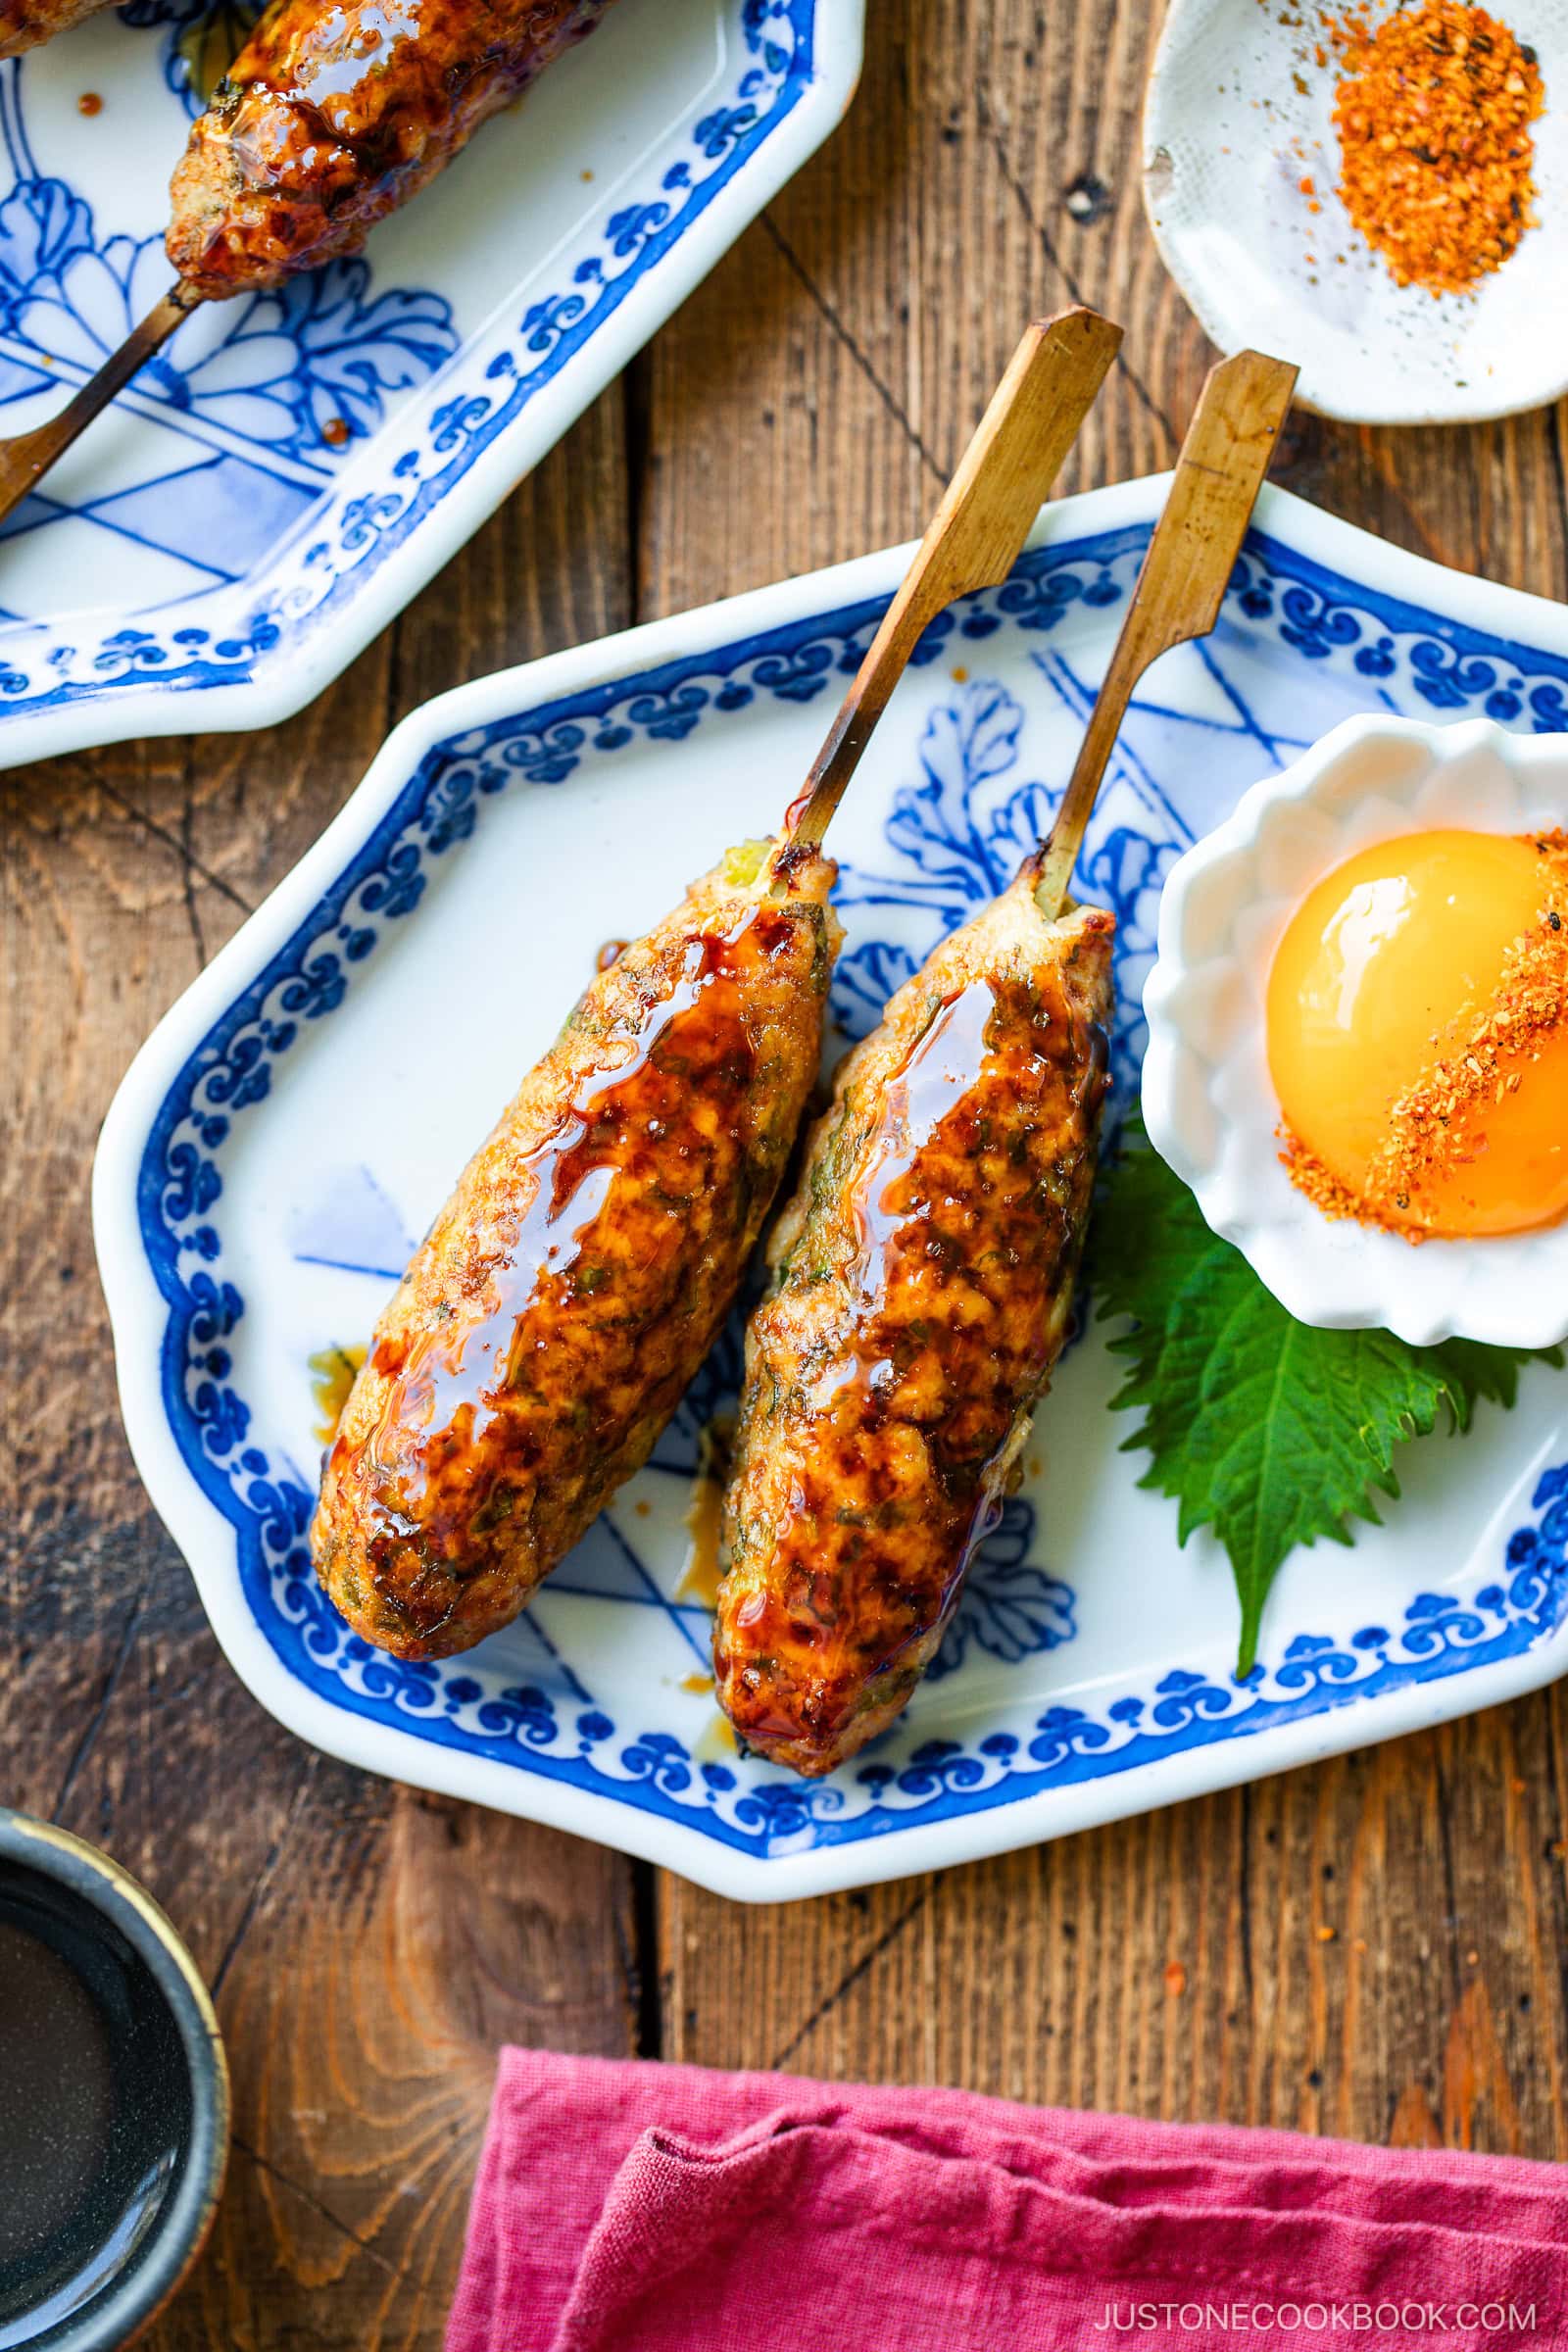
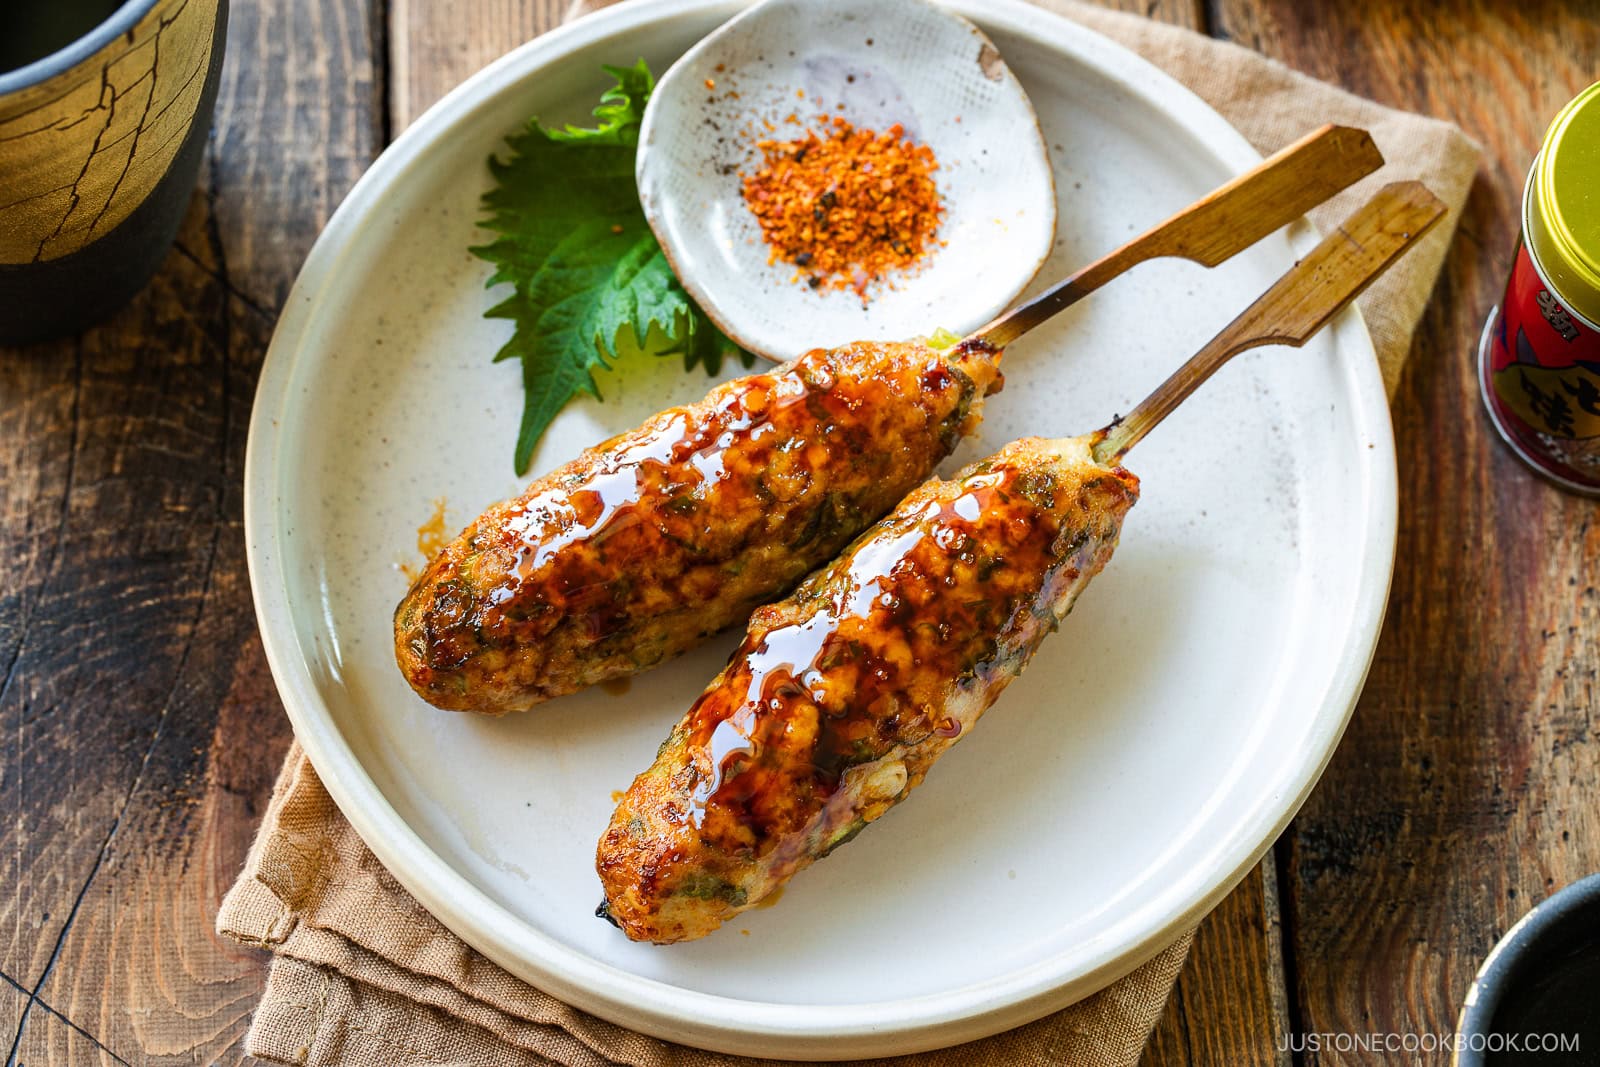
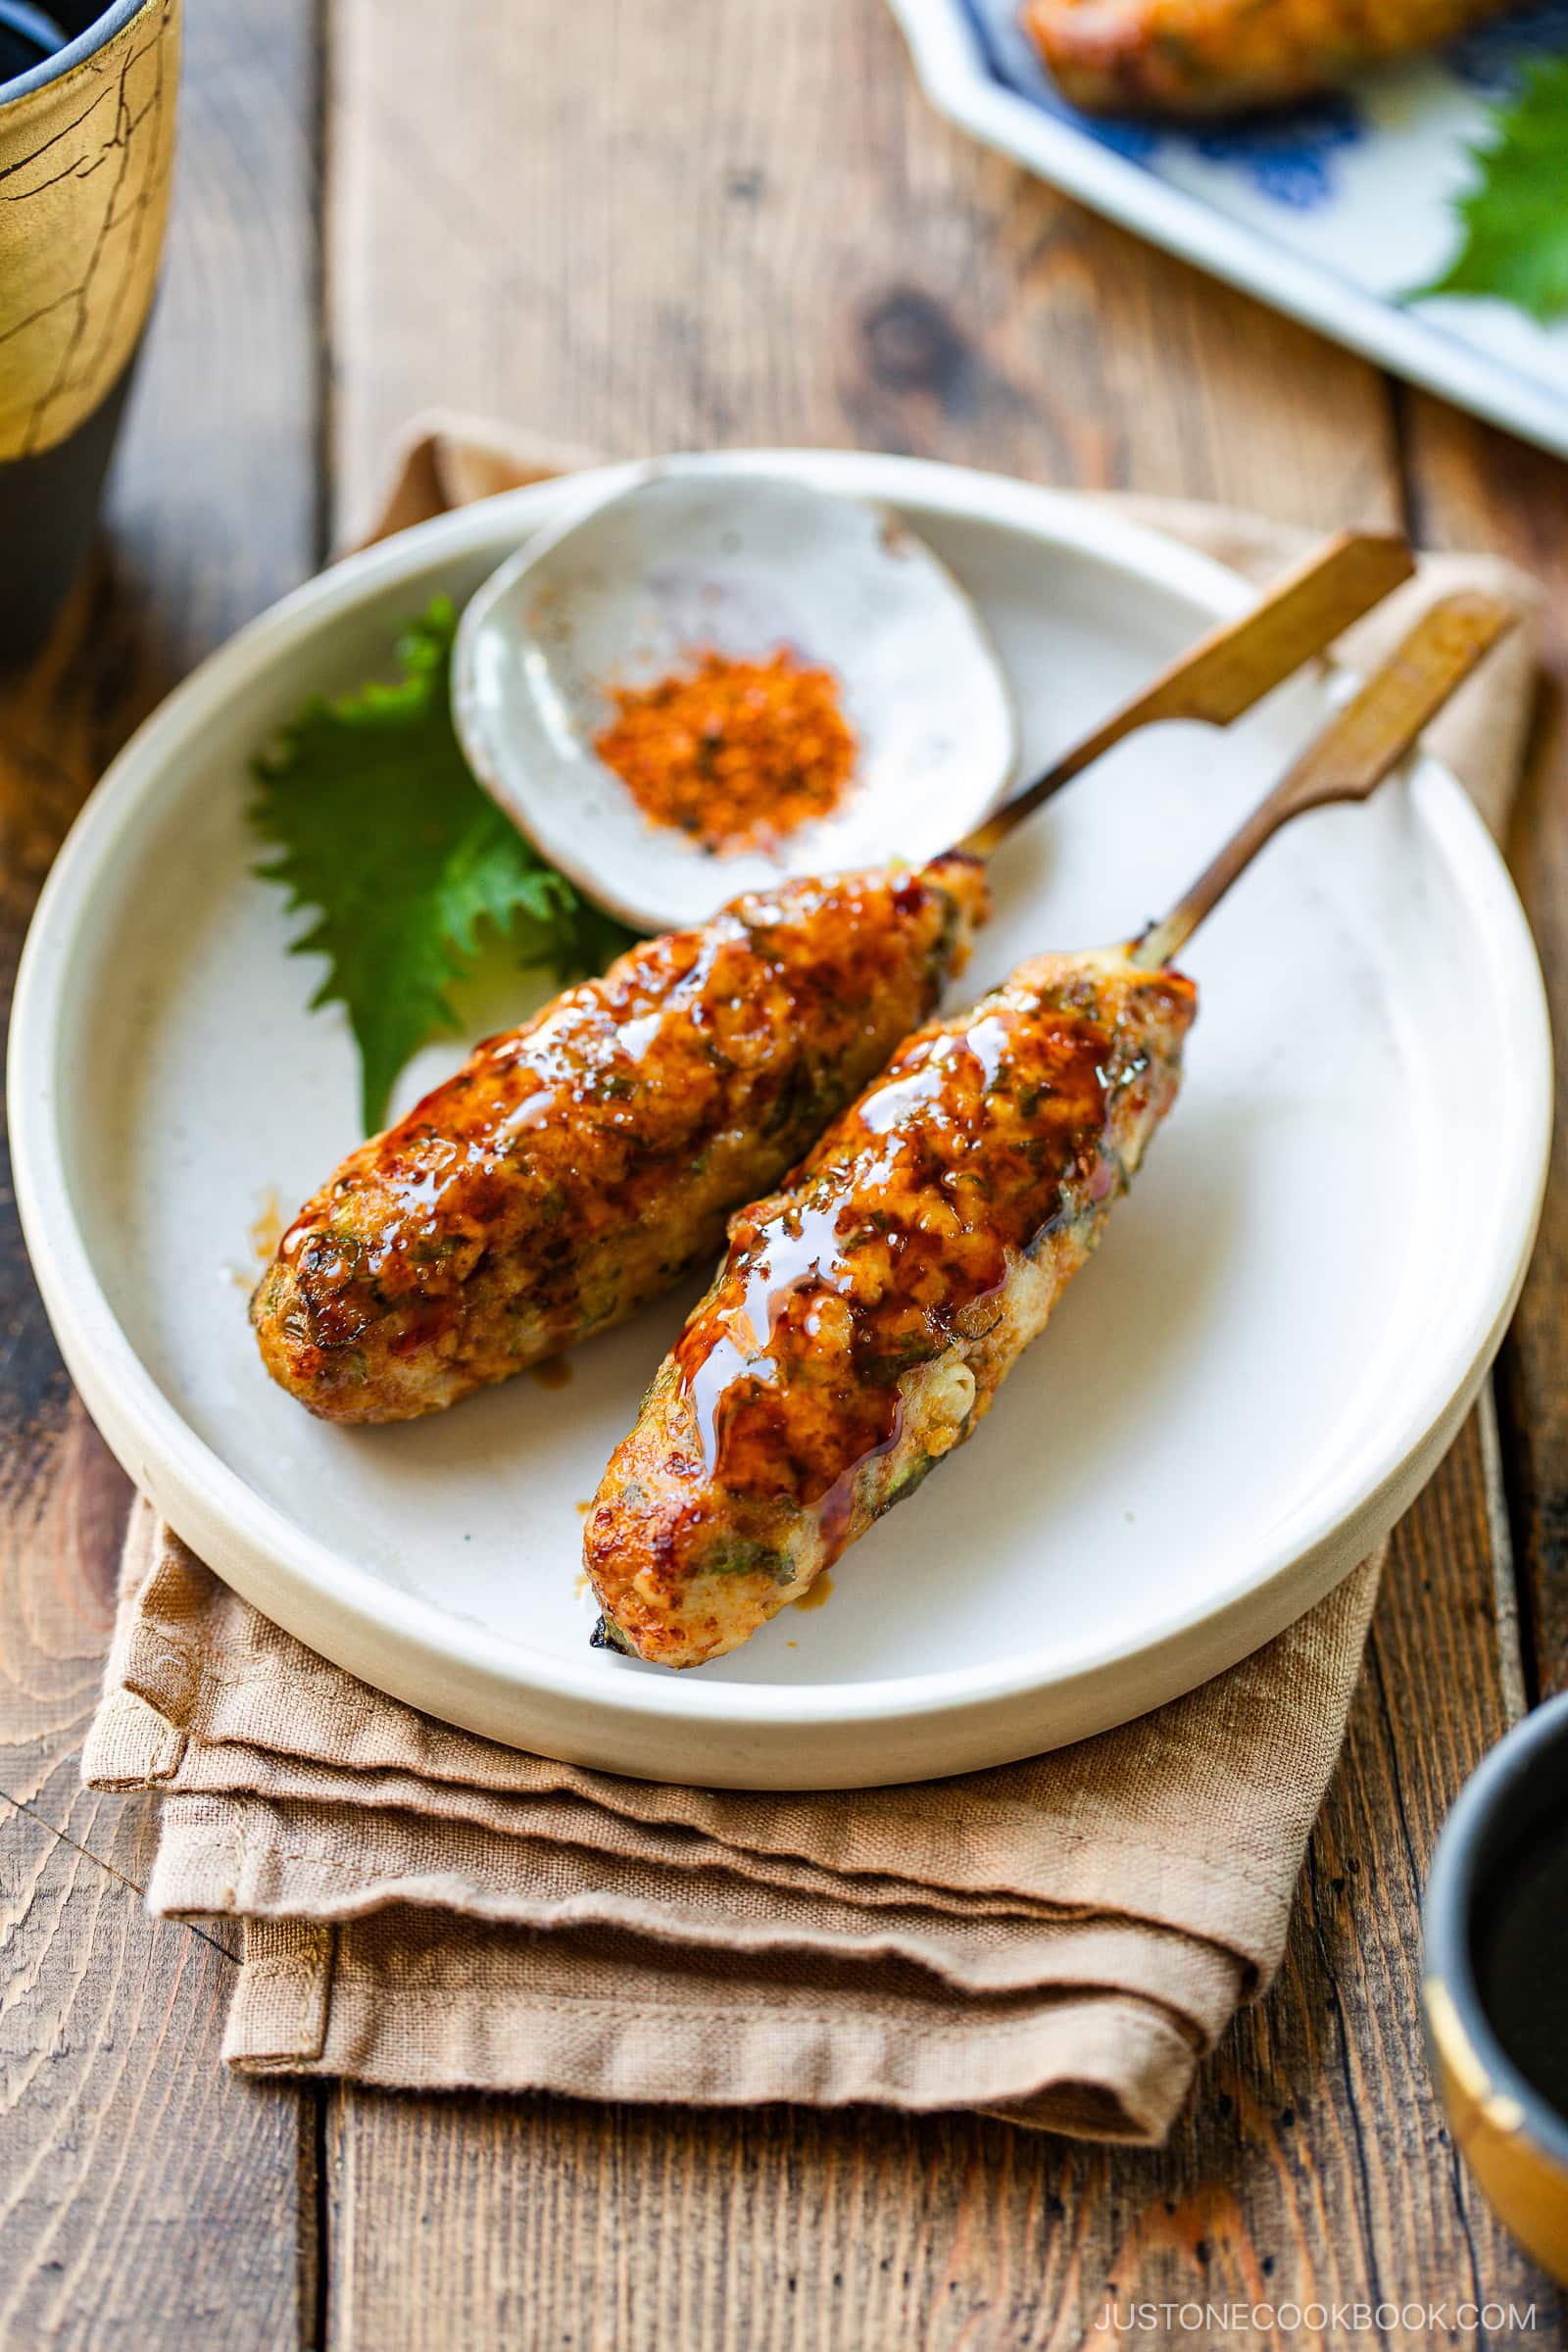
Often spotted at yakitori shops and Japanese gastropubs (izakaya), Tsukune are juicy, sweet-savory chicken meatballs threaded on bamboo skewers and brushed with glossy yakitori sauce.
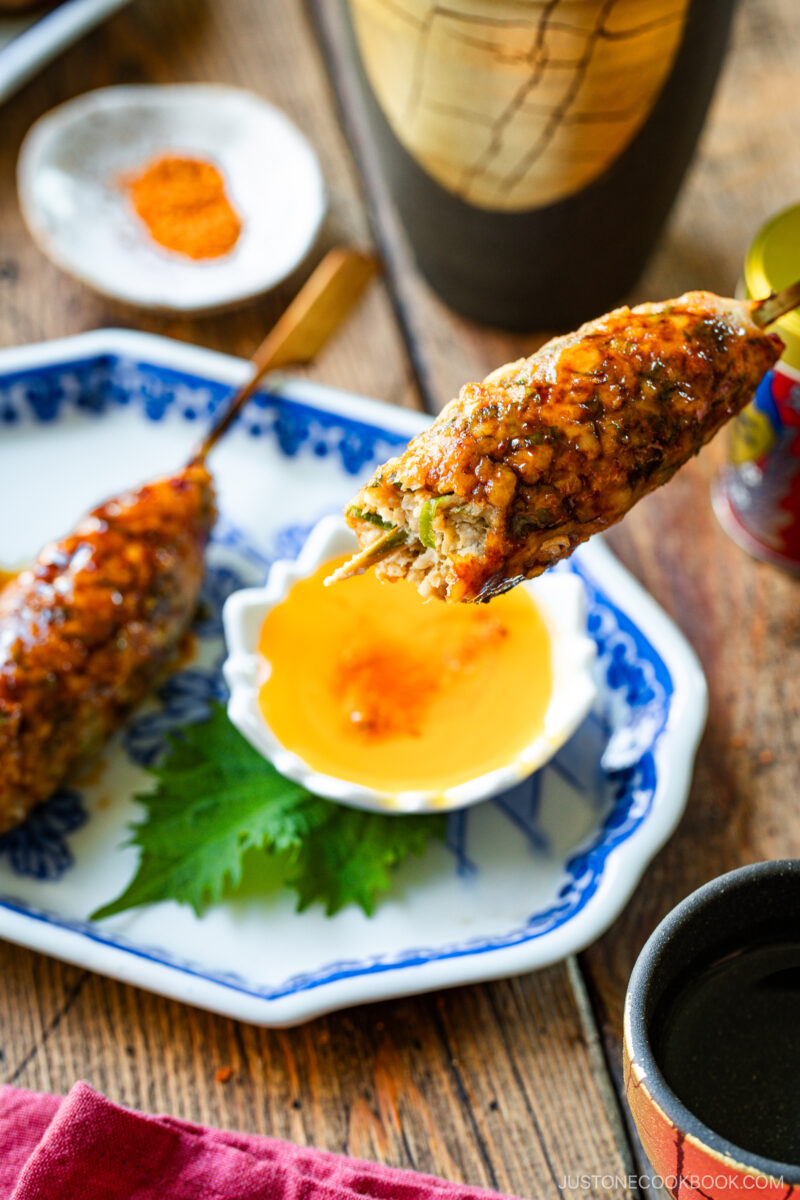
- Fluffy, springy, and juicy meatballs, thanks to a special trick that keeps the meat from shrinking too much
- Restaurant-quality at home with beautifully charred meat and caramelized sauce
- Easy cooking and clean up using the broiler in your home oven
If you love Japanese bar food, try my Chicken Karaage, Yakitori, and Gyoza next!
What is Tsukune?
In Japan, tsukune (つくね) refers to ground chicken meatballs mixed with green onions and various seasonings. They’re usually shaped into ovals, skewered, grilled, and glazed with a sweet and savory sauce called tare. Popular fare at bars, parties, and potlucks, tsukune are also commonly prepared at home as skewer-free, round meatballs or in Tsukune Hot Pot.
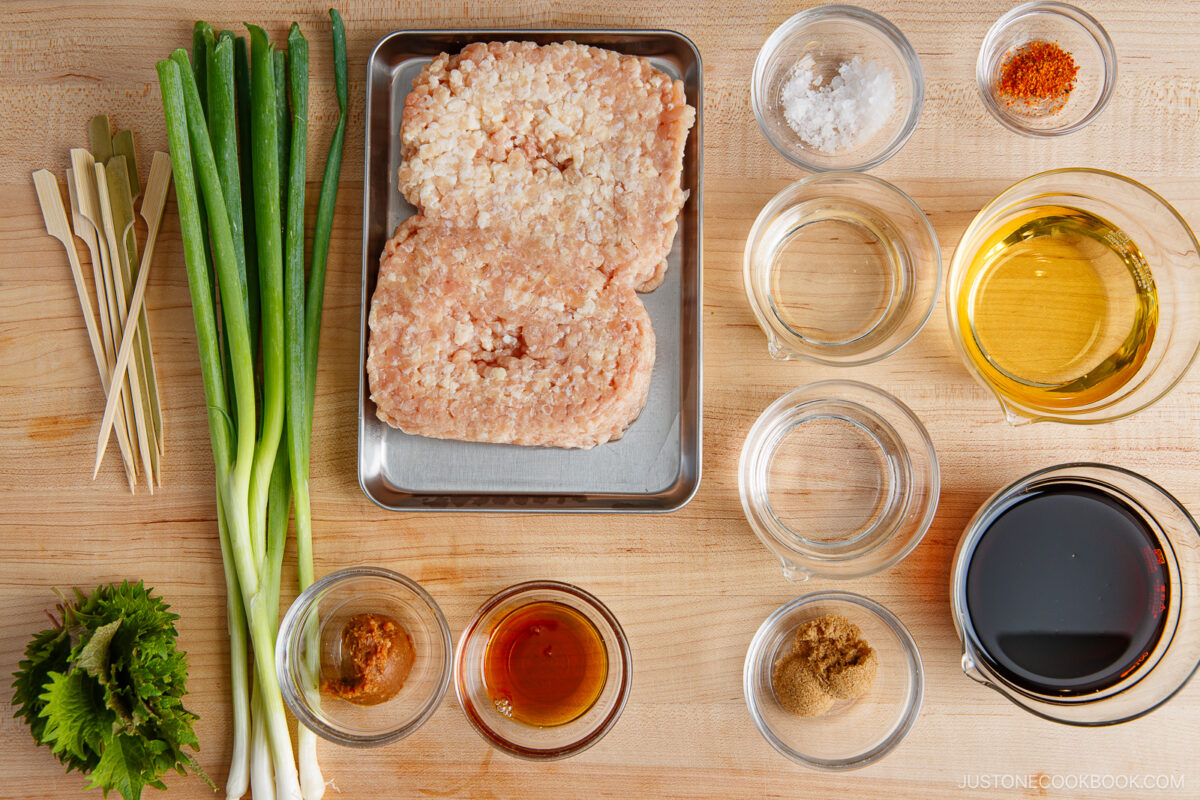
Ingredients for Tsukune
You’ll need eight 6-inch bamboo bamboo paddle skewers.
- ground chicken – ask your butcher to grind a mixture of half white meat (breast meat) + half dark meat (chicken thighs and legs)
- shiso leaves (perilla)
- green onions/scallions
- miso
- sesame oil
- salt – I use kosher salt; you can use sea salt
- Homemade yakitori sauce:
- sake
- mirin
- soy sauce
- brown sugar
- shichimi togarashi (Japanese seven spice), Japanese mayonnaise, and/or raw egg yolk – for serving (optional)
Find the printable recipe with measurements below.
Jump to RecipeHow to Make Tsukune
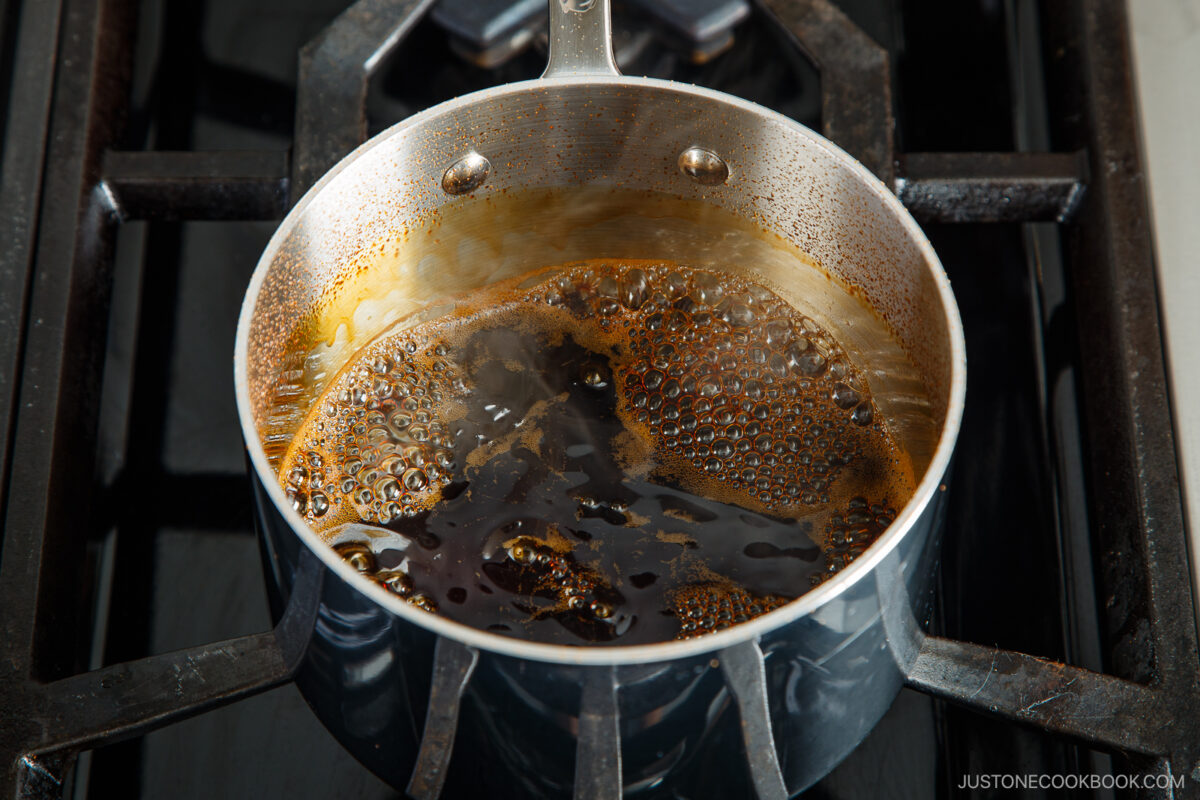
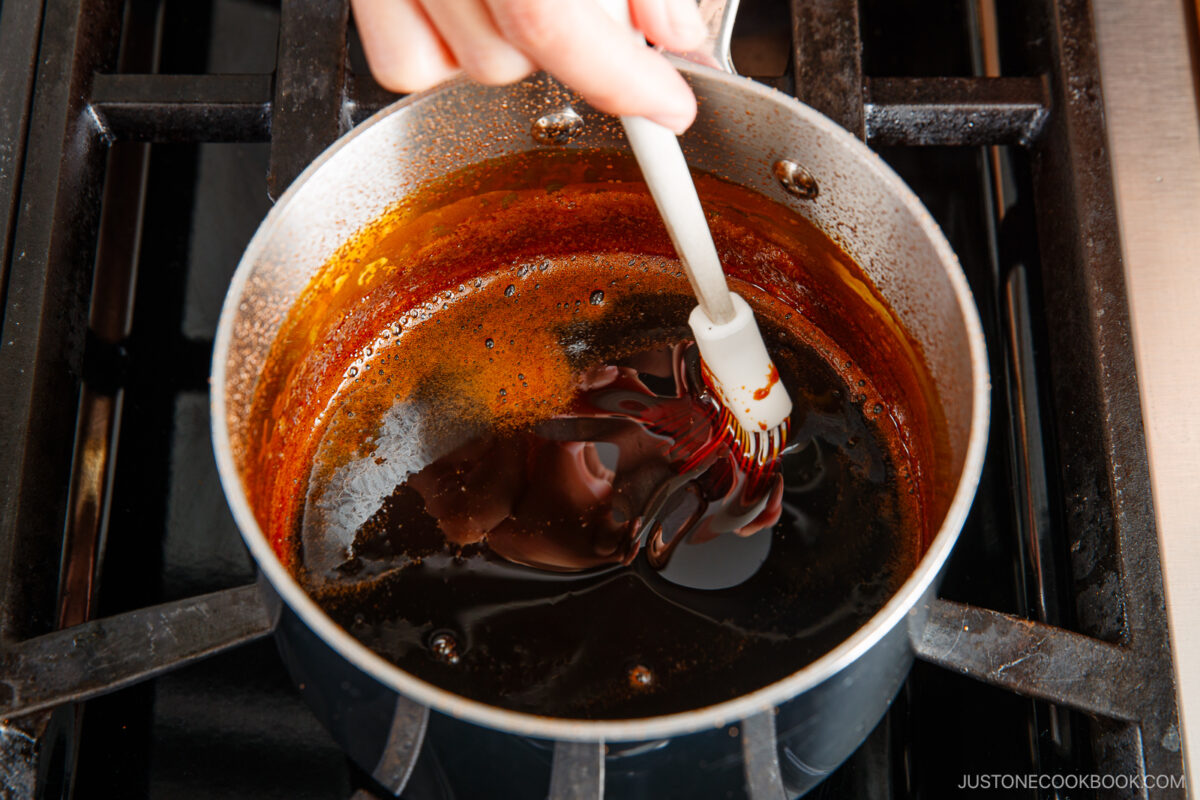
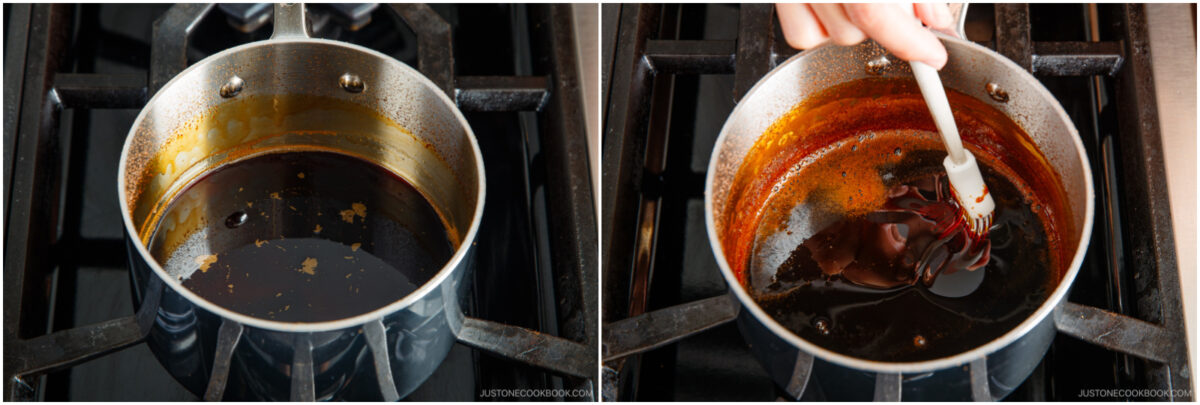
- Make the yakitori sauce in a small saucepan. Bring the ingredients to a boil, then simmer over medium heat for 30 minutes.
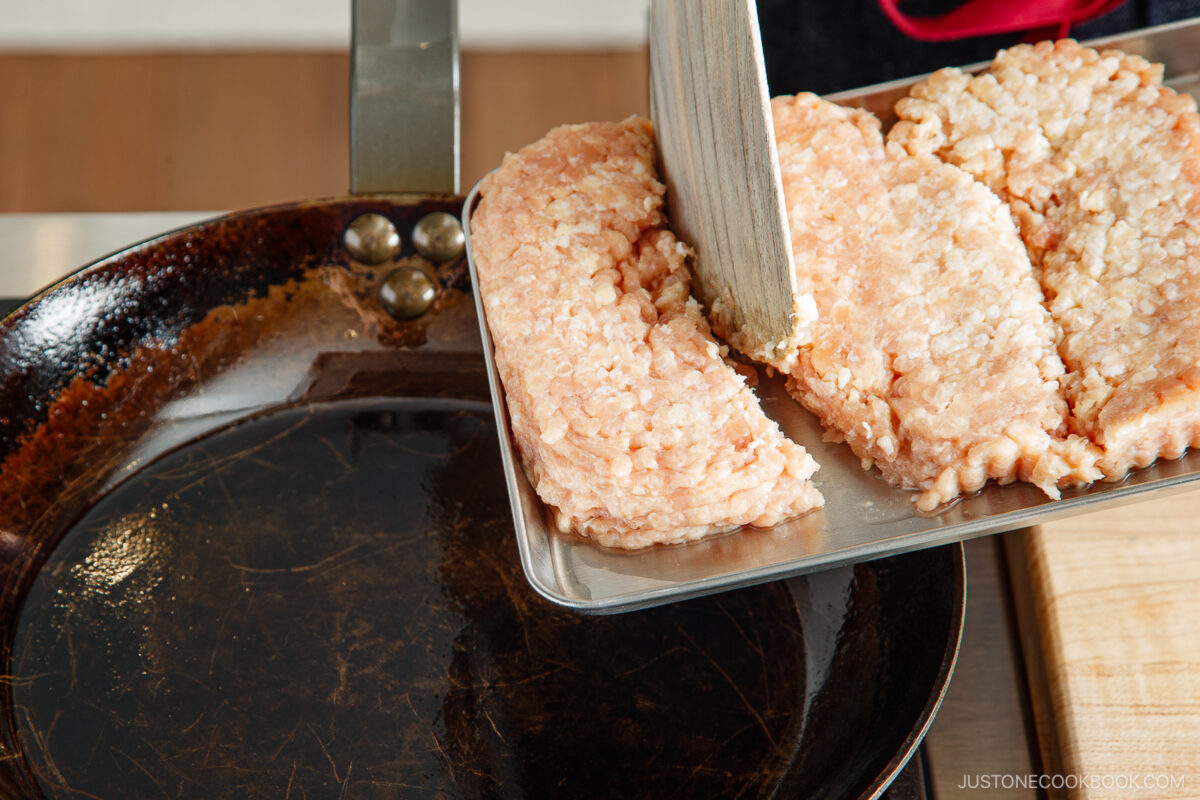
- Cook one-third of the ground chicken in an ungreased pan over medium-low heat; cool completely.
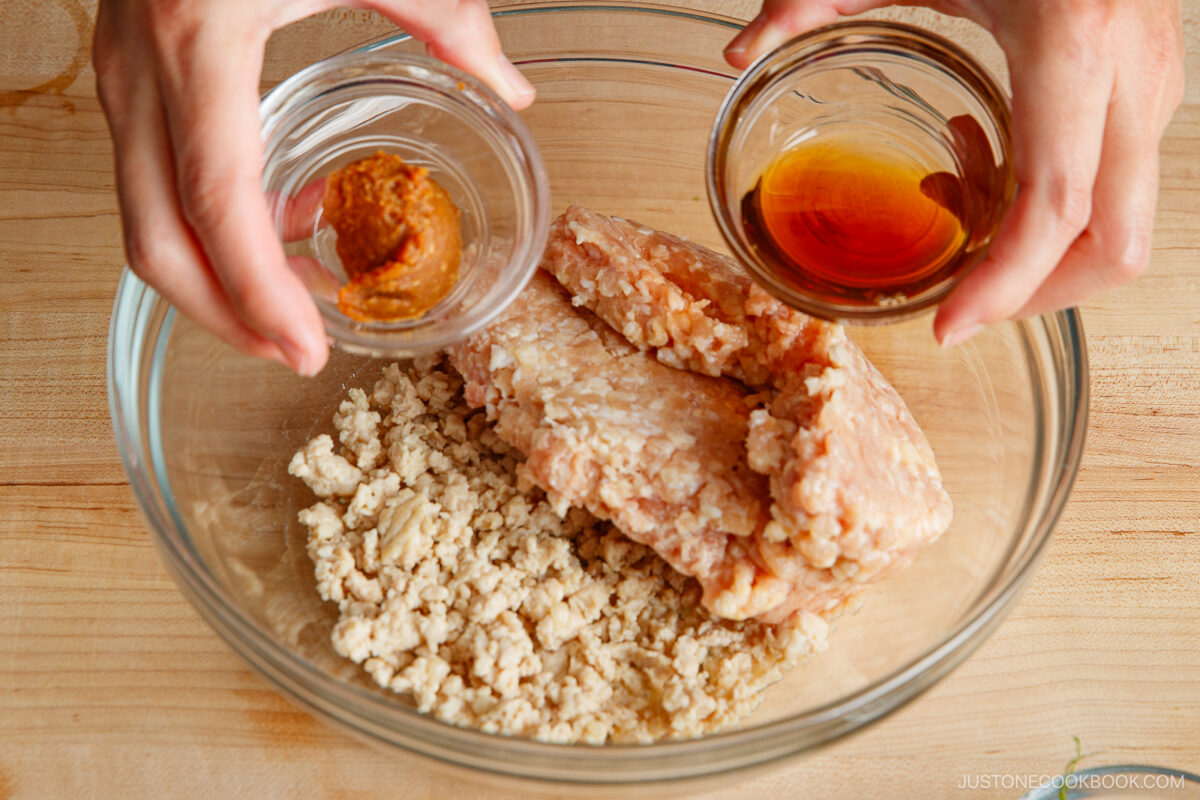
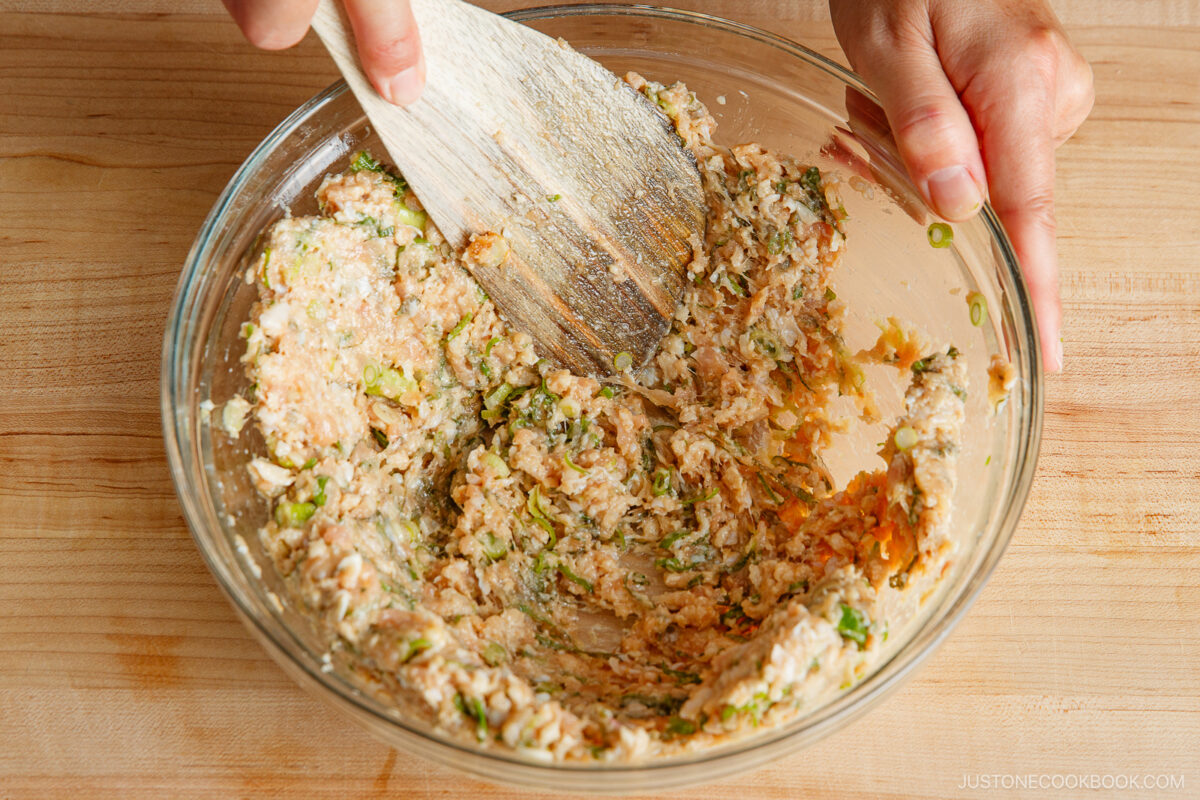
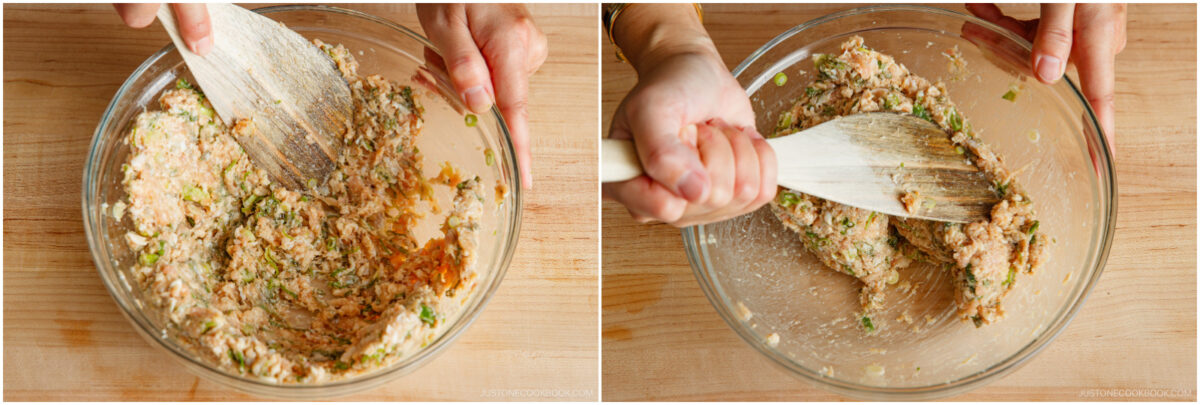
- Knead. Combine cooked and raw chicken in a bowl with shiso, scallions, miso, sesame oil, and salt. Knead by hand until pale and sticky.

- Shape an oval patty 4 inches (10 cm) long, lay a soaked bamboo skewer on top, and wrap meat firmly around the stick. Repeat, keeping sizes equal.

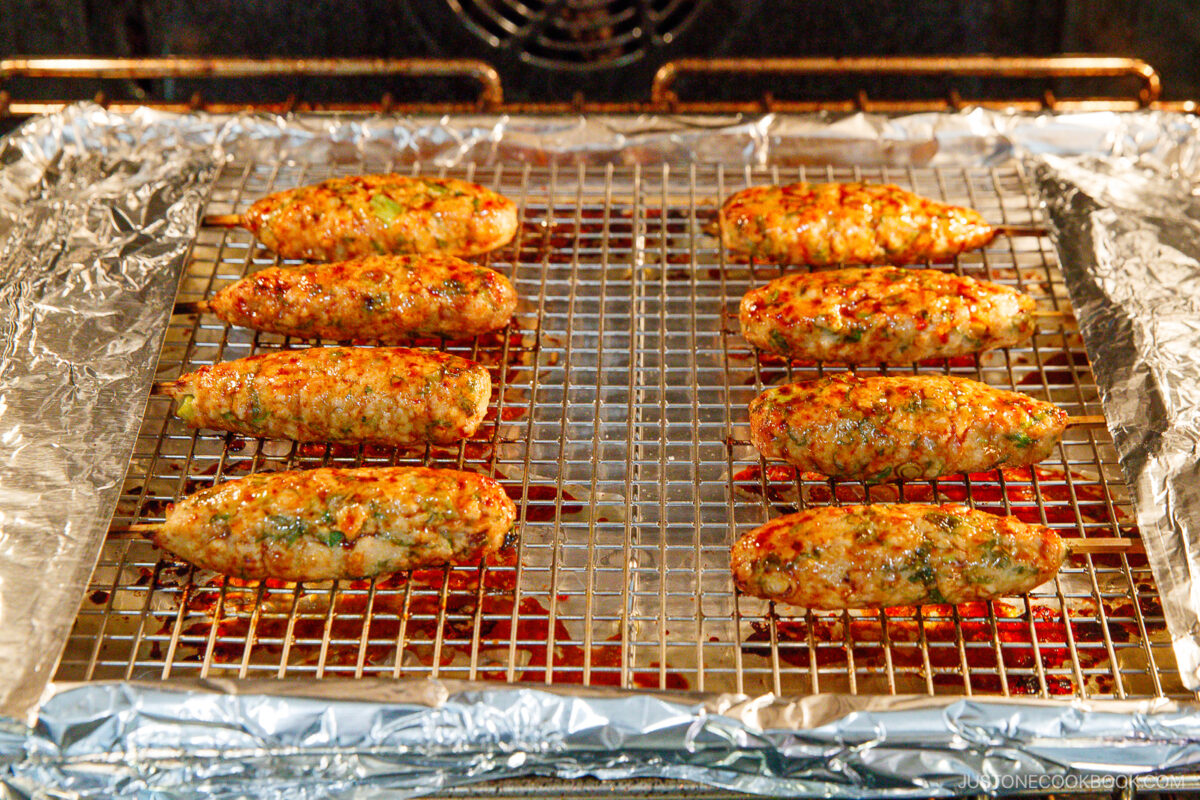
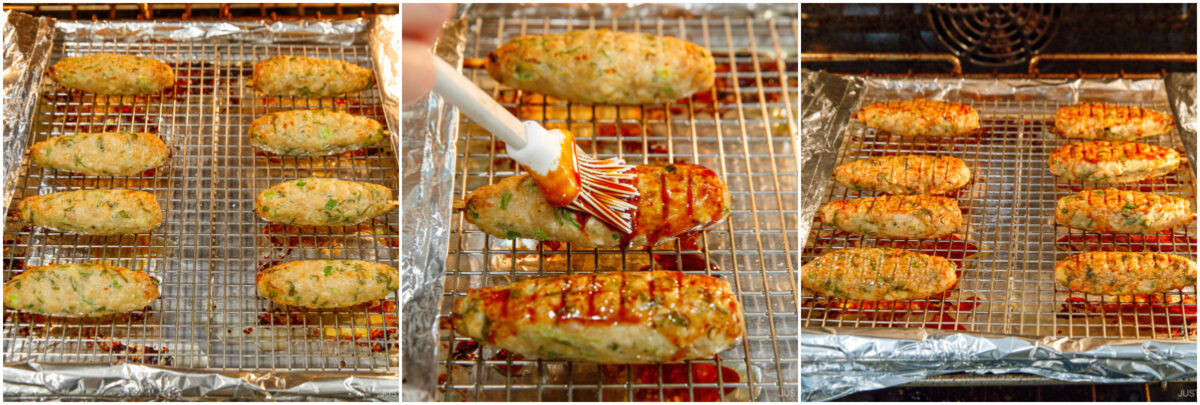
- Broil. Arrange skewered meatballs on a wire rack set over a foil-lined sheet, handles facing out. Broil, flip, and repeat on the other side until cooked through.
- Glaze. Brush with yakitori sauce. Broil until bubbling, the flip and repeat on the other side.
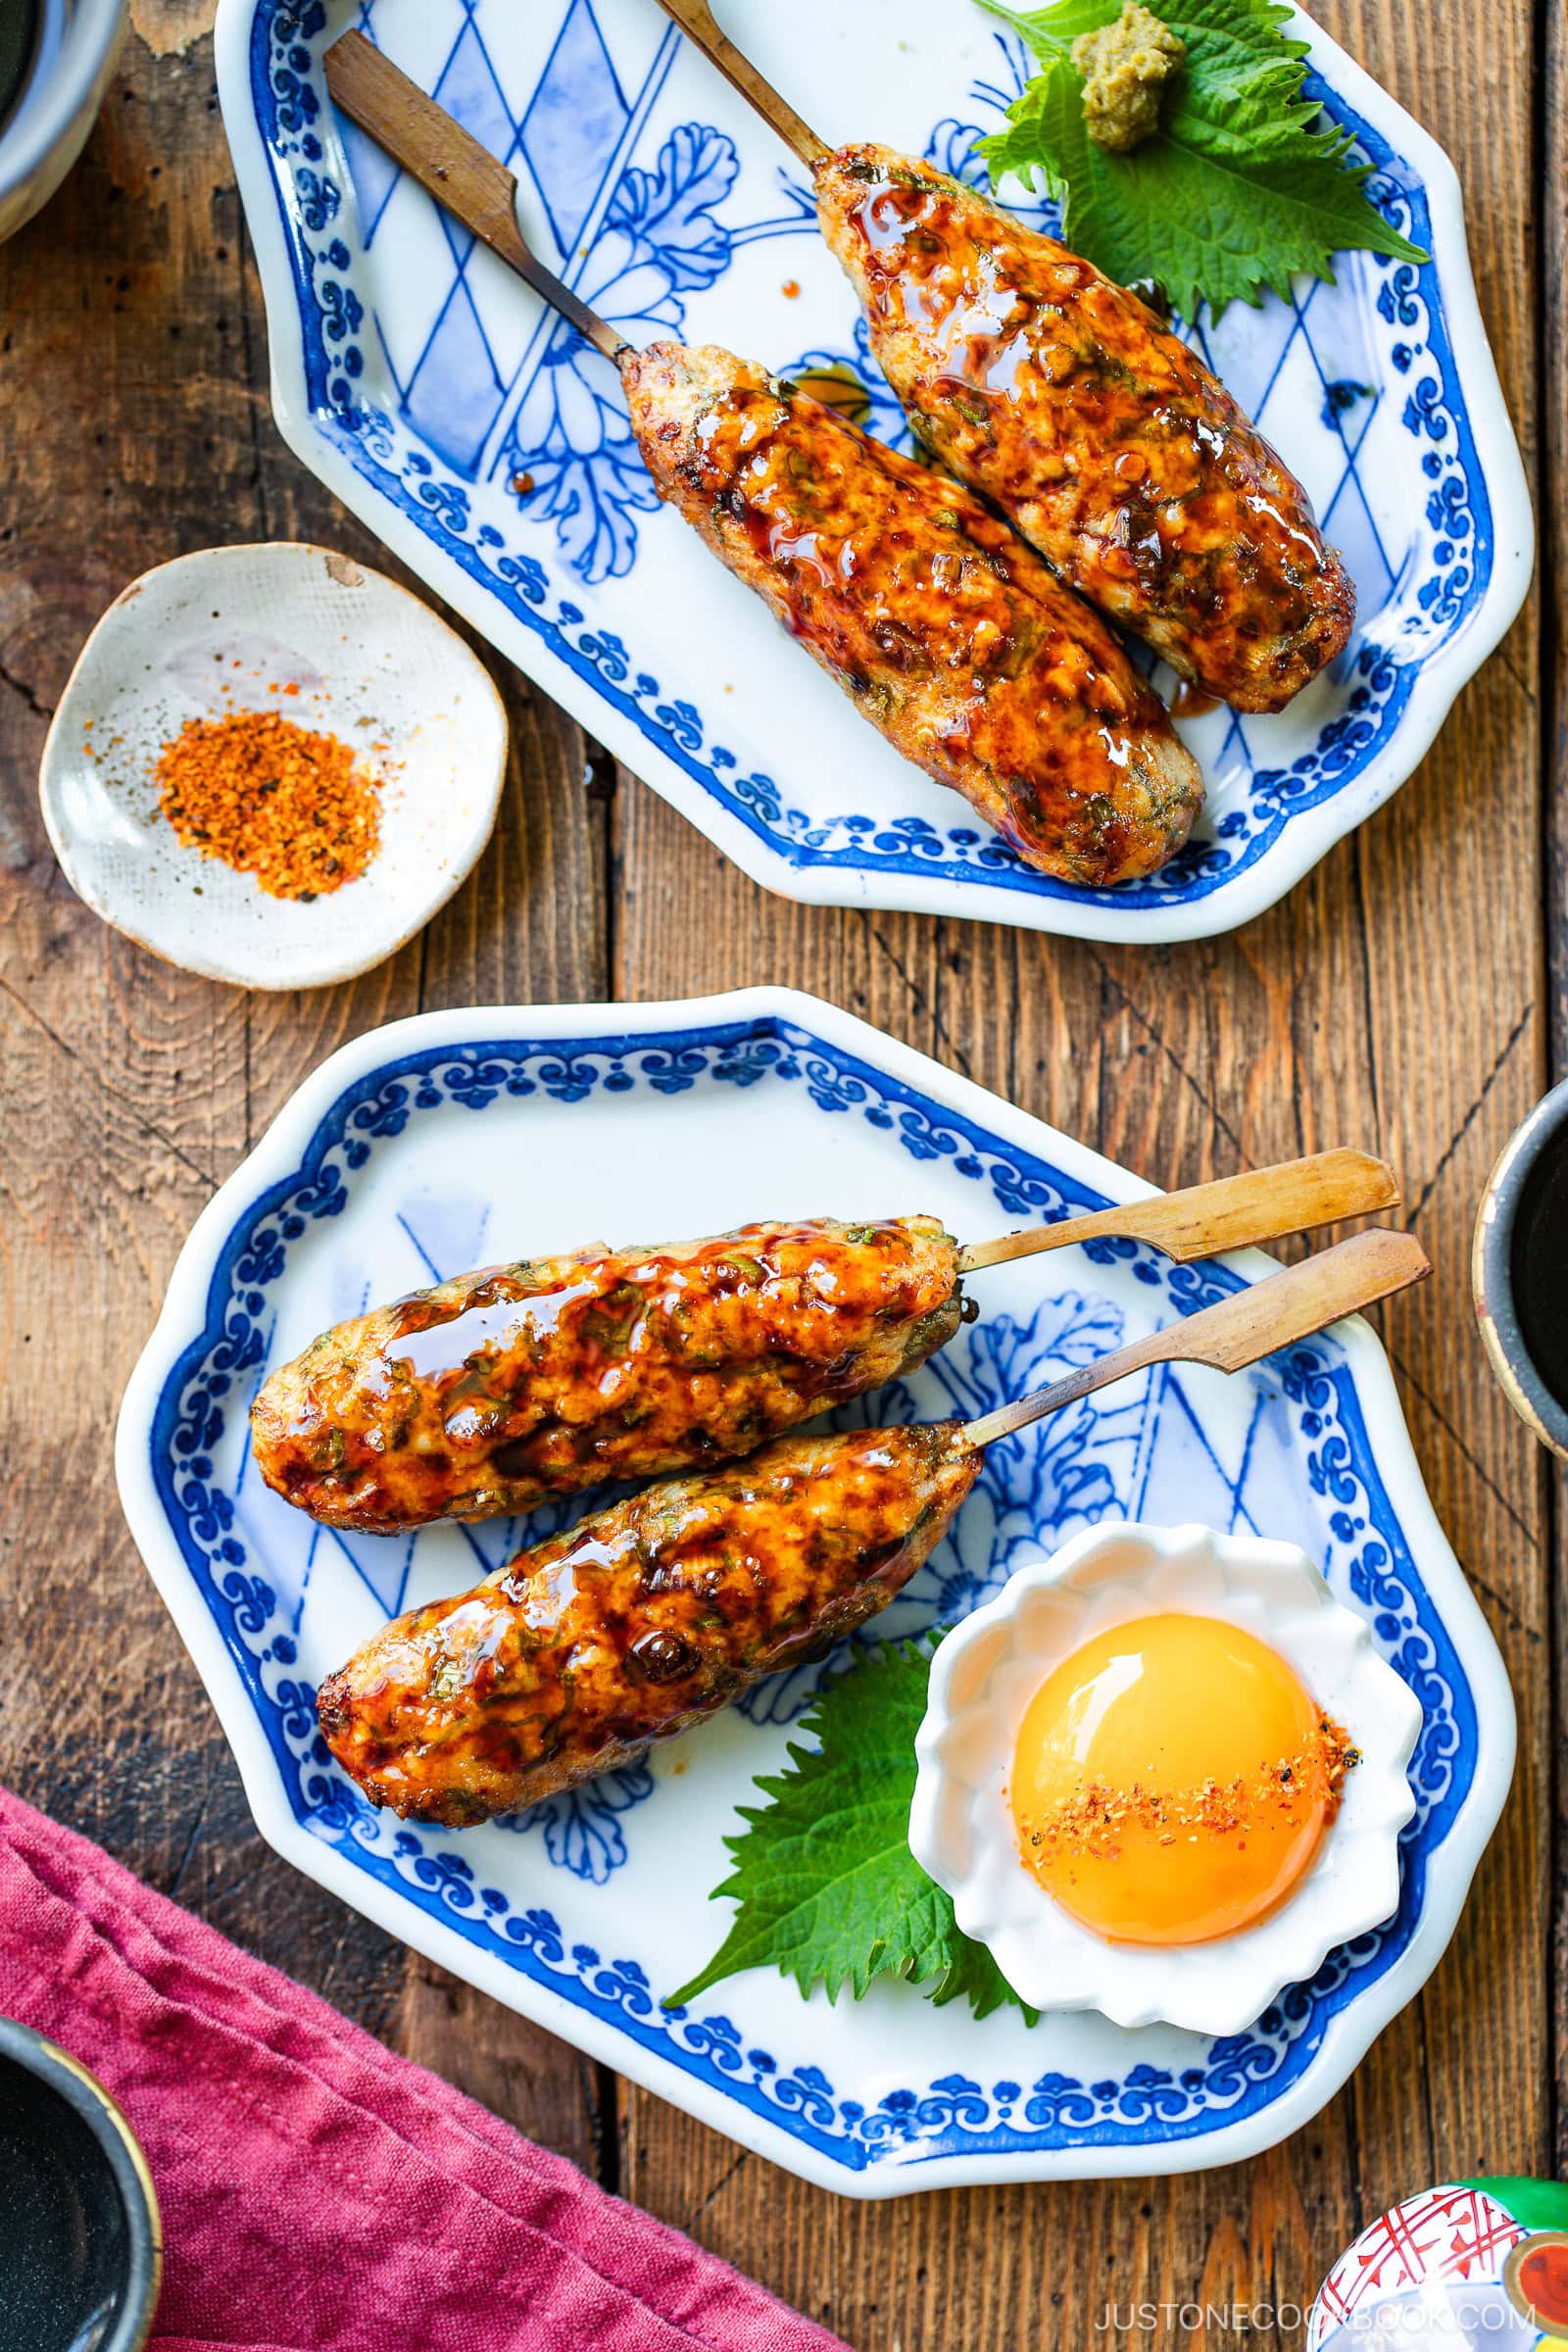
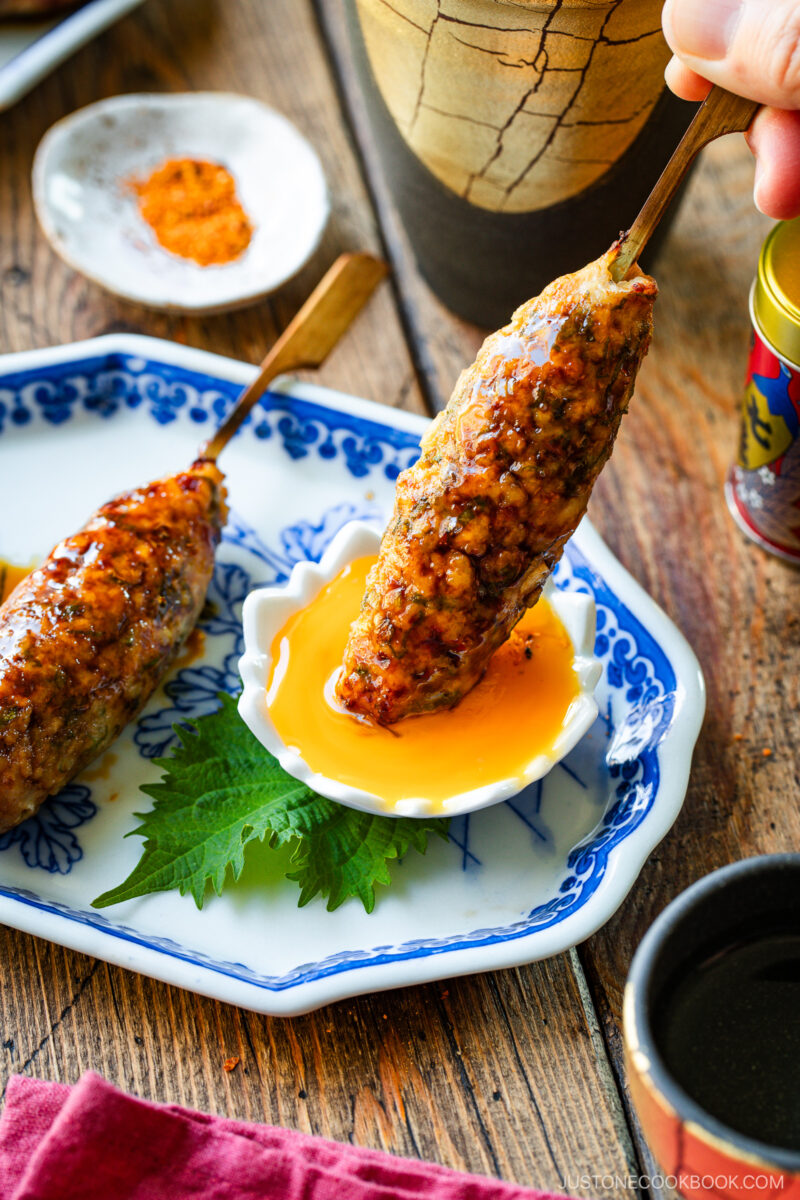
- Serve. Enjoy immediately, sprinkled with shichimi and dipped in Japanese mayo or raw egg yolk.

Nami’s Recipe Tips
These simple tips help you make juicy, springy tsukune every time.
- Pre-cook one-third of the chicken for fluffy, springy, and juicy meatballs. I learned this technique from The Japanese Grill, one of my husband’s favorite grill cookbooks.
- Knead until pale and sticky. My mom taught me to knead the chicken mixture by hand really well, and my tsukune never falls off the skewers!
- Create same-size patties in long, slightly flat cylinders that are not too large for quick heat penetration so the meat cooks at the same rate and finishes at the same time.
- Toss the patty from one hand to the other. This releases any air pockets to prevent breakage during cooking.
- Soak the skewers in water before threading with meat. Also, cover them with foil to prevent burning and turning black.
- Use an oven-safe wire rack so the excess oil can drip onto the baking sheet. This keeps the meat from cooking in a pool of oil.
- Set the oven rack in the center position, about 8 inches (20 cm) away from the heating element. I use the High setting (550ºF/288ºC) and raise or lower the rack if needed. If your oven is small/strong, try Medium (500ºF/260ºC) or move the rack down. Keep a close eye on the food to avoid overcooking!
Variations and Customizations
Looking to change things up? Try these easy and tasty ideas!
- Blend ground chicken and ground pork to increased the fat content for an even juicier meatball.
- Mix in chopped chicken cartilage like we do in Japan to add a crunchy contrasting texture.
- Try a different protein. Experiment with ground beef, turkey, or even fish.
- Make chicken-tofu tsukune. Tofu adds a soft and light texture and reduces calories. See my Teriyaki Chicken Meatballs.
- Enjoy it with yuzu kosho. The citrusy hot sauce gives a bold and spicy taste. Give it a try!
What to Serve with Tsukune
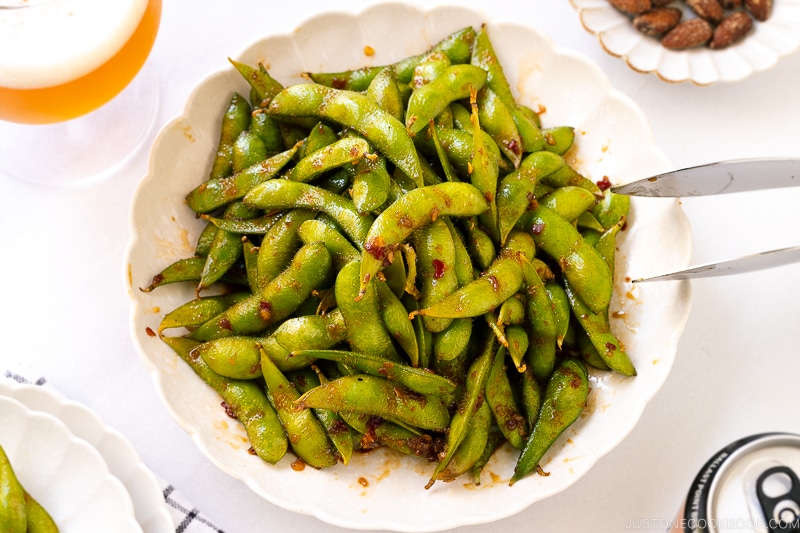
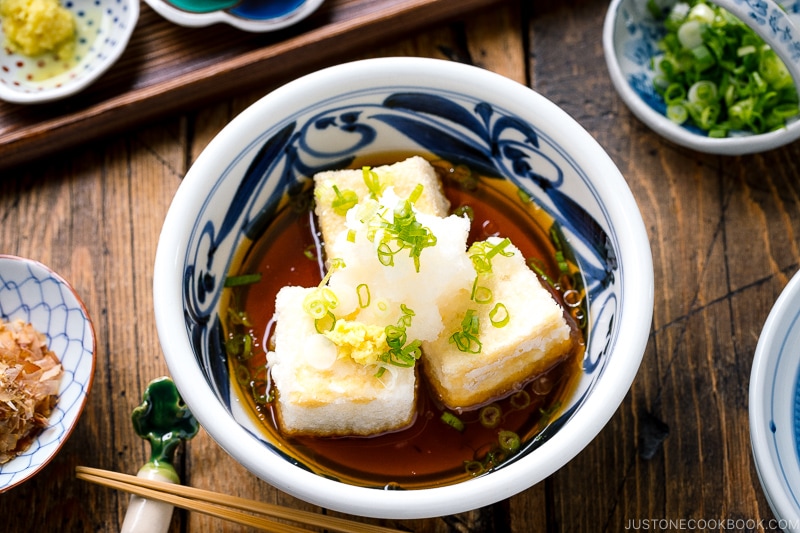
- Appetizer: Spicy Edamame or Agedashi Tofu
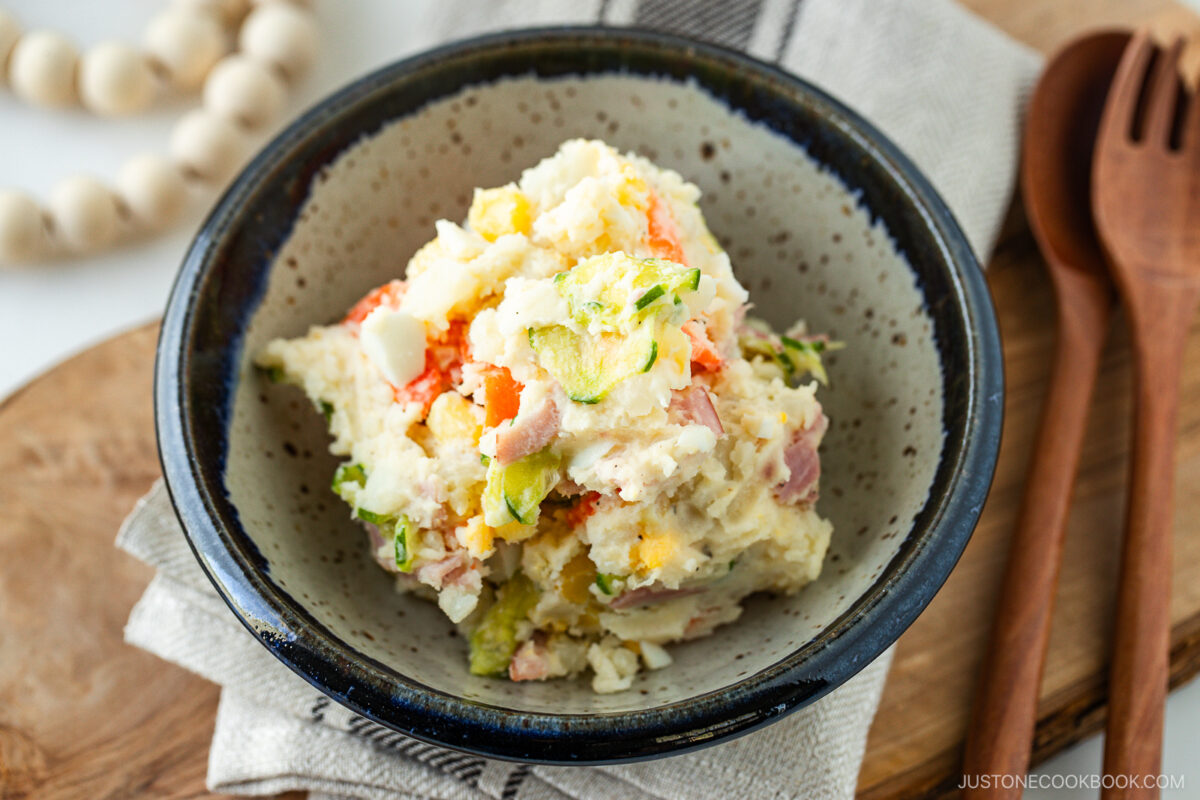
- Salad: Japanese Potato Salad
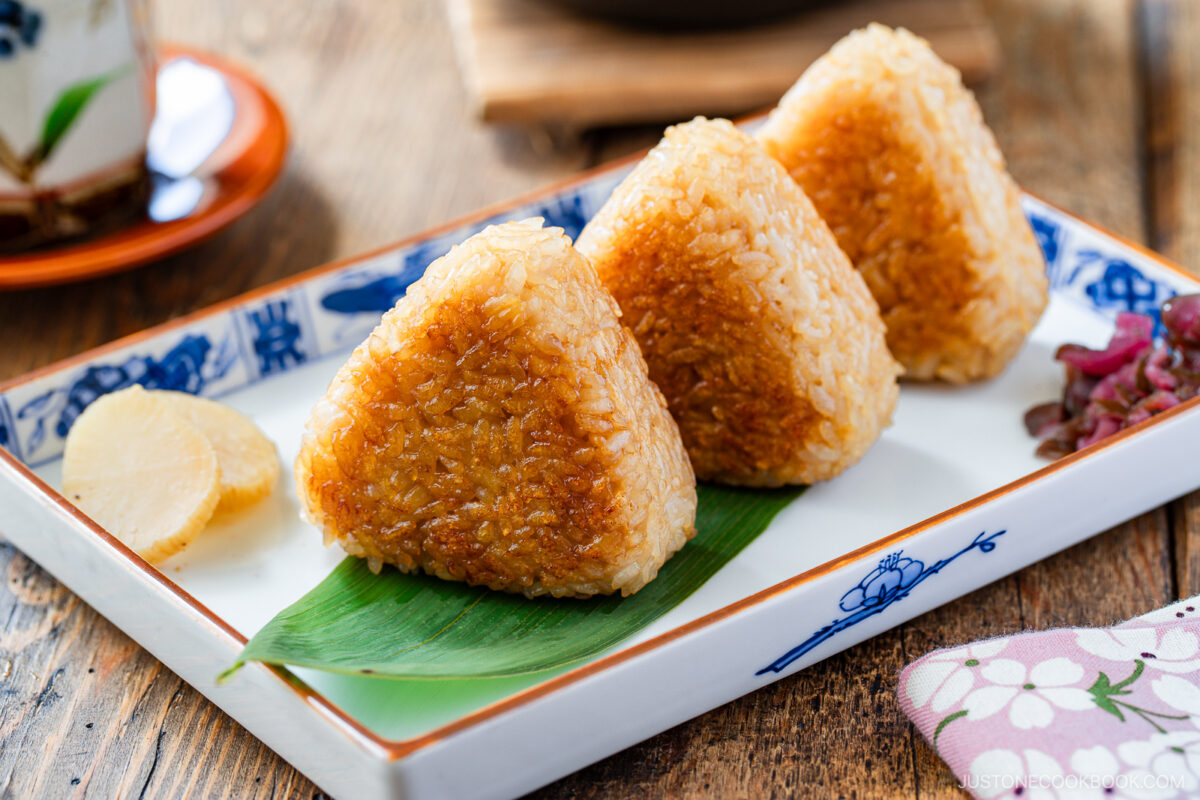
- Rice: Yaki Onigiri (Grilled Rice Balls)
Storage Tips
To store: You can keep the leftovers in an airtight container and store in the refrigerator for up to 3 days or in the freezer for a month.
FAQs
While it’s not traditional, I encourage you to customize your tsukune with a 1–2 teaspoons of grated ginger or minced garlic, if you’d like.
You could, but pan-frying won’t give your the beautifully charred, juicy results of over broiling or grilling over charcoal.
It’s not necessary. Follow my instructions and methods, and you won’t need potato starch or cornstarch as a binding agent.
We recommend Japanese craft beer, Japanese sake, and mixed drinks like Japanese Yuzu Cocktail (yuzu chuhai). To learn more, see my Sake Guide for Beginners and Japanese Beer Guide.

Tsukune (Japanese Chicken Meatball Skewers)
Ingredients
For the Yakitori Sauce
For the Tsukune
- 2–3 green onions/scallions
- 6 shiso leaves (perilla/ooba)
- 1 lb ground chicken (use half white meat + half dark meat if grinding your own)
- 1 Tbsp toasted sesame oil (plus more for coating your hands)
- 1 Tbsp miso (any type works)
- coarse sea salt (for sprinkling)
For Serving
- shichimi togarashi (Japanese seven spice) (optional, for a spicy kick)
Instructions
- Gather all the ingredients.
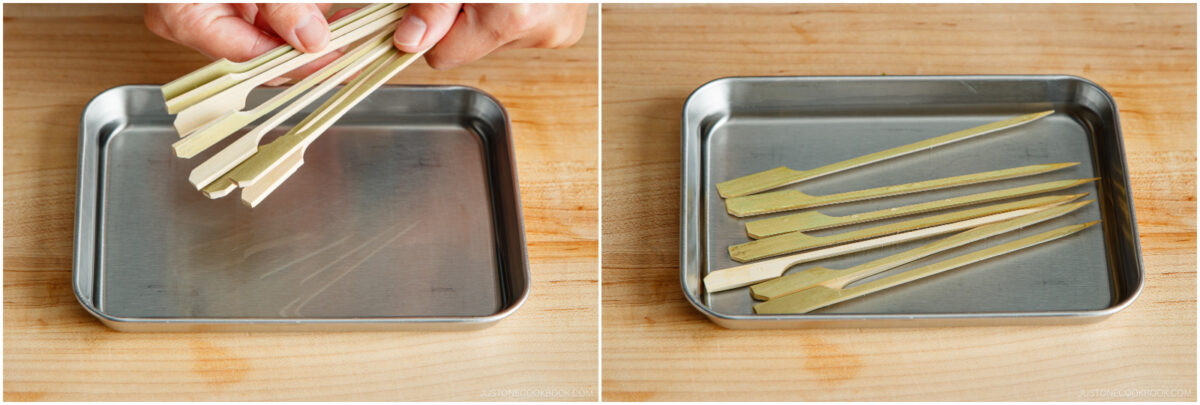
- Soak 8 bamboo wooden paddle skewers (6 inches or 15 cm long) in water for 30 minutes. This will help prevent burning while broiling.
To Make the Yakitori Sauce
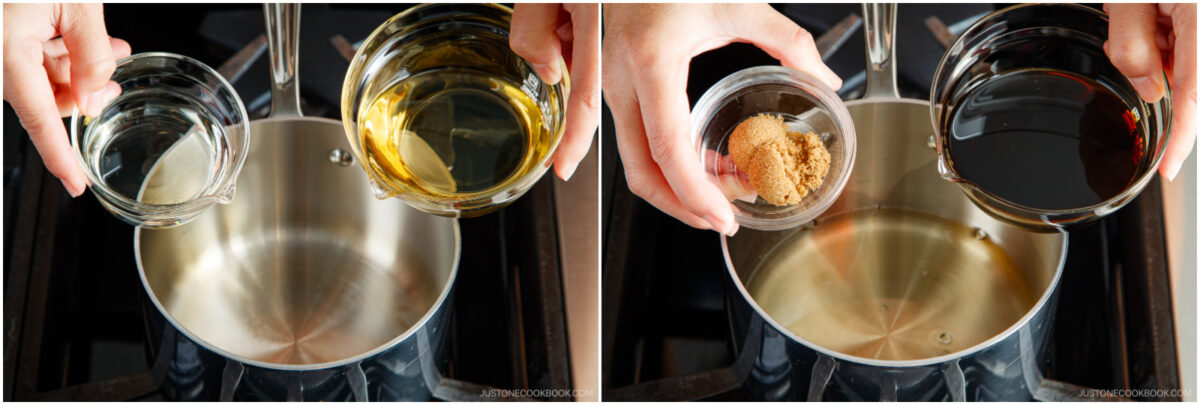
- This sauce recipe makes enough for 2 batches of tsukune. Combine ¼ cup water, ¼ cup sake, ½ cup mirin, ½ cup soy sauce, and 2 tsp brown sugar in a small saucepan.
- Bring the mixture to a boil over medium heat. Once boiling, lower the heat to a simmer and cook for about 30 minutes. Meanwhile, start preparing the tsukune mixture (next section).
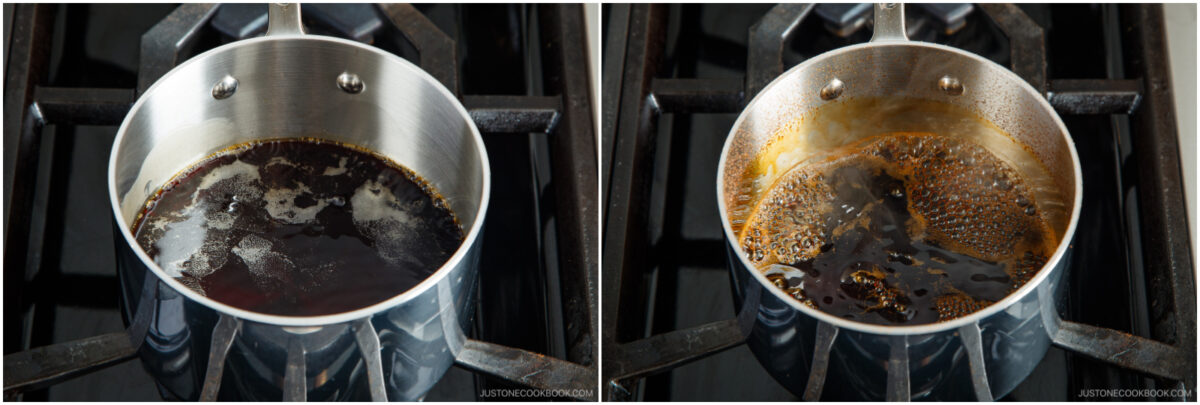
- When the sauce has thickened and reduced by half, remove from the heat. Nami's Tip: The sauce will continue to thicken as it cools and moisture evaporates.
To Prepare the Tsukune Ingredients
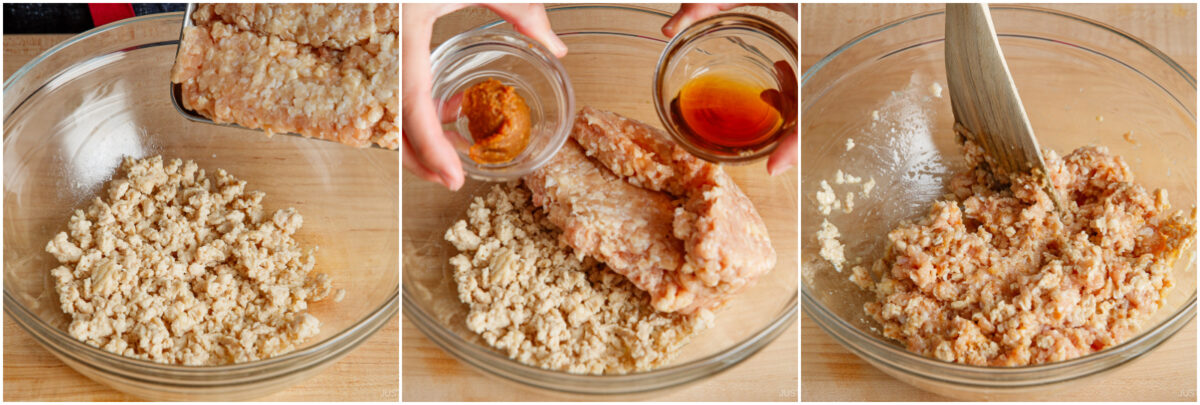
- Heat an ungreased frying pan over medium heat. When it’s hot, add one-third of the 1 lb ground chicken. If your ground chicken package includes both a fatty and lean parts (like the kind sold at Nijiya Market near me), use the lean part here and reserve the fatty part for later. Nami's Tip: Precooking some of the meat mixture prevents the meatball from shrinking too much while cooking and keeps the tsukune juicy.
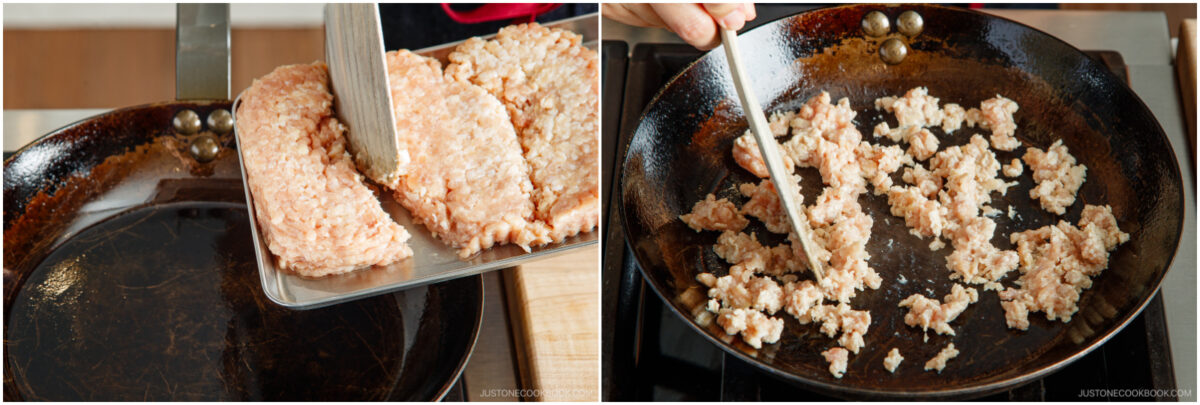
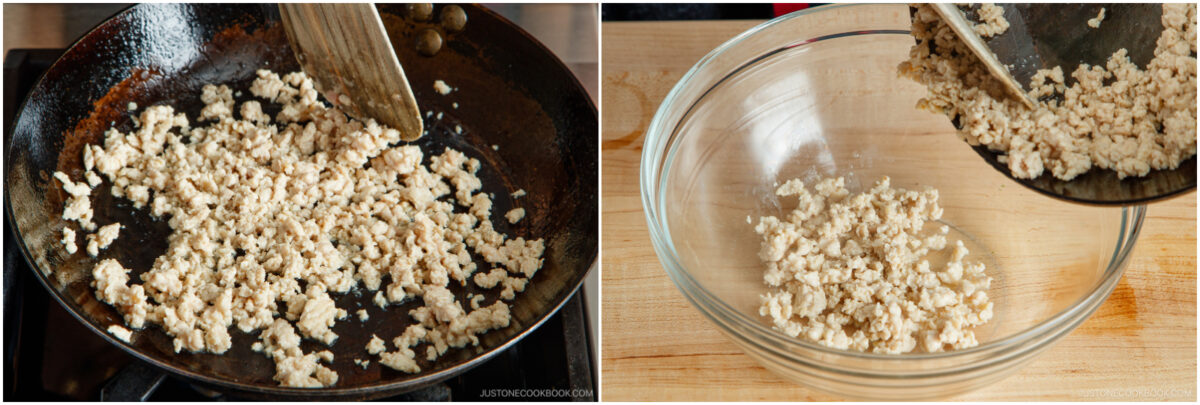
- Cook the meat—without browning it—until no longer pink. While cooking, break it up into small pieces with a wooden spatula. Transfer the cooked meat to a large bowl and let it cool completely.
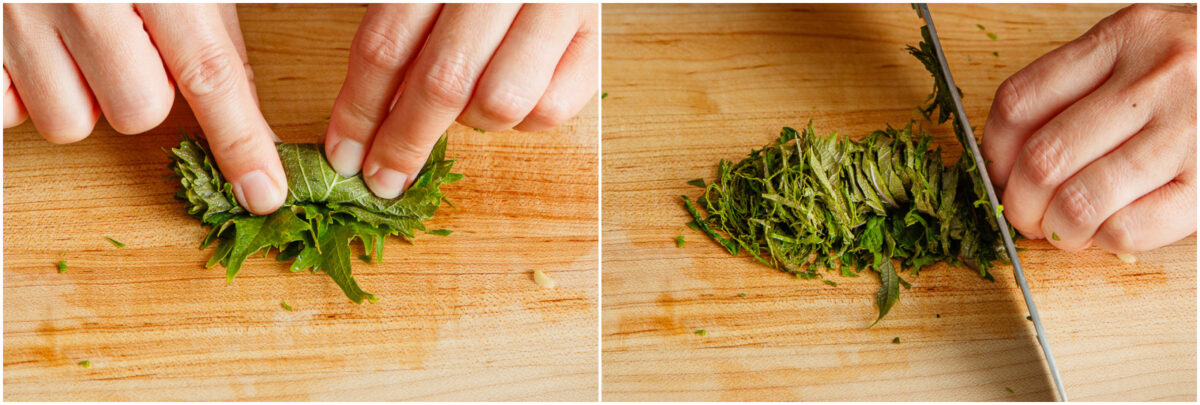
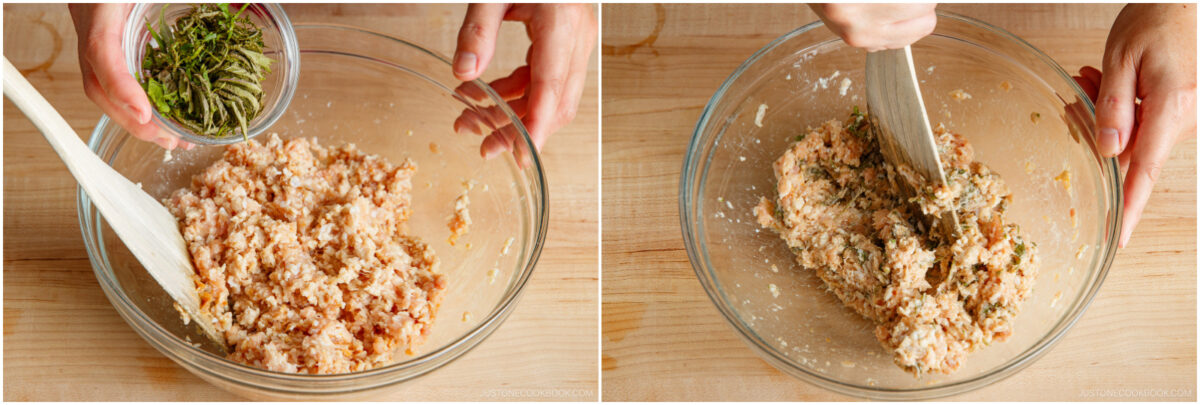
- Stack and roll up 6 shiso leaves (perilla/ooba), then cut into thin julienned slices.
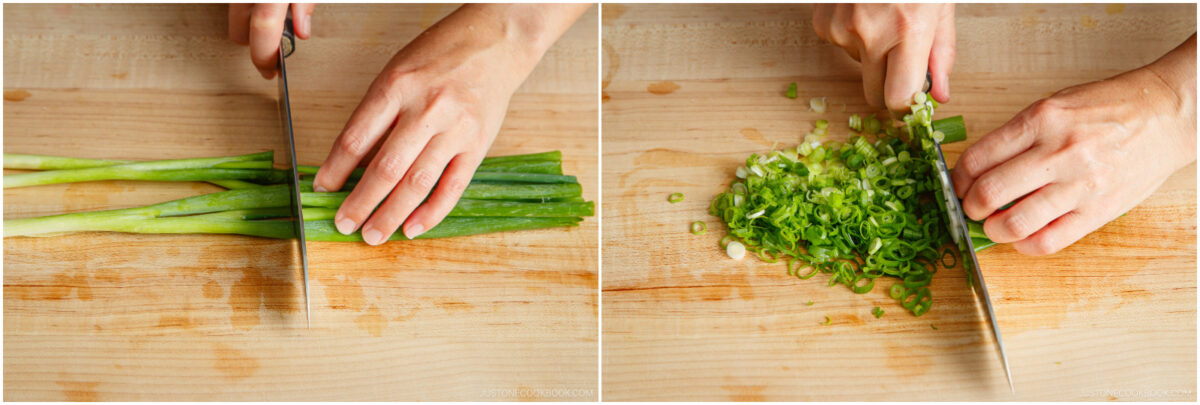
- Cut 2–3 green onions/scallions into thin slices.
To Mix and Knead
- When the cooked ground chicken is completely cooled to room temperature, add the raw ground chicken to it. Then, add 1 Tbsp miso and 1 Tbsp toasted sesame oil. Mix well with the wooden spatula.
- Add the julienned shiso and knead well.
- Add the chopped green onions and knead well.
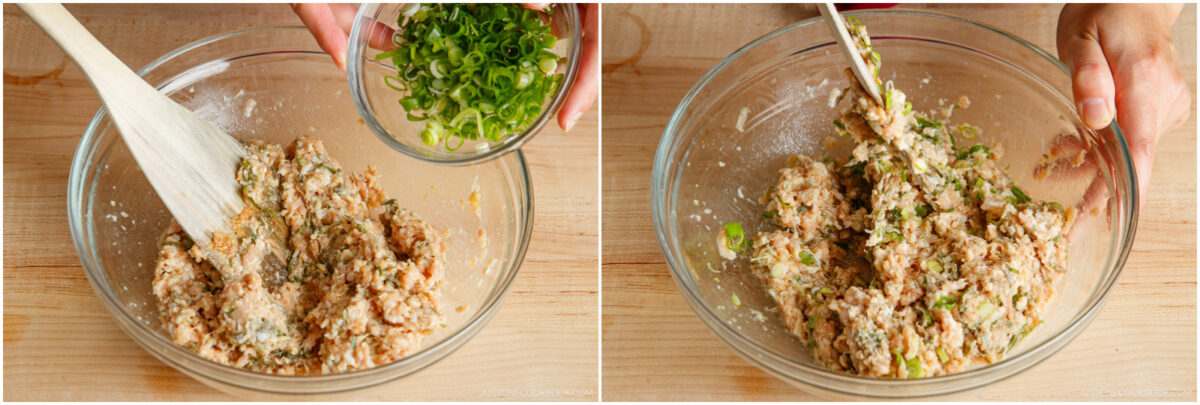
- Spread the mixture around the sides of the bowl with the wooden spatula and then mix. Repeat a few times.
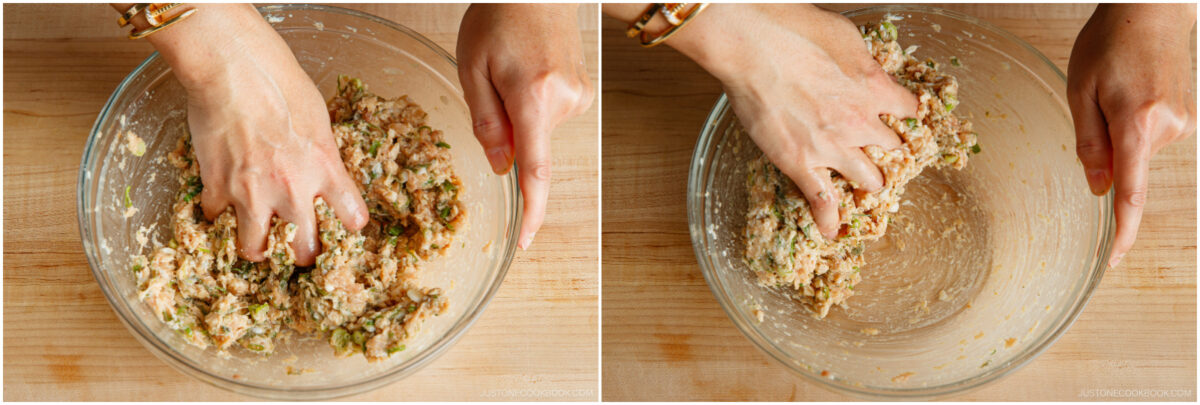
- Now, switch to mixing by hand (you can wear a food-safe disposable glove, if you'd like). Knead and fold the mixture in a clockwise direction 30 times. Then, knead it counterclockwise 30 times. The meat will become pale in color and sticky. Kneading by hand is very important for the meat to stay on the skewer, so please do not skip this step. Nami's Tip: If the fat in the mixture starts to look melted, refrigerate it for 10 minutes, then continue kneading until the mixture is pale and sticky.
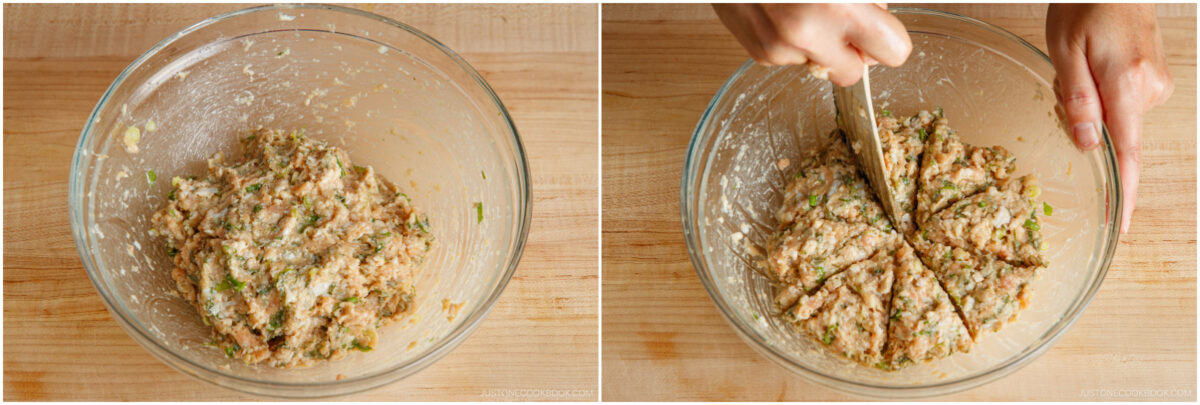
- Now, divide the mixture into 8 equal portions. Patties that are the same size will cook at the same rate and finish cooking at the same time.
To Shape the Tsukune
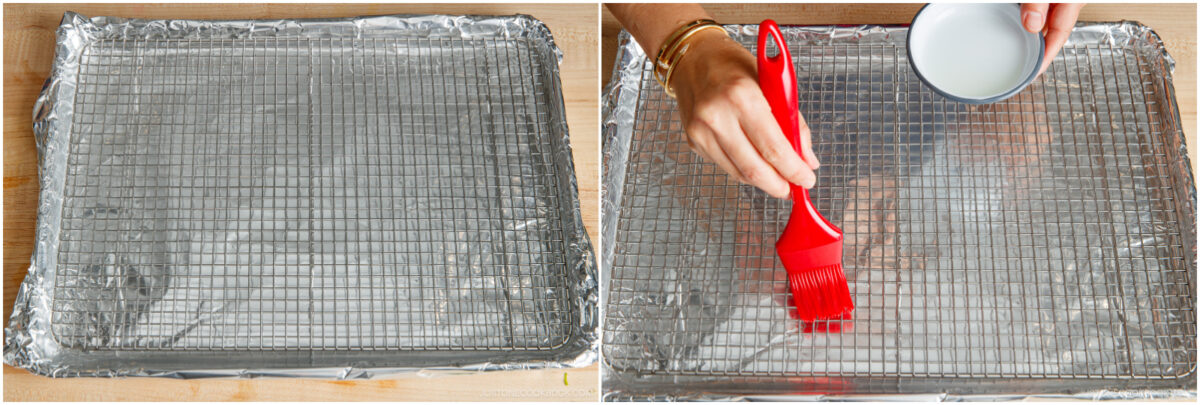
- Prepare a baking sheet lined with aluminum foil. Place an oven-safe wire rack on top and brush it with cooking oil. Nami's Tip: Why use a rack? It allows the excess oil from the meat to drip down to the baking sheet while broiling. This way, the meat chars nicely and comes out juicy. To achieve a restaurant-style tsukune, we don‘t want to cook it in a pool of oil.
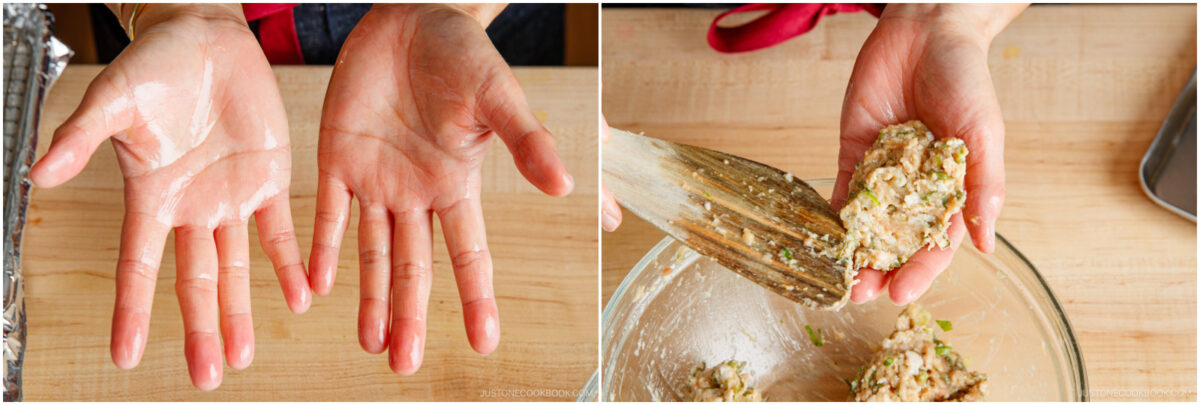
- Lightly coat your hands with sesame oil to prevent the meat from sticking. Scoop up one portion of the chicken mixture.
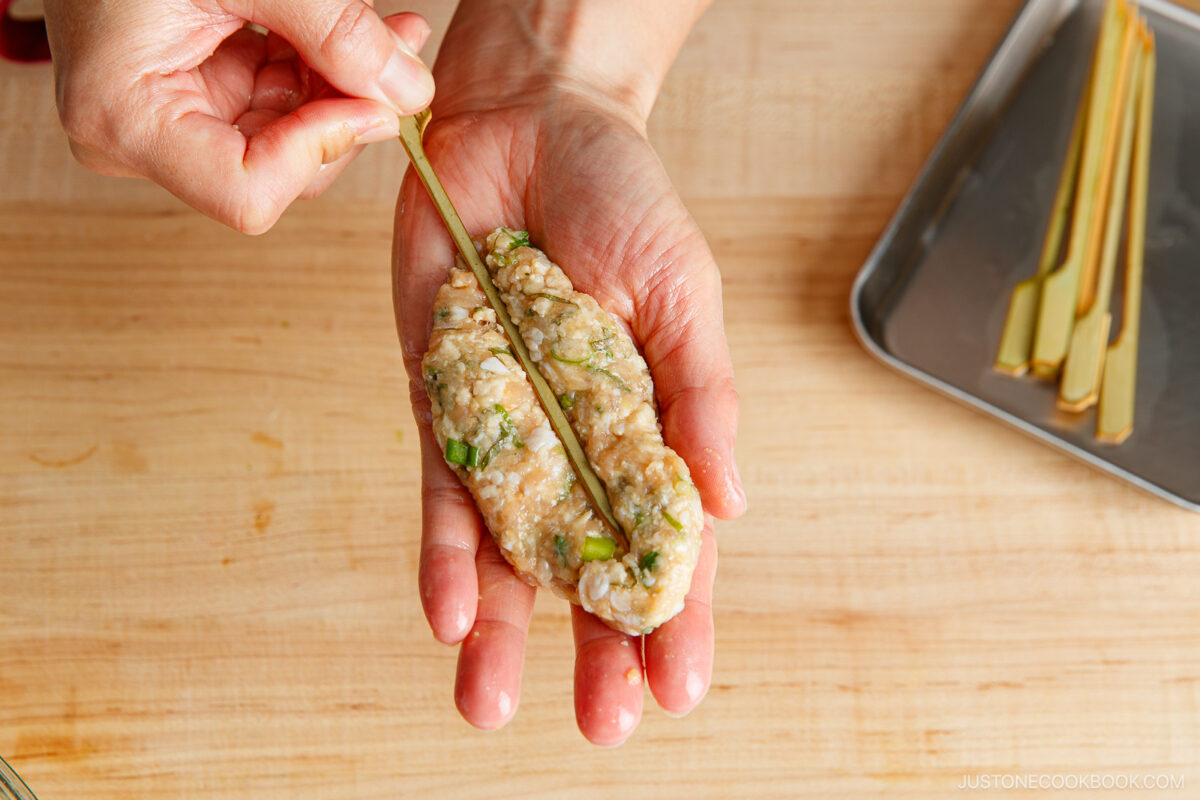
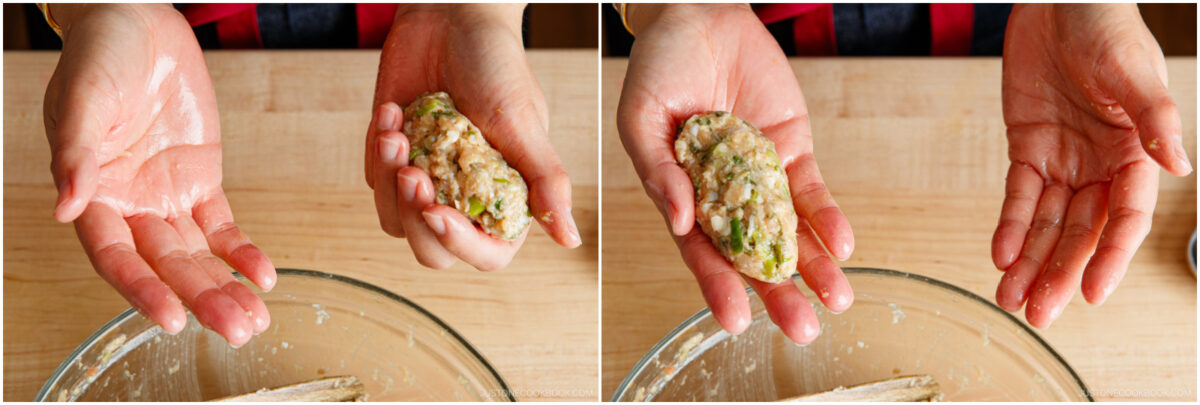
- Toss the meat back and forth for 10 times between your hands to release the air pockets. Then, gently squeeze and shape the meat to form it into a long and oval patty, about 4 inches (10 cm) long.
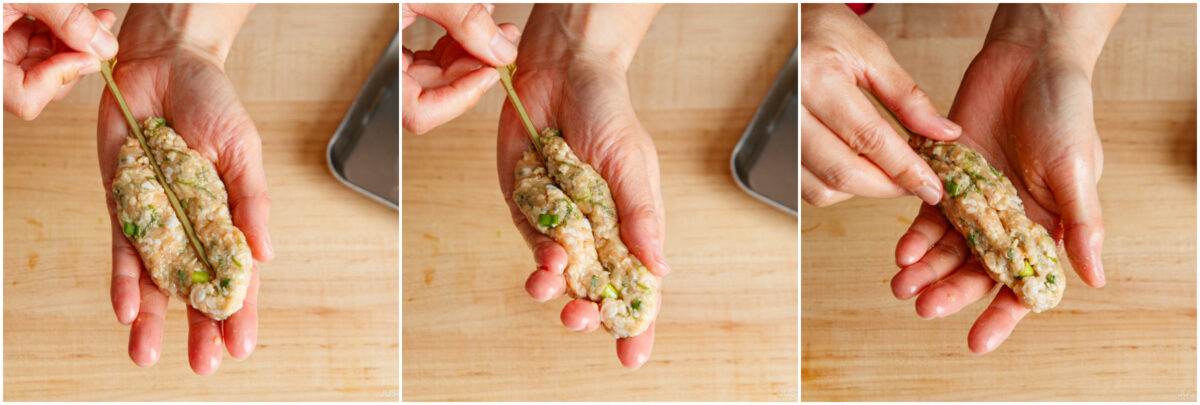
- Flatten the patty a bit. Now, place the top half to two-thirds of a skewer along the center line of the patty. Then, gently close the two sides of the patty around the skewer to encase the stick‘s tip and top part. Seal the edges of the patty together and form it again into a long, cylindrical shape. This shape allows the heat to penetrate the meat quickly.
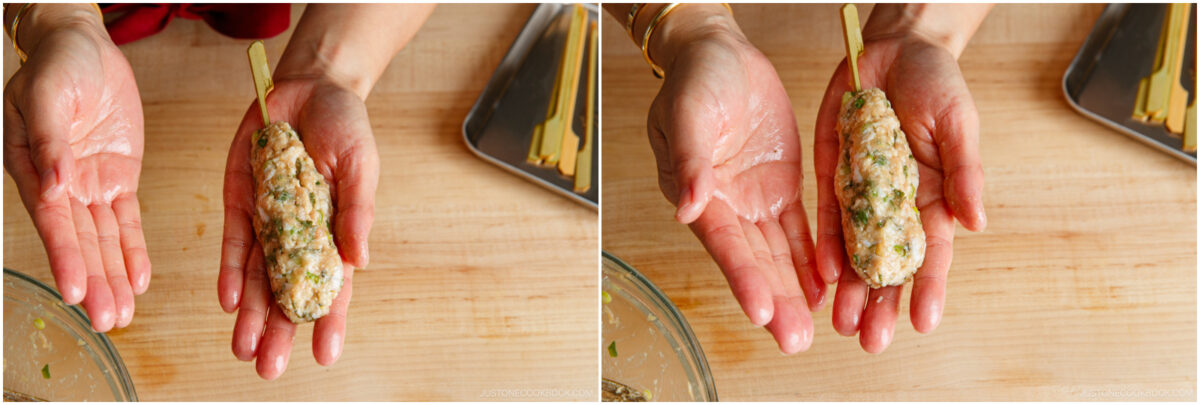
- Gently toss the skewered patty from one hand to the other a few times to make sure the front and back sides are nicely formed. Press and form the meat gently into shape. Do a final check, making sure the skewer is secured in the center.
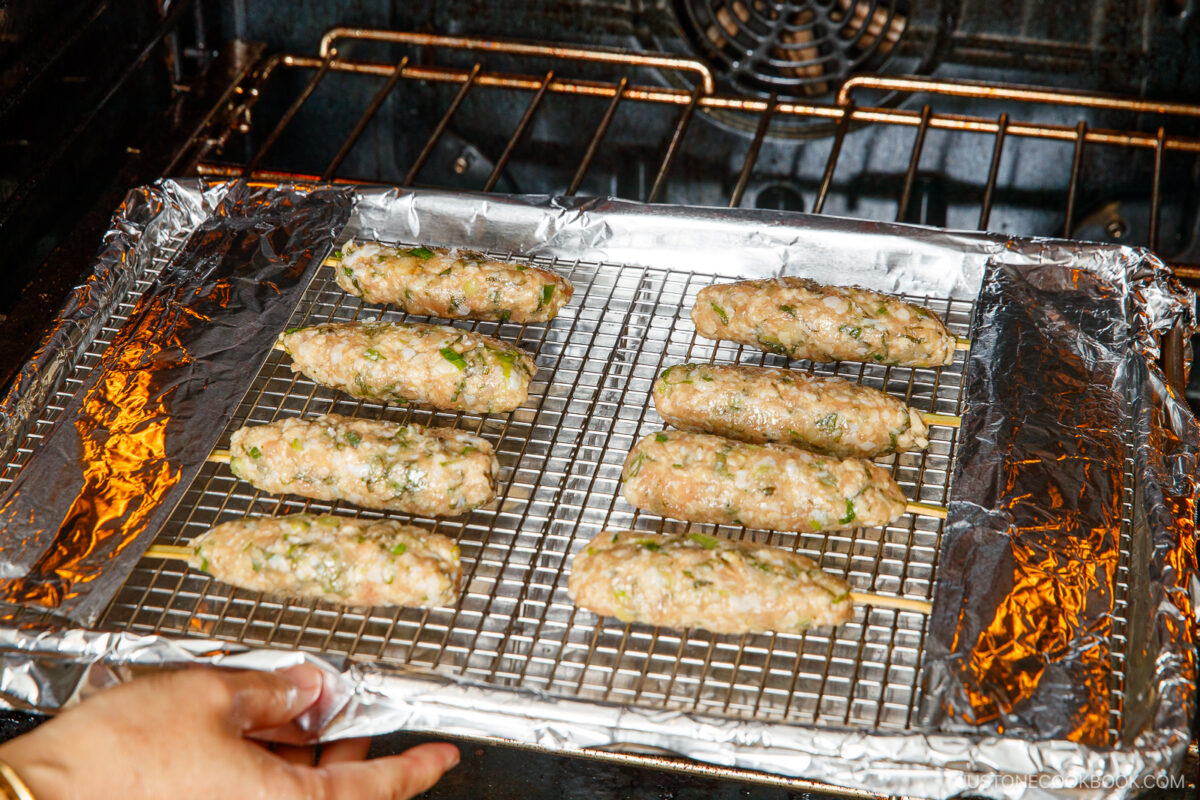
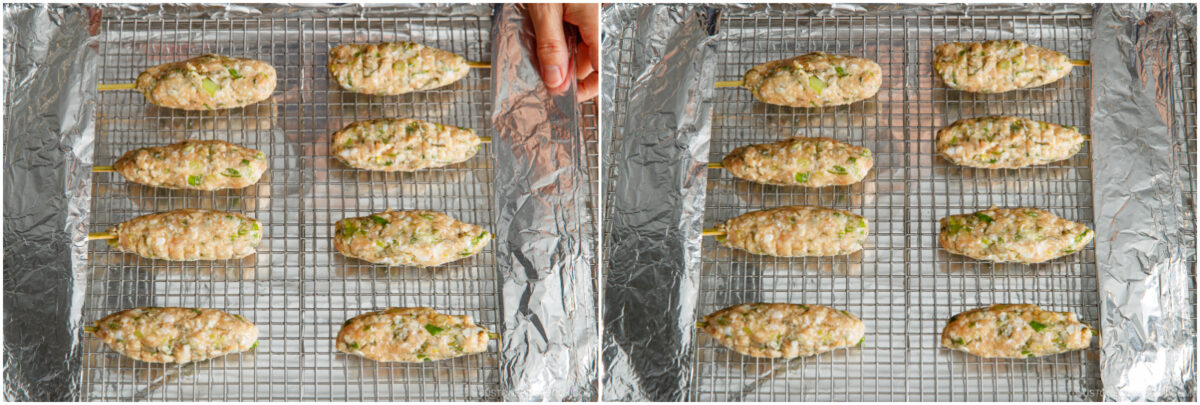
- Place the finished tsukune on the prepared wire rack, and shape the remaining tsukune. Space them apart on the rack and position them so the skewer handles line up along two sides of the rack and the meat points toward the center. Lightly sprinkle coarse sea salt over the meat.
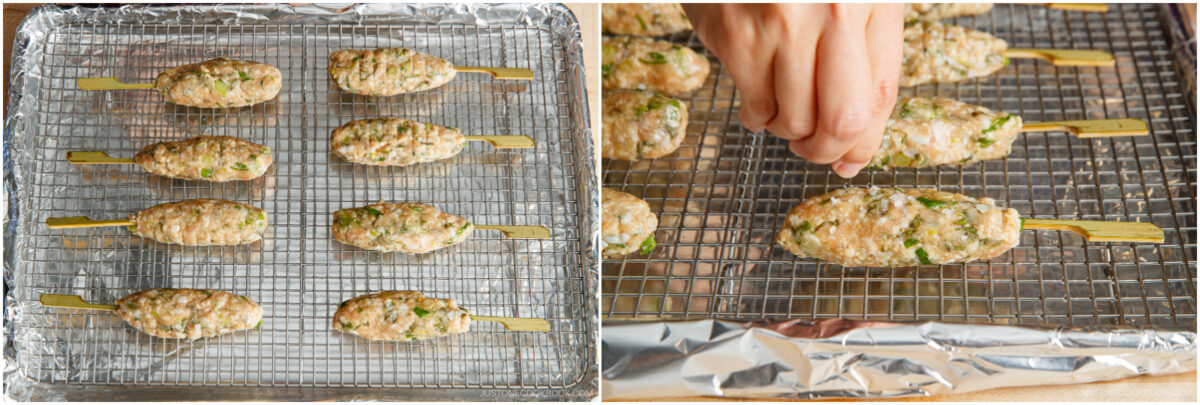
- Prepare strips of aluminum foil to cover the skewer handles and keep them from turning black and burning while broiling.
To Broil in the Oven
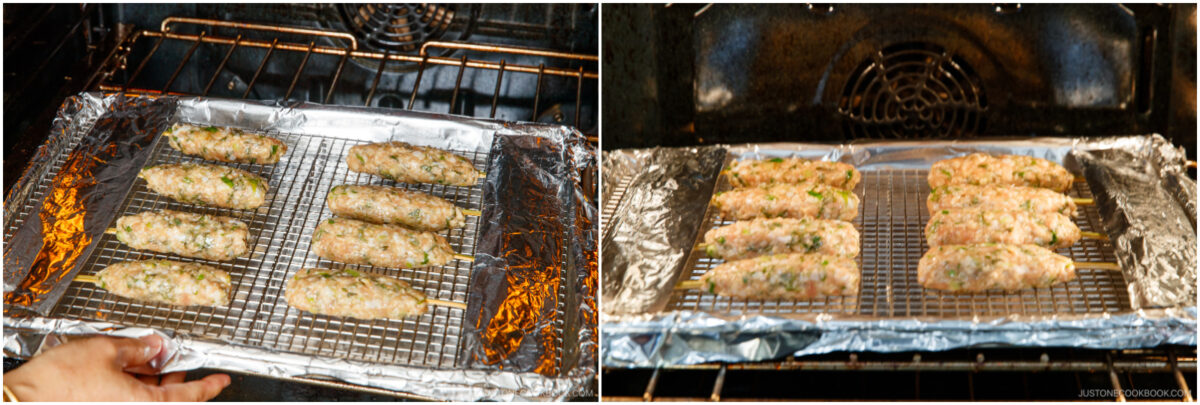
- Five minutes before cooking, set the oven rack in the middle, about 8 inches (20 cm) away from the heating element, and preheat the broiler on High (550ºF/288ºC). After heating for 5 minutes, place the baking sheet in the oven and cook for 6 minutes. Watch the chicken closely while broiling so it doesn‘t burn. If your oven is small/strong, try broiling on Medium (500ºF/260ºC) or lower the rack. Nami's Tip: When broiling, you can‘t set the exact temperature. You adjust two things—the distance of the rack and the broiler settings (Low, Medium, or High). I usually use High and move the rack closer or farther away from the heating element.
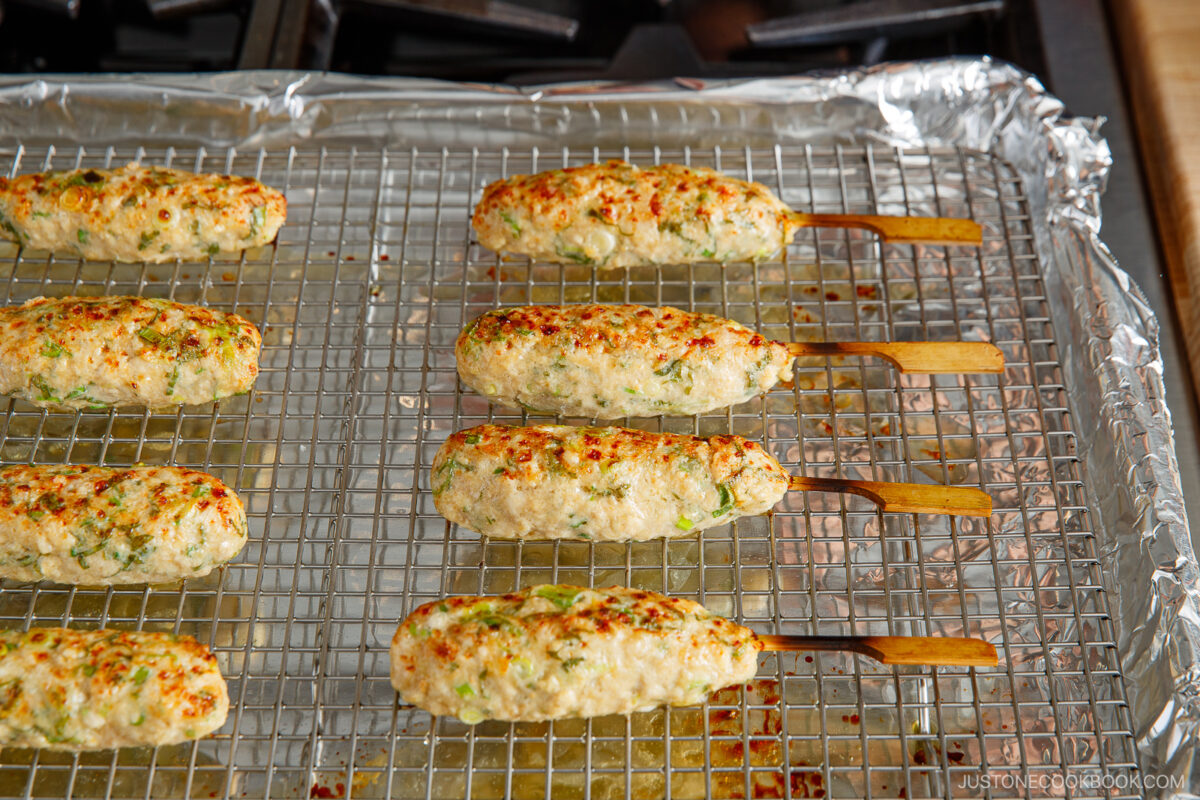
- Remove the baking sheet from the oven and flip the tsukune with a pair of tongs. Return it to the oven and broil the other side for 4 minutes, or until the chicken‘s internal temperature is 165ºF (74ºC).
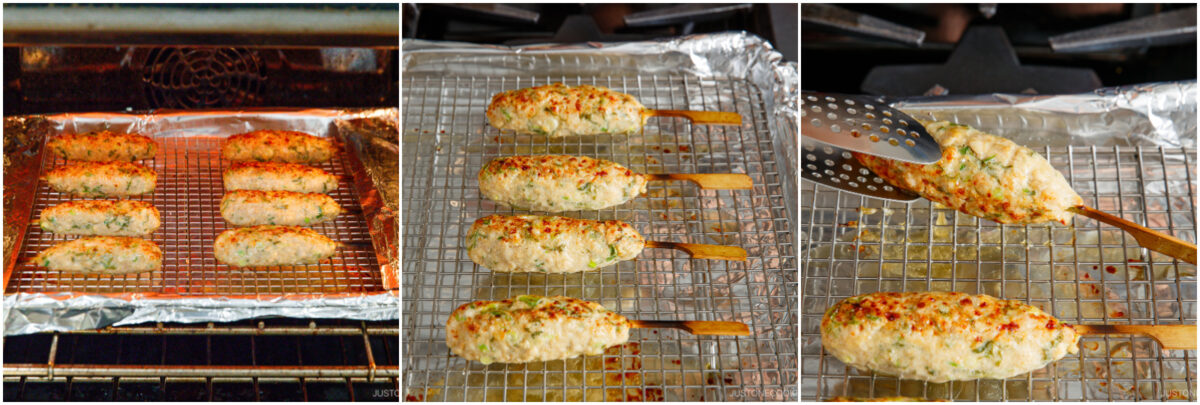
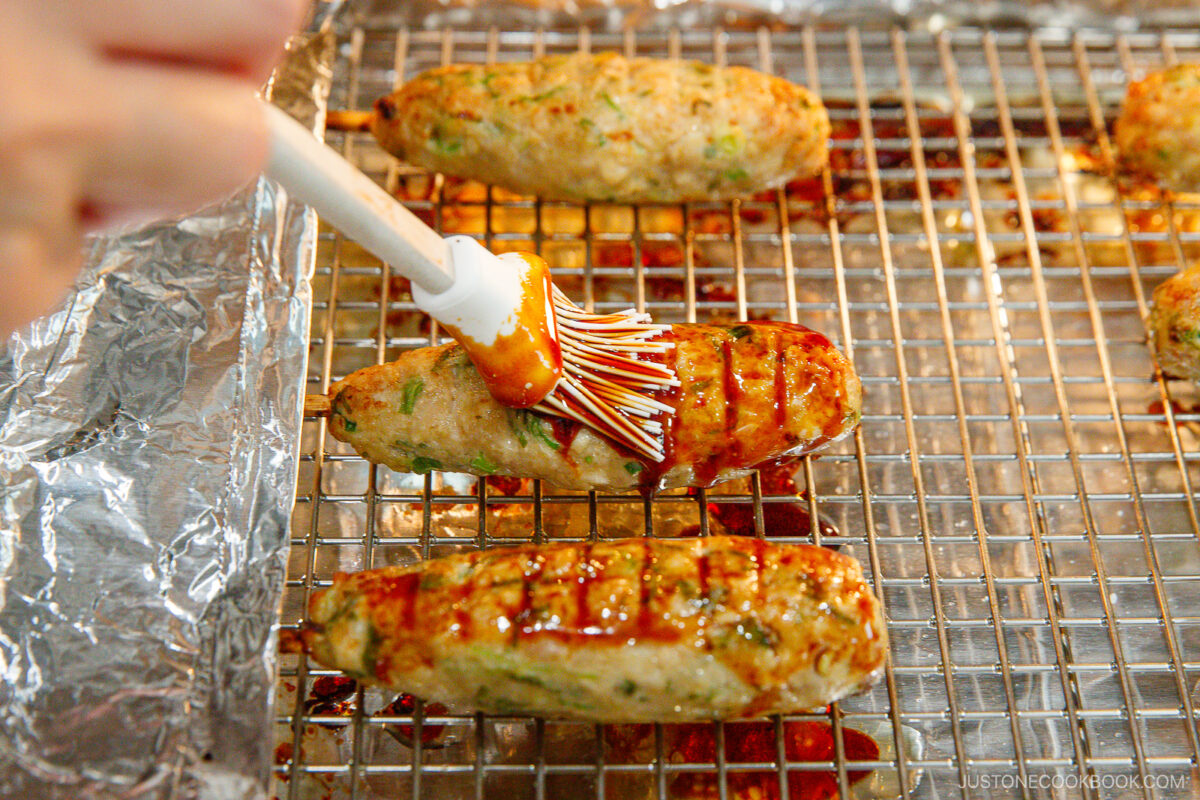
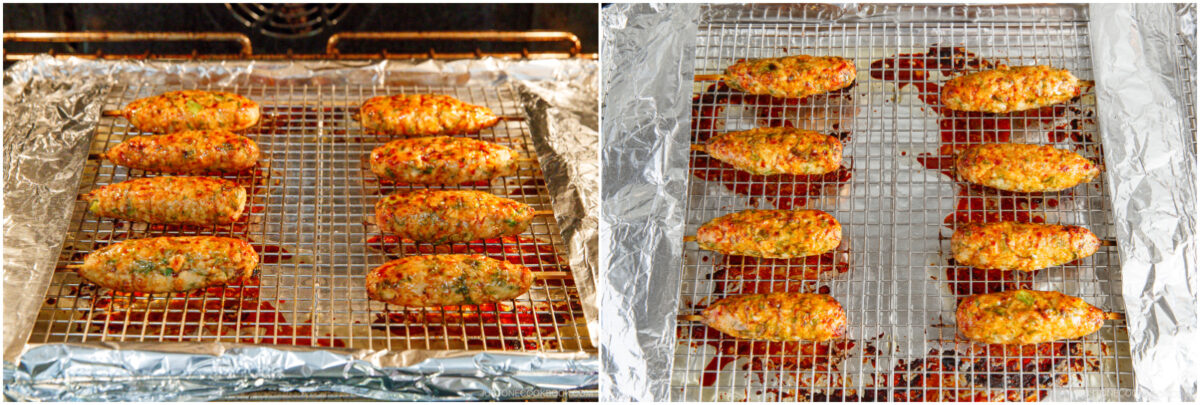
- When both sides are cooked, brush the yakitori sauce on the meat with a silicone brush. Broil for another 45–60 seconds to caramelize the sauce a bit.
- Flip the meat and brush the sauce on the other side. Broil for another 45–60 seconds until sizzling.
To Serve
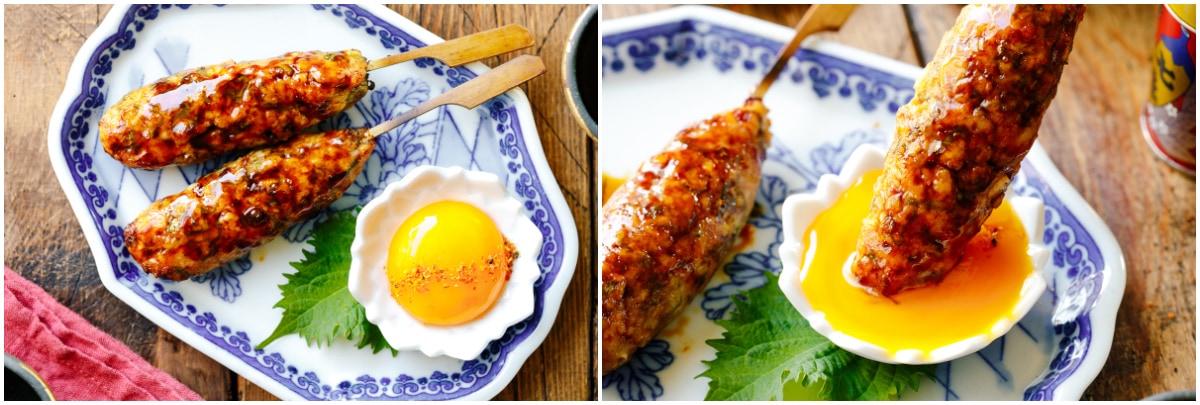
- Transfer the skewers to a serving plate and brush extra sauce on the meat. Serve immediately. Sprinkle optional shichimi togarashi (Japanese seven spice) for a spicy kick. You can try it dipped in Japanese Kewpie mayonnaise or yuzu kosho, too.

- Optionally, tsukune is often served in Japan with raw egg yolk (which is safe to consume in Japan) on the side for dipping. Enjoy!
To Cook on the Grill (optional)
- Clean and grease the grilling grate. Preheat the grill to medium-hot heat, about 400ºF (200ºC). Gently place the skewers on the grill and cook until the bottom side is nicely brown, 3–4 minutes. With both a stainless steel spatula and tongs, gently rotate the tsukune and cook the other side for 2–3 minutes. Turn to the remaining sides where you want to grill more for another 1–2 minutes. To check if it‘s fully cooked, insert a bamboo skewer to see if the juices run clear or check that the chicken‘s internal temperature registers 165ºF (74ºC). Brush with additional yakitori sauce, cook briefly until sizzling, and remove from the heat.
To Store
- You can keep the leftovers in an airtight container and store in the refrigerator for up to 3 days or in the freezer for a month.
Nutrition
Did you make this recipe?
Tag @justonecookbook on Instagram so we can see your delicious creation!
Editor’s Note: This post was originally published on June 2, 2014. It was updated with new images and a new video on January 5, 2024, and republished with more helpful content on November 20, 2025.