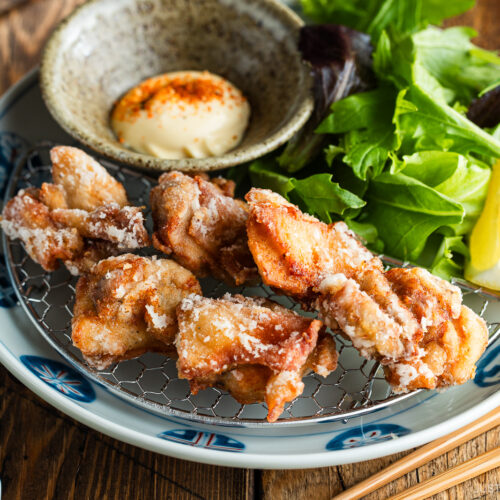
Learn how to make the best Karaage (Japanese Fried Chicken) with tender chicken thighs marinated in aromatics and twice-fried until golden brown. They’re juicy and ultra-crispy, and I’ll share my simple techniques for glorious results.
I grew up eating karaage, Japan’s beloved fried chicken. It’s a timeless dish found everywhere—from home kitchens and bento lunch boxes to street stalls and family diners. My mom often made it when we had guests over, and I’ve been chasing that memory ever since—trying to recreate her version with perfectly crisp skin and tender, juicy meat. It’s the kind of dish you’ll want to enjoy wholeheartedly and without hesitation.
If you’re craving more fried chicken, try my Fried Chicken Wings, Nagoya Style Fried Chicken, or Chicken Nanban next!
What is Karaage?
Karaage (唐揚げ) is a Japanese cooking method where we coat meat or veggies in flour before deep-frying. While technically anything can be prepared in this style, the term is primarily associated with Japanese fried chicken. Karaage is a staple appetizer in Japanese gastropubs (izakaya) and ramen shops and a main dish in bento box lunches and Japanese home-cooked meals.
Why I Love This Recipe
- Golden crust and succulent center – The technique I share guarantees a crispy crust and incredibly moist and tender meat.
- Deceptively easy – If you ever thought frying chicken was daunting, this dish will convince you otherwise.
- Perfect for hosting – We typically serve karaage as a main dish and other dishes for parties.
Ingredients for Karaage
- Chicken thighs – boneless and skin-on
- Kosher salt and black pepper
- Ginger
- Garlic
- Soy sauce
- Sake
- Toasted sesame oil
- Neutral oil – read my post on the Best Neutral Oil for Cooking
- Potato starch – or cornstarch
- All-purpose flour
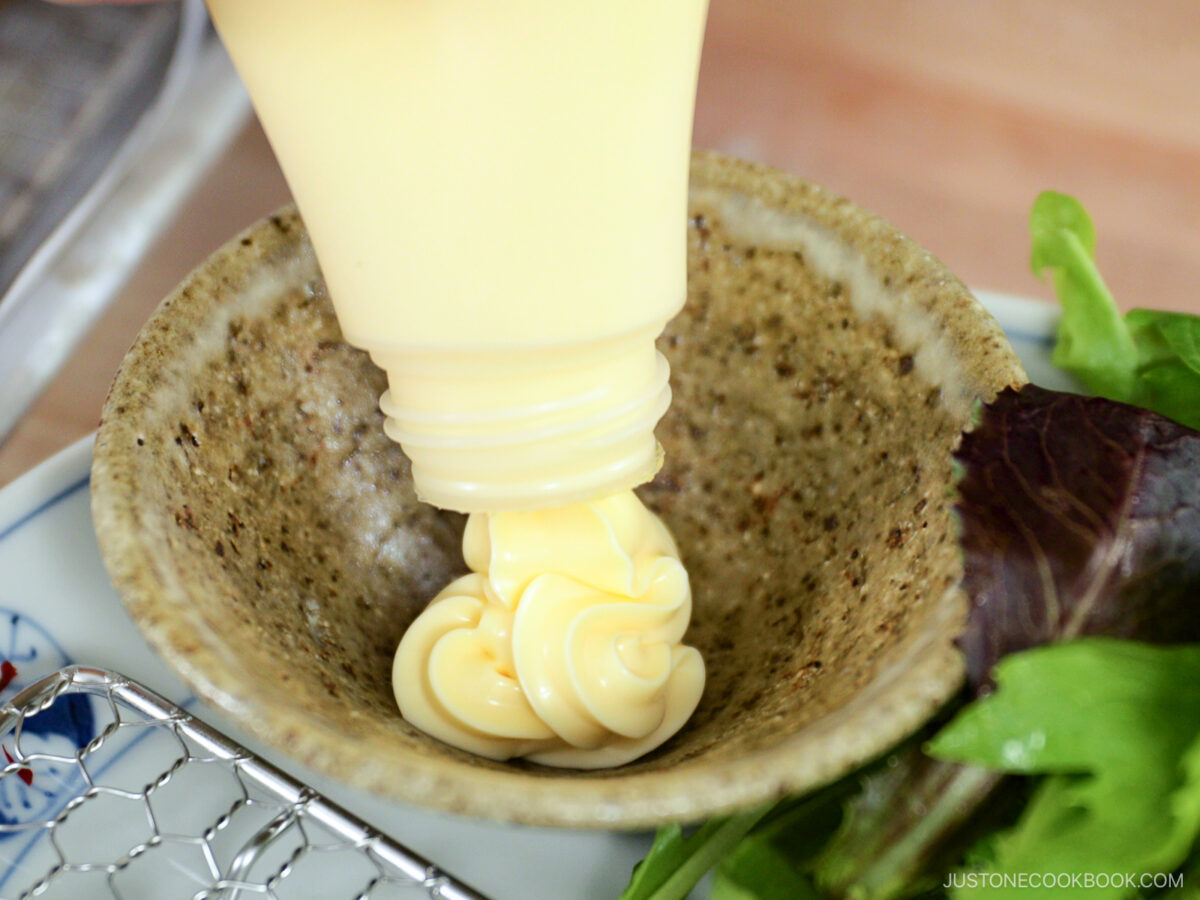
- Lemon wedges, Japanese Kewpie mayonnaise, and shichimi togarashi (Japanese seven spice) – optional toppings and garnishes
Find the printable recipe with measurements below.
Jump to RecipeSubstitutions
- Chicken thighs: I’ve found that boneless, skin-on chicken thighs deliver the best results—the skin turns beautifully crispy while keeping the meat tender and juicy. That said, skinless thighs work too, if you prefer. If your chicken thighs come bone-in, you can ask your butcher to remove the bones or do it yourself at home with a sharp knife.
- Sake: If you can’t find this, I recommend using dry sherry or Chinese rice wine instead, or skip it.
- Potato starch: You could also use rice flour or corn starch instead. I have not tested this dish with tapioca starch, but please let me know how it turns out if you try it.
- All-purpose flour: For gluten-free, substitute with one of the starches instead.
How to Make Karaage
Preparation
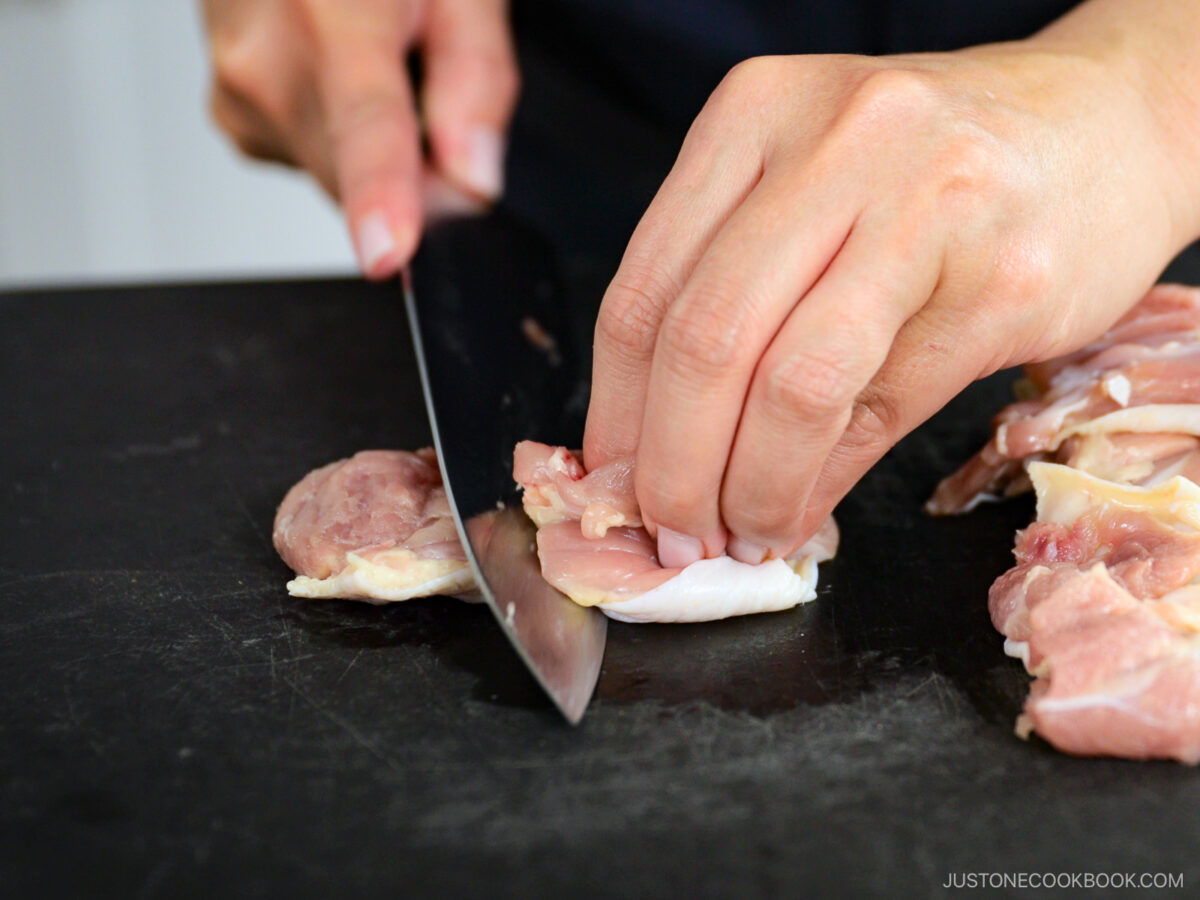
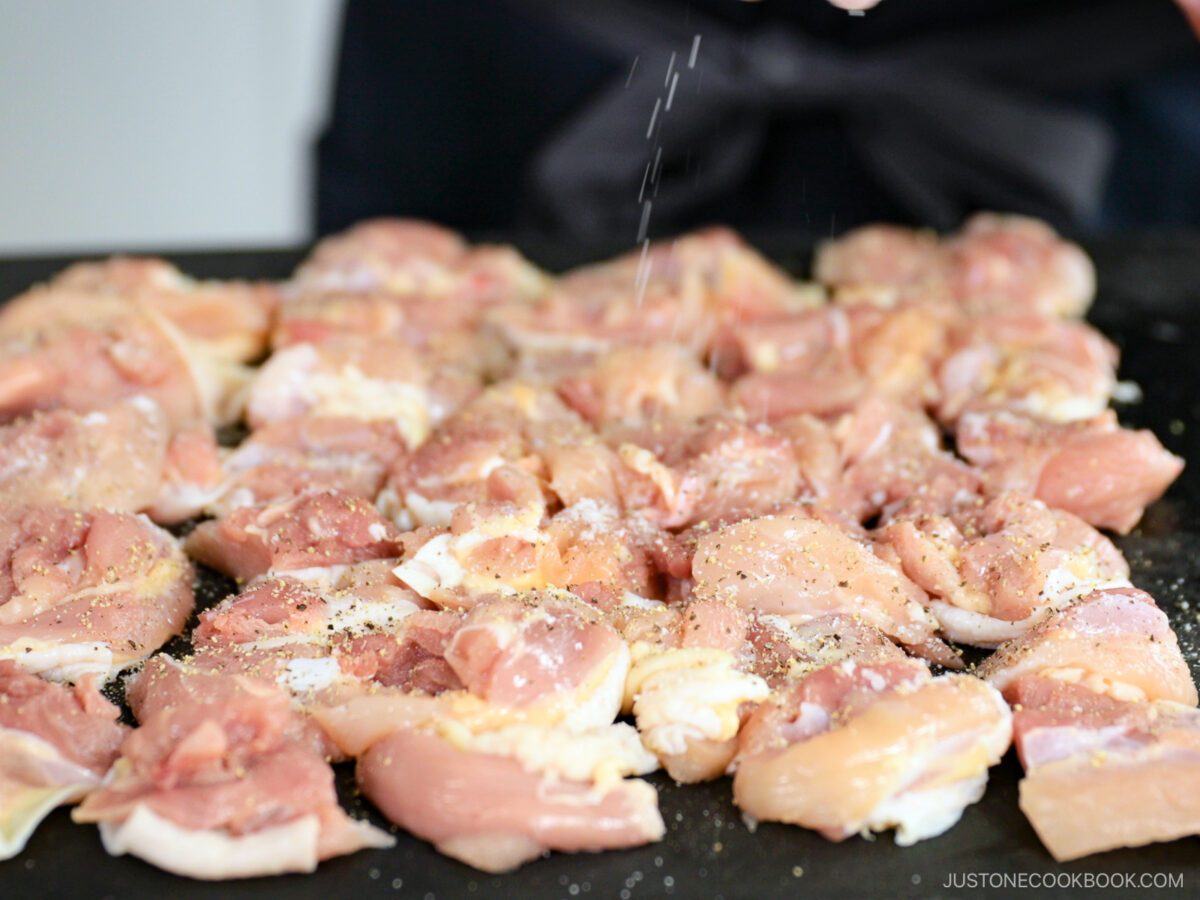
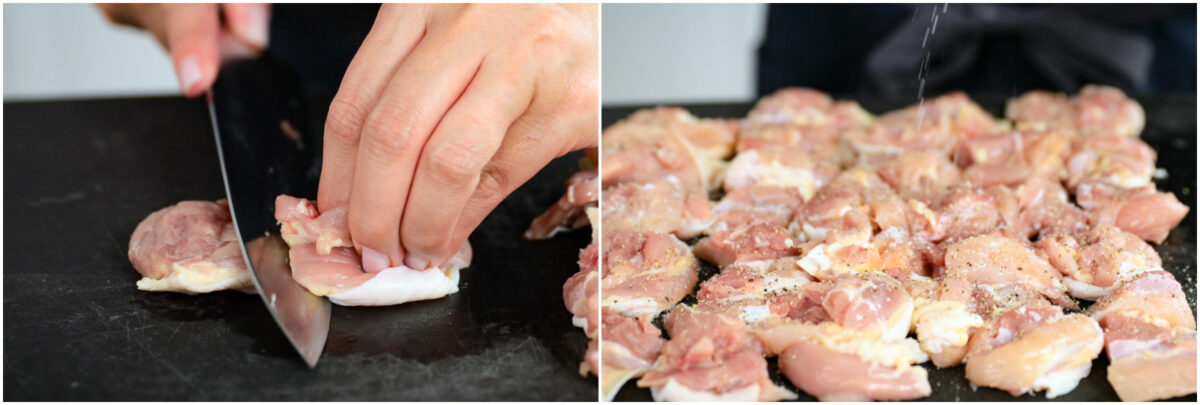
Step 1 – Prepare the chicken. Slice the chicken thighs into 2-inch pieces and season with salt and pepper. Place it in a large bowl.
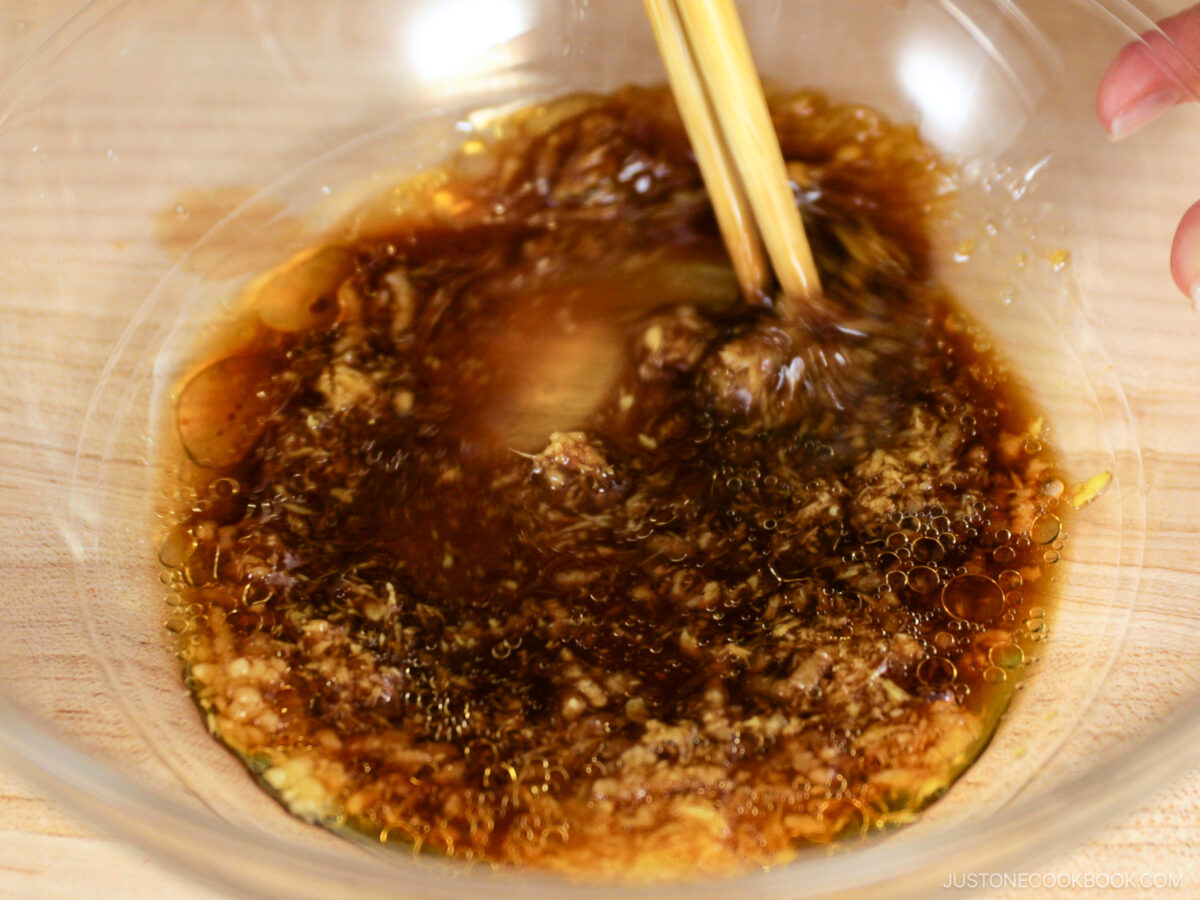
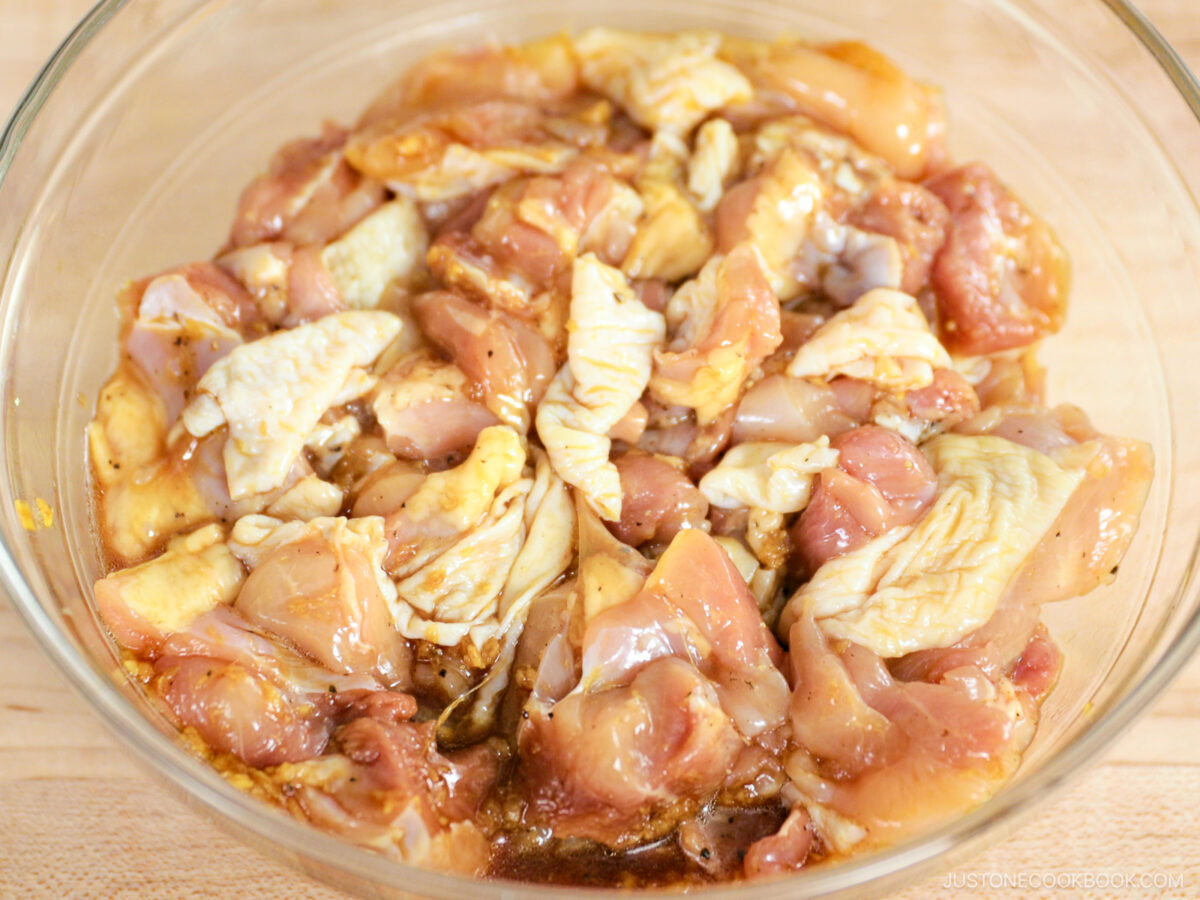
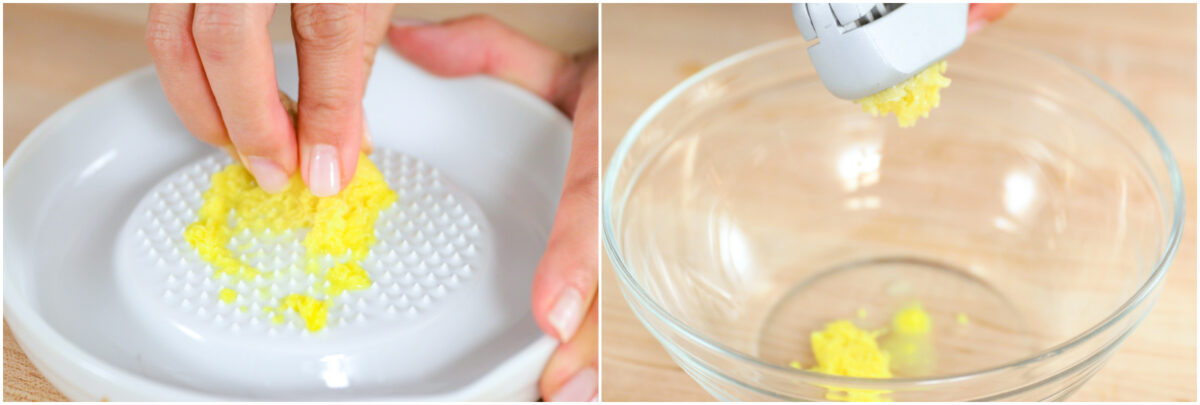
Step 2 – Marinate. Add the grated ginger, garlic, soy sauce, sake, and sesame oil to the bowl. Toss to coat, cover the bowl, and marinate in the fridge for 30 minutes.
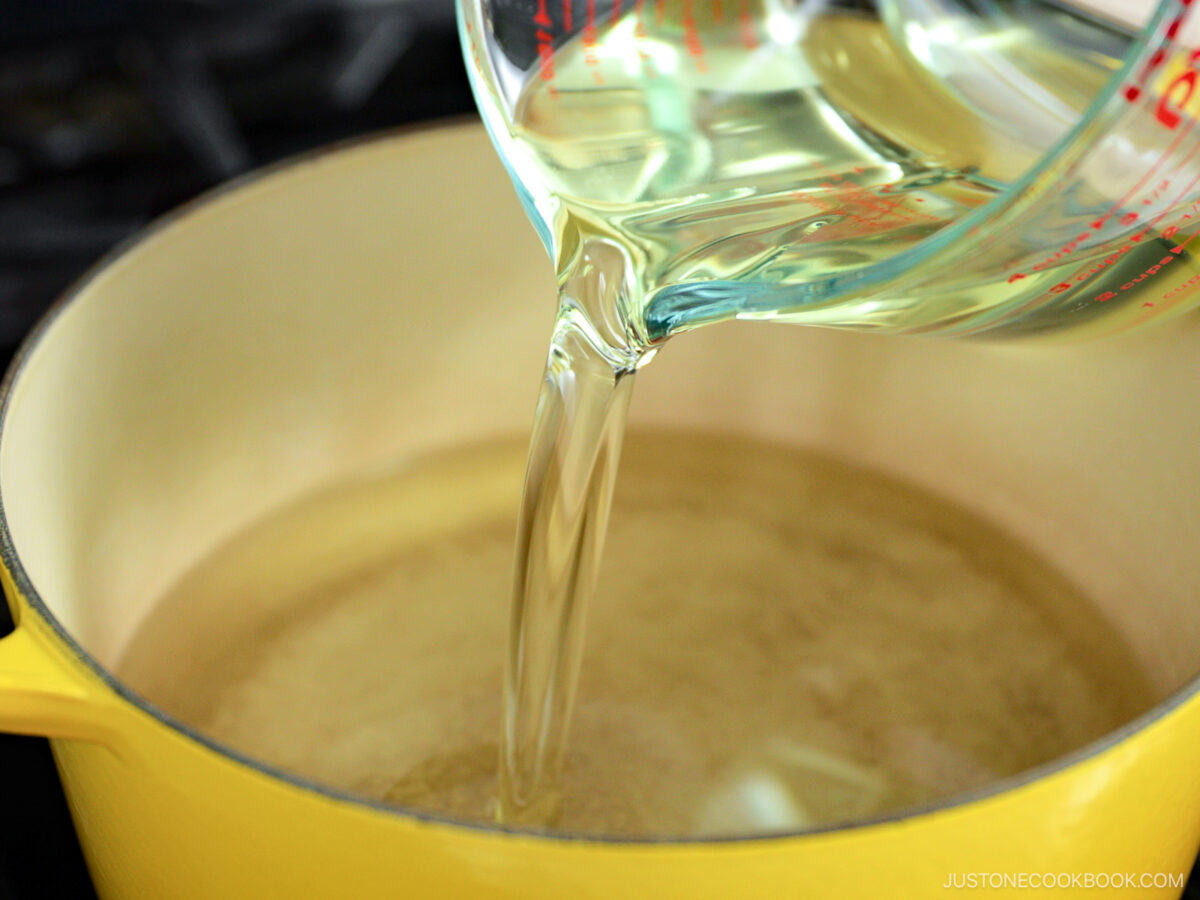
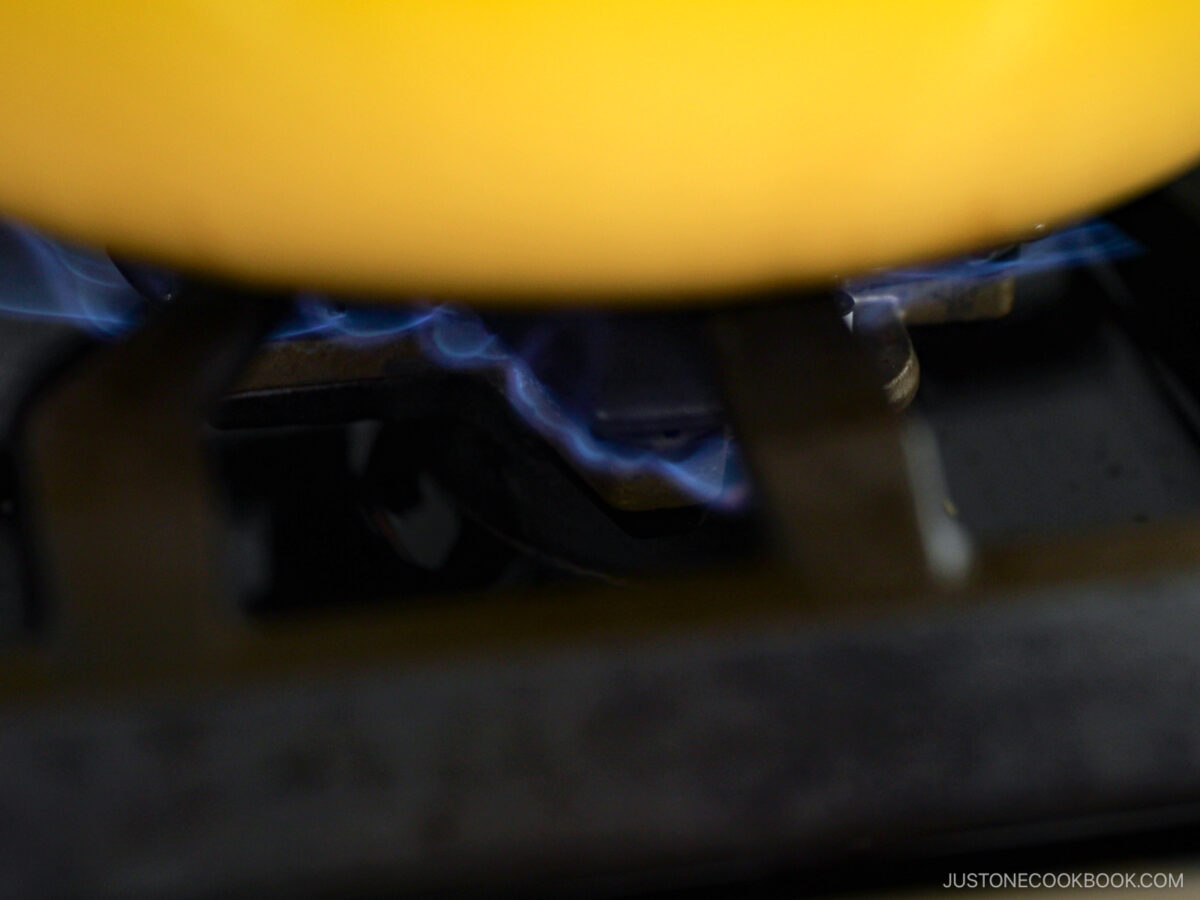
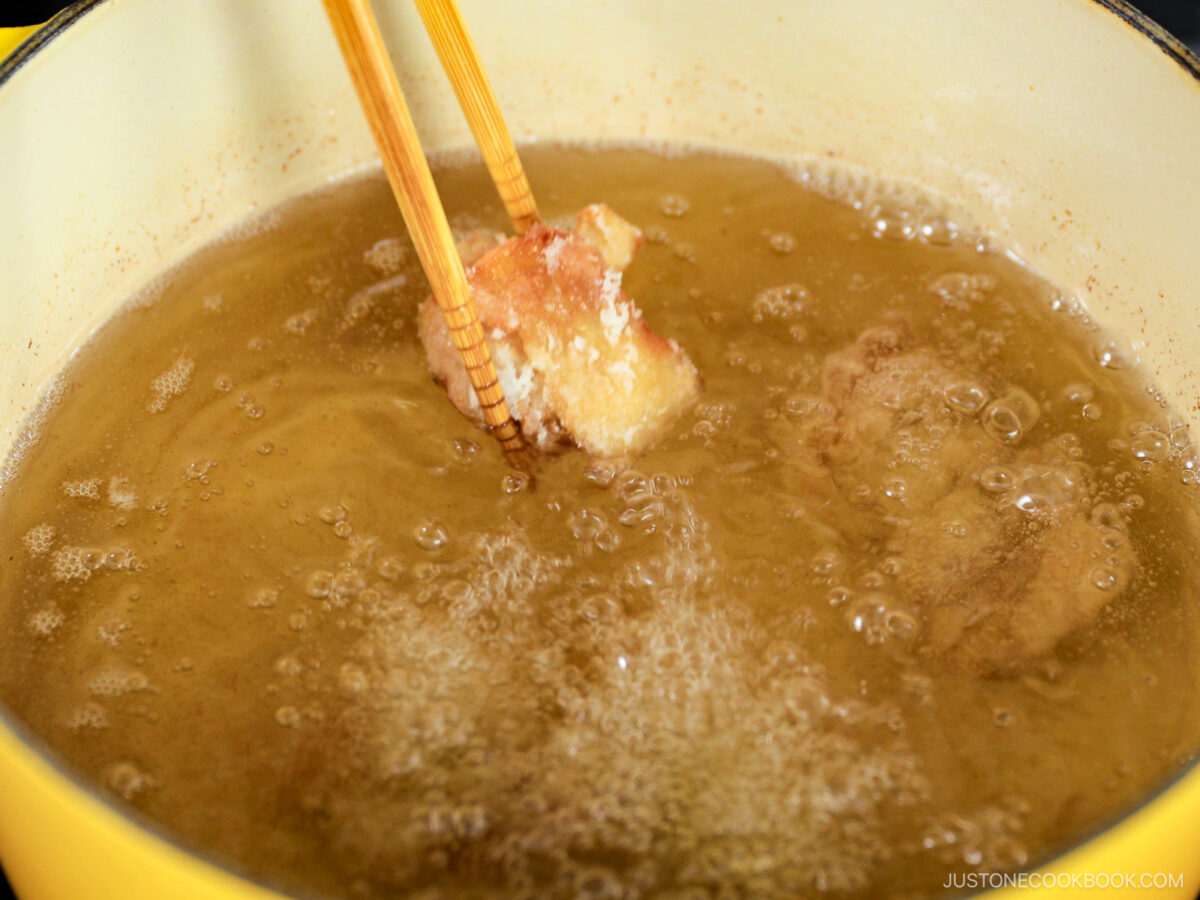
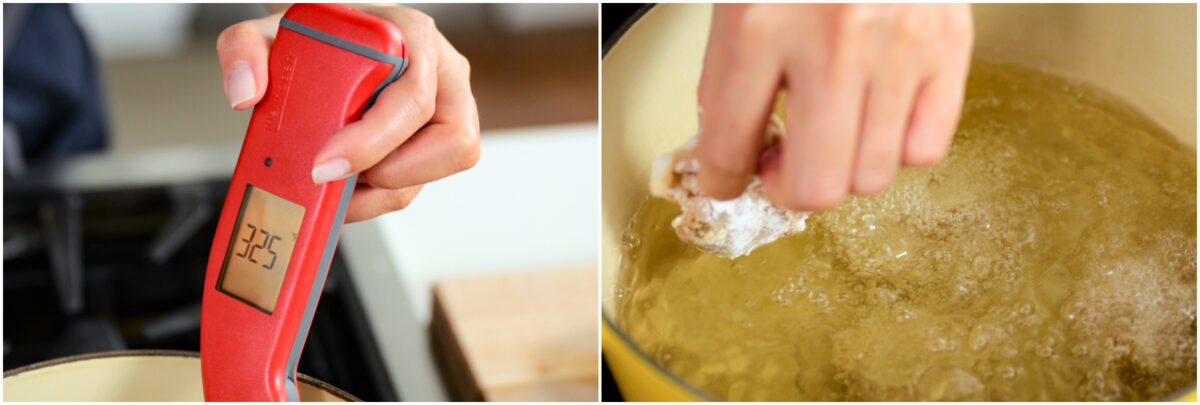
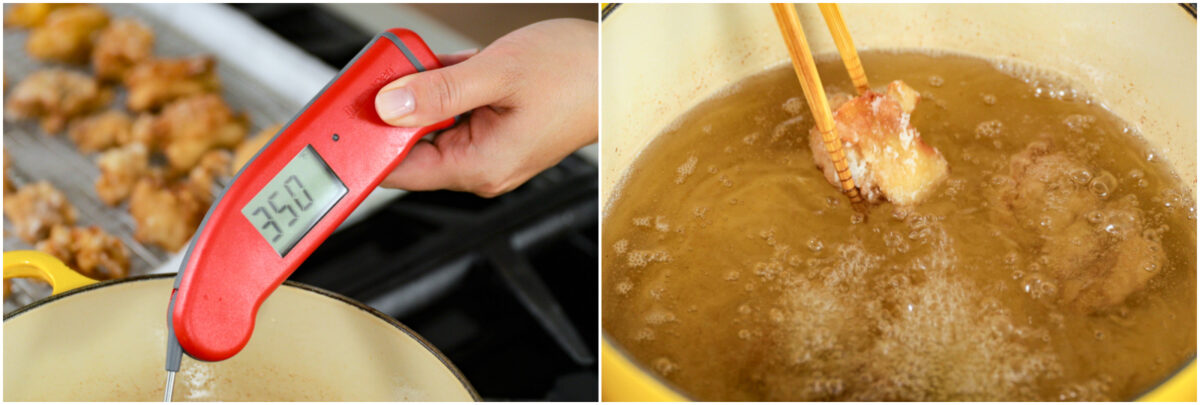
Step 3 – Heat the oil. Add oil to a deep pot over medium heat and preheat to 325ºF (160ºC).
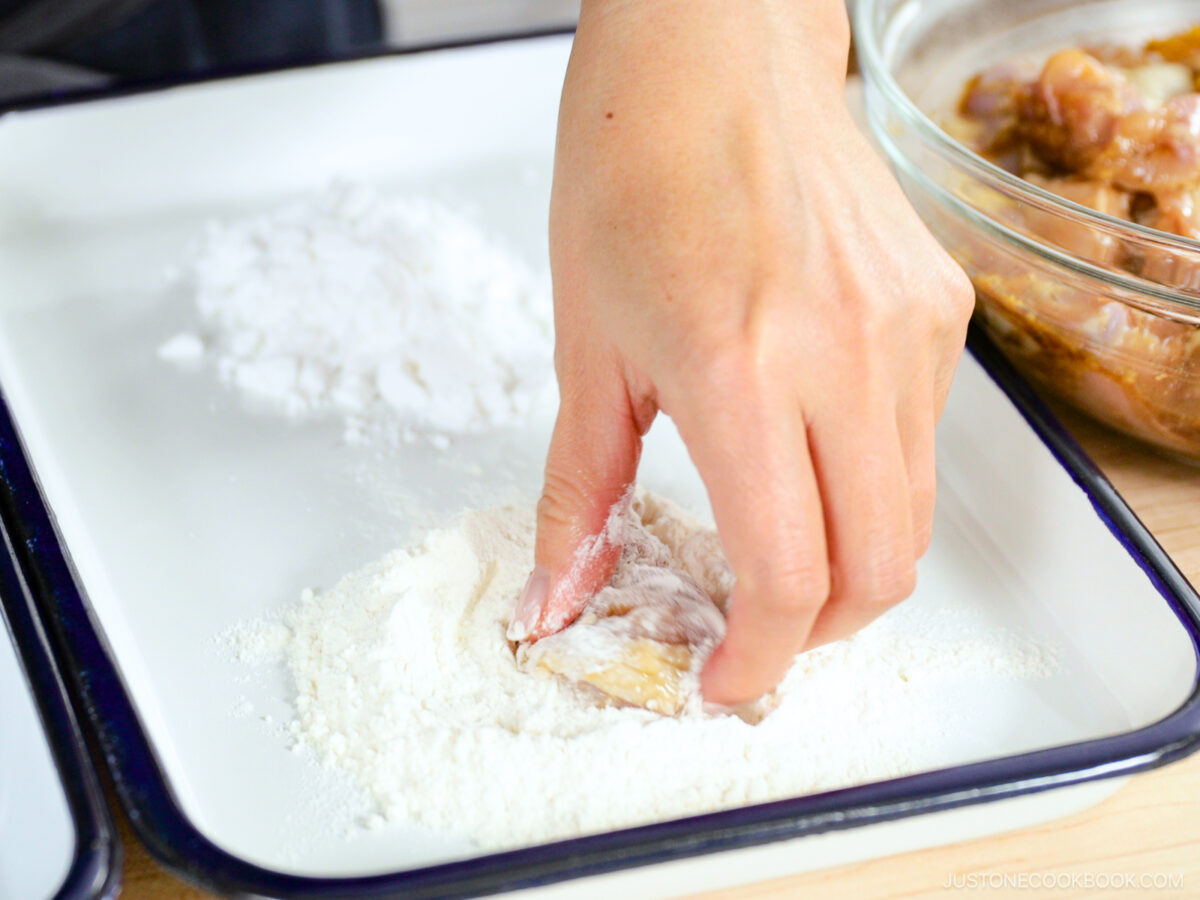
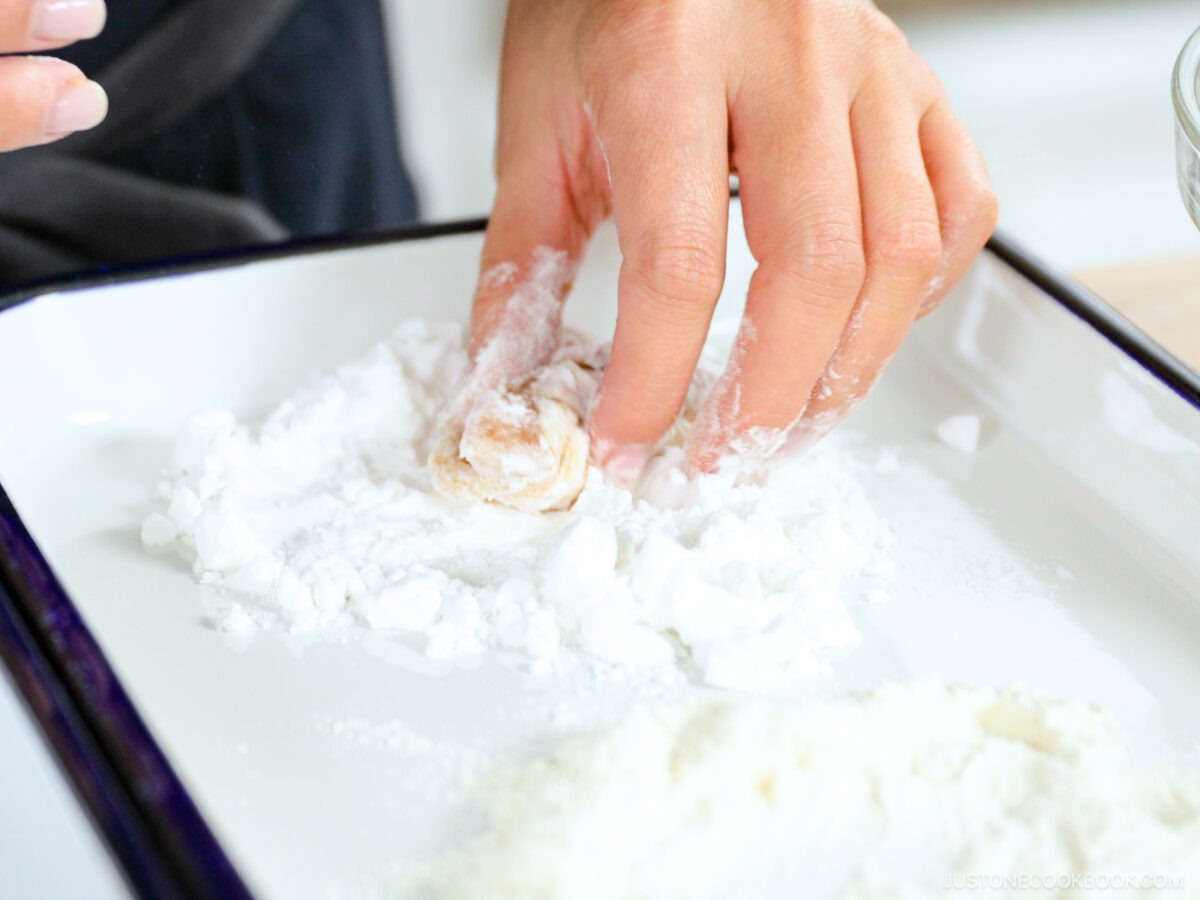
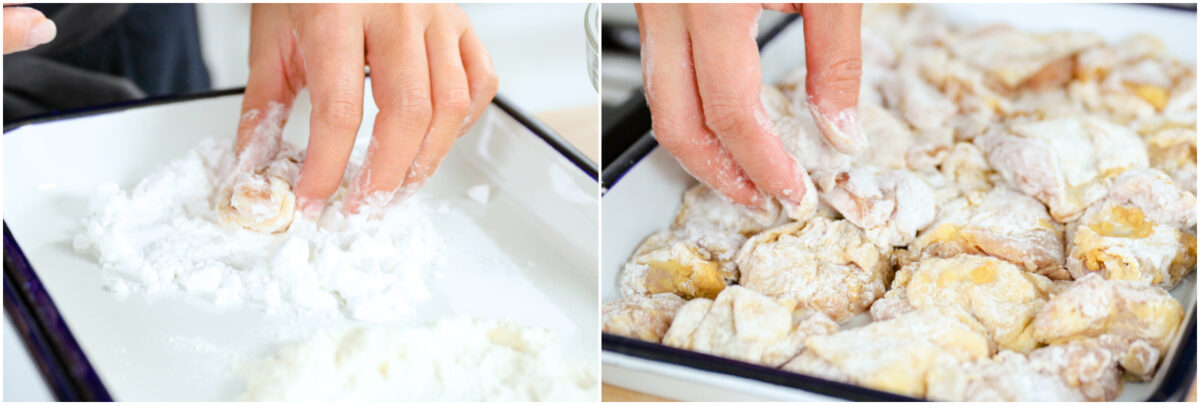
Step 4 – Dredge the chicken. Place the flour and starch in separate piles on the shallow plate. Dredge the chicken in the flour, then the starch. Repeat with the remaining pieces.
Cooking
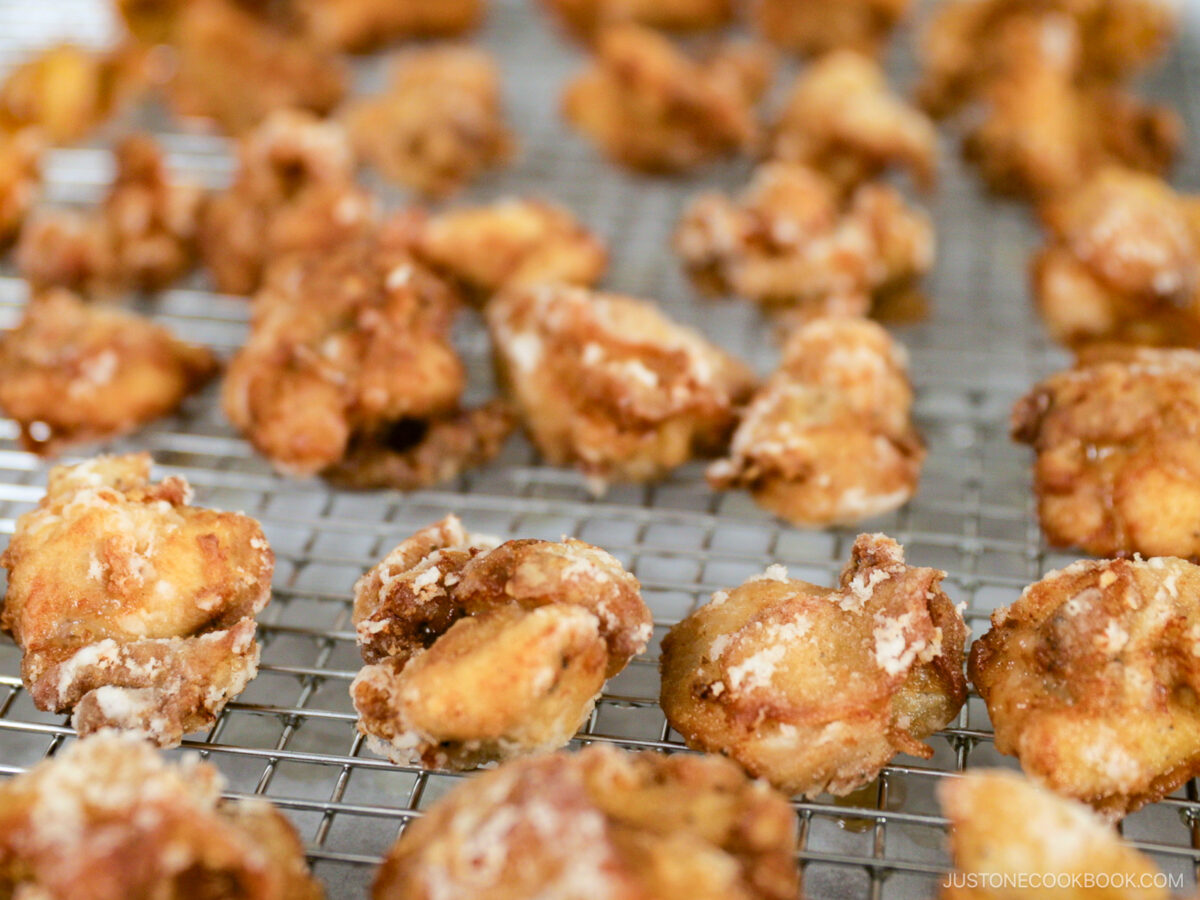
Step 5 – Fry in batches. Submerge several chicken pieces in the hot oil and fry for 90 seconds. Transfer the chicken to a wire rack to drain the excess oil. Repeat with all the chicken.

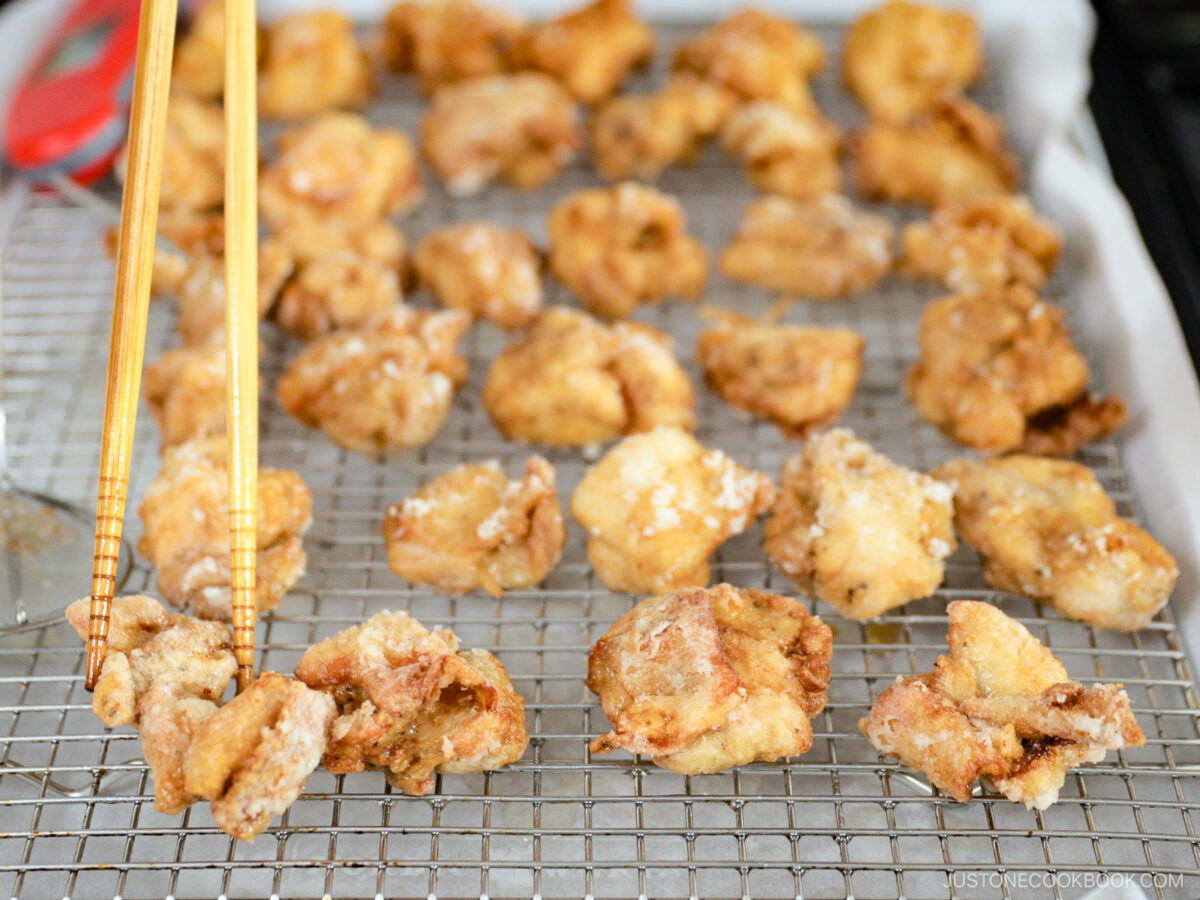
Step 6 – Fry a second time. Raise the oil temperature to 350ºF (180ºC) and fry the chicken again for 45 seconds, then return to the wire rack, and repeat with all of the pieces.
Assemble
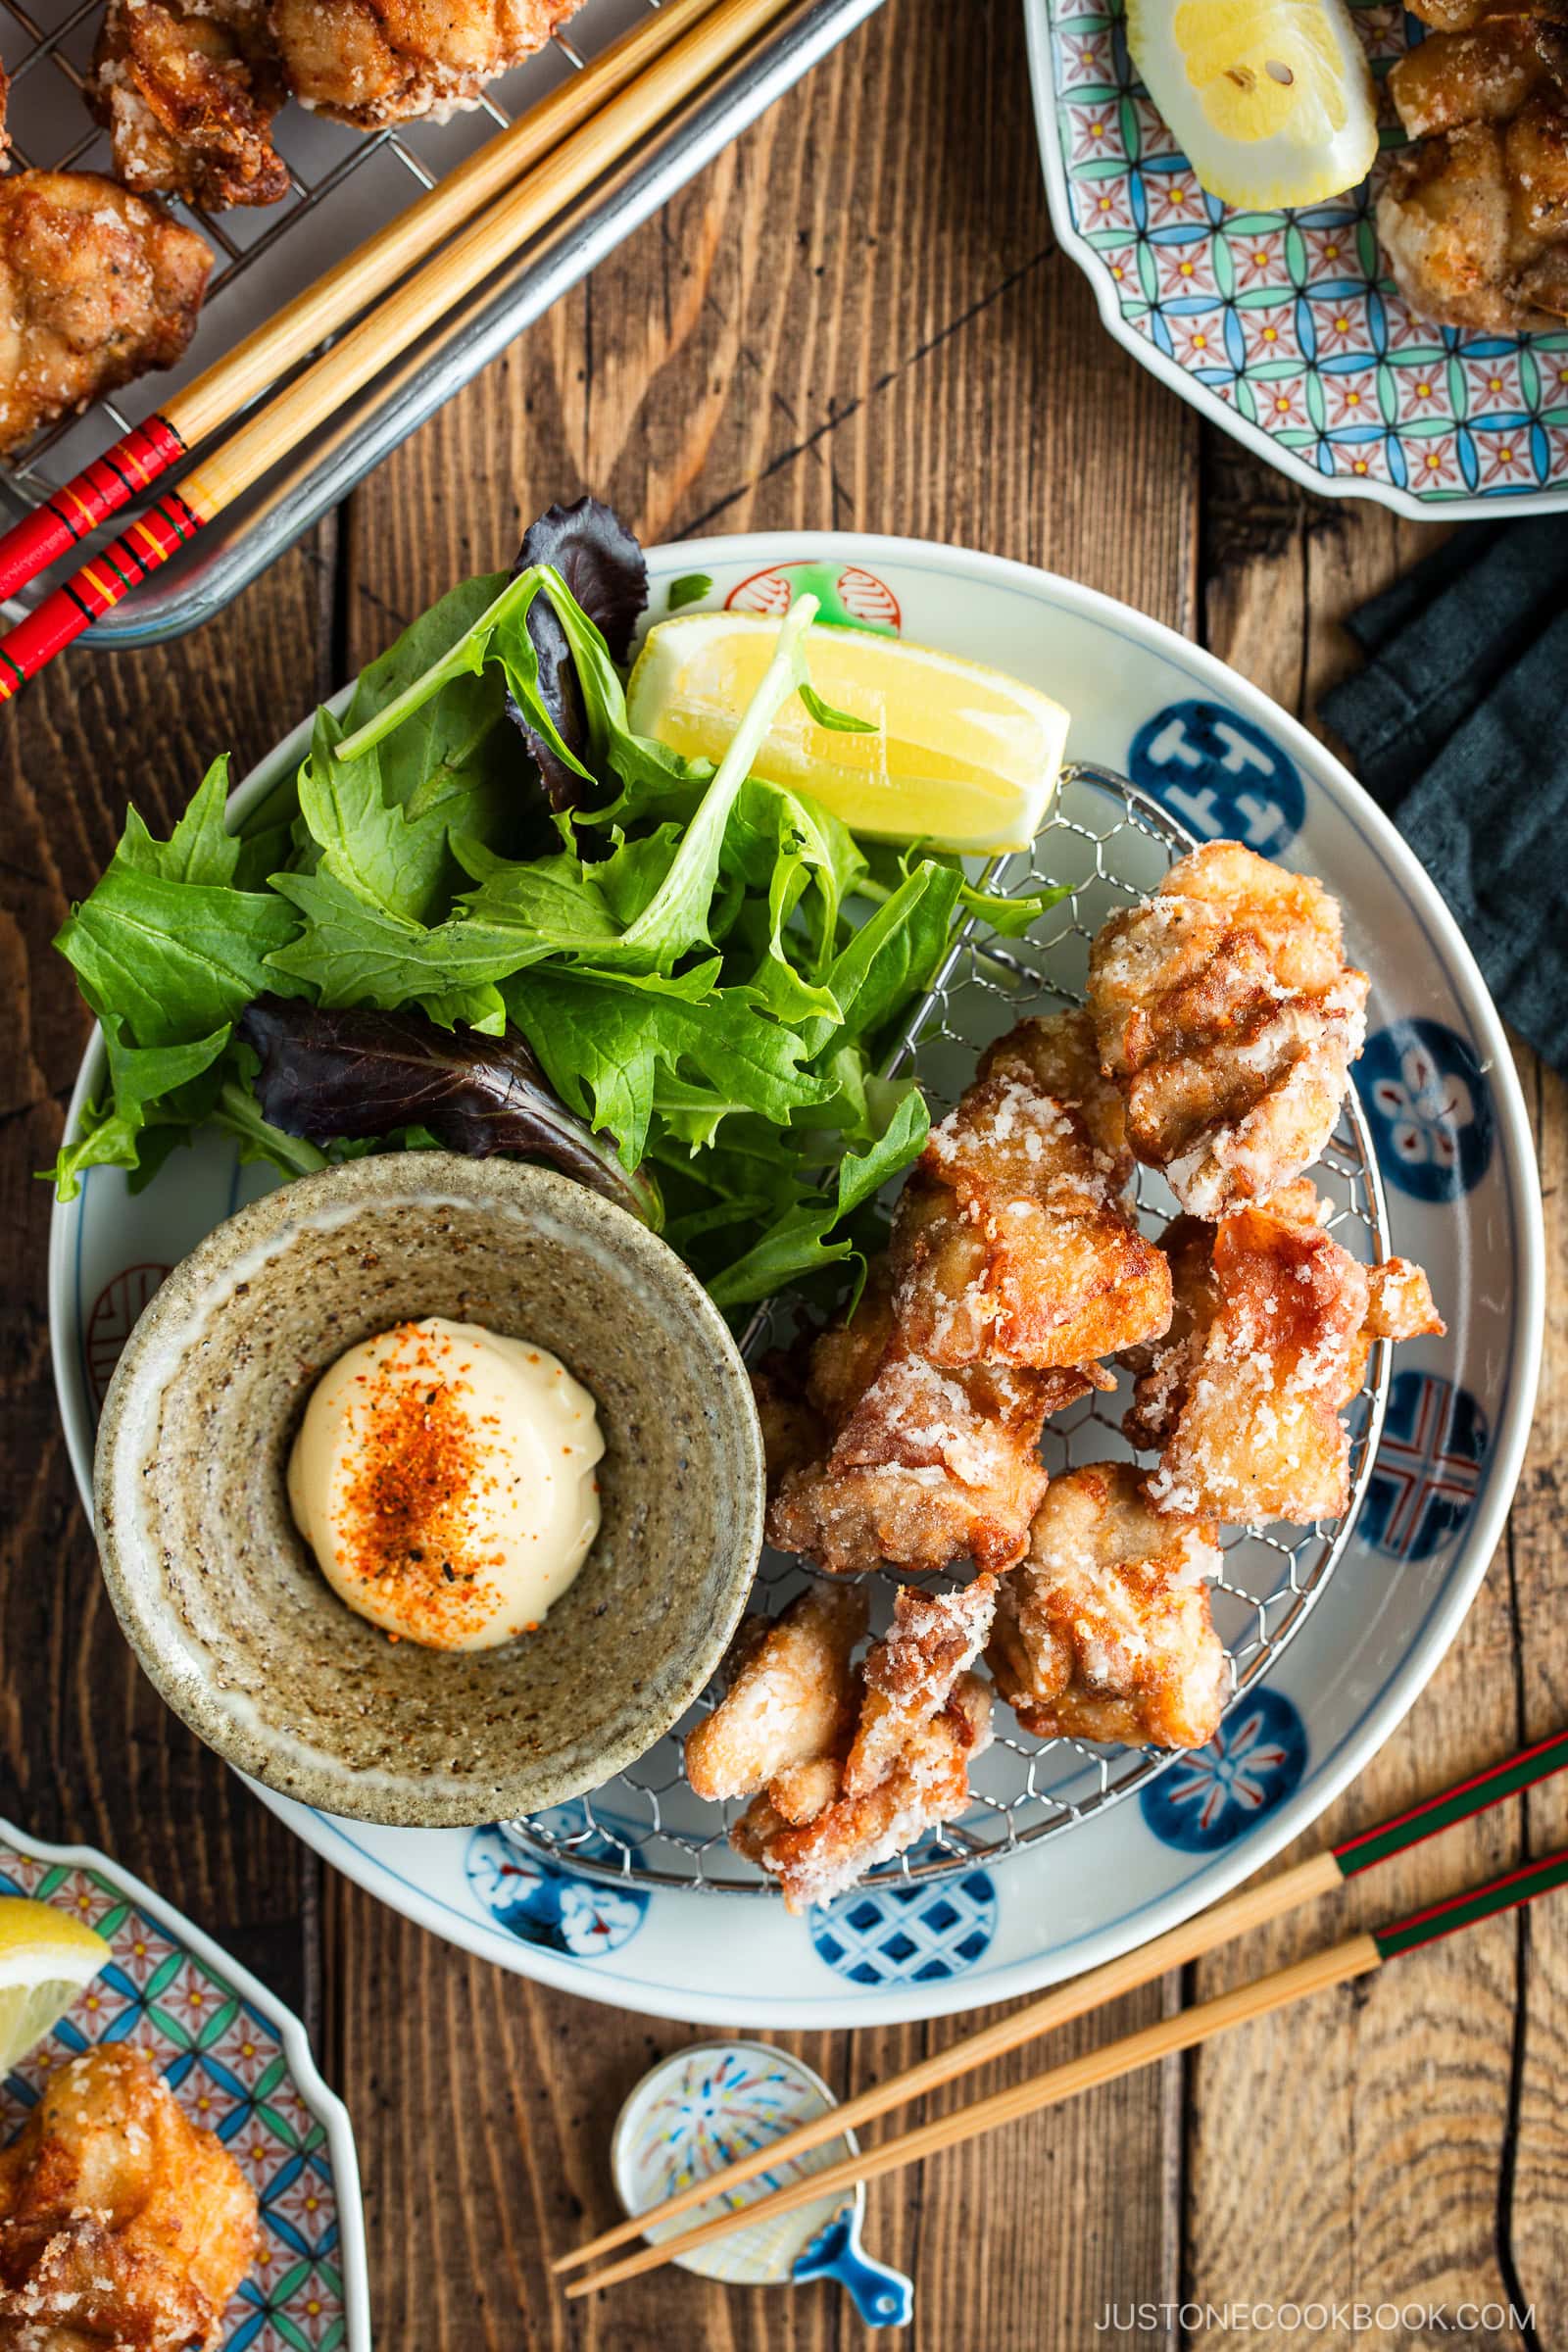
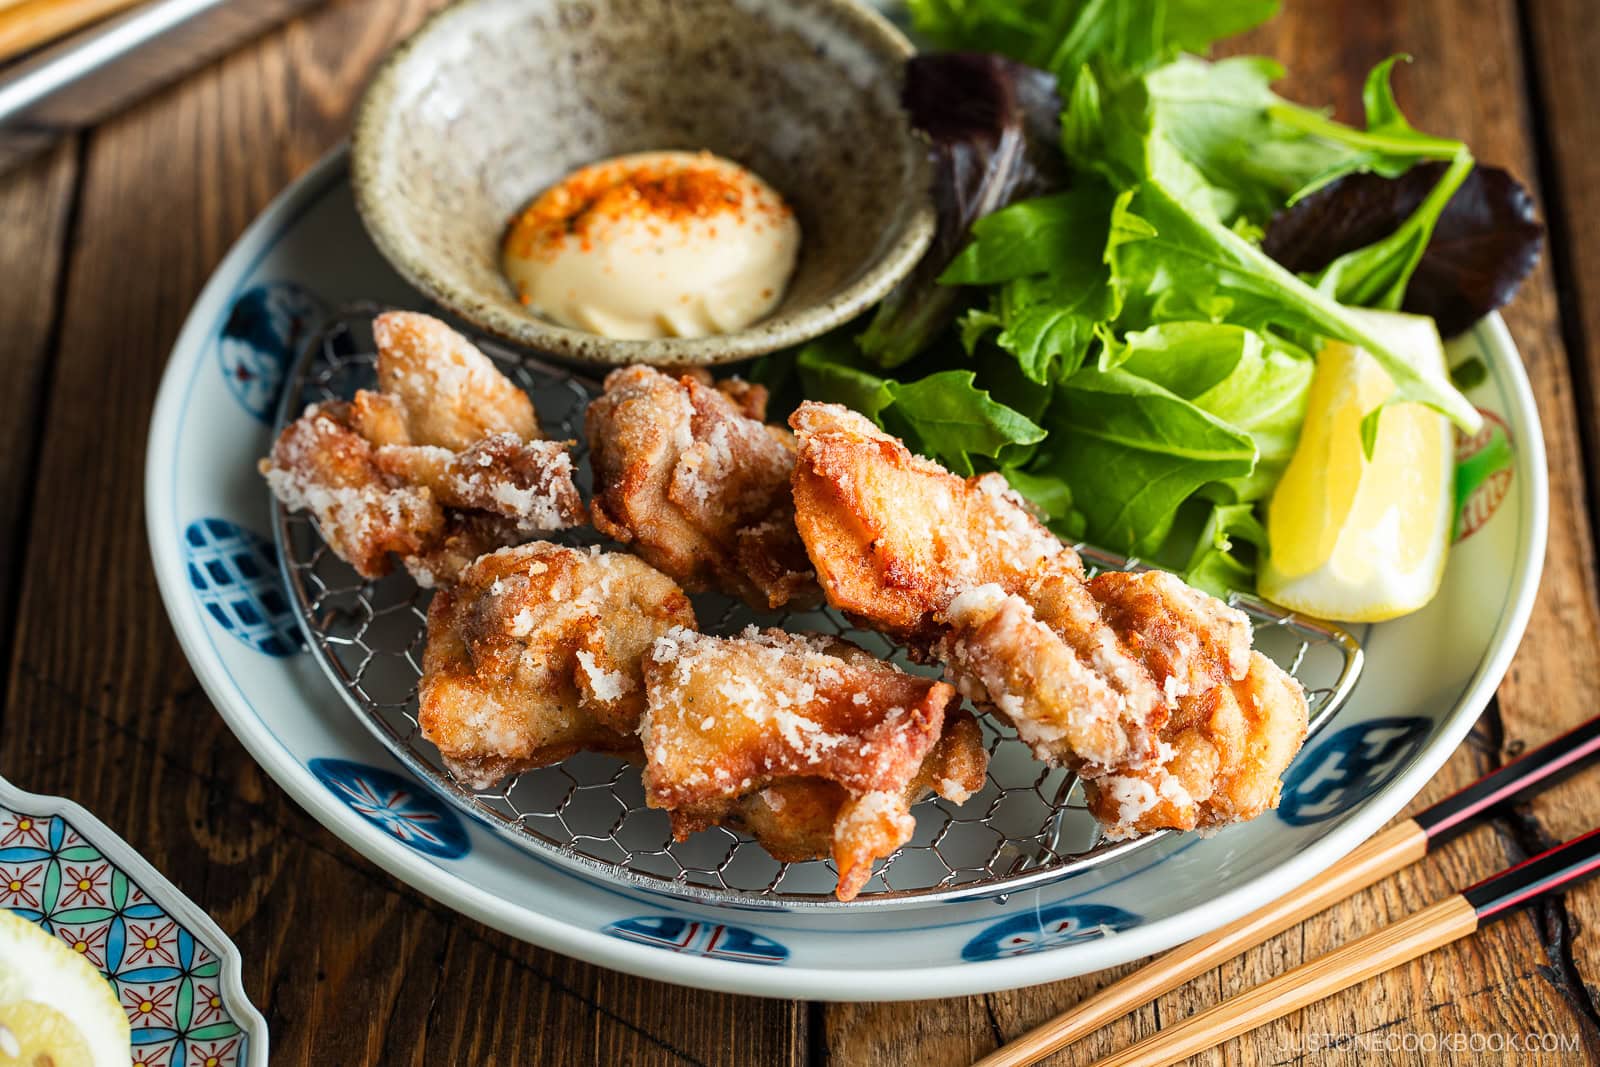
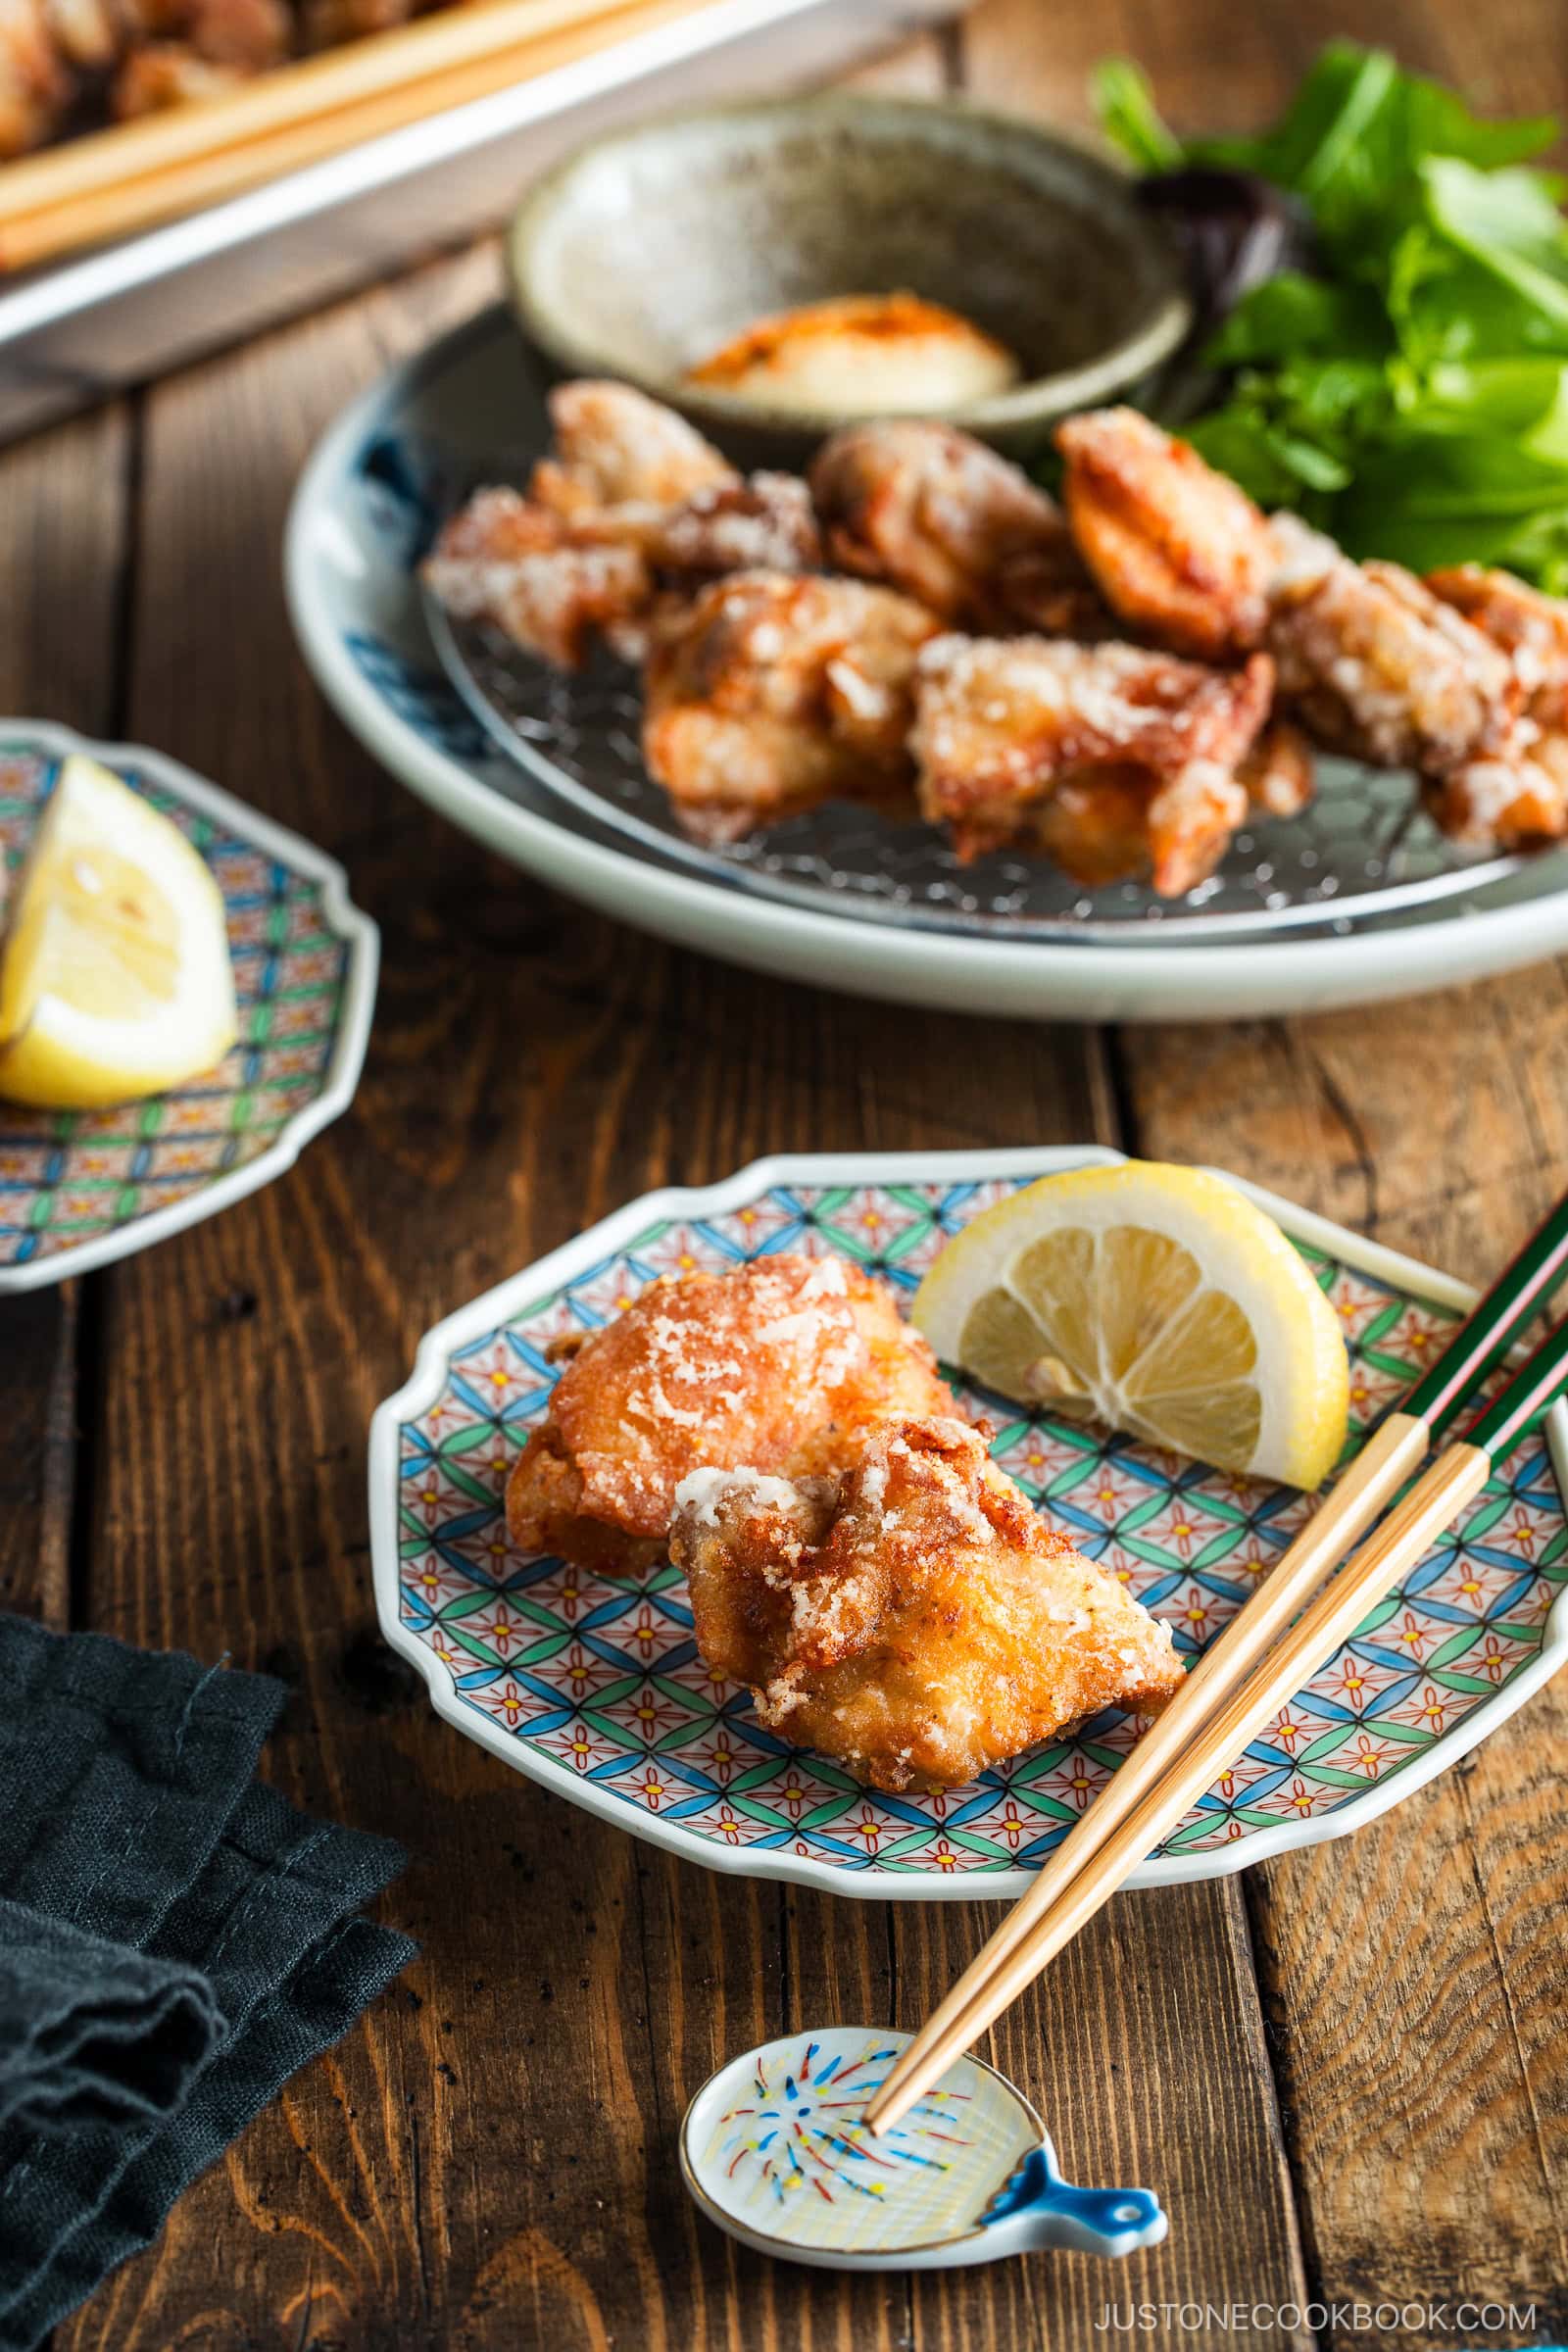
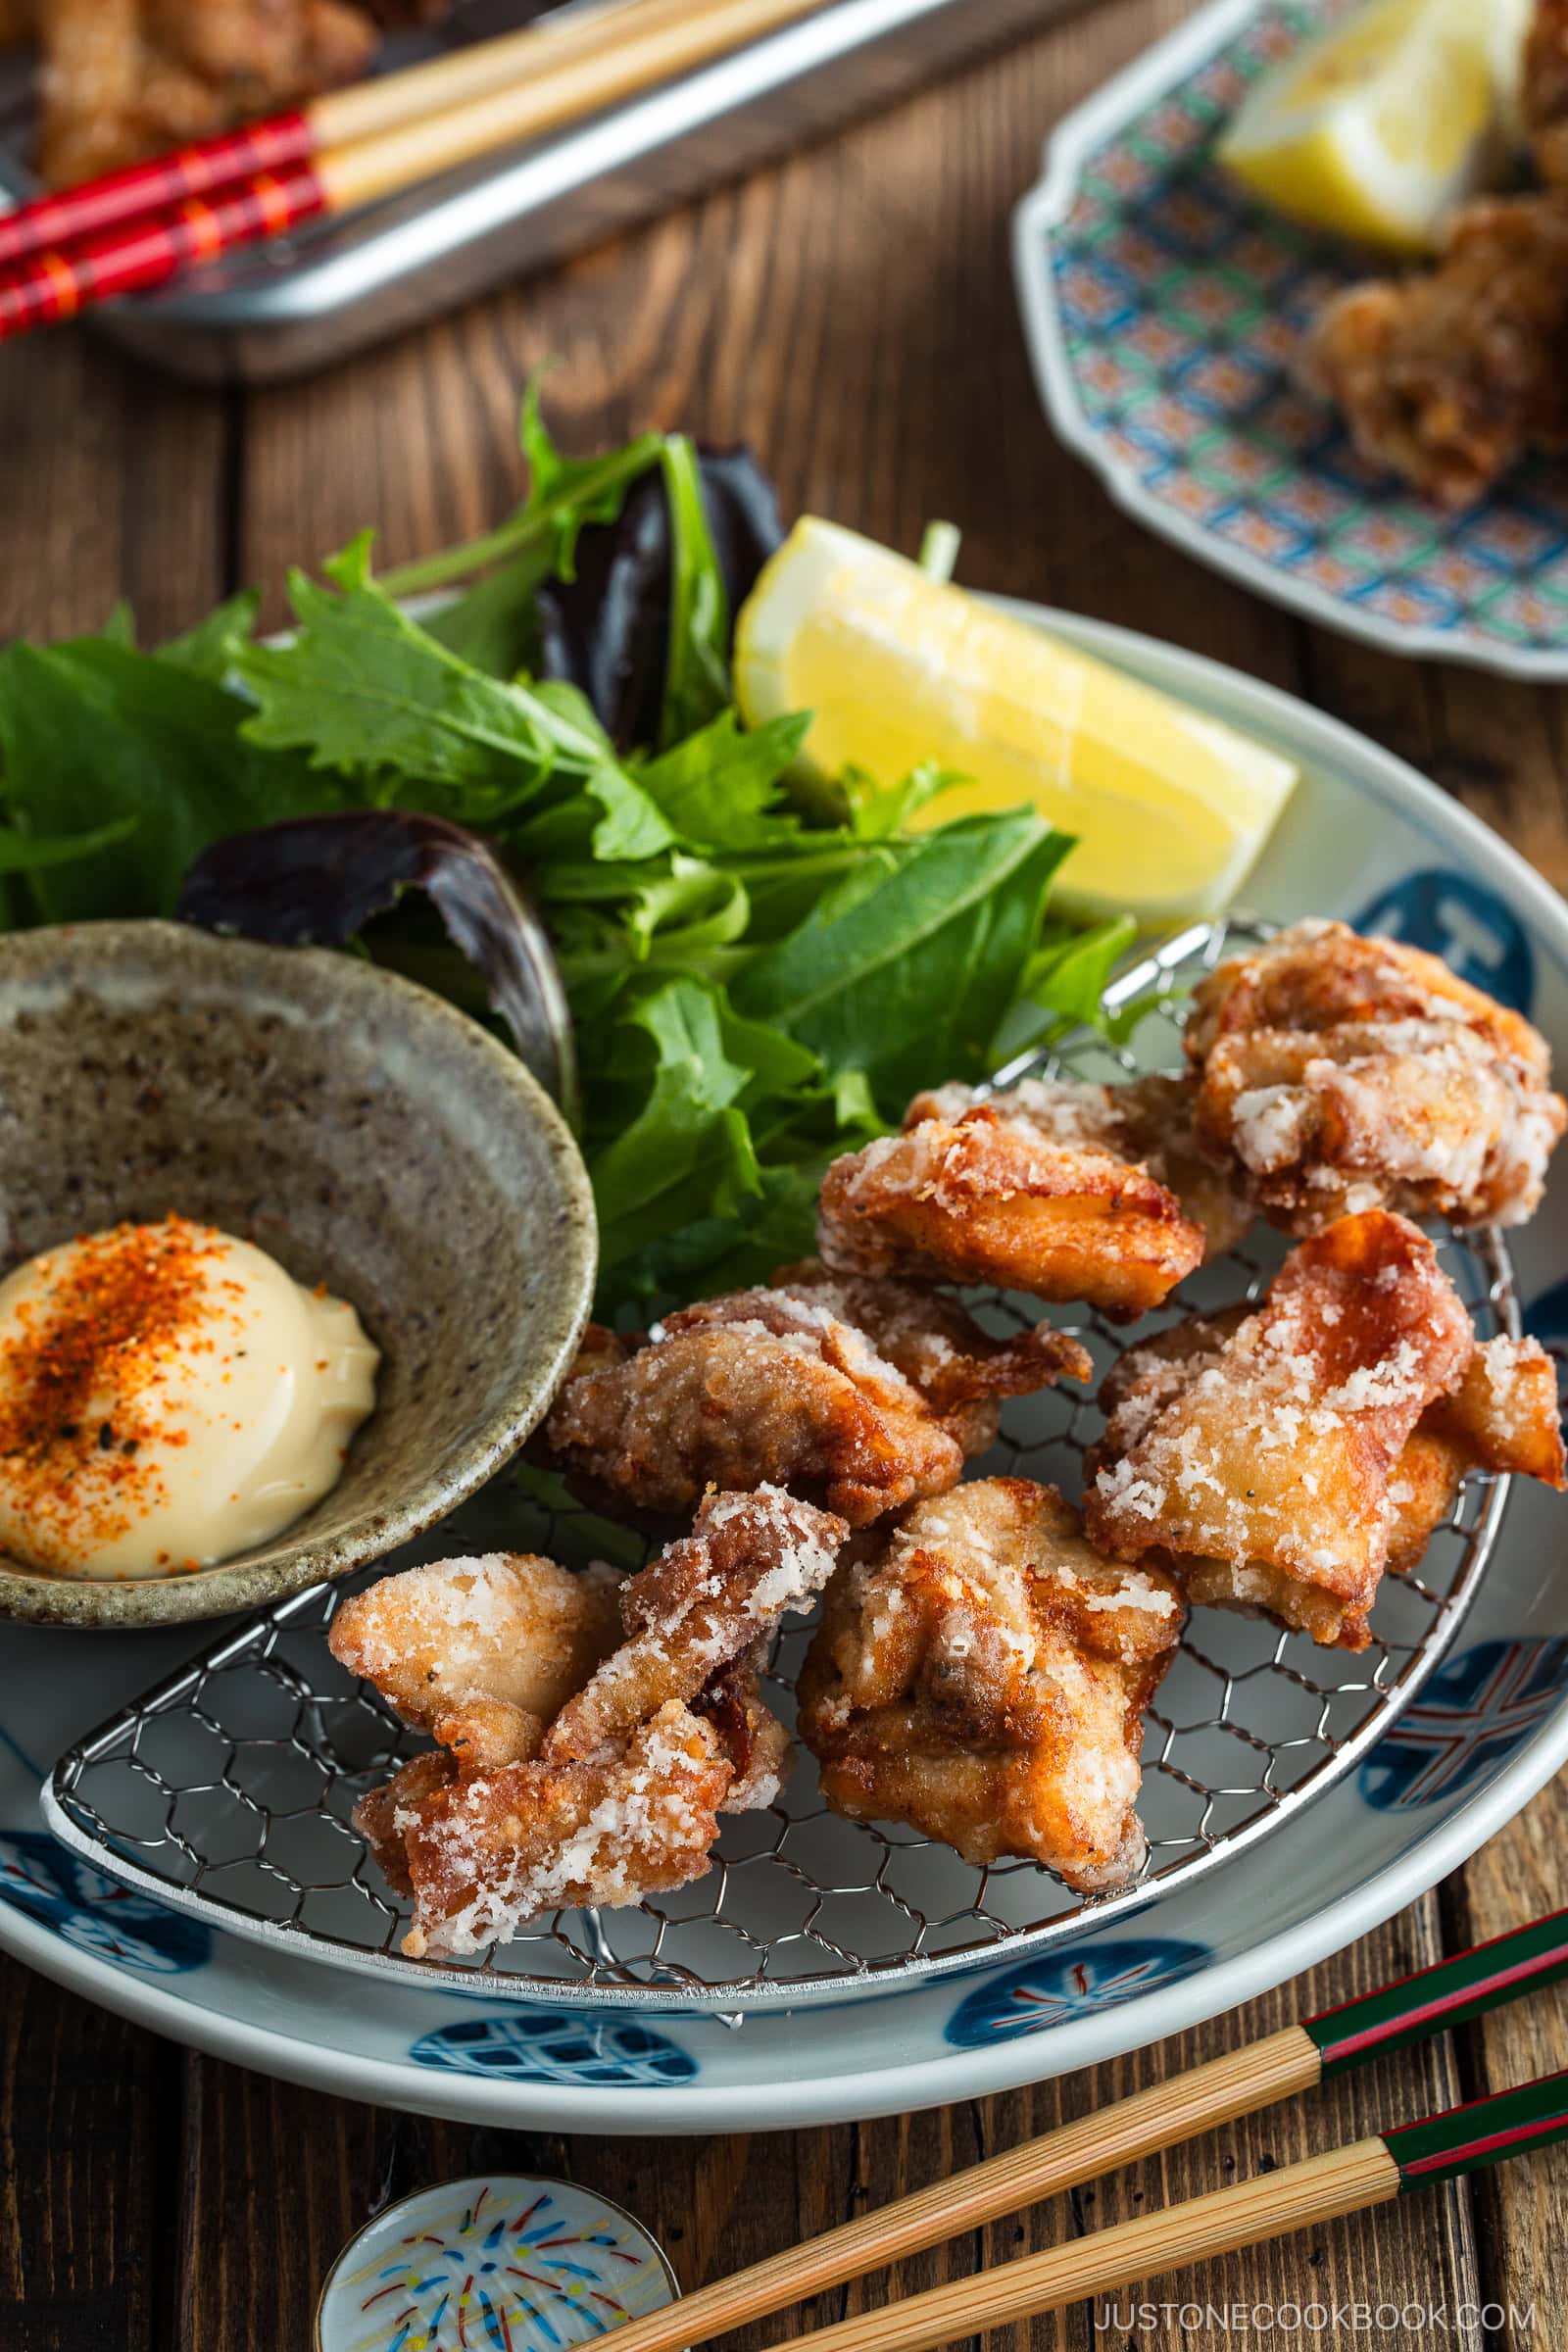
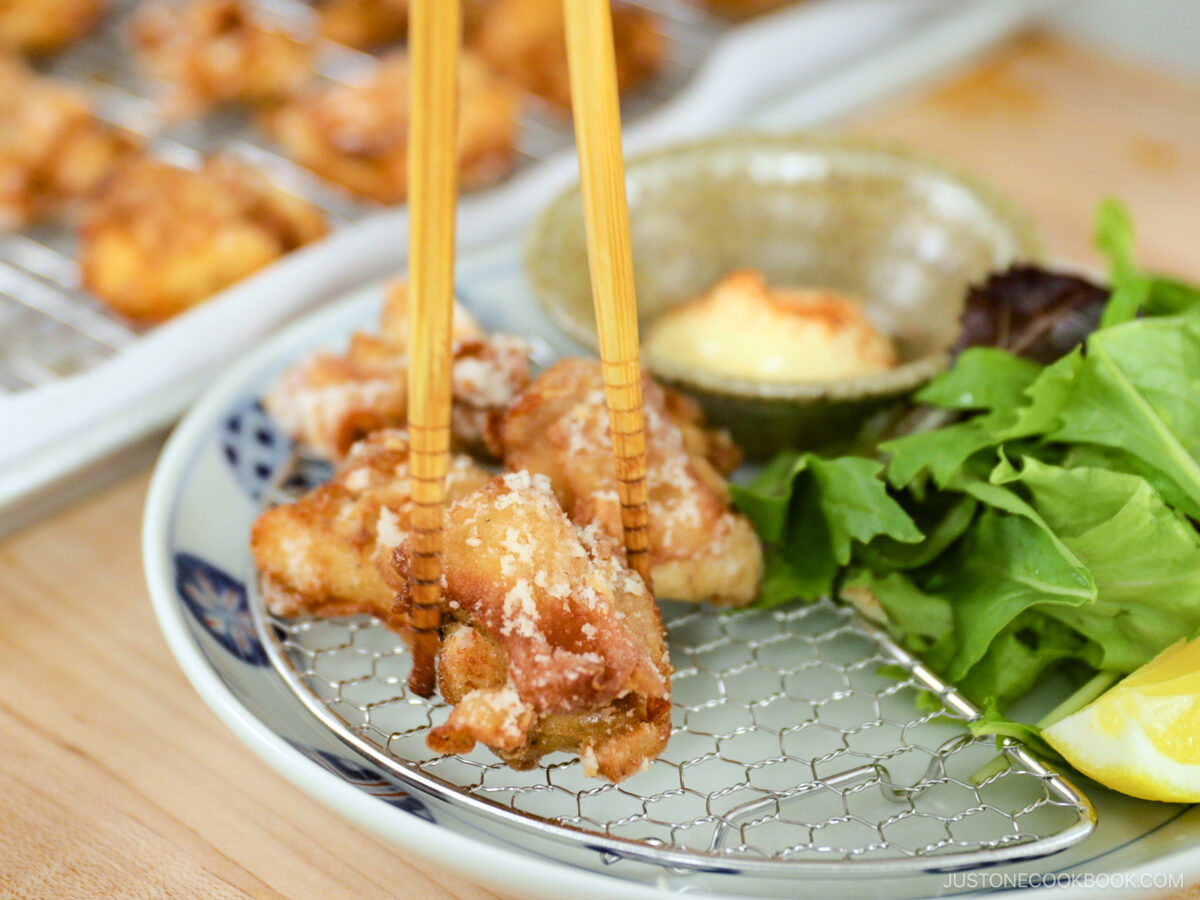
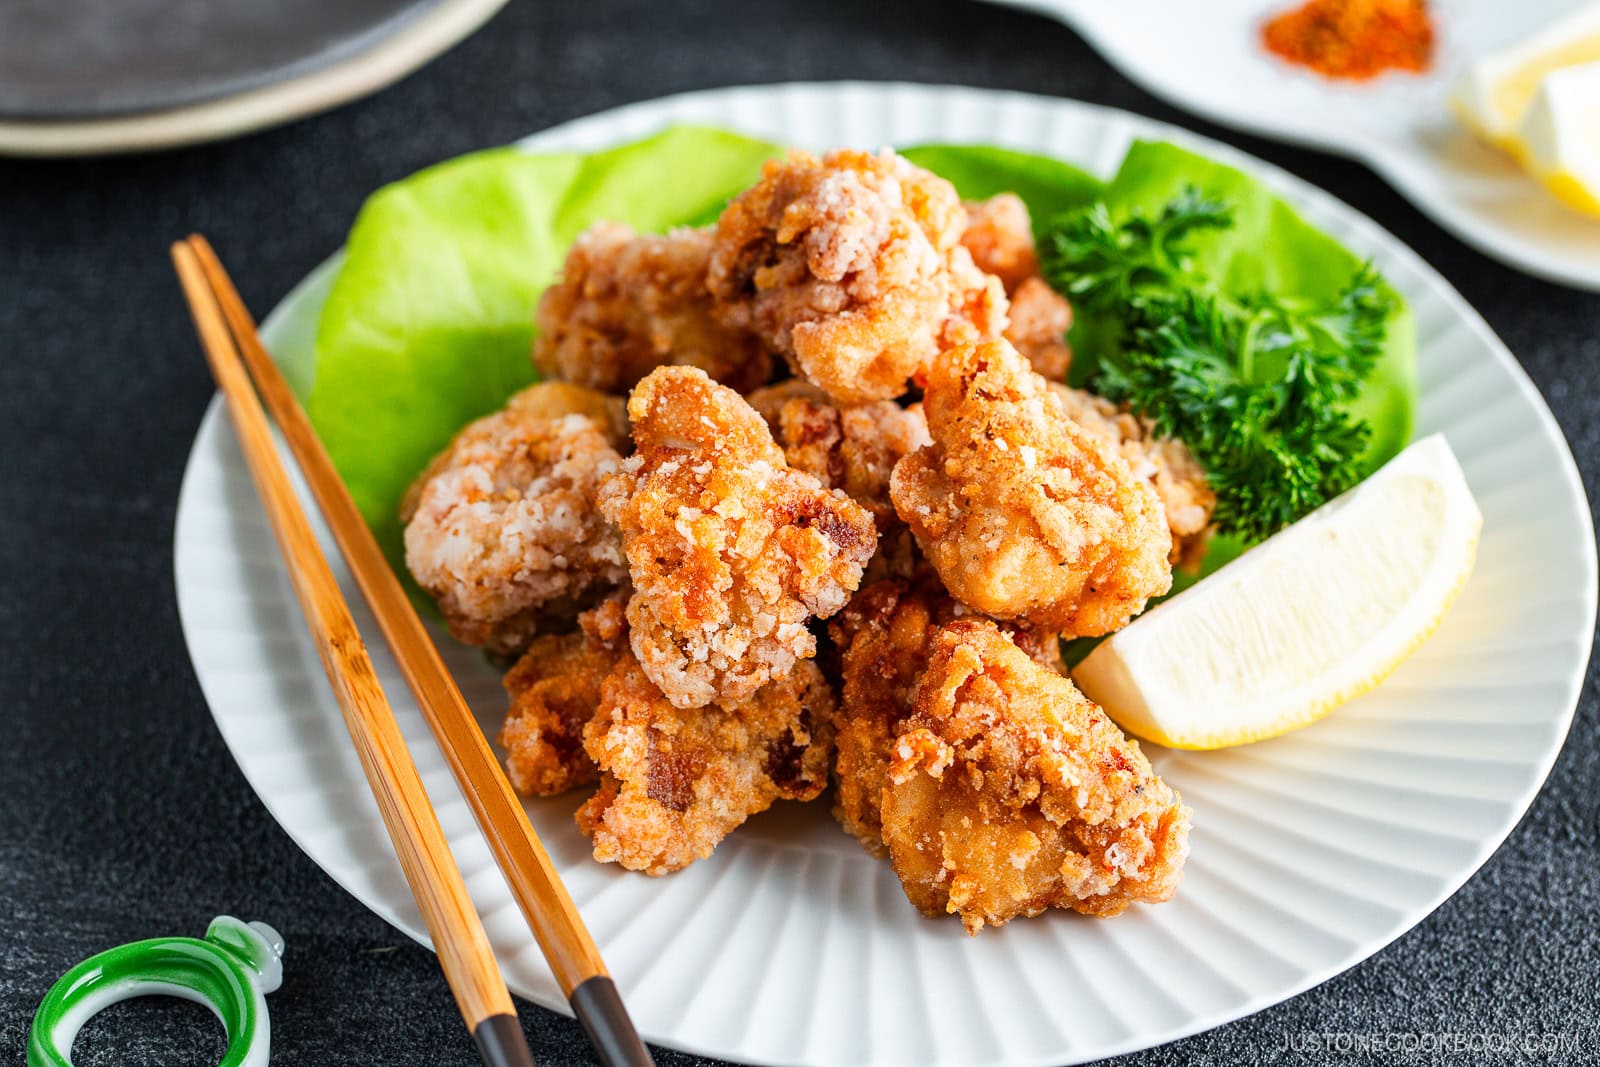
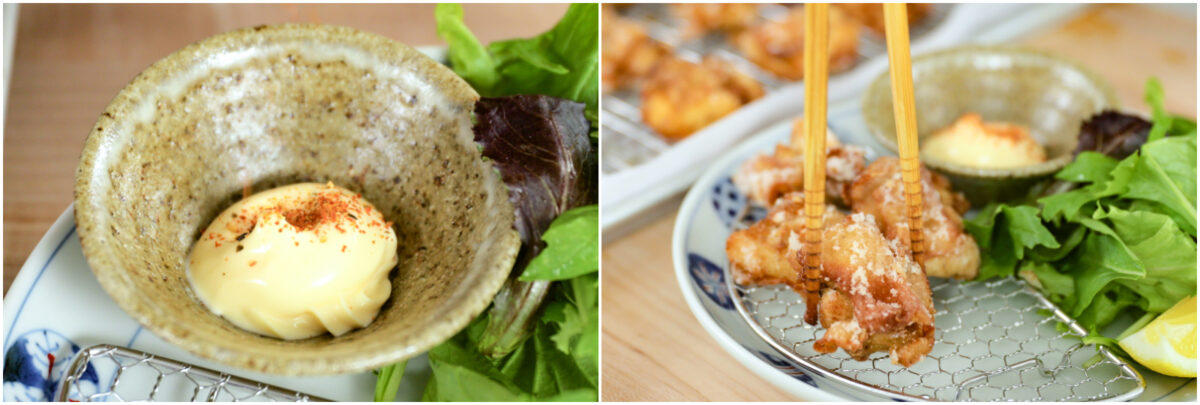
Step 7 – Serve. Serve the fried chicken warm with optional lemon wedges, Japanese Kewpie mayo, and a sprinkle of shichimi togarashi.
Nami’s Recipe Tips
- Cut the chicken into evenly sized pieces – This helps ensure that all the pieces cook at the same rate. When the chicken is uniform in size, you avoid undercooking some pieces while overcooking others.
- Don’t marinate too long – I’ve found that 30 minutes is ideal for the chicken to soak in the flavors.
- Lightly coat in flour – Before frying, I suggest lightly shaking the chicken to remove the excess flour, which could make the oil cloudy and compromise the chicken’s texture.
- Don’t crowd the pot – There should only be 3–5 pieces of chicken in the pot at one time. Any more and the oil temperature will drop, causing the chicken to absorb too much oil. For more helpful tips, see my post How to Deep-Fry Food at Home.
Variations and Customizations
Like many versions of fried chicken, my recipe has a lot of room to modify and adjust to your preferences. Here are some of my suggestions.
- Use other cuts of chicken. Although they are less flavorful and juicy, chicken breasts would work in this recipe. Remember that chicken breasts cook more quickly than thighs, so reduce the frying time by 15–20 seconds.
- Make it gluten-free. Try my Gluten-Free Karaage recipe, which is just as delicious.
What to Serve with Karaage
- With vegetable sides – Green Beans with Yuzu Vinaigrette always make for a bright and vibrant side.
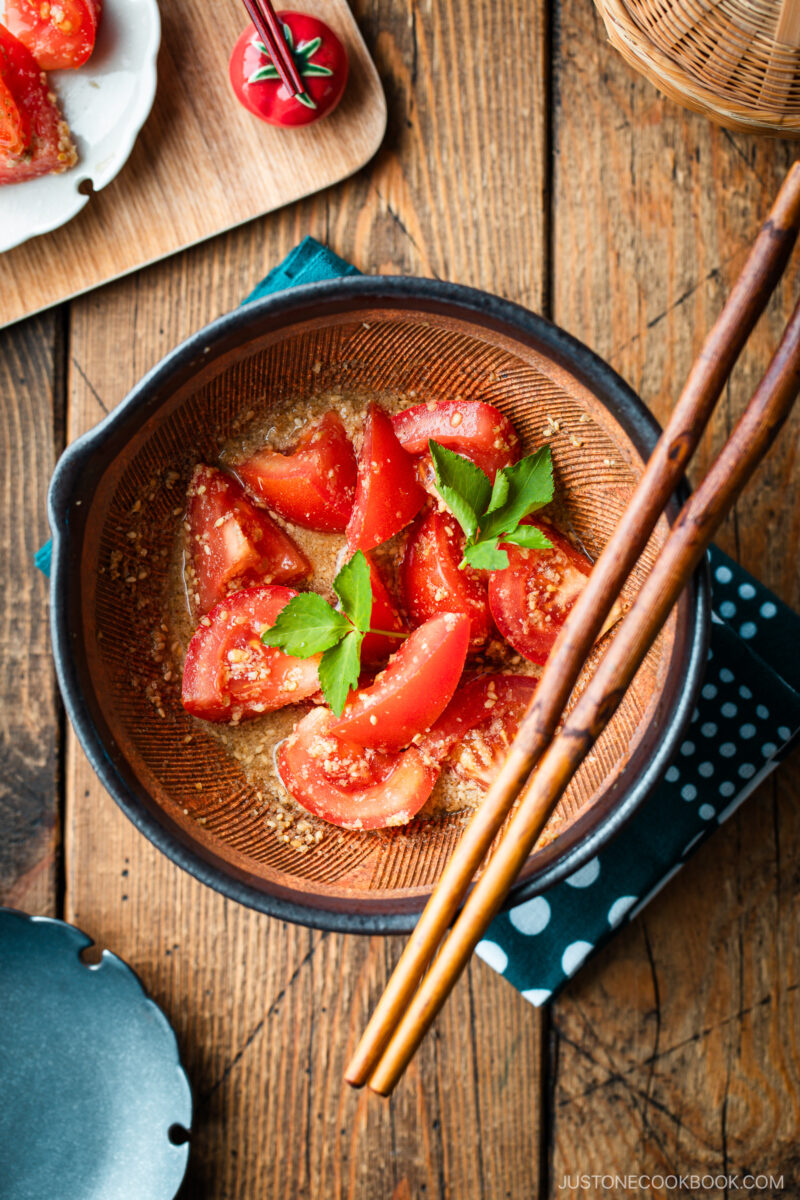
- With a salad – A refreshing Tomato Salad with Sesame Ponzu balances the rich fried texture of the chicken.
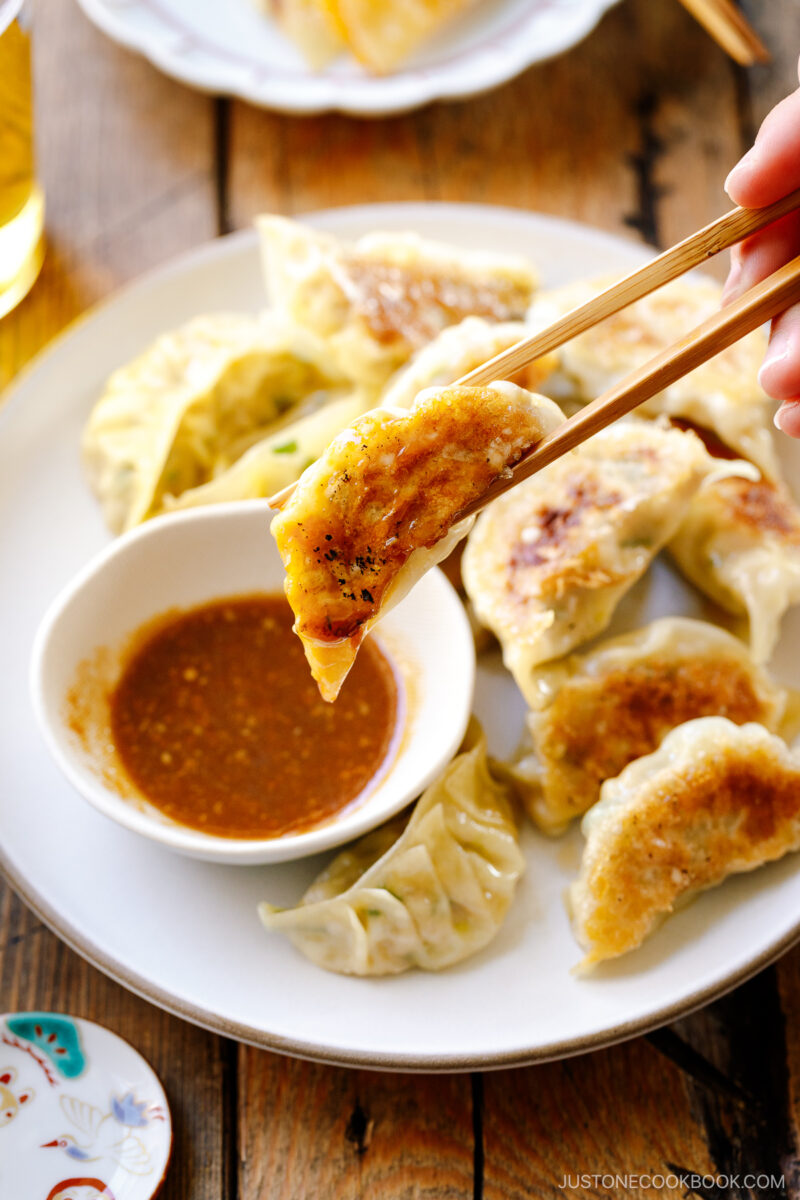
- With more appetizers – I recommend Gyoza for an additional shareable dish.

Storage and Reheating Tips
To store: Allow the chicken to cool completely, then refrigerate it in an airtight container for 3–4 days or freeze it for up to 3–4 months.
To reheat: Reheat leftovers in the oven at 350°F (180ºC) for 7–8 minutes or until warm and crispy throughout.
Frequently Asked Questions
Katsu refers to deep-fried cutlets and commonly uses panko-breaded chicken breast, while karaage uses bite-size chicken thighs that are coated in starch. We serve katsu with a sweet-savory brown sauce called tonkatsu sauce. For karaage, we usually serve it with Japanese mayonnaise and a squeeze of lemon juice.
While both karaage and tatsuta-age are beloved Japanese fried chicken dishes, they differ slightly in preparation and presentation. Karaage is typically marinated in a mixture of soy sauce, sake, garlic, and ginger, then coated in either flour, potato starch, or a mix of both before frying. This gives it a golden, rustic appearance with bold, savory flavors. In contrast, tatsuta-age uses a simpler marinade—usually just soy sauce and mirin—which results in a slightly sweeter taste. It’s coated only in potato starch, giving it a lighter, crispier texture and a pale, almost powdery finish once fried.
Karaage (Japanese Fried Chicken)
Video
Ingredients
- 1½ lb boneless, skin-on chicken thighs (4–6 pieces; read the blog post for details)
- ½ tsp Diamond Crystal kosher salt
- ⅛ tsp freshly ground black pepper
For the Marinade
- ½ tsp ginger (grated, with juice)
- 1 clove garlic
- ½–1 Tbsp soy sauce
- ½ Tbsp sake (or substitute dry sherry, Chinese rice wine, or skip it)
- ½ tsp toasted sesame oil
For Deep-Frying
- 3–4 cups neutral oil
- 2 Tbsp potato starch or cornstarch (plus more, if needed)
- 2 Tbsp all-purpose flour (plain flour) (plus more, if needed)
For Serving (optional)
Instructions
- Before You Start…Please note that this recipe requires 30 minutes of marinating time. Gather all the ingredients.
To Marinate the Chicken
- Prepare 1½ lb boneless, skin-on chicken thighs by cutting each into 2-inch (5-cm) pieces. Season with ½ tsp Diamond Crystal kosher salt and ⅛ tsp freshly ground black pepper.
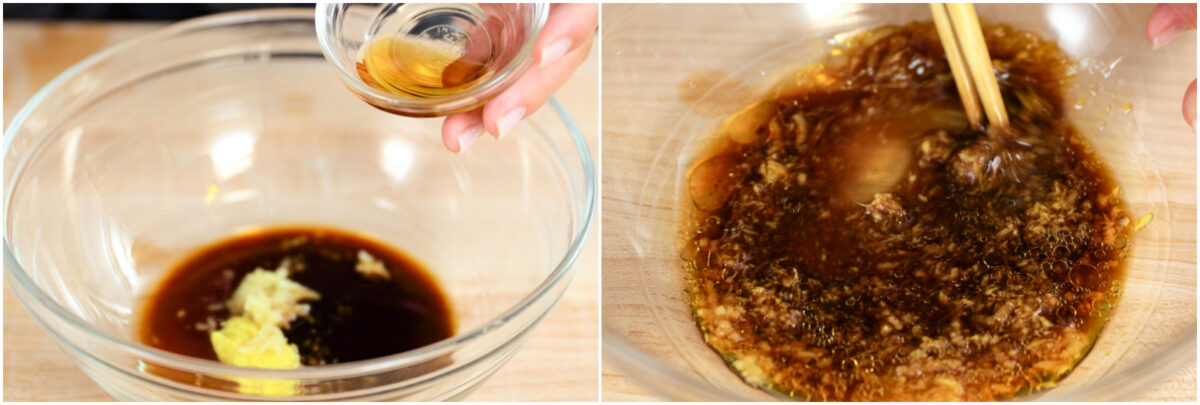
- Now, grate the ginger (I use a ceramic grater) and measure ½ tsp ginger (grated, with juice). Add it to a large bowl. Mince or press 1 clove garlic (I use a garlic press) and add it to the bowl.
- Add ½–1 Tbsp soy sauce, ½ Tbsp sake, and ½ tsp toasted sesame oil to the ginger and garlic. Whisk to combine.
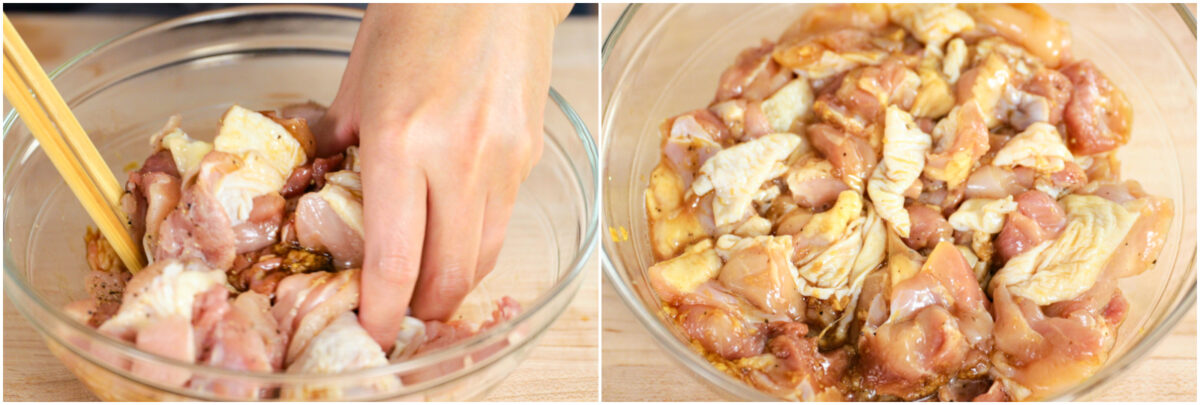
- Add the chicken to the marinade and mix it with your hands. Cover and marinate in the refrigerator for 30 minutes.
To Preheat the Oil
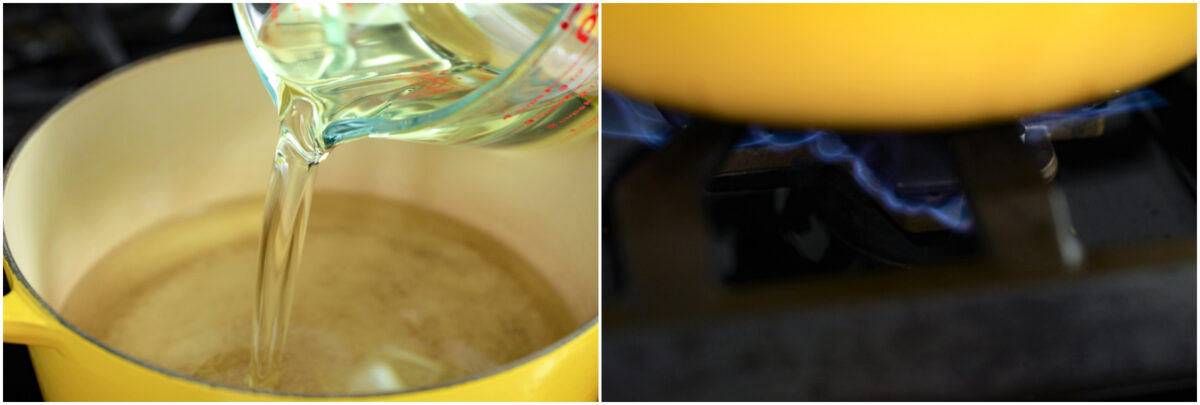
- While the chicken is marinating, prepare the oil for deep-frying. Pour about 3–4 cups neutral oil into a heavy-bottomed pot (I like using the 2.75-QT Staub), until you have at least 1 to 1½ inches (2.5 to 3.8 cm) of oil. Heat it to 325ºF (160ºC) over medium-low heat so you have enough time to prep the chicken.
To Coat the Chicken
- Meanwhile, dredge the chicken pieces. Prepare separate piles of 2 Tbsp all-purpose flour (plain flour) and 2 Tbsp potato starch or cornstarch in a tray. Lightly coat a piece of marinated chicken in the flour and dust off the excess.
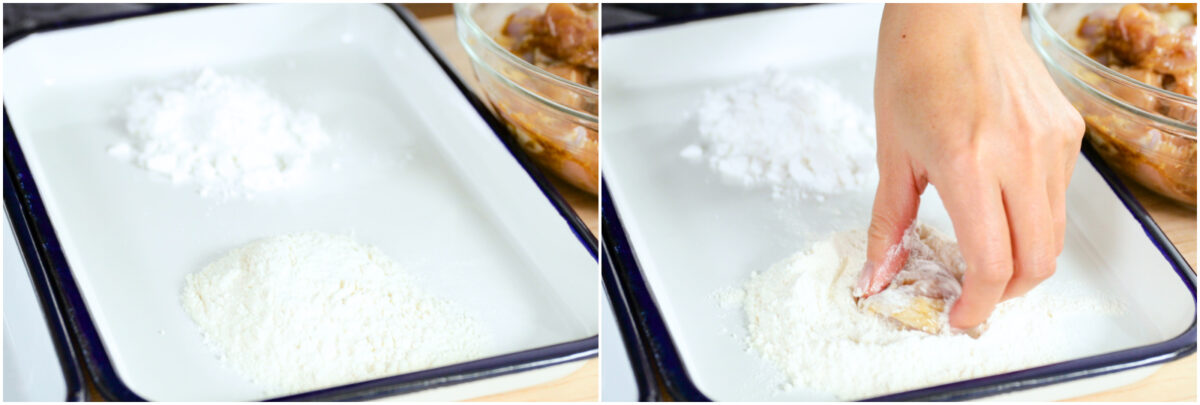
- Next, dredge it in the potato starch and shake off the excess. Place it in a separate tray. Continue with the remaining chicken pieces.
To Cook: The First Fry
- Check that the oil temperature has reached 325ºF (160ºC). Tip: If you don‘t have an instant read thermometer, insert a wooden chopstick into the oil; you‘ll know it‘s hot enough if small bubbles start to appear around the tip. For more helpful tips, see my post How to Deep-Fry Food.When it's ready, gently add 3 to 5 chicken pieces at a time to the hot oil. Do not overcrowd the pot. Tip: If you add too many pieces at once, the oil temperature will drop quickly, and the chicken will absorb too much oil.
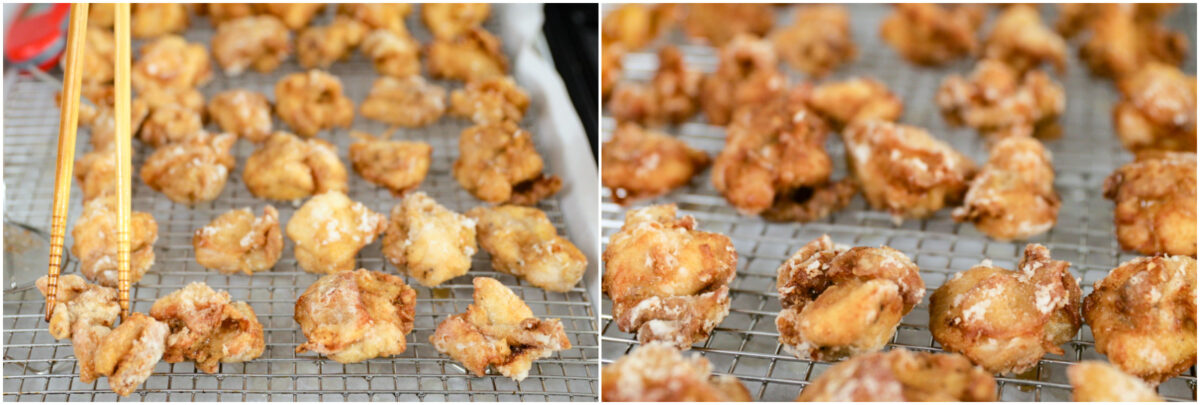
- Deep-fry for 90 seconds, or until the chicken is a light golden color. Transfer to a wire rack to drain the excess oil. Tip: If the chicken browns too quickly, then the oil temperature is too high. Either put a few more pieces of chicken in the oil or lower the heat setting. Controlling the oil temperature at all times is very important for deep-frying.
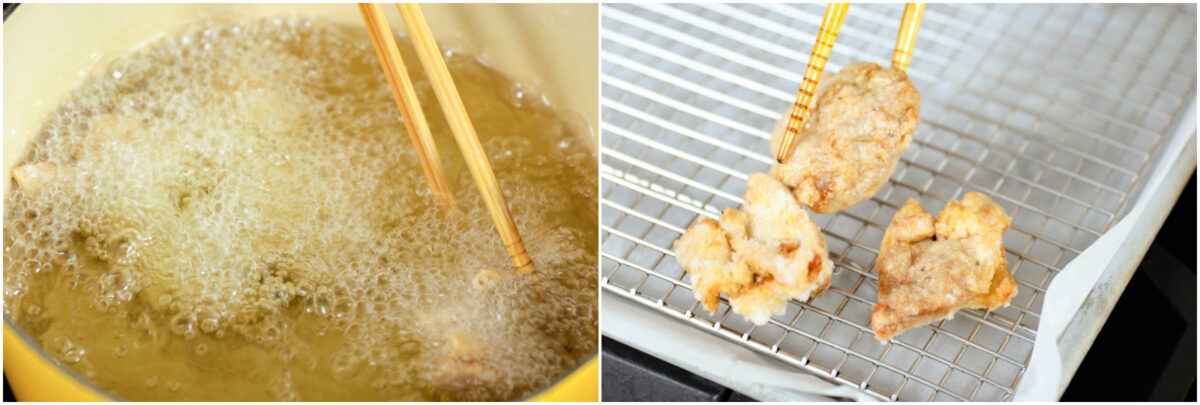
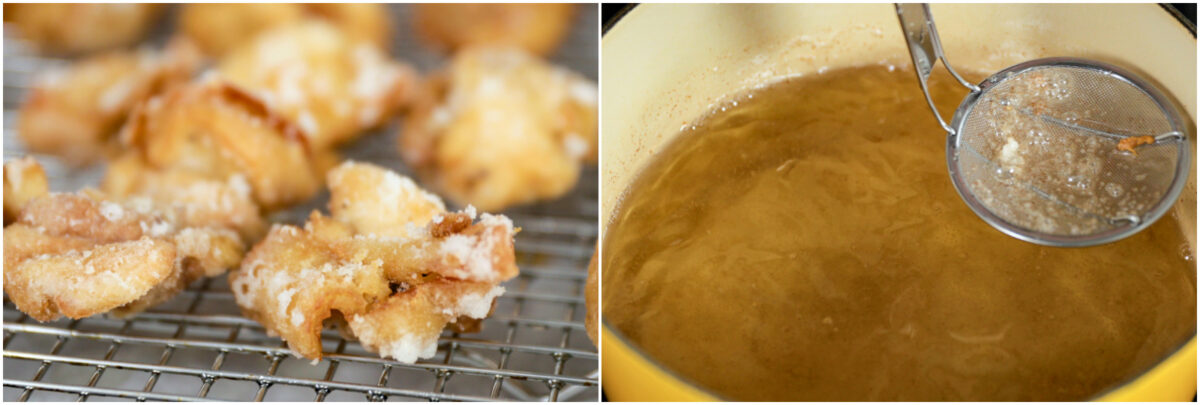
- The residual heat will continue to cook the chicken as it rests. Continue to fry the remaining chicken pieces. Between batches, scoop up and discard the crumbs in the oil with a fine-mesh sieve. This keeps the oil clean and prevents it from becoming darker.
The Second Fry
- Now, raise the oil temperature to 350ºF (180ºC). Place the first 3 to 5 pieces of rested chicken back into the oil and deep-fry for 45 seconds, or until the skin is golden brown and crispy. Transfer them to the wire rack to drain the excess oil. Continue frying the remaining chicken pieces.
- The left photo shows the chicken pieces after the first fry and the right photo shows them after the second fry. The chicken pieces on the right are slightly darker in color.
To Serve
- Serve the chicken hot with lemon wedges and a dipping plate of Japanese Kewpie mayonnaise. You can also sprinkle shichimi togarashi (Japanese seven spice) on the mayo for a bit of spice, if desired.
To Store
- Let it cool completely and transfer to an airtight container. You can store it in the refrigerator for up to 3 days and in the freezer for up to a month.
Nutrition
Editor’s Note: This post was originally published on October 10, 2012, and updated with new images and a video on October 3, 2019. It was republished on April 25, 2025, with additional tips and helpful information.


how do we reheat freezer stored kaarage? Thank you.
Hi rosario, Thank you so much for trying Nami’s recipe!
The best way to reheat the Karaage is to bake them in the oven (400F) or oven toaster until the inside is warm.
You can also reheat them in the microwave for a few minutes and toast them in the toaster oven or oven for extra crispiness.
We hope this helps!
Hiya, if I’m opting to have karaage as a main what side dishes would accompany it well. I was thinking maybe macaroni salad and cabbage..? What do you usually have?
Hi Talya! Thank you for trying Nami’s recipe!
Macaroni salad and shredded cabbage sound great! Deep-fried foods are always served with shredded cabbage in Japan. 😊
Other salad recipes that go well with Karaage are available here:
https://www.justonecookbook.com/categories/recipes/salad/
We hope this helps!
How long can I wait between the first and second fryings? I’m thinking about including this is in a dinner for friends, but want to have the timing such that the kaarage is done right around the same time as other dishes. Would be easiest if I could do first fry an hour in advance, but don’t know if waiting an hour for second frying is too long.
Hi Terence! Thank you so much for reading Nami’s post and trying her recipe!
One hour between the frying would be fine.
We hope everyone enjoys the homemade Karaage!
Hi Nami, I’ve been following your blog for the past decade or so. I know that this is a long shot but do you still have the garlic karaage recipe from years ago? It was honestly my favorite version of karaage, the one that uses plenty of garlic, I can’t find it anymore. Please bring it back 🙏
Hello there, Lisa! Thank you so much for being our loyal reader!❤️
If you type “garlic” in the comment search box, the old recipe will show up in the comment list. Could you please try it?
We hope this helps!
Is it possible to cook this using an air fryer?
Hi Allison! Thank you for reading Nami’s post and experimenting with her recipe!
It should work, but you will need to spray oil on the Karaage to get the right texture.
Cook for 10–15 minutes at 390F, and flip the Karaage once in the middle.
We hope this helps!
Amazing recipe! I just tried making them in the air fryer, and I think they turned out well. They’re better (crispier) made traditionally, but they’re still great this way too. I recommend spraying them lightly with oil (trust me, I think I overdid it with the olive oil) put it in for about 7 minutes at 390, flip them, then put it in for another 6 minutes.
Hello, Maria! Thank you for experimenting with Nami’s recipe and providing us with your tip!
We’re glad you enjoyed the Air Fryer Karaage!
Happy Cooking!😊
Love your recipes! Can I use cornstarch? Have you tried cooking kaarage in air fryer? If it’s possible to cook in air fryer that would be great cause we’re trying to eat healthy.
Hi Gemma! Thank you for trying Nami’s recipe!
Yes, you can use cornstarch, but potato starch is the best.
As for the air fryer, you can try baking this at 390F for about 10 minutes. However, you still have to spray the meat with oil to get the right Karaage texture.
We hope this helps!
I LOVE YOUR SITE. Lived for several years in Japan and could eat Japanese food every day. I live in a rural area with no Japanese restaurants. I have tried other karaage recipes and they either turned out dry or tasteless. I followed the recipe almost completely. I had to cut the amount of soy sauce because my roommate can’t eat large quantities but even so, that marinade made it DELICIOUS. It tasted exactly as I remember my best friend’s karaage! Thank you so much!
Hi Miz! Thank you very much for your kind feedback!
Nami and all of us at JOC are so happy to hear you love our site and Nami’s Karaage recipe!🥰
Thank you for sharing your story with us. Happy Cooking!
why is my batter not sticking on?
Hi Josh! Thank you very much for trying Nami’s recipe!
When you dredge each marinated chicken piece in the flour, please ensure to dust off the excess flour. Then dredge it in the potato starch. Pressing the chicken in the potato starch might be easier if it doesn’t stick on.
We hope this helps!
Hi Namiko, 作るのを楽しみにしてます!I’m actually going to go off of this recipe for a pop-up event I’m doing and was hoping to figure out how to batch as many as quickly and efficiently as possible. Would it be okay to do the first fry fo 50 or so karaage then let them sit and do the second fry as orders come in?
Hi Shoichi! Thank you very much for trying Nami’s recipe!
Sure, you can do that, but please avoid overcrowding the pot. (add only 3-5 pieces at a time or use a bigger pot. If you put too many pieces in at once, the oil temperature will drop quickly, and the chicken will end up absorbing too much oil.)
And don’t leave out the Karaage for more than 2 hours at room temperature.
We hope this helps!
Hello Namiko! Thank you for the lovely recipe. I was wondering where did you get your white dredging trays? 🙂
Hi Amanda! Nami got it from here: https://www.amazon.com/dp/B0044S5C4I?tag=onamzjusoneco-20&linkCode=ssc&creativeASIN=B0044S5C4I&asc_item-id=amzn1.ideas.JD39FUPH6SRN
We hope this helps!
if I’m going to make this as a topping for a ramen that I haven’t made yet, can I fry it once, then freeze and then do the second fry right before I serve the soup? Or does it need to be fried twice and then put into the freezer?
Hi Cal, Thank you very much for trying Nami’s recipe!
If you like to freeze Karaage, we recommend frying twice and letting it cool completely, then put it into the freezer.
You can defrost and fry them quickly again or put them in the oven for more crispy if you would like.
We hope this helps!
Thanks so much!!
My pleasure!
Just made your recipe of karaage. Quite good! Karaage is always a winner, but my kids and wife really enjoyed it. We doubled the recipe and will have karaage bento tomorrow for lunch. My tip, I used the extra side burner on my grill to cook it outside. kept the mess of oil out of the kitchen! Worked out great despite it being a little cold out still.
Hi David! Awesome! No mess in the kitchen!🤩 What a great idea cooking Karaage outside.😁
Thank you very much for trying Nami’s recipe! We are glad to hear you and your family enjoyed Karaage.
I am very excited to try this recipe, I just love karaage! I was curious, I want to add a curry flavor to my karaage, does anyone know if I can just add curry powder to the marinade or in the flour? I really like the taste of curry-flavored kara-age and want to replicate it
Hi Samantha! Thank you very much for reading Nami’s post!
You can make curry flavor Karaage by adding the curry powder to flour or marinade.
We prefer adding curry powder to flour.😉Try 2~4 teaspoons.
We hope this helps!
Curious question, why can’t you let it marinade for too long?
It’s not that you can’t, if you like it more stronger flavoured you can of course. Though, in Japanese cuisine, people try to keep the natural flavour of ingredients with a hint of added flavour. With a short marinade time you will keep the taste of the natural chicken flavour with a hint of ginger, garlic and soy sauce.
Hi Lauren! Thank you very much for reading Nami’s post and trying her recipe!
The Chicken is small 2-inch pieces, and 30 minutes is enough to marinade. If you marinate it too long, it will be saltier.😉
If you prefer to marinade it for longer to have more seasonings flavor, we recommend no more than 12 hours. So the marinade would not overbreak down muscle fibers.
We hope this helps!