Here‘s my detailed video and step-by-step tutorial on how to clean clams. This method is the best and easiest way to purge sand and grit from clams! Use this guide when you use fresh clams in a recipe.
Why We Need to Clean Clams
Live clams filter out sand and saltwater out of their systems when they breathe. Clams that you caught at the beach definitely need to be purged, but how about ones you get from the supermarket?
You may think the clams at the store are ready to be cooked, and some packages may say “cleaned”. However, the clams haven’t thoroughly purge sand yet. Besides sand, clams emit poop, dirt, and saltwater constantly as they are alive! So I still recommend cleaning the clams when you get home.
The worst experience is that while you’re enjoying clams, you crunch into gritty clam in your dish. It happened to me before for those “cleaned” clams. Don’t take a risk and ruin your meal.
When to Clean Clams
The best time to clean clams is when you come home from grocery shopping (or clamming at the beach). Refrigerated clams slow down and it will take more time to purge. So sooner the better!
Different Ways to Clean Clams
There are various articles on the Internet on how to clean clams and each method will probably work just fine. In the US, popular methods include the use of cornmeal to get the sand out of clams. Clams purge the sand and grit out by ingesting the cornmeal.
In Japan, the most common method is by using simple saltwater. Fishermen and housewives all use this method and that’s how I clean clams, too. If you are interested in the Japanese way, here’s how we do it.
What You’ll Need
- Salt – It is important to make salt water as close to seawater as possible. The salt concentration of seawater is about 3%.
- Water
- Flat tray (or large bowl)
- Wire rack (or large sieve) – will explain in the instructions
- Aluminum foil
- Brush
3 Easy Steps
- Make salt water.
- Let the clams purge in salt water for 1 hour.
- Clean and ready to use!
Check the detailed instructions below and see how to do each step.
Clam Recipes on Just One Cookbook
- Japanese Clear Clam Soup
- Japanese Clam Miso Soup
- Clam Pasta
- Sake Steamed Clams
- Grilled Little Neck Clams
Wish to learn more about Japanese cooking? Sign up for our free newsletter to receive cooking tips & recipe updates! And stay in touch with me on Facebook, Pinterest, YouTube, and Instagram.
How To Clean Clams – The Best Way to Purge Sand
Instructions
Before You Start…
- Live clams should be cooked within 48 hours of purchase. Even though you do not use the clams right away, it‘s important to de-grit them first as soon as you bring the clams home from the store. Keeping the clams in the refrigerator will slow them down and they may not purge sand later.
To Purge Sand from Clams
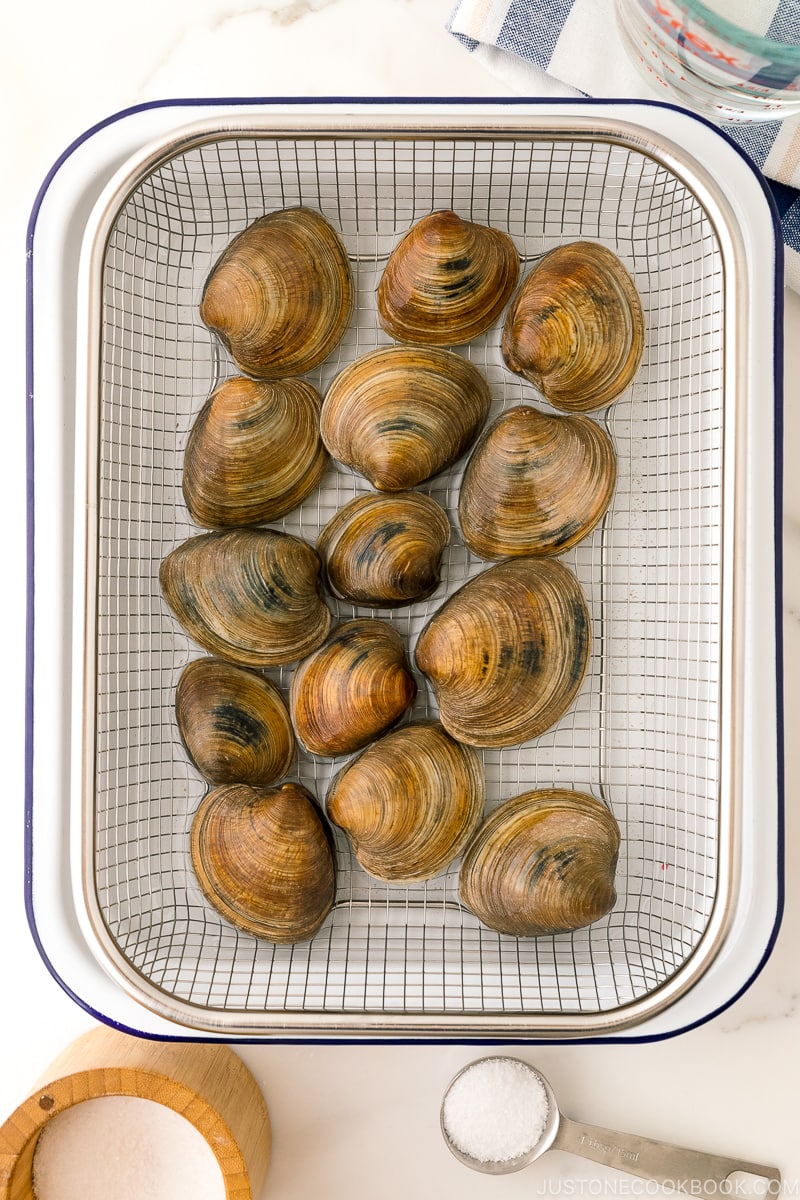
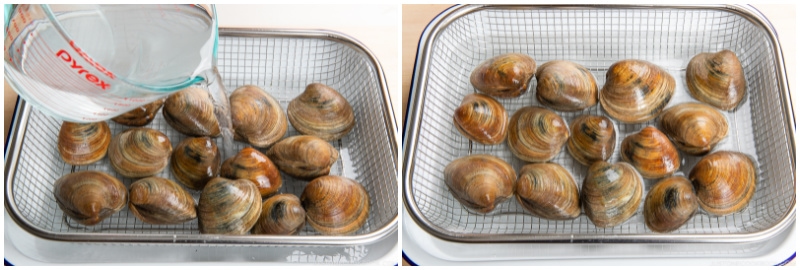
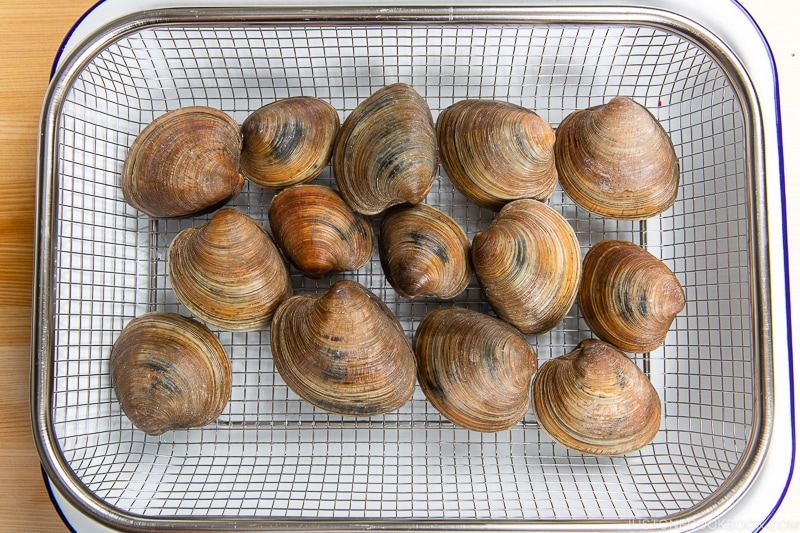
- Gather all the ingredients. Gently tap any clams with open shells and discard any clams that do not close their shells within a few minutes or that have cracked or chipped shells.

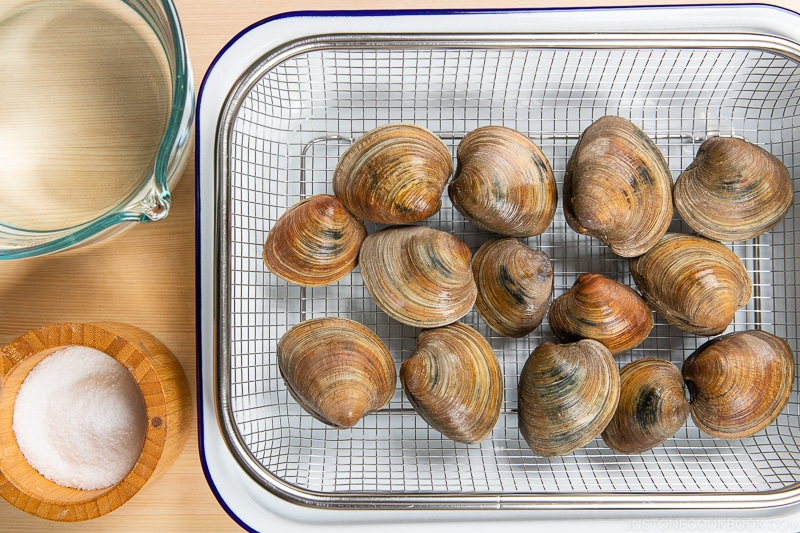
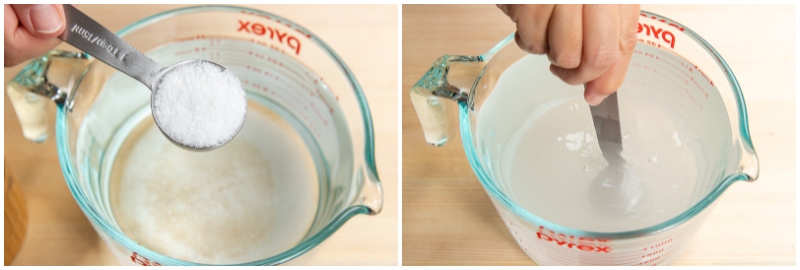
- To make the salt water, combine 2 cups water and 1 Tbsp Diamond Crystal kosher salt in a measuring cup or bowl and mix well until the salt is completely dissolved. For my setup, I doubled the ingredients to 4 cups water and 2 Tbsp kosher salt.

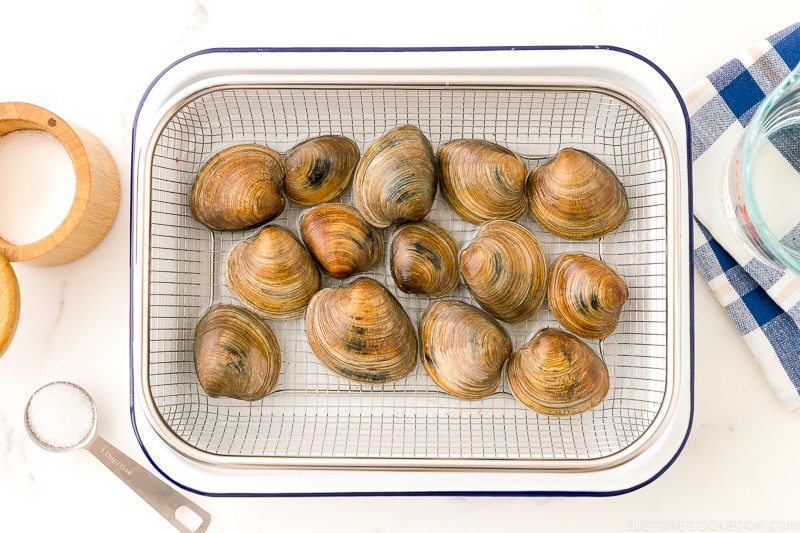
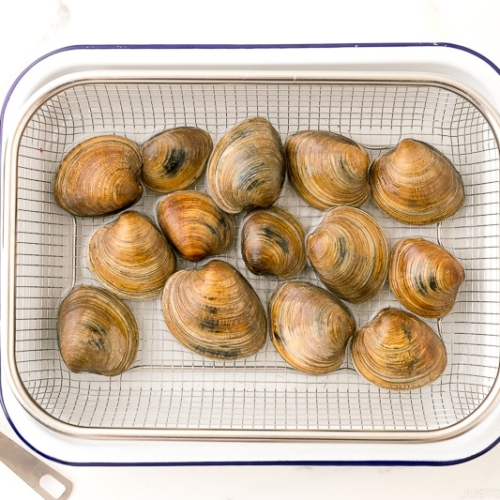
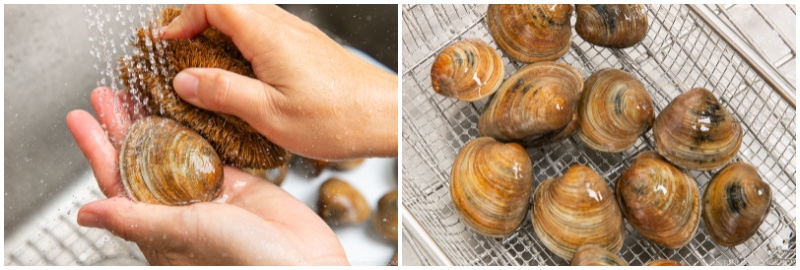
- Place a wire rack/sieve inside the large tray/bowl and put the clams in a single layer. The purged sand goes to the bottom of the rack/sieve and it will not be consumed again by the clams. Pour the salt water into the tray/bowl. The salt water should be right around the clam’s mouth. Don‘t submerge the clams under the salt water! If there isn’t enough salt water, then make more using the same ratio of water and salt.
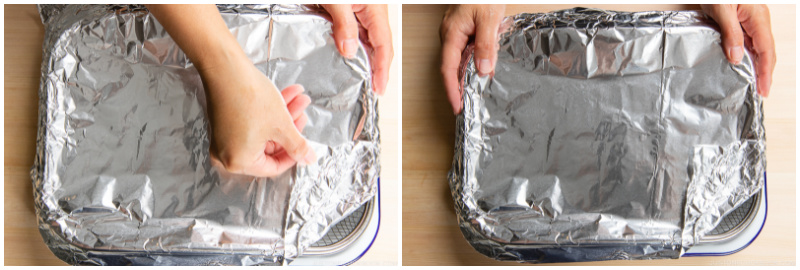
- Cover the top with aluminum foil (clams prefer to be in a quiet and dark environment), leaving some space at the corner for air. Keep it in a cool dark place for 1 hour. Clams become active when water is around 69ºF/20ºC. If you live in a hot climate, you may need to adjust the water temperature between the refrigerator and a cool place in your house. If you get your own clams from the beach, you will need about 6 hours for clams to purge sand.
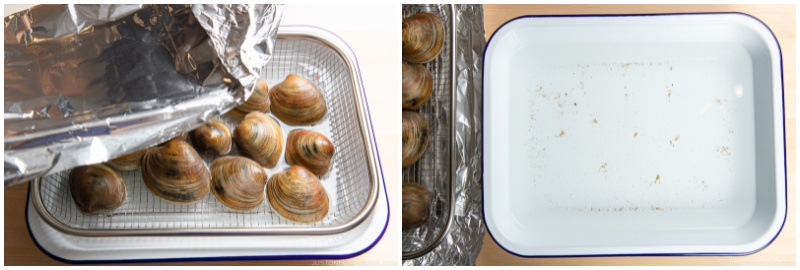
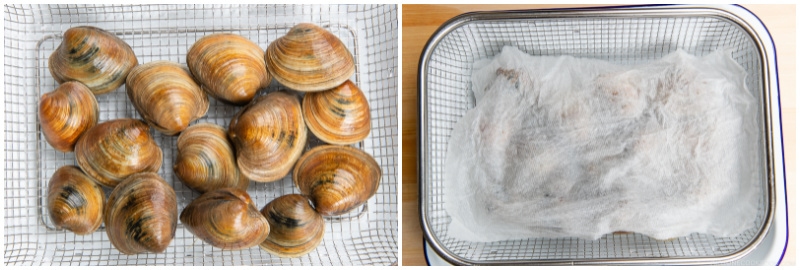
- After 1 hour, remove the aluminum foil cover and take out the rack/sieve. Discard the dirty salt water and clean the tray/bowl.
To Purge the Salt from Clams
- This step is only for clams that you got from clamming yourself. Place the rack/sieve again to de-salt as the clams contain a lot of seawater. Keep the clams in the sieve and leave them at the counter for 1 hour. Without this process, the clams may taste too salty.
To Clean the Clams
- Wash each clam with a brush under cold running water.
To Use and Store
- Now the clams are ready! Put the clean clams in a bowl/tray and cover them with a damp paper towel on top. Keep it in the refrigerator for up to 2 days. To freeze, place the live clean clams in a plastic bag and remove the air. Store it in the freezer for 2 weeks.
Nutrition
Editor’s Note: This post was originally published on March 01, 2011. New images have been added and the blog content has been updated.


“Salt – It is important to make salt water as close to seawater as possible. The salt concentration of seawater is about 3%.” So how much salt per gallon is that????
Hi darby, Thank you so much for trying Nami’s recipe!
For one gallon of water, you can add 114g of salt.
We hope this helps!
Hi! If I wash the clams as soon as I get home but don’t use them until later that day or the next day do I just pop them back in the fridge after? Do I need to keep them in water? Thanks!
also I use a lot of your recipes. They are all wonderful!
Hi Ray! You will need to complete the process of de-gritting, even though you won’t cook until the next day. Then, keep in the fridge with a damp paper towel on top (see the last step). I’m happy to hear you enjoy my recipes!
Essential step.
Hi Junji! Thank you for reading Nami’s post and for your kind feedback! 🤗
Hello! For the frozen clams from the grocery? Is it already safe to eat without cleaning?
Hi Karen! Usually, the frozen clams are precleaned and ready to use. But please refer to the package instruction.
Hi Nami! Thanks for your recipe.
Where did you get the wire sieve with basin that you used on this post? (how to clean clams) It looks very nice and functional.
Also, do you have a recommendation for a good salt grinder? I have used XO brand, but the base, where it twists, wears out over time.
Thanks!
Hi Natalie! I got this wire sieve from a Korean grocery store in Santa Clara. I don’t use a salt grinder. I buy Diamond Crystal kosher salt and pour it into a salt container made of bamboo… I just open and scoop up with a spoon or use my fingers to pick up the salt. Hope this helps!