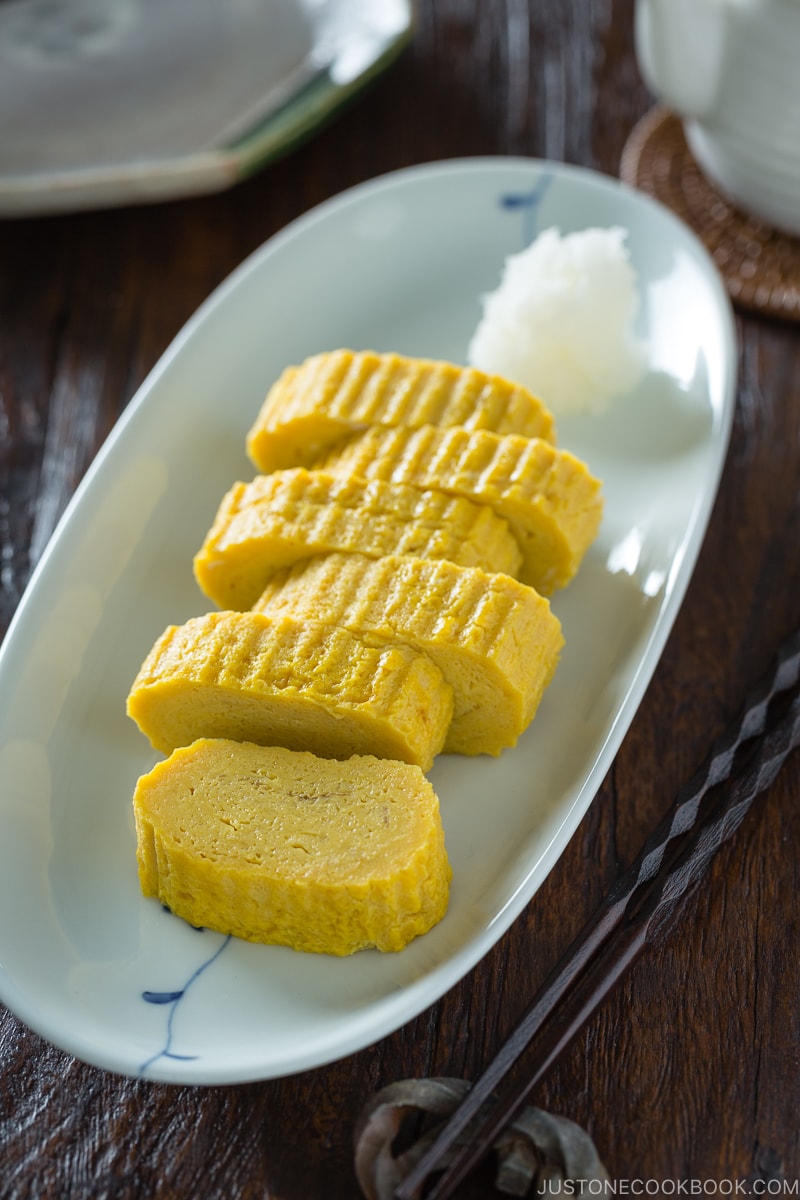
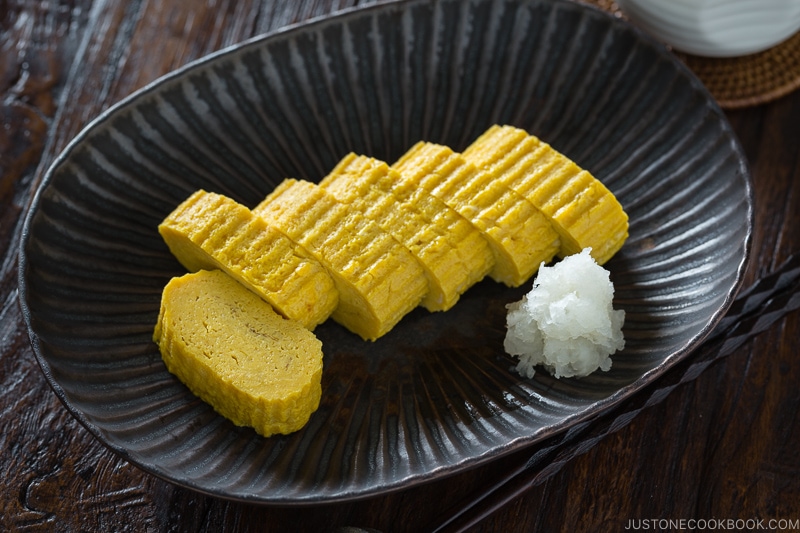
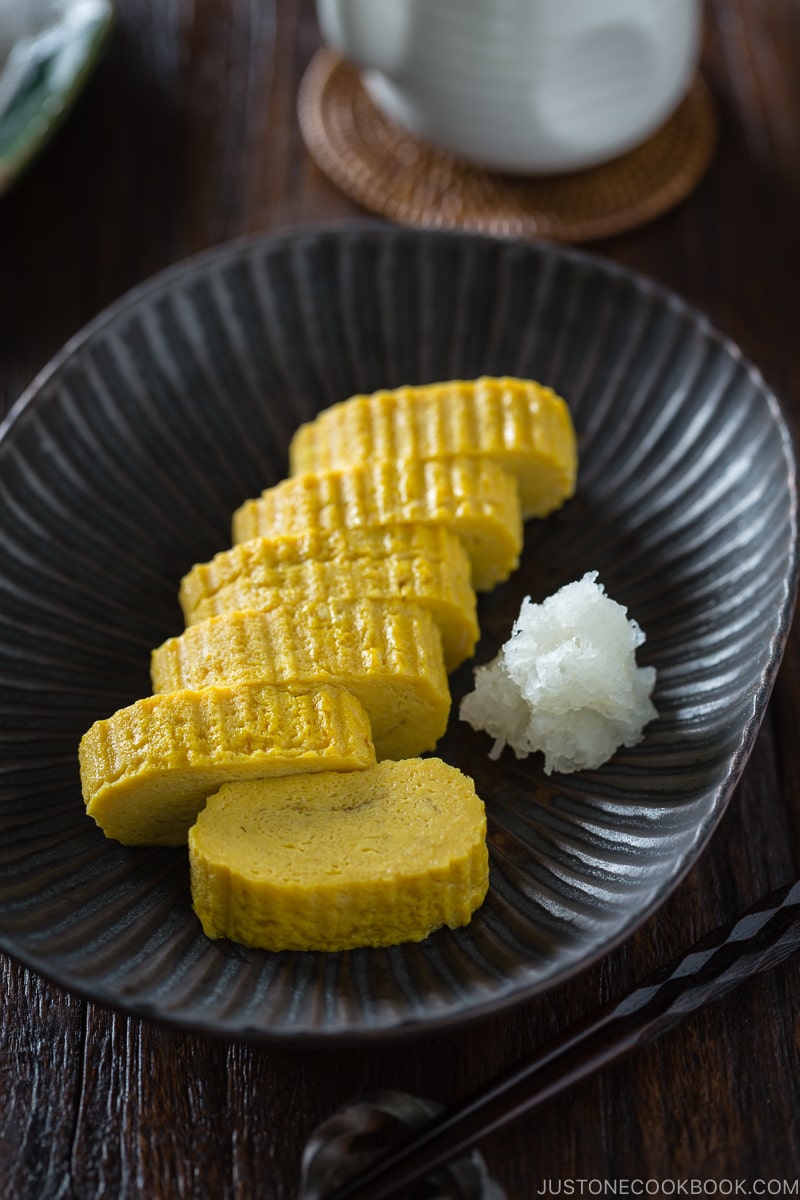
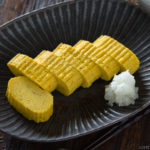
Lightly sweet yet savory, Tamagoyaki is a Japanese rolled omelette that makes a delightful breakfast or side dish for your bento lunches. This advanced version called Dashimaki Tamago seasoned with dashi stock is enjoyed primarily in the Kansai (Osaka) region.
Tamagoyaki (卵焼き or 玉子焼き) is a sweetened Japanese omelette that resembles mini bars of golden pillows. With a slightly sweet taste and custardy texture, tamagoyaki is well-loved among Japanese children and adults. You’ve most likely tasted these rolled eggs in a Japanese breakfast as a source of protein, as a side dish in a bento (Japanese lunch box), or atop sushi.
Today, let’s learn how to make a dashi-forward tamagoyaki called Dashimaki Tamago (だし巻き玉子)! There are many types of tamagoyaki, and this advanced version is the most challenging to make since the egg mixture is quite watery. Don’t worry; I’ll guide you every step of the way with photos and detailed instructions.
Table of Contents
What is Tamagoyaki?
In Japanese, tamago means egg, and yaki means grill, so tamagoyaki translates to “grilled egg.” To make this classic dish, we roll up layers of thin egg crepe in a frying pan, wrap it into a log shape, and slice it into bite-sized pieces that you can pick up with chopsticks.
Unlike the typical Western omelette, Japanese tamagoyaki uses an egg mixture flavored with dashi, soy sauce, mirin, and sugar. This seasoning gives it a lightly sweet and savory taste.
Tamagoyaki Variations
Tamagoyaki (玉子焼き, 卵焼き) is a general umbrella term for various types of Japanese rolled omelettes. It can be dashimaki or atsuyaki depending on the region.
- Tamagoyaki (卵焼き) – This is the simplest form of a rolled omelette without extra sugar or dashi (Japanese soup stock). If you are new to making tamagoyaki, start practicing from this recipe.
- Dashimaki tamago (出汁巻き玉子) – This is today’s recipe. Primarily enjoyed in the Kansai (Osaka) region, it has a dashi-forward, salty flavor from the large amount of dashi used. It’s very silky and tender and must be eaten immediately. It’s the most challenging to make of all the types since the egg mixture is very watery.
- Atsuyaki tamago (厚焼き玉子) – Known for its sweetness, it’s popular in the Kanto (Tokyo) region and northern regions. With less dashi, it’s much easier to roll, but it’s prone to burning from the higher sugar content. I make a golden sweet dashi called Kanro dashi (甘露だし) ahead of time so I can enjoy atsuyaki tamago often. If you are experienced making tamagoyaki, try my sweet rolled omelet recipe.
- Castella tamago (カステラ玉子) – Served as part of the Edomae-style menu at high-end sushi restaurants in the Kanto (Tokyo) region, this variation is reminiscent of Castella cake. It’s made in a similar method to datemaki. Shrimp paste and grated yam give it a spongy, bouncy texture. This style is baked in the oven.
Easy Tamagoyaki Recipes for Beginners
If you’re a beginner cook or prefer a simplified method, here are two easier recipes:
- Quick & Easy Tamagoyaki — For one serving, perfect for a lunch box.
- 3-Ingredient Simple Tamagoyaki — No dashi required, so it’s fast and easy to make.

If you have never tried making tamagoyaki recipe before, skip this post and practice rolling the omelette with my 3-Ingredient Simple Tamagoyaki first.
Ingredients You’ll Need for Dashimaki Tamago
You just need simple Japanese pantry ingredients for this recipe. To find the right balance of sweet and umami flavors, feel free to adjust the seasonings to suit your taste:
- large eggs
- dashi (Japanese soup stock) – see the next section
- seasonings – soy sauce, mirin, sugar, and salt (adjust to reduce the sodium)
- for the garnish – daikon radish and soy sauce
3 Ways To Prepare Dashi (Japanese Soup Stock)
Because the dashimaki tamago uses more stock, preparing tasty dashi creates a more delicious final dish. I recommend one of these three methods:
- Kombu and katsuo dashi made from scratch (takes 20 minutes)
- Vegan/vegetarian dashi made from scratch (takes 20 minutes)
- Dashi made with a dashi packet (takes 3 minutes)
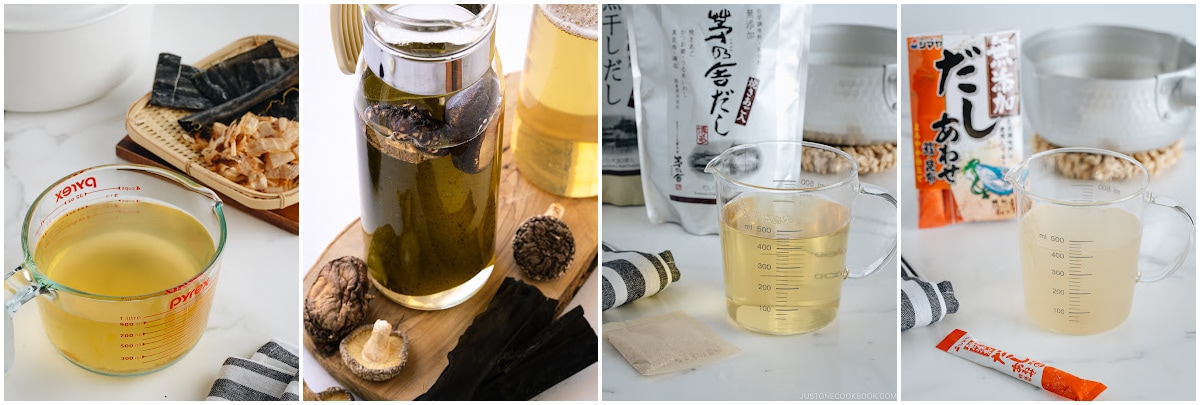
I always use the dashi packet method for convenience and good flavor. You can easily get it on Amazon or from a Japanese grocery store.
Dashi made with dashi powder may cut the prep time and total time since it only takes 1 minute, but I don’t recommend it as the flavor is not robust.
How To Make the Best Dashimaki Tamago
Here’s a quick overview of the steps. Read the recipe card below for detailed tips, techniques, and photos.
- Heat the pan thoroughly. I start heating it on a very low heat while I prepare the egg mixture.
- Prepare the egg mixture. Whisk and combine the eggs, dashi, and seasonings.
- Grease the pan thoroughly. Apply the oil with a pastry brush or paper towel. Check if the pan is hot enough by touching it with chopsticks dipped in egg mixture. If it sizzles, the pan is ready for the first layer.
- Pour a thin layer of egg mixture into the pan and pop the air bubbles.
- Once the egg mixture is set on the bottom but runny on the top, roll from the far side of the pan toward the end closer to you.
- Repeat steps 3 through 5 until you use all the egg mixture.
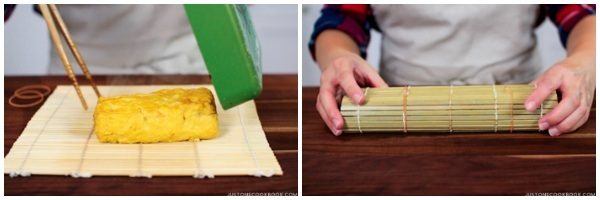
- Shape the tamagoyaki using the bamboo sushi mat (optional) and cut into equal pieces.
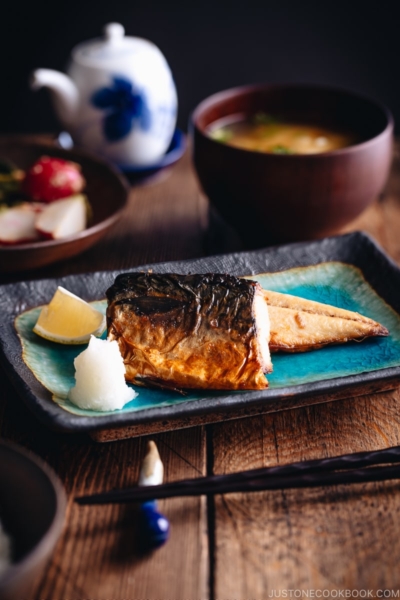
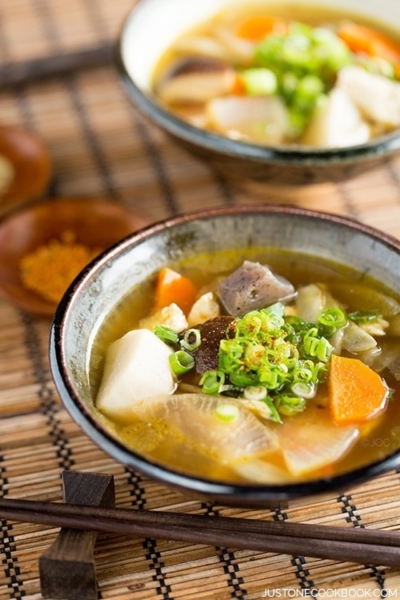
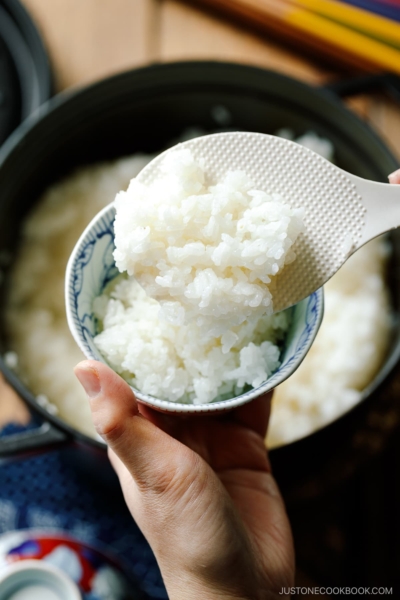
Serve it as part of a Japanese breakfast along with a bowl of hot rice, miso soup, grilled salmon fillet, and Japanese pickles.
5 Cooking Tips for the Best Tamagoyaki
Tamagoyaki requires some practice to get right, but you will get better each time you make it. Here are a few helpful tips:
- Use a 3:1 ratio of dashi to eggs. As a rule of thumb, 1 tablespoon of dashi per large egg is a good ratio. If you want to try restaurant-style dashimaki tamago, you can increase the dashi. Before you try this, make sure you’re comfortable making tamagoyaki because it’s extremely difficult to fold and roll.
- Do not worry about neatness in the first few layers. The inner rolls do not need to be perfect, as you will keep rolling more layers on top. The first few rolls are the center of the tamagoyaki, so they don’t need to lined up neatly!
- Always grease the pan. I know you want to use less oil to reduce calories. So do I! However, you must coat the pan with oil so the egg doesn’t stick to the pan. This goes for a nonstick pan, too.
- Heat the pan completely before starting. Test the temperature with a small amount of egg mixture. The egg must sizzle to confirm that the pan is hot enough.
- Control the heat by moving the pan away from the heat source. Keep your heat at medium at all times. We need to roll up the thin layers of omelette quickly before it overcooks, so there is no time to adjust the heat. The best way is to move the pan closer to and away from the stove.
Tamagoyaki Pan for a Classic Shape
Rolled omelette is a staple in Japanese home cooking that we make for breakfast and the bento box, so it’s worth investing in a special pan. Tamagoyaki pans are either square or rectangular, so you can easily make the Japanese rolled omelet into a log shape.
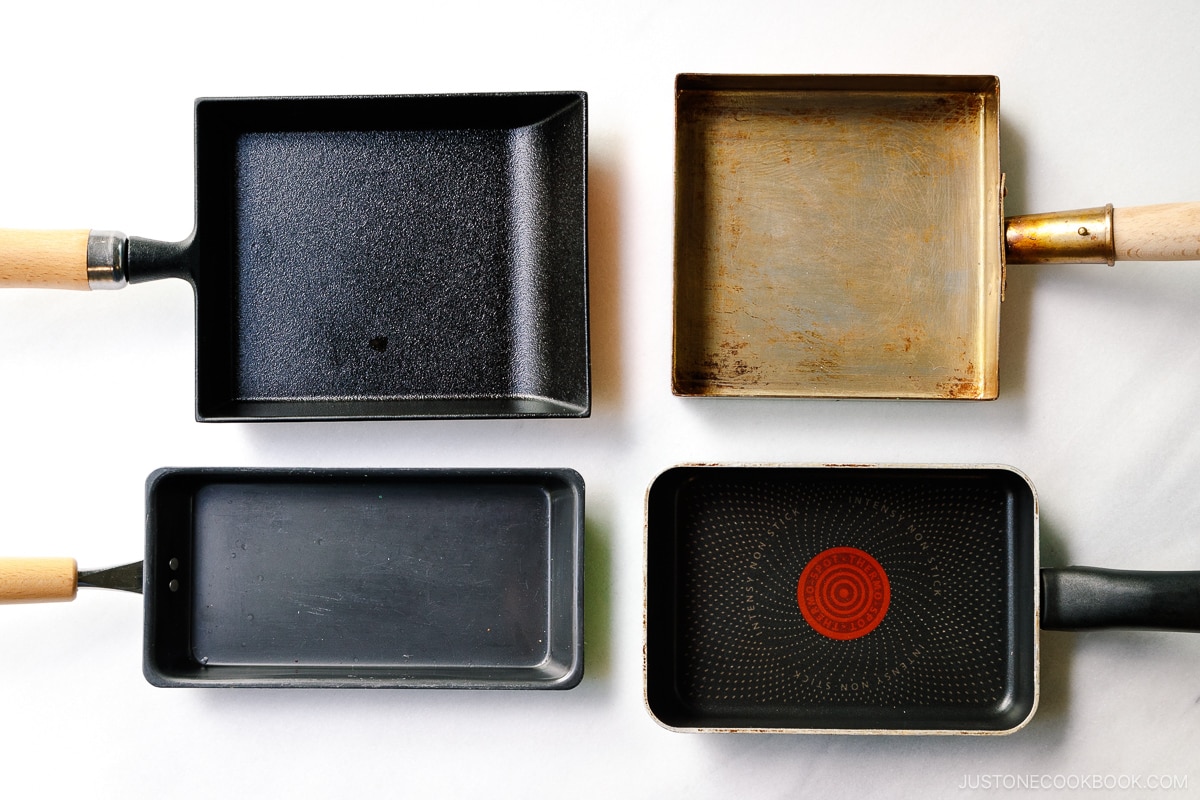
Here are the various types of tamagoyaki pans I’ve tried in the past:
- nonstick tamagoyaki pan
- copper tamagoyaki pan
- carbon steel tamagoyaki pan
- cast iron tamagoyaki pan (my favorite since 2024)
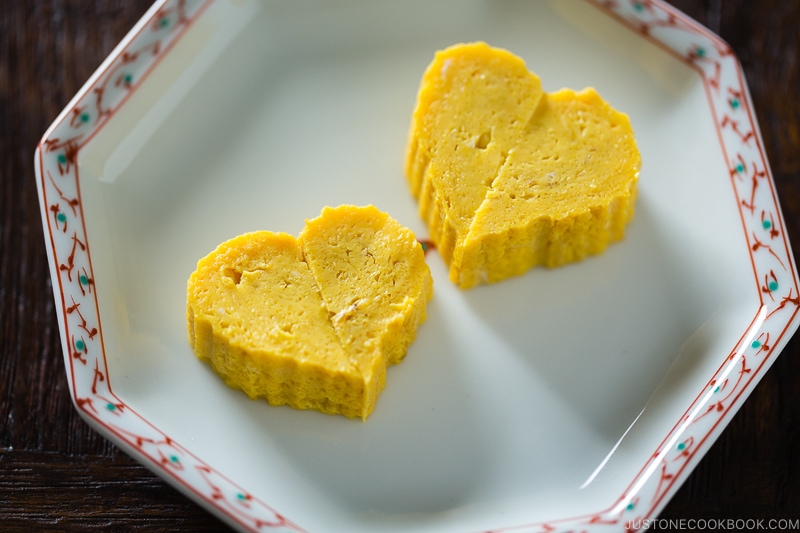
Can I Use a Round Frying Pan for Tamagoyaki?
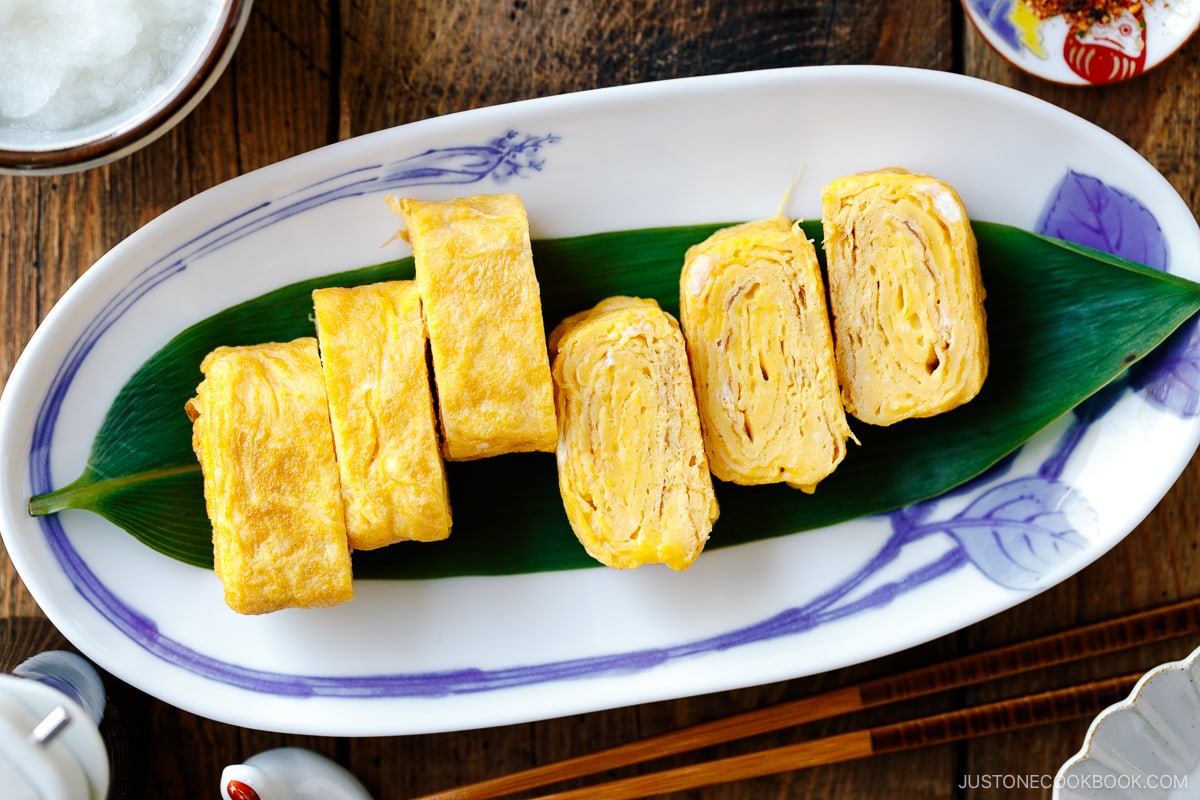
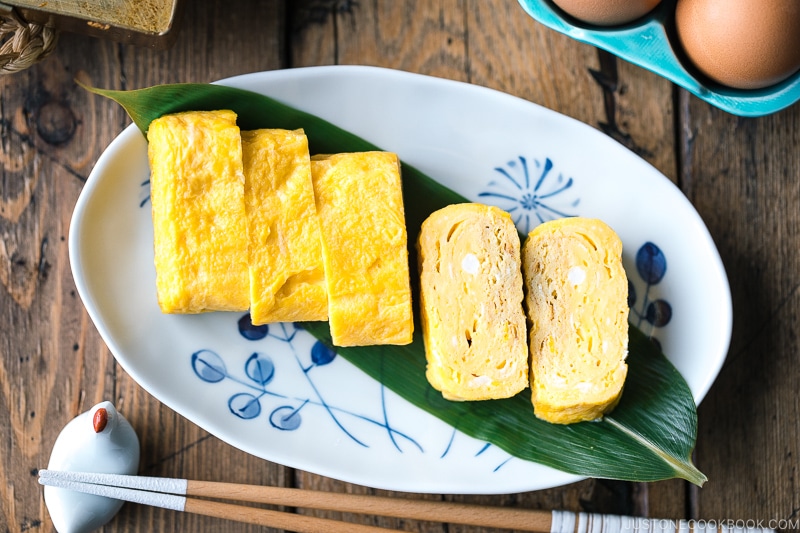
Yes! You don’t need a special tamagoyaki pan if you are not aiming for the classic shape. A tamagoyaki pan definitely helps to make a thick rectangular log, a round frying pan will work. I demonstrate both methods in my video and the step-by-step recipe images below.
For a thicker tamagoyaki, use a 9- or 10-inch nonstick frying pan. In the recipe below, I used my big 12-inch pan and it turned out flatter, as you can see. If you only have a 12-inch pan, you can double the recipe to solve this issue. Don’t worry about it if you don’t mind the flat shape.
More Tamago (Egg) Recipes
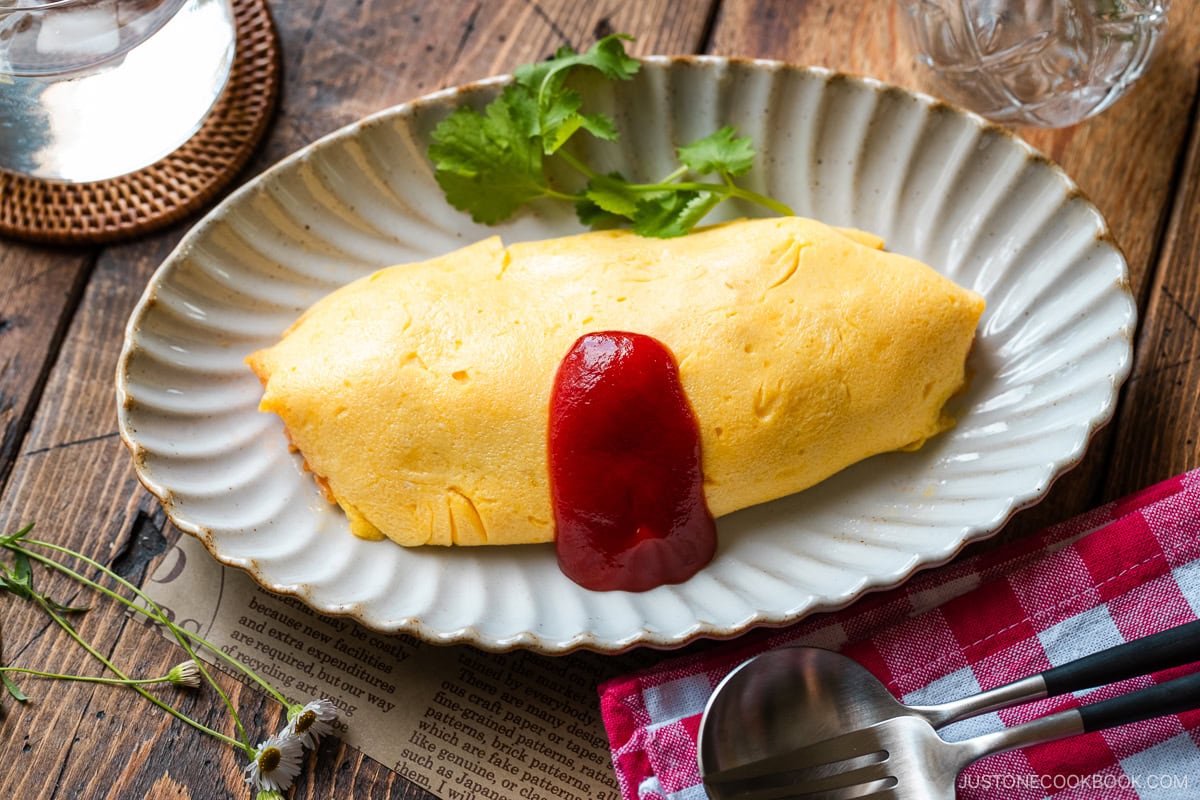
- Omurice (Japanese Omelette Rice)
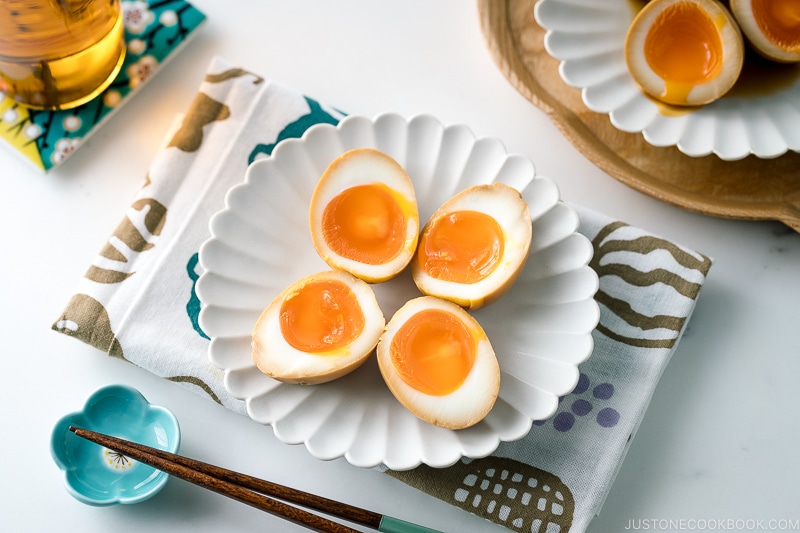
- Ajitsuke Tamago (Ramen Egg)
- Onsen Tamago (Japanese Hot Spring Eggs)
- Hanjuku Tamago (Perfect Soft-Boiled Eggs)
- Tamago Sando (Japanese Egg Sandwich)
Wish to learn more about Japanese cooking? Sign up for our free newsletter to receive cooking tips & recipe updates! And stay in touch with me on Facebook, Pinterest, YouTube, and Instagram.
Tamagoyaki (Japanese Rolled Omelette) — Dashimaki Tamago
Video
Ingredients
- 3 large eggs (50 g each w/o shell)
For the Seasonings
- 3 Tbsp dashi (Japanese soup stock) (use standard Awase Dashi or Vegan Dashi; or make quick dashi with water and a dashi packet or dashi powder)
- 2 tsp sugar
- 1 tsp soy sauce (use GF soy sauce for gluten-free)
- 1 tsp mirin
- 2 pinches Diamond Crystal kosher salt
For Cooking
- 2 Tbsp neutral oil
- 1½ sheets nori (dried laver seaweed) (optional; see Method 2 below)
For the Garnish
- 3 oz daikon radish (1 inch, 2.5 cm; use the sweeter, greenish part near the top)
- soy sauce
Instructions
- Before we start… Among all the types of tamagoyaki, this is the most challenging to make as the egg mixture is very watery. If you're new to tamagoyaki making, start practicing with my 3-Ingredient Simple Tamagoyaki recipe without dashi.Gather all the ingredients.

- In a bowl, gently whisk 3 large eggs (50 g each w/o shell). It‘s best to “cut“ the eggs with chopsticks in a zig-zag motion; do not overmix.
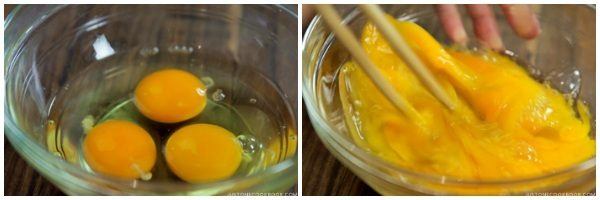
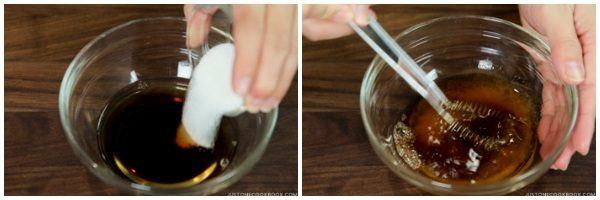
- In another bowl, combine the seasonings: 3 Tbsp dashi (Japanese soup stock), 2 tsp sugar, 1 tsp soy sauce, 1 tsp mirin, and 2 pinches Diamond Crystal kosher salt. Mix well.
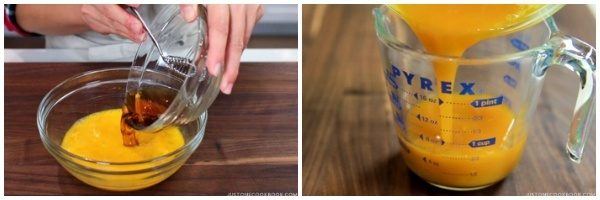
- Pour the seasonings mixture into the eggs and whisk gently to combine. Then, pour the mixture into a measuring cup with a spout and handle so that it‘ll be easier to pour into the frying pan. Next, I‘ll show you how to make your omelette in either a tamagoyaki pan or a round frying pan.
(Method 1) To Cook in a Tamagoyaki Pan
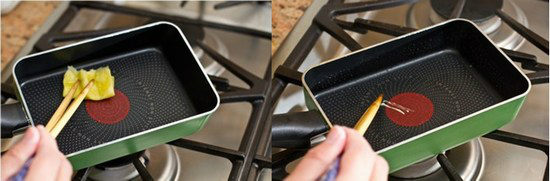
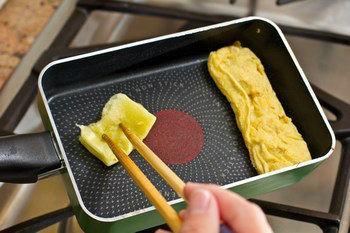
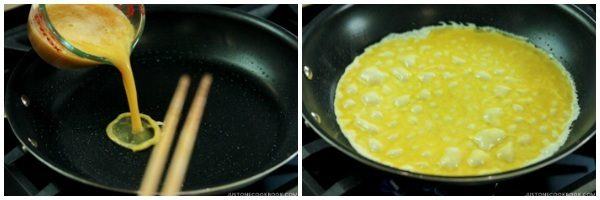
- Heat the pan over medium heat. Then, dip a folded paper towel in 2 Tbsp neutral oil and apply a thin layer of oil to the pan. To check if the pan is hot enough, put a drop of the egg mixture in the pan. When you hear a sizzling sound, the pan is ready.
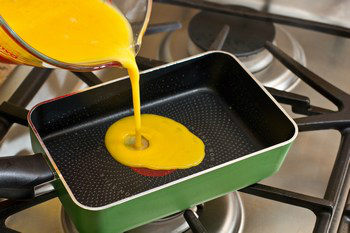
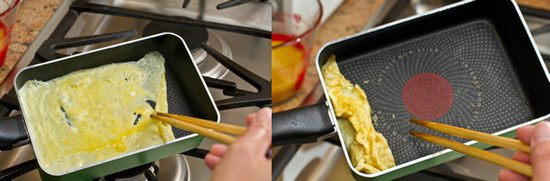
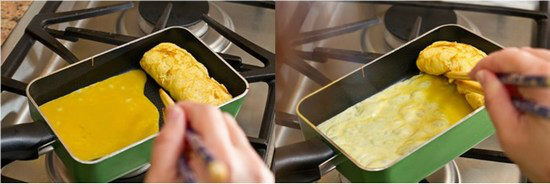
- Pour a thin layer of the egg mixture into the pan, quickly tilting the pan so that the egg mixture coats the entire cooking surface.
- Poke any air bubbles to release the air. After the bottom of the egg has set but is still soft on top, start rolling the egg into a log shape from one side to the other, starting from the far side of the pan and rolling toward the pan handle.
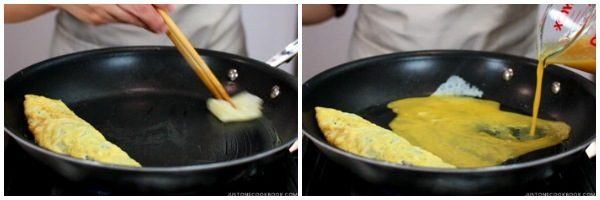
- Move the rolled omelette to the far side of the pan where you started to roll, and apply more oil to the pan with a paper towel, even under the omelette.
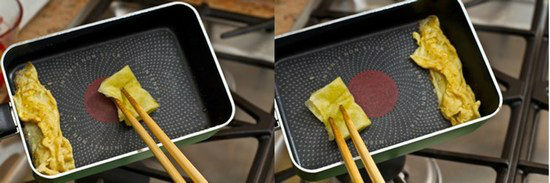
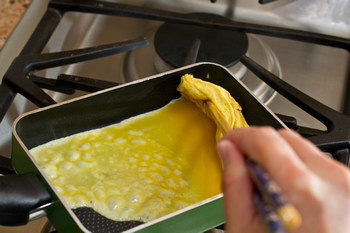
- Pour in a thin layer of the egg mixture to just cover the bottom of the pan again. Make sure to lift the omelette to spread the mixture underneath.
- When the new layer of egg has set and is still soft on top, start rolling it from one side to the other.
- Move the rolled omelette to the side where you started to roll and apply more oil to the pan with a paper towel, even under the omelette.
- Pour in a thin layer of the egg mixture to just cover the bottom of the pan again. Make sure to lift the omelette to spread the mixture underneath.
- When the new layer of egg has set and is still soft on top, start rolling it from one side to the other.
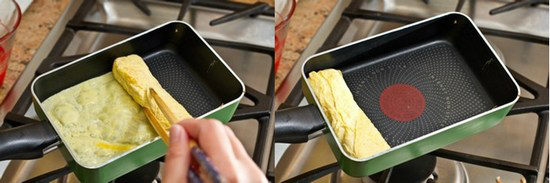
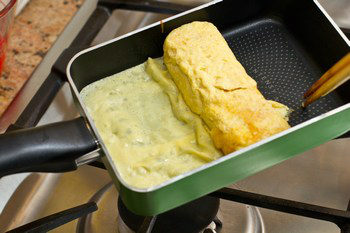
- Repeat the process. This is now the third round.
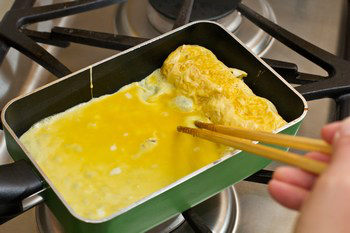
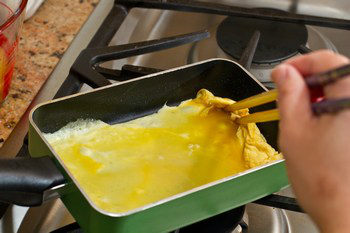
- This is the fourth round. Pour in more egg mixture and make sure it thinly coats the bottom of the pan, including under the rolled omelette.
- Continue rolling it into a log shape. Tip: Control the temperature of the pan by lifting the frying pan rather than adjusting the stove heat. If the heat is too weak, the egg will stick to the frying pan, so be careful.
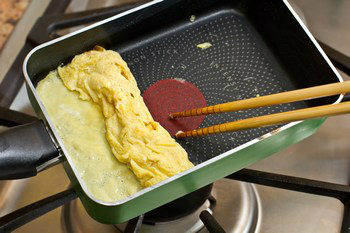
- This is the fifth round.
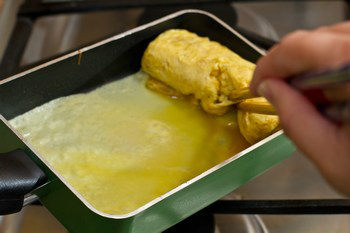
- This is the sixth and final round.

- You can brown the omelette a little bit.
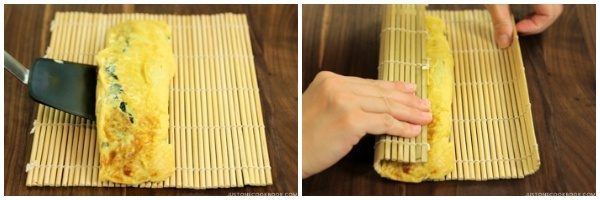
- Remove it from the pan and place the omelette on a bamboo sushi mat. While it’s still hot, roll up the omelette in the bamboo mat to help set its shape. Let it stand for 5 minutes.
(Method 2) To Cook in a Round Frying Pan
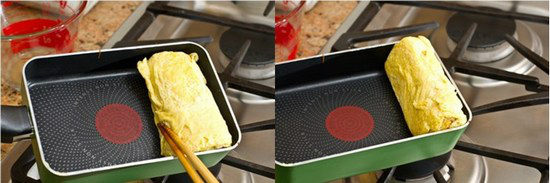
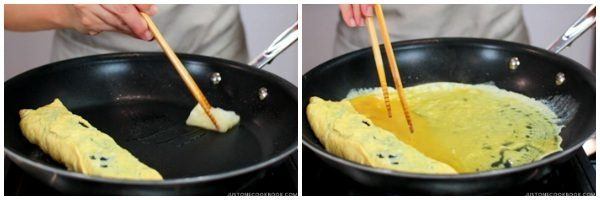
- Heat the pan over medium heat. Then, dip a folded paper towel in 2 Tbsp neutral oil and apply a thin layer of oil to the pan. To check if the pan is hot enough, put a drop of the egg mixture in the pan. When you hear a sizzling sound, the pan is ready. Then, pour a thin layer of the egg mixture into the pan, quickly tilting the pan so that the egg mixture coats the entire cooking surface.
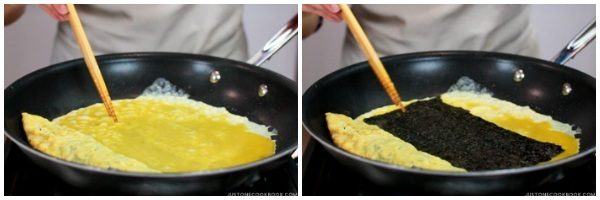
- Poke any air bubbles to release the air. After the bottom of the egg has set but is still soft on top, start rolling the egg into a log shape from one side to the other, starting from the far side of the pan and rolling toward the pan handle. Here, I added ½ sheet of nori (optional) to my omelette and then rolled.

- Move the rolled omelette to the far side of the pan where you started to roll and apply more oil to the pan with a paper towel, even under the omelette. Pour in a thin layer of the egg mixture to just cover the bottom of the pan again. Make sure to lift the omelette to spread the mixture underneath.
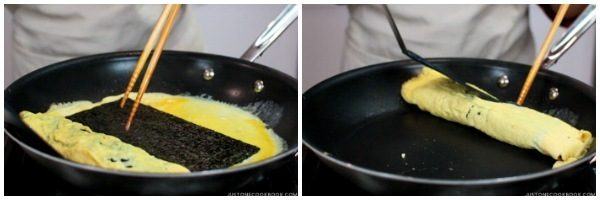
- When the new layer of egg has set and is still soft on top, start rolling it from one side to the other. This is optional, but I placed another layer of ½ nori sheet on top before rolling.
- Move the rolled omelette to the far side of the pan where you started to roll and apply more oil to the pan with a paper towel, even under the omelette. Then pour in a thin layer of the egg mixture to just cover the bottom of the pan again. Make sure to lift the omelette to spread the mixture underneath.
- When the new layer of egg has set and is still soft on top, start rolling it from one side to the other. I placed another ½ sheet of nori here before rolling. Continue until you’ve used all of the egg mixture.
- Remove it from the pan and place the omelette on a bamboo sushi mat. While it’s still hot, roll up the omelette in the bamboo mat to help set its shape. Let it stand for 5 minutes.
To Serve
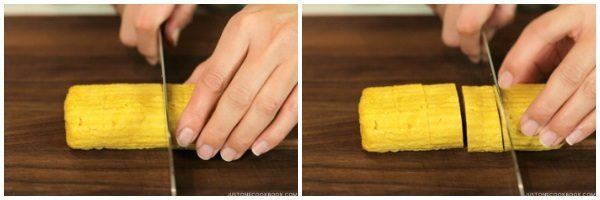
- Slice the omelette into ½-inch (1-cm) pieces.
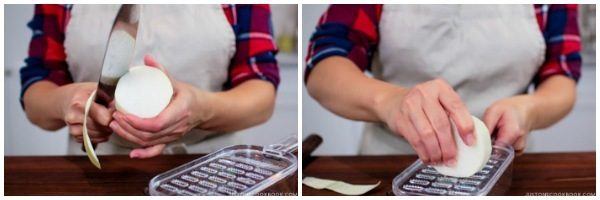
- Peel and grate 3 oz daikon radish. Gently squeeze the water out and place in a small dish or bowl. Pour soy sauce over the grated daikon and serve on the side with the Tamagoyaki.
To Store
- You can put the Tamagoyaki in an airtight container and store in the freezer for up to 2 weeks. Defrost overnight in the refrigerator or microwave.
Nutrition
Editor’s Note: This post was originally published in March 2012. The video and new photos were added in January 2016. The post content was updated in August 2019.


I don’t understand… 3 tbsp of dashi is way way too much for 3 eggs. I knew this but followed the recipe anyway and it was inedible… is it supposed to be 3 tsp???
Hi Claire! Thanks for trying this recipe! This is Dashimaki Tamago, meaning that dashi amount in the tamagoyaki is very high, and it’s the most difficult tamagoyaki due to the thinness of the egg mixture. If you are new to tamagoyaki making, I highly recommend starting with my recipe without dashi (https://www.justonecookbook.com/tamagoyaki/).
Then, once you are familiar with technique, you can try either this recipe you’ve tried or a sweeter version (similar liquid portion: https://www.justonecookbook.com/japanese-sweet-rolled-omelet/). Regarding the amount, it’s pretty standard amount of liquid to make fluffy and tender dashi-included tamagoyaki.
The fluffy tamagoyaki comes from the extra liquid in the egg mixture. If you make my easier tamagoyaki, you will notice that the texture is not as fluffy as dashimaki tamago. If you tried dashimaki tamago in Japan, the dashi oozes out when you cut. That’s how much liquid is inside, which makes it soft and tender tamagoyaki.
Hope this helps!
Are you putting 3 tbsp of instant dashi powder? You need to take 3 tbsp of water then add a tiny amount of dashi powder to taste
That was what was needed? From the way the recipe is phrased I thought it was straight dashi
Hi Ross! Dashi is a Japanese soup stock or broth (liquid). It’s not a solid, which is why it’s called “dashi powder.”
There are different ways to make dashi. You can make dashi with water AND a dashi PACKET, dashi POWDER, or make it from scratch with kombu and bonito flakes.
For vegan dashi, you can make it with kombu or dried shiitake mushrooms. I have detailed information on dashi when you click the “Dashi (Japanese soup stock)” link. I hope that page is helpful. Let me know if you need more help. I’m happy to help! xo
I’ve thought to try making tamagoyaki in a real tamagoyaki pan. I finally bought the last week and this evening I tried making my first tamagoyaki. It’s not as difficult as i’d feared! I didn’t have any dashi, so I need to get some for next time. It turned out just fine, though not as nice as yours. Hanks for the inspiration!
Hi Phil! We are glad to hear you are happy with Tamagoyaki Pan!
Thank you so much for reading Nami’s post and trying her recipe. Happy Cooking!
This is so fun to make in a tamagoyaki pan! I love experimenting with it too, the recipe is very forgiving 😊
Hello, Shelli! We’re thrilled to hear you have a Tamagoyaki Pan and enjoy creating Tamagoyaki as much as we do!
Thank you so much for trying Nami’s recipe and for your kind feedback!
I’ve been wanting to make this ever since I watched Midnight Diner. I made it today for the first time and it turned out great! I didn’t have dashi, so I subbed 1 t miso paste in 3 T water. It was delicious! This might be my new go-to breakfast.
Hi Traci! We are so happy to hear you enjoyed Tamagoyaki.
Thank you so much for trying Nami’s recipe and sharing your cooking experience with us.
Happy Cooking!
I really appreciate you having a video showing how to use this pan. I just came back from Tokyo, and I bought a copper, Kansai style small pan. You mention it is the best, but I do not see you using it. Also, you mention atsuyaki tamago, and that it is easier to make. However, there is no information on how to make it. It seems like it would be a good place to start with a new pan!
I have chickens, and I would love for you to provide many more egg based recipes. Also, one of the hotels I stayed at in Tokyo had the most amazingly healthy breakfast, It had the same basics, as you describe. in your traditional breakfast. Miso soup is a wonderful addition to breakfast! But it also had various steamed vegetables and pickles. I would like to be able to prepare some of these items in advance, and understand which can be prepared and stored in advance, and which are better made at breakfast time. Thank you for mentioning that the cooked omelettes can be frozen and defrosted!
Your website is invaluable. I have made so many great dishes from your recipes. People think I am a great cook, but you are the great cook and also teacher.
Thank you again.
Hi Bronwyn! When I shared this recipe in 2016 with updated images then, I didn’t have a copper tamagoyaki pan so that’s why you don’t see any images of me using it. I shared Atsuyaki Tamago in 2021, I had the pan, so I used it in the step-by-step images.
https://www.justonecookbook.com/japanese-sweet-rolled-omelet/
It’s not as easy as a non-stick pan, and requires more oil to make tamagoyaki. 🙂
Thank you so much for your kind words. I’m so happy to hear you got to enjoy Japanese breakfast in Japan!
I followed your recipe it’s delicious and easy to make
Hi Kessi, Thank you so much for trying Nami’s recipe!
We are so happy to hear that you enjoyed the homemade Tamagoyaki. Happy Cooking!
Great traditional recipe.
I just wanted to add that you can use Chinese-style Chicken Bouillon granules (about 1/3tsp in 3tbsp of water) to sub the Dashi to very good results as well.
My son has a fish allergy (something something proteins) and traditional dashi powder gives him issues, so I tried this on a whim one day (rather than making kombu or mushroom dashi) and it turned out better than the usual substitutions. The Chinese-style bouillon is mostly MSG with just a dash of “chicken” flavor, unlike many of the western-types which have a lot of salt in them, so you get a result that is not dissimilar from using traditional dashi. Mushroom/kombu works as well, but always felt “lacking” to me by comparison.
Just a head’s up!
Hi Paul! Thank you for reading Nami’s post and experimenting with her recipe!
We are glad to hear it worked out well for you. Happy Cooking!
This is an absolutely delicious reciper. The addition of the dashi and mirin is a real game-changer to me, had the lot eaten immediately! Plan next time is to make a lot at once and then try and overcome the urge to eat them so I can freeze some for later. Thanks for the amazing recipe!
Hi Ads! Aww.🥰 We are so happy to hear you enjoyed Nami’s Tamagoyaki recipe.
Thank you very much for taking the time to try her recipe and for your kind feedback.
Happy Cooking!