
Japanese curry or Kare (カレー) is one of the nation’s most popular comfort foods. To satisfy the frequent cravings, we have a decent array of curry menus – from Curry Udon and Curry Doria, to Curry Bread and Katsu Curry – all delicious in their own right.
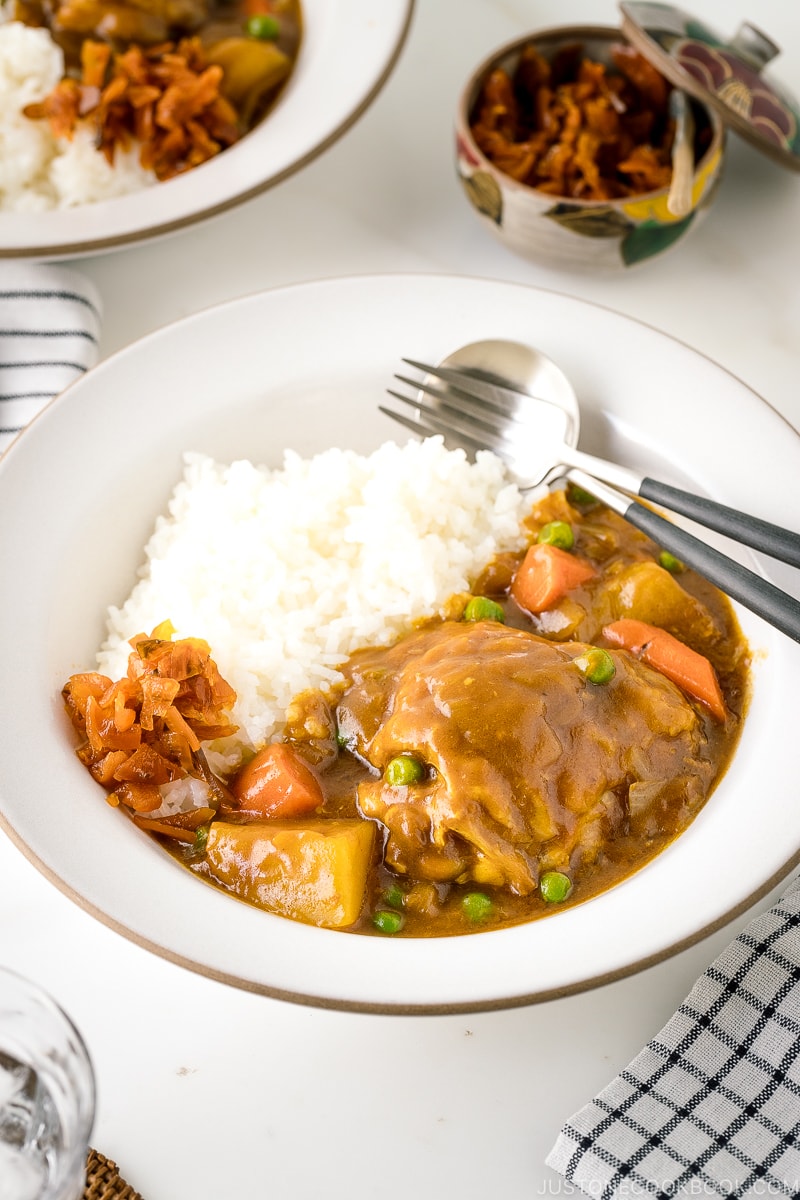
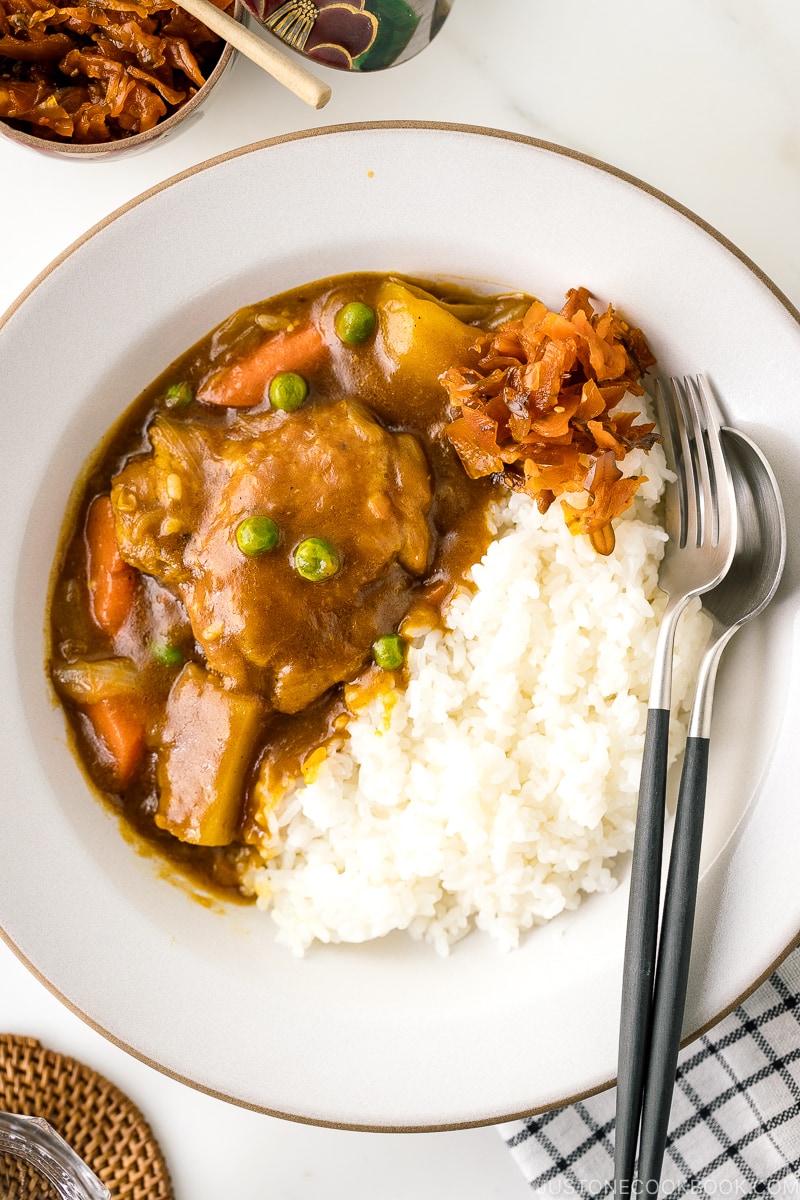
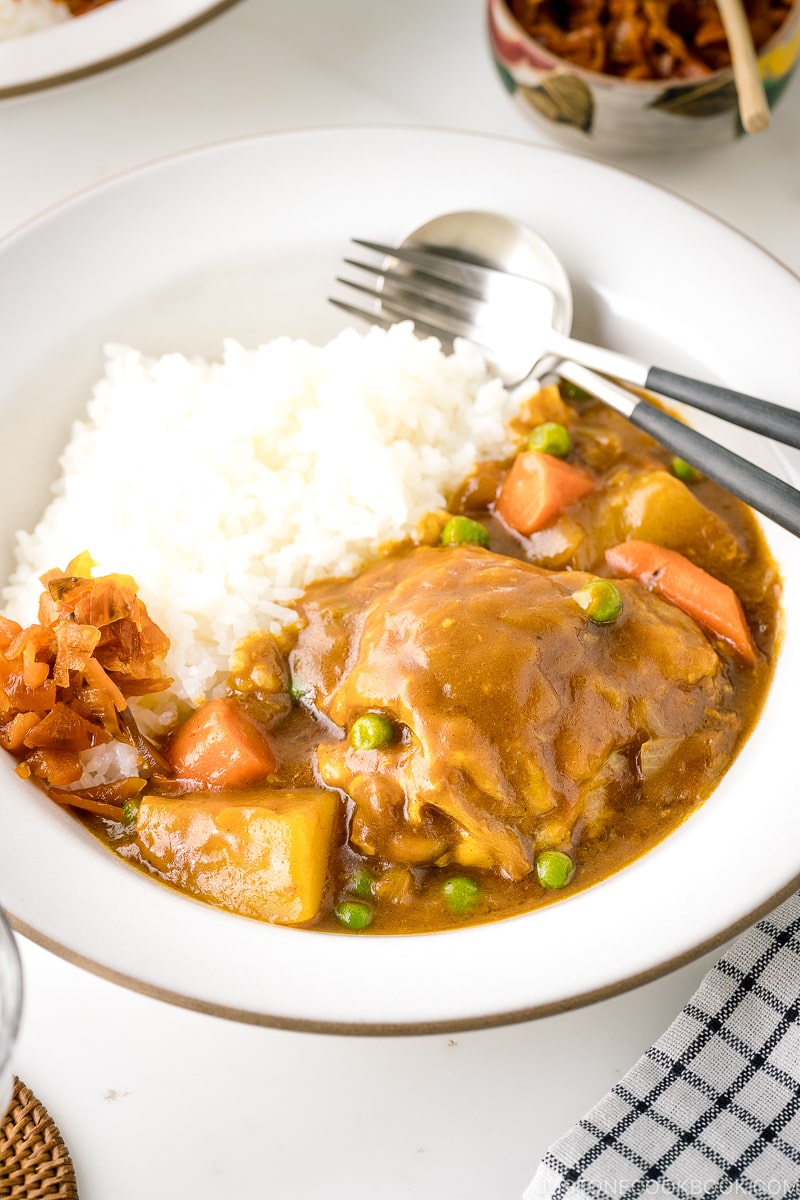
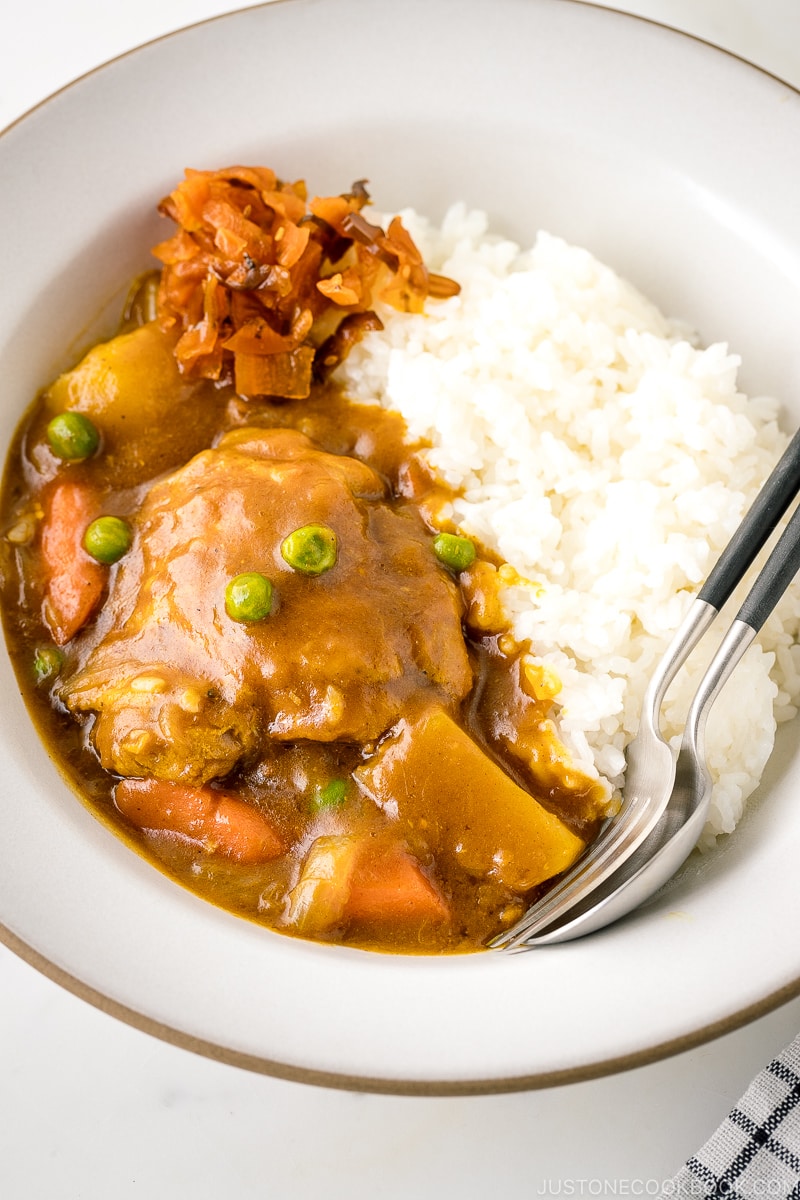
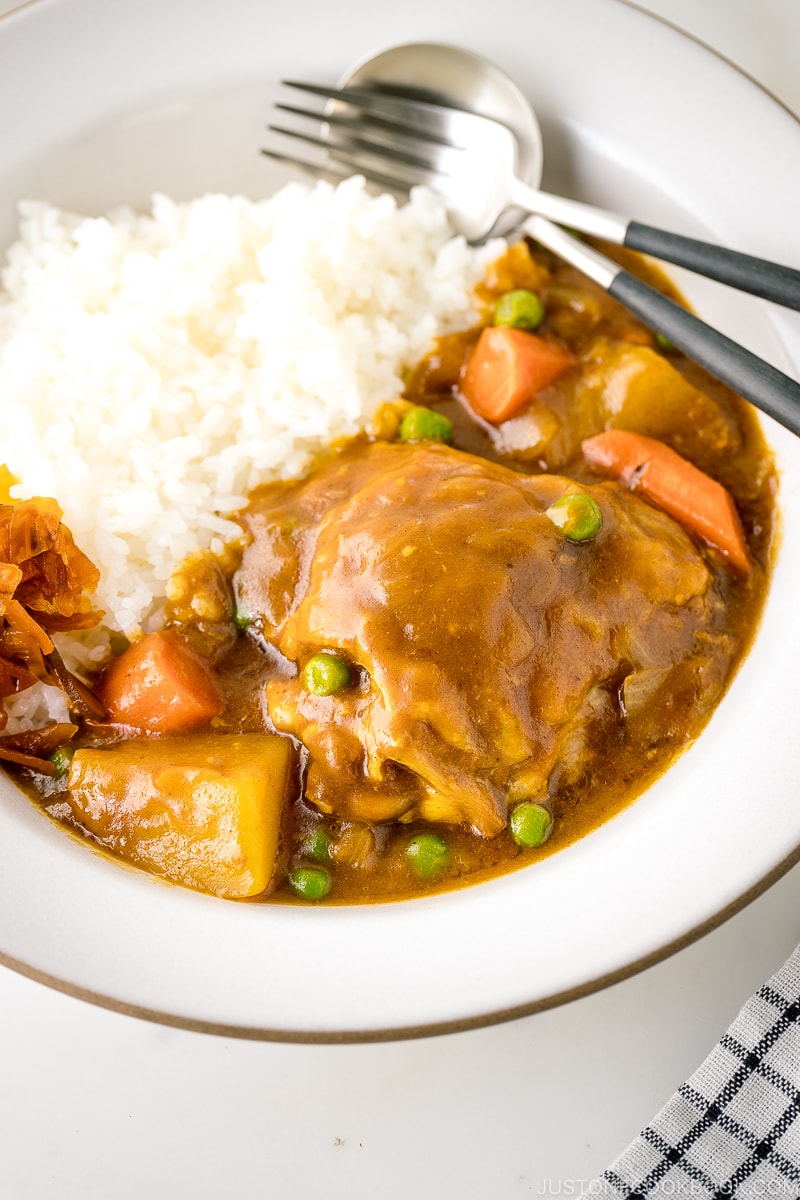
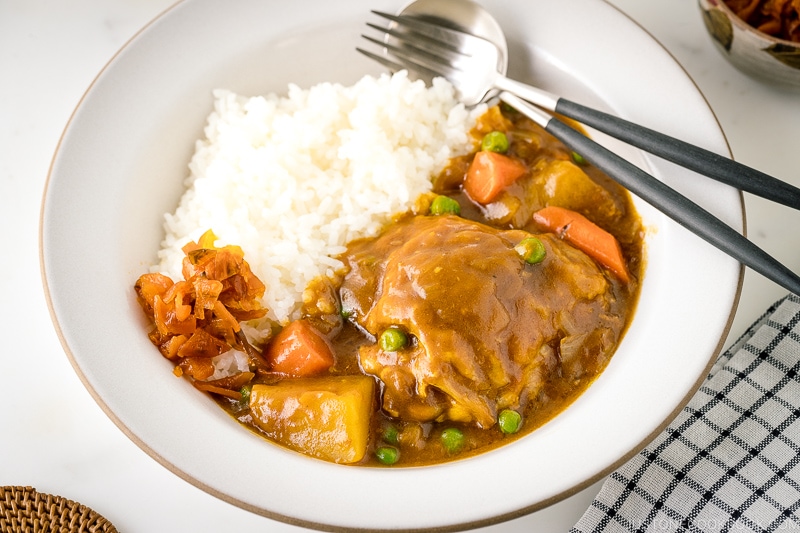
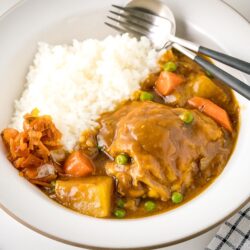
Today’s recipe is Bone-In Chicken Curry (骨付きチキンカレー). It takes slightly longer to cook because of the bone-in meat, but you get super tender chicken and mega flavorful thick curry sauce that reign supreme.
How to Cook Bone-In Chicken Curry
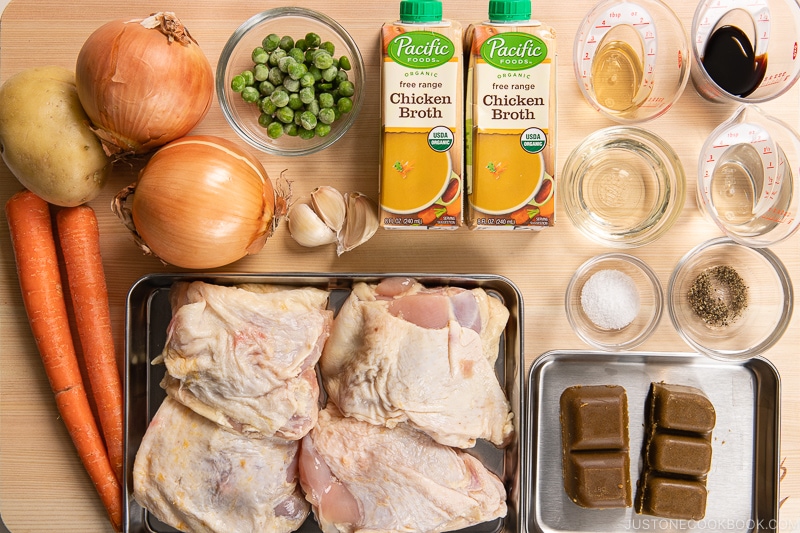
Ingredients You’ll Need
You will only need simple pantry ingredients to make this dish.
- Bone-in, skin-on, chicken thighs (for the best flavor!)
- Onions
- Carrots
- Yukon gold potato (You can also use Russet potato, but it dissolves more easily)
- Green peas
- Garlic
- Chicken stock (You can use less-sodium one, and add salt if necessary)
- Sake
- Japanese curry roux (store-bought or homemade)
- Soy sauce
- Mirin
5 Easy Cooking Steps
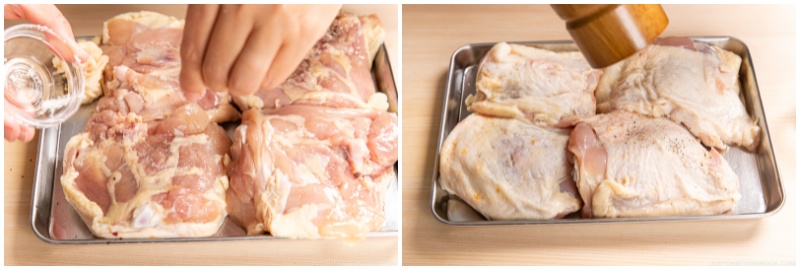
- Cut ingredients and season the chicken with salt and pepper.
- Brown the chicken first, then take it out, and saute the onion till tender.
- Add the chicken back along with sake and stock, and let it simmer for 45 minutes.
- Add the carrot and potato and cook for another 15 minutes.
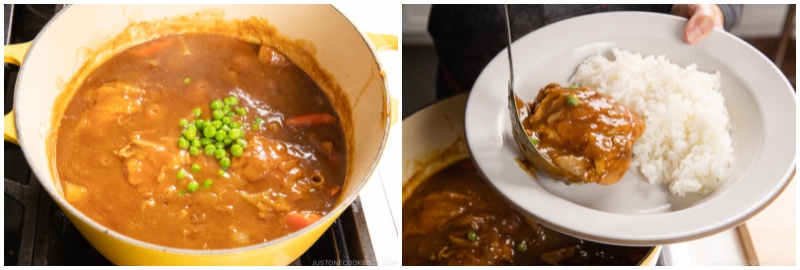
- Add curry roux, seasonings, and green peas. Serve and enjoy!
Helpful Cooking Tips
- Prick the chicken skin with a knife/fork – This technique will cook the chicken from the inside out keeping it moist and flavorsome, while the fat oozes out to crisp up the skin.
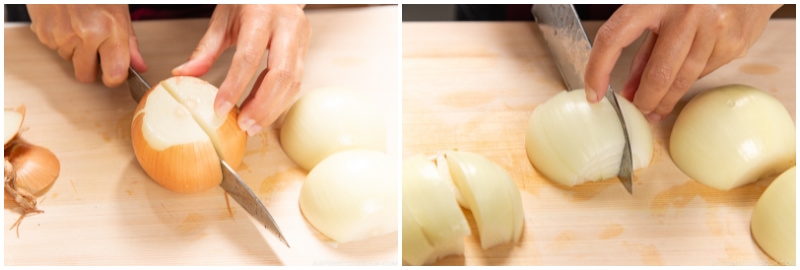
- Cut the onion into wedges for texture – I love sweet, tender, caramelized onion in the curry. I cut the onion into thick wedges, which add some texture to the curry.
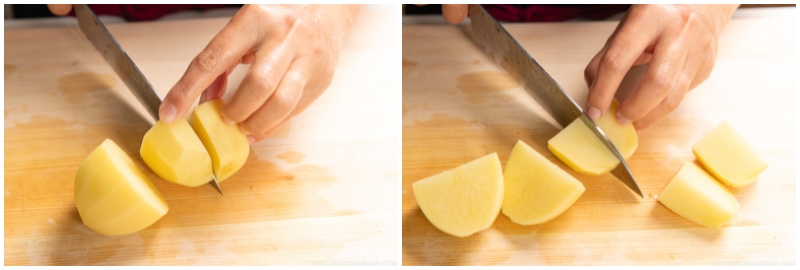
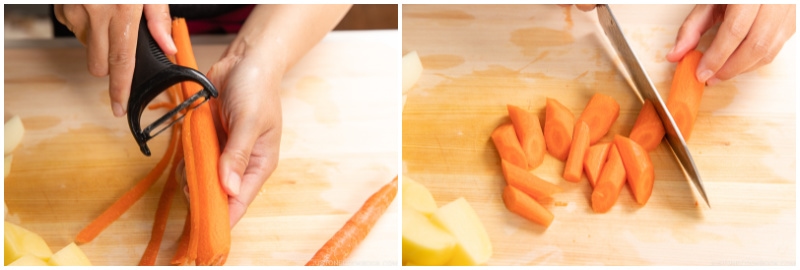
- Cut the carrot and potato in similar size – Cut these two veggies into bite-size, small pieces, as we will only cook for 15 minutes. We do not want to overcook them.
- Brown the skin side first until the skin releases itself – Chicken skin releases fat which equals to flavors. The skin will first stick to the pan, but once it’s crisp up, you can easily flip the chicken.
- Saute the onion till tender and caramelized – For extra flavor boost!
- Turn off the heat while you dissolve curry roux – Once curry is in, keep the heat at the lowest. Curry will burn too easily.
- Use two different brands of curry roux (sometimes mix the spice level, like mild and medium spicy) – Store-bought curry doesn’t have to be boring! Mix it up so it’s not always same old flavor.
- Adjust the consistency of the curry – You can always adjust the thickness of the curry with stock/water. If your chicken stock is salty, use water.
- Add soy sauce and mirin – Why? Read the next section.

Personalize Store-bought Curry with Additional Seasonings
Many home cooks in Japan add some kind of condiments/seasonings to give additional layers of flavors to the store-bought curry. Today I added mirin for mild sweetness and soy sauce for umami, but you can add different seasonings. Here are the common add-ons.
- Butter
- Chocolate
- Coffee
- Grated apple
- Honey
- Ketchup
- Mirin
- Oyster sauce
- Red wine
- Sake
- Soy sauce
- Tonkatsu sauce
- Worcestershire Sauce
- Yogurt
Have you tried any of the flavor add-ons? If so, what are some of your favorites?
What to Serve with Bone-In Chicken Curry
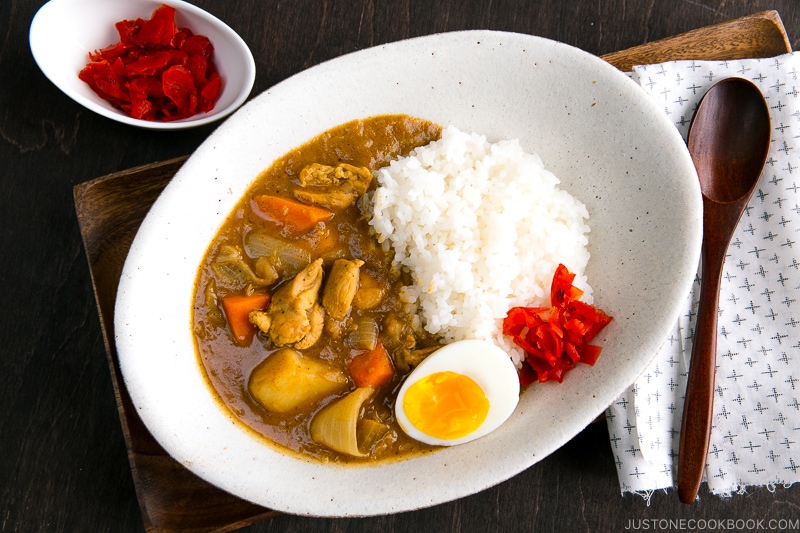
Typically, Japanese curry is served with steamed rice, along with Pickled Rakkyo (Shallots) and Fukujinzuke and a bowl of salad.
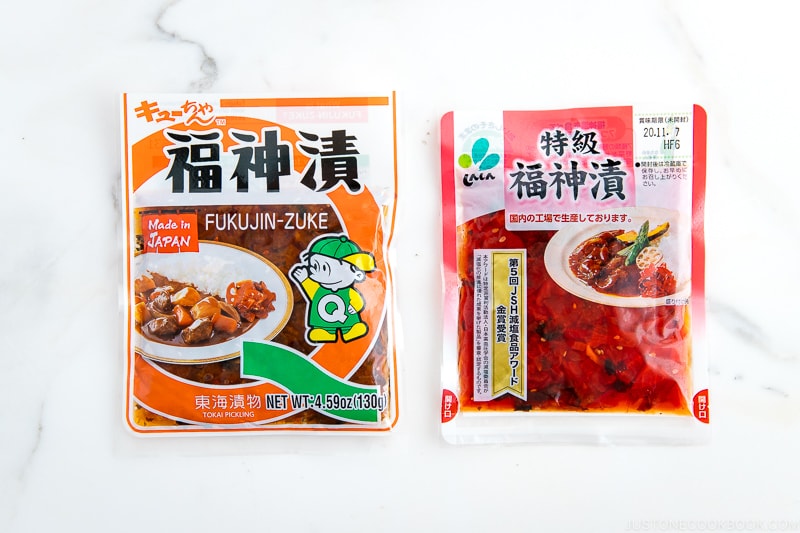
- Fukujinzuke (福神漬) – It is lightly brined in a sweet soy sauce and does not undergo fermentation. The crunchy condiment is more like a chunky chutney, served with Japanese curry. It features seven vegetables as the name inspired by the Seven Lucky Gods (七福神).
- Rakkyo (ラッキョウ) – A pickle of the bulb of Chinese onions/shallots, Rakkyo can be pickled in salt, soy sauce, or sweet vinegar. It resembles a garlic clove but with a taste similar to shallots.
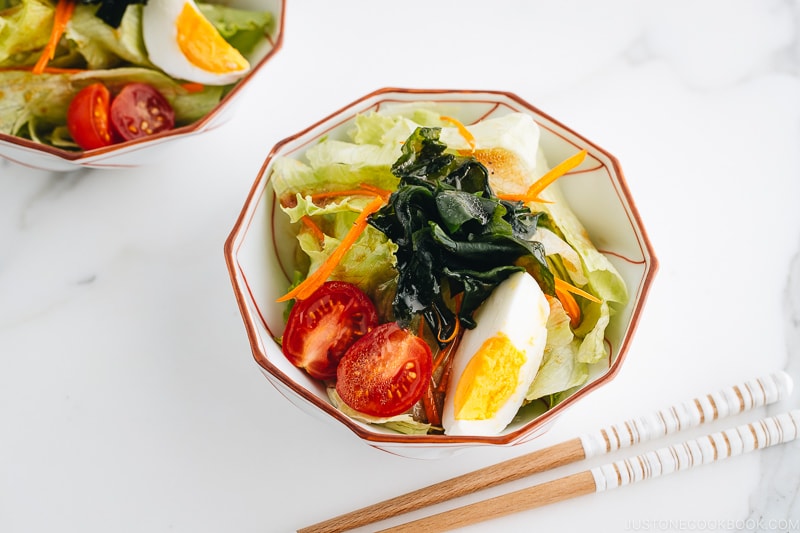
Check out our various salad recipes and salad dressings on the blog!
Other Curry Recipes You May Enjoy
- Chicken Curry
- Beef Curry
- Pressure Cooker Seafood Curry
- Pressure Cooker Japanese Curry
- Sapporo Soup Curry
Wish to learn more about Japanese cooking? Sign up for our free newsletter to receive cooking tips & recipe updates! And stay in touch with me on Facebook, Pinterest, YouTube, and Instagram.
Bone-In Chicken Curry
Ingredients
- 4 bone-in skin-on chicken thighs (1.8 lb, 800 g)
- ½ tsp Diamond Crystal kosher salt
- freshly ground black pepper
- 2 onions (1 lb, 454 g)
- 1 Yukon gold potato (6.5 oz, 184 g)
- 2 carrots (4 oz, 113 g)
- 3 cloves garlic (minced or crushed)
- ¼ cup green peas (1.3 oz, 36 g)
- 2 Tbsp neutral oil (for cooking)
For the Curry Sauce
- ¼ cup sake
- 2 cups chicken stock/broth (or use vegetable stock)
- ½ cup water (add more if needed)
- ½ package Japanese curry roux (3.5–4.2 oz, 100–120 g; or make my homemade curry roux; I use 2 different brands and mix)
- 1 Tbsp mirin
- 1 Tbsp soy sauce
Instructions
- Gather all the ingredients.
To Prepare the Ingredients
- Prick skin of 4 bone-in skin-on chicken thighs with the tip of your knife (so the flavors will penetrate the skin). Cut off the excess fat with a pair of scissors (or knife).
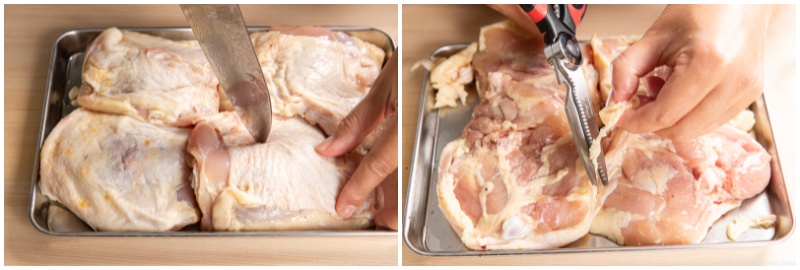
- Season the chicken with ½ tsp Diamond Crystal kosher salt and freshly ground black pepper on both sides.
- Cut 2 onions into wedges. The wedge cut adds more texture; however, you can also thinly slice or dice.
- Peel and cut 1 Yukon gold potato into 8 pieces.
- Peel and cut 2 carrots into bite-size pieces. Here, I use the Japanese rangiri cutting technique. Set aside the vegetables on a tray or plate.
To Cook the Curry
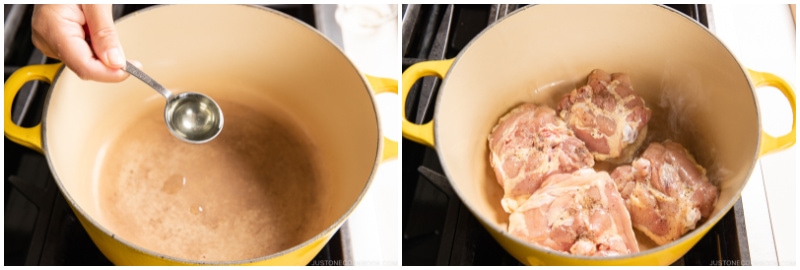
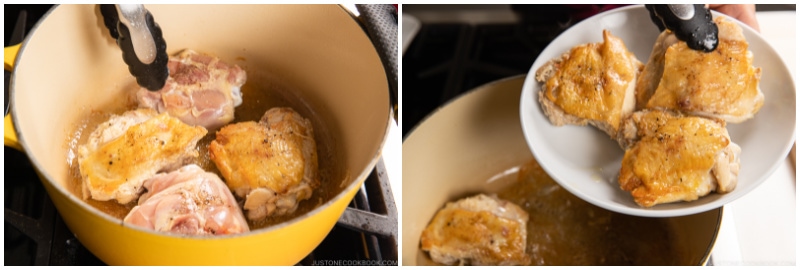
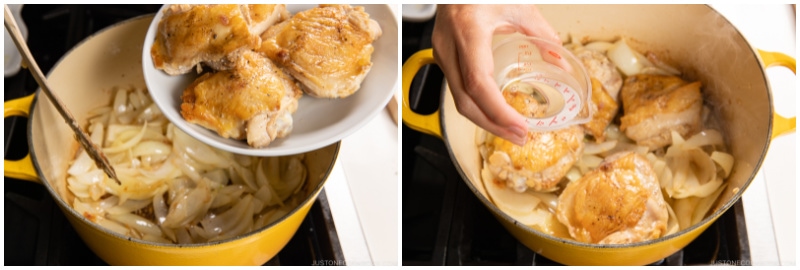
- In a large pot (I use a Dutch oven), heat 1 Tbsp neutral oil on medium-high heat. When it’s hot, sear the chicken on the skin side first. Do not crowd the pan to avoid steaming the chicken and cook in batches if necessary.
- Flip the chicken and cook the other side for 2 minutes and then transfer to a plate until the rest is done.
- Add the onion to the pot and coat with the oil using a wooden spoon/spatula. If there is not enough oil, add ½–1 Tbsp more oil.
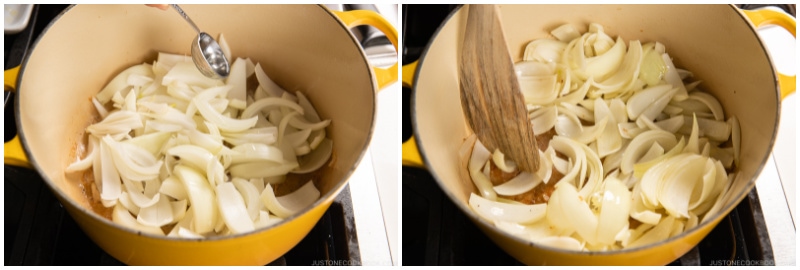
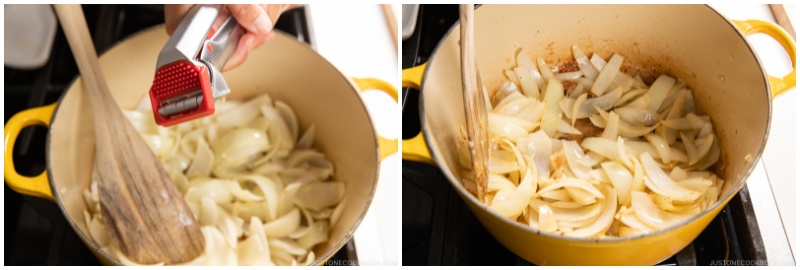
- Add the minced/crushed 3 cloves garlic and sauté, stirring occasionally, until the onions are tender. If the burnt spots on the bottom of the pot need some scraping, you can add sake here (instead of the next step) to loosen them up.
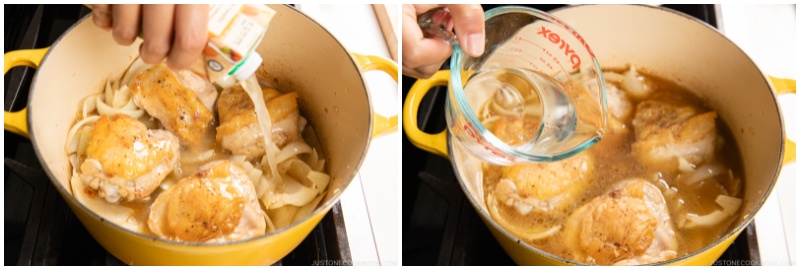
- Add the chicken back into the pot and add ¼ cup sake.
- Add 2 cups chicken stock/broth and ½ cup water, just enough to almost cover the chicken. If you use a larger pot, it may not cover, so please adjust the amount of stock/water. This is not a soupy curry, so we do not need much liquid.
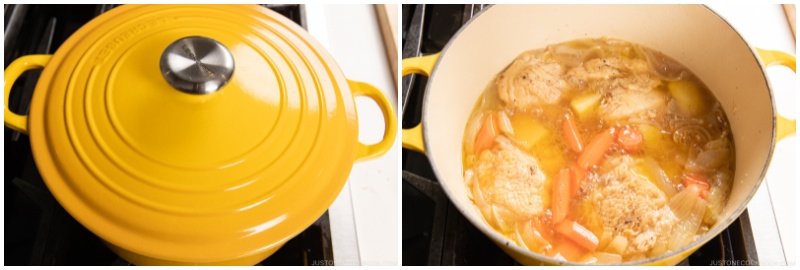
- Cover the lid and bring it to a simmer. When simmering, skim the scum and foam with a fine-mesh skimmer.
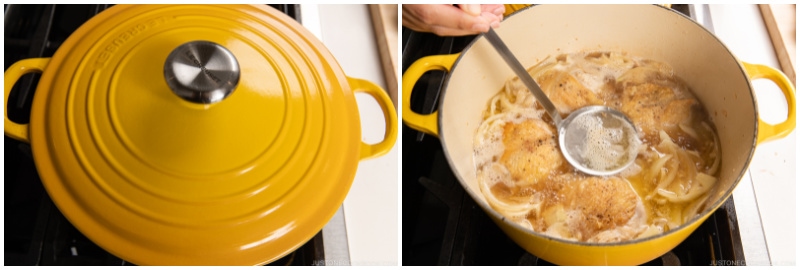
- Cook covered on low heat for 45 minutes.
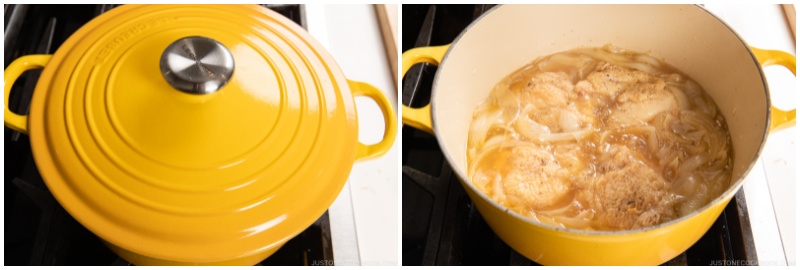
- Add the carrots and potatoes and make sure they are submerged in the cooking liquid.
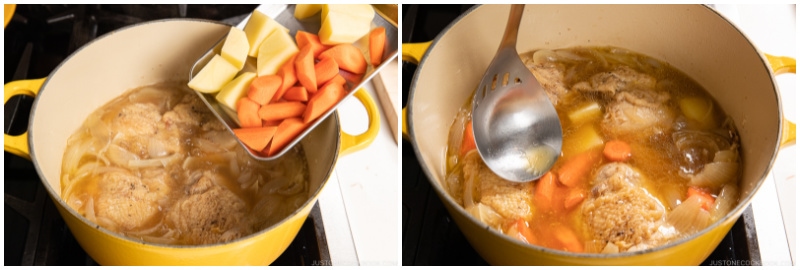
- Cook covered until they are tender, about 15 minutes.
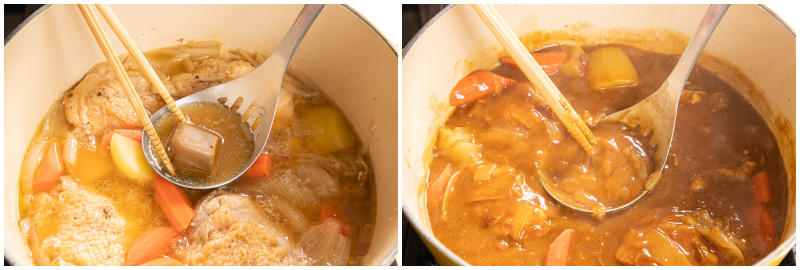
- Turn off the heat and dissolve ½ package Japanese curry roux, one cube at a time in a ladleful of hot broth. When the first cube is dissolved, release it to the broth and mix gently without breaking the tender vegetables. Repeat the process until you finish dissolving all the roux.
- Add 1 Tbsp mirin and 1 Tbsp soy sauce. Mix all together and check the taste. You can add water to loosen the curry if it's too thick. I added 2 Tbsp water here. If your pot does not have a tight-fitting lid, your cooking liquid might have evaporated more than mine. Then add more water, if necessary. You can control the consistency of the curry here. This Bone-in Chicken Curry should have a thicker sauce than my other regular curry, but please adjust the consistency to your liking.
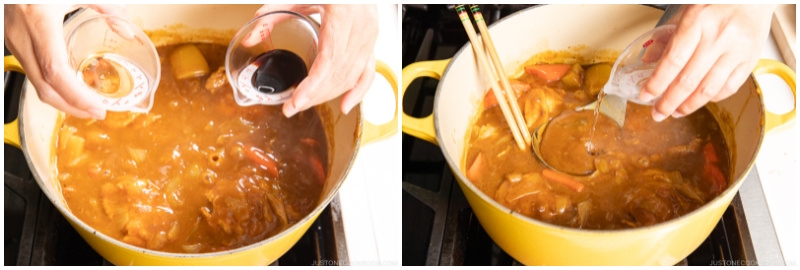
- Add ¼ cup green peas and cook for another minute. Serve the curry with steamed rice.
To Store
- You can keep the leftovers in an airtight container and store in the refrigerator for up to 3 days or in the freezer for a month. Remove the potatoes as they change texture once frozen. Defrost the frozen curry in the refrigerator for 24 hours before you want to reheat it.
To Reheat
- Leftover curry sauce will thicken into a paste as it cools, so it tends to burn while reheating. To avoid this, stir ½ cup (120 ml) water or more into the leftover sauce to loosen. Then, gently reheat it on low heat. If the sauce seems thin, continue heating with the lid off to reduce the sauce.
Nutrition
Did you make this recipe?
Tag @justonecookbook on Instagram so we can see your delicious creation!
Editor’s Note: The post was originally published on May 6, 2011. The images have been updated in May 2, 2021 and a new video has been added.