Recipe Highlights
How to Make Sushi Rice is the foundation of great sushi. Perfectly cooked Japanese rice, seasoned while hot with a simple vinegar mixture, gives you glossy grains with a balanced sweet and tangy flavor. I’ll share the exact method I use so your sushi rice turns out right every time.
- Consistently shiny, plump, well-seasoned rice
- Uses the golden rice-to-water ratio for the perfect texture
- Easy homemade sushi vinegar with 3 pantry ingredients
If you love sushi, try my Spicy Tuna Rolls, Dragon Roll Recipe, and Temaki Sushi (Hand Roll) recipes next!

What is Sushi Rice?
Sushi rice dates back to ancient narezushi, where rice was used to ferment and preserve fish. Over time, vinegar replaced fermentation to create the same lightly sour taste. Sushi evolved again in the 1600s to use vinegared rice and fresh fish in hayazushi or “fast sushi.” Known as shari (シャリ), sushi-meshi (鮨飯), or su-meshi (酢飯), seasoned rice today is the foundation of modern sushi.
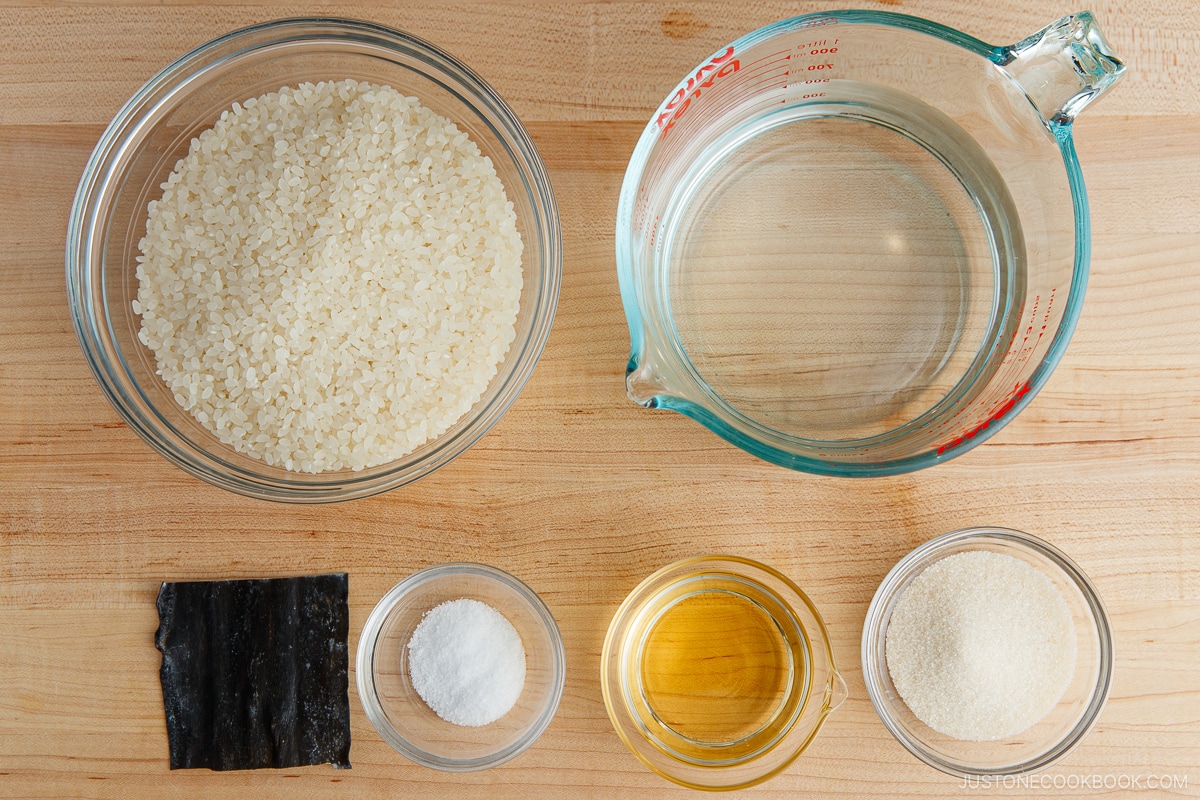
Ingredients for Sushi Rice
- Japanese short-grain white rice
- kombu (dried kelp) – optional
- Japanese rice vinegar (unseasoned)
- sugar
- salt
Find the printable recipe with measurements below.
Jump to RecipeHow to Make Sushi Rice
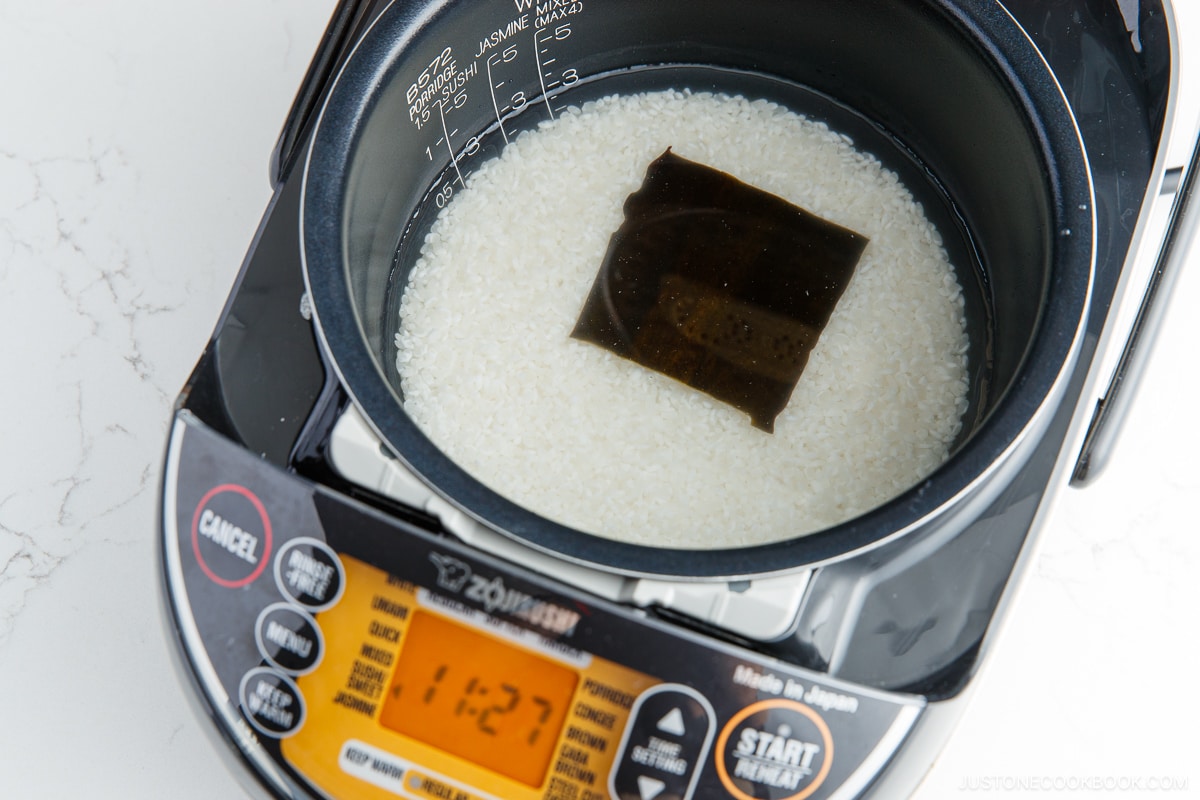
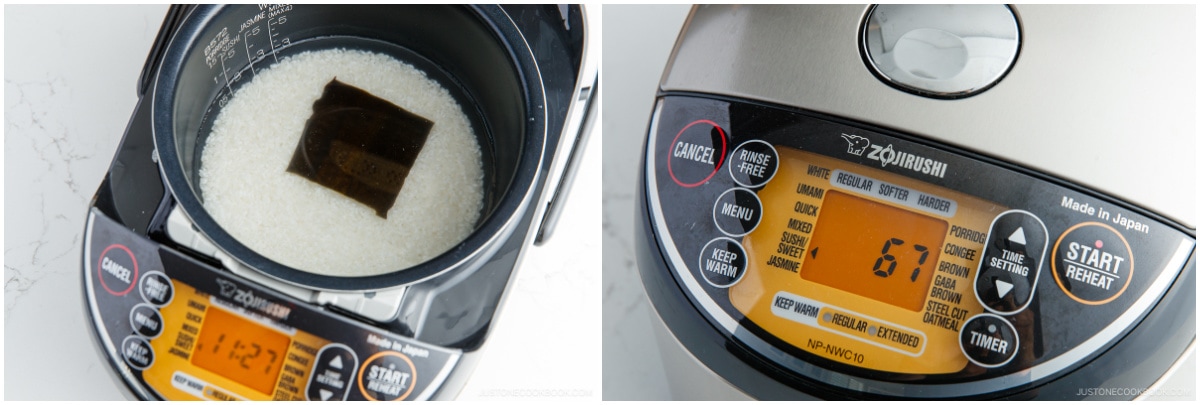
- Wash and cook the rice. Rinse the rice several times until the water runs clear. Drain well, then add it to the rice cooker with the measured cold water and kombu. Let the rinsed rice soak for 20–30 minutes. Cook using the Sushi setting, if available.
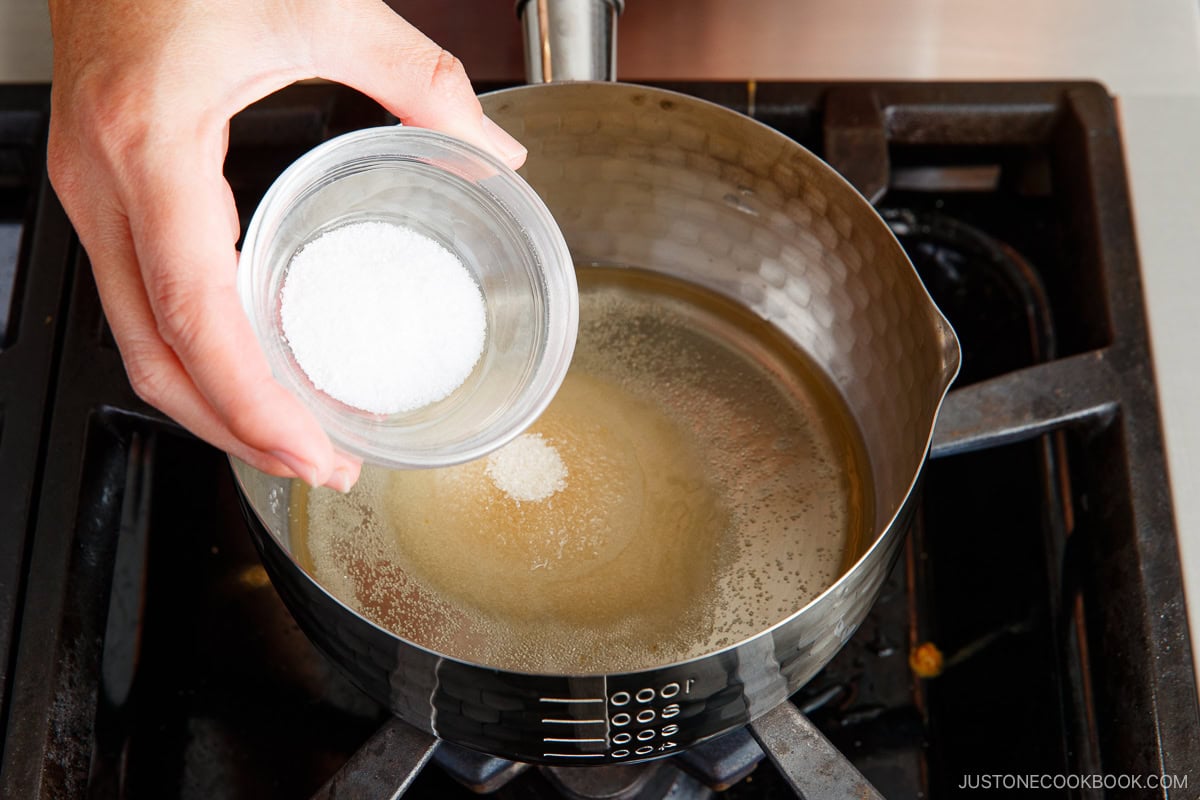
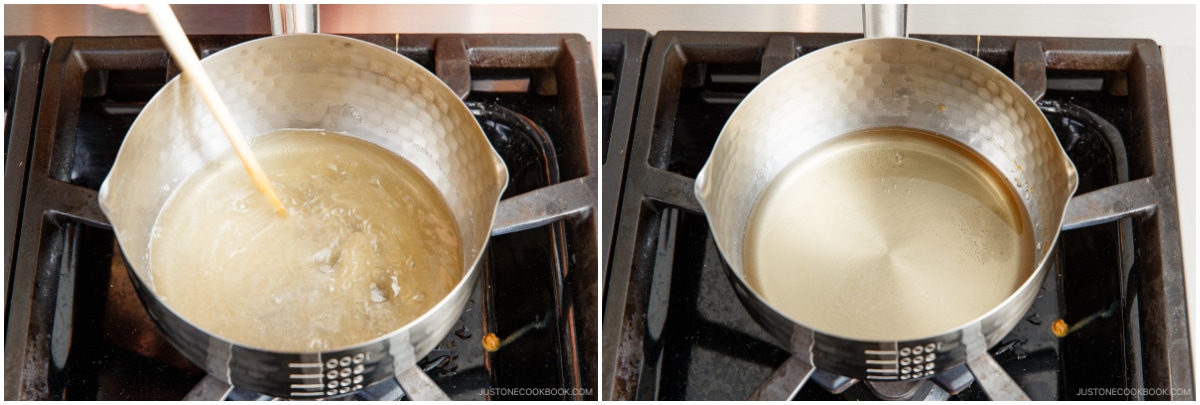
- Make the rice seasoning. Meanwhile, gently heat the rice vinegar, sugar, and salt in a small saucepan on the stove over medium-high heat to a near boil. Cool.
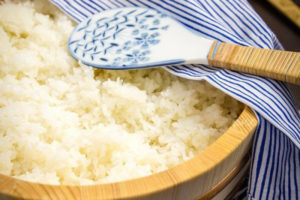
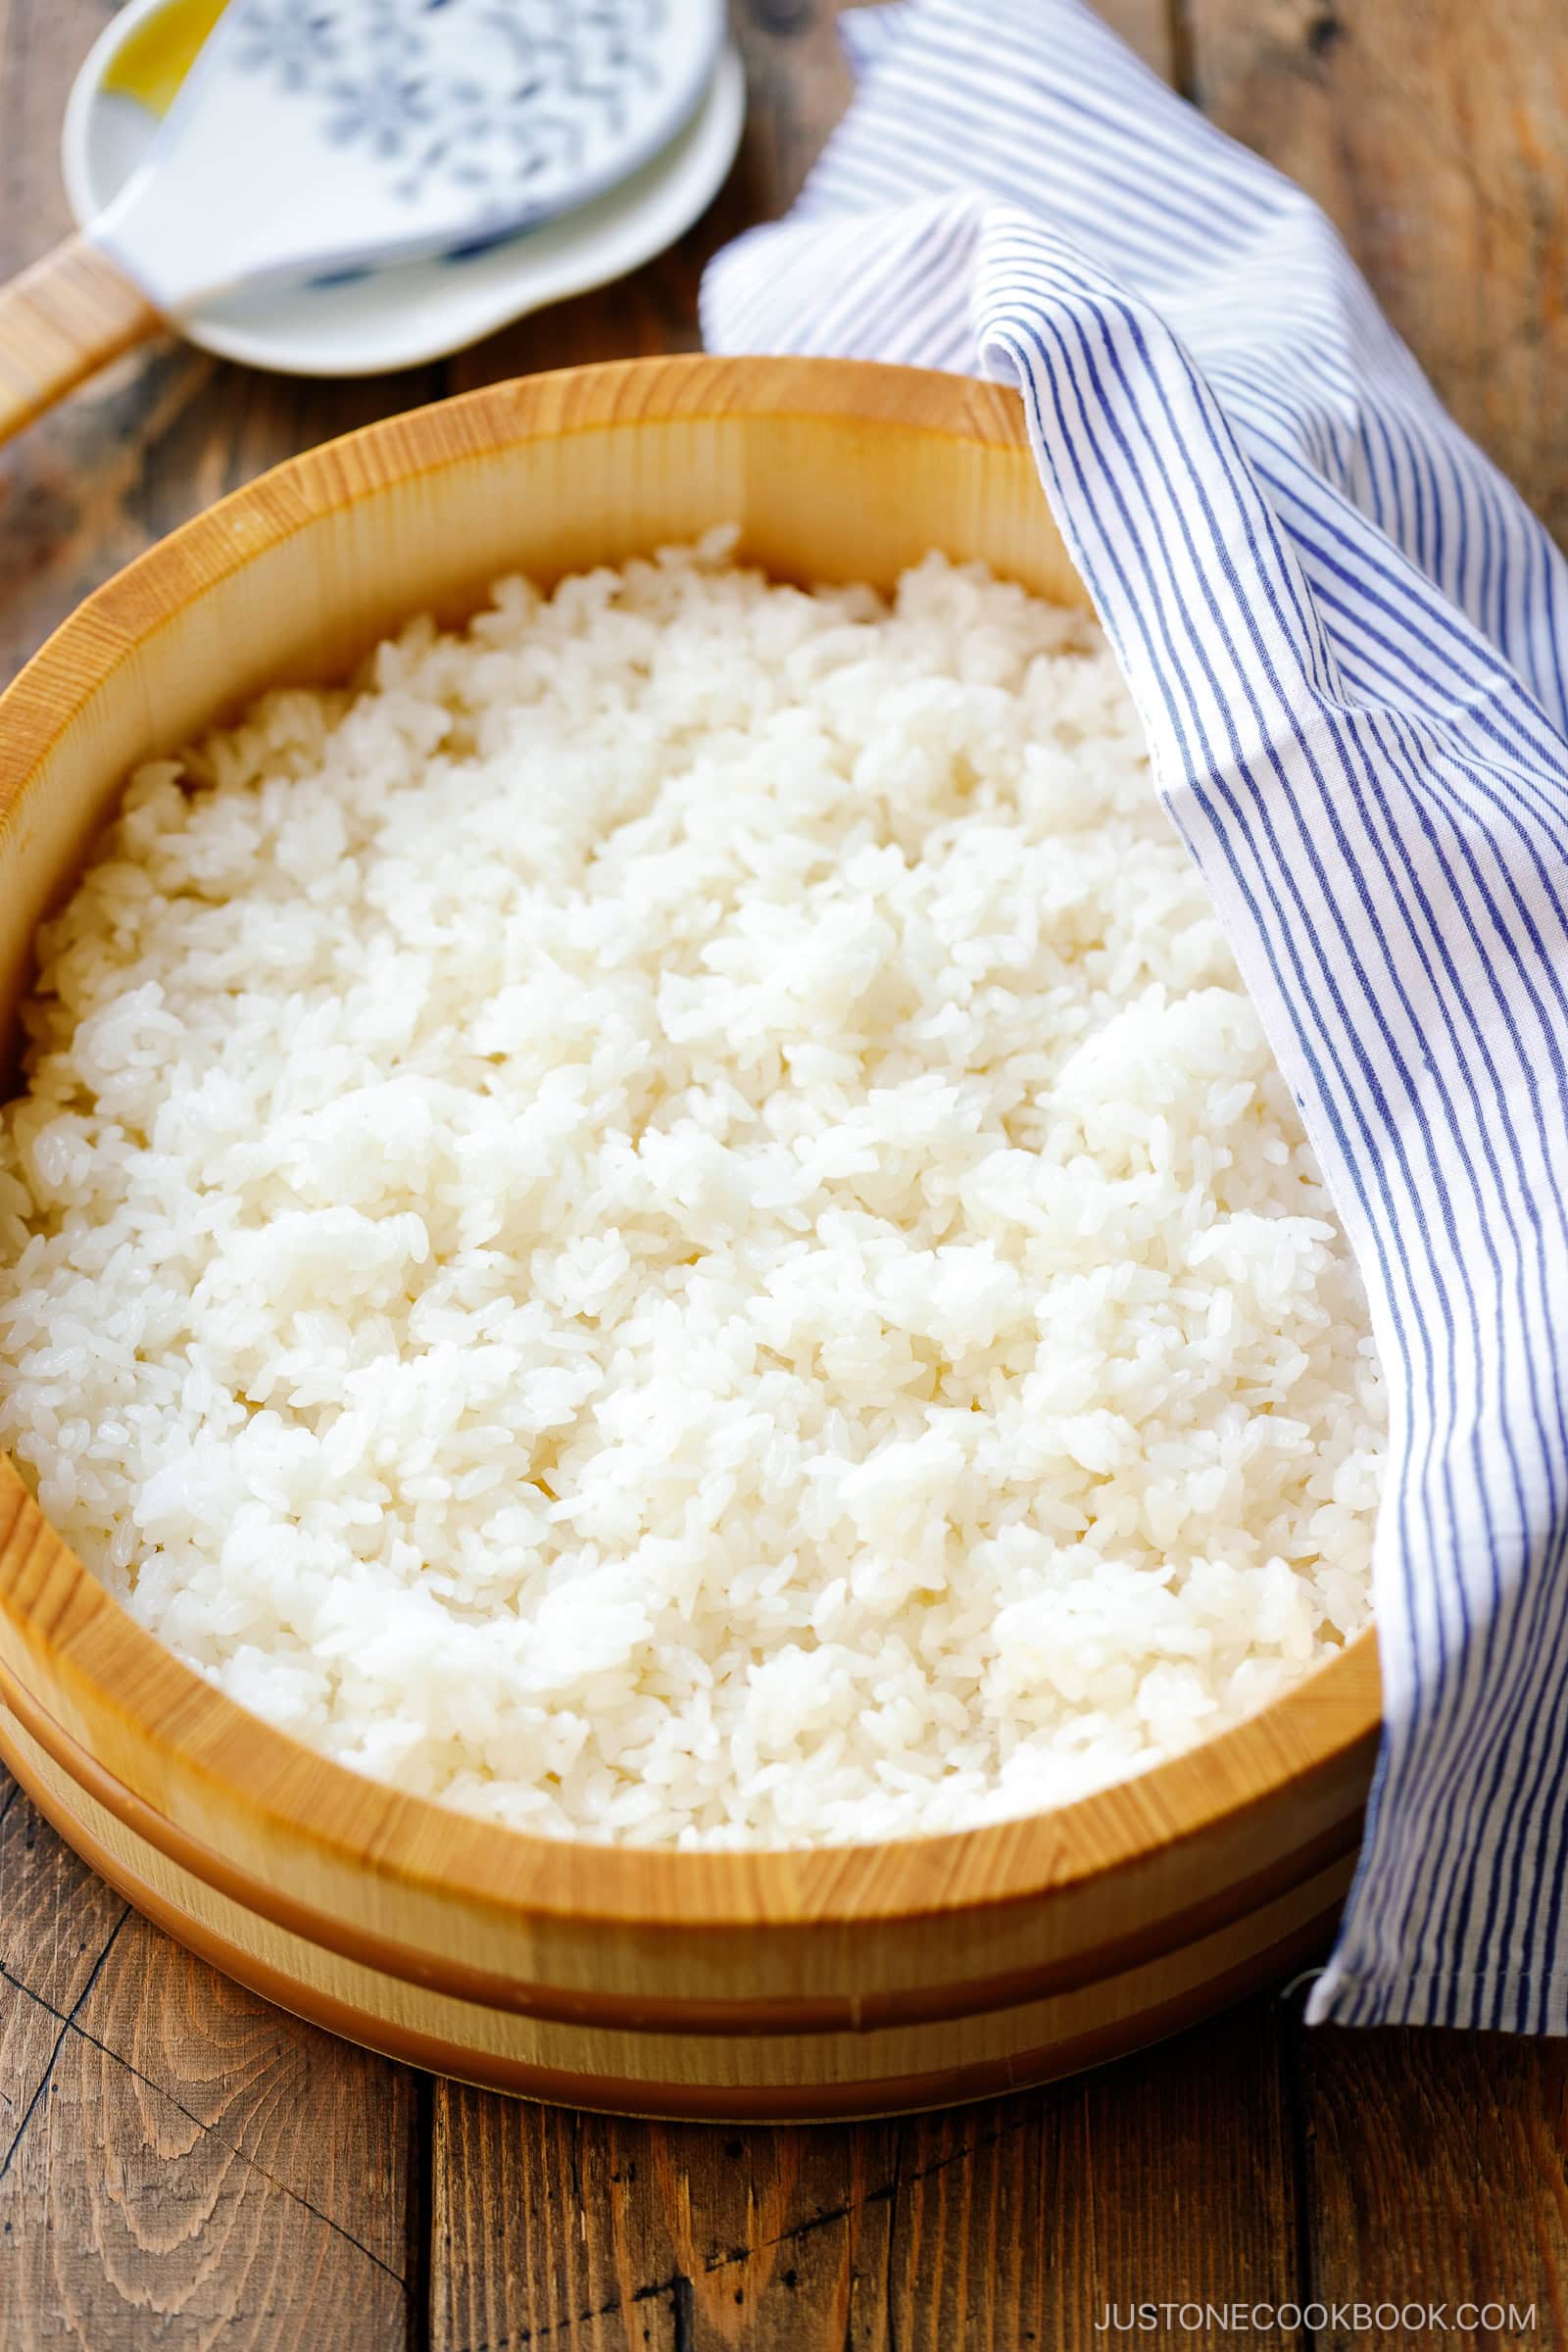
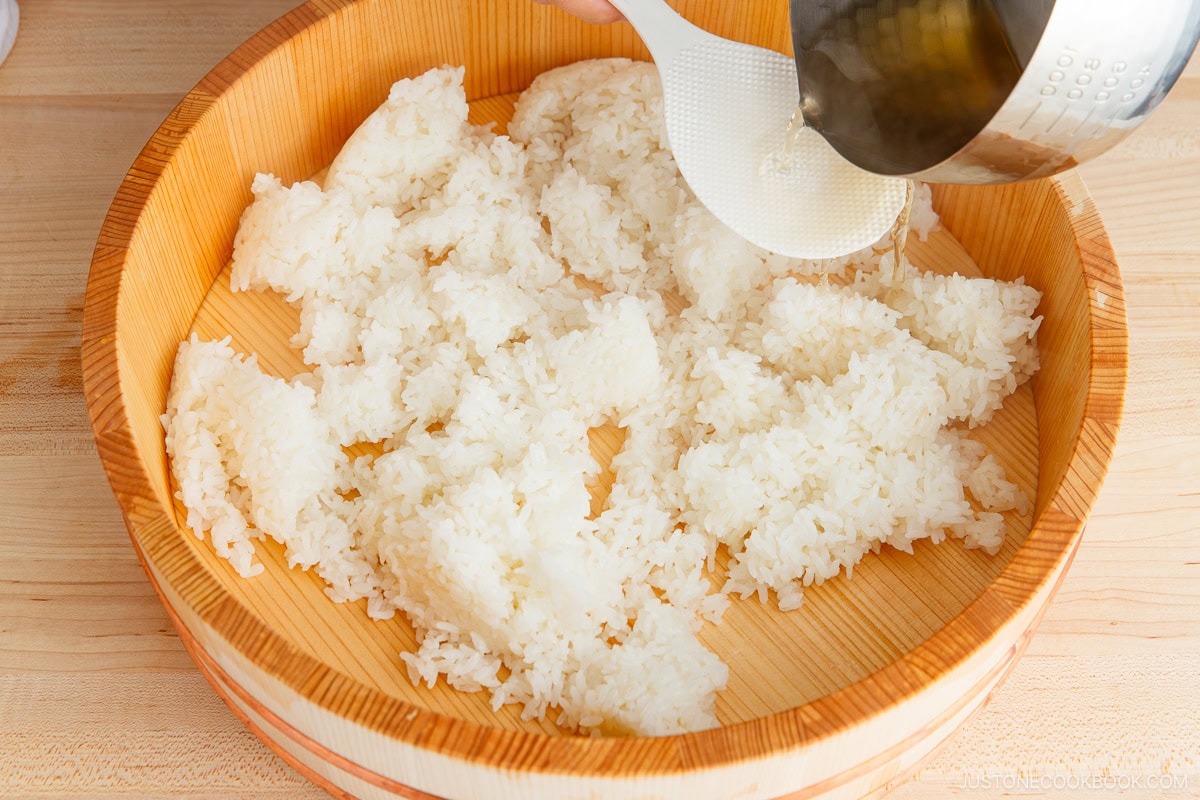
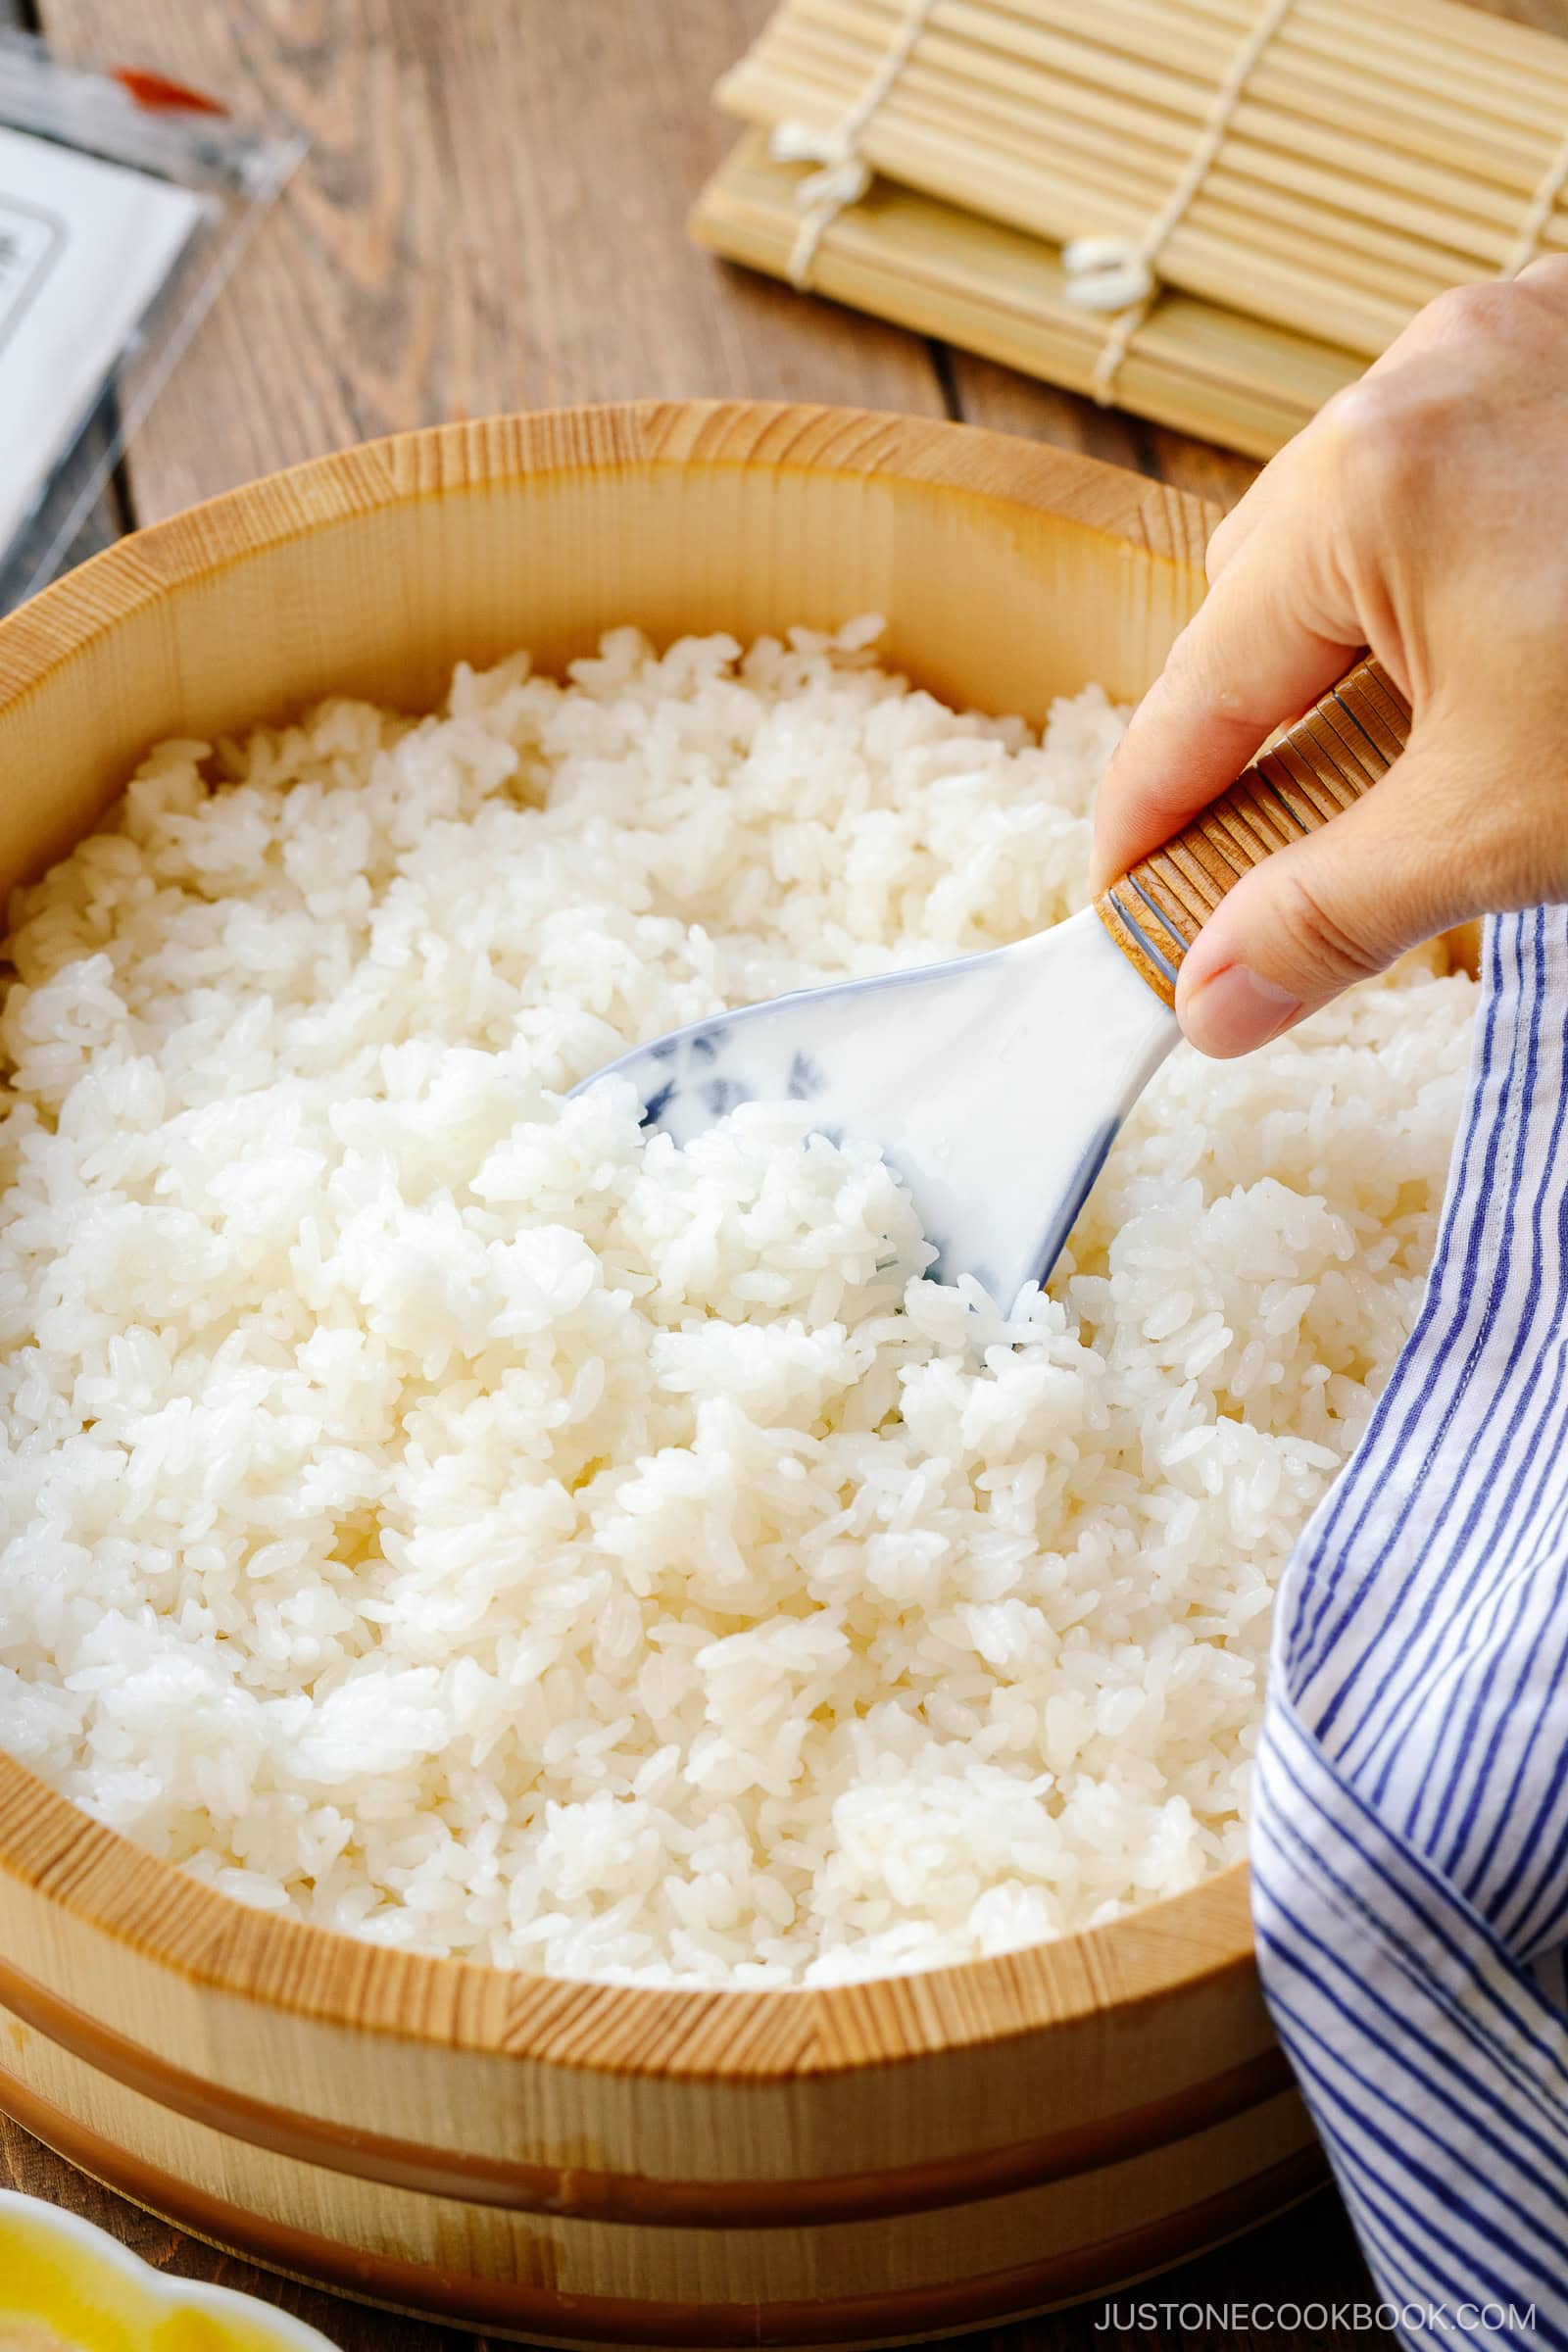
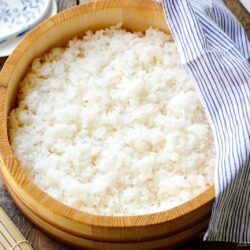
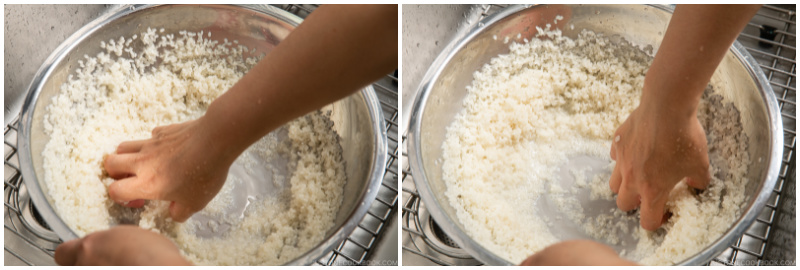
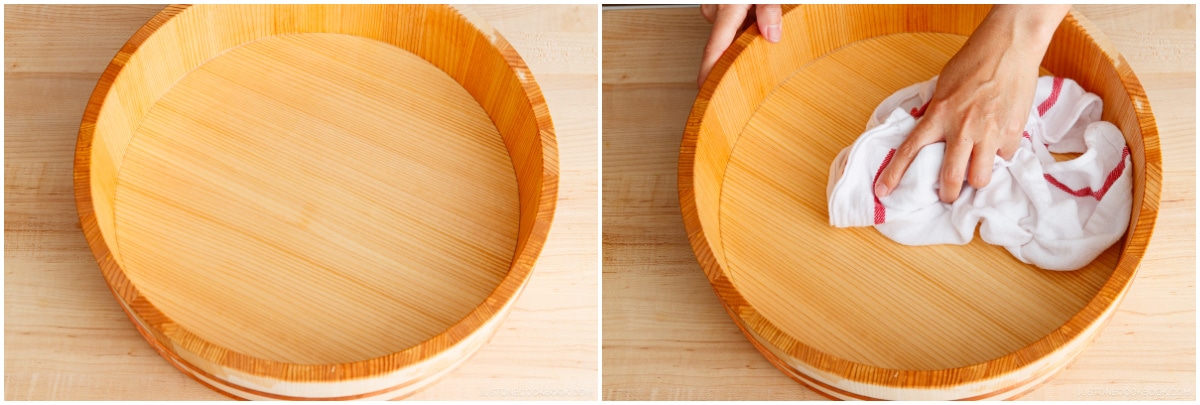
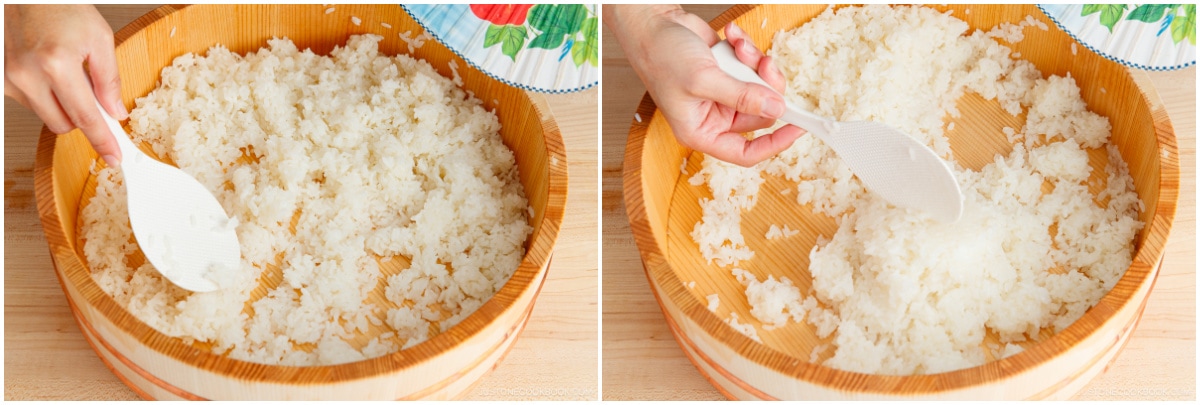
- Season the cooked rice. Remove the kombu and transfer the hot rice to a wooden sushi oke (called hangiri), baking sheet, or wide large bowl. Spread it out so steam can escape. Pour the cooled sushi vinegar over the hot rice, using a rice paddle to control the flow.
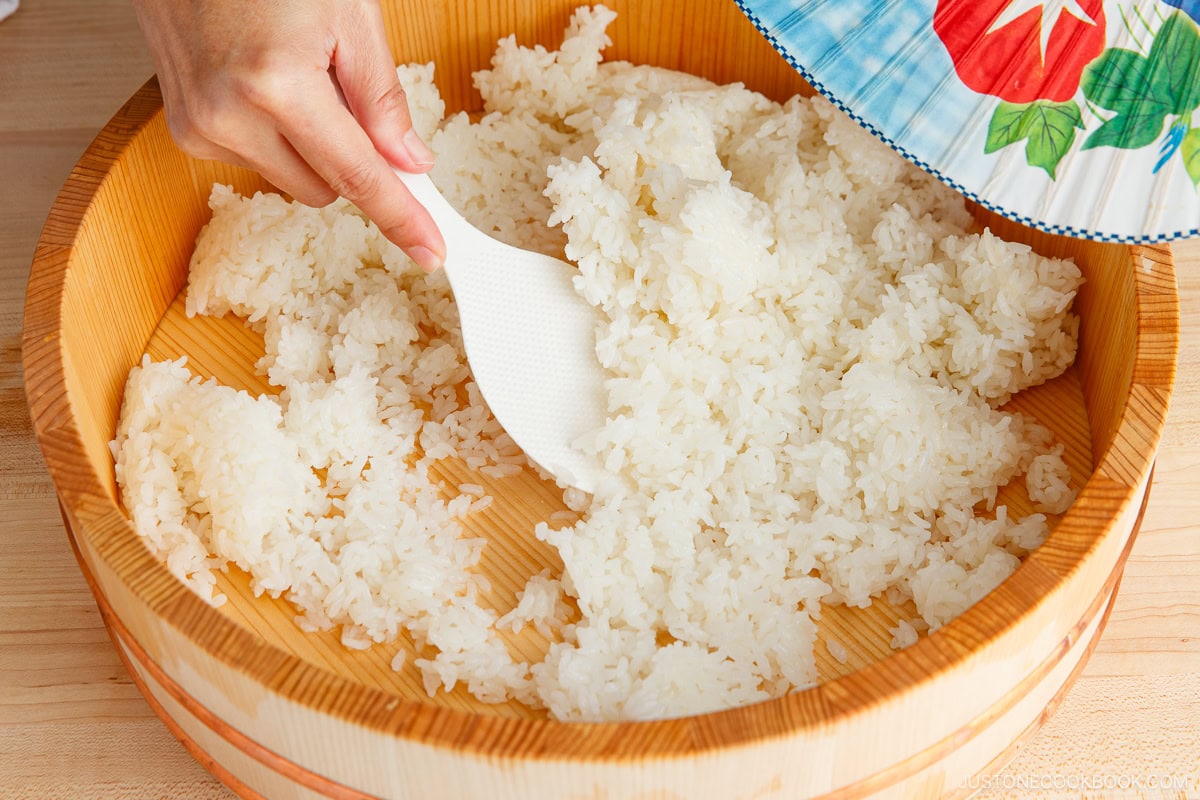
- “Slice” the rice and let cool. Hold the rice paddle at a 45-degree angle and use a slicing motion to distribute the seasoned vinegar and break up clumps while fanning the rice. Flip gently until glossy and cooled.
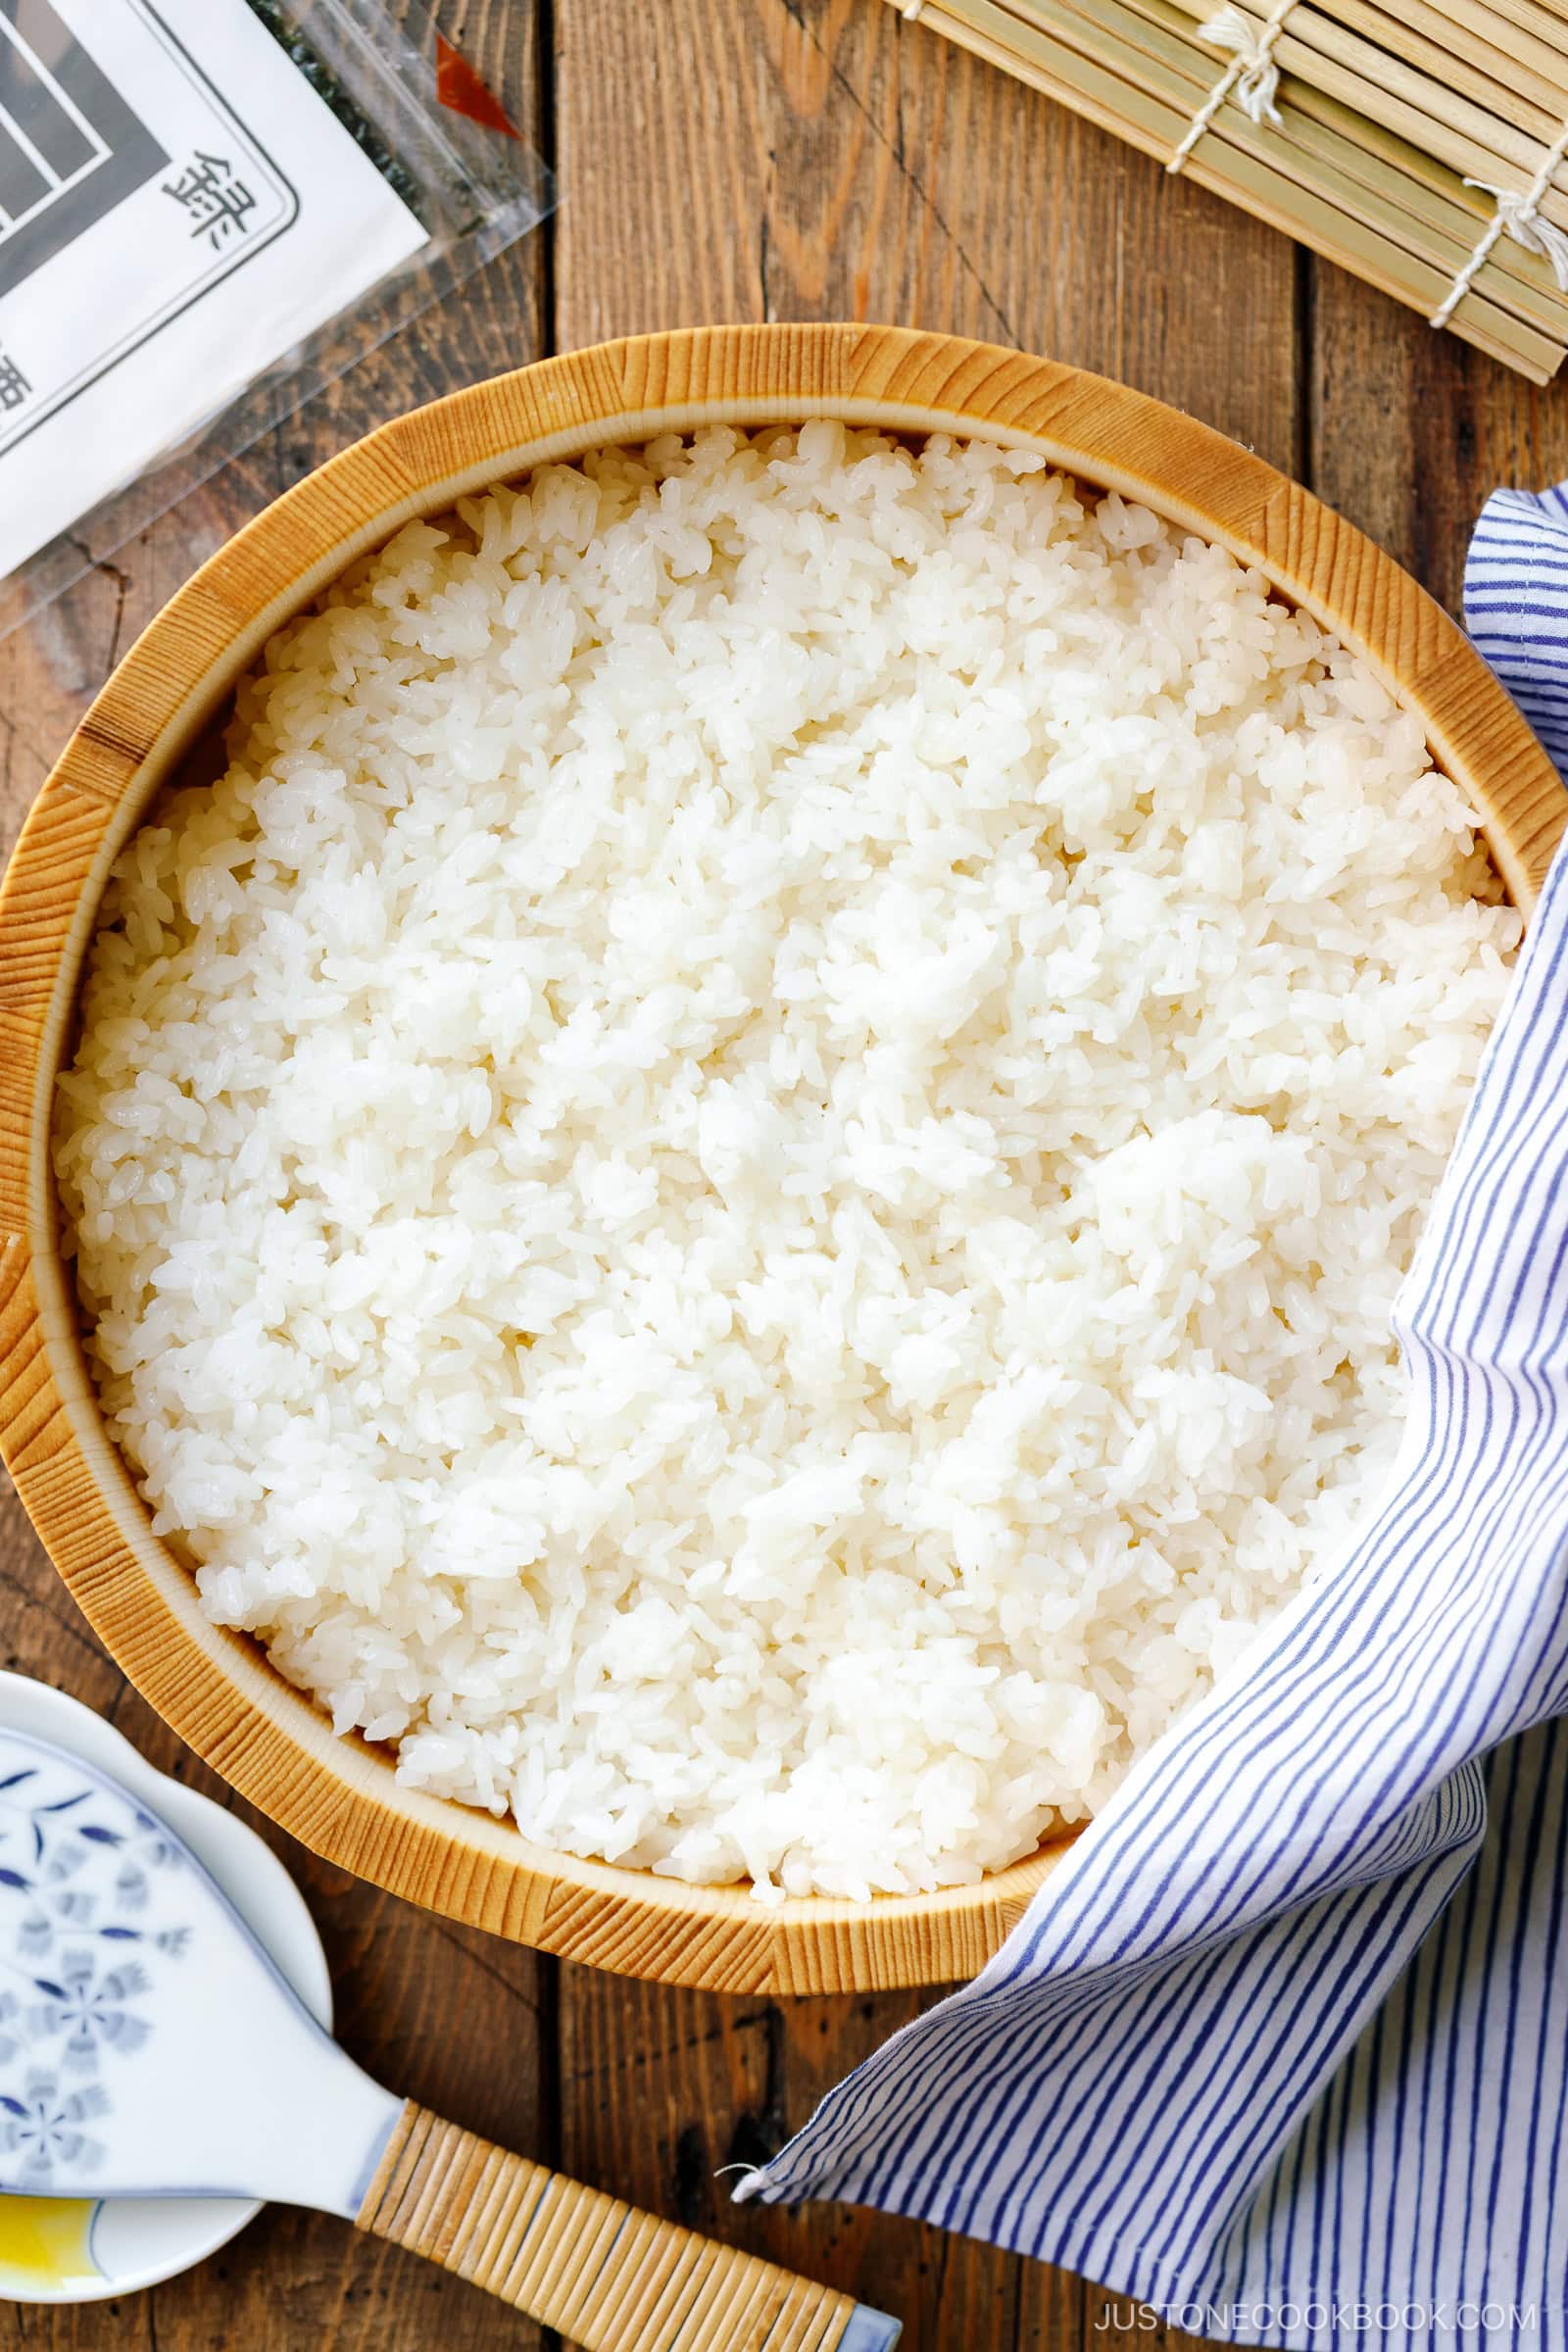
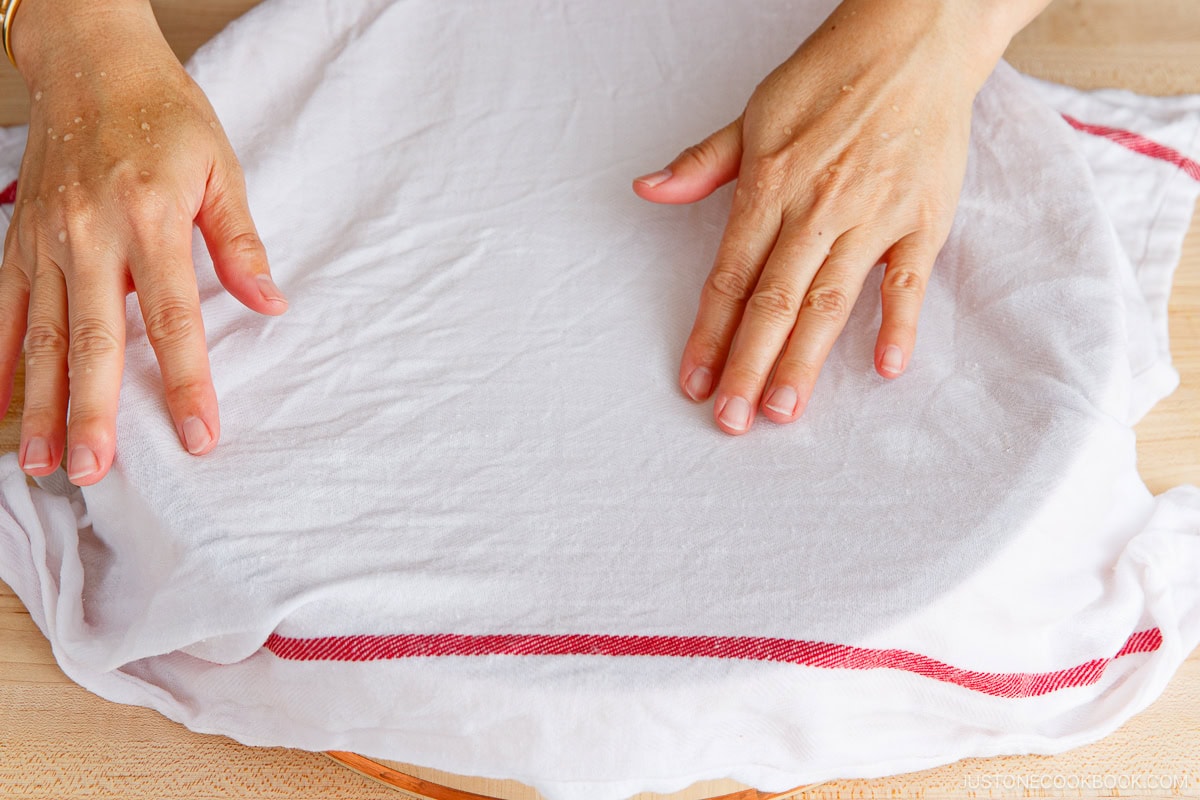
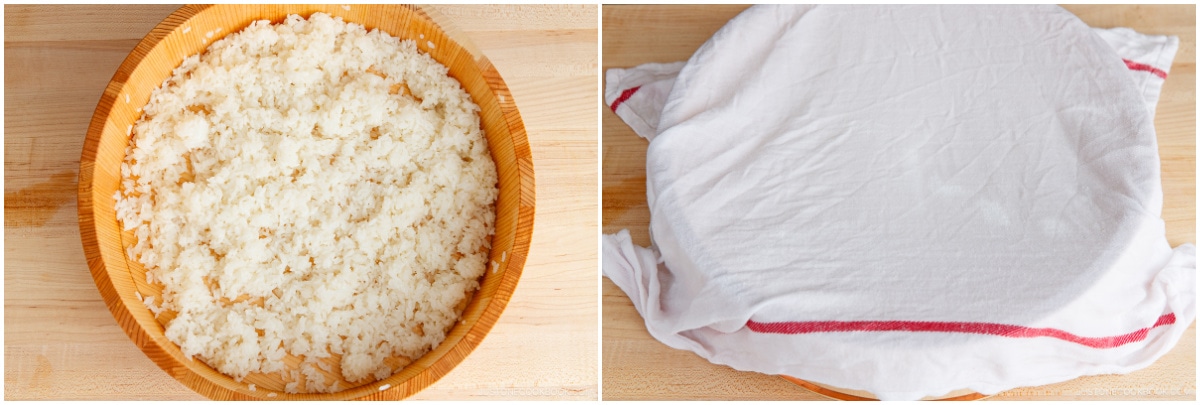
- Serve. Cover with a damp towel or paper towel and use it at room temperature.

Nami’s Recipe Tips
These simple tips will help you make sushi rice successfully every time.
- To save time, use bottled sushi vinegar (seasoned rice vinegar), also called sushizu (すし酢), instead of making it from scratch.
- If you make it at home, use Japanese rice vinegar—It has a mild flavor for an authentic taste.
- Use less water (1:1 rice-to-water ratio). This keeps the rice from turning mushy after adding seasoned rice vinegar.
- Cook rice with kombu, if you like. A small piece adds gentle aroma and umami, though it’s optional.
- Season the rice while hot. Hot rice absorbs the vinegar evenly.
- Use a slicing motion and cool quickly. Stirring breaks the grains and makes the rice mushy. Gently fan to remove excess moisture and add shine.
- Don’t forget to cover with a damp towel. This keeps the rice from drying out while you make sushi.
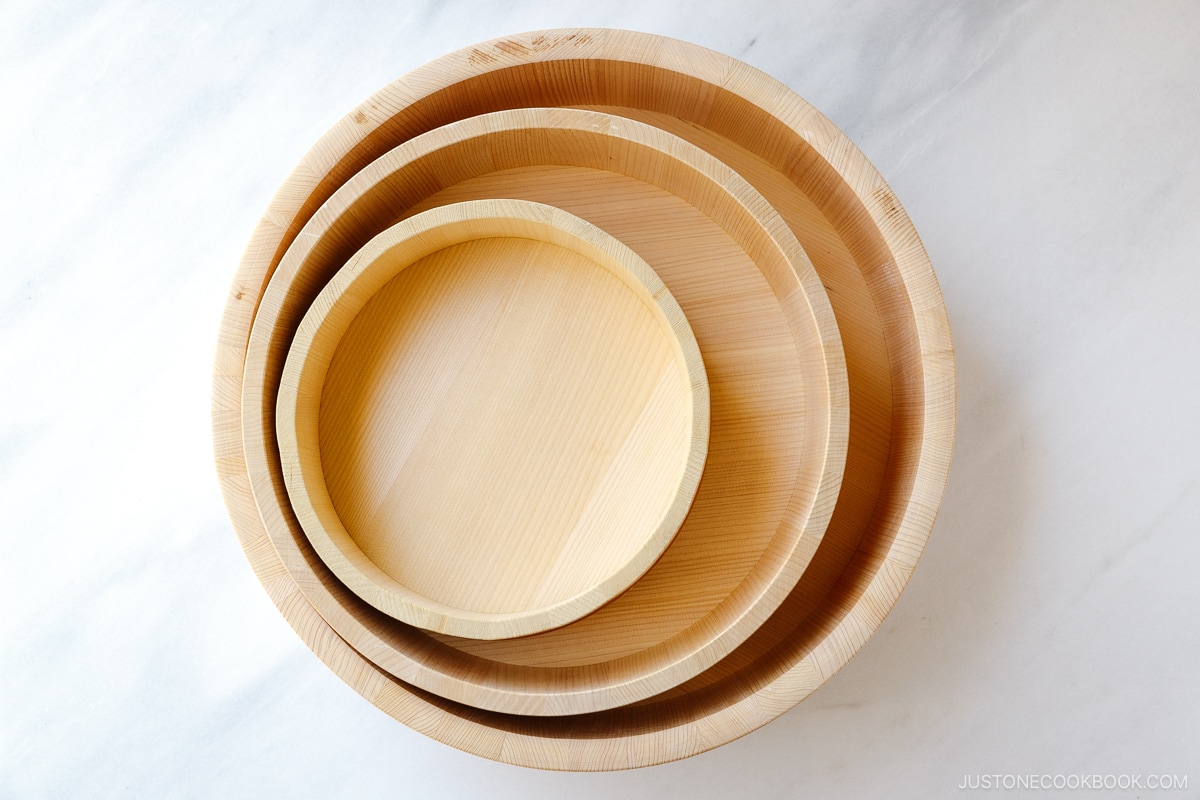
- Use a hangiri (sushi oke) or a large tray, such as a baking sheet. A hangiri is the traditional vessel for seasoning the rice. It makes it easy to spread out hot rice and cool it after adding the sushi vinegar, and the hinoki (cypress) wood absorbs excess moisture. Lightly moisten it with water before adding the rice.
How to Use Your Sushi Rice
Use your perfect homemade sushi rice as the foundation for all types of sushi, from everyday meals to celebratory occasions.
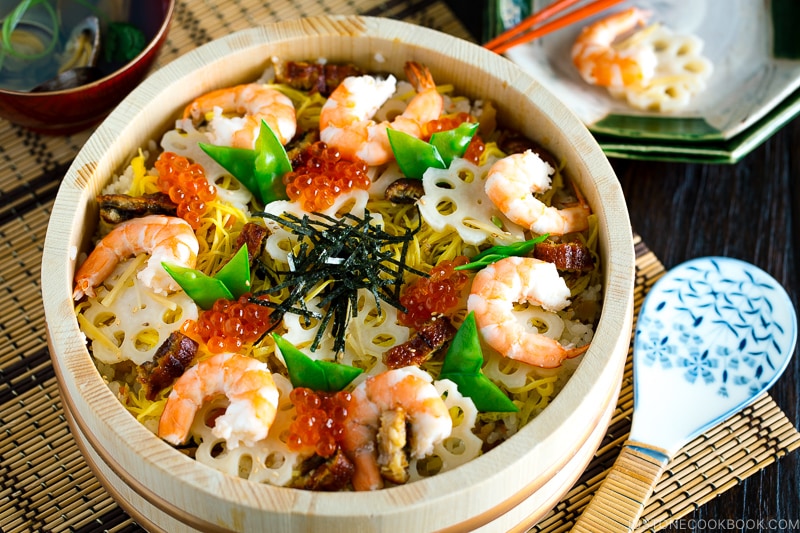
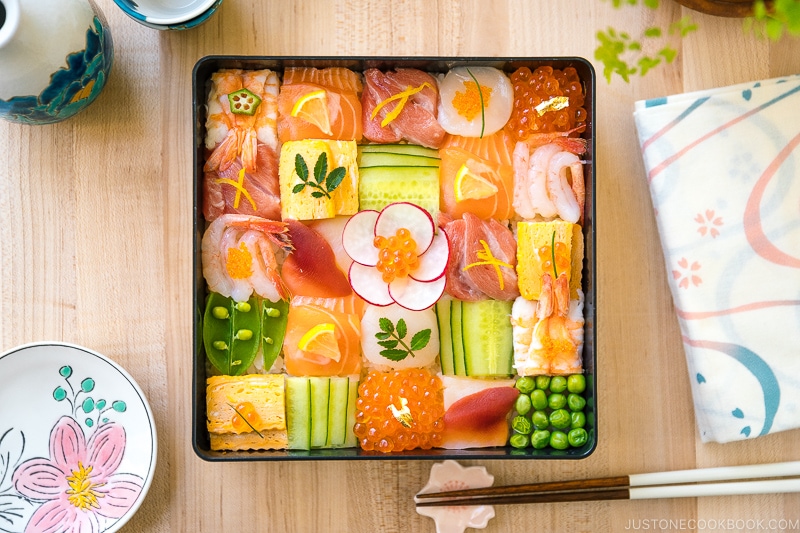
- In scattered sushi: Chirashi Sushi is colorful, festive, and easy to assemble.
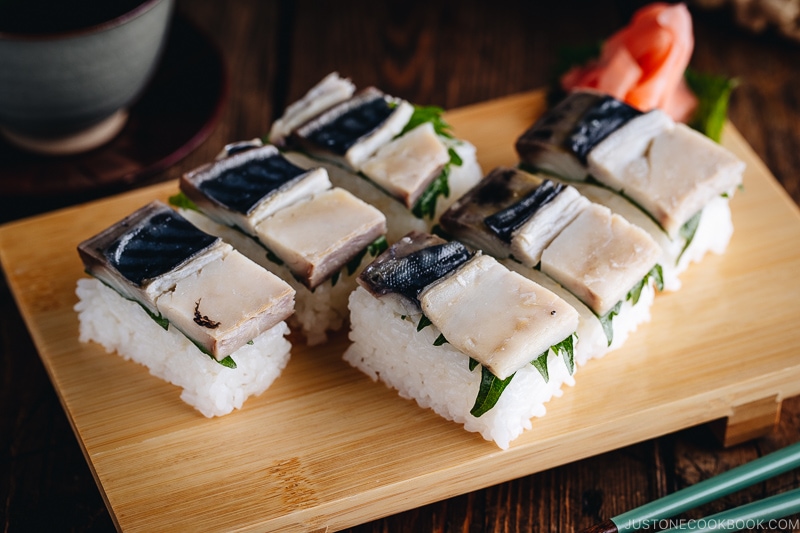
- For pressed sushi: Mackerel Pressed Sushi is a popular variety of layered and compressed oshizushi.
- For checkerboard sushi: Mosaic Sushi showcases pressed seasoned rice in a colorful, beautiful pattern.
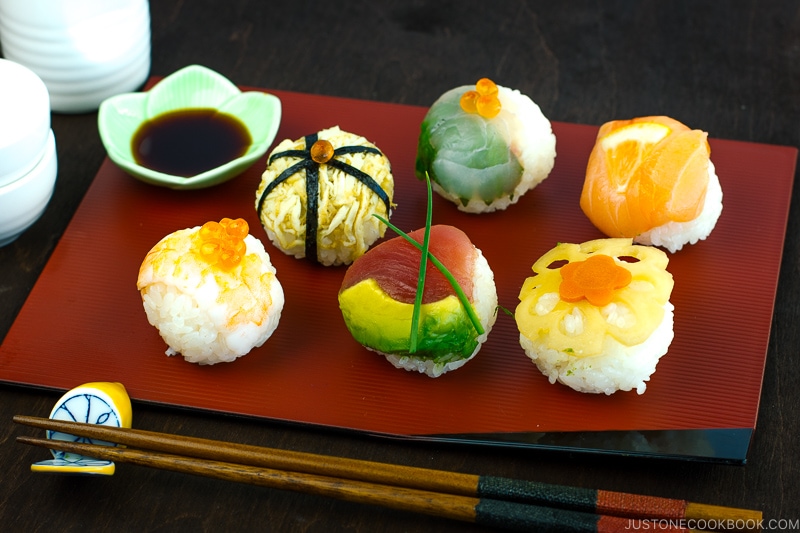
- Ball-shaped sushi: Temari Sushi are some of the prettiest sushi you can make!
- For nigiri: Scallop Sushi with sushi rice pillows is the perfect bite.
- For sushi rolls: Spicy Tuna Rolls and Dragon Roll are all-time favorite choices in the United States.
- For beginners: California Roll is approachable and easy to assemble.
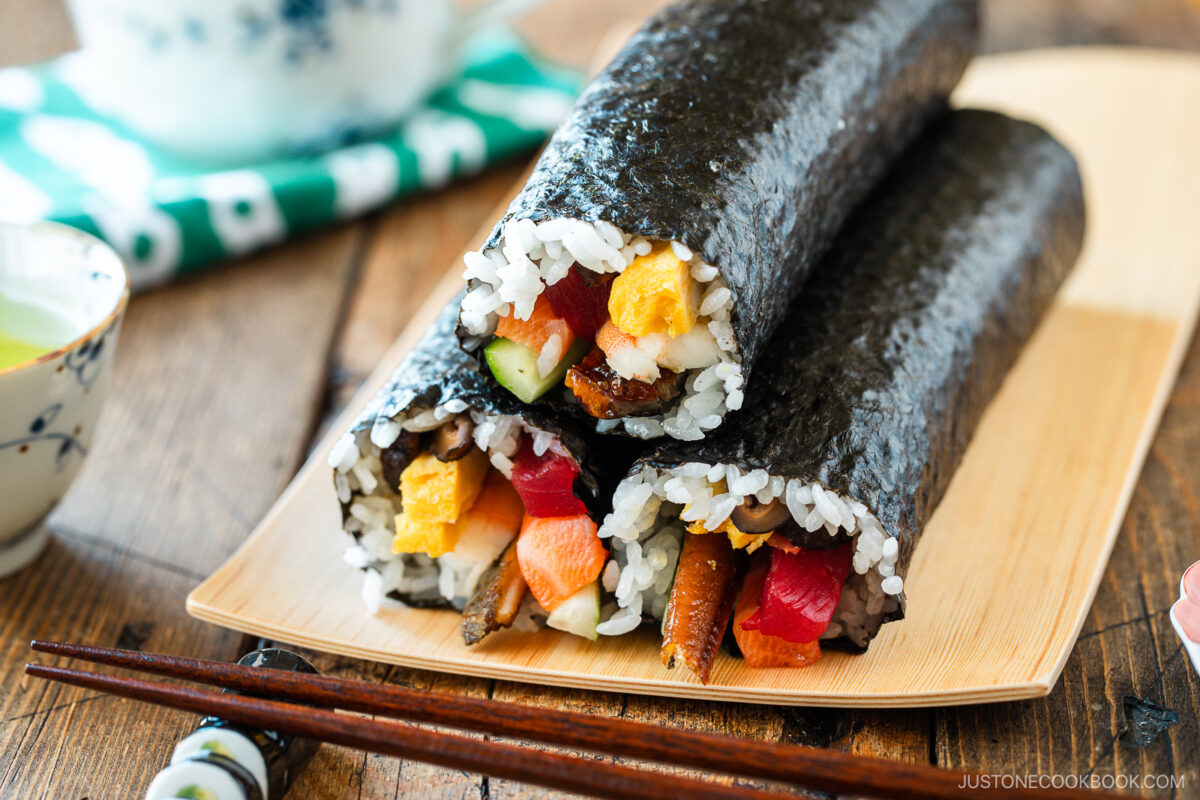
- For traditional thick rolls: Futomaki Sushi and Ehomaki are colorful, filling, and celebratory.
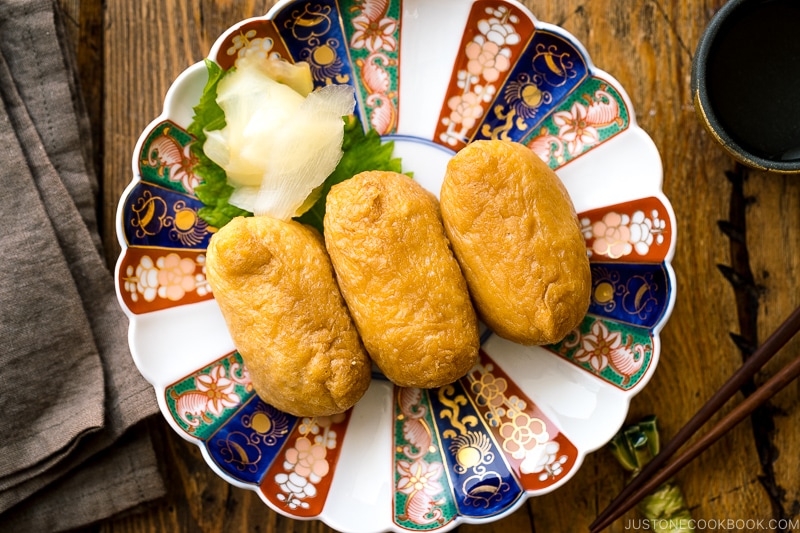
- For simple sushi: Inari Sushi is vegan friendly and one of the easiest types to make at home.
Storage Tips
To store: Transfer leftover rice to an airtight container and freeze. Do not refrigerate.
To reheat: Bring frozen rice back to room temperature before using. Do not microwave.
FAQs
What is the best rice for sushi?
Japanese short-grain white rice has the ideal balance of moisture and firmness and that’s what I use. In the U.S., California grown medium-grain white rice is commonly used for sushi rice. Long-grain, jasmine, or brown rice will not hold together properly.
For short-grain substitute, I recommend Korean short-grain white rice, which is quite similar to Japanese short-grain white rice.
What is sushi rice seasoning made of?
Sushi rice seasoning is made from unseasoned Japanese rice vinegar, sugar, and salt, creating the signature sweet, salty, and tangy flavor.
Why is my sushi rice mushy?
Sushi rice turns mushy when it’s cooked with too much water. Use equal parts rice and water—slightly less than regular steamed rice since you’ll add sushi vinegar later. Make sure to season the rice while it’s hot. Also, sushi rice gets mushy when it’s stirred too much so make sure to gently slice and fold instead of stirring.
I’d love to hear how yours turned out! 💛 Please leave a star rating and comment below to share your experience. Your feedback not only supports Just One Cookbook but also helps other home cooks discover recipes they can trust.
How to Make Sushi Rice (for Sushi Recipes)
Ingredients
★ For 3–4 Servings (Makes 4 Medium Sushi Rolls)
- 1½ cups uncooked Japanese short-grain white rice (2 rice cooker cups; 360 ml; yields 4⅓ cups or 660 g of cooked rice)
- 1½ cups water (360 ml)
- 1 piece kombu (dried kelp) (5 g per piece; 2 x 2 inches, 5 x 5 cm; optional, for a nice aroma!)
- 4 Tbsp rice vinegar (unseasoned) (or use the same amount of bottled, pre-seasoned sushi vinegar and skip the sugar and salt)
- 2 Tbsp sugar (skip if using bottled sushi vinegar)
- 1 tsp Diamond Crystal kosher salt (skip if using bottled sushi vinegar)
★ For 5–6 Servings (Makes 6 Medium Sushi Rolls)
- 2¼ cups uncooked Japanese short-grain white rice (3 rice cooker cups; 540 ml; yields 6⅔ cups or 990 g of cooked rice)
- 2¼ cups water (540 ml)
- 1 piece kombu (dried kelp) (5 g per piece; 2 x 2 inches, 5 x 5 cm; optional, for a nice aroma!)
- ⅓ cup rice vinegar (unseasoned) (or use the same amount of bottled, pre-seasoned sushi vinegar and skip the sugar and salt)
- 3 Tbsp sugar (skip if using bottled sushi vinegar)
- 1½ tsp Diamond Crystal kosher salt (skip if using bottled sushi vinegar)
Instructions
Before You Start…
- DO NOT use scaling (x 2 or x 3) for this recipe. For guidance on how much rice to make for your sushi recipe, please see the Notes at the end of the recipe.
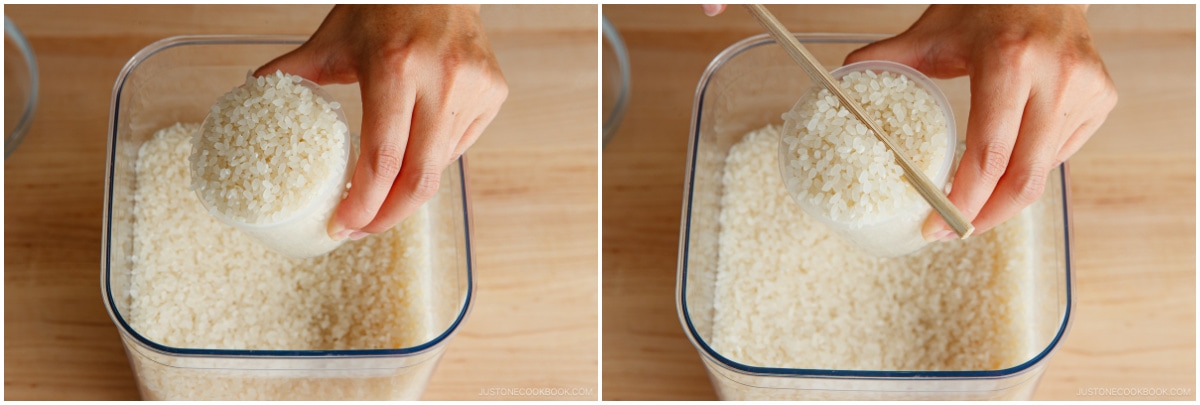
- How to Measure Rice: Overfill uncooked short-grain white rice in a ¾ cup measuring cup or a plastic rice cooker cup and level it off. Pour the rice in a large bowl. Repeat until you have the amount you need. Nami's Tip: You must use Japanese short-grain white rice or your sushi will fall apart.
- Now, gather all the ingredients.
To Wash the Rice
- Quick Rinse: Add just enough water to the bowl to submerge the rice, then pour it off immediately. Nami's Tip: Rice absorbs water quickly at first, so discard this water right away. This helps rinse off impurities and reduce absorption of the milky water.

- Wash: Gently agitate the wet grains in a circular motion with your fingers for 10–15 seconds. Nami's Tip: Using very little water allows the grains to rub against each other and reduces the absorption of impurities.
- Rinse: Add water to cover the grains and immediately discard the cloudy water. Repeat wash and rinse (steps 2 and 3) two more times.
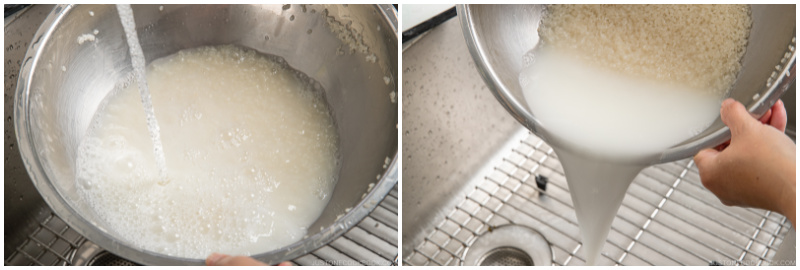
- Drain Well: When the water is almost clear, drain the rice thoroughly in a fine-mesh sieve. Shake off any excess water.
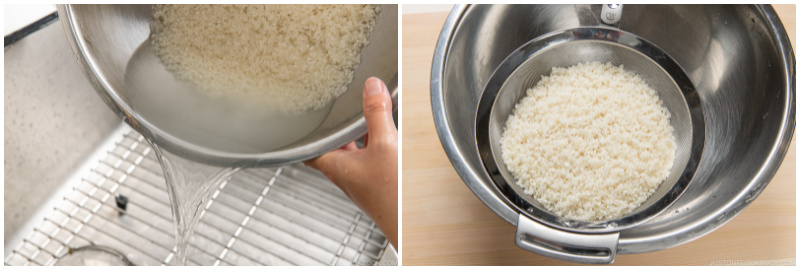
To Soak and Cook the Rice
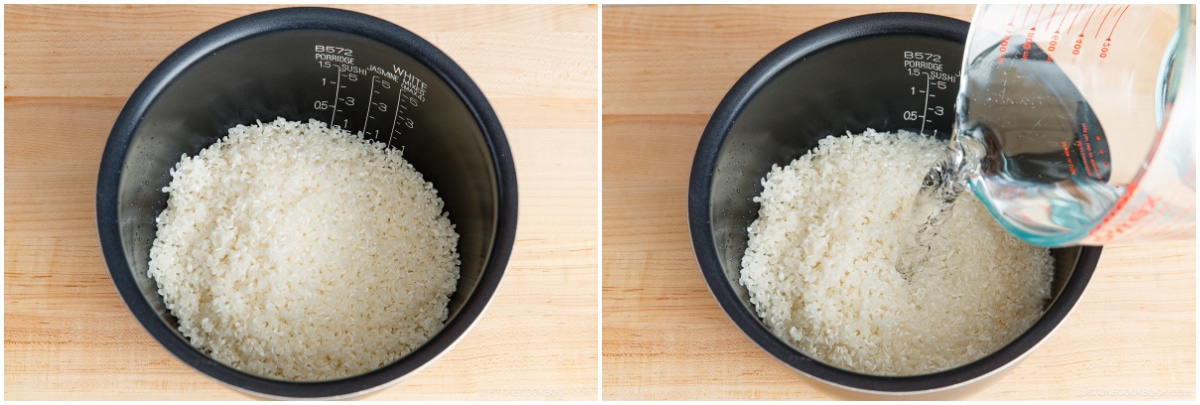
- Put the well-drained rice in the inner pot of a rice cooker. Then, add the measured amount of water. Nami's Tip: Use 1 part rice to 1 part water for sushi rice—less liquid than for regular steamed rice—to account for absorbing the sushi vinegar later. For easy measuring, you can use your rice cooker's Sushi Rice mode and add water to the line for the number of rice cups you're cooking (1 rice cup = ¾ cup). Or, use the White Rice mode and add water to just under that line.
- If you see any dirt particles on the kombu, gently wipe them off with a damp cloth and place the kombu on top of the rice. (This is the traditional method, but kombu is fairly clean these days). DO NOT wipe off the white powdery substance, as it contributes to the umami flavor. NEVER wash kombu!
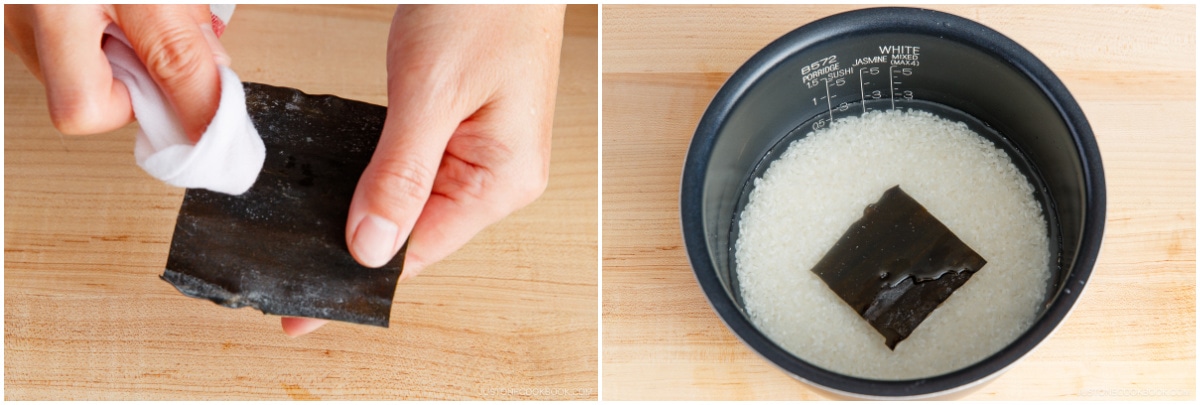
- Soak the rice and kombu for 20–30 minutes, then start cooking. You can also cook the rice in a pot over the stove, Instant Pot, or donabe with the same amount of water I specified.
To Make the Homemade Sushi Vinegar (Optional)
- If you are not using bottled sushi vinegar (seasoned rice vinegar), here's how to make it at home: Combine the rice vinegar, sugar, and salt in a small saucepan.
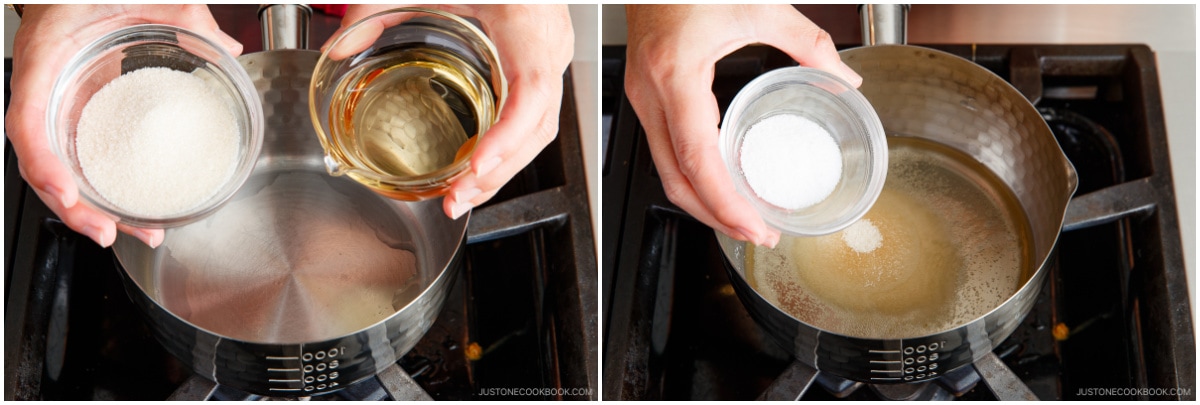
- Heat it over medium-high heat until it's nearly simmering while whisking until the sugar is dissolved. Alternatively, you can heat the ingredients in a microwave-safe bowl for 1 minute or until the sugar dissolves. Set aside and cool.
To Season the Rice
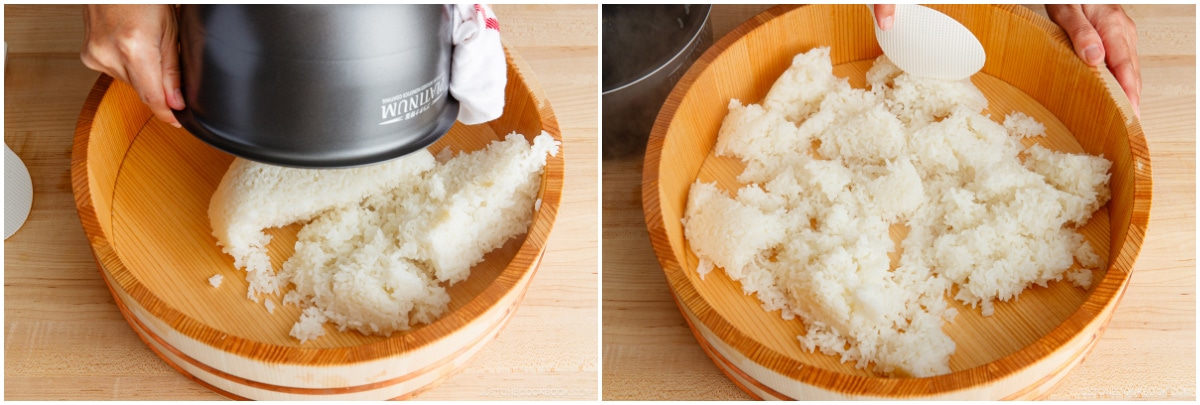
- Moisten a wooden sushi oke (hangiri) with running water, drain, and dry it with a clean towel. You can also use a baking sheet moistened with water. Nami's Tip: This wooden tub helps absorb excess moisture, whereas a baking sheet does not.
- When the rice is done cooking, discard the used kombu (or repurpose it to make Kombu Tsukudani (simmered kombu)).

- Transfer the hot cooked rice to the sushi oke. Spread out the rice evenly with a rice paddle so it will cool faster.
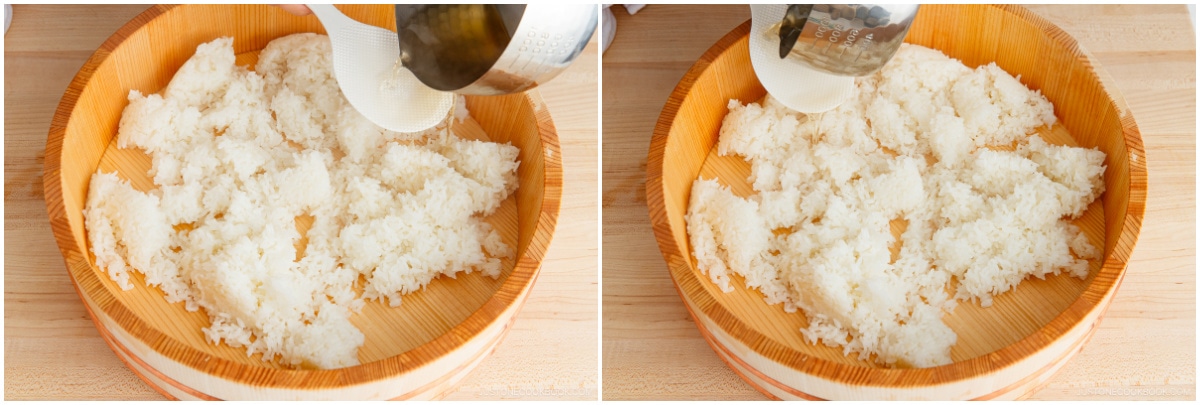
- While the rice is hot, pour the cooled sushi vinegar over it.
- Gently “slice” the rice with the rice paddle at a 45-degree angle to incorporate the seasoned vinegar and separate the rice chunks. Do not stir or mix because that may break the grains and make it mushy. As you slice, vigorously fan the rice to cool it with a paddle fan or another fan.Nami's Tip: Fanning wicks away the excess moisture and makes the rice shine.
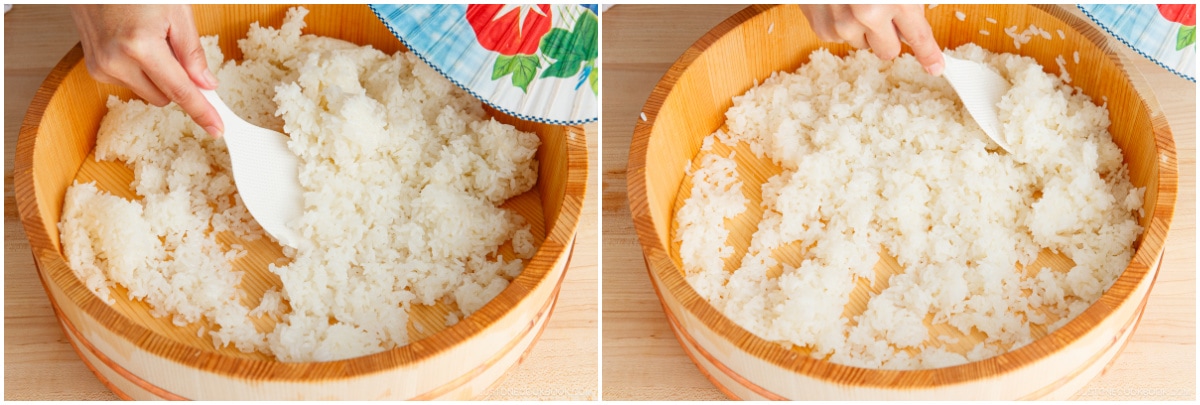
- Gently flip a scoop of rice after every few slices.
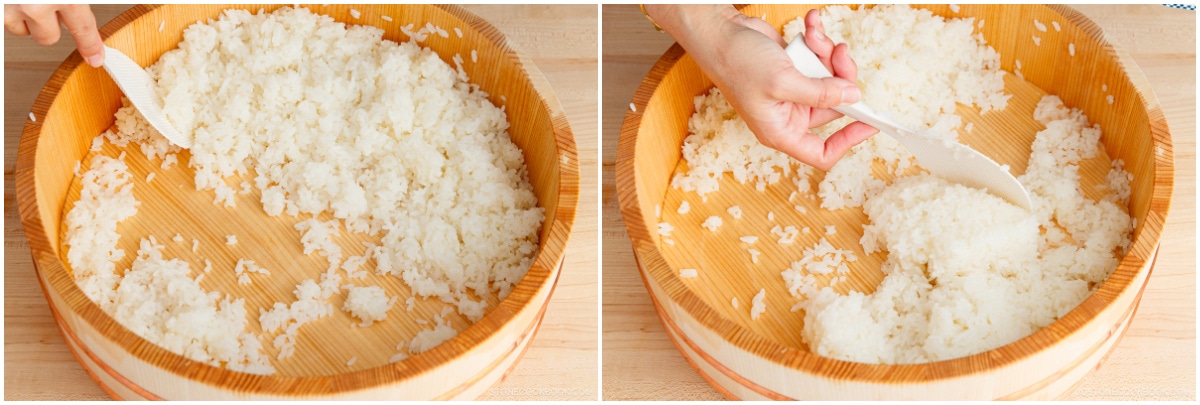
- Continue until the rice has cooled to the temperature of human skin. Your sushi rice is now ready to use in your favorite sushi recipes.
To Keep
- Cover the sushi rice with a damp towel (or paper towel) and keep it at room temperature for up to a few hours. To store it longer, see below.
To Store
- Freeze the leftovers in an airtight container for up to a month. To use, defrost it overnight in the fridge, then bring it to room temperature (not hot) in the microwave. Rice gets hard and dry in the refrigerator from the cold air, so I don't recommend storing it there. If you really want to refrigerate it, cover the container with a thick kitchen towel so the rice stays cool but doesn't become cold.
Notes
What’s the measurement for 1 rice cooker cup?
- The plastic rice cooker cup that comes with the rice cooker is ¾ cup (180 ml). In Japan, this amount is called ichi go (一合).
- One rice cooker cup of uncooked short-grain Japanese rice is 150 grams.
How much rice do you need to make?
- 1 rice cooker cup (180 ml, ¾ cup, 150 g) of uncooked rice makes 2¼ cups (330 g) of cooked rice.
- 1 thick sushi roll
- 2 medium sushi rolls
- 4 thin sushi rolls
- 3 inside-out rolls
- 2 rice cooker cups (360 ml, 1½ cups, 300 g) of uncooked rice make 4⅓ cups (660 g) of cooked rice.
- 2 thick sushi rolls
- 4 medium sushi rolls
- 8 thin sushi rolls
- 6 inside-out sushi rolls
- 3 rice cooker cups (540 ml, 2¼ cups, 450 g) of uncooked rice make 6⅔ cups (990 g) of cooked rice.
- 4 thick sushi rolls
- 6 medium sushi rolls
- 12 thin sushi rolls
- 9 inside-out sushi rolls
- 4 rice cooker cups (720 ml, 3 cups, 600 g) of uncooked rice make 8¾ cups (1320 g) of cooked rice.
- 5 thick sushi rolls
- 8 medium sushi rolls
- 16 thin sushi rolls
- 12 inside-out sushi rolls
- 5 rice cooker cups (900 ml, 3¾ cups, 750 g) of uncooked rice make 11 cups (1650 g) of cooked rice.
- 6 thick sushi rolls
- 11 medium sushi rolls
- 20 thin sushi rolls
- 15 inside-out sushi rolls
How much prepared sushi rice do you need for one sushi roll?
- One thick sushi roll (Futomaki) requires 1⅔ cups (250 g) of prepared sushi rice.
- One medium sushi roll (Chumaki), like Vegetarian Sushi Roll, requires 1 cup (150 g) of sushi rice.
- One thin sushi roll (Hosomaki) requires ½ cup (80 g) of sushi rice.
- One inside-out sushi roll (Uramaki), like California Roll, requires ¾ cup (110 g) of sushi rice.
- One nigiri sushi requires 20 g of sushi rice.
Nutrition
Did you make this recipe?
Tag @justonecookbook on Instagram so we can see your delicious creation!
Editor’s Note: This post was originally published on Aug 18, 2011 and updated with new images and video on January 19, 2024. It was republished with more helpful content on December 8, 2024, and updated again on January 26, 2026.