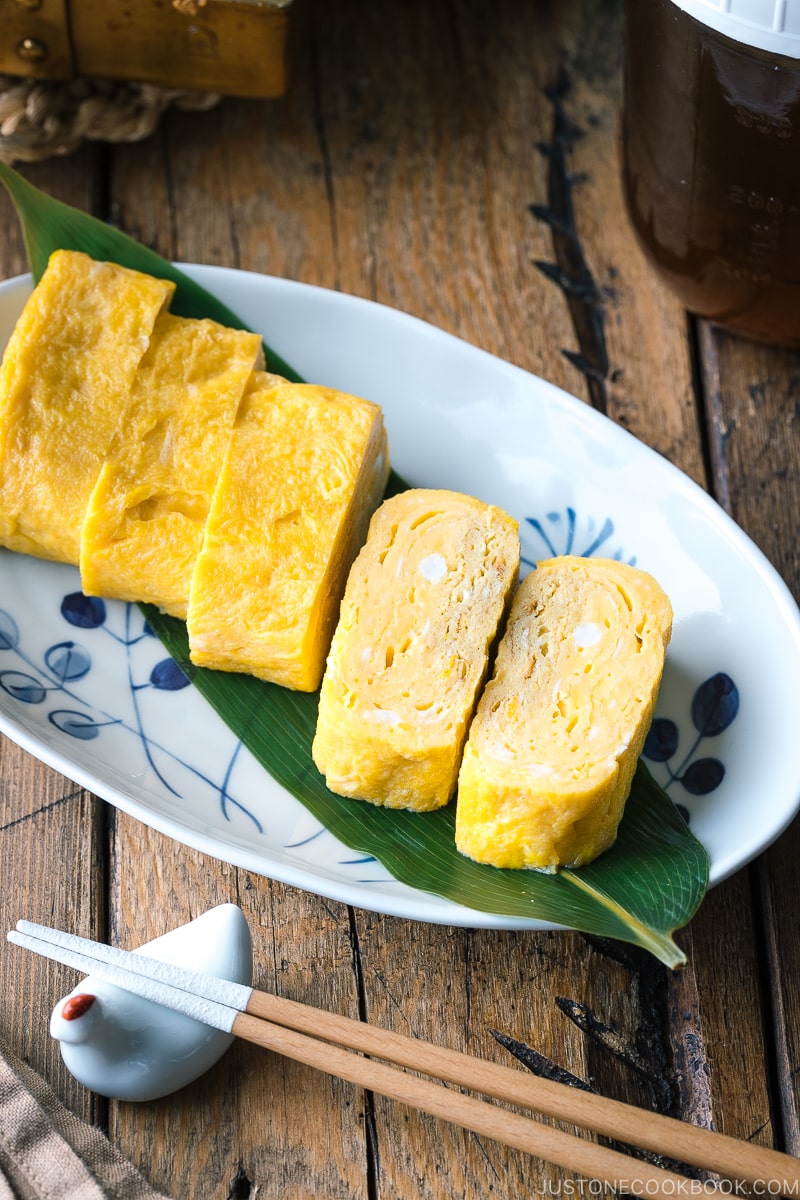
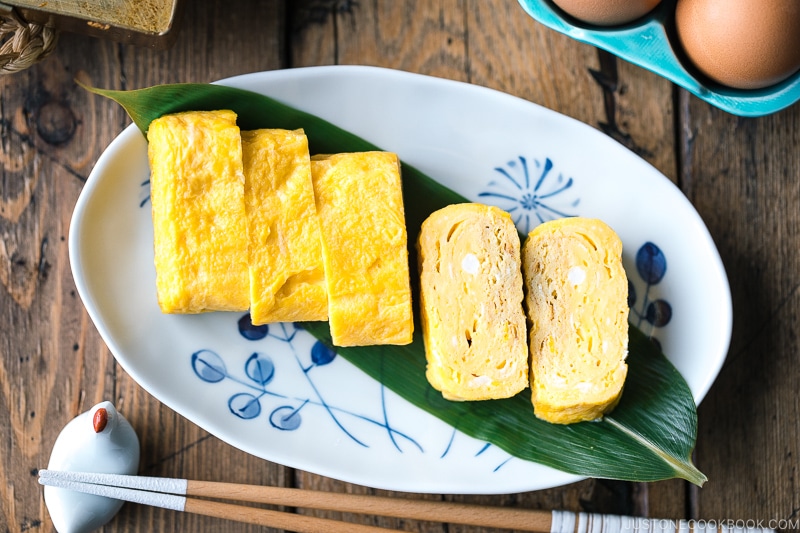
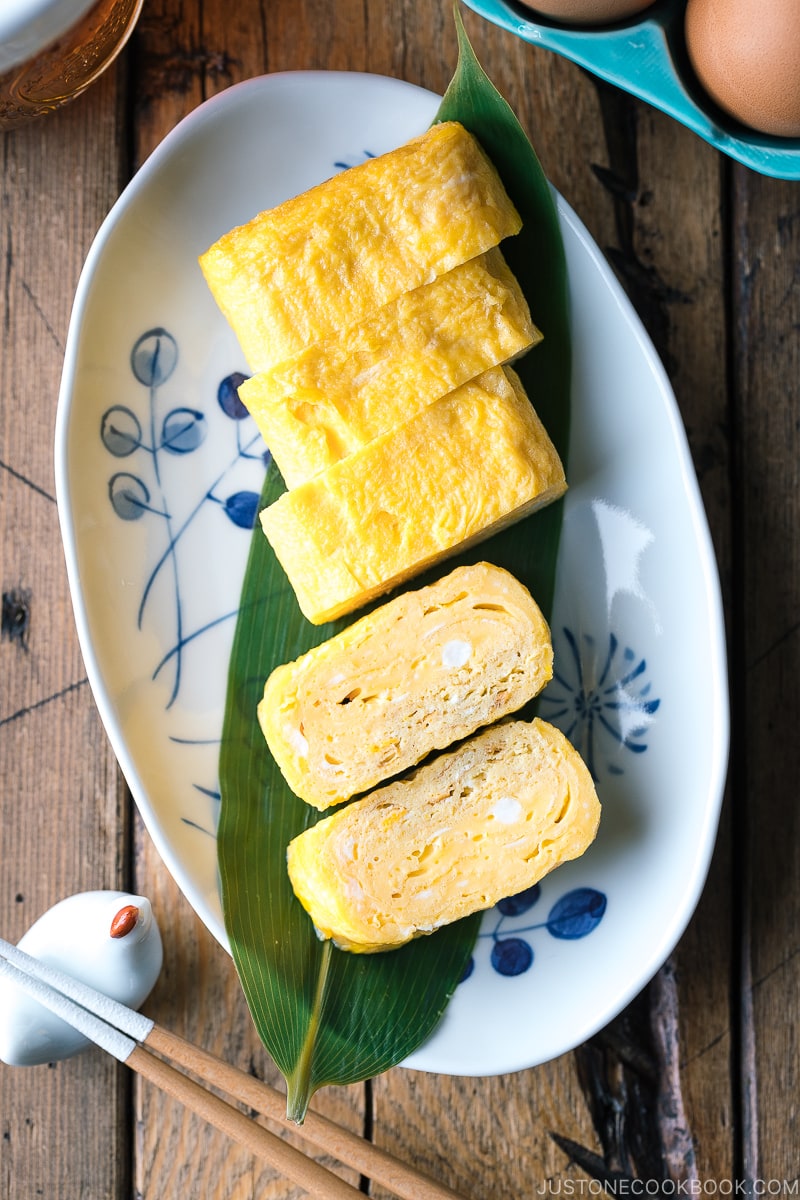
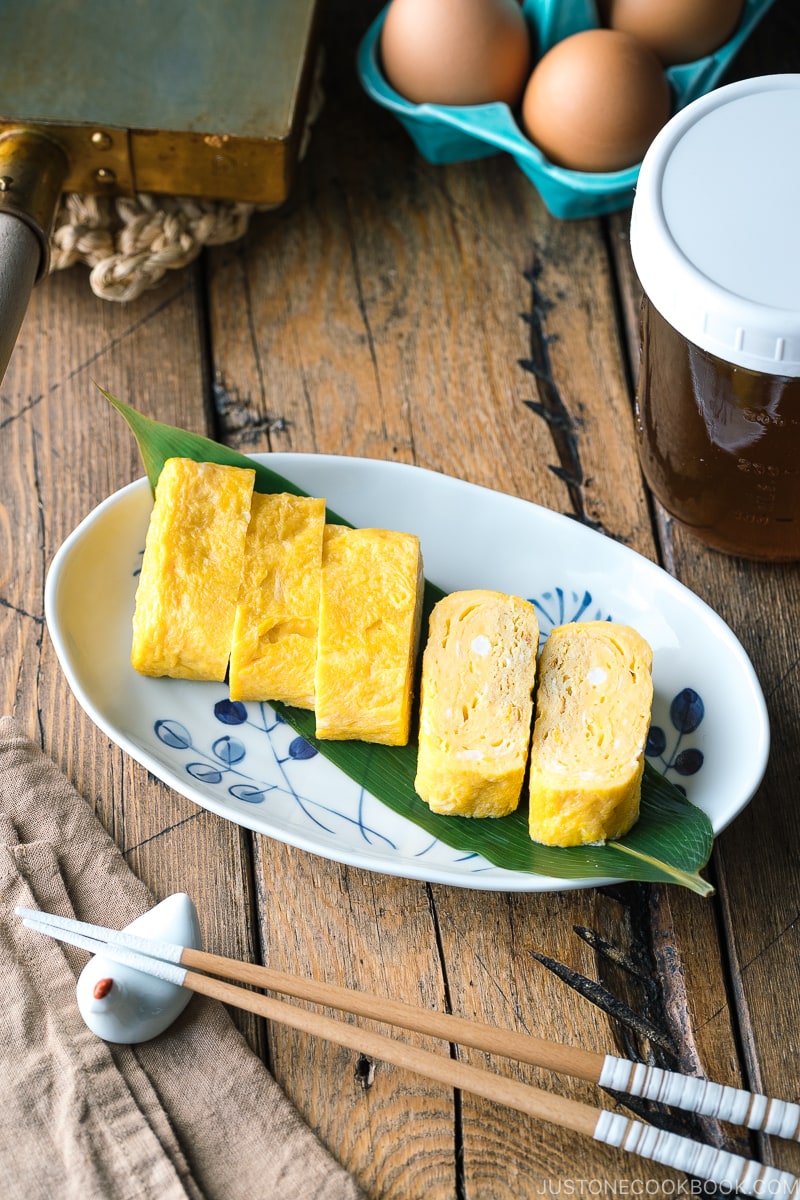
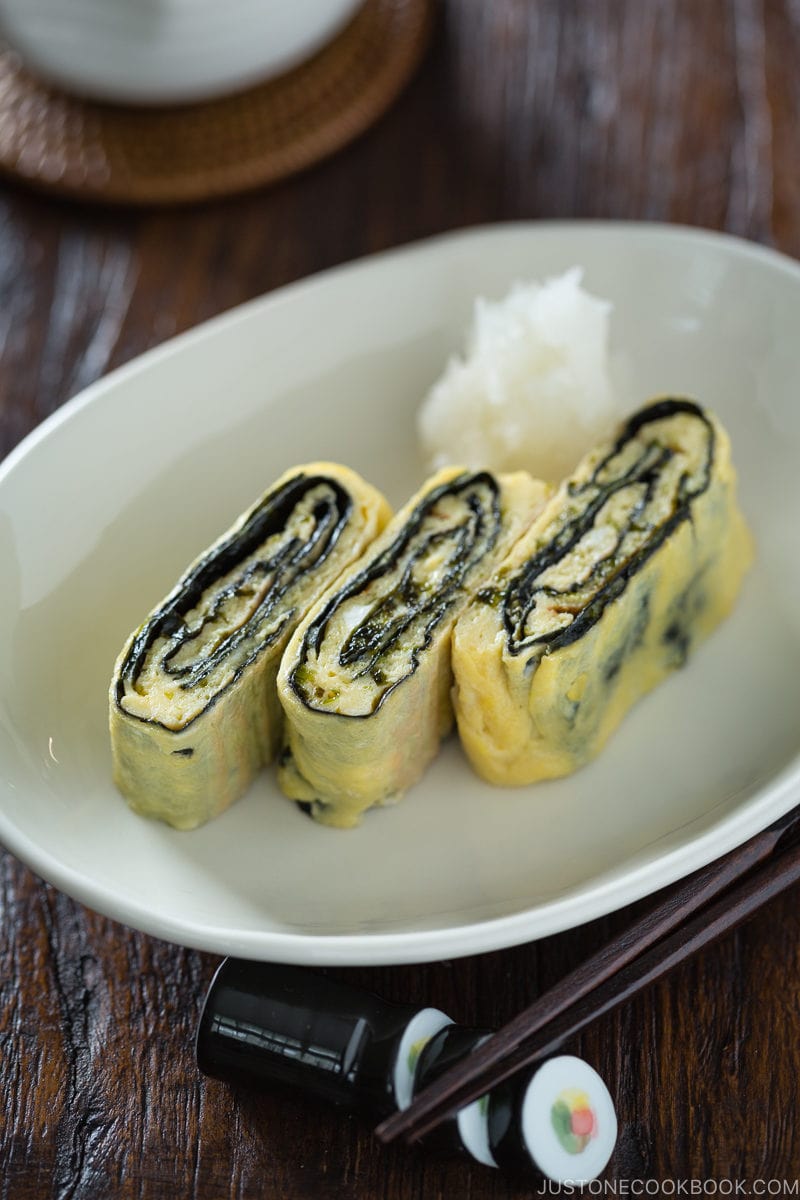
Learn how to make my recipe for a beautiful Japanese Sweet Rolled Omelet (Atsuyaki Tamago) from thin layers of fried egg seasoned with dashi, soy sauce, and sugar. Enjoy this delicious and versatile tamagoyaki side dish for breakfast, bento lunch, or a standalone snack!
Today, I’m sharing a Tokyo-style Japanese Sweet Rolled Omelet or Atsuyaki Tamago (厚焼き玉子). You might have seen this omelette made by Master in the popular Netflix® show—Midnight Diner: Tokyo Stories.

What is a Japanese Rolled Omelet (Omelette)?
Tamagoyaki (卵焼き, 玉子焼き), the Japanese rolled omelette, is known for its bright yellow, miniature pillow-shaped appearance. This petite egg dish is ubiquitous in Japan and is a favored option for breakfast or as a filling for bento boxes.
The preparation involves rolling thin layers of seasoned and slightly sweetened egg mixture to create a compact, rectangular shape.
Variations of Tamagoyaki
Tamagoyaki (玉子焼き, 卵焼き) is a general umbrella term for various types of Japanese rolled omelettes. It can be dashimaki or atsuyaki depending on the region.
- Tamagoyaki (卵焼き) — This is the simplest form of a rolled omelette without extra sugar or dashi (Japanese soup stock). If you are new to making tamagoyaki, start practicing from this recipe.
- Dashimaki Tamago (出汁巻き玉子) – Primarily enjoyed in the Kansai (Osaka) region, this rolled omelette features a dashi-forward, salty flavor due to the large amount of dashi used in the egg mixture. Among all the types of tamagoyaki, this is the most challenging to make as the egg mixture is very watery. As a result, dashimaki is very silky and tender and must be eaten immediately.
- Atsuyaki Tamago (厚焼き玉子) – Known for its sweetness, it is enjoyed in the Kanto (Tokyo) and north of Kanto regions. With less dashi in the egg mixture, it’s much easier to make, but the sugar content makes it prone to burning. I prepare a golden sweet dashi called Kanro Dashi (甘露だし) ahead of time, making it easier to frequently enjoy atsuyaki tamago. If you have experience in making tamagooyaki, I recommend my recipe below.
- Castella Tamago (カステラ玉子) – Served as part of the Edomae-style sushi menu at high-end sushi restaurants in the Kanto (Tokyo) region, this variation is reminiscent of a sweet baked dessert, Castella. The method of making Castella Tamago is similar to Datemaki. The spongy, bouncy texture comes from the addition of shrimp paste and grated yam to the egg mixture. Unlike being rolled in a pan, it is baked in the oven.
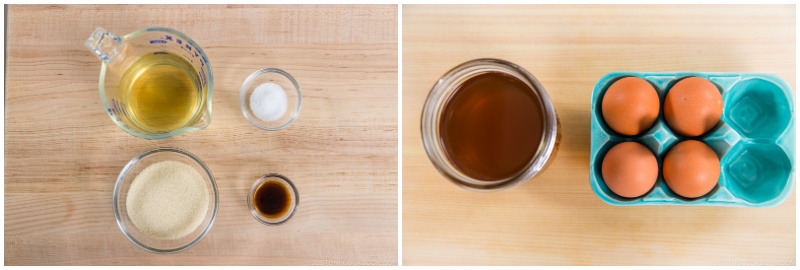
Ingredients for Atsuyaki Tamago
The best thing about this recipe is that you can make tamagoyaki fast! I prepare sweet dashi ahead of time and make this sweet tamagoyaki for my children’s lunch.
- eggs
- sweet dashi (kanro dashi) — please read more information below
- cooking oil
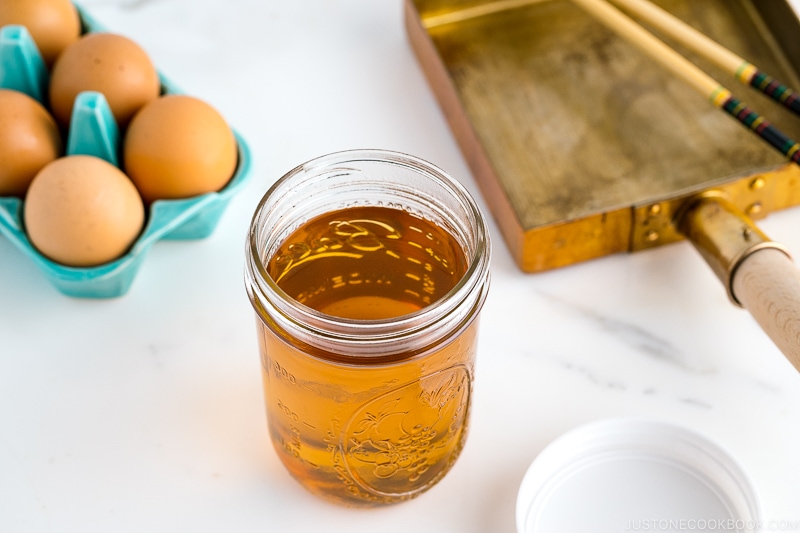
How to Make Sweet Dashi (Kanro Dashi)
This golden liquid is called Kanro Dashi (甘露だし) in Japanese, but let’s just call it Sweet Dashi. The soup stock is a simple mixture of dashi, sugar, soy sauce, and salt, which is used to make the Tokyo-style Sweet Rolled Omelet (Atsuyaki Tamago) that I’m sharing here.
I usually make one batch and use the sweet dashi throughout the week. Any leftovers can be used as a base in simmered foods or braised vegetables.
If you make tamagoyaki regularly, having this sweet dashi stashed away in the pantry will help you get to your meal prep quicker.
How to Make Sweet Rolled Omelet (Atsuyaki Tamago)
- Make the sweet dashi. First, let’s make good dashi (Japanese soup stock). See the section below for more information on dashi. Once you have dashi, mix it with sugar, soy sauce, and salt. The key is to make this sweet dashi ahead of time and keep it in the fridge.
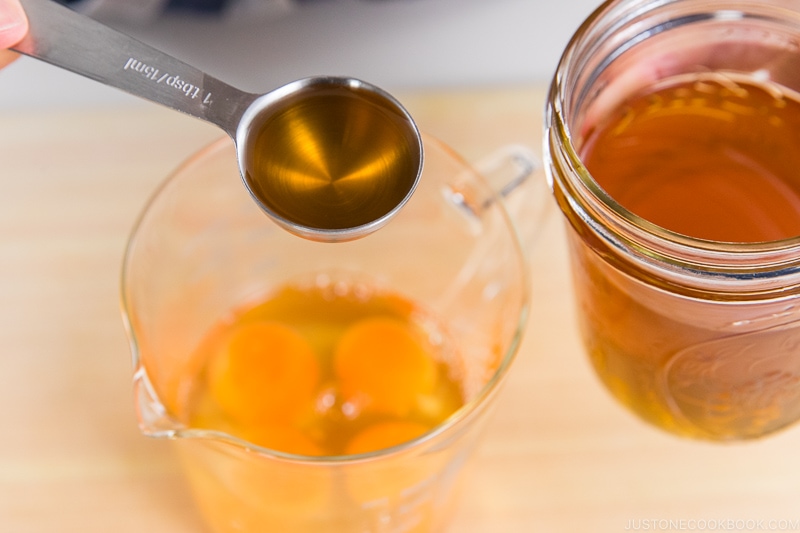
- Prepare the egg mixture. I use 1 tablespoon of sweet dashi for 1 large egg. Don’t overmix the egg yolks and egg whites.
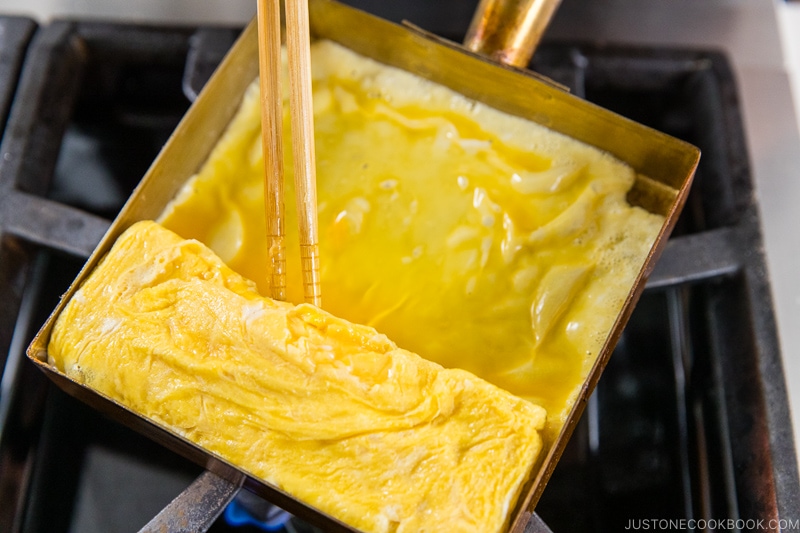
- Cook the egg and start rolling. Detailed step-by-step instructions are provided in the recipe card below.
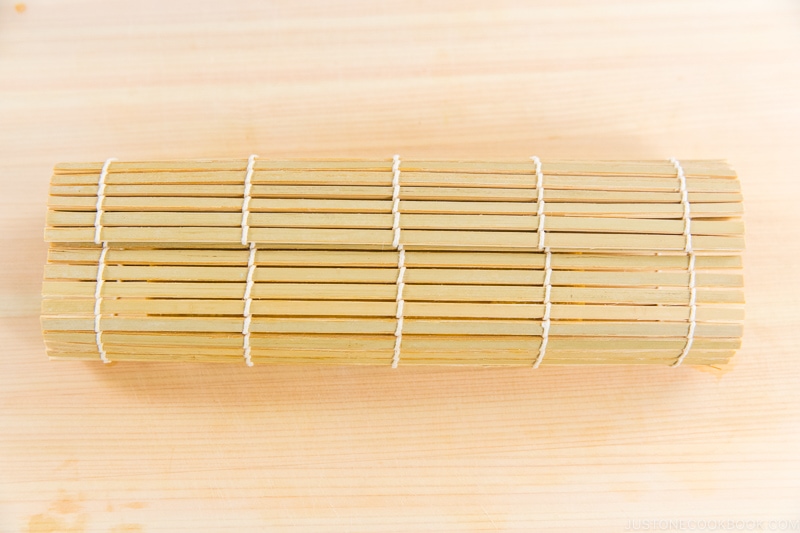
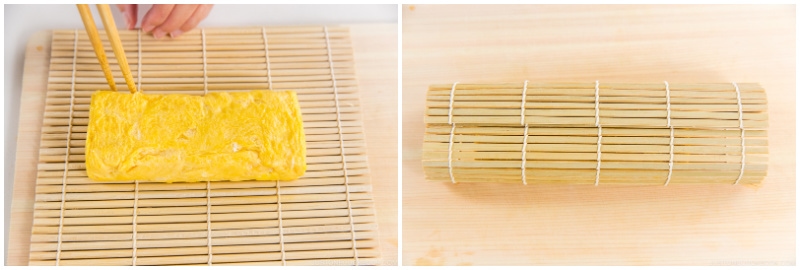
- Wrap Tamagoyaki with the sushi mat. Wrap the hot tamagoyaki in the bamboo sushi mat to mold it into a proper shape.
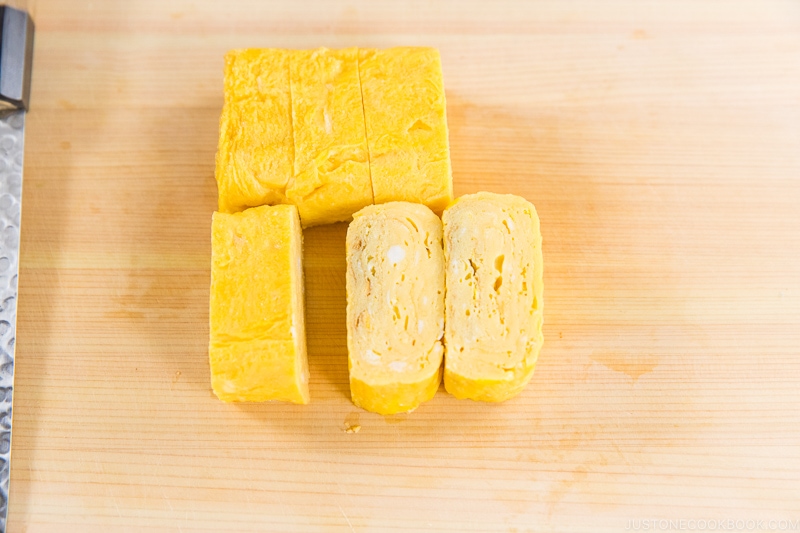
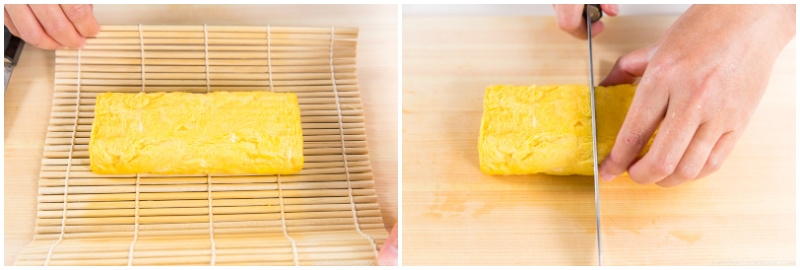
- Cut into thick slices. The tamagoyaki pan I used for this recipe is 6 x 6 inches (15 x 15 cm), so I cut into 1 inch thickness. Feel free to adjust the thickness.
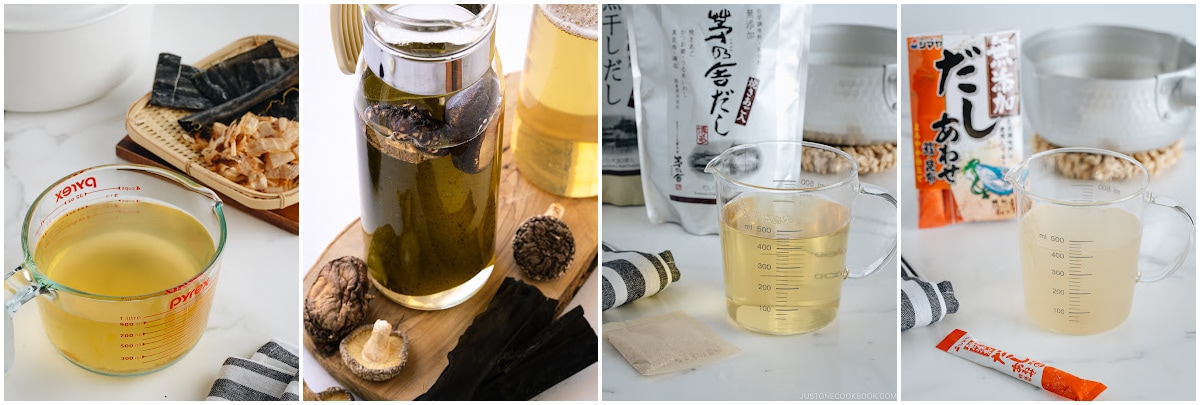
How to Prepare Dashi (Japanese Soup Stock)
My personal recommendation is the first 3 options, but here are the instructions on how to make dashi:
- Kombu and katsuo dashi made from scratch (takes 20 minutes)
- Vegan/vegetarian dashi made from scratch (takes 20 minutes)
- Dashi made with a dashi packet (takes 3 minutes)
- Dashi made with dashi powder (takes 1 minute)
I always use the dashi packet method for convenience and good flavor. You can easily get it on Amazon or from a Japanese grocery store.
Cooking Tips
- Practice, practice, practice — I can’t tell you enough. I started making tamagoyaki since middle school. Yet, when I take a long break, my rolling skill gets rusty. After making more tamagoyaki (on consecutive days), I get the cooking rhythm back. Don’t get discouraged even after trying a couple of times. You just need a little more practice.
- Figure out what works for you — Despite my tutorial and tips, the result comes down to your own pan, heating element, and skill. Each plays a role, so pay attention to the details. Be flexible and adapt my technique to what you have.
Tamagoyaki Pan
Tamagoyaki is a staple in Japanese home cooking. We love the eggy goodness so much that we even invested in a special pan for making tamagoyaki at home! Tamagoyaki pans are either square or rectangular, so the tamagoyaki will easily turn into a rectangular shape.
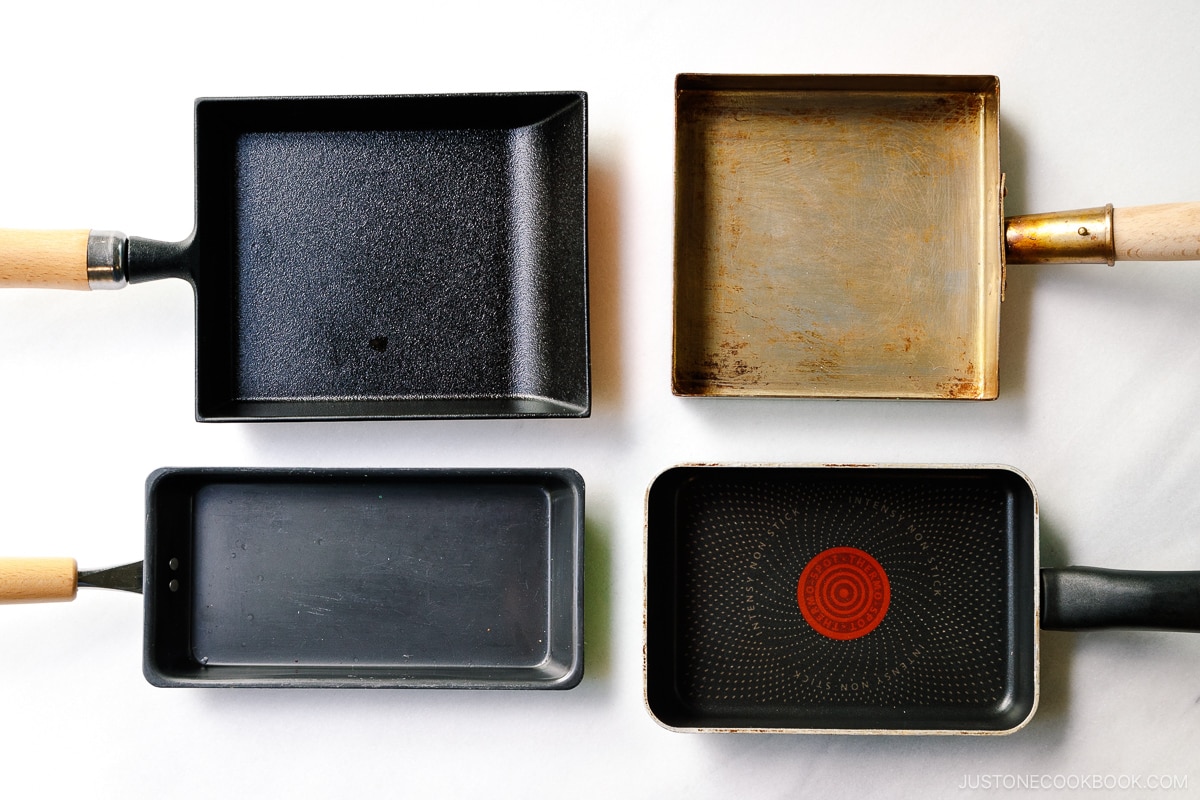
In the past, I’ve tried various types of tamagoyaki pans:
- non-stick tamagoyaki pan
- copper tamagoyaki pan
- carbon steel tamagoyaki pan
- cast iron tamagoyaki pan (my favorite since 2024)
Can I Use a Round Frying Pan for Tamagoyaki?
Yes! I’ve made the rolled omelet with a round frying pan many times and it works just fine. The drawbacks are mainly appearance (see below):
- It would be flatter — A round pan is typically wider and bigger than a Tamagoyaki pan so it will require more egg mixture to make each layer. If you use the same recipe, you will have a flatter rolled egg.
- It would be uneven — Because each layer of egg is rolled from a round shape, it’s natural that both ends don’t have complete layers of egg. The center of the tamagoyaki will still look nice.
- It would be looser — The curved edges of a round frying pan are less ideal for “tightening up” the egg rolls.
As you see, it’s all related to the “look” of the tamagoyaki. You can still make pretty good tamagoyaki even with a regular frying pan! The trick is to increase the egg mixture to create a complete look.
What to Serve with Tamagoyaki
Tamagoyaki is a versatile side, but I think it is extra special when enjoyed in a traditional Japanese-style breakfast. If you’re up for a hearty Japanese breakfast, try it on a weekend! Here are some ideas to serve tamagoyaki with:
- Steamed Rice
- Salted Salmon
- Spinach gomaae or Green Bean Shiraae
- Tsukemono (Japanese Pickles)
- Miso Soup
Of course, all these dishes can be prepared ahead of time, so you won’t have to spend the whole morning cooking everything at once.
Wish to learn more about Japanese cooking? Sign up for our free newsletter to receive cooking tips & recipe updates! And stay in touch with me on Facebook, Pinterest, YouTube, and Instagram.
Japanese Sweet Rolled Omelet (Tamagoyaki) — Atsuyaki Tamago
Ingredients
- 4 large eggs (50 g each w/o shell)
- 4 Tbsp sweet dashi (recipe follows)
- 2 Tbsp neutral oil (to cook the egg)
For the Sweet Dashi (makes 1¾ cups)
- 1¼ cups dashi (Japanese soup stock) (use standard Awase Dashi, dashi packet or powder, or Vegan Dashi)
- ½ cup sugar
- 1½ tsp soy sauce
- 2 tsp Diamond Crystal kosher salt
Instructions
- Gather all the ingredients for the sweet dashi and rolled omelet.
To Make the Sweet Dashi
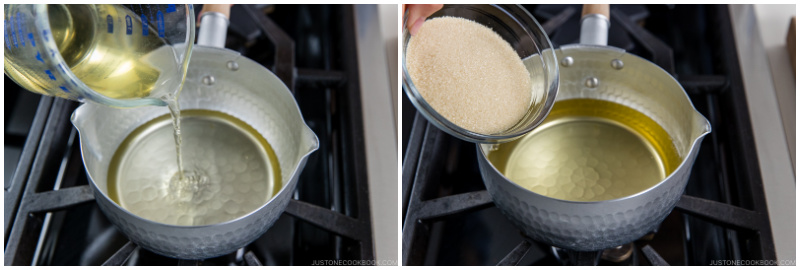
- In a small saucepan, combine 1¼ cups dashi (Japanese soup stock) and ½ cup sugar.
- Add 1½ tsp soy sauce and 2 tsp Diamond Crystal kosher salt. Turn the heat to medium and mix well together.
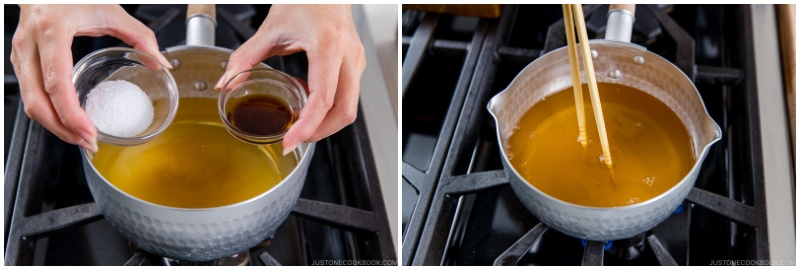
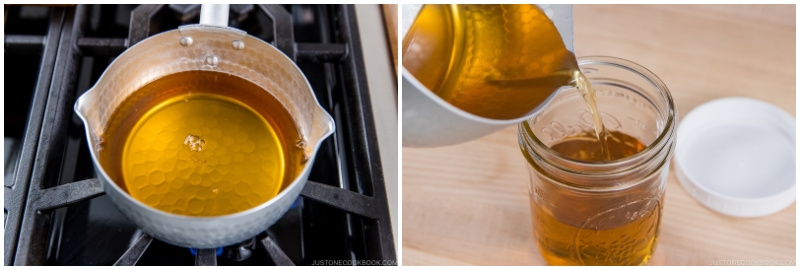
- When the sugar is dissolved, turn off the heat and transfer into a mason jar. Let cool completely before closing the lid. Store in the refrigerator for up to a week or freeze it in batches. For example, my tamagoyaki pan requires 4 eggs and 4 Tbsp sweet dashi, so I‘d freeze 4 Tbsp portions of sweet dashi. You can also use an ice cube tray to freeze it.
To Make the Egg Mixture
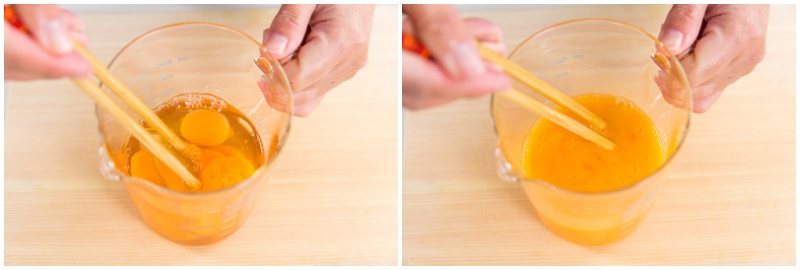
- In a bowl or a liquid measuring cup with a handle, combine 4 large eggs (50 g each w/o shell) and 4 Tbsp sweet dashi (1 Tbsp of sweet dashi per large egg). Depending on the size of your tamagoyaki pan (or frying pan), adjust the number of eggs.
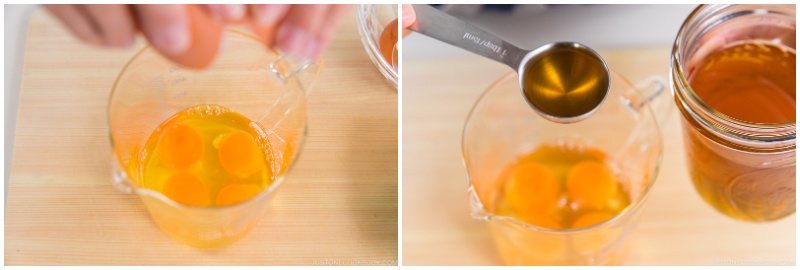
- Using chopsticks, break the egg yolks and whisk to combine with the whites, but do not overbeat. It should have a thick and elastic consistency.
Final Tips Before You Start
- Please remember: 1) The pan must be hot when you add the egg mixture; otherwise, it will stick. 2) To adjust the heat, lift and move the pan away from or toward the heat source. 3) Use your arms and shoulders to move the pan toward you and roll the egg, instead of using just your wrist. It gives you better control and momentum. 4) Only the final layer matters for the look. Don’t worry about small tears and holes until the final layer. Make sure to maintain a good shape throughout cooking, as the final layer can’t hide an irregular shape. 5) Make 4–6 layers for a rectangular tamagoyaki pan and 2–3 layers for a round pan.
To Cook the Tamagoyaki
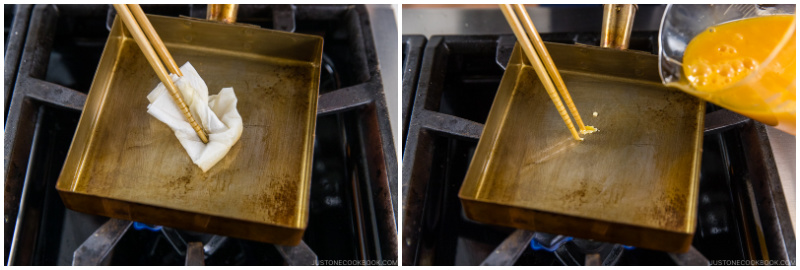
- Heat the tamagoyaki pan over medium heat. Add 2 Tbsp neutral oil to a small bowl. Grease the bottom and sides of the pan with a folded paper towel soaked in the oil. Make sure to wipe off any excess oil. Test the pan to see if it‘s hot enough: Dip chopsticks in the egg mixture and touch the tips to the frying pan. If the egg sizzles, the pan is ready. Note: I once tried to use a silicone brush instead of a paper towel, but it left excess oil that created an unpleasant look on the omelet with lots of small holes/bubbles.
- The 1st layer: Pour in just enough egg mixture to cover the cooking surface. Pop the air bubbles with chopsticks and tilt the pan to fill the holes with excess egg mixture.
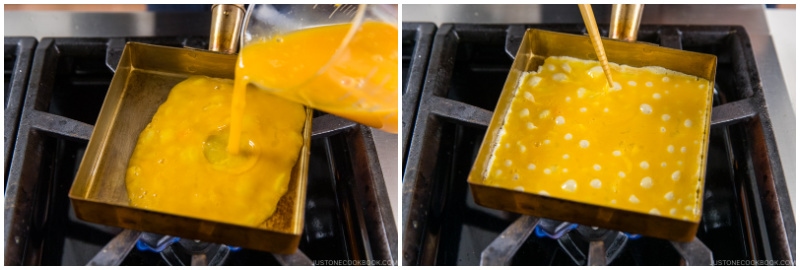
- When the egg is just set (the mixture is not runny but not cooked through), run your chopsticks along the edges to detach the egg from the pan‘s sides. Then, roll the egg toward you, starting from the far edge. If you use chopsticks, lift the frying pan toward you in a rolling motion to create momentum that will help you roll the egg. If you use a spatula, you may need to occasionally remove the pan from the heat so the bottom doesn’t get too hot.
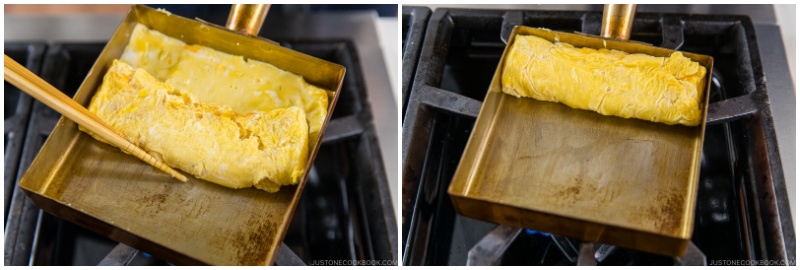
- Once you‘ve finished rolling up the omelet to the side closest to you, grease the bottom and sides of the pan with the paper towel soaked in oil (remember to remove any excess).
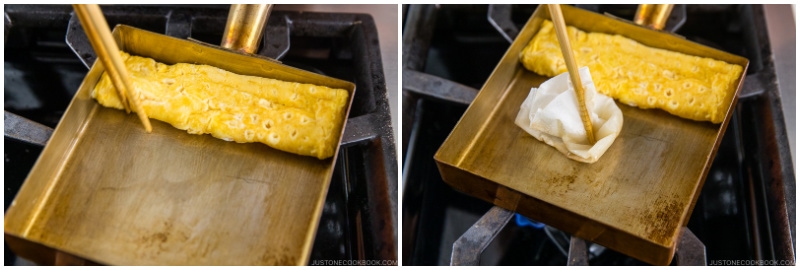
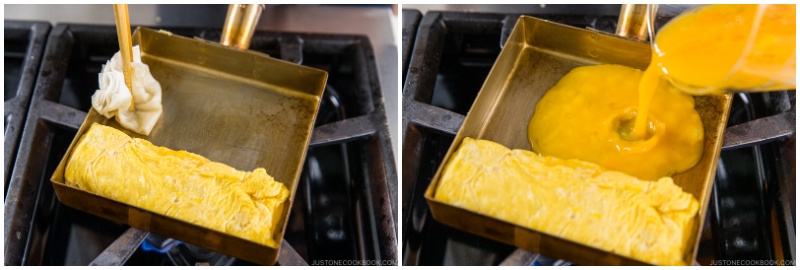
- Move the omelet to the far edge and grease the bottom and sides that you just uncovered. Test the pan again with a bit of the egg mixture. If it sizzles, the pan is hot enough.
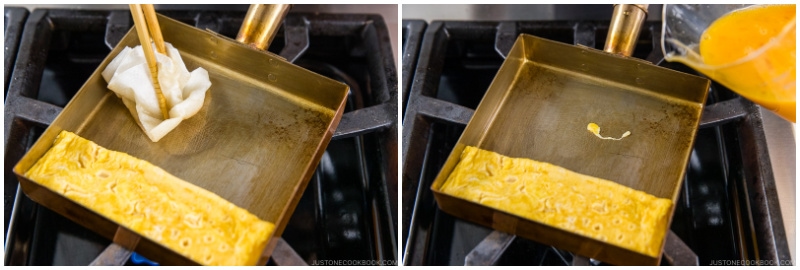
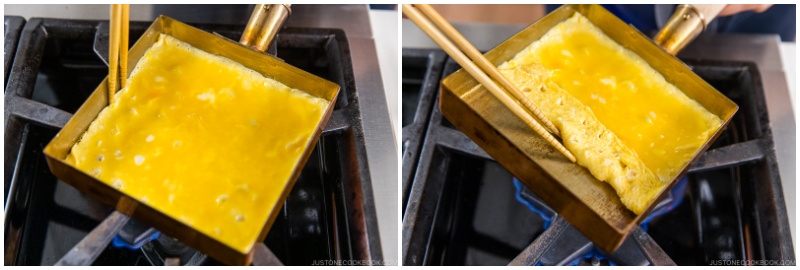
- The 2nd layer: When the pan is ready, pour in just enough egg mixture to cover the cooking surface. Tilt the pan and lift the rolled omelet so some of the egg mixture goes underneath it.
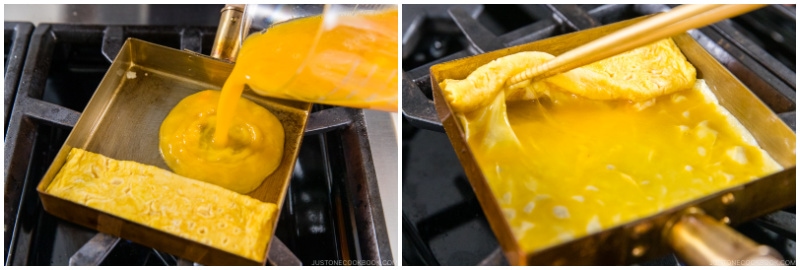
- Pop the air bubbles with chopsticks and tilt the pan to fill up the holes with excess egg. When the egg is just set, run your chopsticks along the edges to detach to egg.
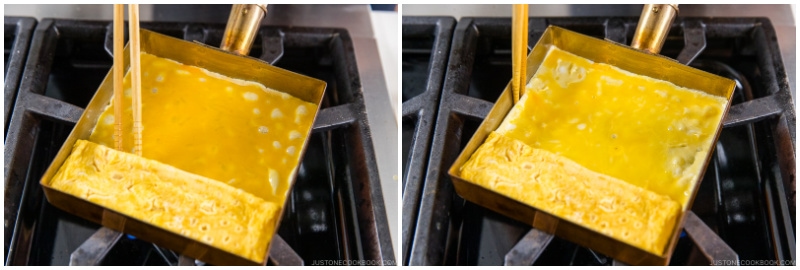
- Roll the omelet toward you again. Once you've finished, grease the bottom and sides again. Move the omelet to the far edge. Grease the pan again and test to see if it‘s hot enough.
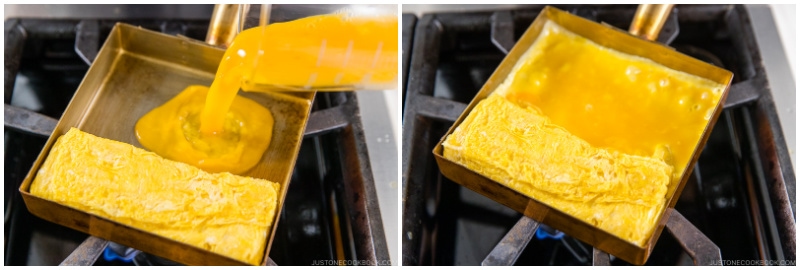
- The 3rd layer: Repeat cooking another layer of the egg mixture. You can create momentum with the pan using your arm and shoulder to roll the egg as it gets heavier.
- The 4th layer: Repeat cooking another layer of egg. When the pan is hot, pour in the egg mixture and tilt some of it underneath the rolled egg. Pop the air bubbles, detach from the edges, and start rolling.

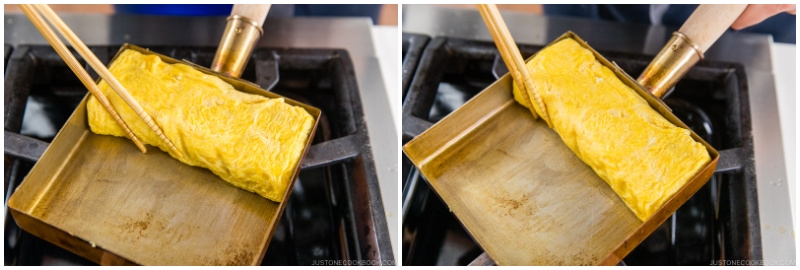
- The final/outer layer: Grease the bottom and sides again. Add the remaining egg mixture, lift up the rolled omelet, and pop the air bubbles. Carefully roll the final layer. This is the outer layer, so make sure not to break it.
- Shape the rolled egg, pushing it against the edges and corners of the tamagoyaki pan.
To Mold the Omelet in a Sushi Mat
- Wrap the rolled omelet in a bamboo sushi mat for 5 minutes.
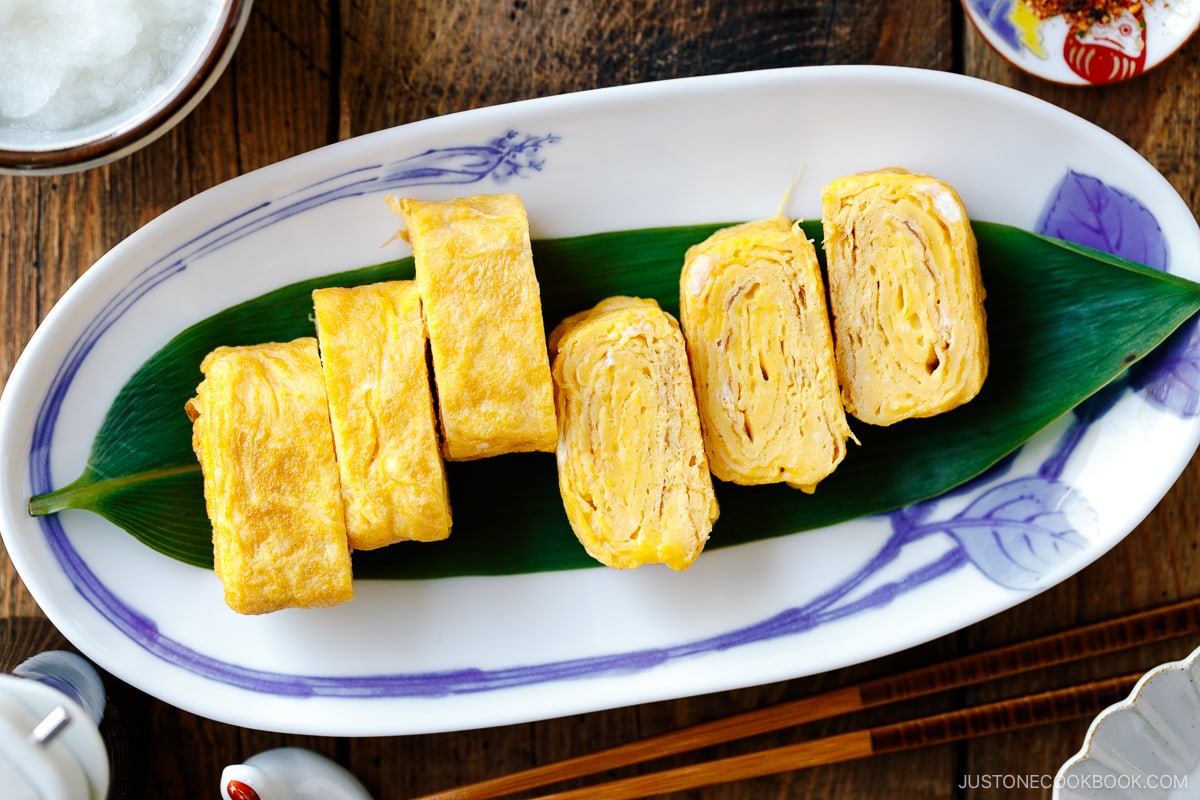
- Open the sushi mat and cut the rolled omelet in half.
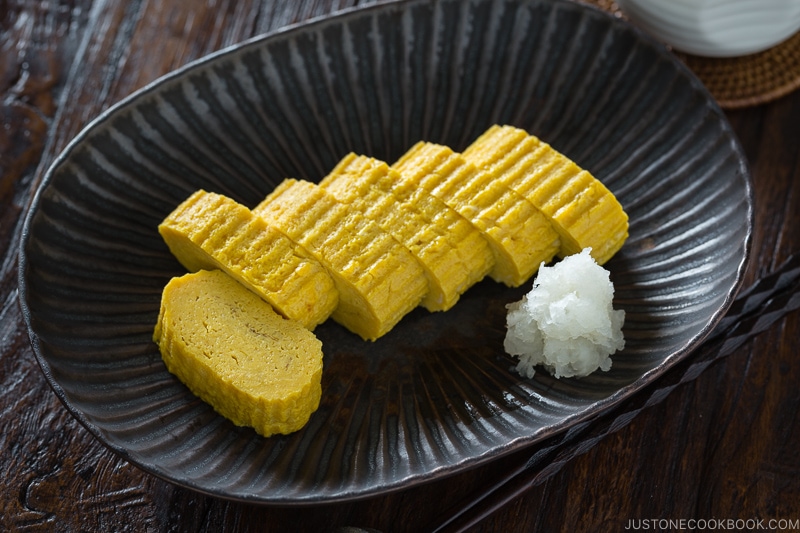
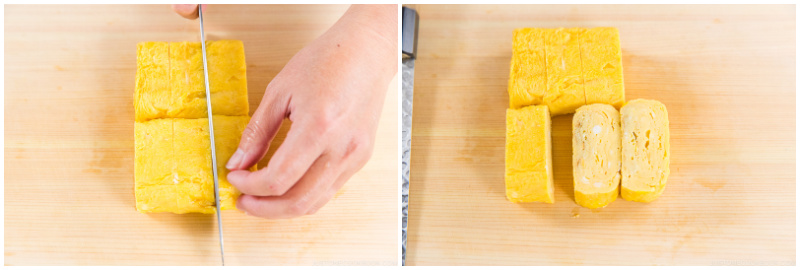
- Then cut each half into 3 equal pieces. Serve immediately or at room temperature. Optionally, you can serve with grated daikon drizzled with soy sauce.
To Store
- You can keep the leftovers in an airtight container and store them in the refrigerator for up to 2–3 days and in the freezer for 2 weeks.


Beautiful recipe…so delicate and the taste takes me back to a friend’s home in Hawai’i!
Hi Denise! Aww. We are so happy to hear you enjoyed Nami’s recipe!
Thank you so much for your kind feedback! 🤗
Hi, after defrosting the frozen tamagoyaki, do we need to reheat it before eating?
Hi KLL, Thank you for taking the time to read Nami’s post and try her recipe!
If you are eating it right away after defrosting, you do not need to reheat it. But if you prefer to enjoy warm Tamagoyaki, it can be reheated.
We hope this helps!