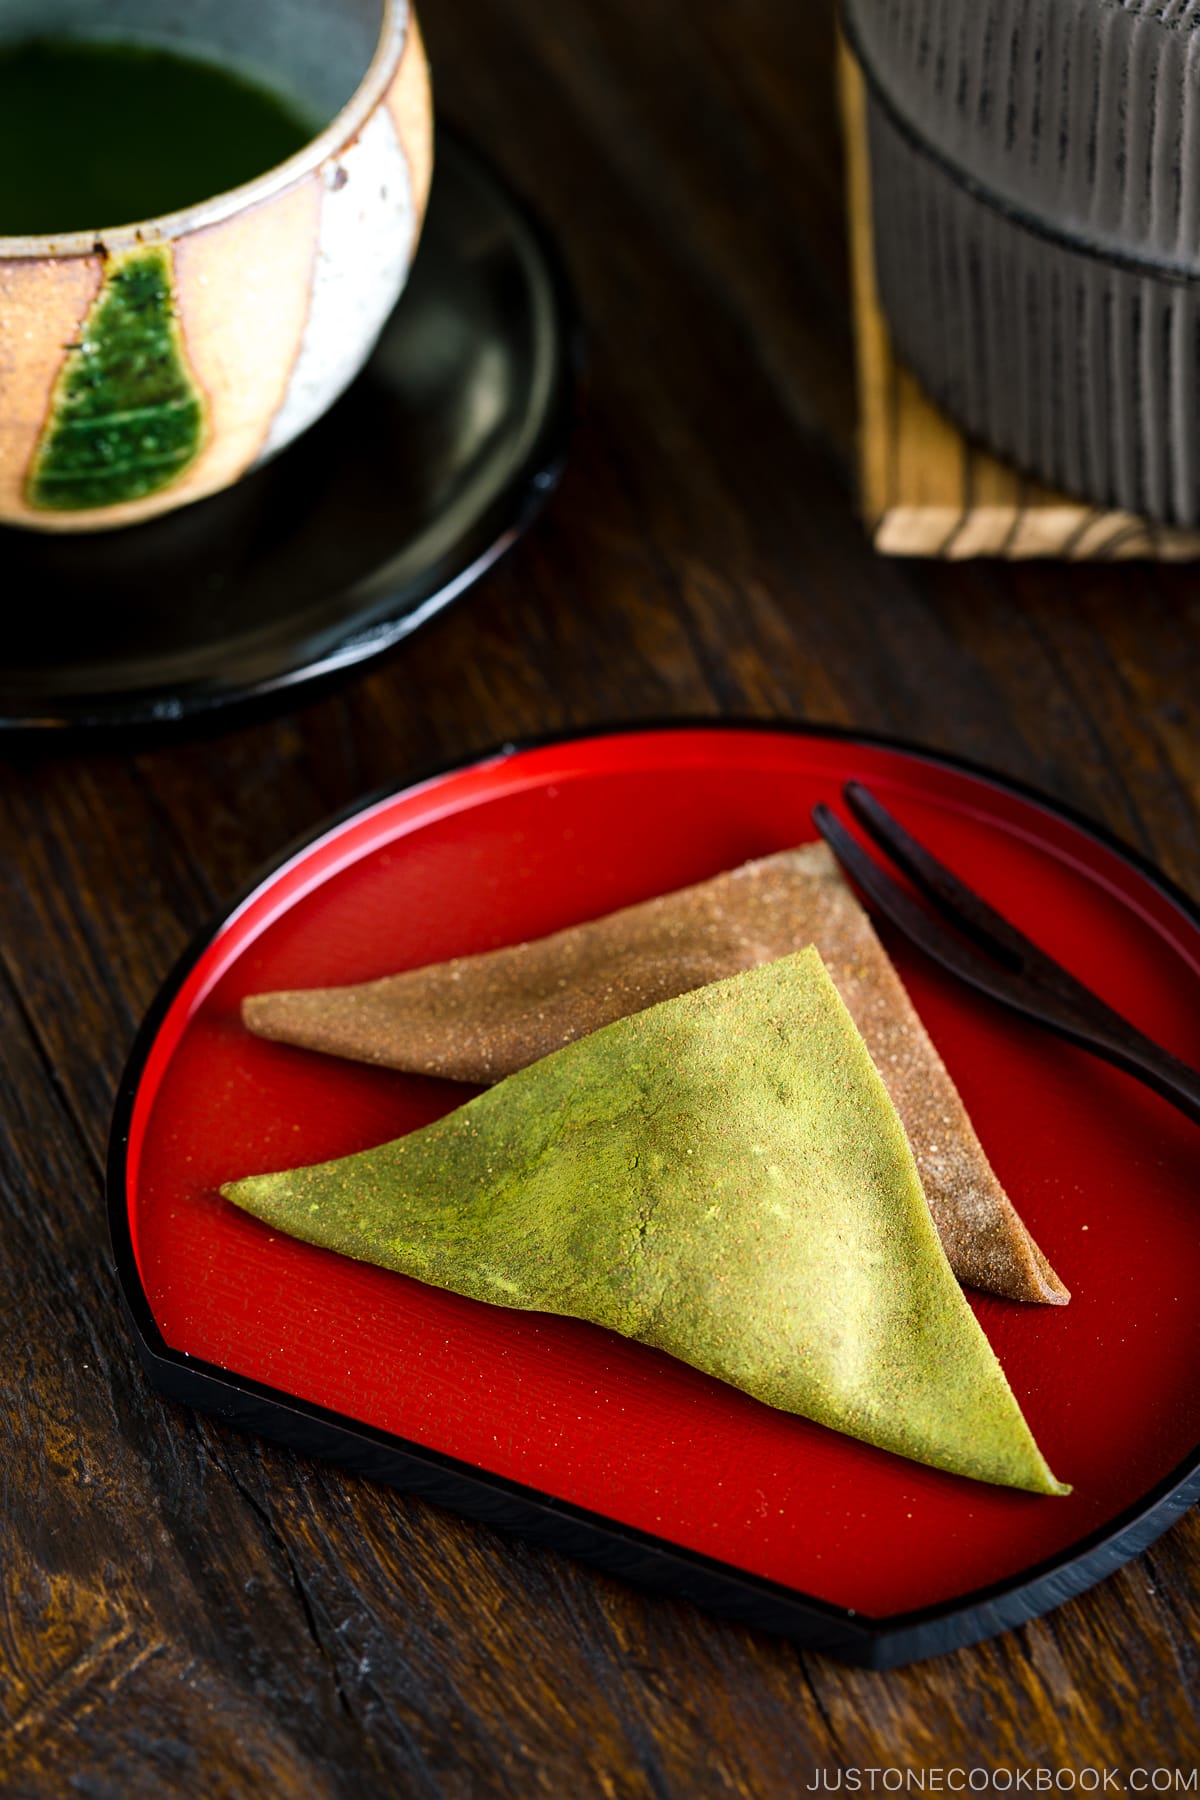
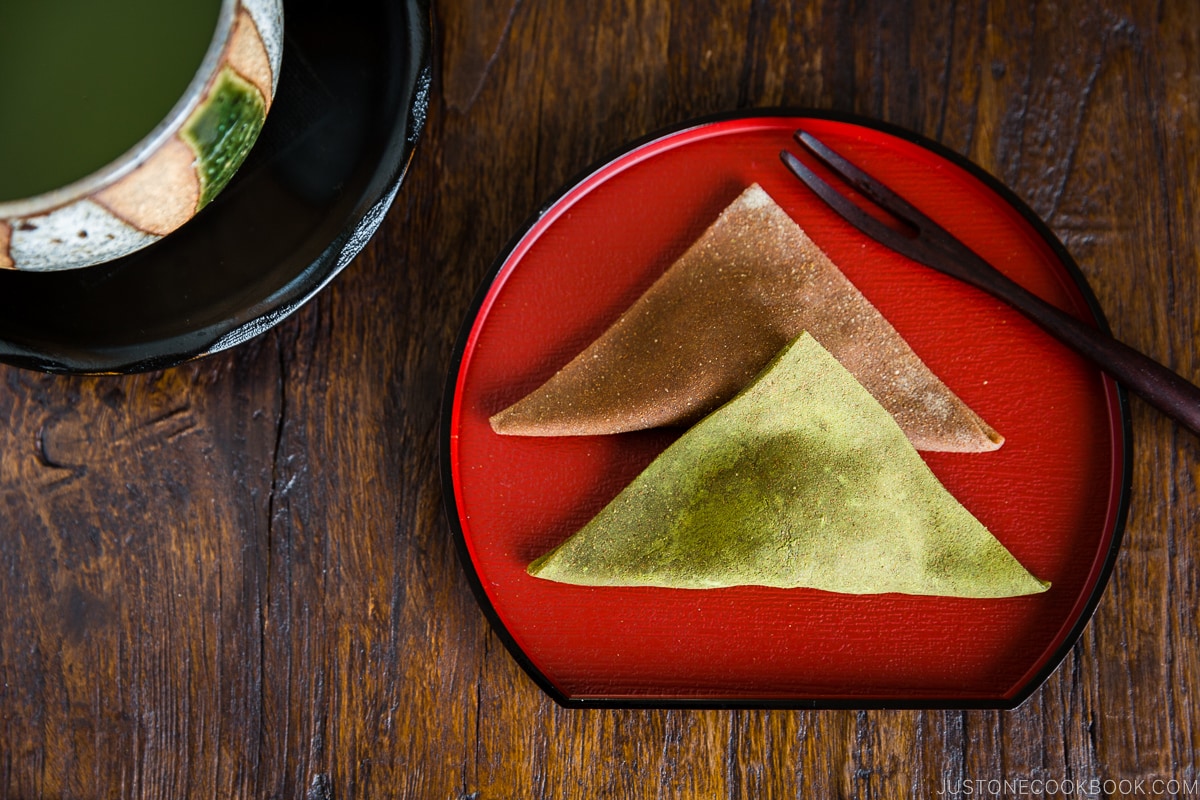
Yatsuhashi is the most famous traditional Japanese confectionery from Kyoto. Chewy, mochi-like wrappers are flavored with cinnamon and matcha then filled with sweet red bean paste. You can make this delicious treat at home with just a few simple ingredients.
When you visit Kyoto (京都) – one of the most beautiful cities in Japan with ancient temples, gorgeous Japanese gardens, serene rock display, and fabulous food, you should also try its popular confectionery, Yatsuhashi (八ツ橋).
If you are not visiting Kyoto, no worries! I’m going to show you how to make it at home, so you can enjoy this delicious Japanese sweet without stepping foot in the city.
What Is Yatsuhashi?
Yatsuhashi (八ツ橋) is a Japanese confectionery that is made from rice flour, sugar, and cinnamon.
When you’re in Kyoto, you’ll notice every souvenir shop sells them. It’s probably the most famous regional product from Kyoto. Since it’s a very well-known gift from the city, you can purchase it even at international airports in Japan.
Yatsuhashi Three Ways
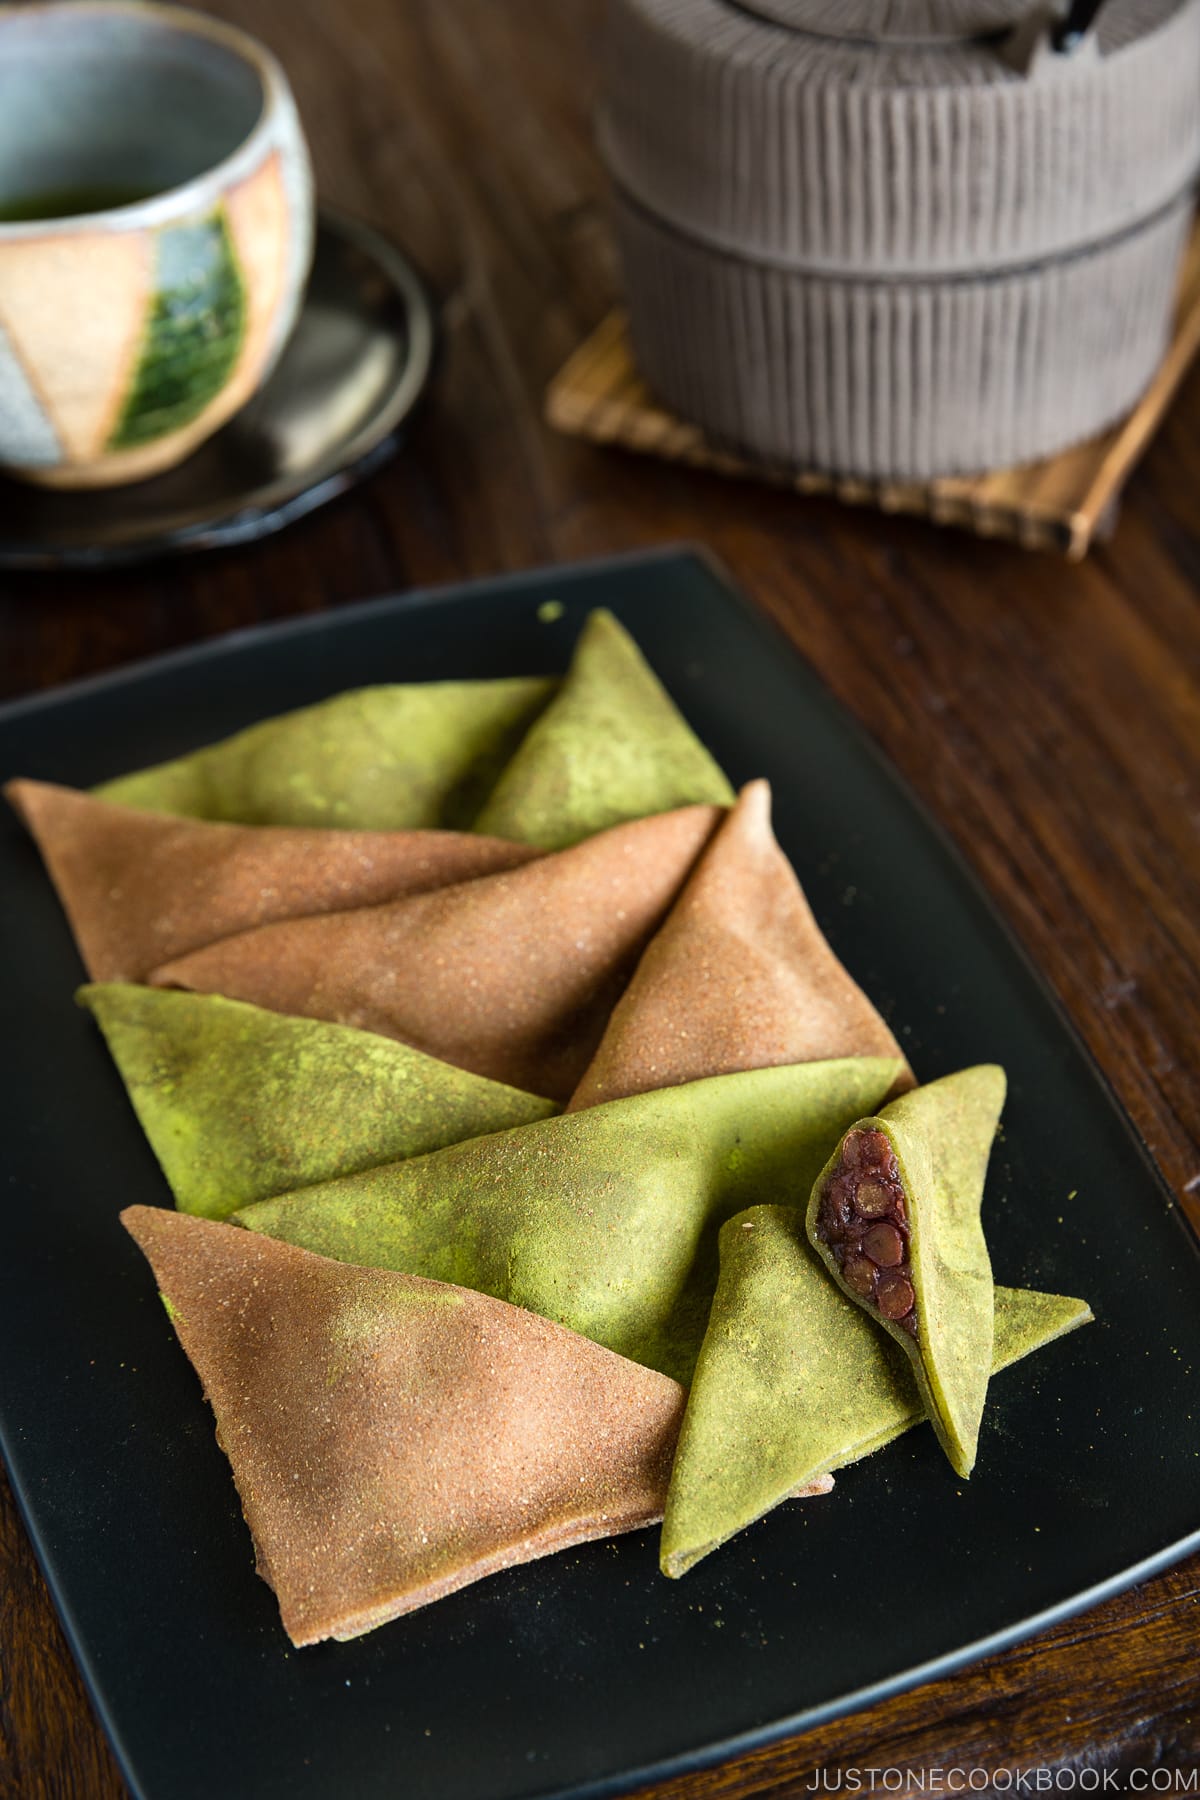
This traditional sweet is made in 3 different ways; baked, unbaked, and unbaked with Red Bean Paste.
When the mochi dough is flattened and baked until it gets hard, we simply call it Yatsuhashi. This is the most traditional type. The shape of the crackers is roundish and resembles a Japanese harp or a bamboo stalk cut in half lengthwise. The texture is very crispy and you may find it a bit hard to bite and break with your teeth. They usually come in cinnamon flavor, and you can smell and taste the intense cinnamon spice as you bite into the crackers.
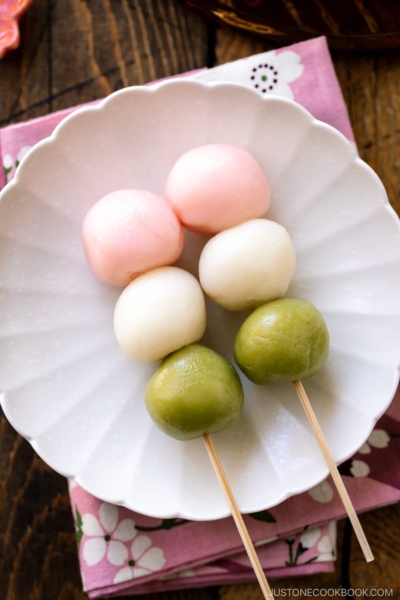
The unbaked version is called Nama Yatsuhashi (生八ツ橋). The steamed mochi is rolled out and cut into a small rectangular shape, and it is enjoyed as is. There are different flavors for Nama Yatsuhashi. The most common ones are cinnamon and matcha (green tea powder) flavors.
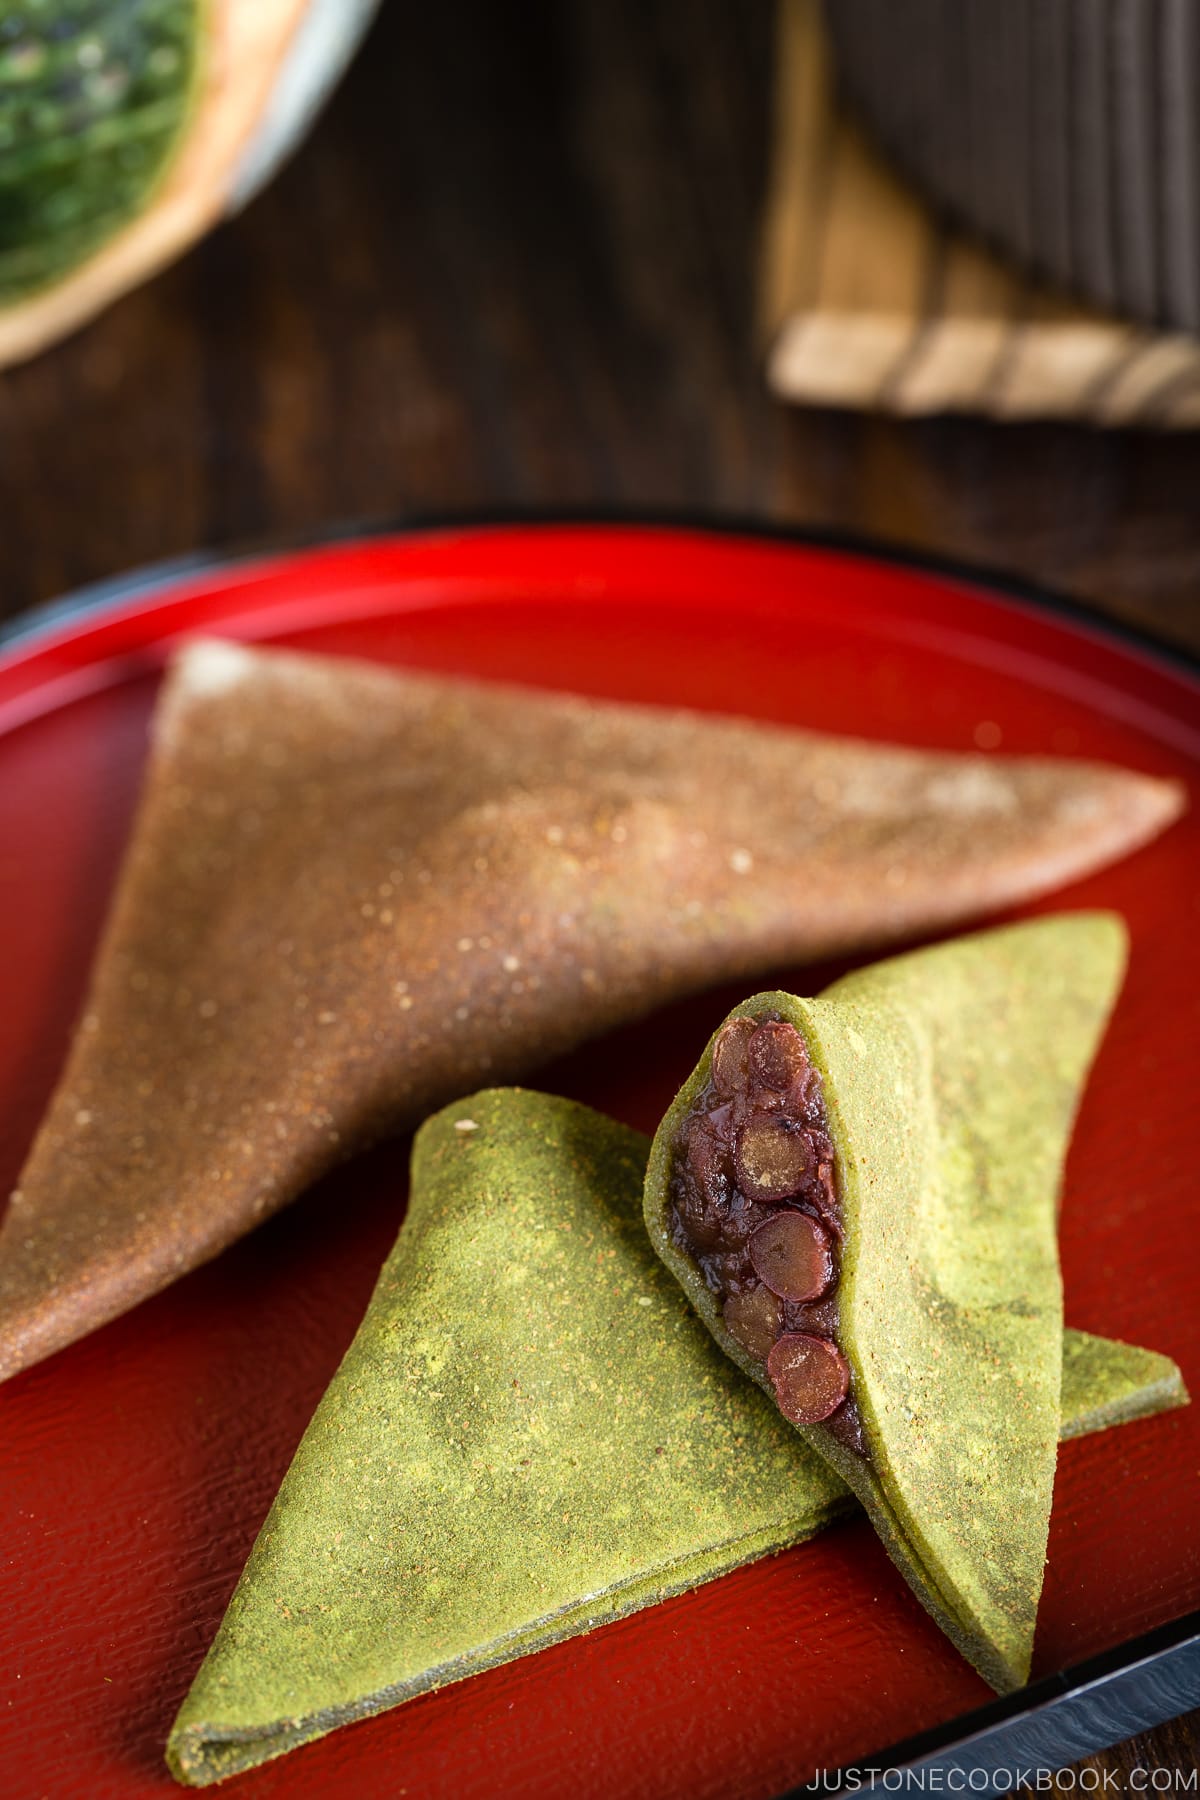
Nama Yatsuhashi with Red Bean Paste (餡入り生八ツ橋) is the most popular kind these days. The square thin mochi is folded into a triangle and filled with red bean paste (tsubuan). Today I’m sharing this most popular recipe.
The Key Ingredients for Nama Yatsuhashi
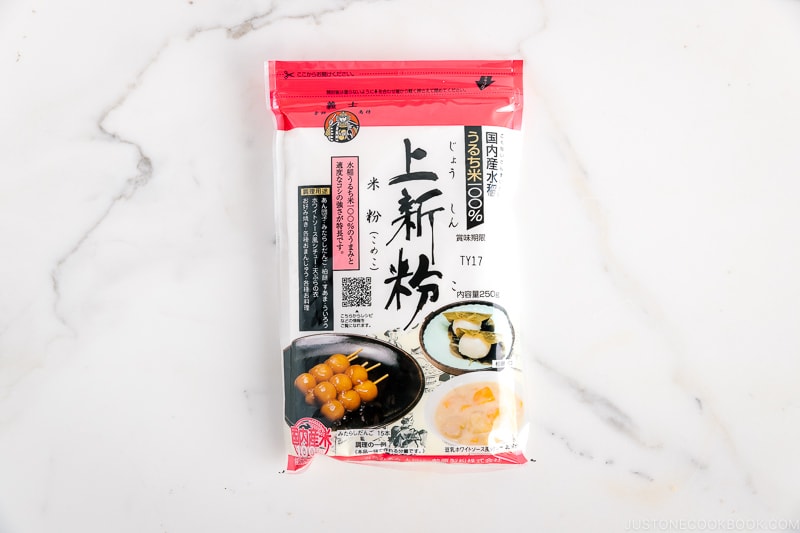
The authentic version is made of 100% rice flour (米粉) – the flour made from short-grain Japanese rice (うるち米), not glutinous rice flour/sweet rice flour (もち米).
The majority of homemade Yatsuhashi recipes online require both Joshinko (上新粉) and Shiratamako (白玉粉).
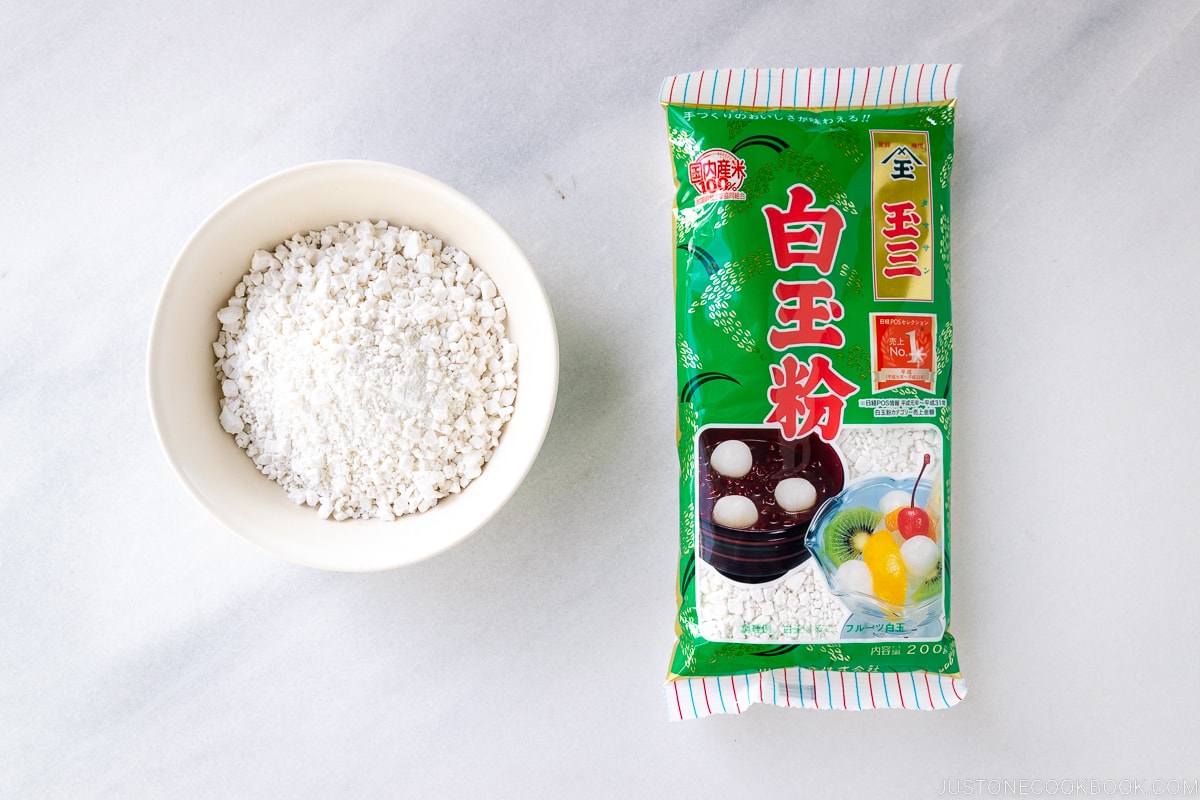
Joshinko is a type of rice flour and its texture is very fine. When you cook it, it’s not as elastic/pliable as mochi made from glutinous rice flour. Shiratamako is a type of glutinous rice flour.
Depending on the recipe, the ratio between these two flours could vary, and a lot of people use more Shiratamako than Joshinko. However, I used more Joshinko in this recipe to keep it closer to the authentic Yatsuhashi taste with 100% rice flour.
Where to Find Joshinko and Shiratamako
Joshinko and Shiratamako can be found in Japanese grocery stores or on Amazon.
When you look for shiratamako at a Japanese grocery store, keep in mind that the texture of shiratamako is rather coarse, despite it being glutinous rice “flour”. Some pieces are as big as 1/8 inch (3 mm).
In Asian grocery stores, you can find other Asian rice flour and glutinous rice flour. However, they are not made from Japanese short-grain rice. I’ve heard from my readers that the taste and texture of the final dish are not the same.
If you cannot find Shiratamako, you can use another type of glutinous rice flour/sweet rice flour called Mochiko on Amazon or at some American grocery stores. However, please know that the result will not be the same.
Wish to learn more about Japanese cooking? Sign up for our free newsletter to receive cooking tips & recipe updates! And stay in touch with me on Facebook, Pinterest, YouTube, and Instagram.
Yatsuhashi
Ingredients
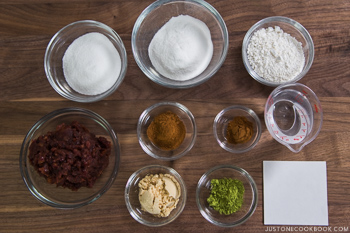
- 30 g shiratamako (glutinous rice flour/sweet rice flour) or mochiko (scant ¼ cup)
- 65 ml water (¼ cup + 1 tsp)
- 60 g sugar (¼ cup + 2 tsp)
- 50 g joshinko (Japanese rice flour) (¼ cup + 2 tsp)
- 1 Tbsp kinako (roasted soybean flour)
- 2 tsp cinnamon powder
- 2 tsp matcha (green tea powder)
- 1 tsp cinnamon powder (to mix with the matcha)
- ⅔ cup sweet red bean paste (anko) (tsubuan chunky paste; you can make homemade Anko on the stovetop or in the pressure cooker)
Instructions
- Gather all the ingredients.
- In a large (microwave-safe) bowl, add 30 g shiratamako (glutinous rice flour/sweet rice flour) or mochiko (a scant ¼ cup) and 65 ml water (¼ cup + 1 tsp). Whisk well to combine so that there are no lumps of flour. We mix these two first before adding the rest of the dry ingredients.
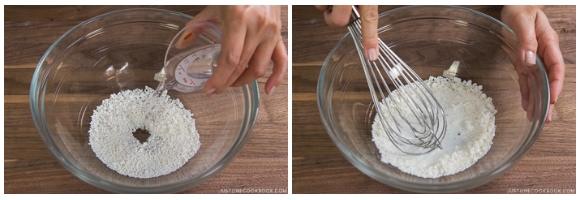
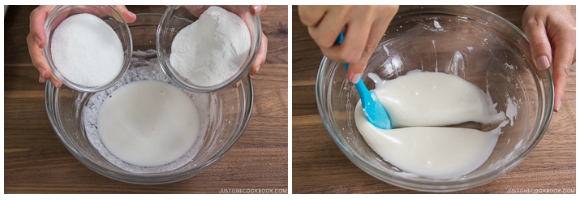
- Add 60 g sugar (¼ cup + 2 tsp) and 50 g joshinko (Japanese rice flour) (¼ cup + 2 tsp). Mix well with a spatula. The sugar will make the dough watery. You should be able to see the bottom of the bowl for a second when you draw a line. Add more water to reach that consistency, if necessary.
To Cook the Dough in the Microwave (Method 1)
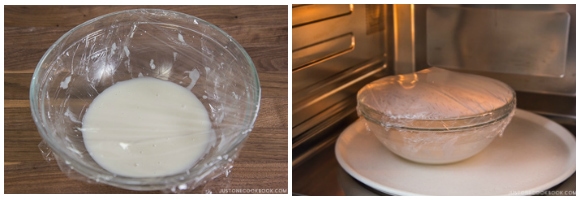
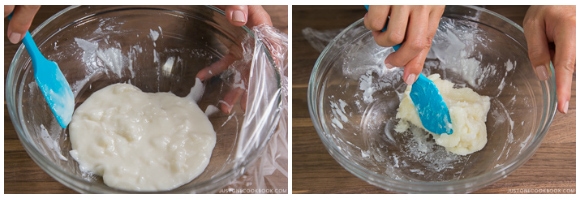
- Loosely cover the bowl with plastic wrap and put it in the microwave. My microwave is 1400W and strong, so I reduced the power to half (P5) and then microwave for 1½ minutes (if you microwave is 600W then you should heat it for 3 minutes). Take it out and mix evenly with a wet spatula. Cover with plastic wrap again and microwave for another 1 to 1½ minutes (adjust based on your microwave wattage).
- It’s ready once it becomes thick and sticky like soft mochi when you mix it with the wet spatula.
To Cook on the Stovetop (Method 2)
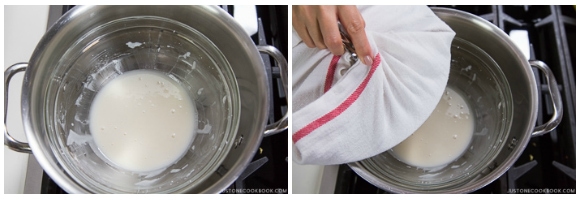
- Place a steamer rack inside a pot that is large enough to fit the bowl with the ingredients. Fill the bottom of the pot with water (but make sure the water won’t reach to bowl when boiling). Bring the water to a boil. Once boiling, place the bowl inside. Wrap the lid with a kitchen towel so that the condensation won’t drop into the mixture. Cover the lid and steam for 12–15 minutes or until the texture becomes like mochi—sticky, white, and thick when you mix with a wet spatula.
To Roll and Cut the Dough
- Spread some of the 1 Tbsp kinako (roasted soybean flour) on the work surface.

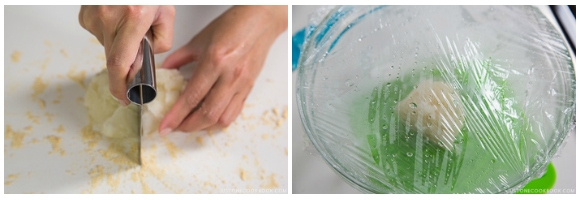
- Divide the dough in half. Keep one half in the bowl and cover with plastic wrap so it won’t dry out.
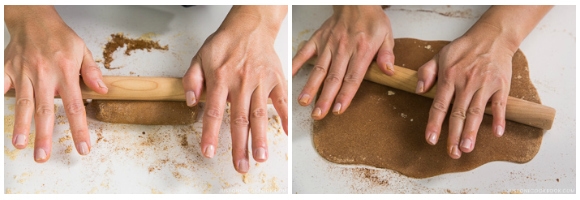
- With the other half of the dough, flatten it and sprinkle with 2 tsp cinnamon powder.
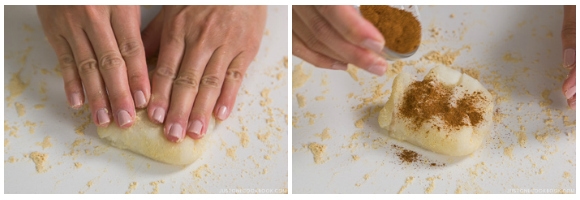
- Knead the dough to evenly distribute the cinnamon powder.
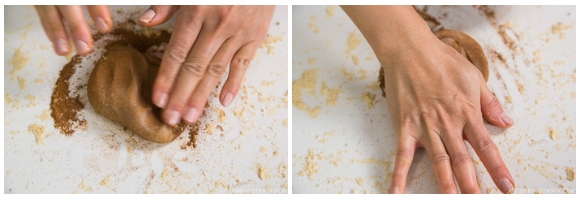
- With a rolling pin, roll out the dough to a thin sheet. Try to stretch it out into a rectangular (or square) shape, so it’ll be easier to cut into squares.
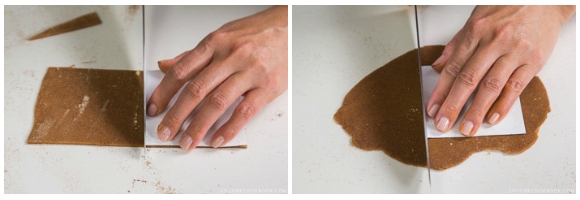
- Create a 3 x 3 inch (8 x 8 cm) square pattern with a piece of cardboard. Place it on the dough and cut out squares of dough with a knife. Sprinkle more soybean powder in between the wrappers so they don’t stick together.

- With the leftover pieces, knead and roll flat again to create more squares.
- Combine 2 tsp matcha (green tea powder) and 1 tsp cinnamon powder. Whisk well together.
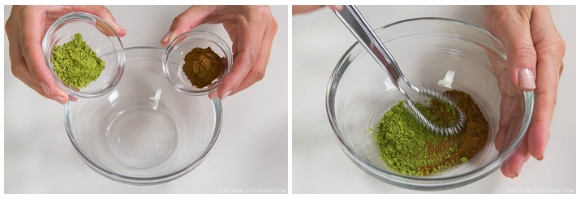
- Flatten half of the dough that you kept in the bowl and sprinkle the matcha/cinnamon powder over the dough as you knead.
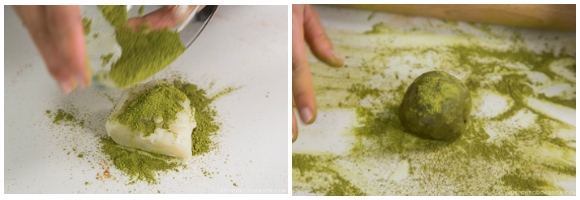
- With a rolling pin, roll out the dough to a thin rectangular sheet. Try to stretch it out into a rectangular or square shape, so it’ll be easier to cut into squares. Cut the dough into squares.

To Fold the Yatsuhashi
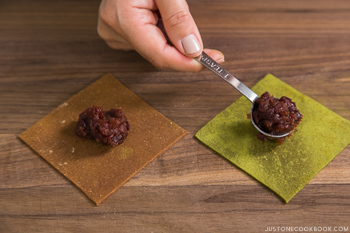
- With the ⅔ cup sweet red bean paste (anko), place 1 heaping teaspoon (15 g) of red bean paste in the center of each dough square.
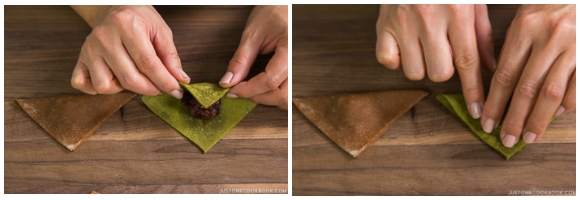
- Fold in half diagonally into a triangle shape and press to seal the edges. If the dough edge won’t stick, wet it with water and press to seal. Enjoy within 24 hours.
To Store
- Just like other mochi desserts, Yatsuhashi will become hard and dry when it‘s stored in the refrigerator. Keep them in an airtight container and store at a cool room temperature.
To Make Baked Yatsuhashi
- Roll out the dough thinner and cut into strips ¾ x 2¼ inches (2 x 6 cm). Bake them at 300ºF (150ºC) for 15–20 minutes. If you prefer it to be more crispy, keep it in the oven a little longer. When they are crispy, remove them from the oven and let them cool.


After being given authentic yatsuhashi from Kyoto, I needed to know the recipe to make it my own. I bought the same flours used in this recipe. I substituted the kinako for almond flour (soy sensitivity) and it worked out really well. Everything was perfect until I baked them. (I made baked/no filling) I must have rolled them out too thick, even though I thought it would be enough and it was difficult to put them onto the baking sheet at the thickness I had cut them at. They are technically underbaked and soft, and I am new to cooking and baking so I was afraid to keep them in the oven any longer. Any suggestions on how thin they should be rolled out, easier ways to transfer them from counter to sheet? Thank you so much for future feedback, and I will definitely be making this recipe until I perfect it and will be sharing it with my loved ones. Thank you so much!
Hi, Yoko! Thank you for reading Nami’s post. 😊
Yatsuhashi thickness is typically 1.5 mm. It is easier to transfer if they are cut into small pieces. We hope this helped!
I seem to remember having yatsuhashi that were strawberry and cinnamon flavor (with red bean inside). Do you know how one would make strawberry ones? Maybe with dehydrated strawberry powder?
Hello, Sara! Thank you so much for taking the time to read Nami’s post!
We don’t have a strawberry Yatsuhashi recipe, but they’re usually made using freeze-dried strawberries for color and flavor.
We hope this was helpful!
Hi there Sara,
a guess I got on top of Namis reply: if it’s make cheap you just put 1 drop strawberry aroma into the whole dough. You could aromate a lot of fillings too like this, without the texture problems. But more delicious is mostly always not chemical. The only exception was my christmas cookies, they tasted more like vanilla with vanilla aroma than with real vanilla, which I found strange, but I do everything for the best taste! 😉