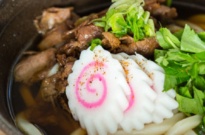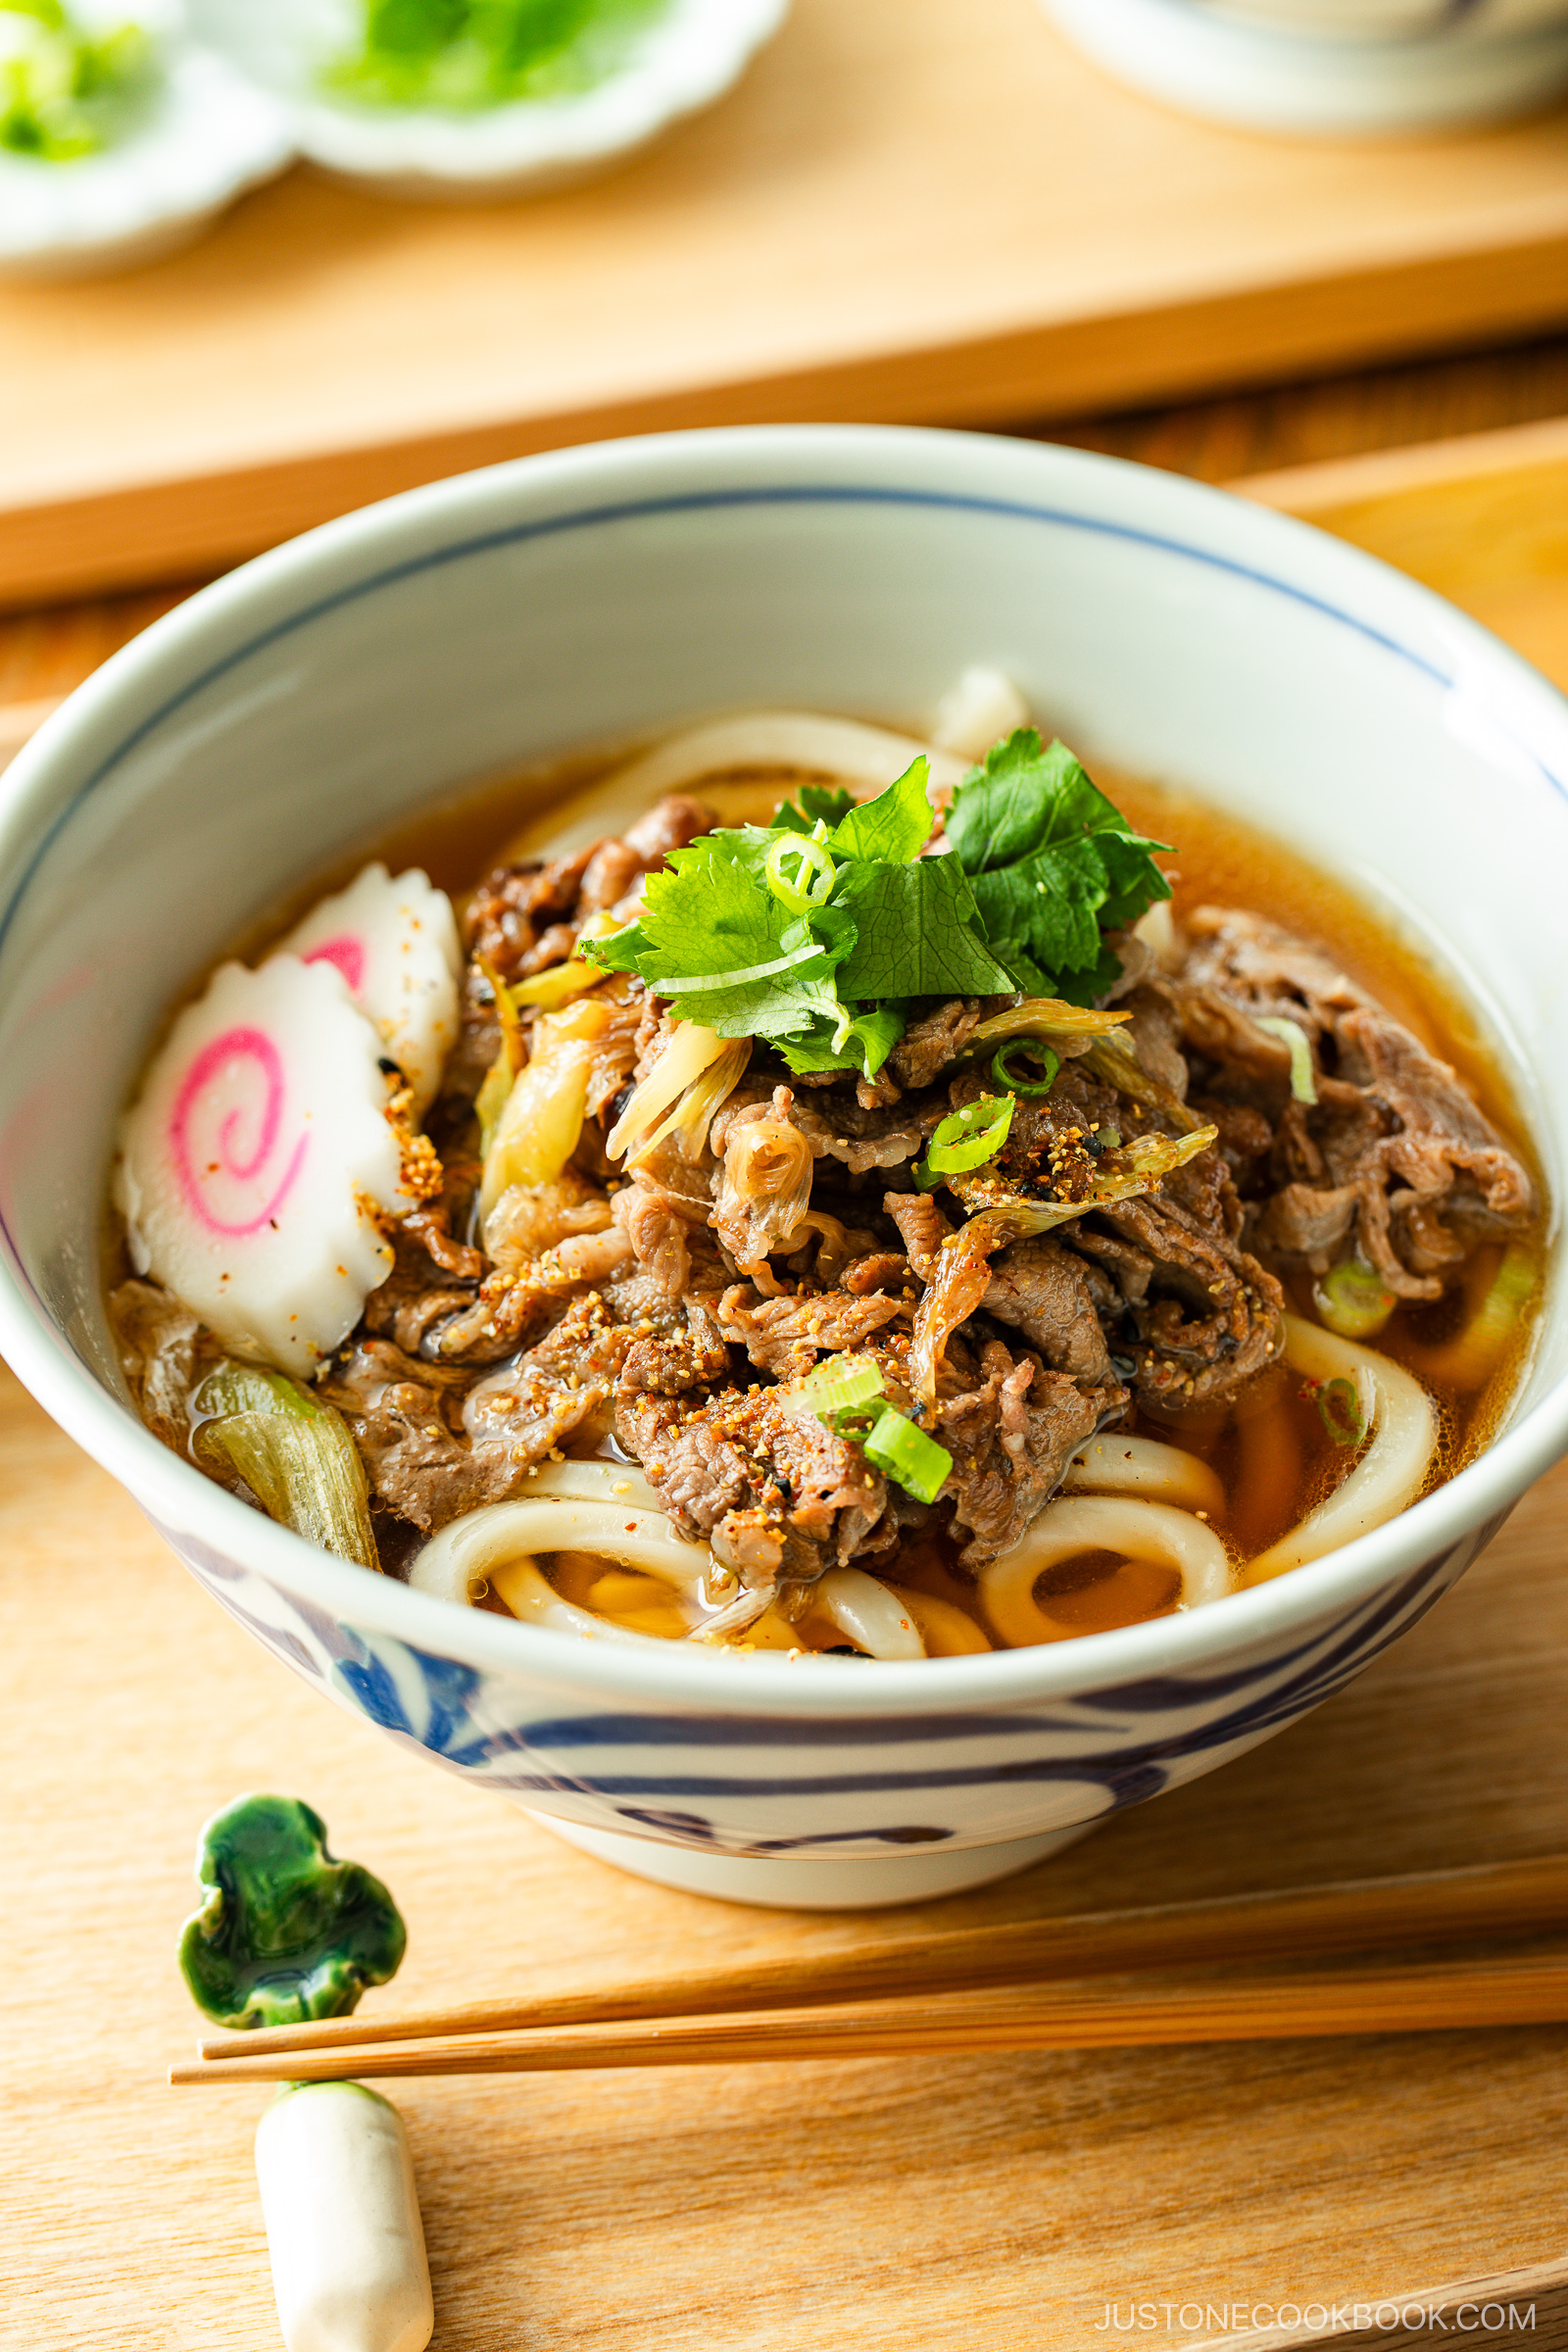
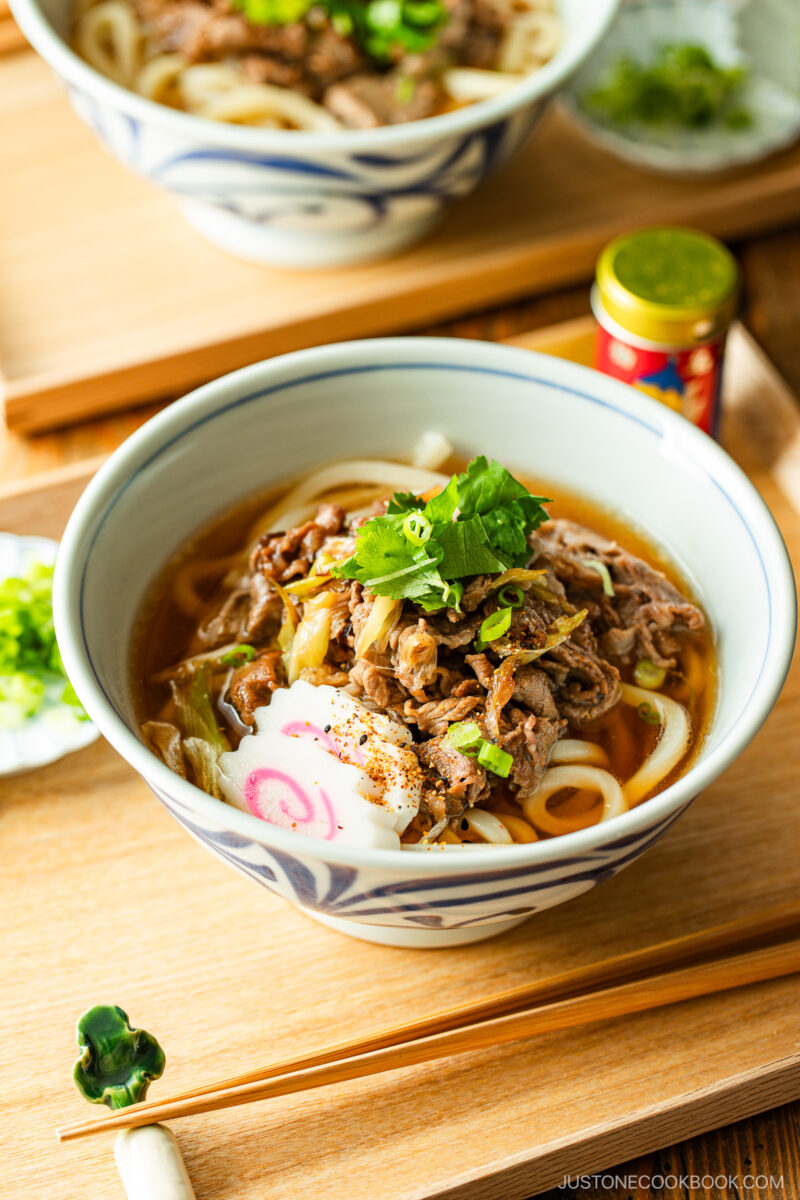
When a chilly day calls for something cozy, I reach for Beef Udon. Thick and chewy noodles soak up a flavorful dashi broth, while tender slices of seasoned beef and onion add richness that warms you from the inside out. Happily, you can recreate the same soul-hugging dish at home in about 30 minutes.
If you’re craving more Japanese udon recipes, try my Yaki Udon, Cold Udon, or Udon Noodle Soup next!
What is Beef Udon?
Beef udon (肉うどん) noodle soup is a beloved staple in homes and udon shops across Japan. The pairing of beef and noodles is relatively new, with the Japanese adopting Western customs like eating beef between the late 1800s and early 1900s. I first fell for this combo in Takayama, Japan, where a ryokan served it with prized Hida beef.

Why I Love This Recipe
- Perfect for beginners. Super easy to make—even if you’re new to Japanese cooking!
- Pure comfort food. Savory beef and umami-rich dashi create a warm, soothing broth.
- Minimal ingredients. Just a few staples make this a quick, weeknight-friendly meal.
- Pantry & freezer-friendly. I always keep udon noodles and thin-sliced beef in the freezer so I can whip this up anytime my family asks—which is often!
Ingredients for Beef Udon
- Udon noodles
- Thinly sliced beef
- Tokyo negi – or green onion/scallion
- Neutral oil, soy sauce, and sugar – for sautéing
- Homemade broth: dashi (Japanese soup stock), soy sauce, mirin, sugar, kosher salt
- Garnish and toppings: green onions, narutomaki (fish cake), mitsuba (Japanese parsley), and shichimi togarashi (Japanese seven spice)
Find the printable recipe with measurements below.
Jump to RecipeSubstitutions
- Udon noodles: I recommend frozen udon from a Japanese/Asian market, but you could use dried or fresh. For fresh udon noodles from scratch, try my Homemade Udon Noodles recipe.
- Thinly sliced beef: I use pre-sliced “shabu shabu” beef that you can find at a Japanese market. If you can’t find it, you can learn How to Slice Meat Thinly at home with ribeye or chuck steak.
- Homemade soup broth: Make my shortcut broth with mentsuyu (concentrated noodle soup base) in the recipe instructions.
- Dashi: I use convenient Japanese soup stock packets as the flavor is pretty good. Or, learn How to Make Dashi from scratch with dried kelp (kombu) and dried bonito flakes (katsuobushi). Use dashi powder only in a pinch.
- Mirin: If you don’t have it, use 3 parts sake (or water) to 1 part sugar. The flavor isn’t the same, but it’s close.
How to Make Beef Udon
Preparation
- Make dashi (Japanese soup stock). Prepare your preferred stock; I often use a packet for speed. (Skip if you’re making the shortcut broth.)
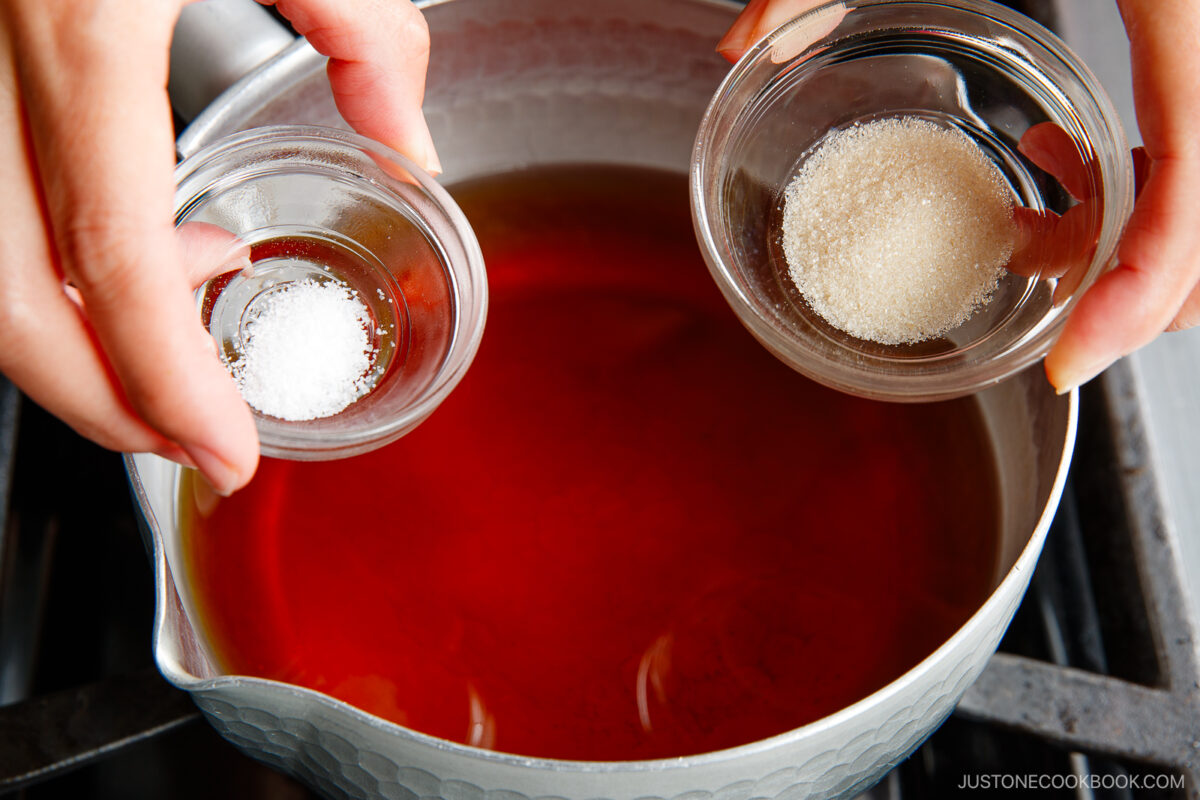
- Season the broth: Stir soy sauce, mirin, sugar, and salt into the hot dashi, then keep it warm.
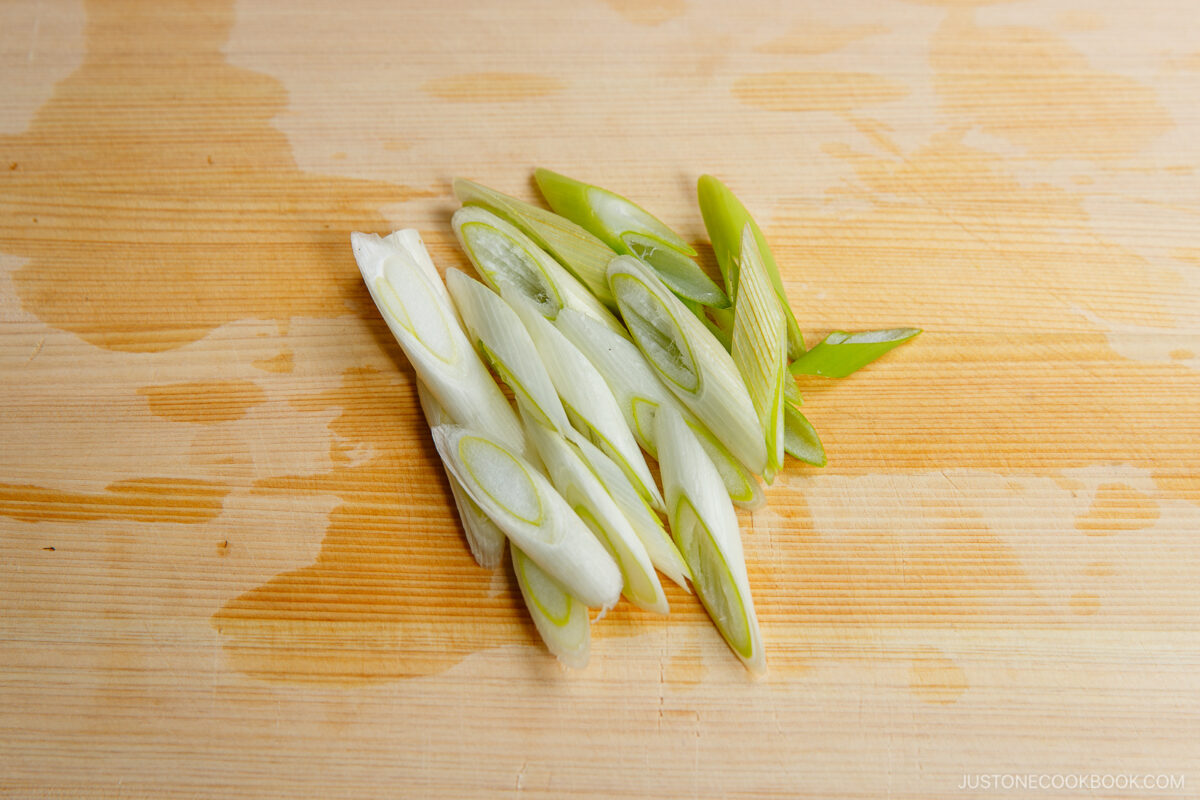
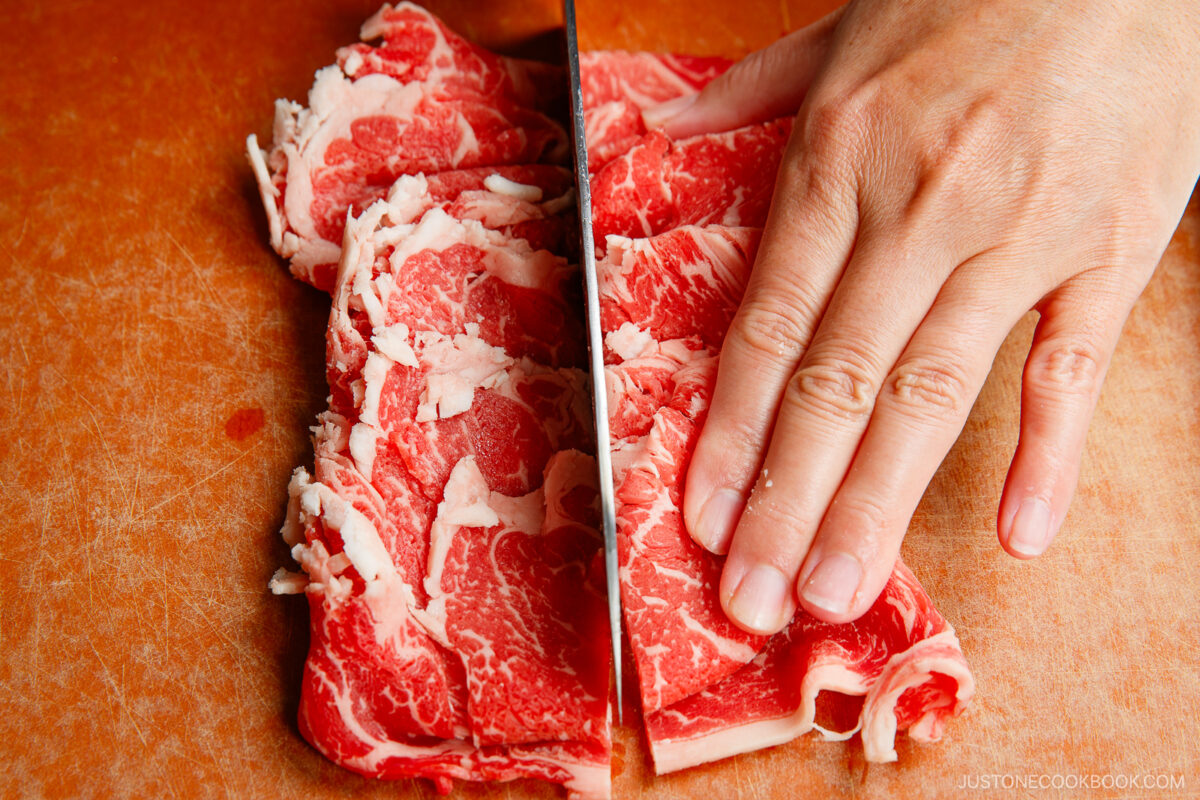
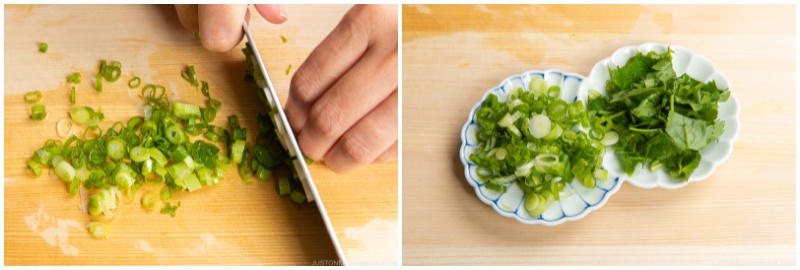
- Cut the ingredients. Cut the white part of Tokyo negi diagonally into thick slices. Cut the thinly sliced meat in half. Thinly slice the green onions (and mitsuba) and the optional fish cake (narutomaki).
Cooking
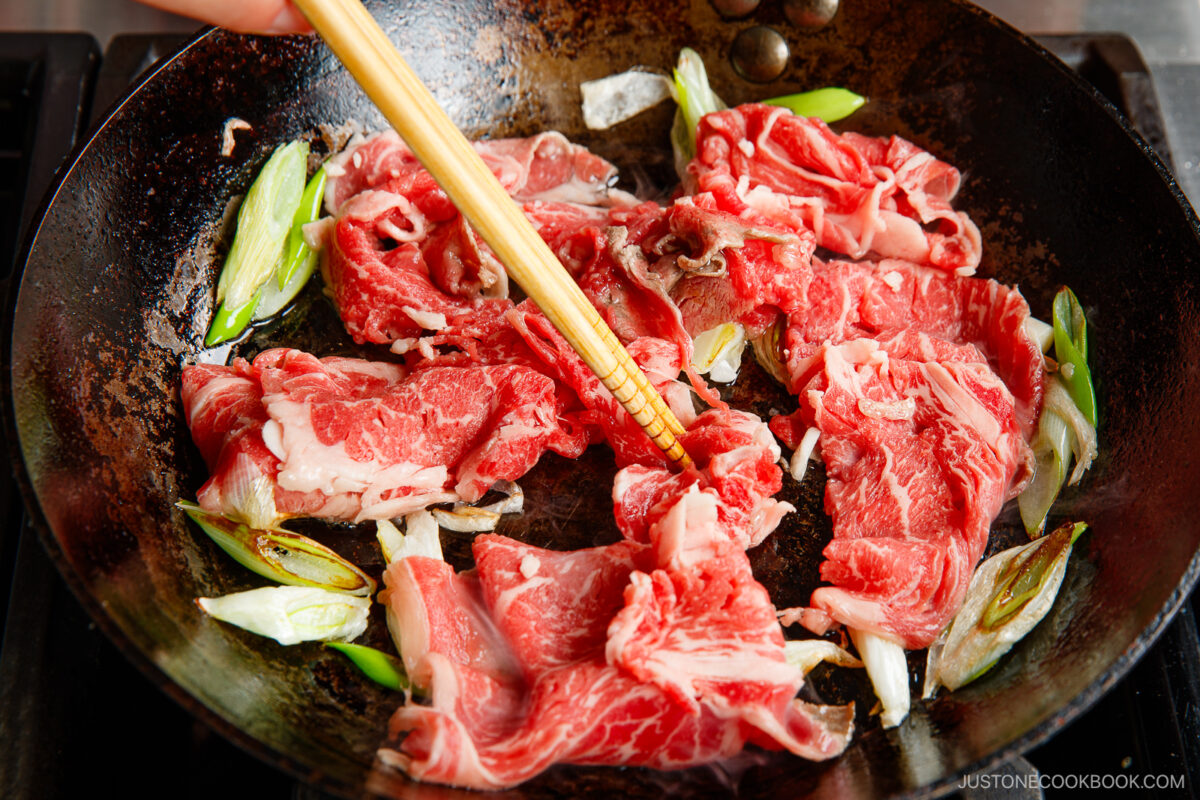
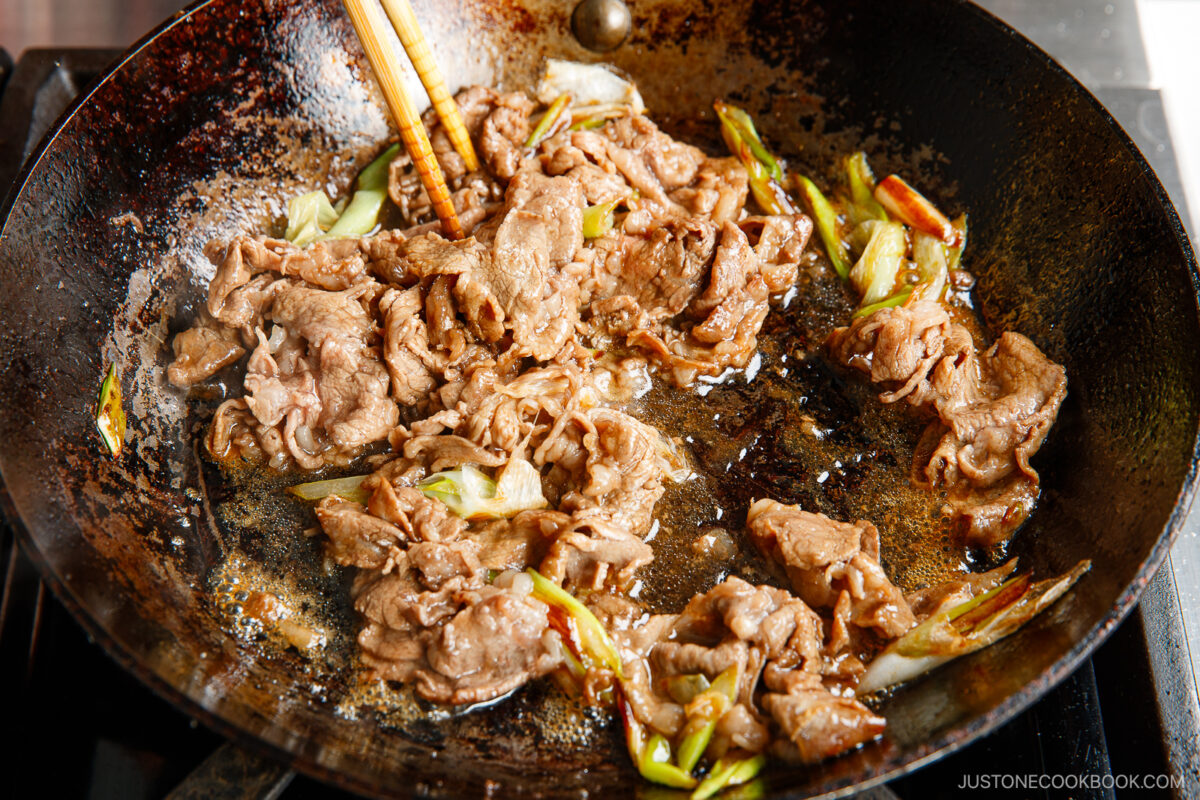
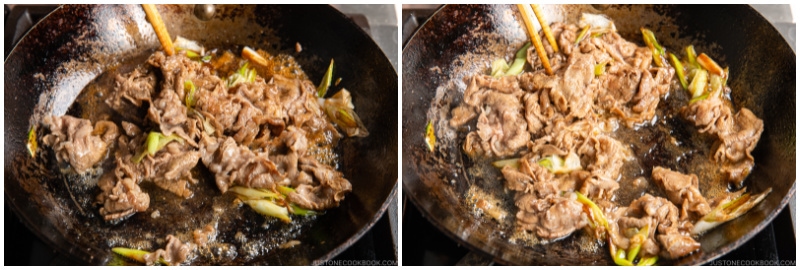
- Stir-fry beef and Tokyo negi in a skillet with oil and cook until no longer pink. Sprinkle in sugar and soy sauce; stir until glazed.
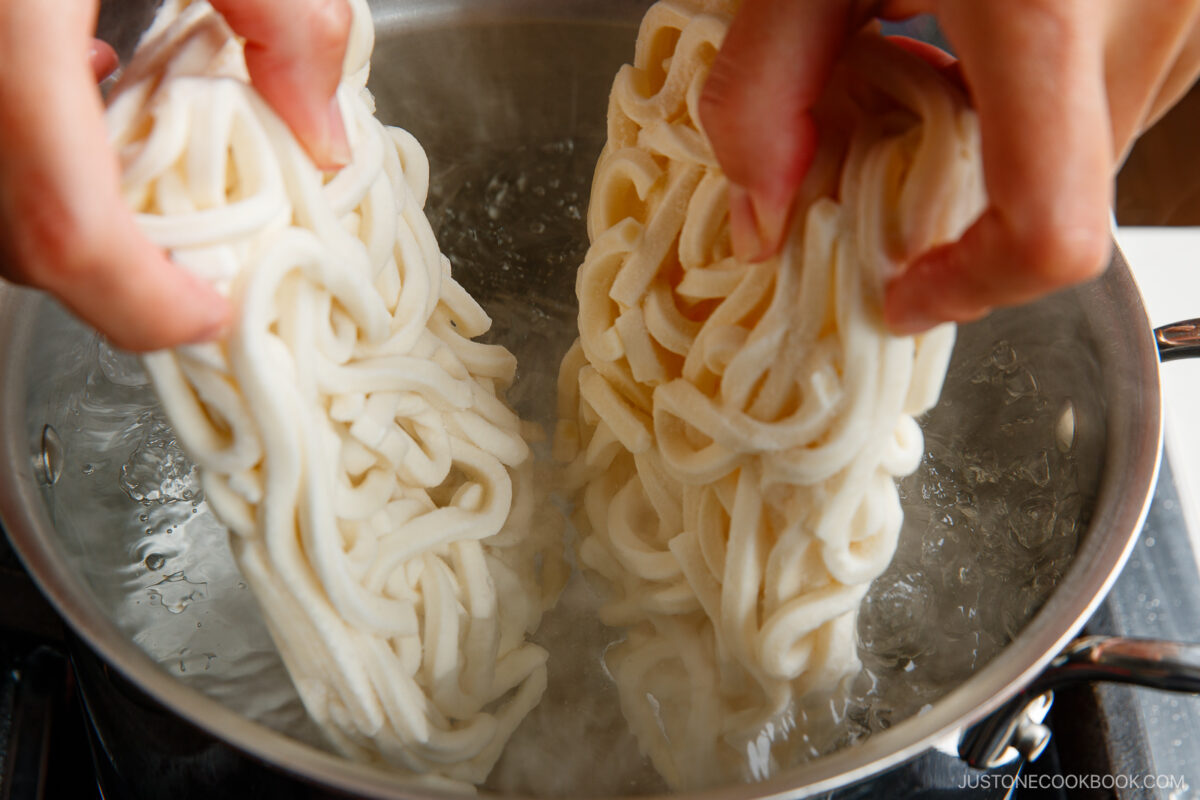
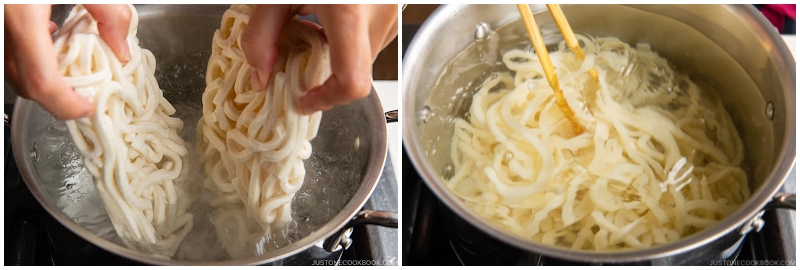
- Heat noodles in a pot of boiling water according to the package directions. Drain well and divide them into individual bowls.
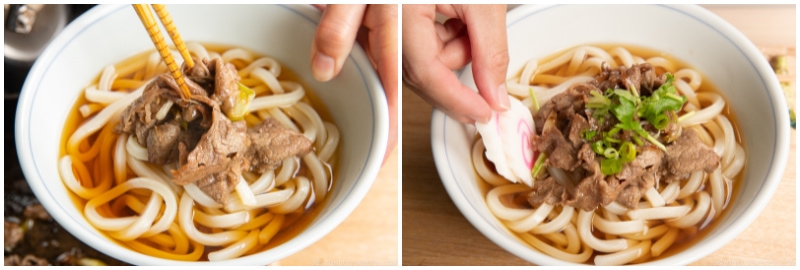
Assemble
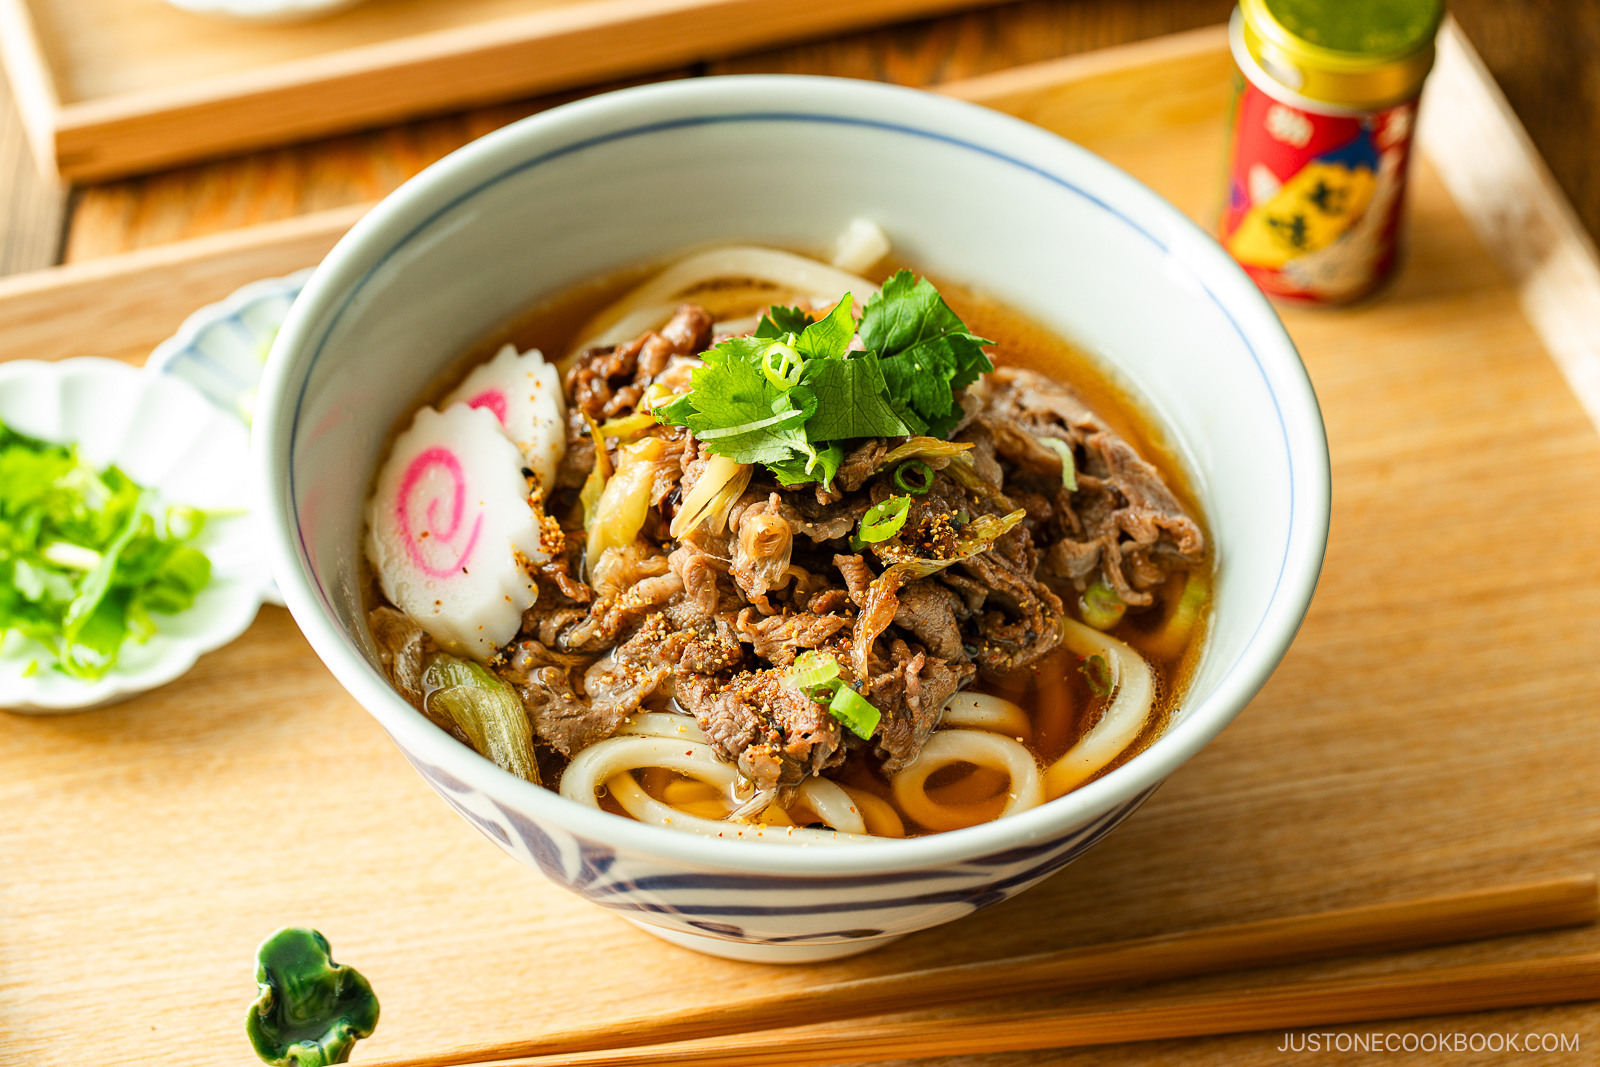
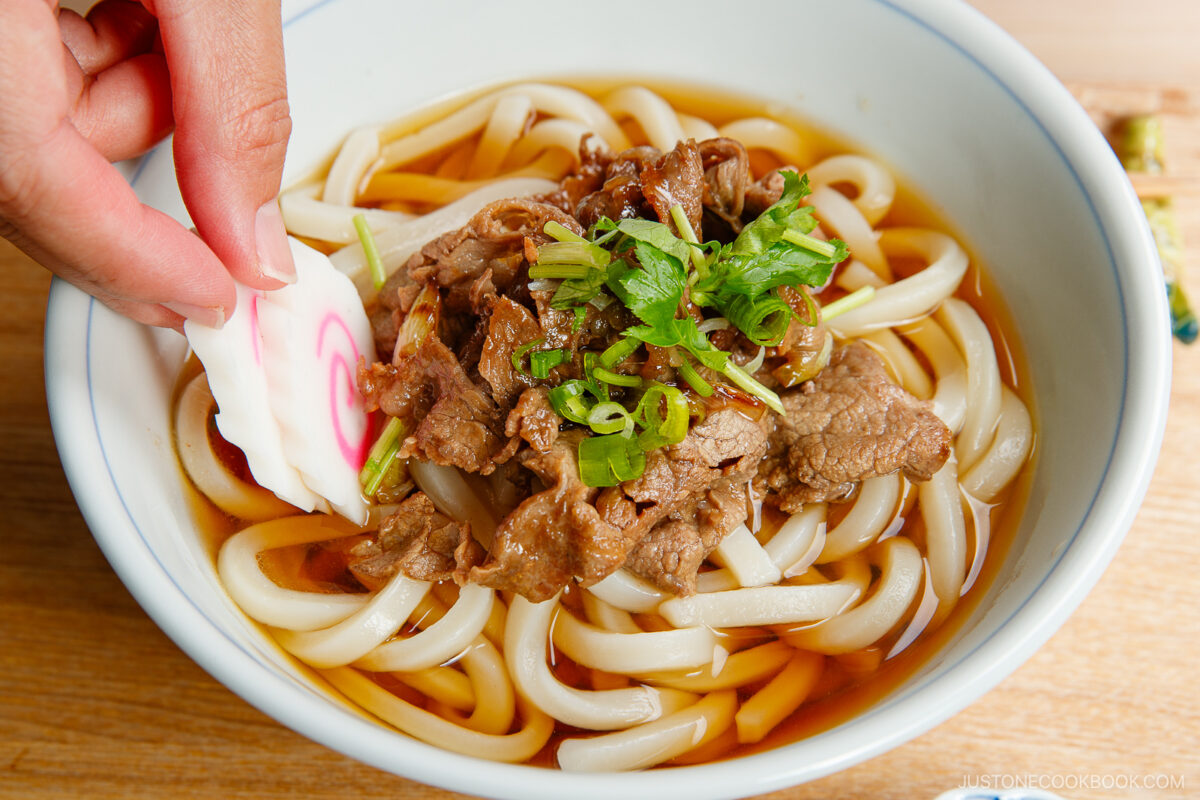
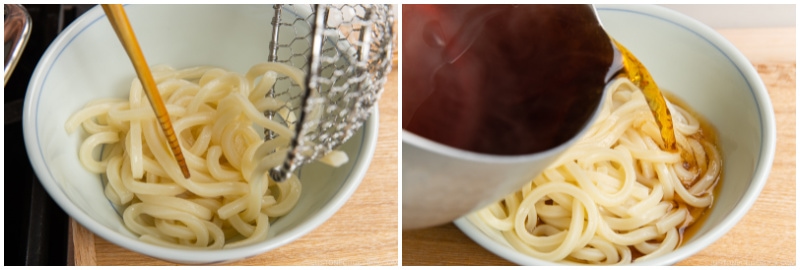
- Build the bowls. ladle in hot broth, and top with the sweet-soy beef mixture. Garnish with green onion, fish cake, mitsuba, and a pinch of shichimi togarashi to taste. Serve immediately while piping hot.

Nami’s Recipe Tips
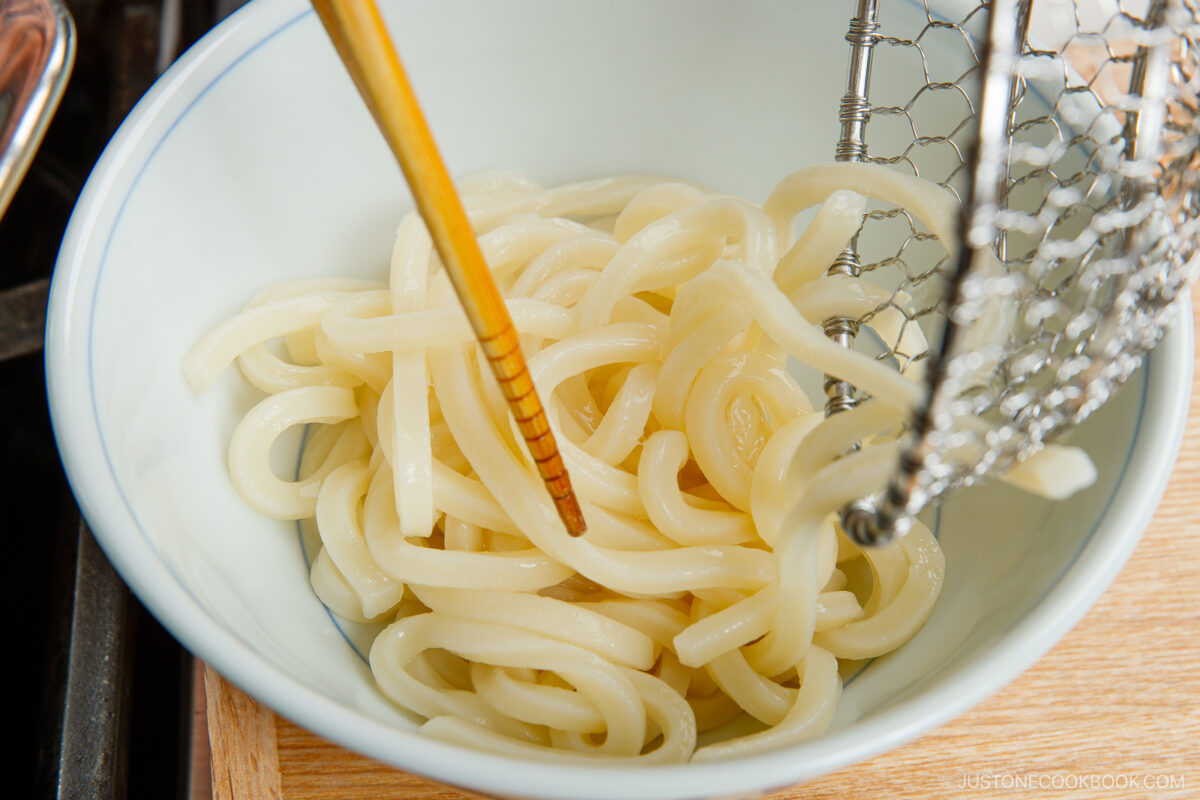
- Reheat frozen udon; don’t boil it. A 1-minute dip keeps the texture bouncy.
- Loosen noodles with chopsticks so they don’t clump in the boiling water.
- Use a wide pan to give the beef room to sear instead of steam.
- Remove the beef as soon as it browns; ultra-thin slices cook in seconds.
Variations and Customizations
- Extra veggies: For more color and nutrition, add sliced onion, bell pepper, cabbage, mushrooms, or bok choy.
- Aromatic boost: Sauté minced garlic and ginger with the beef for deeper flavor.
- Swap proteins: Thinly sliced pork or chicken also tastes wonderful in the same sweet-soy glaze.
What to Serve with Beef Udon
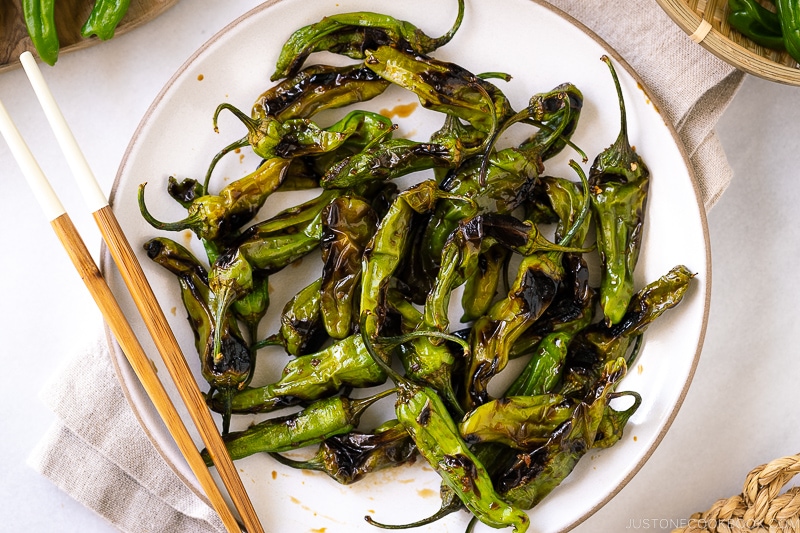
- Blistered Shishito Peppers with Ginger Soy Sauce for a light veggie side.
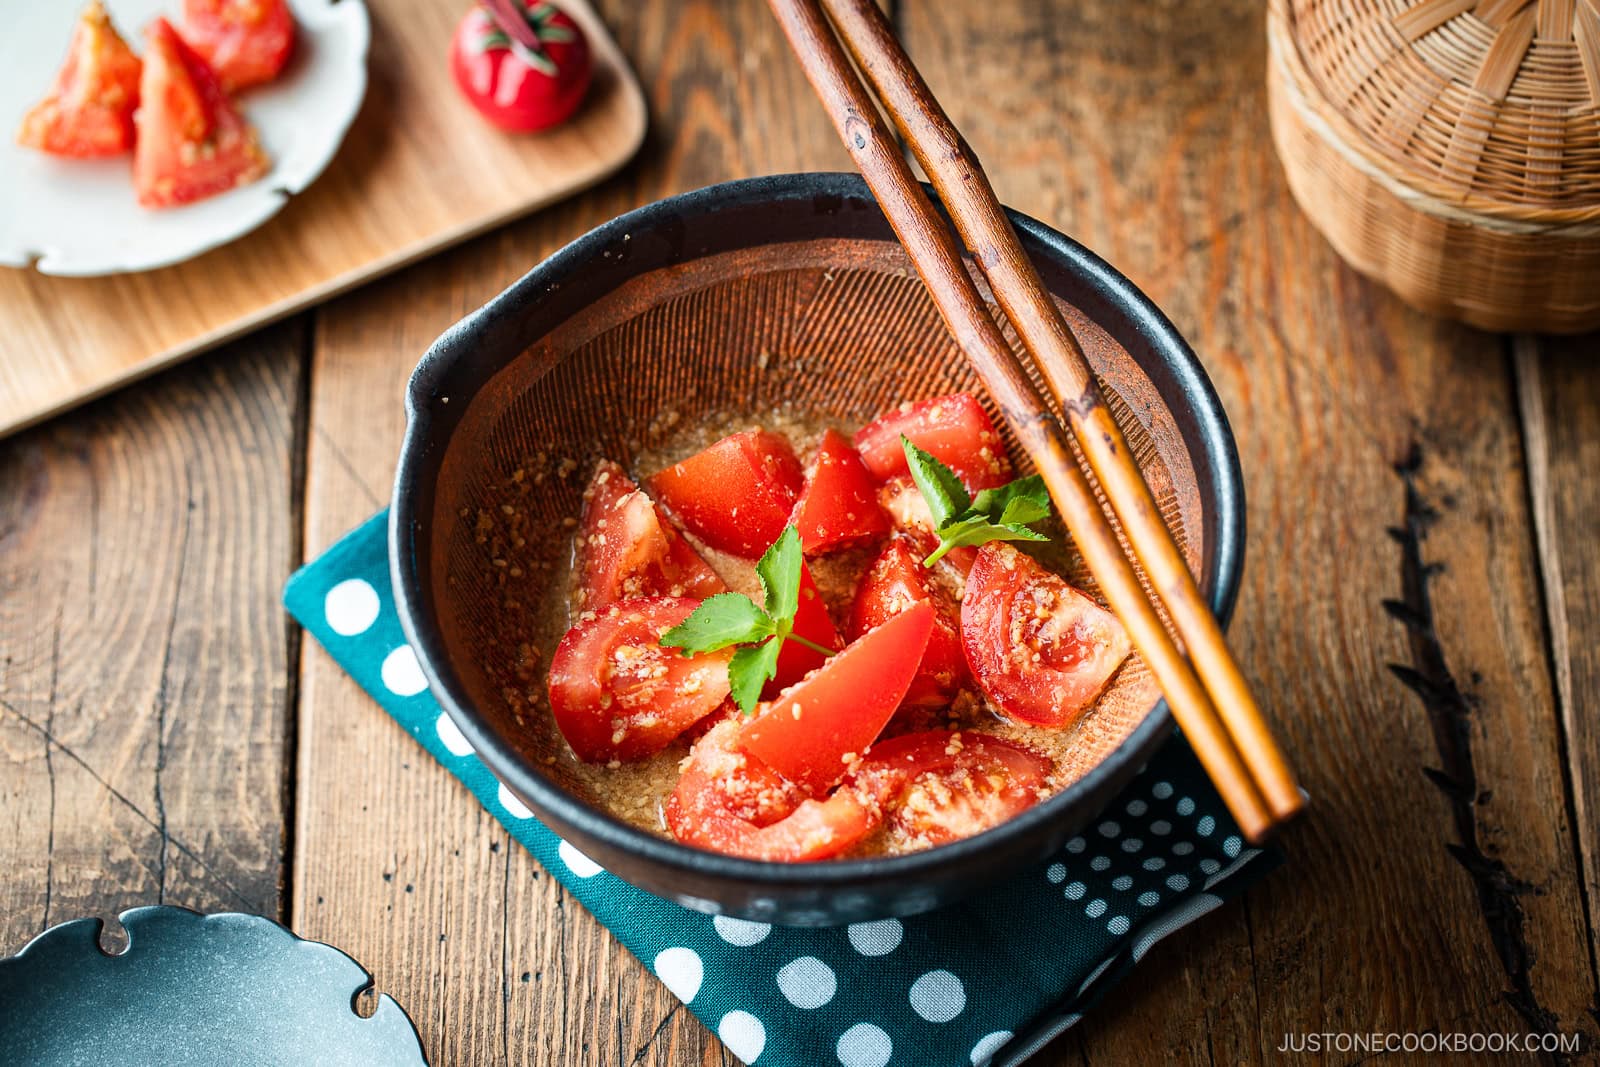
- Tomato Salad with Sesame Ponzu for a bright contrast.
Storage and Reheating Tips
To store: Keep cooked beef, broth, and noodles in separate airtight containers in the refrigerator for up to 3 days.
To reheat: Warm the broth and beef together on the stove until hot; reheat noodles at the last minute.
Frequently Asked Questions
Prepare the broth in advance, but cook the beef and noodles right before eating for best texture.
Substitute wide rice noodles and use gluten-free soy sauce.
Mix 1 tablespoon sake (or water) with 1 teaspoon sugar for each tablespoon of mirin required. The taste is slightly different but close enough for a weekday fix.
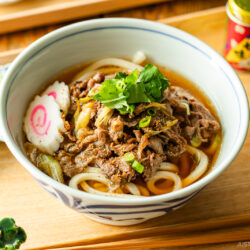
Beef Udon
Ingredients
For the Broth from Scratch
- 2½ cups dashi (Japanese soup stock) (use standard Awase Dashi, dashi packet or powder, or Vegan Dashi)
- 1½ Tbsp soy sauce
- 1 Tbsp mirin
- 1 tsp sugar
- ⅛ tsp Diamond Crystal kosher salt
For the Udon Noodle Soup
- ½ Tokyo negi (naga negi; long green onion) (white part only; or use 2 green onions)
- 1 green onion/scallion (for topping)
- 4 sprigs mitsuba (Japanese parsley) (optional; for garnish)
- 6–8 oz thinly sliced beef (such as ribeye) (or learn how to slice meat thinly at home)
- 4 slices narutomaki (fish cakes) (optional)
- 1 Tbsp neutral oil
- 2 tsp sugar
- 1 Tbsp soy sauce
- 2 servings udon noodles (1.1 lb/500 g frozen or parboiled udon noodles; 6.3 oz/180 g dry udon noodles)
For Serving
- shichimi togarashi (Japanese seven spice) (optional)
For the Quick Broth with Mentsuyu (optional)
- ⅓ cup mentsuyu (concentrated noodle soup base)
- 2⅓ cups water
- 1 Tbsp mirin
Instructions
- Gather all the ingredients. Bring a large pot of water to a boil for the udon noodles. Once boiling, keep it covered on low heat until you‘re ready to heat the noodles.

To Make the Broth from Scratch
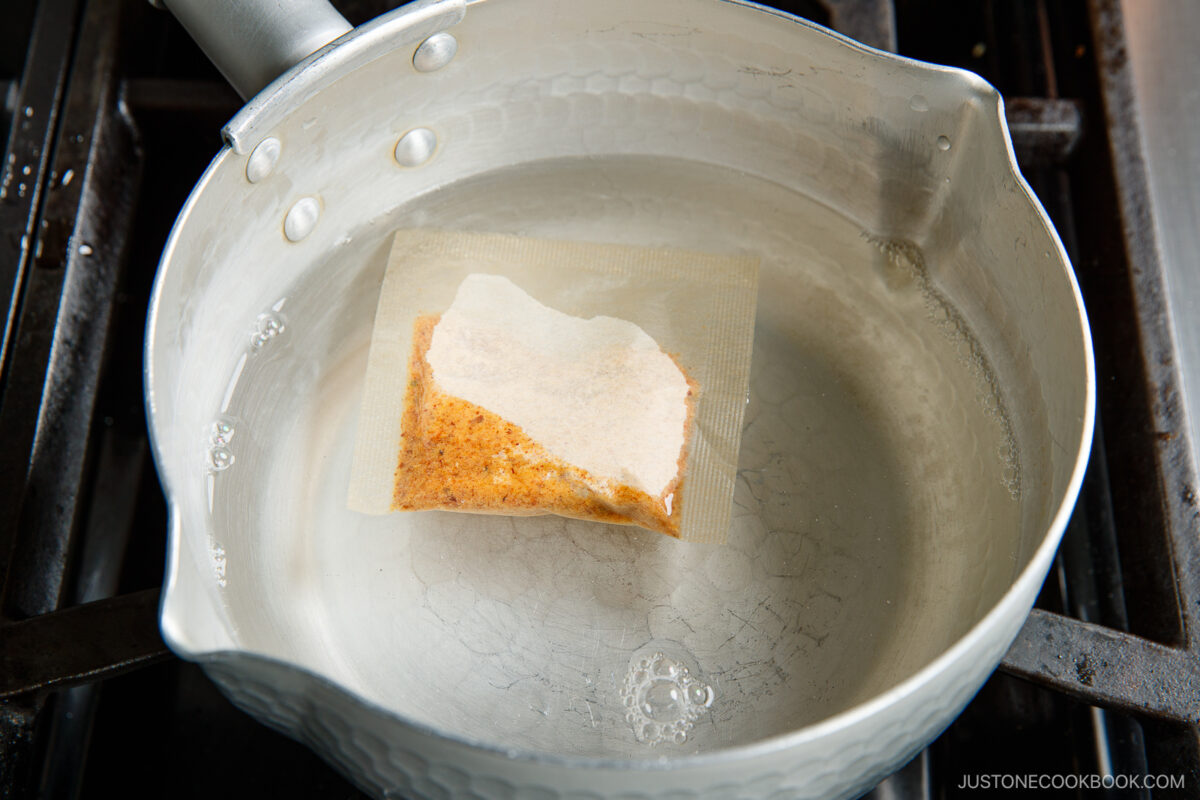
- First, make 2½ cups dashi (Japanese soup stock) of your choice. (To make a quick broth with mentsuyu noodle soup base, see the instructions at the end of the recipe.) Here, I‘ll show you how to make a quick dashi using a dashi packet (you can find it on Amazon). In a medium saucepan, add 2½ cups or 600 ml water and 1 dashi packet. Bring it to a boil over medium heat.
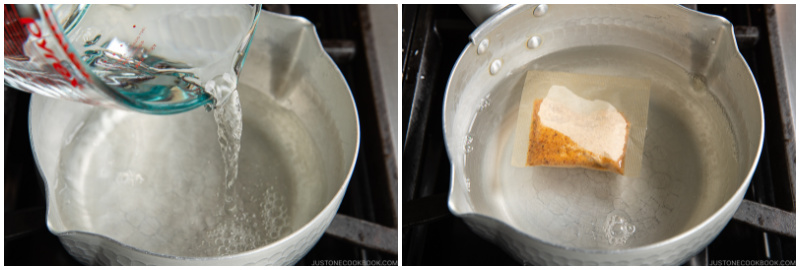
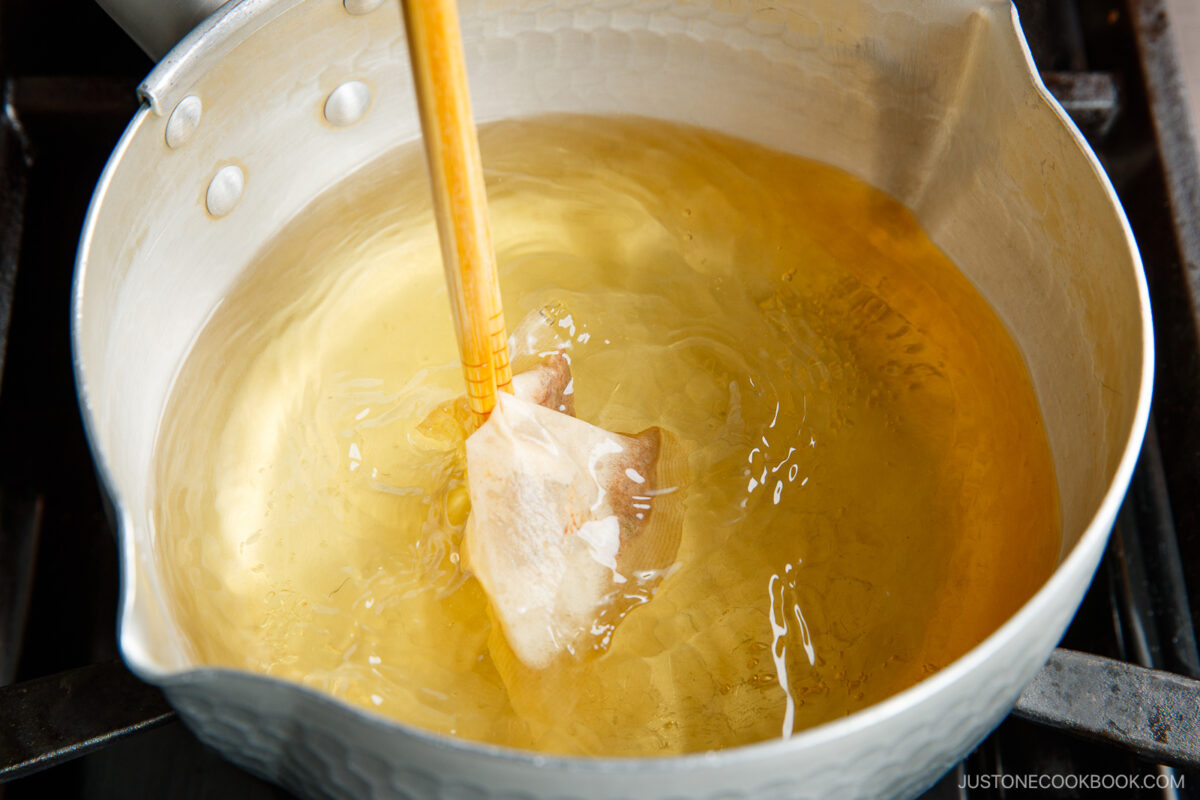
- Simmer for 2–3 minutes. Then, squeeze the liquid from the dashi packet and discard the packet.
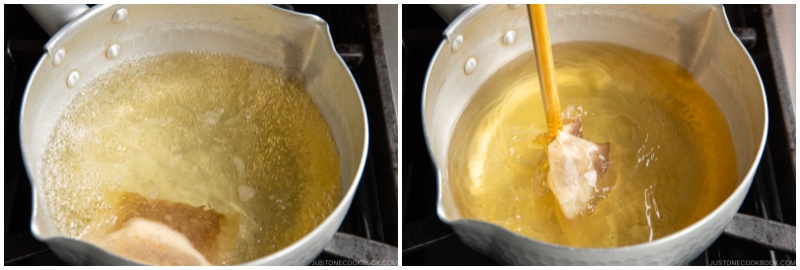
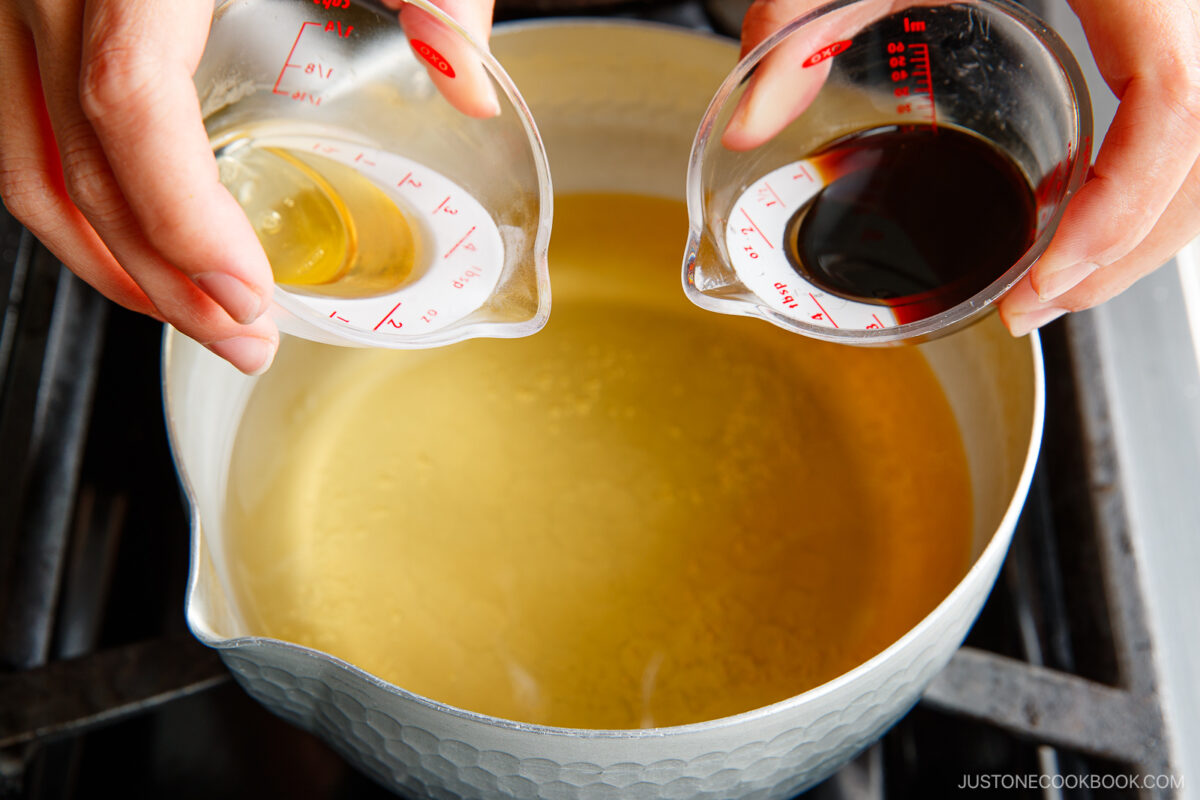
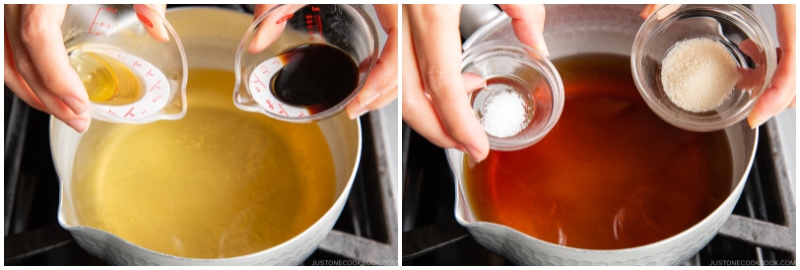
- Season the dashi with 1½ Tbsp soy sauce, 1 Tbsp mirin, 1 tsp sugar, and ⅛ tsp Diamond Crystal kosher salt and mix it all together. Cover the pot with a lid to keep it hot and prevent evaporation. Turn off the heat and set aside.
To Prepare the Ingredients
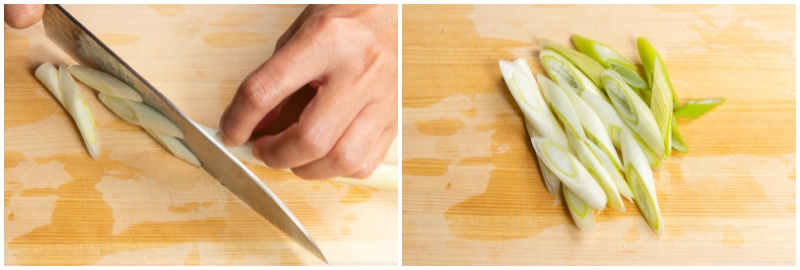
- Cut the white part of ½ Tokyo negi (naga negi; long green onion) diagonally into ½-inch (1.3-cm) slices. Set aside.
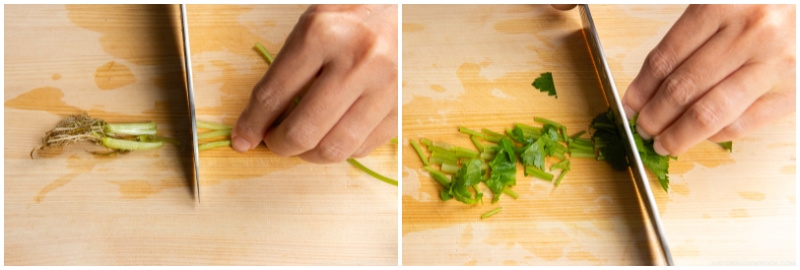
- Thinly slice the leaves and tender stems of 4 sprigs mitsuba (Japanese parsley)(optional).
- Cut 1 green onion/scallion into thin slices. Transfer the green onion slices and optional mitsuba to a small plate or bowl for topping the soup later.
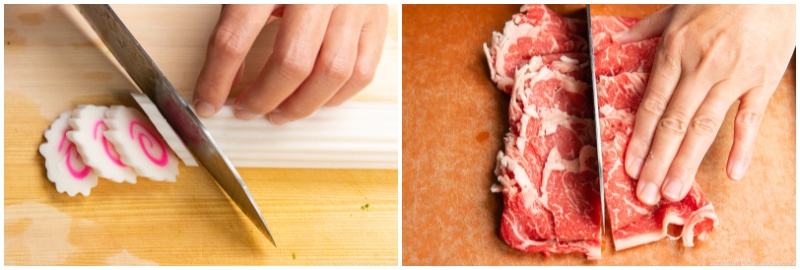
- Diagonally cut 4 slices narutomaki (fish cakes) (optional). Then, cut 6–8 oz thinly sliced beef (such as ribeye) in half to about 1½–2 inches (3.8–5 cm) wide.
To Cook the Beef
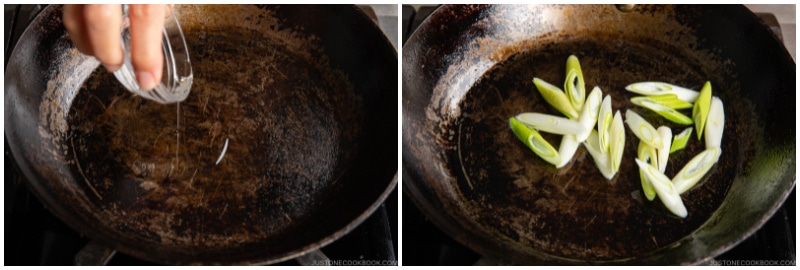
- Heat the frying pan on medium heat. When it‘s hot, add 1 Tbsp neutral oil and the Tokyo negi.
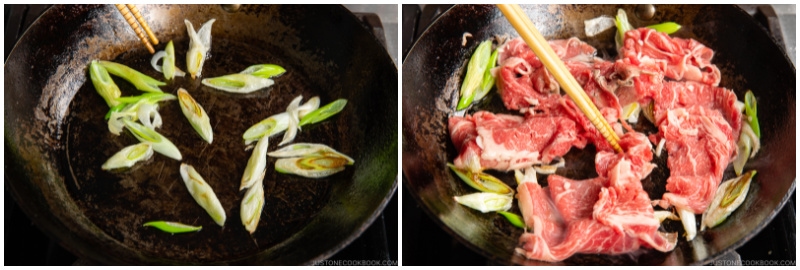
- Sauté the negi until golden brown and tender. Then, add the thinly sliced beef and cook until it‘s no longer pink.
- Add 2 tsp sugar and 1 Tbsp soy sauce.
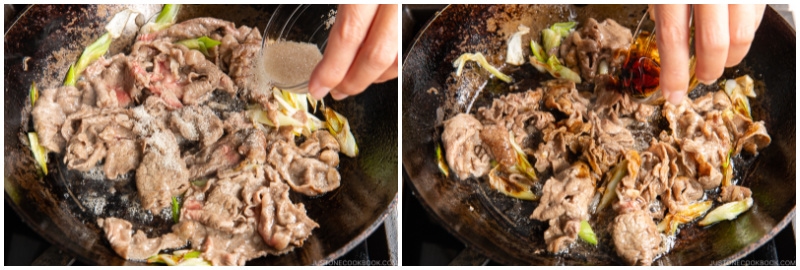
- Stir-fry the meat until it is well coated with the seasoning. Remove from the heat.
To Boil the Udon Noodles
- Cook 2 servings udon noodles in boiling water according to the package instructions. For frozen udon noodles, boil from frozen for 1 minute to reheat.
To Serve
- Divide the drained udon noodles into individual serving bowls and pour the hot broth to cover.
- Place the stir-fried beef, narutomaki, green onions, and mitsuba on top. If you like it spicy, sprinkle shichimi togarashi (Japanese seven spice) on top. Enjoy!
To Store
- You can keep the stir-fried beef, udon noodles, and broth separately in airtight containers and store them in the refrigerator for up to 3 days.
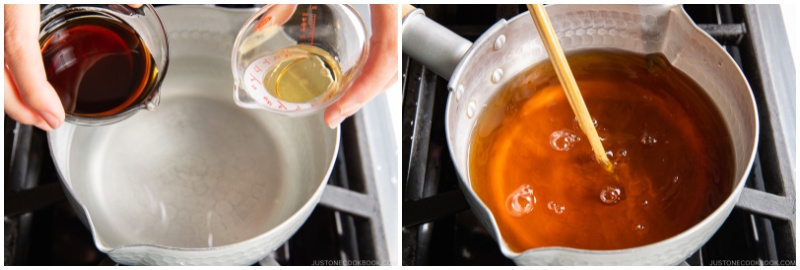
To Make the Broth with Mentsuyu (Optional)
- In a medium saucepan, combine ⅓ cup mentsuyu (concentrated noodle soup base), 2⅓ cups water, and 1 Tbsp mirin and mix well. Bring the mixture to a gentle simmer over medium heat. Cover with a lid and turn off the heat. The udon broth is now ready to use.
Nutrition
Did you make this recipe?
Tag @justonecookbook on Instagram so we can see your delicious creation!
Editor’s Note: This post was originally published on November 8, 2015. It’s been updated with new images and video on November 17, 2021, and republished with more helpful information on July 31, 2025.