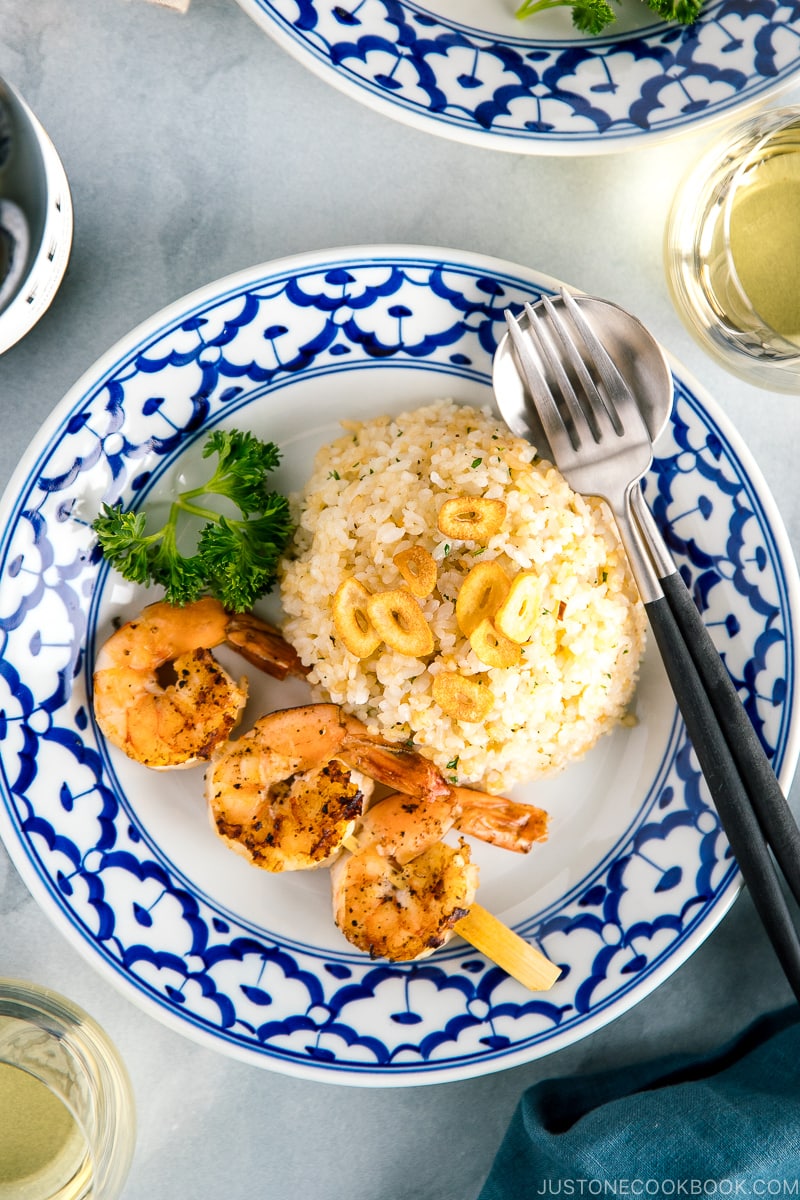
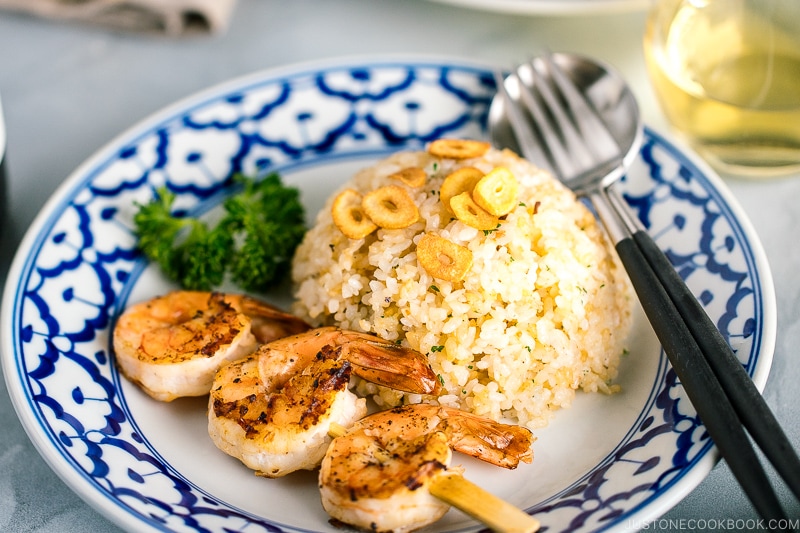
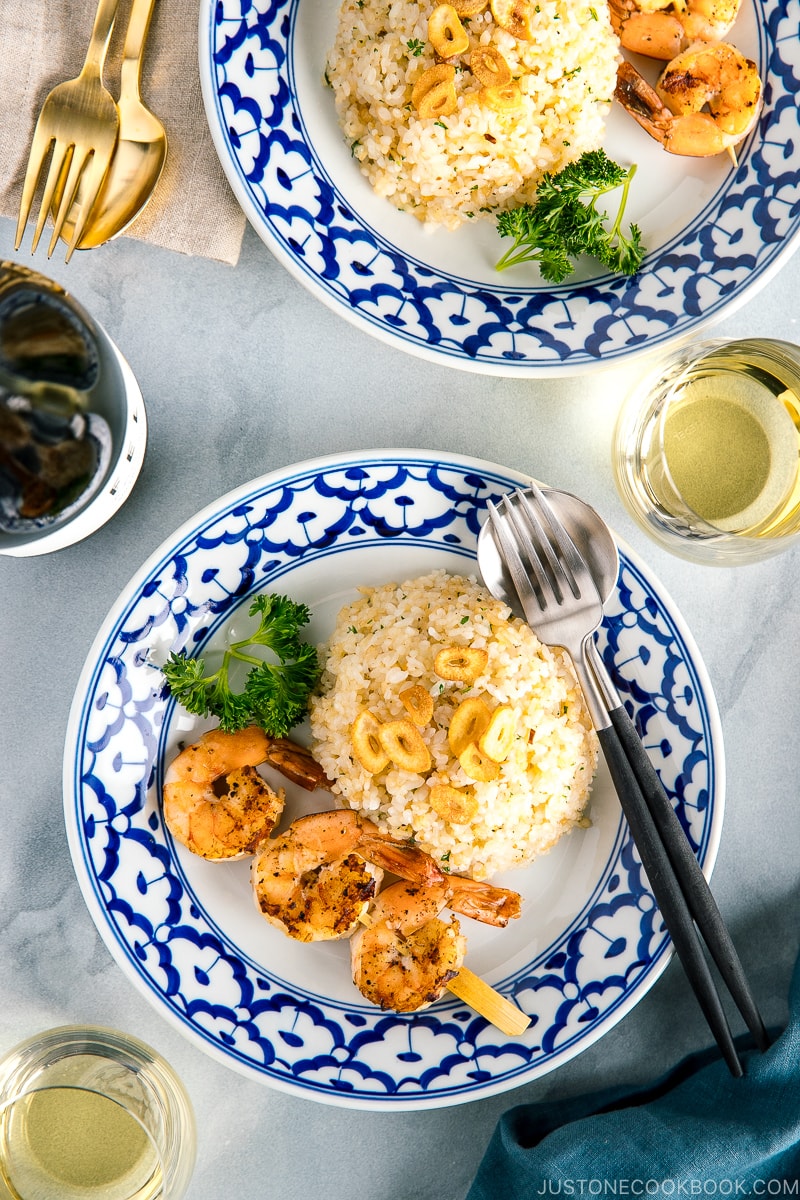
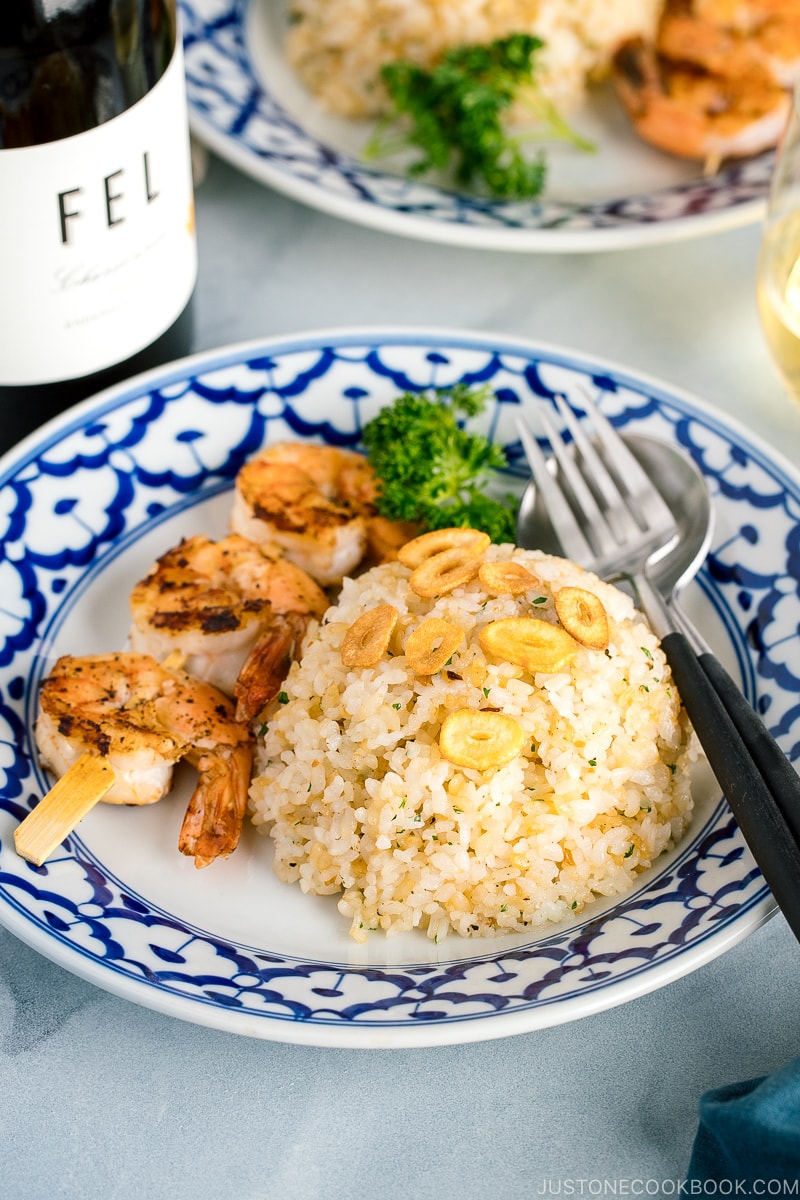
Aromatic and buttery, this easy Japanese Garlic Fried Rice recipe topped with garlic chips is a weeknight winner! It is simple yet indulgent. Pair it with succulent grilled shrimp skewers, baked chicken, or teriyaki tofu for a wholesome meal. Ready in 15 minutes!
Japanese Garlic Fried Rice, or what we call Garlic Rice (ガーリックライス) in Japan, reminds me of my college days when I used to cook it over and over. It was quick and easy and super flavorful. And really, there’s nothing better than a hot plate of garlicky fried rice!
With a simple salad and a protein on the side, it was a nice home-cooked meal that kept me going on those long study nights. Now, many years later, I’m still cooking this Japanese Garlic Fried Rice for my family and they love it just as much as I do.
Table of contents
What Makes This Garlic Fried Rice Extra Special
- The addition of crunchy garlic chips results in more aroma and texture to the fried rice. It’s worth the extra step!
- We specifically use Japanese short grain rice in this recipe as it is distinctively Japanese. Japanese short grain rice has a slightly sticky texture than long grain rice such as Jasmine rice or basmati rice. You can expect some toothsome yet chewy mouthfeel.
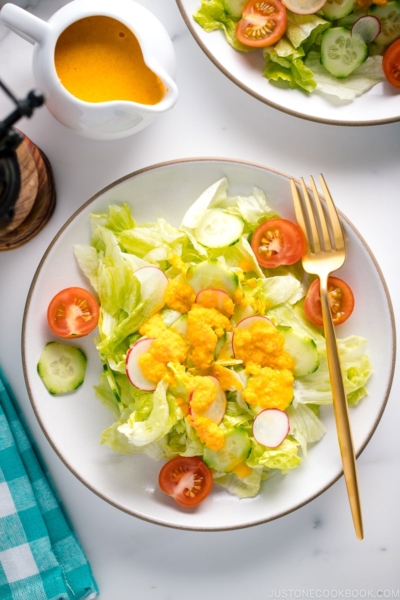
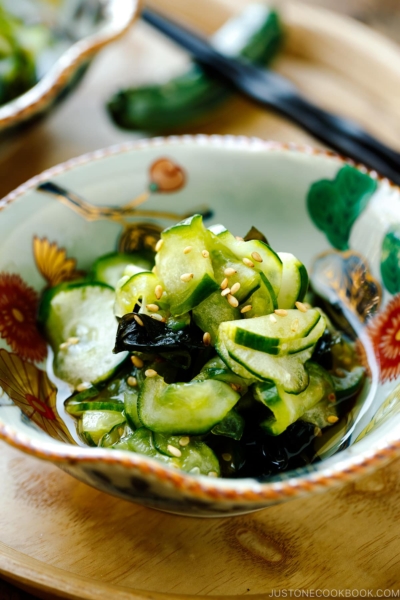
- The beauty of this garlic fried rice lies on simplicity, which is why I don’t add other veggies such as peas, onion, carrots, etc. To make it a complete meal, serve it with a side of salad, a simple sautéed green, and your choice of protein.
How to Make Japanese Garlic Fried Rice
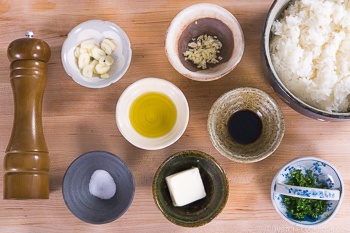
Ingredients You’ll Need
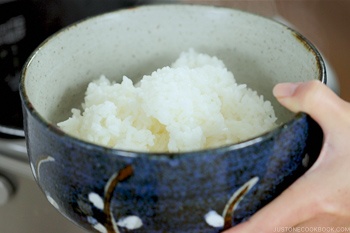
- Japanese short-grain rice – Frozen day-old rice is great as this will speed things up. Pop the frozen rice in the microwave until just warm before frying. If not, you will need to make some fresh rice at least an hour early. Spread your cooked rice on a baking sheet to cool for 60 minutes to remove excess moisture. You want to make sure the rice is still warm so it is easier to cook.
- Garlic – Japanese recipes don’t usually use a lot of garlic compared to other cuisines. One to two cloves of garlic is considered a “good” amount. Keep that in mind when you make this fried rice. It might not be “garlicky” enough to your taste, so feel free to use more to your liking. Just make sure it doesn’t overpower the side dish you plan to enjoy it with.
- Olive oil and butter – I use a mix of olive oil and butter for richness. Omit butter or use vegan butter if needed.
- Soy sauce – A splash of soy sauce is all you need! We are NOT using the soy sauce to season the entire dish, but to bring umami and char taste.
- Salt and pepper
- Parsley (or substitute with chopped green onion)
- Your choice of side dish to serve with the fried rice.
Overview: Cooking Steps
- Make sure all your ingredients are ready to go. Fried rice cooks fast and having everything prepped makes it a lot easier.
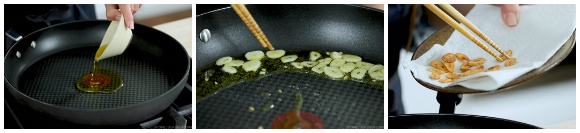
- Add olive oil to a large skillet over medium-high heat and gently fry the thinly sliced garlic pieces until golden brown. Transfer to a dish lined with paper towel and keep the garlic infused oil in the pan.
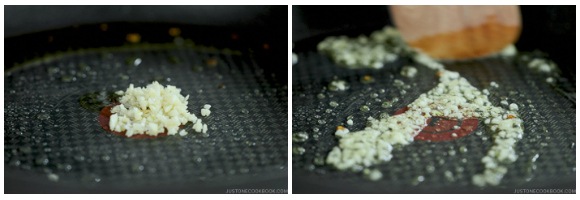
- Add the minced garlic in the same pan and stir fry until golden brown and fragrant.
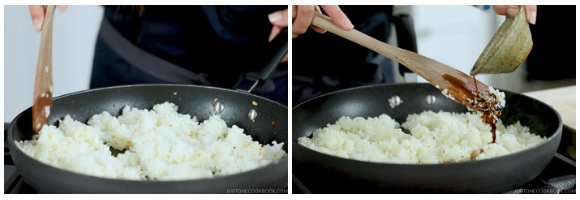
- Add in butter and swirl around to coat the pan, followed by the warmed steamed rice. Break the chunk of rice to separate. Once the garlic oil is coated with the rice, add the soy sauce and toss the fried rice.
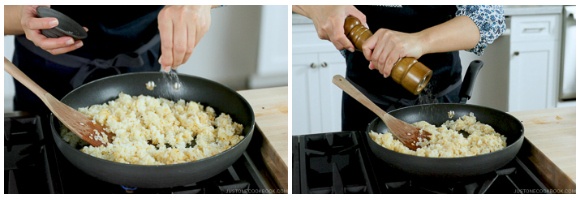
- Season with salt and freshly ground black pepper. Taste and adjust accordingly.
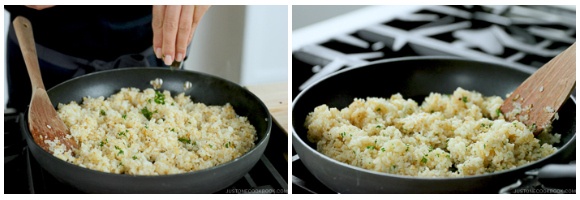
- Lastly, add the chopped parsley and mix all together.
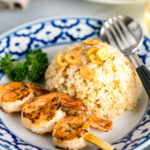
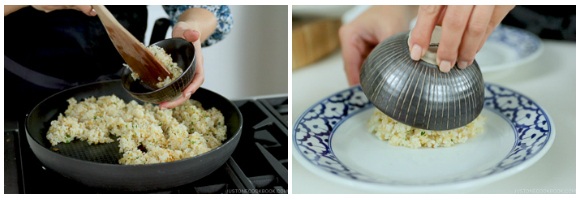
- To serve, place the garlic fried rice in a rice bowl, pressing gently to make sure there is no space in the bowl, and invert the rice on a serving plate.
I paired this garlic fried rice with grilled shrimp (included in the Recipe Card below), but you can also top it with fried eggs, grilled tofu, or baked chicken.
What to Serve with Japanese Garlic Fried Rice
Garlic fried rice is really delicious on its own, but we often serve it with yoshoku, a Japanese-style western meal. That said, you can serve it with anything that goes well with fried rice. Here are some recipes that I sometimes serve garlic rice with:
- Hambagu (Japanese Hamburger Steak)
- Loco Moco
- Sous Vide Japanese-style Steak
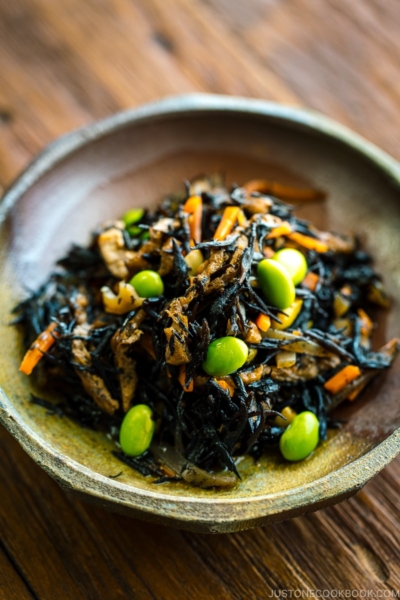
- Japanese Spinach Salad with Sesame Dressing
- Spicy Bean Sprout Salad
- Simple Salad with Sesame Dressing
Wine Pairing with Japanese Fried Garlic Rice
We previously paired FEL’s pinot noir with waygu beef, and it was really delicious so we were excited to try their 2015 FEL Chardonnay Anderson Valley. The Chardonnay didn’t disappoint and paired perfectly with the garlic fried rice and grilled shrimp.
As you smell the wine, it is refreshing, pure, with a hint of sweetness. You can already dream of how delicate the wine will taste. The first sip feels like sipping peach juice on a warm sunny day, with flavors of melons and pear fruits. The mouthfeel is light, like drinking spring water and we love how it’s not syrupy and overly sweet. Finally, it finishes with a hint of citrus with no lingering aftertaste.
If you are looking for a bottle of white to pair with seafood, or to enjoy on a warm sunny day with friends, give this bottle a try.
Japanese Ingredient Substitution: If you want to look for substitutes for Japanese condiments and ingredients, click here.
Wish to learn more about Japanese cooking? Sign up for our free newsletter to receive cooking tips & recipe updates! And stay in touch with me on Facebook, Pinterest, YouTube, and Instagram.
Japanese Garlic Fried Rice
Video
Ingredients
- 4 cups cooked Japanese short-grain rice (cooled or day old; frozen cooked rice works well)
- 2 cloves garlic (divided)
- 2 Tbsp extra virgin olive oil
- 1 Tbsp unsalted butter
- 1 tsp soy sauce
- ¼ tsp Diamond Crystal kosher salt (or more, to taste)
- freshly ground black pepper
- 3 stalks parsley
For the Grilled Shrimp Skewers (optional; makes 2)
- 6 pieces shrimp (medium size)
- ½ Tbsp extra virgin olive oil
- 1 Tbsp sake
- Diamond Crystal kosher salt
- freshly ground black pepper
Instructions
- Gather all the ingredients. For the steamed rice, please note that 1½ cups (300 g, 2 rice cooker cups) of uncooked Japanese short-grain rice yield 4⅓ cups (660 g) of cooked rice. See how to cook it with a rice cooker, pot over the stove, Instant Pot, or donabe.
To Prepare the Ingredients
- For your 4 cups cooked Japanese short-grain rice, make sure it‘s at room temperature or slightly warmer. If you‘re using frozen cooked rice, defrost and warm it. Tip: If your cooked rice is still hot, transfer it to a large bowl or baking sheet (for more surface area). Spread it out and set aside for 60 minutes, uncovered, to remove the moisture.
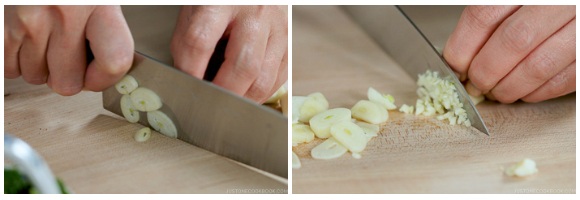
- Cut half of the 2 cloves garlic into thin rounds widthwise (so you see a hole in the center). Mince the other half.
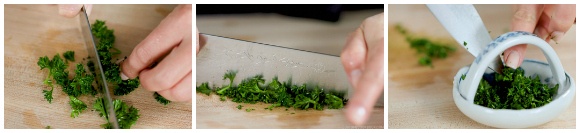
- Remove the leaves from the stems of 3 stalks parsley and mince the leaves.
To Cook the Garlic Fried Rice
- Add 2 Tbsp extra virgin olive oil and the thinly sliced garlic pieces to a large frying pan over medium-high heat (or medium heat on a professional stove). Slowly fry the garlic slices until golden brown. If you add them to hot oil, they will cook too fast and you may end up with burnt garlic slices. Transfer to a dish lined with paper towel. Keep the garlic-infused oil in the pan.
- Add the minced garlic to the same pan and stir-fry until golden brown and fragrant.
- Add 1 Tbsp unsalted butter and swirl around to coat the pan. Then, add the steamed rice. Tip: If you use cold rice, it would take too long to warm up and the garlic would get too dark and may burn.
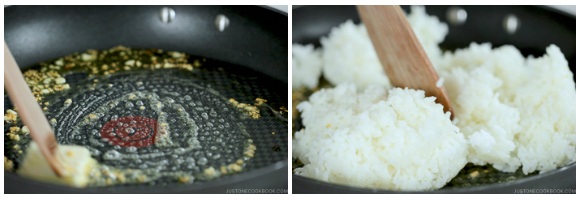
- Break up the chunks of rice with a wooden spatula to separate. Japanese short-grain rice is stickier than other types of rice, so it’s normal to stick together but it should not be in huge chunks. Once the rice is well coated in the garlic oil, add 1 tsp soy sauce and toss to coat the rice.
- Season with ¼ tsp Diamond Crystal kosher salt and freshly ground black pepper. Taste the rice and make sure it is seasoned to your liking.
- Lastly, add the chopped parsley and mix it all together.
To Serve
- Put the garlic fried rice in a rice bowl, pressing gently to make sure there is no space in the bowl, and invert the rice on an individual serving plate. Top with the fried garlic chips.
To Make the Grilled Shrimp Skewers (optional)
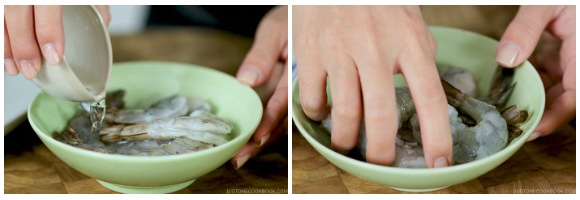
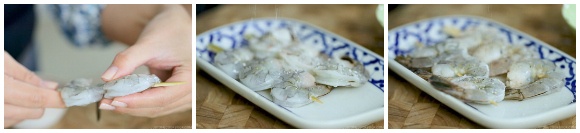
- If you‘d like to serve the garlic fried rice with grilled shrimp skewers, then shell 6 pieces shrimp and devein the shrimp. You can keep or remove the tail. Add 1 Tbsp sake and coat the shrimp well.
- Thread 3 shrimp on each damp skewer (previously soaked in water) without leaving spaces. Sprinkle with Diamond Crystal kosher salt and freshly ground black pepper.
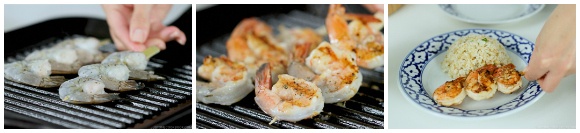
- Lay the skewers flat on a cast iron pan (or regular frying pan) greased with ½ Tbsp extra virgin olive oil. Cook the shrimp with the lid on about 2 minutes per side or just until cooked through and no longer transparent. Remove the shrimp from the pan and serve with the garlic fried rice.
To Store
- You can keep the leftovers in an airtight container and store in the refrigerator for 3–4 days and in the freezer for a month.


I just want to let you know how much happiness your cooking videos give me. I’m an old lady now, retired. I lived in Japan for 4 years a long time ago. The good food and your wonderful teaching helps me remember wonderful times; plus, I get to cook a little bit and eat well.
Hi Alice! Aww.🥰 We couldn’t be happier to hear how much joy and excitement Nami’s recipes and videos have brought to you!
Thank you very much for your kind feedback. Happy Cooking!
Hi. Did you use all the cooked rice (4cups) in this recipe? Cause it says this recipe is only for 2 servings. Thank you.
Hi Angie! Yes, Nami used 4 cups of rice for this recipe.
The servings size is for this recipe is Main Course, and it is approximately. If you are serving as a side dish, please feel free to adjust for your needs! Happy Cooking!