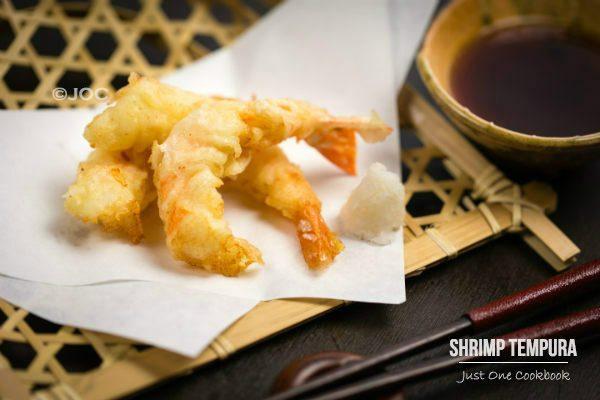
Learn to make crispy and delicious Shrimp Tempura at home! In this recipe, I’ll share my secrets to a light and airy coating that doesn’t absorb oil. It’s all in the batter and deep-frying technique.
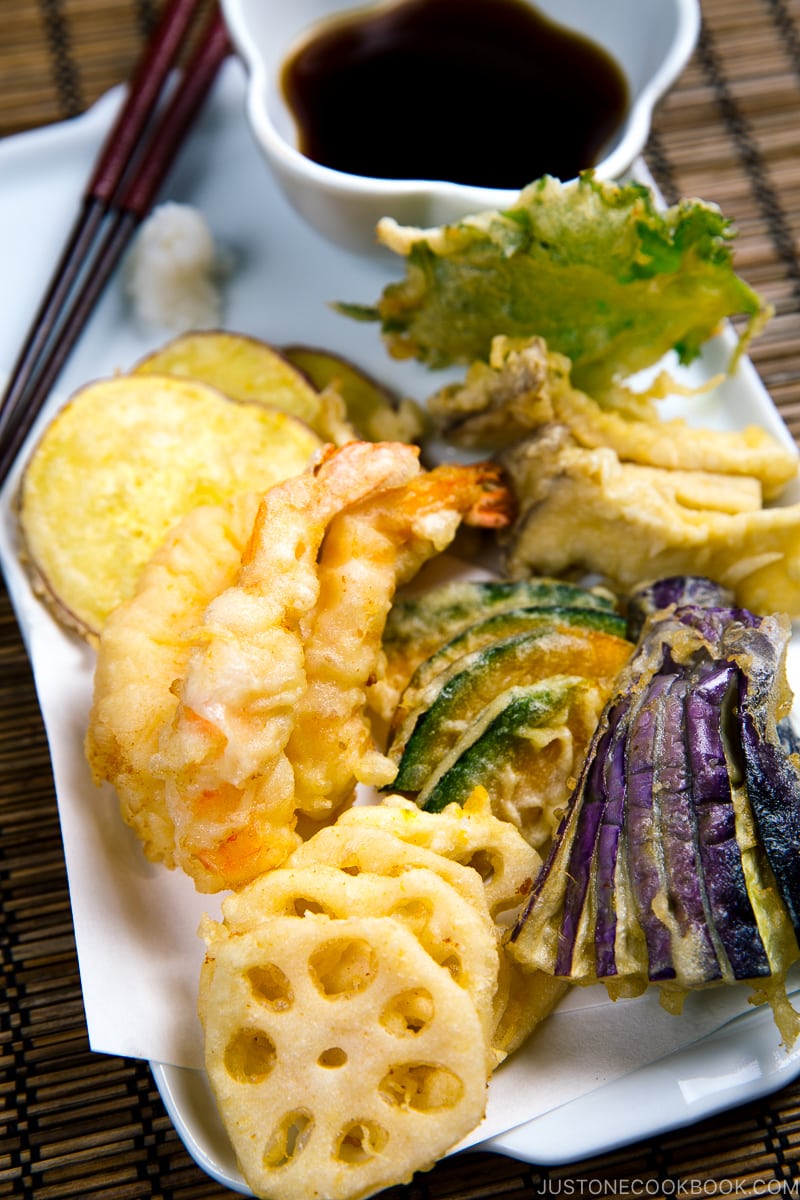
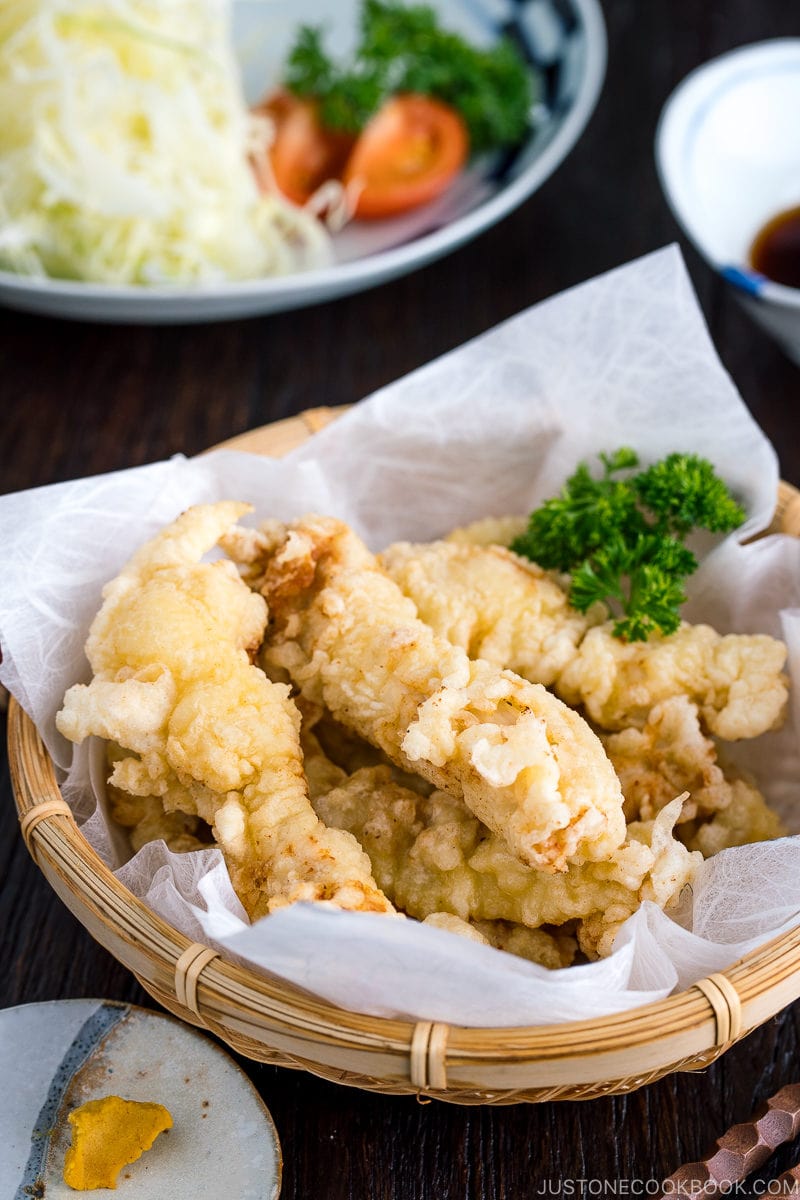
Tempura is one of the most popular and well-known Japanese dishes around the world! Besides using vegetables, we often use seafood as a main ingredient. Among seafood, shrimp is definitely the most popular.
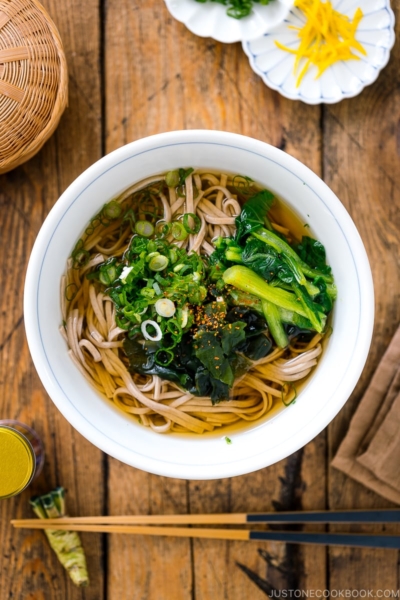
You probably see shrimp tempura at your local Japanese restaurants. In Japan, we call it ebi no tempura (海老の天ぷら) or ebiten (えび天). Ebi means shrimp and ten comes from tempura. Besides being a standalone main dish, crispy shrimp tempura is served over a rice bowl like Tendon or noodle soup like Tempura Soba and Nabeyaki Udon.
Table of Contents
What is Shrimp Tempura?
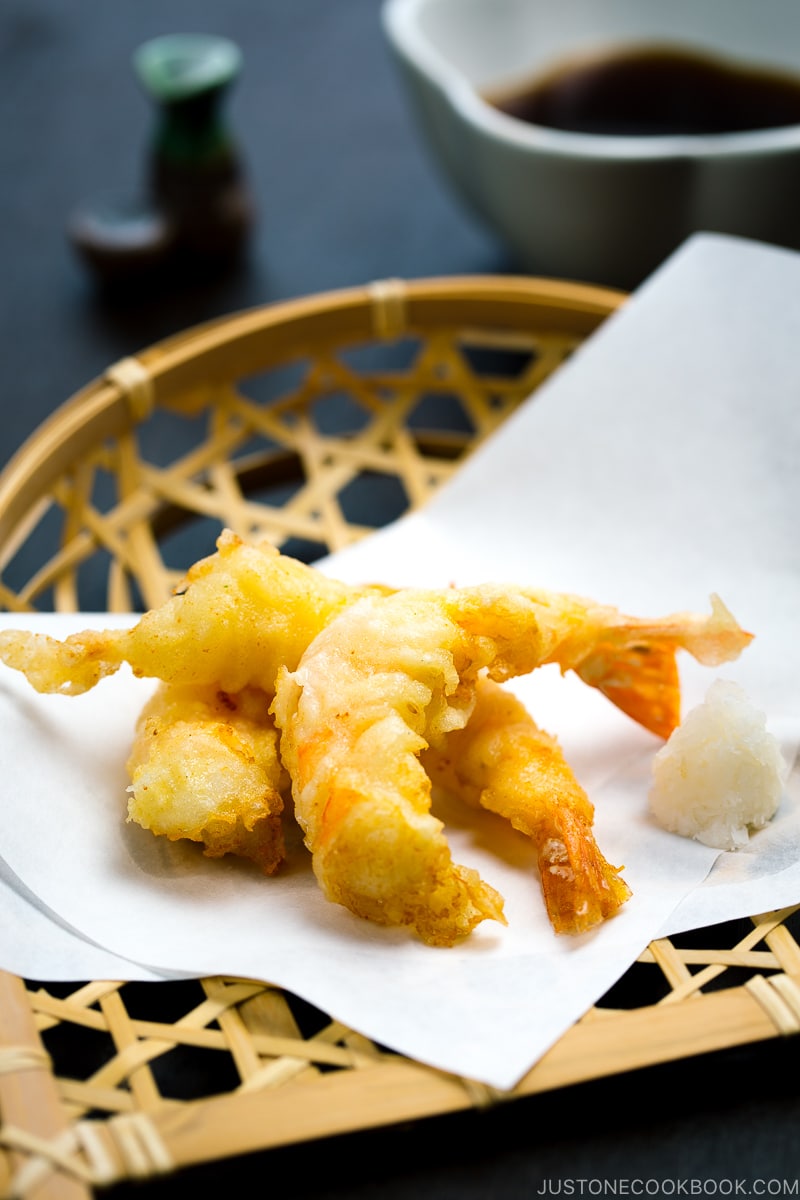
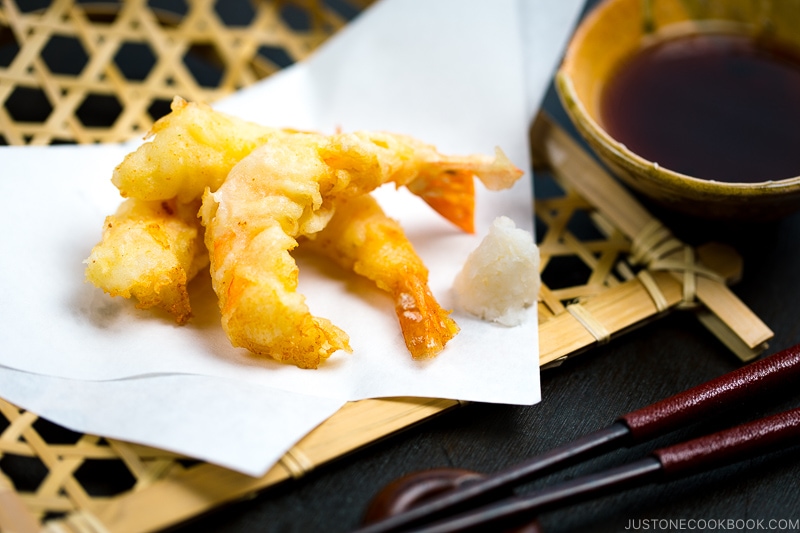
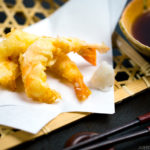
Shrimp tempura are large, plump shrimp dipped in batter and deep-fried to a light and crisp-crunchy texture. It’s served with tempura dipping sauce called Tentsuyu on the side. The right deep-frying technique and a light, ice-cold batter are the secrets to an airy coating that doesn’t absorb oil.
It’s generally believed that Portuguese missionaries brought tempura-style batter to Japan in the 16th century during the Muromachi period (1333-1573). Tempura became popular in the early Edo period (1603–1868) as a street food among commoners. By the late Edo period and early Meiji period (1868–1912), tempura shops and restaurants began to establish this food as a specialty item in Japanese cuisine.
5 Tips To Make Shrimp Tempura
Here are some helpful tips on making tempura:
- Chill all the batter ingredients before starting. Use ice cold water and keep your all-purpose flour and egg in the fridge until mixing.
- Never overmix the tempura batter. Whisk the egg and water vigorously, but mix in the flour only until barely combined. It’s okay to leave some flour lumps.
- As soon as you make the batter, start frying.
- Keep a steady oil temperature at all times in your pot or deep-fryer.
- Don’t crowd the pot. Cover just half of the oil surface with ingredients at any one time.
How Do We Keep the Shrimp Straight?
You may notice that the shrimp tempura you order at Japanese restaurants is very straight. How do you keep shrimp and prawns from curling up when frying? It’s easy to do with a Japanese method to devein, peel, cut slits in, and clean this shellfish.
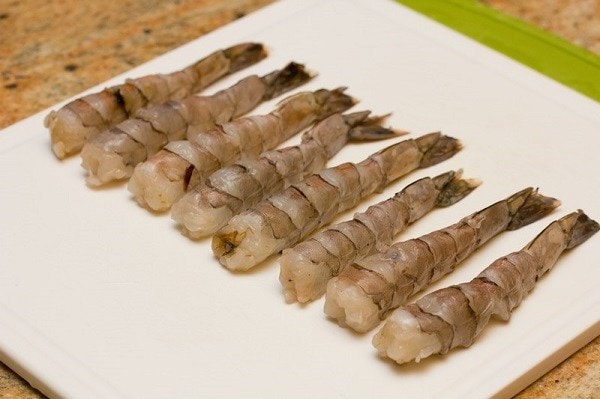
This extra prep time adds to the total time for this dish. However, it’s time well spent for a beautiful presentation. See my simple tutorial with step-by-step photos on How To Prepare Shrimp for Shrimp Tempura and Ebi Fry.
Hanaage Technique: Crispy Crumbs on Shrimp Tempura
Sometimes, when you order shrimp tempura at Japanese restaurants, crispy crumbs may coat the light golden brown tempura. Typically, you will see shrimp tempura with extra crispy batter on noodle soup dishes or tempura rice bowl dishes.
We call this cooking method hanaage (花揚げ); hana means flower and age means deep-frying. Why flower? When the chef adds the tempura batter to the hot oil, it blooms like a flower. Check out the video below to see how it’s done:
Did you see the chef dip his hand in the oil? Crazy, isn’t it?
If you go to tempura specialty restaurants in Japan, though, the tempura chefs will not serve excess batter on the tempura. That’s because they want you to taste the flavor of the shrimp, not only the batter.
Most Japanese home cooks don’t make the hanaage-style tempura, either. It’s more time-consuming to fry and a bit difficult to make. Simply coating with batter and deep-frying shrimp is a lot easier.
Other Tempura Recipes You’ll Love
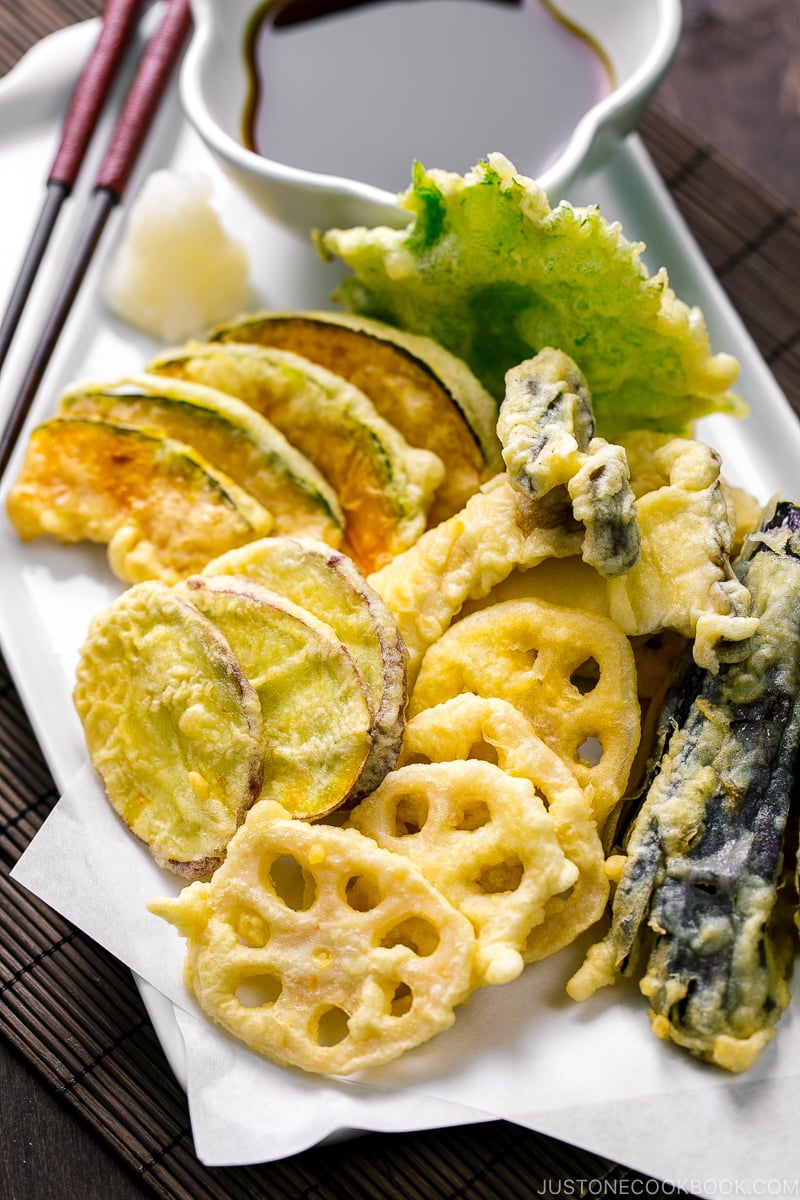
- Vegetable Tempura – learn to fry different kinds of veggies
- Gluten-Free Tempura – everyone will enjoy this crispy tempura!
- Chicken Tempura – a regional dish from Oita prefecture
- Tenmusu (rice balls with shrimp tempura) – a popular Nagoya specialty
- Tentsuyu – make this dipping sauce with dashi, soy sauce, mirin, sugar, and daikon radish
Wish to learn more about Japanese cooking? Sign up for our free newsletter to receive cooking tips & recipe updates! And stay in touch with me on Facebook, Pinterest, YouTube, and Instagram.
Shrimp Tempura
Ingredients
For the Dipping Sauce (Tentsuyu)
- ¾ cup dashi (Japanese soup stock) (use standard Awase Dashi, dashi packet or powder, or Vegan Dashi)
- 3 Tbsp soy sauce
- 2 Tbsp mirin
- 2 tsp sugar
For the Tempura
- 10 prawns (black tiger prawns for home cooking, typically)
- 3 cups neutral oil (or use a 10-to-1 ratio of neutral oil to sesame oil)
- potato starch or cornstarch (for dusting)
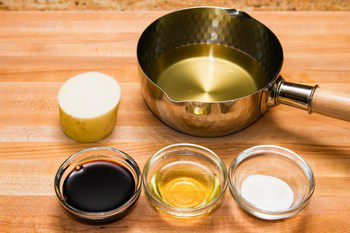
For the Batter
- 1 cup all-purpose flour (plain flour) (chilled; weigh your flour or use the “fluff and sprinkle“ method and level it off)
- 1 large egg (50 g each w/o shell) (chilled)
- 200 ml iced water (¾ cup + 4 tsp)
For Serving
- 2 inches daikon radish (grated and lightly squeezed of liquid)
Instructions
- Before You Start: Gather all the ingredients. I strongly encourage you to weigh your flour in metric using a kitchen scale. Click on the “Metric“ button at the top of the recipe to convert the ingredient measurements to metric. If you‘re using a cup measurement, please follow the “fluff and sprinkle“ method: Fluff your flour with a spoon, sprinkle the flour into your measuring cup, and level it off. Otherwise, you may scoop more flour than you need.
To Make the Dipping Sauce (Tentsuyu)
- Gather the ingredients for the tempura dipping sauce.
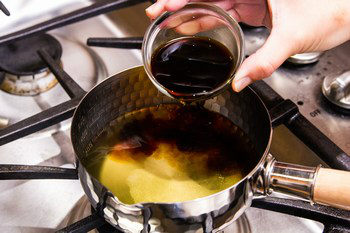
- Combine ¾ cup dashi (Japanese soup stock), 3 Tbsp soy sauce, 2 Tbsp mirin, and 2 tsp sugar in a small saucepan and bring it to a boil. Lower the heat and let it simmer until the sugar is completely dissolved. Remove from the heat and set aside. Tip: For a quick dashi, use ¾ cup (180 ml) water + 1 tsp dashi powder.
To Prepare the Shrimp
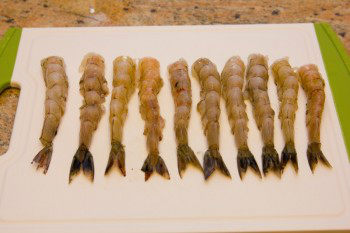
- Peel 10 prawns, leaving on the tail and last shell segment (closest to the tail). Straighten the shrimp so it looks gorgeous; learn how in my post on how to prepare shrimp. Pat dry with paper towels to completely remove any surface moisture. Any excess moisture will keep the tempura from getting crispy and make it soggy. Tip: We typically use black tiger prawns to make shrimp tempura at home. Tempura specialty restaurants in Japan use the more-expensive Japanese tiger prawns.
To Prepare the Oil
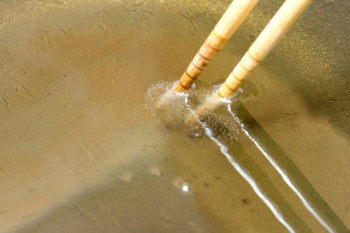
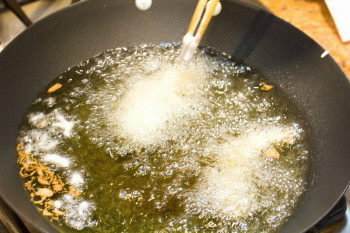
- In a wok or a medium-sized pot, add 3 cups neutral oil or enough for 1½ inches (3 cm) of oil in the pot. Heat the oil to 340–350ºF (170–180ºC) and check the temperature using a thermometer. To check with wooden chopsticks, dip them in the oil; when small bubbles form around the tips, the oil is ready. Be sure to maintain the oil temperature at all times. Tip: For enhanced aroma and taste, I like to add 1 part sesame oil for every 10 parts neutral oil.
To Make the Batter
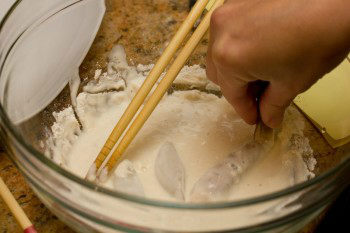
- While the oil is heating up, prepare the tempura batter. We‘ll use a 1-to-1 ratio (by volume) of flour to egg + water. First, gather the batter ingredients.
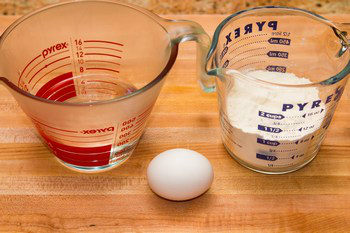
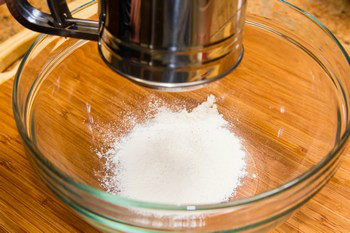
- Next, sift 1 cup all-purpose flour (plain flour) into a large bowl.
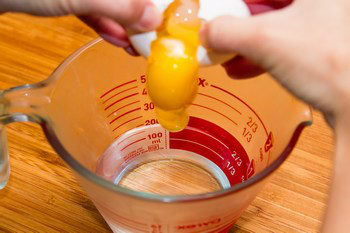
- Add 1 large egg (50 g each w/o shell) and 200 ml iced water to a measuring cup or bowl.
- Whisk the egg mixture vigorously and discard the foam on the surface.
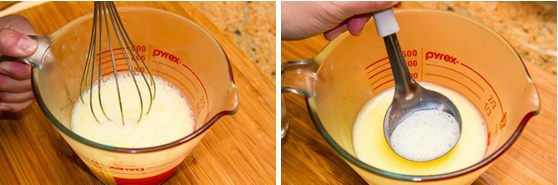
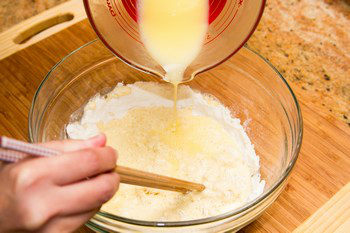
- Slowly pour the egg mixture into the flour. Mix the batter, but do not overmix; it‘s okay to leave some lumps. Keep the batter cold at all times. I store mine in the refrigerator until ready to use. Make the batter right before deep-frying to avoid activating the wheat gluten in the flour.
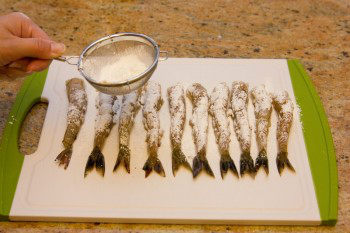
- Dust the shrimp lightly with potato starch or cornstarch. The starch acts as a glue that helps the batter adhere to the shrimp.
- Now, dip the shrimp in the batter and add them to the hot oil. Add a few shrimp pieces to the batter bowl. Pick up one piece by the tail, dip in the batter, let the excess drip off for 1–2 seconds, and very gently place in the hot oil. Continue to dip and add one piece at a time. Do not crowd the pot. Tip: When you deep-fry, do not overcrowd the pot because the oil temperature will drop quickly and your food will absorb too much oil. Your ingredients should take up no more than about half of the oil surface area at any one time. For more helpful hints, read my post on how to deep-fry food.
- Deep-fry until golden brown, about 2 minutes. Don‘t overcook the shrimp; otherwise, the texture will be tough and dry. Transfer the shrimp to a wire rack or a plate lined with a paper towel to drain the excess oil. Between batches, skim and discard the crumbs in the oil, which will burn and turn the oil darker if left in the pot.
To Serve
- Peel and grate 2 inches daikon radish (I love this grater) and gently squeeze out some of the liquid.
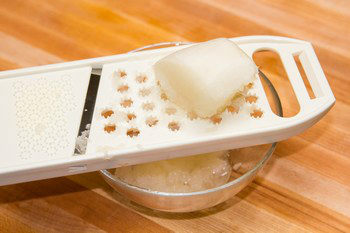
- Prepare 3–4 Tbsp warm tentsuyu in each individual dipping bowl with 1 Tbsp grated daikon per serving on the side. Add the grated daikon to the dipping sauce, then dip the Shrimp Tempura in the sauce to enjoy.
To Store
- If you have unused dipping sauce, you can store it in the refrigerator for up to 1–2 weeks.You can keep the leftovers in a single layer between paper towels and put in an airtight container or a resealable plastic bag. Store in the freezer for 2 weeks. To reheat, place the tempura on a wire rack in the preheated oven (400ºF or 200ºC) or the toaster oven for 5 minutes or until crisp on the outside and heated through on the inside.
Nutrition
Editor’s Note: The post was originally published on July 6, 2011. The images and the recipe have been updated in November 2013.


Holy Cow! How does that chef not have missing fingers. I could never stick my fingers in hot oil like that without getting burned!
I’ve been making Tempura for 60 years and it was always a favorite. However, I now have to try your recipe. It looks delicious.
Hi Vivian! Thank you for reading Nami’s post and watching the video! 😃
Hi! I am glad to see this recipe and will follow this. 🙂 If I were to serve around 50 shrimps, what will be the desired measurements? Will it be overwhelming for the batter?
Hi Jas! Thank you very much for trying Nami’s recipe!
As Nami mention in this recipe, the batter should be made right before deep frying to avoid activation of wheat gluten. So if you are making 50 shrimps, we recommend making the batter at least a few times.
We hope this helps!
Well, I have a few secrets for making tempura stress free and consistent: I use equal parts Wondra flour, rice flour, and cornstarch. This eliminates the gluten problem and the necessity of keeping the batter ice cold. Instead of water I use beer or soda water. This process creates light and crunchy tempura. Yours looks good, but the breading is a bit more like deep fried. Also, in my experience, 350°F is a bit low and allows too much oil into the batter. Try keeping the oil @355-360°. BTW, I always fry with Rice Bran Oil – I’m pretty sure the food gods invented it for tempura…
Hi David! Thank you very much for sharing your secret for making tempura!
I am an experienced cook, but tempura eludes me..it doesn’t have the texture I am seeking. I came up with one small solution….when I mix the dipping sauce, I place it in a bowl of ice/water to keep it really cold…I dip the meat/veggies in the cold batter before frying it & it maintains the crispy coating I desire. Also, a person’s suggestion of using an air fryer to maintain crispy texture really works. Best recipe i have found for Tempura! Thanks
Hi Nancy! Thank you very much for trying this recipe and sharing your tip with us! 😊
Read the newest comment from David…
Is it possible to baked Shrimp Tempura rather than deep fry in oil? If so, can you give recipe?
Hi Sonya, Nami has a Coconut shrimp recipe (Baked) but currently doesn’t have a baked Shrimp Tempura recipe on the site. Sorry! https://www.justonecookbook.com/coconut-shrimp/
Thank you! For answering the question I had about why restaurant tempura seems so much crispier than homemade tempura (and tempura from tempura restaurants). I have two questions:
1. One cooking class I took in Japan taught us to use a knife tip to squeeze out the water from inside the tail of the shrimp so it doesn’t splatter when it’s frying. Is that necessary?
2. If I use store-bought tempura flour would the results be different?
Thanks!
Hi Angela,
Yes, squeezing out with a knife is necessary for 2 reasons.
1) a lot of dirty things are in the tips. If you scrape it with a knife tip, you see so much dirt coming out. If you remove it, it will look pretty red in color. So it’s good to keep it clean.
2) lots of moisture is in the tail, so it will help avoid oil splatter when deep frying.
Here is the post link for how to prepare shrimp: https://www.justonecookbook.com/how-to-prepare-shrimp-for-shrimp-tempura-ebi-fry/
As for the question about store-bought tempura flour, Yes. They are made with egg powder and use less gluten so that the result will be different.
We hope this is helpful!
Hi, love your site! My son learned to make poke from your recipes and all his friends rave about his poke…say they won’t eat it at a restaurant again. I need to ask you about substitutions for wheat flour in your recipes, we have family members with celiac that don’t want to miss out on your delicious recipes. Also if you know where I can purchase gluten free wonton wrappers or have a recipe, I would appreciate it. Looking forward to making a lot more of your recipes!
Hi Alina! So happy to hear your son and his friends enjoyed the poke recipe! Yay! 🙂 Please check out my Gluten Free Tempura recipe. Hope you like the recipe!
https://www.justonecookbook.com/gluten-free-tempura/
Hi Nami, is it ok if I swap the corn starch for corn flour?
Hi Thadeus! Sorry, they are not the same thing. 🙂
Corn flour is a yellow powder made from finely ground, dried corn, while cornstarch is a fine, white powder made from the starchy part of a corn kernel. Corn flour is used similarly to other flours, whereas cornstarch is mainly used as a thickener.
Hi, would this recipe work for nigiri sushi? When I was in Japan I fell in love with shrimp tempura nigiri with mayo but I can’t find it anywhere in the states. I know for the mayo I would need to use kewpie but I’m not sure if I would need to do anything special with the tempura to make it work for nigiri. If you have any advice I’d appreciate it!
Hi Aiden! Hmm.. I never had nigiri sushi with shrimp tempura on top. I think it’s nice to drizzle some tempura sauce along with mayo?
As an Issei in his 60s living in America lamenting when our mother used to cook tempura, following your recipes and site brings back memories of my youth. Thank you.
Hi Junji! Thank you so much for your kind feedback! I’m so happy to hear you get to enjoy this dish at home. 🙂