
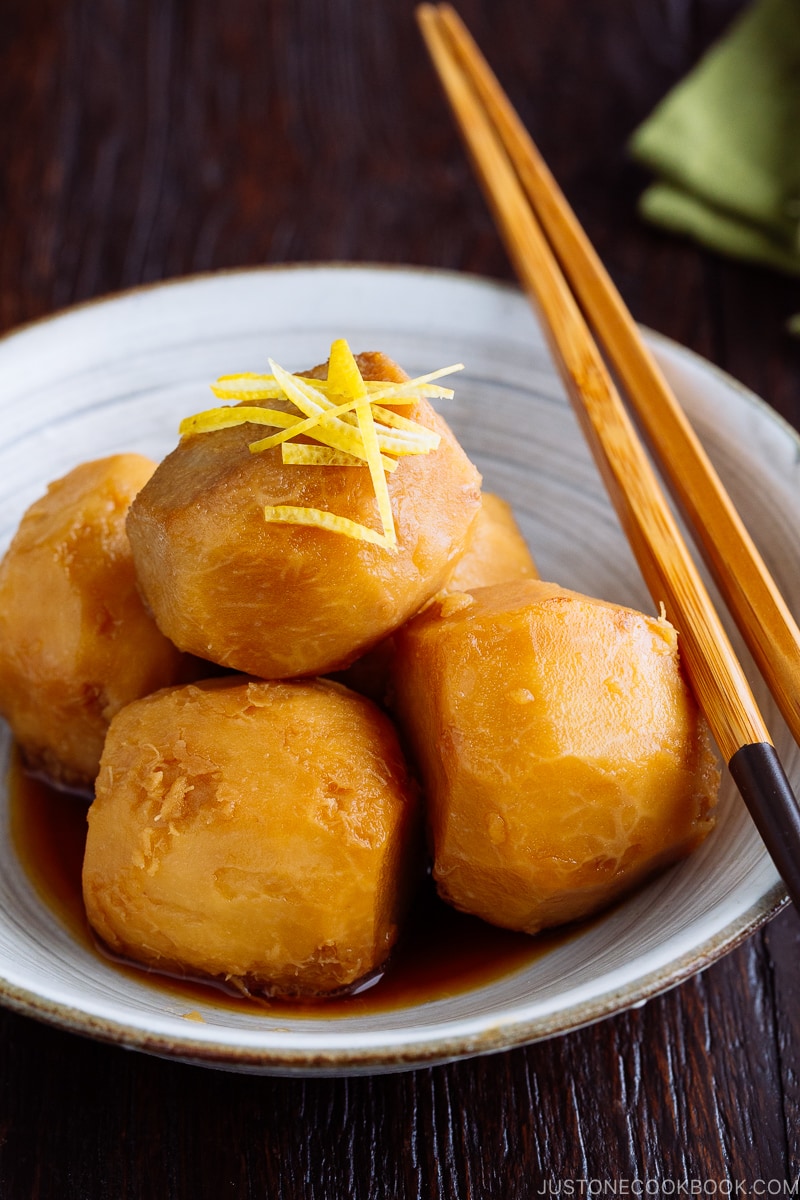
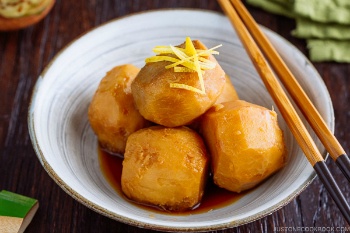
Simmered Taro, is a classic simmered dish in Japan. In Japanese, we call this dish Satoimo no Nimono (里芋の煮物) or Satoimo no Nikkorogashi (里芋の煮っころがし). Just like the other simmered dishes, simmered taro is cooked with the basic Japanese seasonings – dashi (Japanese soup stock), sake, soy sauce, mirin, and some sugar. The simplicity of this preparation allows taro to take the center stage while it soaks up the savory flavor of the sauce.
What’s Taro?
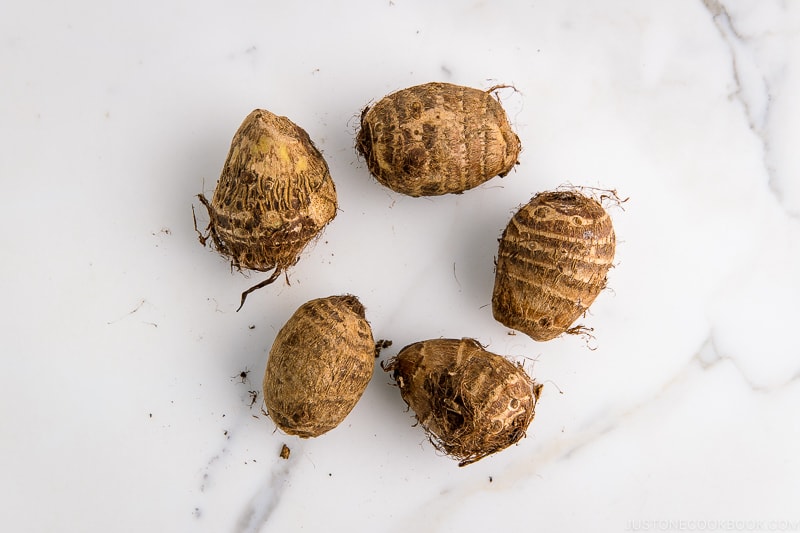
If you’re unfamiliar with taro, it is a starchy root crop that is known for its nutritional values and essential minerals. The variety of taro varies in size and shape, but the ones we use for Japanese cuisine are often smaller, round, dark in color, and hairy. These unassuming root vegetables are called Satoimo (里芋) in Japanese and you can find them at Japanese or other Asian grocery stores. Simmered Taro is very simple to prepare, which is why it has been a popular home-cooked dish.
How to Prepare Taro
While the recipe for simmered taro is uncomplicated, there are a few things you want to take note of when preparing taro. If consumed raw, it can cause mild irritation and itchiness and the flesh is slimy. Why then bother cooking with it? Well, aside from its many nutritional values, taro is appreciated for its unique texture and ability to soak up flavors. Give it a try and you’ll discover why it is widely enjoyed in Japanese cuisine.
I include some tips below on how to prepare taro, especially if this is your first time cooking with taro.
- Taro has hairy, tough, and thick skin which is hard to peel with a peeler. Make sure to rinse it well underwater and remove the hair as much as you can.
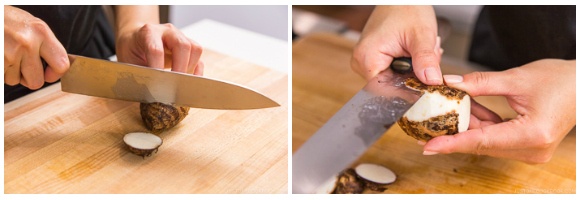
- Cut off both ends first and peel from one end to the other end. And it’s okay to peel the thick skin off.
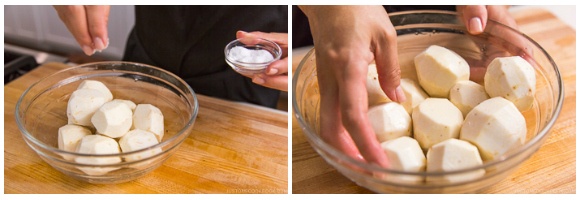
- To get rid of the sliminess, use salt to rub the taro and rinse under cold water.
- Boil the taro to get rid of the bitterness and foam/scum. Drain the water completely and the taro is ready to get seasoned!
Tips to Make Best Simmered Taro
1. Blanch taro first to avoid bitterness
If you start cooking taro directly in a simmering sauce, taro will release bitterness and affects the final taste. Therefore, it’s best to blanch taro first before coating it with savory sauce.
2. Coat the taro with oil after pre-blanching
The oil helps lock in all the flavors inside the taro and prevent umami from going away. It also helps to keep the shape without breaking into pieces.
3. Season with sweet condiments before salty condiments
When working with an ingredient that requires some time to cook, make sure to season it with sweet condiments such as mirin and sugar. If you add salt or salty condiment, the natural sweetness of the ingredient will be lost and it requires more sugar/mirin to sweeten again.
4. Use otoshibuta (drop lid) to keep the taro submerged at all times
Otoshibuta is an essential kitchen tool to make nimono or simmered dishes in Japan. The drop lid helps the ingredient submerge in the simmering sauce at all times while preventing the sauce from evaporating too fast. It also keeps the taro steady in place so it won’t break down into pieces. You can buy an adjustable stainless drop lid like mine or you can make your own otoshibuta with aluminum foil.
5. Drizzle mirin last for luster
Mirin is known for adding luster to the dish, which is why mirin is an essential ingredient when you make Teriyaki (as Teri means “luster” in Japanese). Not only it adds sweetness, but it adds beautiful and delicious shine to the dish right before you turn off the heat and serve.
What Other Dishes to Serve
You can serve the simmered taro in the Ichiju Sansai ‘one soup three dishes’ style, by complementing it with braised pork belly (kakuni), chawanmushi, steamed rice, pickled cucumber and miso soup.
Wish to learn more about Japanese cooking? Sign up for our free newsletter to receive cooking tips & recipe updates! And stay in touch with me on Facebook, Pinterest, YouTube, and Instagram.

Simmered Taro (Satoimo no Nimono)
Ingredients
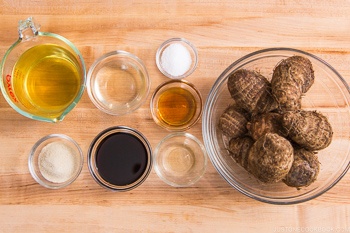
- 10 taro (satoimo) (1¾ lb, 800 g)
- ½ tsp Diamond Crystal kosher salt
- 2 tsp neutral oil
For the Seasonings
- 1¼ cups dashi (Japanese soup stock) (use standard Awase Dashi, dashi packet or powder, or Vegan Dashi)
- 3 Tbsp sake
- 2 Tbsp sugar
- 2 Tbsp soy sauce
- 1 Tbsp mirin
For the Garnish
- yuzu peel (or julienned lemon peel; optional)
Instructions
- Gather all the ingredients.
- Wash 10 taro (satoimo) with water and drain. Cut both ends and peel the skin. Taro is slimy, so be careful when you’re handling it with the knife.
- Sprinkle ½ tsp Diamond Crystal kosher salt over the taro and rub it with your hands. Then, rinse under cold water and drain completely.
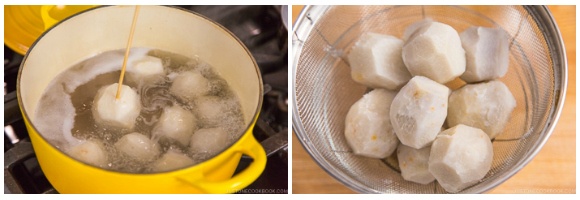
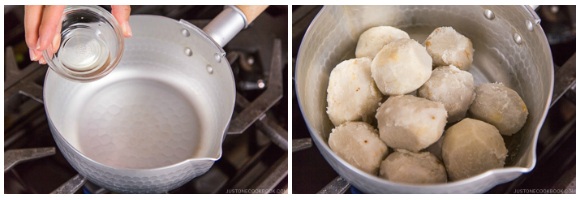
- Now, pre-blanch the taro. Place the taro in a large pot and add enough water to cover the taro. Bring the water to a boil.

- Once boiling, reduce the heat and simmer for 5 minutes, or until a skewer inserted into the taro goes through smoothly. Pre-blanching helps the taro absorb flavors when simmering in seasonings. Drain and rinse off the sliminess under warm water.
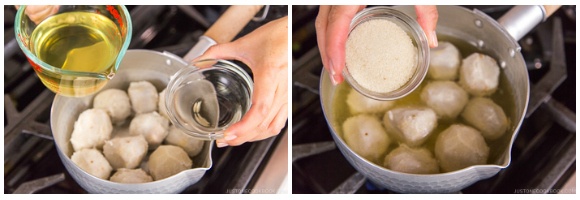
- Heat 2 tsp neutral oil in the pot. Add the taro and quickly coat it with the oil. The oil helps lock the flavors inside the taro and prevent umami from going away. It also helps the taro keep its shape without breaking into pieces.
- Add 1¼ cups dashi (Japanese soup stock), 3 Tbsp sake, and 2 Tbsp sugar, and bring it to a boil. Skim if necessary.
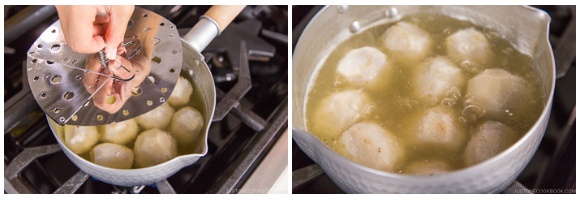
- Lower the heat and place an otoshibuta (drop lid) on top. Simmer for 5 minutes.
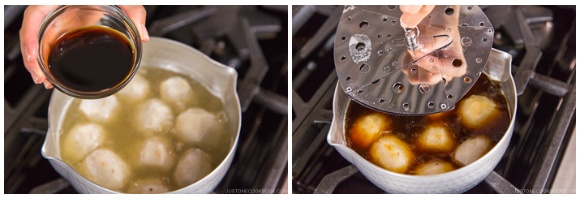
- Remove the otoshibuta and add 2 Tbsp soy sauce; adding the soy sauce later helps the sweet flavors easily soak in. Place the otoshibuta back on and simmer for another 20–25 minutes (depending on the size of your taro; mine are large). Lastly, add 1 Tbsp mirin and gently shake the pot to coat the taro with the sauce. Adding the mirin toward the end gives a nice luster to the dish.
- Garnish with julienned yuzu peel, if you‘d like.
To Store
- You can keep the leftovers in an airtight container and store in the refrigerator for up to 3–4 days.
Nutrition
Did you make this recipe?
Tag @justonecookbook on Instagram so we can see your delicious creation!