This post may contain affiliate links. Please read my disclosure policy for details. As an Amazon Associate I earn from qualifying purchases.
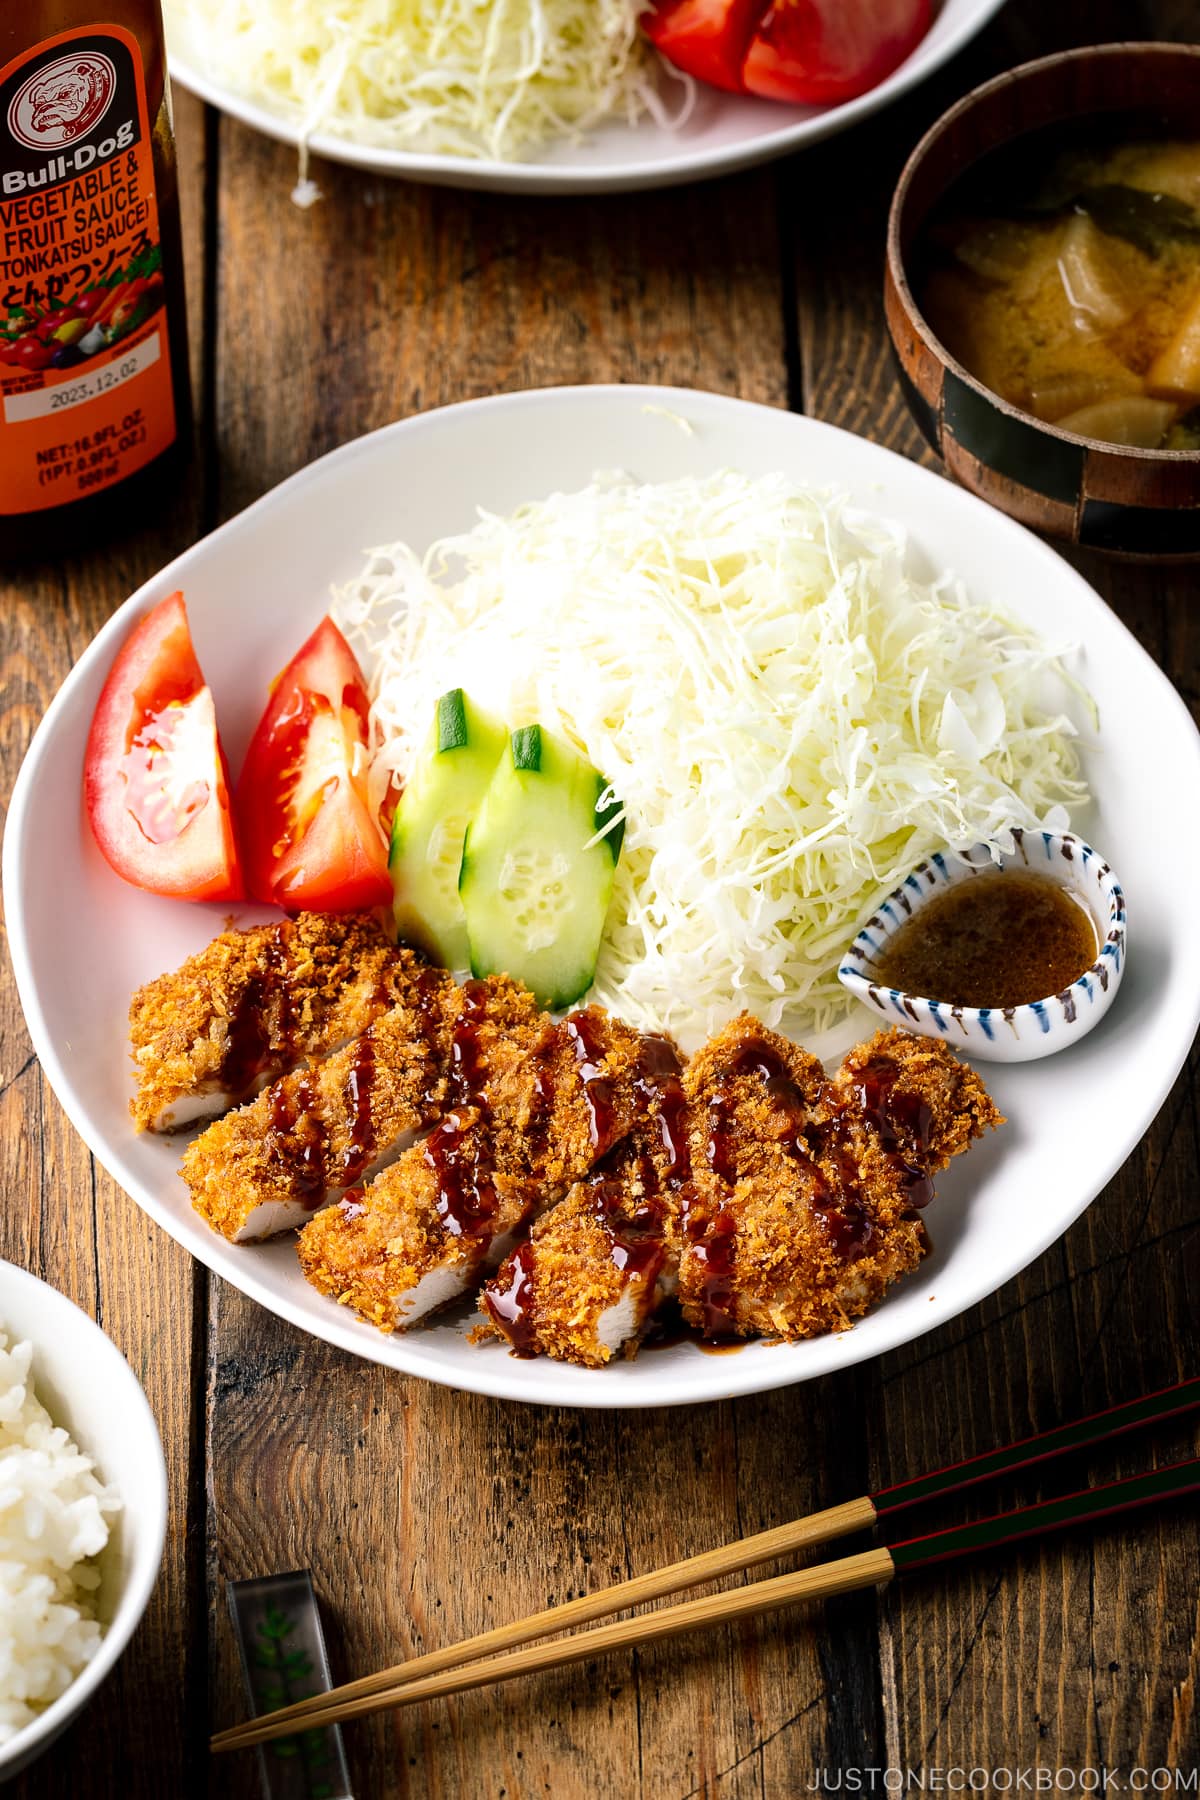
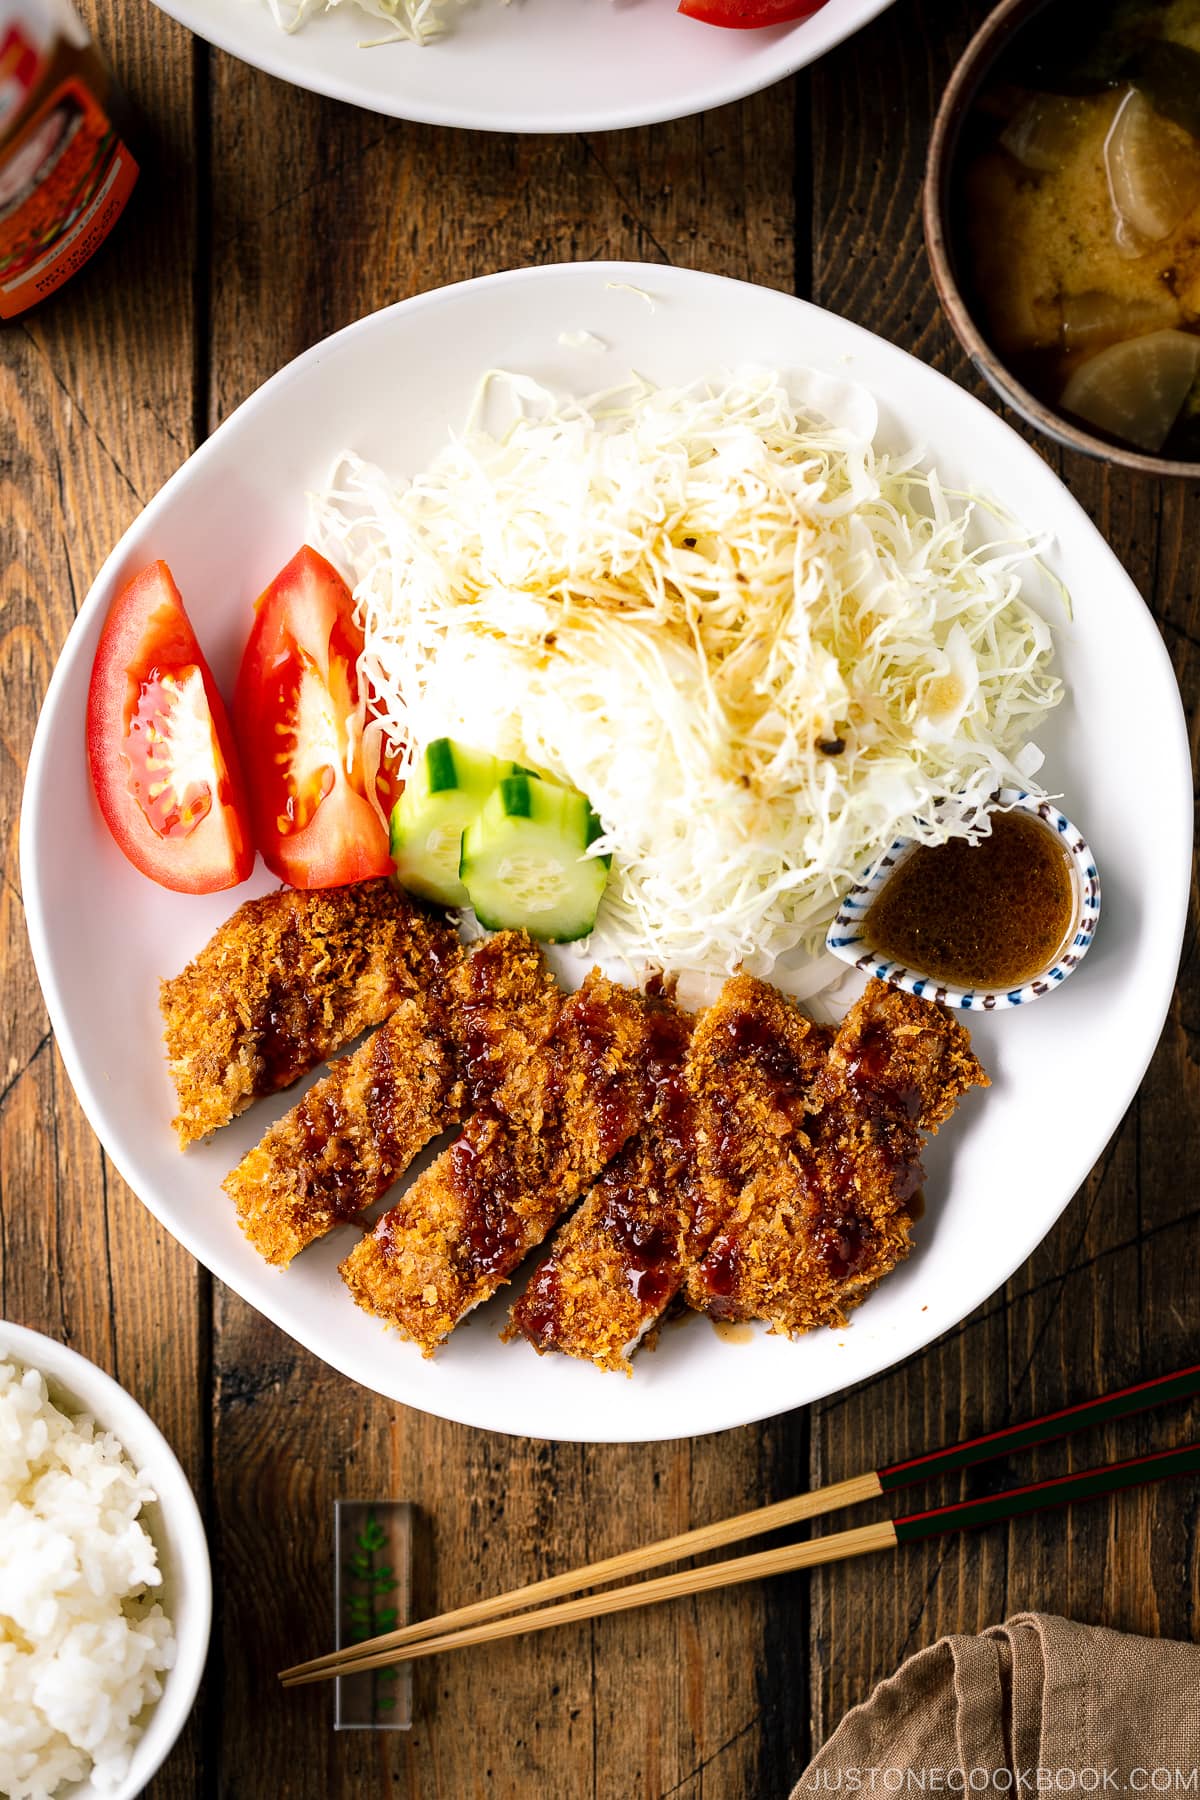
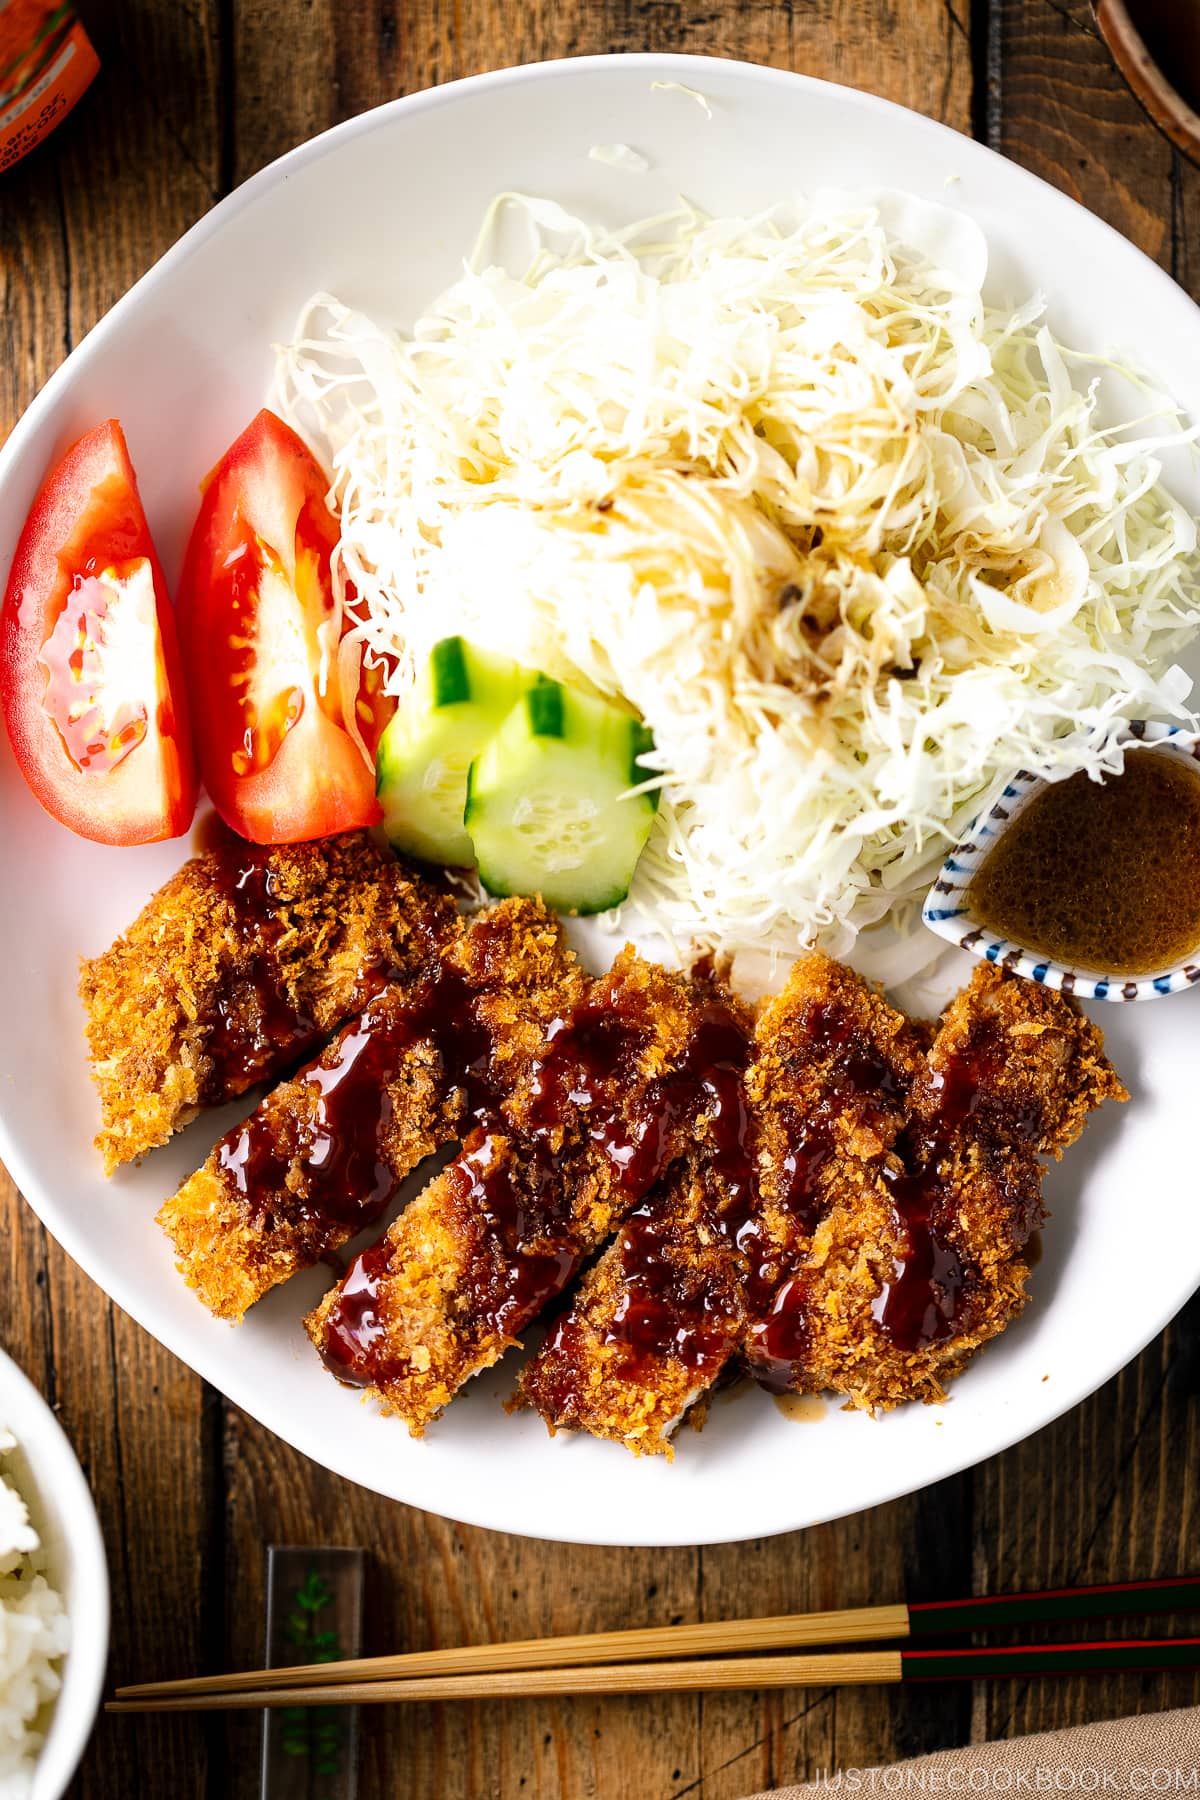
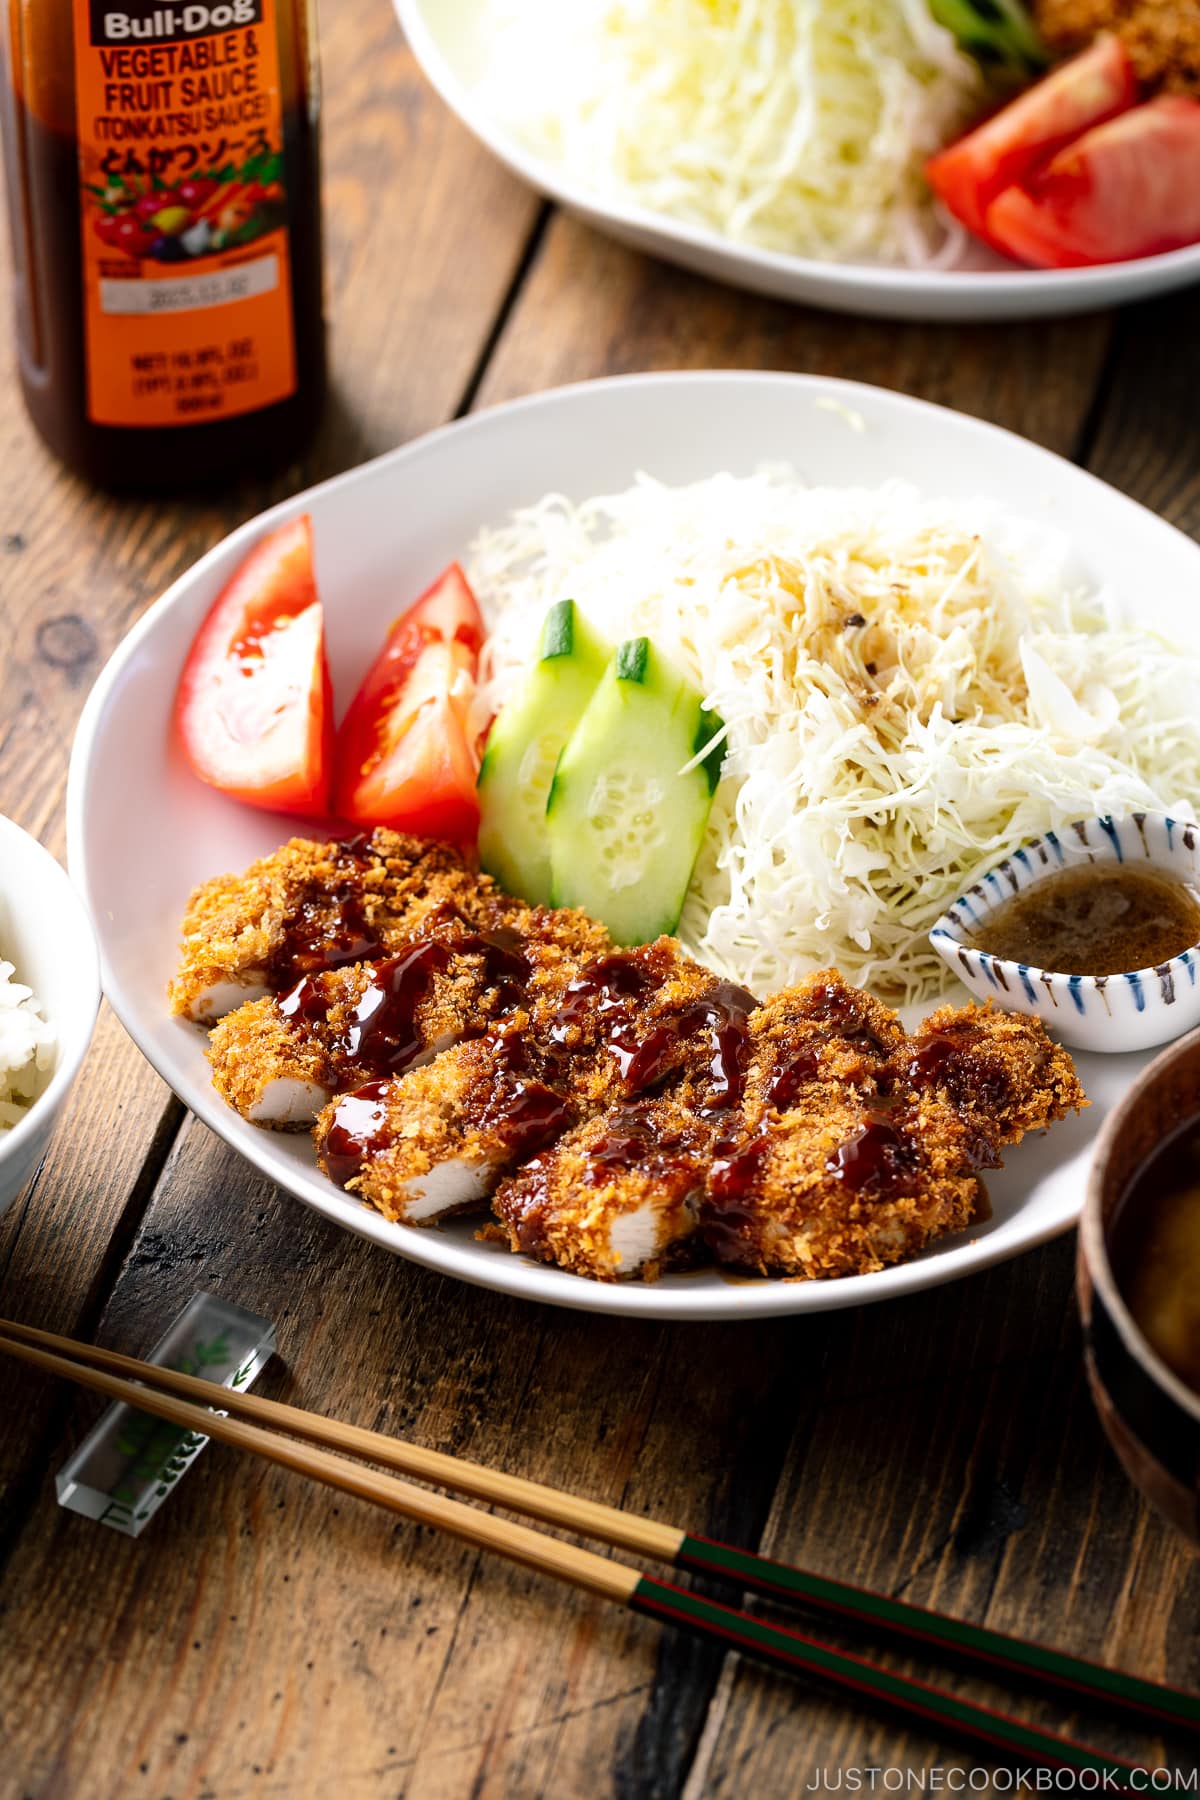
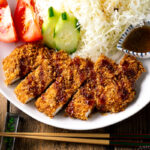
Juicy, tender, and crispy baked chicken katsu served with a bright spring salad. In this recipe, chicken breast is coated in toasted panko and baked in the oven until golden brown. It makes a much healthier stand-in for greasy fried chicken. So simple and easy, you want to make this tonight!
Japanese food is typically pretty healthy, but we do have a love for deep-fried food. If you are comfortable with deep frying, popular Japanese dishes like Chicken Katsu and Tonkatsu are easy to make at home. However, the majority of people prefer eating these dishes at restaurants because they prefer to avoid the mess and clean-up after deep frying food.
If you can relate to this, then today’s recipe is for you. This crispy Baked Chicken Katsu recipe is super easy, which makes it possible to make for a weeknight dinner. Since the chicken is oven-baked with my toasted panko method, it is a much healthier option and you can enjoy without any guilt.
Baked Chicken Katsu with Toasted Panko
My mom is really good at deep frying. Her deep-fried foods are always super crispy, and they never look or taste too oily. Although I enjoy deep-fried foods and occasionally make these special treats for my family, I try to go for the healthier options whenever I can.
This Baked Chicken Katsu is a wonderful choice if you want to eat a healthier version of my Chicken Katsu recipe or if you prefer not to deep fry at home.
Why Do We Toast Panko?
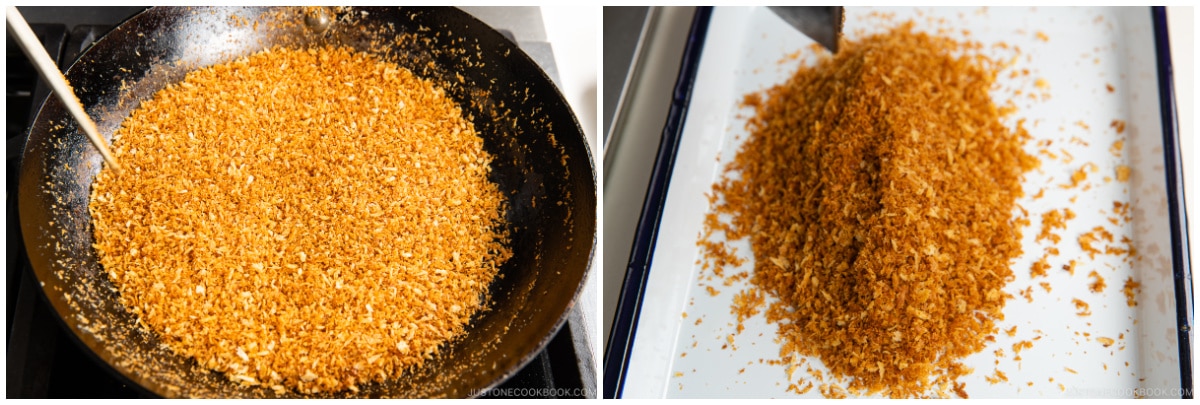
- Even golden color – If you don’t use toasted panko and bake, the panko never gets even golden color due to the oven’s hot spot. With this method, your baked chicken katsu looks just like deep-fried chicken katsu.
- Extra crispy panko texture – Toasting helps to remove any moisture in the panko and makes it extra crisp and crunchy.
I used organic chicken breast in my recipe so it turned out really juicy and flavorful. With the crispy crust, this Baked Chicken Katsu is very close to the deep-fried version.
Now if you want to substitute chicken with pork to make baked Tonkatsu, you need to make sure the pork is thin so it will be cooked completely.
Light and Healthier Choice
My mom is really good at deep frying and her deep-fried foods are always super crispy and never taste too oily. Although I enjoy making and eating deep-fried foods, I try to go for healthier options whenever I can.
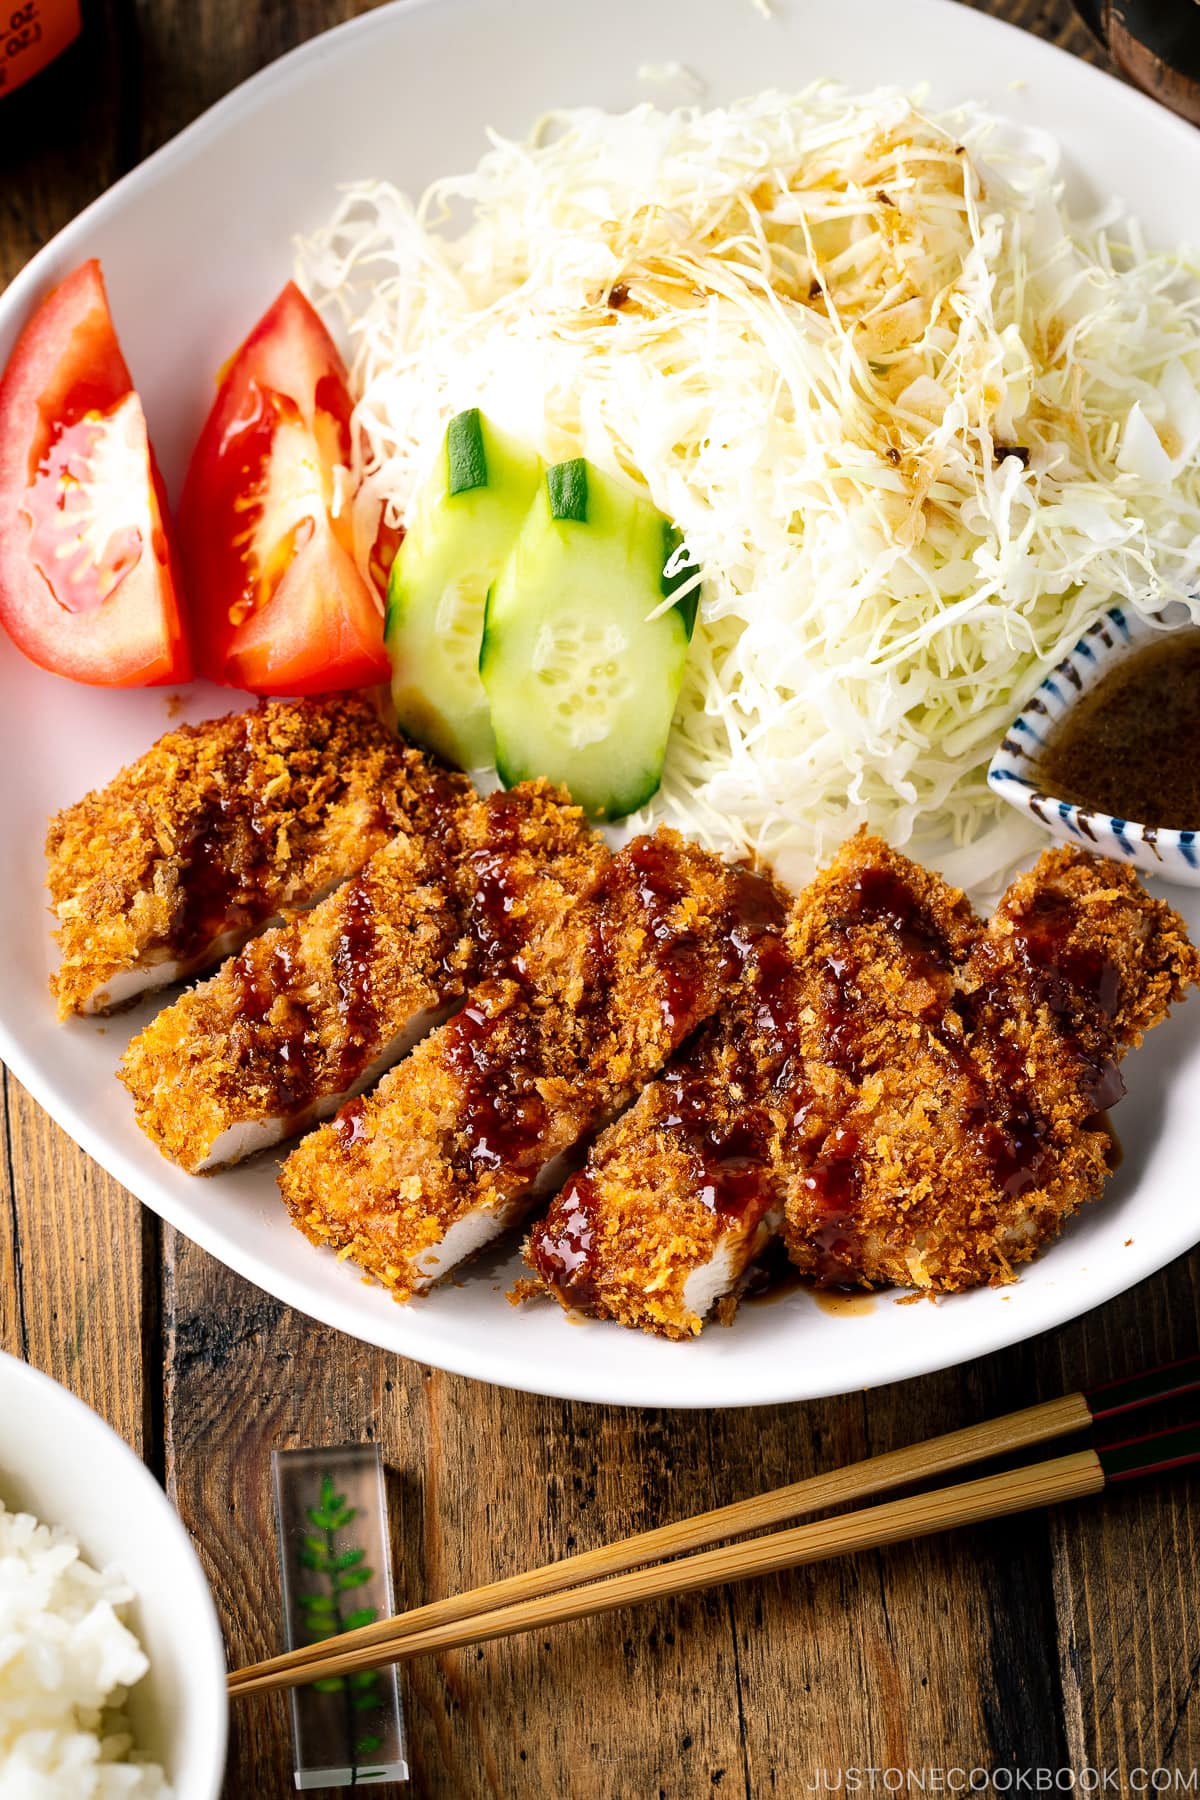
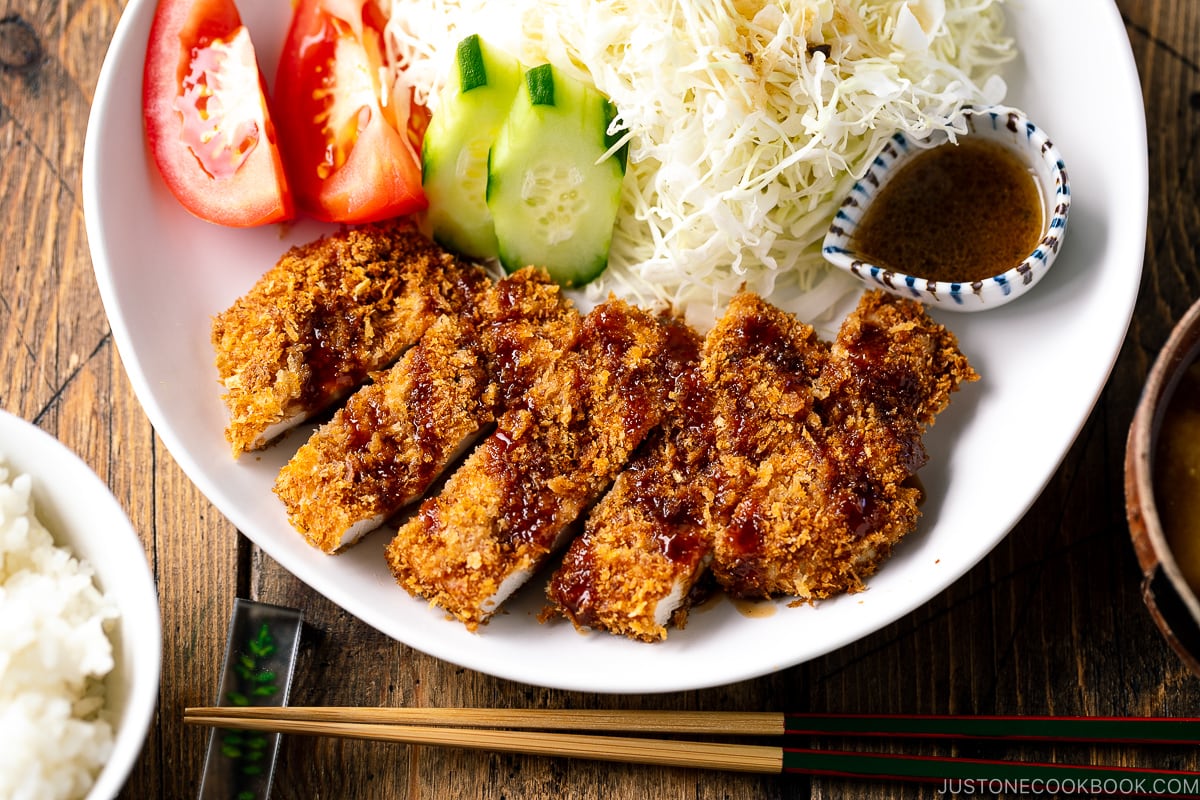
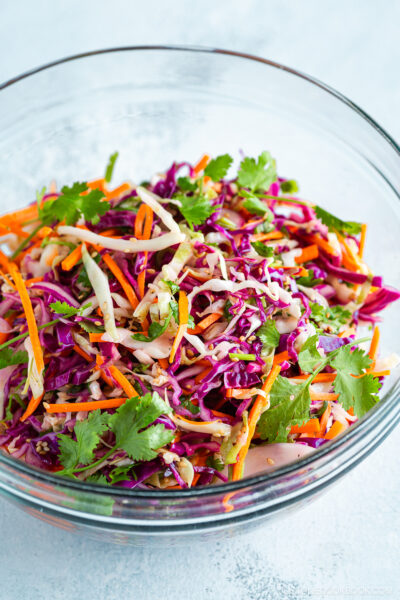
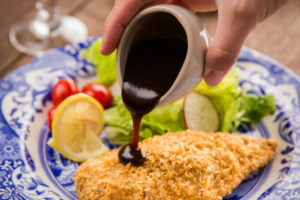
I was really surprised how well this Baked Chicken Katsu turned out and best of all, my children loved it as well. The chicken is crunchy on the outside and tender on the inside. It makes a complete meal when served with a bright spring salad and a delicious tonkatsu sauce.
Watch How To Make Baked Chicken Katsu
Juicy and tender crispy baked chicken katsu! Chicken breast is wrapped in a toasted panko crust and it tastes just like deep-fried chicken katsu!
Japanese Ingredient Substitution: If you want to look for substitutes for Japanese condiments and ingredients, click here.
Sign up for the free newsletter delivered to your inbox and stay in touch with me on Facebook, Pinterest, YouTube, and Instagram for all the latest updates.
- 1 cup panko (Japanese breadcrumbs) (60 g)
- 1 Tbsp extra-virgin olive oil
- 1 lb boneless, skinless chicken breast (454 g)
- kosher/sea salt (I use Diamond Crystal; Use half for table salt)
- freshly ground black pepper
- ¼ cup all-purpose flour (plain flour) (30 g)
- 1 large egg (50 g w/o shell)
- 1 Tbsp water
- Tonkatsu sauce (See Notes for homemade recipe)
-
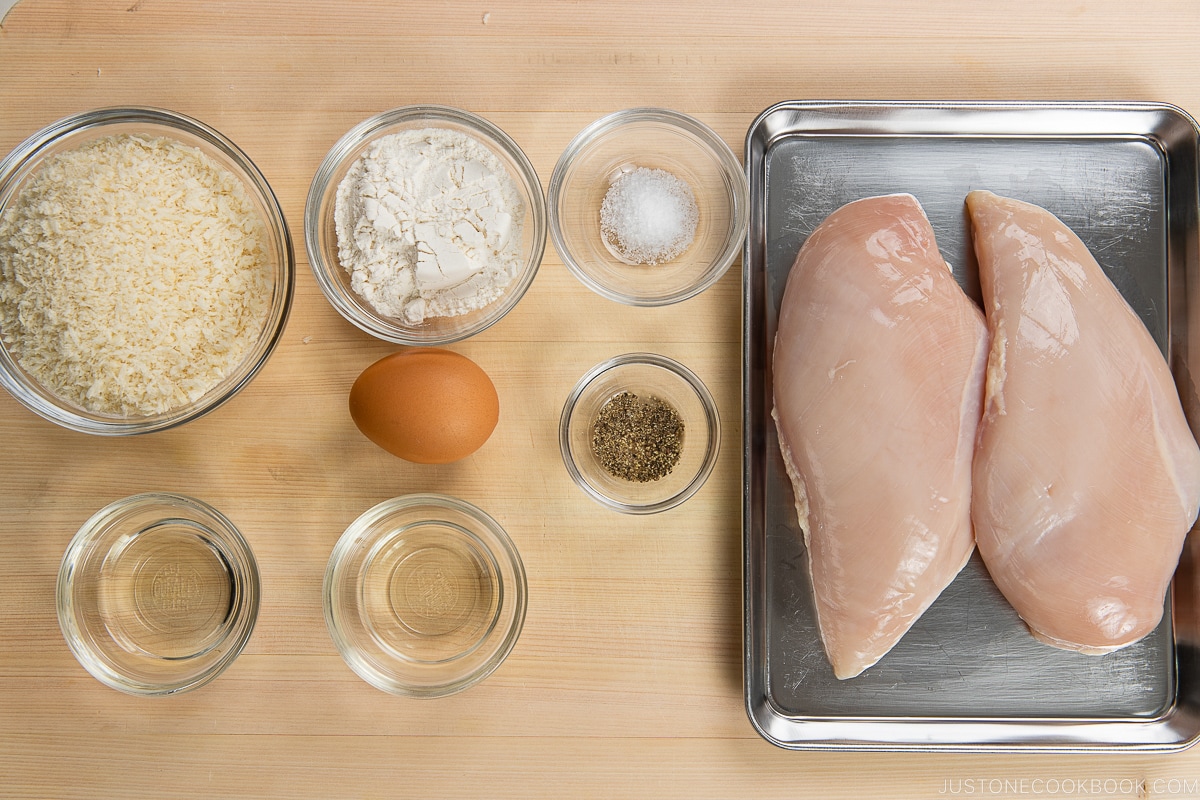
Gather all the ingredients. Adjust an oven rack to the middle position and preheat the oven to 400 ºF (200 ºC). Line a rimmed baking sheet with parchment paper.
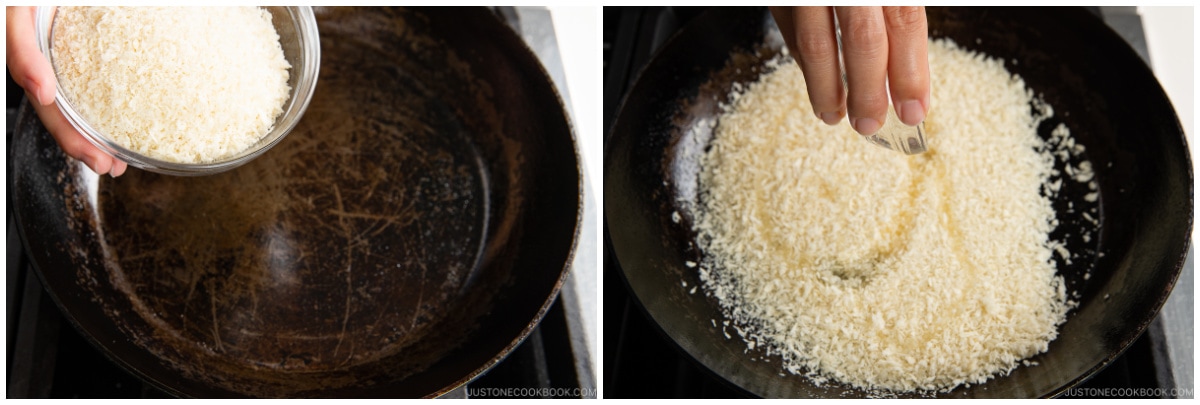
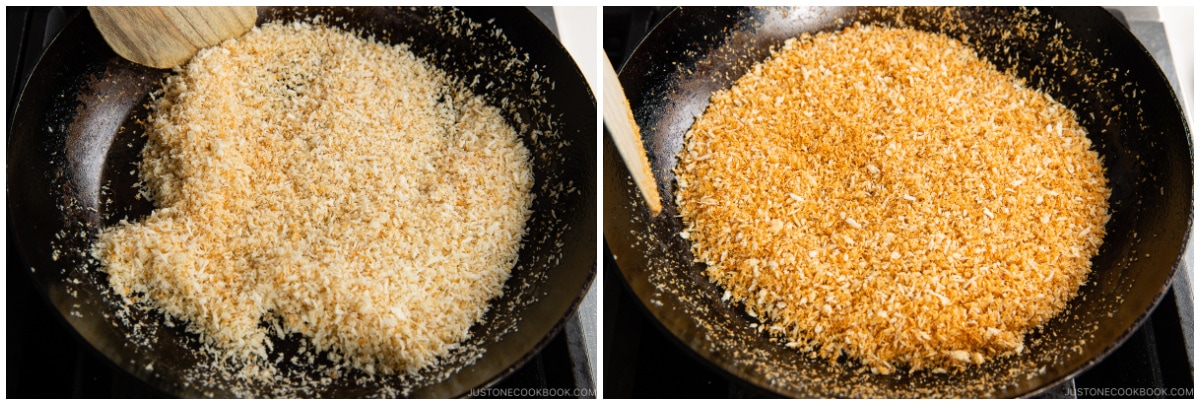
- Combine the panko and oil in a frying pan and toast over medium heat until golden brown. Transfer panko into a shallow dish and allow to cool.
-
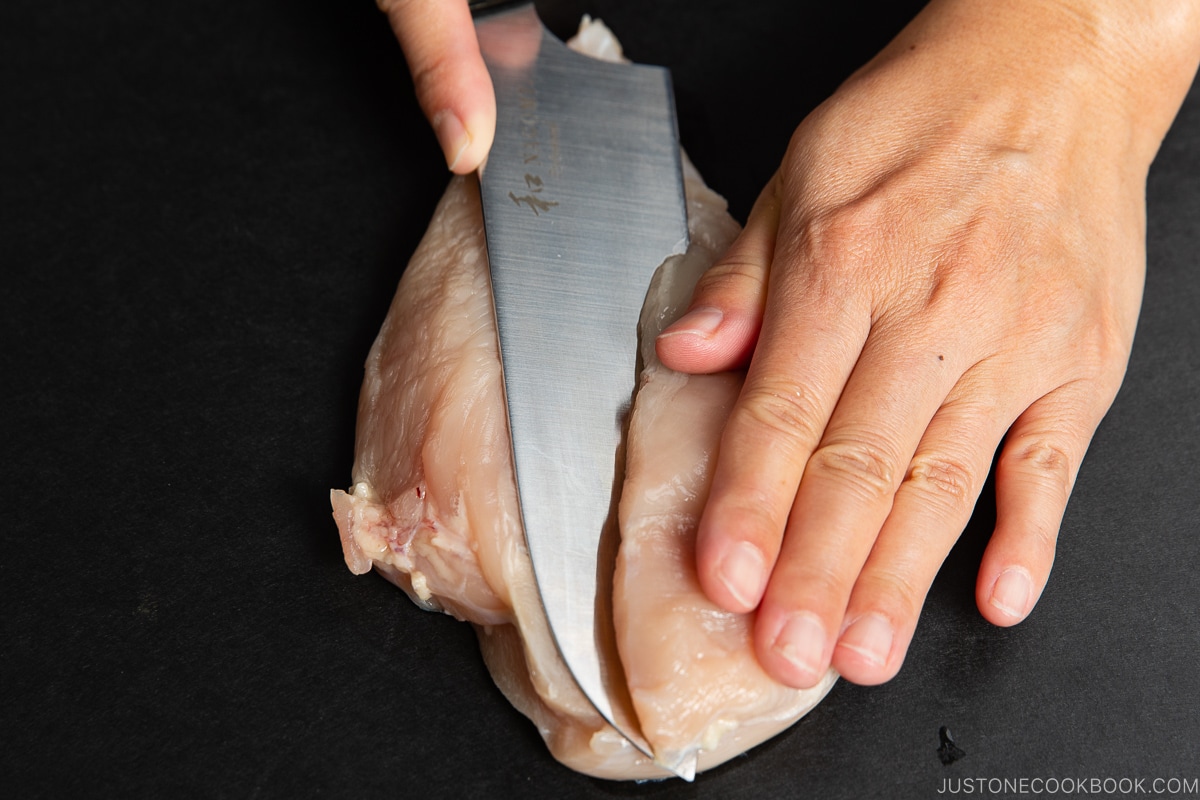
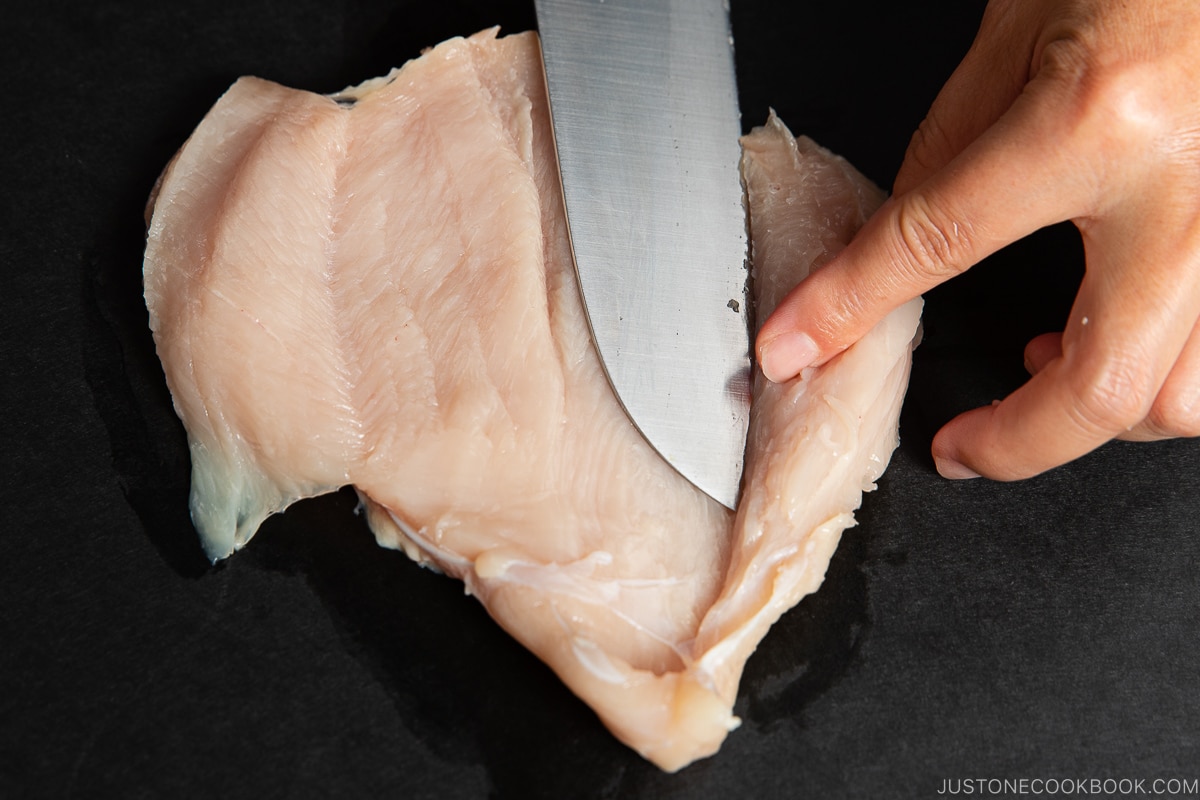
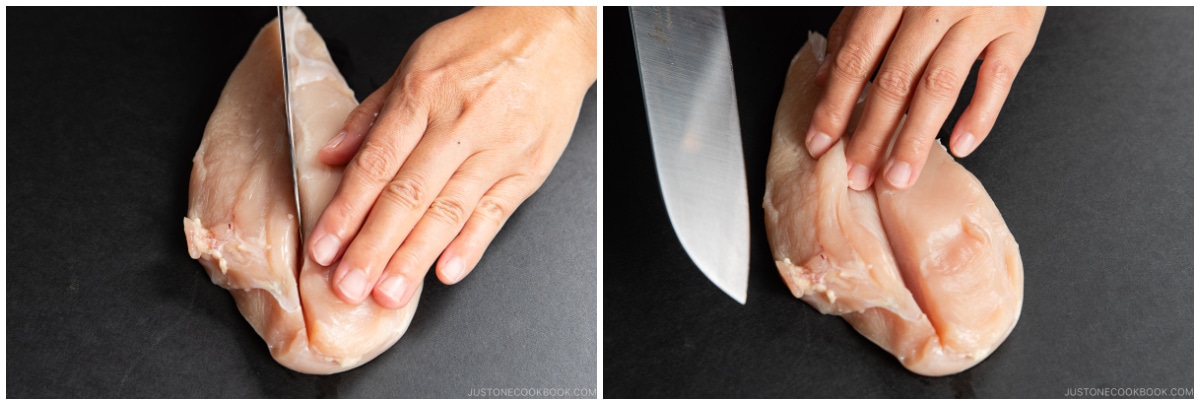
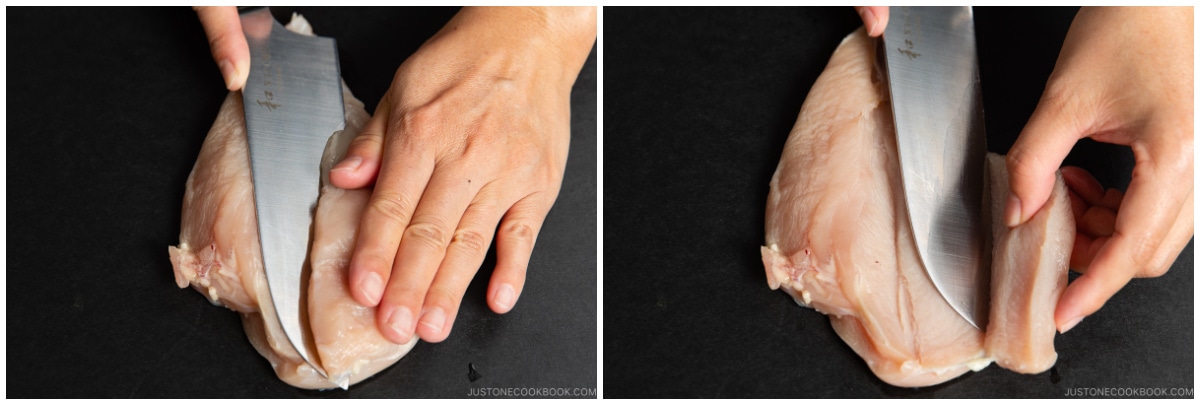
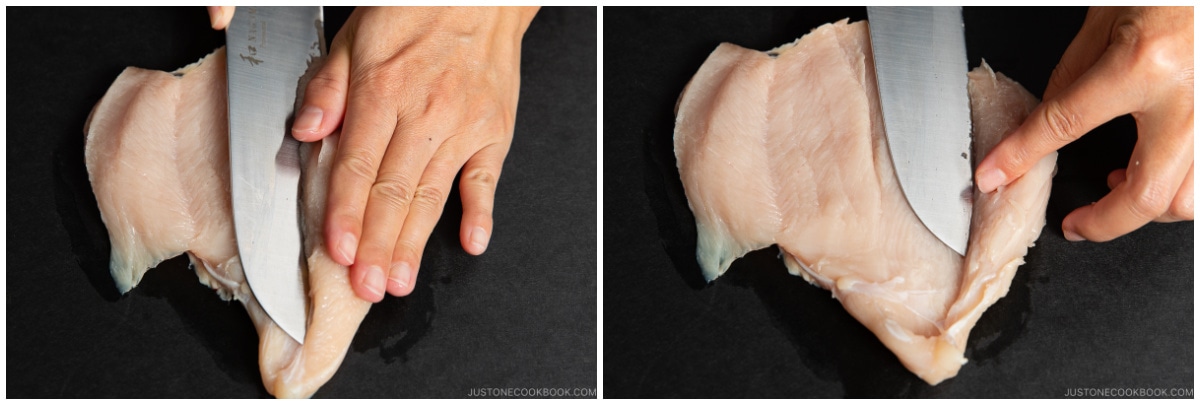
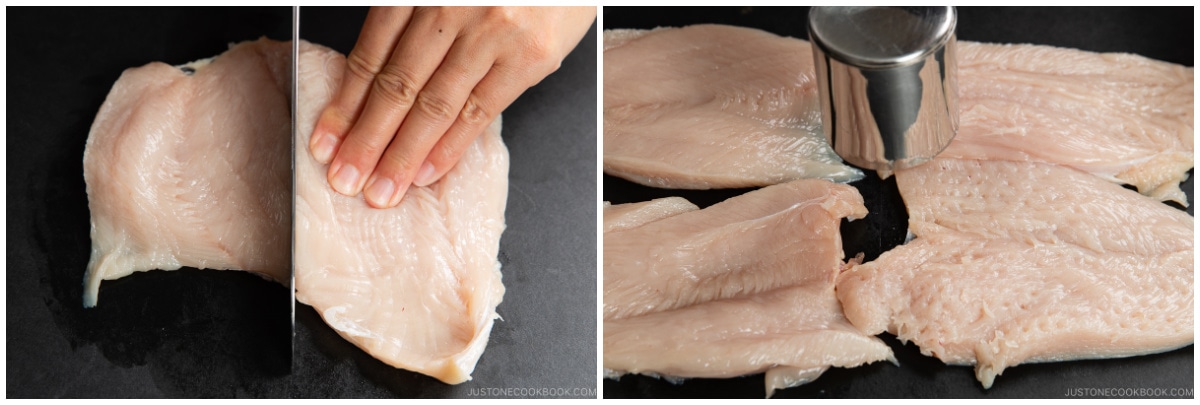
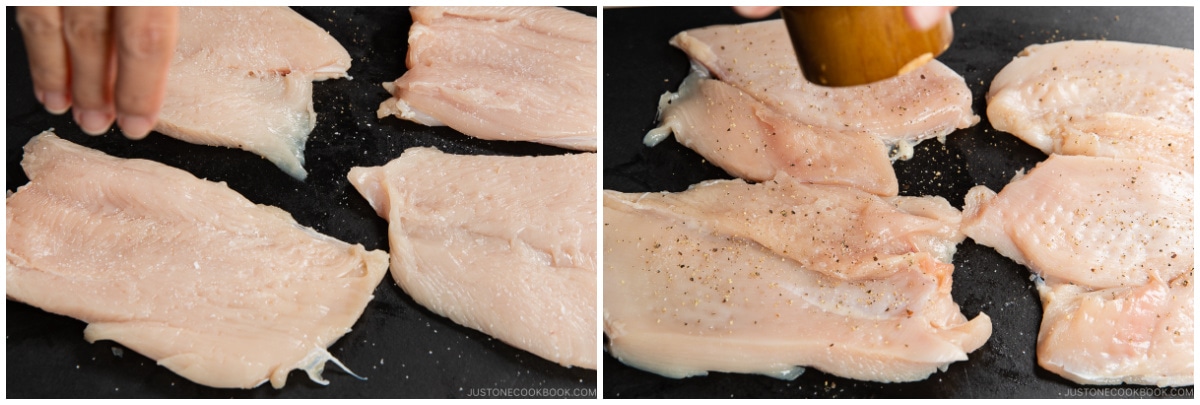
Butterfly the chicken breast and cut in half. Using a mallet or rolling pin, pound the chicken to equal thickness if necessary. Season salt and pepper on both sides of the chicken.
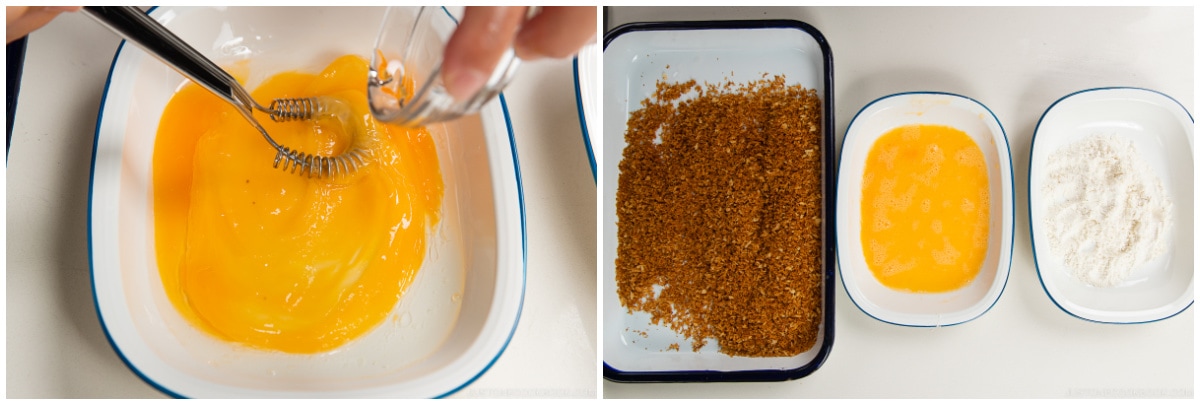
- In a shallow dish, add flour and in another shallow dish, whisk together the egg and water.
-
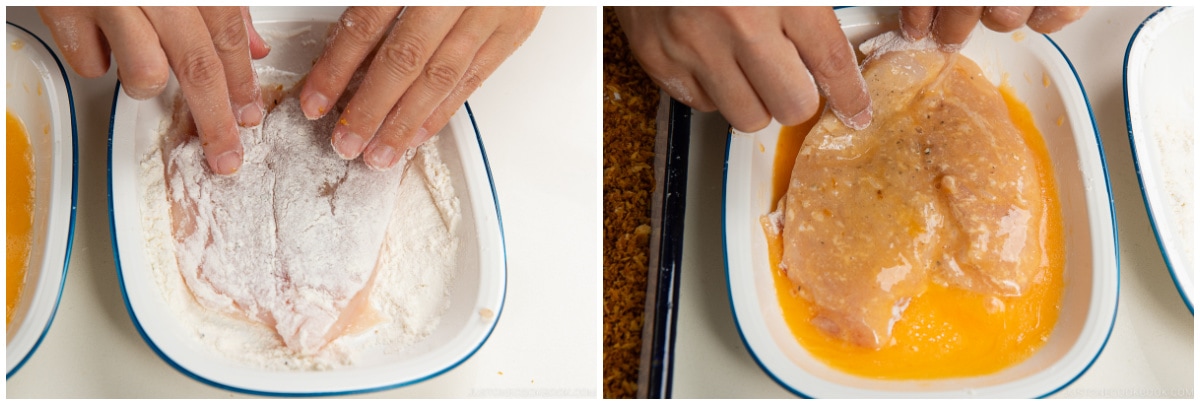
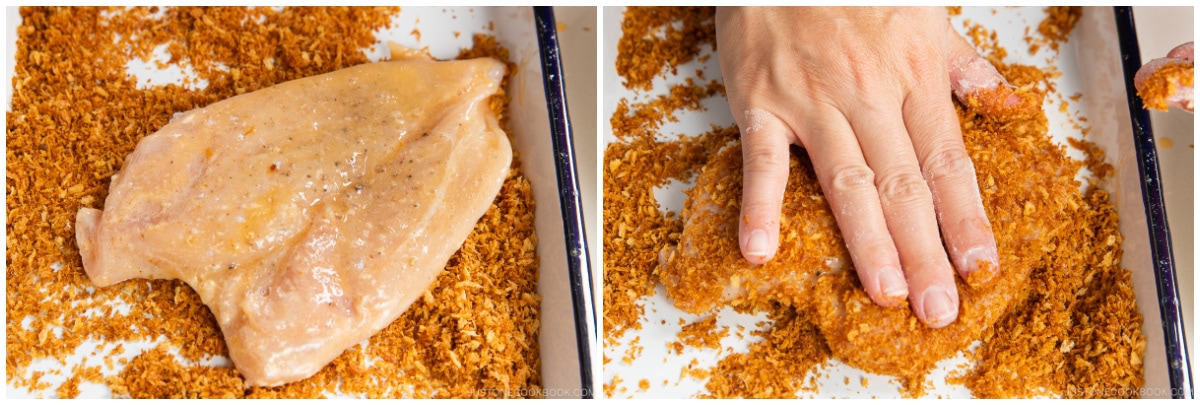
Coat each chicken piece in the flour and shake off any excess flour. Dip into the egg mixture and then coat with the toasted panko, pressing firmly to adhere to the chicken.
-
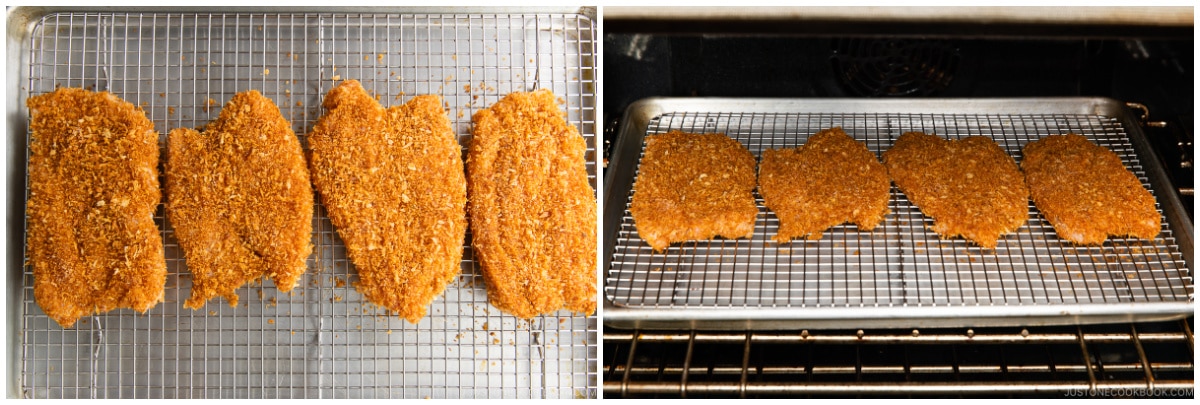
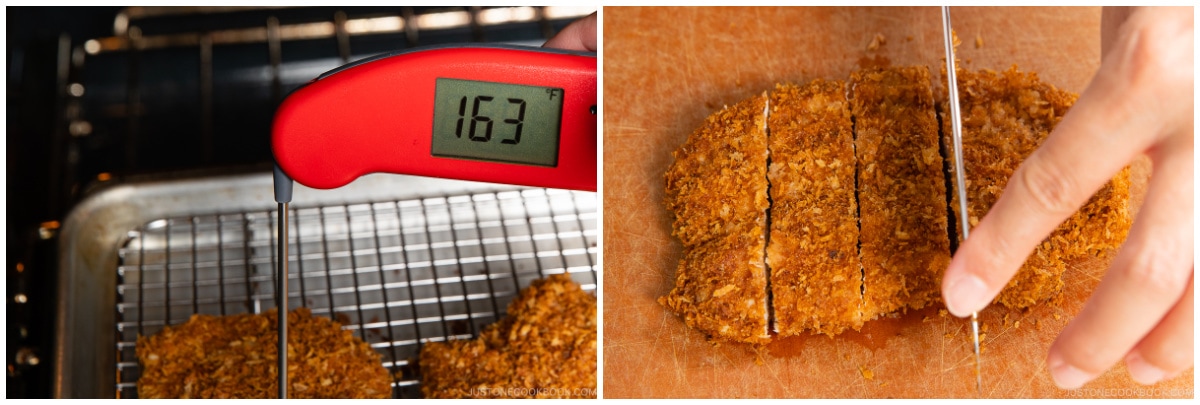
Place the chicken pieces on the prepared baking sheet (I recommend putting on a wire rack as I did in this recipe) and bake at 400 ºF (200 ºC) until the chicken is no longer pink inside (internal temperature should be 165 ºF (74 ºC)), about 25-30 minutes. Serve immediately or transfer to a wire rack so the bottom of the katsu doesn't get soggy from the moisture.
-
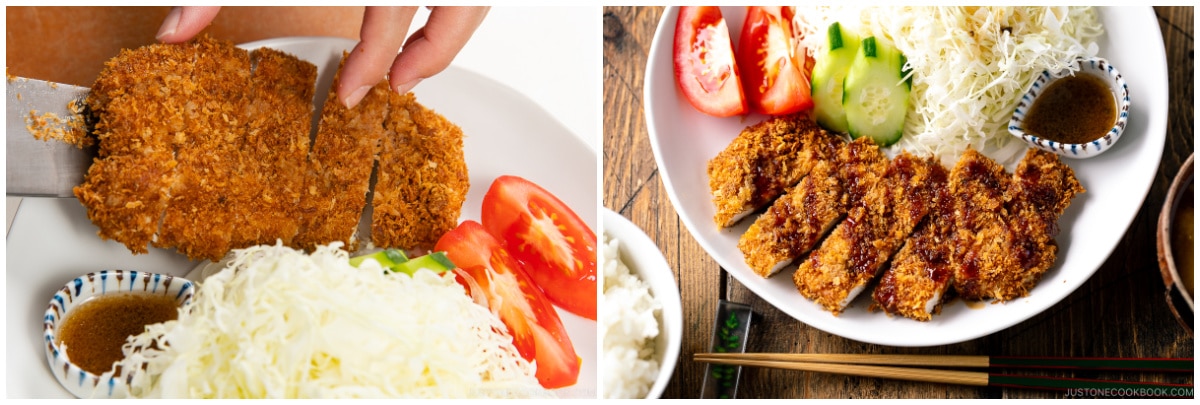
Serve with salad and tonkatsu sauce on the side.
Tonkatsu sauce: Homemade recipe, click here.
Recipe by Namiko Chen of Just One Cookbook. All images and content on this site are copyright protected. Please do not use my images without my permission. If you’d like to share this recipe on your site, please re-write the recipe in your own words and link to this post as the original source. Thank you.
II made this recipe tonight and it was great. When I told my spouse that I was preparing chicken katsu, he looked at me in disbelief that he did not want me cooking the katsu in oil and making our home smelling “oily”.
I told him that it is cooked in the oven and the results were just amazing. Really crisp and with the katsu sauce, it was a winner. Thank you so much for sharing this recipe.
Hi Mae! You made it already!! YAY!!! I’m so happy you liked this recipe! No more deep fried katsu for you! Healthy and no more worry about oil smell in the house! 😀 Thank you so much for your feedback. I’m so glad! 🙂 xp
There’s a really good sauce that goes well with this. The sauce is called Aurora sauce. It’s a popular sauce in Japan right now and many people really enjoy it. They also say that it goes well with anything but the other day I tried it with this chicken and it was amazing!!!! Unfortunately, I don’t know where my mom found this recipe… (It was on a japanese website.) The ingredients don’t sound all that great, but once you mix it all together, it is really good!
Ingredients:
Ketchup
Japanese Mayonnaise
Vinegar
Pepper
I also don’t know how much of each, but just experiment with it and try it some kind of meal.
Hi Megumi! Thank you so much for sharing, and I’ll definitely give it a try! 🙂 I’ve done ketchup and mayo (1:1) but haven’t added vinegar and pepper before. Thank you Megumi!
I know what is for dinner tonight!
I hope you enjoy Mary!
The family loved it!!!
Yay! So happy to hear that. Thank you for trying it out and I’m glad you enjoyed it. 🙂
Thank you Megumi! 🙂
Tried your recipe last night. It turned out good and my family loved it. My husband was surprised when he learnt that it was baked. Thanks for the great recipe.
Hi Shirley! I’m so happy to hear that your husband thought it was deep fried. 😉 That’s a great compliment! Thank you for trying this recipe and for your feedback!
Thank you, I was looking all over for a chicken katsu type of recipe that did not involve deep frying. This looks great, I may try it for dinner tonight! I like your site.
Hi Jeanna! Thank you for your kind words! I hope you enjoy(ed) this recipe. I really think this is pretty close to the deep fried version. 🙂
Yes, I made it for dinner and everyone really loved it! It turned out great!
Thanks so much for letting me know, Jeanna! 🙂
Can I replace with chicken thigh or drum? Do I need to remove the skin & bone? Your videos are a great help for newbies like me. Thanks.
Hi Ju! Sure, chicken thigh is a good option! Drumstick may take extra time to cook (especially with bone), so it may be better when it’s fried. I’ve never made it with drumsticks, but it’s bigger and longer time to cook. I’d recommend chicken thigh. Glad to hear the videos are helpful! 🙂
Nami! I love your recipes! Thank you for sharing…
Hi Aileen! Thanks so much for your kind words! 🙂
you forgot to include the recipe for the tonkatsu sauce
Hi Rico! Thank you for bringing it to my attention. Recipe is updated with the link for how to make tonkatsu sauce. 🙂
Thanks for the fast reply Nami. I love the taste of the concoction for tonkatsu sauce in the link you provided 🙂
Hi Nami,
I was just curious, I wonder why you used flour first instead of using breadcrumbs twice? I hope my question makes sense ;D. Here in Indonesia we’re so used to using breadcrumbs 2-3 times; first we dip it in egg wash, breadcrumbs, then egg again and breadcrumbs again until 2-3 times.
Hi Fenny! Well, that’s how we typically do in Japan. 🙂 We think flour is to prevent the flavor/umami from leaving the meat and to keep the panko layer stay on the food. If you don’t put flour, it’s easy to separate panko and meat.
So we do flour, egg, and panko in this order. Sometimes to make the fried food looks bigger, we do flour, egg, panko, egg, panko. 🙂
It’s the same reason we dust flour before dipping in tempura batter too. 🙂
Ahhh.. ok, interesting! Different countries have different cooking methods.
I see what you mean about fried food looks bigger! That’s why here in Indonesia, we dip it in panko/ breadcrumbs more than twice hahaha..
Looking forward to trying your method. Thanks, Nami! 😀
Yeah each country has their own way and reason for cooking technique based on their preference. 🙂 Hope you enjoy the recipe!
I love Tonkatsu or the chicken variety, but yes, the mess it makes…. not to mention you’ve to throw away your frying oil after…
Thanks for this recipe, I will give it a try tomorrow.
Hi Lawrence! I think and hope you love this recipe! A lot of people gave me feedback that it’s almost deep fried version. Hope you enjoy! 🙂
Hi I just baked this dish – hen I pohed the chicken with a fork I can see the juice come out! The chicken is really tasty 🙂 thanks for the recipe!
Sorry auto spelling mistake – I poked the chicken I meant
No problem! I’m on mobile a lot and sometimes it drives me crazy with auto spelling check! 🙂
How do you reheat it? In the oven? I don’t want it to dry out.
Hi Brittany,
We recommend reheating in the oven or oven toaster.
400F oven for 5~10 mins or so.
I hope this helps!
Hi Lily! Glad to hear you enjoyed this recipe! Thanks so much for your feedback! 🙂
Hi Nami!
I’ve just done this crispy baked chicken and it turned out amazing. Thanks so much for this recipe!
It made our dinner unforgettable 🙂
xoxo
Hi Karolina! I’m so happy to hear you enjoyed this recipe! Thank you very much for your kind feedback! 🙂
Hi Nami, can I freeze the baked chicken? how do I reheat it to keep the crispyness for the chicken? thank you.
Hi Star! Yes we freeze them but when you reheat, use a toaster oven or oven and do not microwave. 🙂
Hi Nami, thank you for the reply. Do I need to first thaw in the fridge? for reheating in oven, whats the temp and for how long? thank you.
Hi Star! You can thaw in the fridge first or you can just pop in 400F oven and reheat for 20 mins or so.
This recipe is perfect! Made it for dinner and it was delicious! I’m adding this my list of go-to recipes. Thank you for sharing!
Hi Cherisse! I’m so happy to hear that you enjoyed this recipe. Thank you for your kind feedback! 🙂
Another winner. So easy and clean up is quick and easy. Chicken was moist and outside crispy. My whole family loved it paired with steamed green beans and fresh cherry tomatoes. I made the homemade sauce and we all loved it, but my husband and I opted for some Siracha and it was really good if you like a little kick. Thanks so much for sharing this recipe.
Hi Grace! So happy to hear you tried this recipe! He hee yeah Sriracha sauce sounds tempting too. 😀 Thank you for your kind feedback, Grace! xo
I made this for the first time last night for my boyfriend! I was really surprised by how well it turned out. I have a question, should I flip the chicken breasts half way while they bake? The top side of my chicken came out crispy, but the panko on the bottom of the chicken was soggy, any suggestions? I love your blog, I’ve also made nikujaga using the recipe from this website and it came out really well! Thank you for posting all of these lovely Japanese recipes!
Hi Lisa! I’m so happy to hear you enjoyed this recipe! Thank you for your feedback.
I don’t recommend flipping it because always the bottom side looks too flat to serve and I want to save the good looking side. However, I learned that using the (oven safe) wire rack helps to ventilate the bottom side. I usually don’t have the soggy problem (often if you leave out the chicken for a longer time before popping into the oven, the moisture comes out (while waiting for the oven etc). So I recommend pop in immediately after you coated with panko. Don’t leave out the chicken for a long time. It causes wet bottom. So you can do both trick, and it shouldn’t be soggy. 🙂
Hi Nami, I was just trawling the comments to see if anyone’s katsu met with the same fate. I definitely popped the chicken into the oven immediately after coating, but the bottom still turned out soggy. Thanks for the wire rack tip, I will definitely try it out again.
Also, your recipe for homemade tonkatsu sauce is fantastic!
Hi Charel! Thanks for trying this recipe! Yeah, do use a wire rack. It will help the bottom to get crispier. 🙂 Thank you for your kind feedback!
Going to try this next week. Made the spam onigirazu this week for lunch and it was super easy n tasty. This looks like it’ll make a great onigirazu for lunch too. Thanks for the recipes!
Hi Luke! I’m so happy to hear you liked the spam onigirazu! Yay! Yes, I have chicken katsu onigirazu recipe too! Fun, easy, and delicious! 😉
https://www.justonecookbook.com/chicken-katsu-onigirazu/
This is delicious! And healthy! Tastes great and I like browning the panko first.
Thank you Cleone! I’m so happy you liked it!!! Thank you for your kind feedback. 🙂
This is a awesome recipe. thanks for sharing this ours turned out great…
simon
I’m so glad to hear that! Thank you for your kind feedback, Simon! 🙂
Hi Nami, is it possible for me to bake a chicken katsu in a pan ? Coz i just make 1 portion. It will take more additional time if i bake in the oven
Hi Kenken! Sure you can deep fry or shallow fry (for one person, this is even easier). 🙂
Hi Nami, I love your blog so much.
Can I toast the panko in advance and keep in refrigerator?
Hi Jia-Huan! Thank you so much for following my blog! Yes, you can. Make sure to keep it in a airtight container to keep it fresh. 🙂
Hi Nami,
Thanks for the recipe! I made this today. I felt like the panko was a little hard so that it hurt a little to swallow. Any tips on how to make the panko just a little crisp and not hard?
Thank you!
What kind of panko did you use? Japanese panko is very flat and flaky (thin and flat), so I think yours could be different panko? I wouldn’t say the toasted panko is “hard” even they are golden brown…
Made this twice now within the first week of trying out the recipe! such a great way to cook and the chicken soaks the tonkatsu sauce so nicely (we just used the bulldog brand)
winner winner… chicken dinner.
Hi Deb! I’m so happy to hear you like this recipe! Thanks so much for making this recipe and for your kind feedback! 🙂
I love your recipes and videos.
I tried the tonkasu sauce. It’s probably my palete, but there’s a weird aftertaste. Maybe the ketchup?
Thanks and keep up the great videos and recipes!
Pattee
Hi Pattee! Thank you so much for your kind words. Hmm… could be additives in some of the sauce? Was the taste okay? Hope adjusting solved the problem…
Thank you for this beautiful recipe! We cannot get enough of it! Every one has been a success and this is no exception. Instead of panko breadcrumbs, we used cornflakes to make it extra crispy and gluten-free! Made it 2 times in one week already and I can’t wait to make it again! A perfect sheet pan meal for dinner!
Here it is: https://sprinkleofvanillasugar.wordpress.com/2017/09/23/30-minute-japanese-chicken-katsu-sheet-pan-gf-oil-free/
Hi Zoe and Mia! I’m so happy to hear you made GF free version with corn flakes! YUM!! I have GF recipe coming this month as well but instead of corn flakes it’s made out of rice. I will definitely try corn flake version as my kids will love the corn flavor crust. Thanks so much for your kind mention on your blog.
Thank you so much for this recipe!! I’ve been searching for a delicious, easy, baked crispy chicken recipe and none of them worked until yours last night. Everyone loved it! And the homemade tonkatsu sauce, too. I usually don’t care for the ones at restaurants because they’re too sweet, but yours was perfect! Excited to try your other recipes, too. Thanks again!
Hi CJ! Thank you for trying this recipe! I’m truly happy to hear you liked my recipe. Thank you for your kind feedback! Hope you find more recipes that you like on my site. 🙂
No mailing list available
Hi Sonny! I added your email to my mailing list. If you prefer to unsubscribe, you can do so by clicking “unsubscribe” at the bottom of newsletter when you receive it next time. 🙂 Thank you!
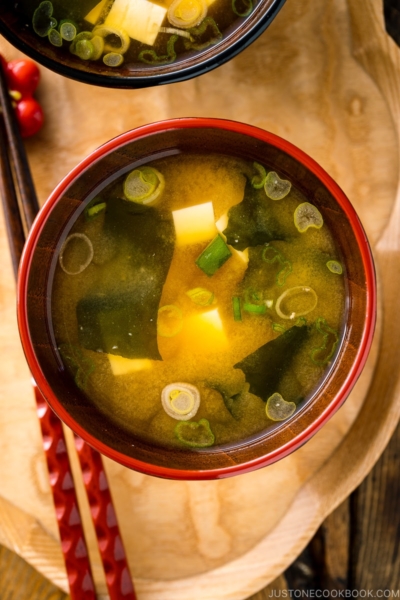
I just cooked had this alongside some miso soup and I have to say it was one of the best home made meals I have ever had!
Hi Jordan! AWESOME! Great job making it! Thank you for trying my recipe and for your kind feedback. You made my day! 😀
Tried it and loved it. I toasted the Panko more cause I like it that way. Thank you. Baking is a much better option.
Hi Joyce! Yay! Thank you so much for writing your kind feedback! Yeah it’s mess free, and healthier! (But I can’t help… I love the deep fried taste and texture no matter I need to deep fry myself. :D)
I found an Italian recipe for baked chicken breasts that cuts a pocket in the thick part of the breast where you put in a baton of cheese (gouda or hard mozzarella) wrapped in a couple of slices ofprosciutto di parma, then crumb them with Saltines (whatever they are). I use the pan browned panko instead and the result is spectacular
Hi Angelo! So happy to use the pan-fried panko technique to create your Italian dish! In Japan, we have a version of chicken katsu filled with cheese too. I’ll share the recipe one day! Thank you so much for your feedback.
I made this and it came out wonderfully! It had that wonderful crisp as I cut it. My husband can be a picky eater but we enjoyed this dinner and are now adding it to the list of meals we rotate through.
Hi Jessica! Thank you so much for trying this recipe and I’m so glad to hear you and your husband enjoyed this recipe! Yay! Thanks for your kind feedback. 🙂
Thank you very much for this recipe I’ve cooked it a few times and it is amazing and healthy! My question is while you also have the recipe for salmon and pork, do you think it’ll work for beef katsu as well? Thanks again
Hi Kay! I’m glad to hear you enjoy this recipe and thanks for your kind feedback. Yes, you can use beef as well, but I think it’s slightly harder to control doneness. Use an instant-read thermometer may help to check the internal temperature. 🙂
Amazing! I love fried food, but it’s not that healthy no matter how healthy you try to make it. This was the perfect twist on traditionally fried Chicken Katsu. I added lemons on top when I baked them and they taste great!
Hi Shiann! Thank you so much for trying this recipe! I’m so happy you enjoyed it. Thanks for the kind feedback. 🙂
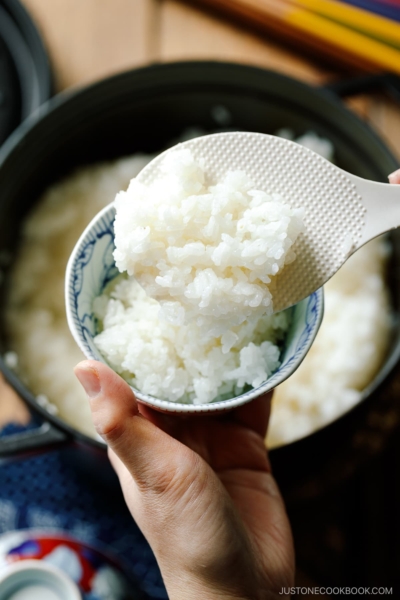
This was absolutely delicious! I followed the recipe to the letter, and I served thinly sliced cabbage, and steamed rice alongside. My husband and I greedily ate the whole thing!
Hi Meghan! Thank you so much for trying this recipe! I’m so glad to hear you and your husband enjoyed this recipe! Thank you for your kind feedback. 🙂
Thank you for this recipe! My husband loves Katsu (mostly Tonkatsu though), but wants to watch his diet a bit – no more Ham Katsu (T-T) . At first he said, it’s not really Katsu, if it’s baked and he was really skeptical. Then he tried it and really liked it! He was happy he could eat his Katsu Curry 🙂
Today I try making an “italian” version with dried herbs and garlic powder in the crust. I’ll serve it with stewed zucchini, eggplant and tomato.
Thank you again for all the great recipes!
Hi Miya! Hahaha! I’m glad he came around and liked the baked version! And I love the Italian version. I also make a similar crust with garlic powder, herbs, and grated cheese in it too. I’d serve it with stewed vegetables like yours next time! Thank you so much for your kind feedback!
Nami-san –
We batch cook in our house so can I simply double or triple the ingredients evenly?
Hi Rob! Yes, you’re correct. 🙂 (Sorry about my late response. I was traveling…)
Nami – – Thank you! While waiting for your reply, I just decided to give it a try, in batch. Other than keeping the oil to panko ratio straight, I just had to make sure I had enough flour (to dredge) and egg (to cover). Have since made it twice and my kids (who happen to be half-Japanese) love it!!!!! They even take it for lunch in their bento. My wife is thrilled that not only are the kids (and us) eating healthier but the clean-up is a whole lot easier; no grease splatters, no frying pans to scrub, and no oil to have to dispose of. Thanks again. – Rob
Hi Rob! I’m so happy to hear your whole family enjoyed it! Thank you so much for your kind feedback. 🙂
Hi Nami-san, thanks for the wonderful sharing.
May I know can we bake the chicken in batch, and then keep in freezer when it has cooled down? Do we need to wrap each baked chicken and keep in freezer bag?
Thank you.
Hi Wan! What I do is to bake the chicken. Let cool, and wrap two pieces (I have 2 kids who bring bento) in aluminum foil. Then put aluminum wrapped katsu in a ziploc bag. When I make bento (or ready to eat), I take out, unwrap the foil and go straight into the oven to reheat. 🙂
thank you Nami !!
Hi Nami, can we do this in batch and keep in freezer? Should I bake first then keep?
Hi Wan! Yes, that’s what I would recommend. 🙂 Reheat in the oven or oven toaster when you are ready to eat. 🙂
Just made this last night. Got rave reviews. Toasting the panko did the trick
Hi Rachel! I’m so happy to hear you enjoyed this recipe! Thank you for trying it and for your kind feedback. 🙂
This was so good! I made the tonkatsu sauce and it really elevated the chicken. I highly recommend eating this over a bowl of rice with a side of garlic bok choy!
Hi Ysela! Thank you so much for trying my recipe and for your kind feedback! I’m so happy to hear you enjoyed it. 🙂
Hi Nami,
Thanks so much for the recipe! I just tried making this but my katsu crumb became soggy after I baked it in the oven. Do you have any suggestions on what I might have done wrong?
Will definitely attempt this recipe again. Hopefully i’ll get it right next time 🙂
Hi Chloe! Thanks for trying this recipe. I recommend getting a wire rack for your baking sheet. That’s what I use these days so the bottom of the katsu gets crispy while you bake (See step 9 in this post – https://www.justonecookbook.com/baked-katsudon/). Also you have to remove the katsu to a wire rack after baking, so the moisture doesn’t build up on the bottom from the heat. 🙂
Hi Nami,
I tried this recipe and everybody loved it! Used this technique to make baked “fried” fish and it worked well. Thank you!
Hi Junko! Thank you for trying my recipe! I’m so happy everyone loved this recipe! I’m so happy to hear that. I make it with salmon with tartar sauce too (https://www.justonecookbook.com/crispy-salmon/)!
This was so easy and delicious! And relatively healthy too 🙂 my friend even liked it better than the fried version you get at restaurants!
Hi Rebecca! I’m so happy to hear you and your friend enjoyed this recipe! Thanks so much for trying this recipe and for your kind feedback! 🙂
I was not expecting this recipe to be so simple! I usually end up using chicken for dishes that go with rice, pasta, noodles ect., however, I wanted to try something with just chicken by itself so I could have some vegetable separately with it. The chicken remained juicy and the crumb was crunchy like it had been deep-fried, but without the oil! I’ll definitely be making this more often.
As always, thanks Nami!
御馳走様でした!
Hi Julia! I’m glad you liked it! It’s a lot easier to bake this dish but I still love deep frying. 😀 It’s less messy, no oily deep fry smell, and it’s a lot healthier this way. Thanks for trying this out! ありがとう!
Any changes to cooking time if I use boneless skinless chicken thighs?
Hi Ewhang! Roughly same, and depends on the size, too. 🙂
Hello! Can I use chicken thigh fillet instead of chicken breast?
Hi Rizza! Sure! 🙂
I’ve made this baked chicken katsu a few times now. Great idea to toast the panko. So delicious! My husband and I really enjoy this healthier version. Thank you for sharing.
Hi Cindy! Thank you so much for trying this recipe! I’m so happy to hear you and your husband enjoy this dish. 🙂
Hi Nami, thank you for sharing this fabulous recipe. I rarely prepare deep fried food and for me baking is definitely a much healthier choice. The pre-toasting of the panko is the perfect method to get the crisp in the oven. I have tried different recipes without pre-toasting panko and they never turned out right. I had the katsu with Japanese curry and rice. My family enjoyed the meal.
However, I still can’t achieve the kind of tenderness for the chicken meat. Do you think by reducing the baking duration or adjusting the temperature would help?
Hi Carel! Thank you for trying this recipe! I’m really glad to hear pre-toasting method worked great! Thanks for your feedback. 🙂 Yeay, try that and you can pound the meat too with the back of your knife a bit. 🙂
I cooked this recipe for dinner tonight and it was delicious! Chicken perfectly cooked and coating crunchy yummy 😋 It’s better for my stomach since for me it’s difficult to eat fried food sometimes.
This will be a regular on my menu. Thank you 😊
Hi Lesirg! Thanks so much for trying this recipe! I’m so glad you enjoyed it! 🙂
Gosh how tasty! Schnitzel has always been a guilty pleasure of mine. Love replacing the pork with chicken, baking it in the oven and using crunchy panko. I actually used chicken thighs. A little less pretty but very tasty!
Hi Afra,
Thank you so much for trying this recipe and for your kind feedback.
We’re so glad to hear you enjoyed this baking chicken version!! 🙂
It was so delicious! My siblings really liked it. Do you have any tips for ensuring chicken breast isn’t overcooked? I stuck a thermometer into it every five minutes after 20 min but it still ended up slightly dry.
In addition, panko crumbs kept falling off the chicken breast. It didn’t change the flavor at all, and we kinda just gathered the bits back up, but I only wonder if there’s a way to prevent this? I thought I slathered the egg on pretty good.
Hi Chelle,
Thank you very much for trying this recipe!
To ensuring the meat is cooked, You may use a meat thermometer that can stay in the oven throughout the cooking period. So that you are not opening the oven door every five minutes. Each time you open the oven door, the heat will escape from the oven and ended up baking a longer time than usual, and the meat gets dry. Also, panko crumbs will fall off every time you touch the meat.
Once you find how long your oven needs to bake the chicken, it will be much easier next time.
We hope this helps!
Hi Naomi!
Thank you for this recipe, it became a favorite here! My boyfriend calls it “magic chicken” as it’s super simple and so much healthier and better than the fried version. It’s his new comfort food after a tiring day of work. He’s a chef and make delicious food, but he asks me to make this chicken almost every Saturday for dinner. Thank you so much! Love your blog and your other recipes too!
Hi Jenny!
Aww… Thank you very much! ♥️
We are so happy to hear you and your boyfriend enjoy this baked version.
Thank you for trying this recipe and for your kind feedback.
Hi, after baking, why is the bottom sometimes wet and not crispy?
Hi Jacqueline,
Thank you for trying this recipe!
Did you use a wire rack, as Nami mentioned in this recipe? During the baking, the chicken’s moisture builds up, and it will not be crispy if you use a baking sheet.
We hope this helps!
Sorry if this has already been asked. How long would you cook it in a convection oven on a wire rack? Thanks!
Hi Lily, Baking time is about 25-30 minutes. (Step 4) If you are using a convection oven with a fan, don’t forget to reduce the oven temperature by 25F! (for this recipe, 375F) We hope this helps!