No rice cooker? No problem! Learn how to make a pot of Japanese white rice on the stove. My simple tips and tricks will ensure that your steamed rice comes out perfectly every time.
Growing up in Japan, where rice is a staple food and the primary source of protein, cooking rice is not only a basic kitchen task but also an extremely important one. While an electric rice cooker with all the bells and whistles seems to be an essential kitchen gadget in most Asian kitchens, I understand that not everyone eats rice daily and may not own a rice cooker. It’s also handy to know how to make rice on the stove in case your rice cooker breaks unexpectedly or you’re craving rice while camping.
In this post, let’s get back to basics, and I’ll show you how to measure rice accurately, wash it properly, and finally cook Japanese rice in a pot on the stove.
Table of Contents
What is Japanese Short-Grain Rice?
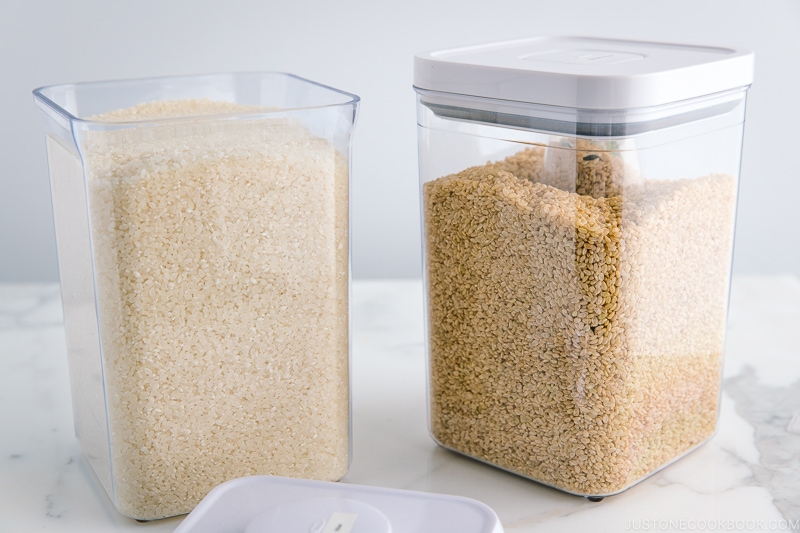
Japanese rice is a type of Japonica short-grain rice that is short, plump, and rounded oval. It’s worth noting that outside of Japan, Japanese rice is often labeled as ‘sushi rice’ for marketing purposes. However, rice is used not just for making sushi, but also for everyday Japanese dishes.
What sets Japanese rice apart from long-grain rice varieties such as basmati or jasmine rice is its high water content, which means the texture is more tender and moist. The grains contain less amylose—a type of starch that separates rice grains— than the long grains, giving them a more sticky, chewy texture.
When cooked properly, the rice grains cling to each other without becoming mushy, allowing you to easily pick up the rice with chopsticks. You’ll also notice a beautiful glossy sheen on the surface of the rice. These unique characteristics of Japanese short-grain rice are essential because they allow us to make dishes like rice balls (onigiri) and sushi that need to stay in one piece.
Sometimes I hear people calling Japanese rice “sticky rice” due to its sticky texture, but please know that ‘sticky rice’ is technically a different type of rice known as sweet rice or glutinous rice, which we use for making mochi (rice cakes).
👉🏼 To brush up your knowledge, I highly recommend reading Everything You Need to Know about Japanese Rice and Types of Japanese Rice.
Best Japanese Rice Brands
When it comes to high-quality Japanese rice, I recommend the Koshihikari variety, which is available in various brands at Japanese grocery stores. Known for its sweet taste and fragrance, Koshihikari is the most popular variety in Japan. I personally prefer the Toyama-grown Koshihikari imported from Japan, which is available at Japanese grocery stores (I purchase mine at Nijiya Market in San Mateo).
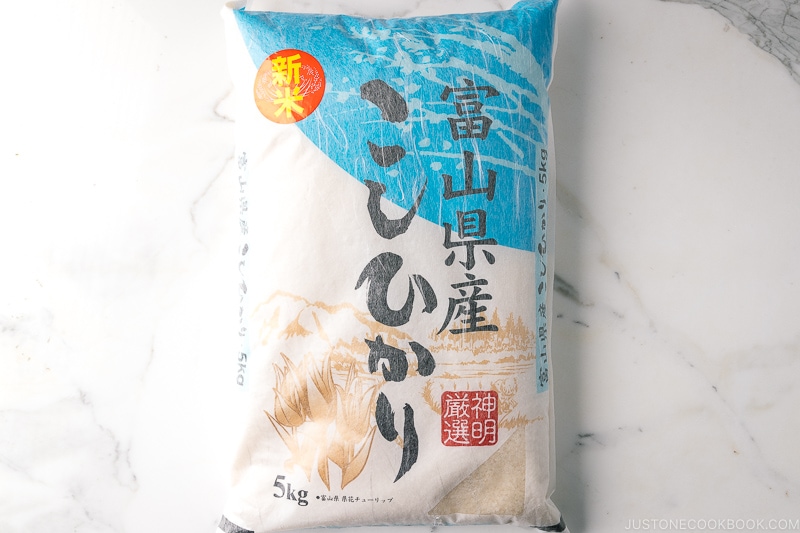
For US-grown koshihikari rice, look for Shirakiku Rice, Tamaki Gold, and Tamanishiki Super Premium Short Grain Rice. For brown rice, we enjoy Genmai Sukoyaka Brown Rice and Koshihikari Premium Sprouted Brown Gaba Rice.
There are also other new cultivars such as Hitomebore, Akitakomachi, Tamanishiki, Tsuyahime, and so on. Each of them has unique characteristics that are different from Koshihikari.

What Kind of Pot to Use
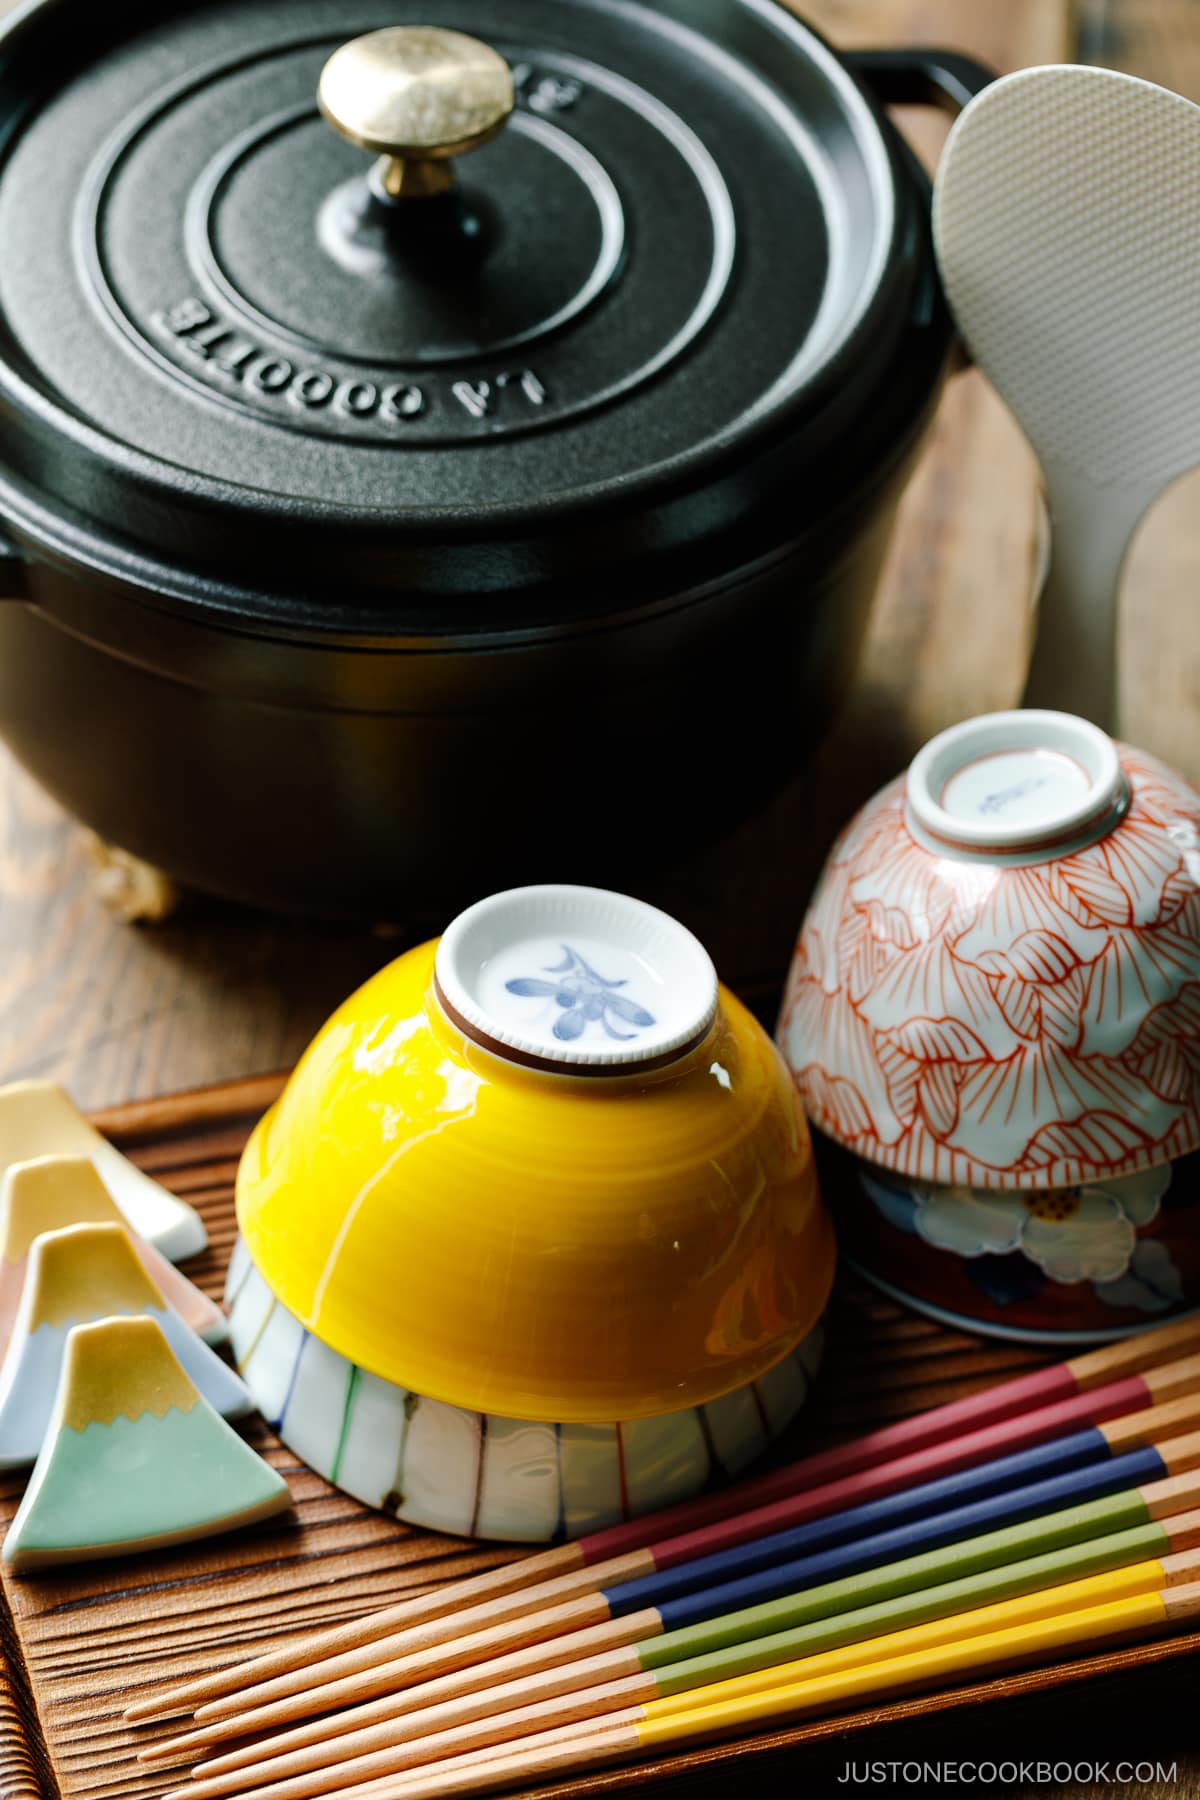
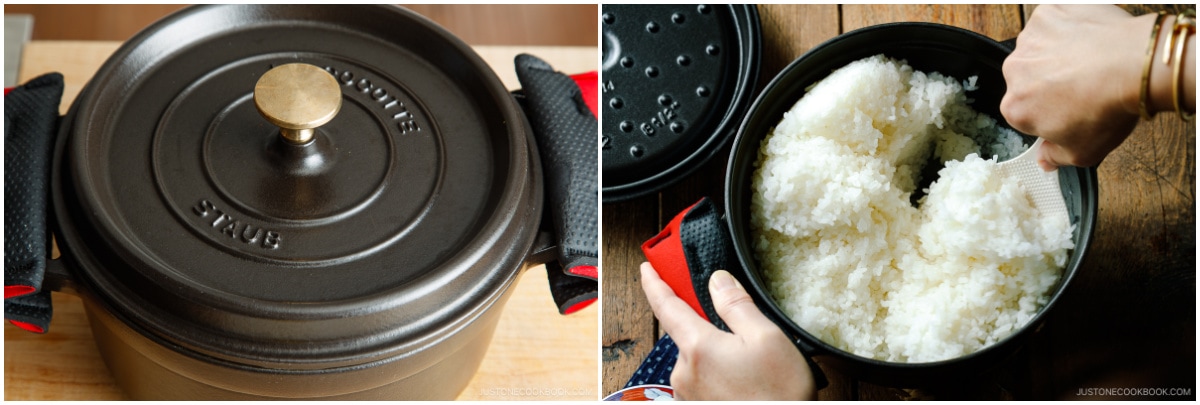
Use a heavy-bottomed pot when cooking rice. The even heat distribution prevents the bottom of your rice from easily getting burnt. Personally, I love using Staub, especially for cooking rice. Compared to other popular Dutch oven brands, Staub features a better, tight-fitting lid that traps all the steam inside.
An alternative option I recommend is a donabe—a Japanese earthenware clay pot. If you plan to use a donabe, I have a separate post on How to Cook Japanese Rice in a Donabe.
How to Measure Rice and Water
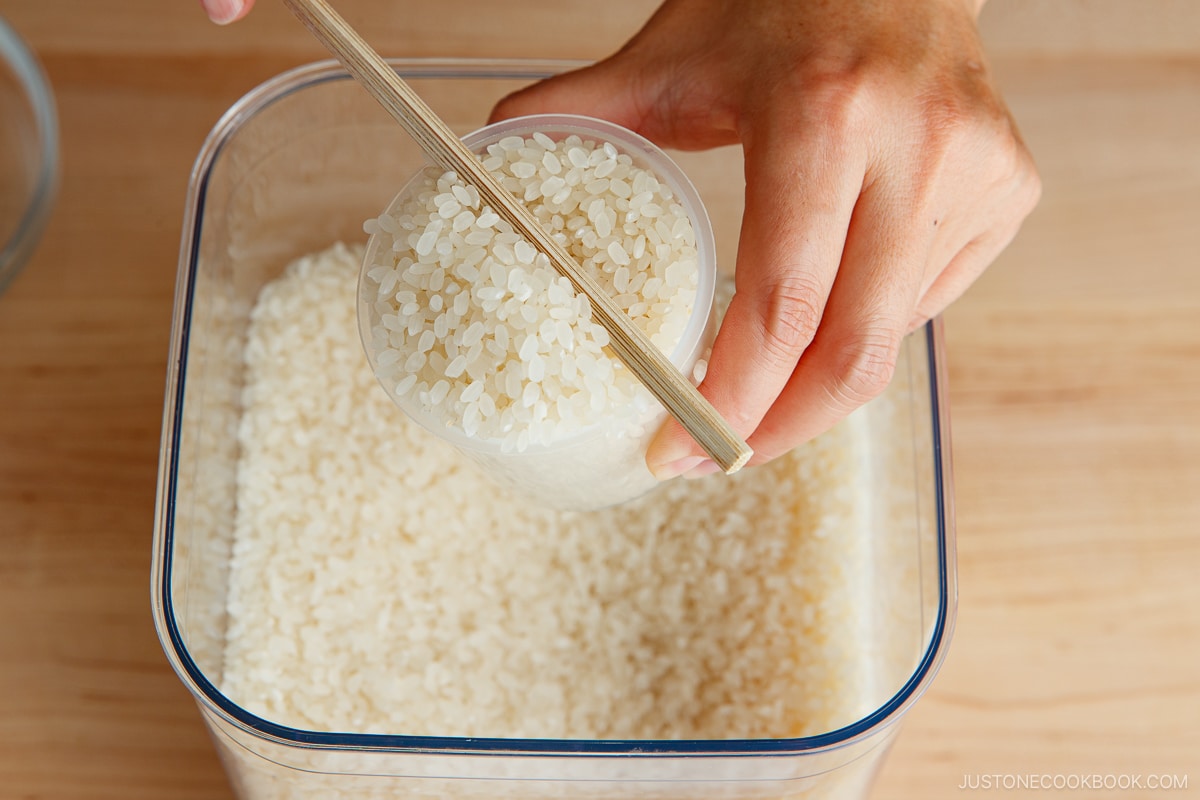
In Japan, rice is always measured with a rice cooker cup, which is 180 ml or American ¾ cup. To measure correctly, overfill a rice cooker cup (or a ¾-cup measure works well for this) with rice and level it off. Failing to level it off may result in your rice not having enough water to cook properly.
Rice-to-Water Ratio
One of the reasons people often struggle to make Japanese rice is due to using the wrong amount of water. There is a lot of misinformation online. To cook Japanese short-grain white rice, the correct rice-to-water ratio is as follows:
The golden rule for the rice-to-water ratio [volume] is 1:1.1 (or 1.2).
This means:
- This means you will need 10–20% more water than rice.
- 1 rice cooker cup (180 ml) of rice – 200 ml of water
- 1 US cup (240 ml) of rice – 1⅛ cups of water (or 264 ml since the rounded-up cup measurement is not accurate)
I recommend getting a rice cooker cup (you can get it on Amazon) and using metrics to measure your water.
How to Wash the Rice
The technique of washing rice is often discussed, and each culture likely follows a different approach.
Here are the quick key points:
- Wash rice in cold running tap water; never use warm/hot water.
- Do not use a strainer to wash rice because it can break the rice.
- Discard the first rinsing water immediately before the rice starts absorbing impurities.
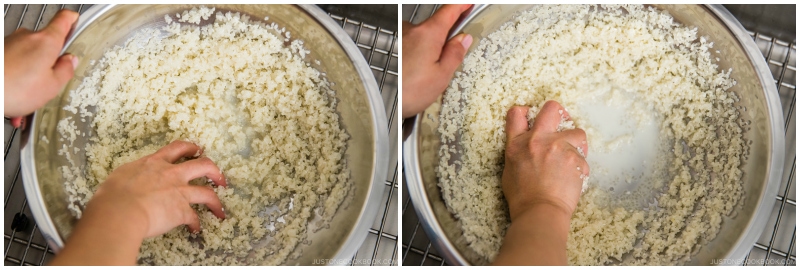
- Use your fingers to gently agitate the wet rice grains in a circular motion for 10–15 seconds. The bowl should have very little water, which allows the grains to rub against each other. Rinse and wash one to two more times until the water is almost clear.
Why Do We Soak the Rice?
Aside from using the incorrect amount of water for rice, another reason people struggle to make perfect Japanese rice is not soaking the rice.
Since soaking isn’t necessary for other types of rice, you might assume it’s a waste of time or unnecessary. However, this results in rice that isn’t cooked through because the core remains hard.
Consider the Japanese short-grain rice kernel: it has a plump body and requires a longer time to absorb moisture to the core. That’s why we give it a headstart by soaking the rice for at least 20-30 minutes.
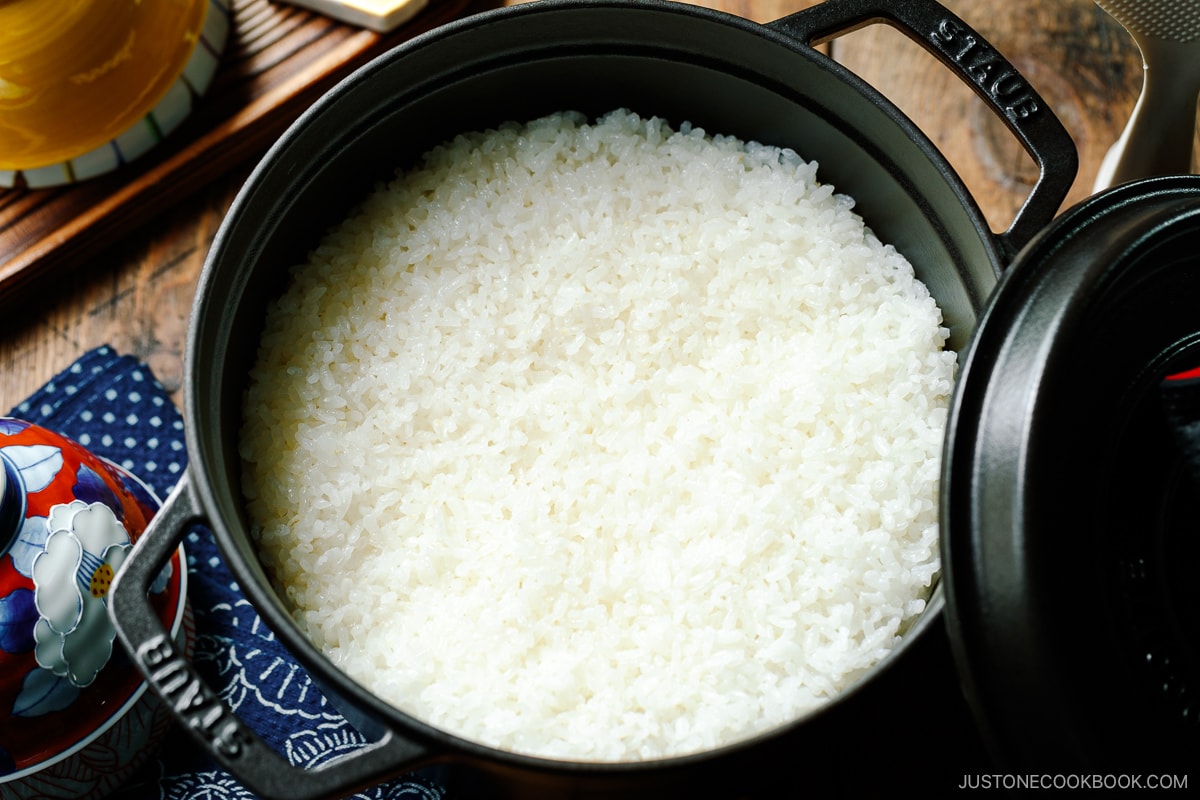
How to Cook the Japanese Rice on the Stove
After 20-30 minutes of soaking, we’re now ready to cook the rice!
- Cover the pot with the lid, leaving a small gap, and bring it to a boil over medium heat. Take a quick peek to see if the water is boiling.
- Once the water is boiling, turn the heat to low and cook, covered, for 12–13 minutes.
- When it’s done cooking, open the lid and take a quick peek to check if the water is completely absorbed. If there‘s water left, close the lid and cook for a little longer.
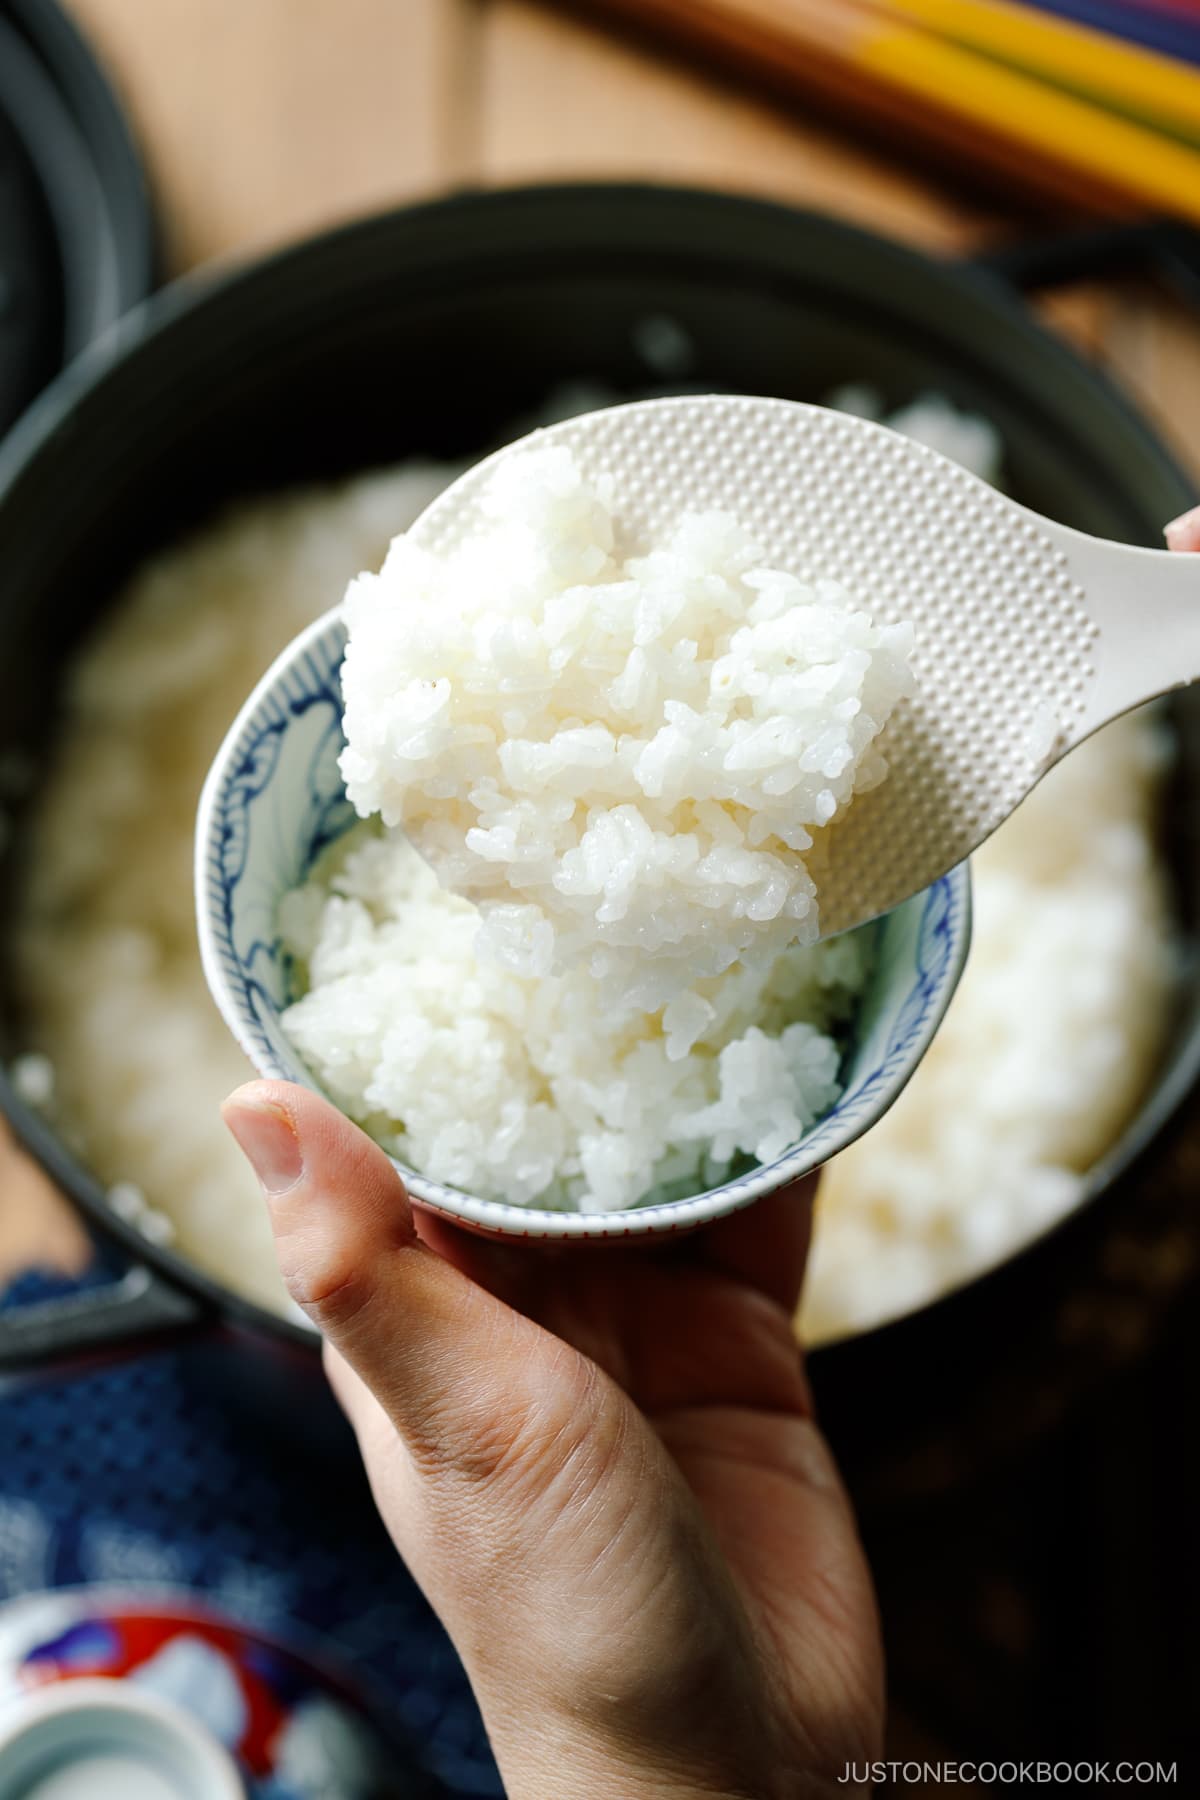
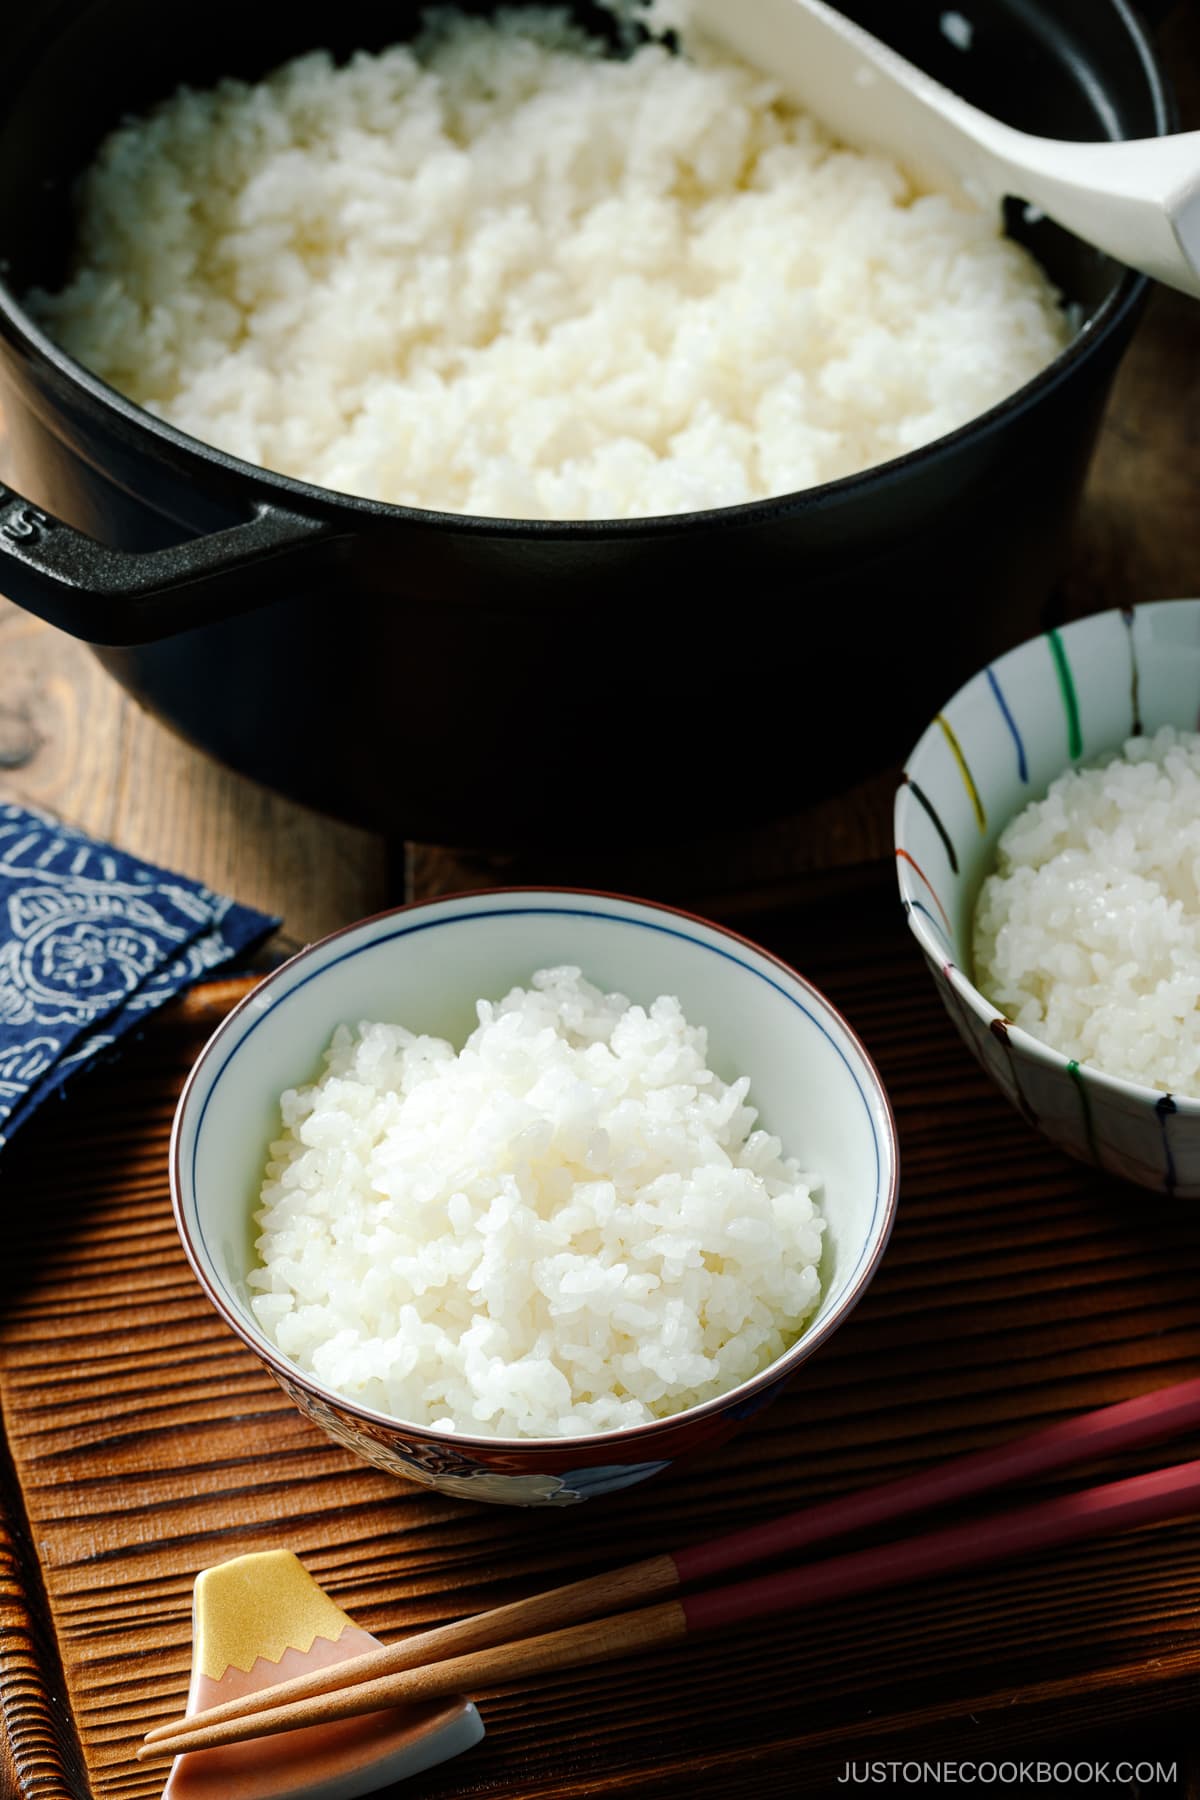
- Remove from the stove and let it steam with the lid on for another 10 minutes.
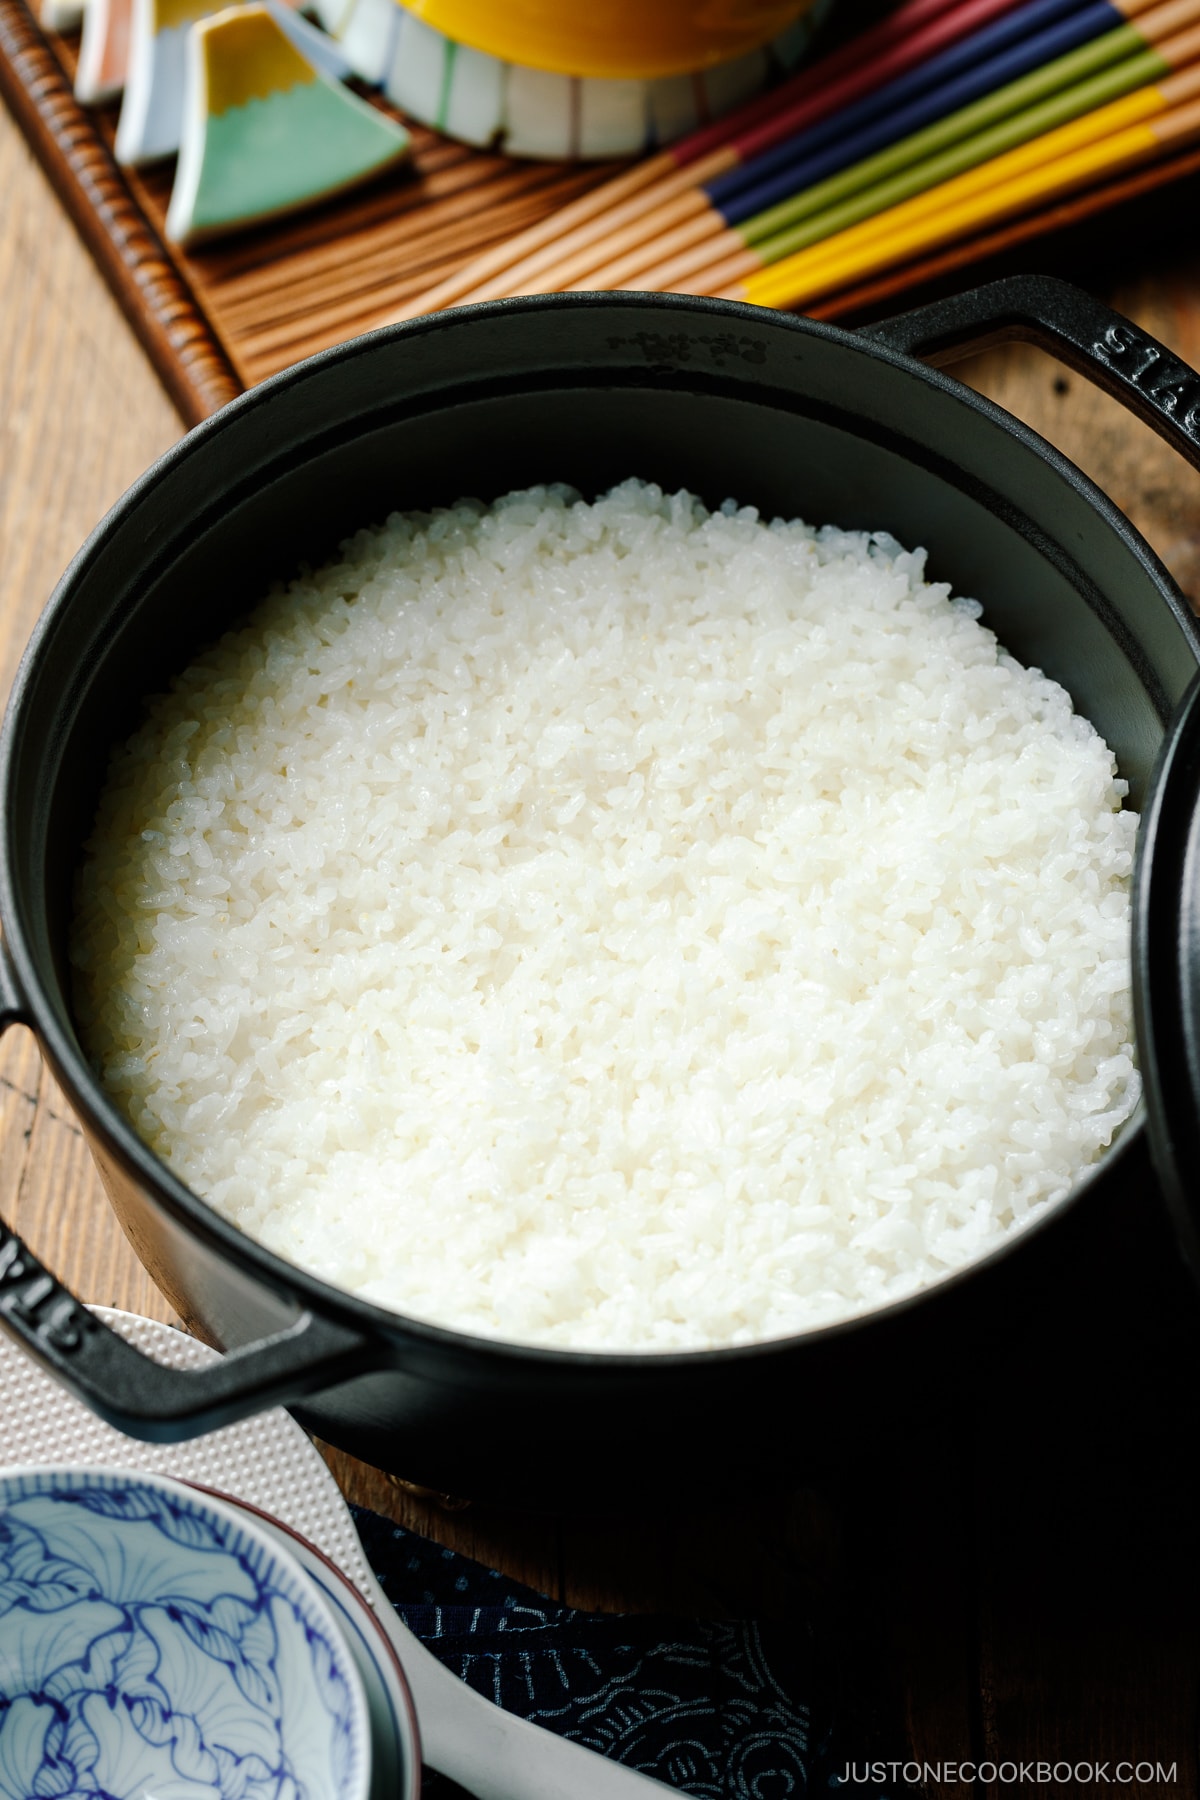
- After 10 minutes, uncover the pot and fluff the rice with a rice paddle. It‘s now ready to serve.
Cooking Tips
Here are 5 main tips to cook a perfect pot of glossy and tender Japanese rice:
- Wash and rinse the rice. Always start by quickly rinsing and washing the rice a few times to help remove the natural occurrence of arsenic and impurities.
- Use a heavy-bottom pot with a tight-fitting lid. If your lid fits loosely, put a clean kitchen cloth between the lid and the pot to keep the steam in.
- Always soak the rice in water for 30 minutes. Rice has been sitting in the bag dried after milling, so it needs moisture to revive the texture. You must give it enough time for the rice to absorb water so that it has a perfect texture after cooking.
- DO NOT open the lid while cooking! This is a big no-no when it comes to cooking Japanese rice. I learned from my experience to catch the indication of “boiling” by sound. However, until you do, it’s okay to “quickly peek” inside to see if it’s boiling.
- Rest and fluff. Once the rice is cooked, let it rest for 10 minutes to steam fully, and then fluff to help evaporate the excess moisture.
Best Way to Store Cooked Rice
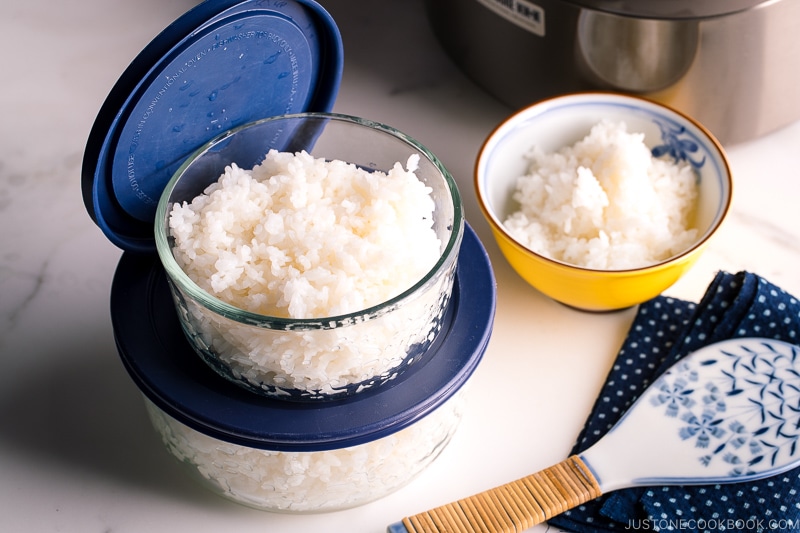
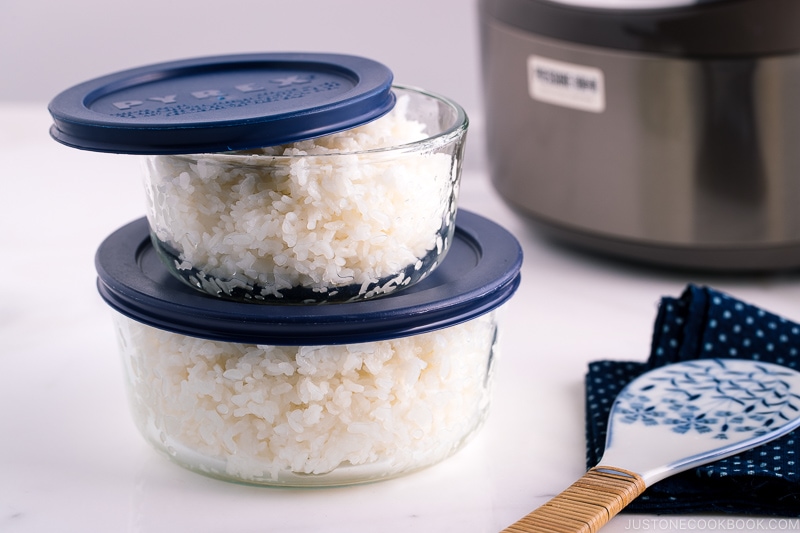
What’s the best way to store the leftover rice? Japanese people always freeze the rice! We never refrigerate the rice because it gets hard.
I use a glass container with a lid. If you already know how much rice you will be using, pack away the freshly made rice immediately to seal in the moisture. Be sure to let it cool before putting it in the freezer.
To reheat the rice, open the lid, place a wet paper towel over the glass container, and microwave. It’s just like freshly made rice.
Pro Tip: I always pack different portions (one serving and two servings) so we can defrost the right amount.
Other Ways to Cook Japanese Rice
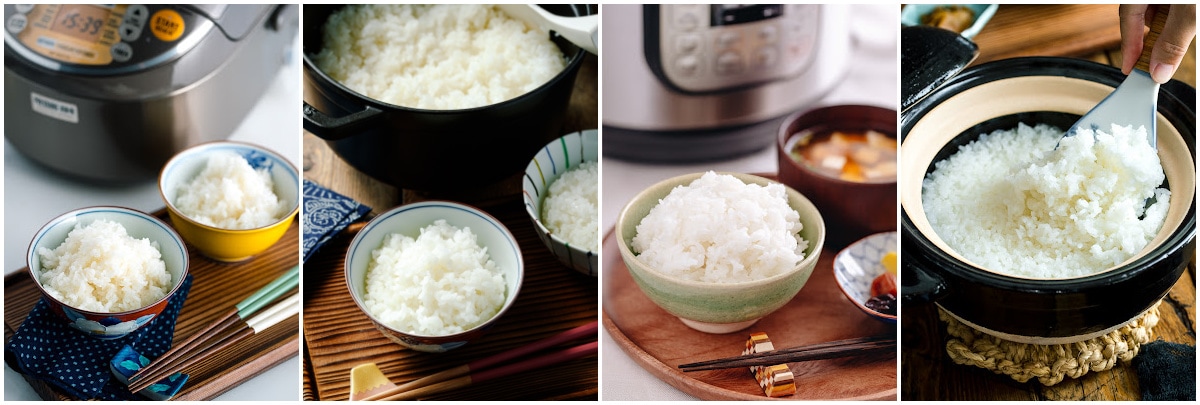
There are different methods to cook Japanese rice at home. Each method has its advantages, and Japanese households often own a few cooking pots/gadgets for different occasions and needs.
- How to Cook Japanese Rice in a Rice Cooker
- How to Cook Japanese Rice in a Pot on the Stove
- How to Cook Japanese Rice in an Instant Pot
- How to Cook Japanese Rice in a Donabe on the Stove
- How to Cook Short-Grain Brown Rice in a Rice Cooker
- How to Cook Short-Grain Brown Rice in an Instant Pot
Wish to learn more about Japanese cooking? Sign up for our free newsletter to receive cooking tips & recipe updates! And stay in touch with me on Facebook, Pinterest, YouTube, and Instagram.
How to Cook Japanese Rice in a Pot on the Stove
Video
Ingredients
For 2 Rice Bowls (2¼ cups, 330 g cooked rice)
- ¾ cup uncooked Japanese short-grain white rice (1 rice cooker cup, 180 ml)
- ⅞ cup water (200 ml)
For 4 Rice Bowls (4⅓ cups, 660 g)
- 1½ cups uncooked Japanese short-grain white rice (2 rice cooker cups, 360 ml)
- 1⅔ cups water (400 ml)
For 6 Rice Bowls (6⅔ cups, 990 g)
- 2¼ cups uncooked Japanese short-grain white rice (3 rice cooker cups, 540 ml)
- 2½ cups water (600 ml)
For 8 Rice Bowls (8¾ cups, 1320 g)
- 3 cups uncooked Japanese short-grain white rice (4 rice cooker cups, 720 ml)
- 3⅜ cups water (800 ml)
For 10 Rice Bowls (11 cups, 1650 g)
- 3¾ cups uncooked Japanese short-grain white rice (5 rice cooker cups, 900 ml)
- 4⅛ cups water (1000 ml)
Instructions
- Before You Start: Please note that Japanese short-grain white rice requires a soaking time of 20–30 minutes. The rice-to-water ratio is 1 to 1.1 (or 1.2) for short-grain white rice. The ratio for brown rice is different; to learn more, read how to cook short-grain brown rice in a rice cooker or Instant Pot.Also note that ¾ cup (150 g, 1 rice cooker cup) of uncooked Japanese short-grain rice yields 2¼ cups (330 g) of cooked rice. This is enough for 2 Japanese rice bowls (typically 150 g each) or 3 onigiri rice balls (typically 110 g each). 1 cup of cooked rice weighs about 5.3 oz (150 g).

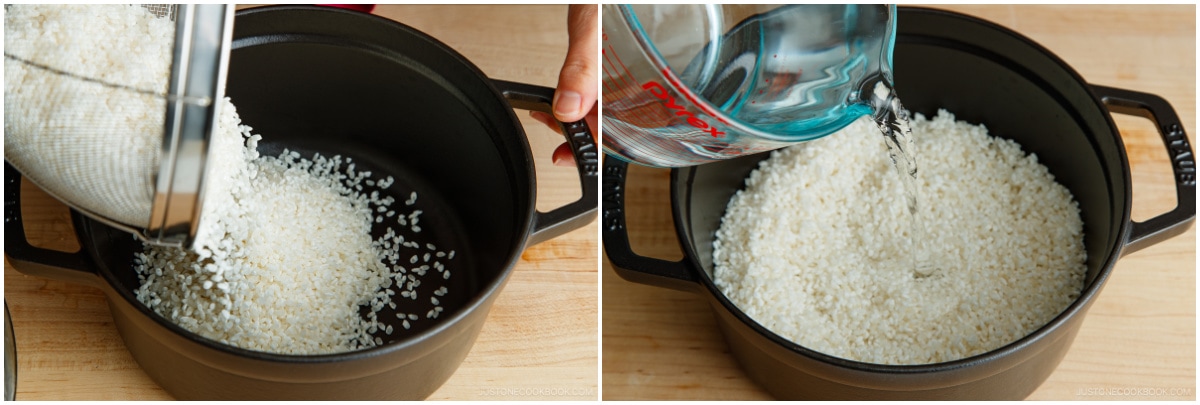
- How to Measure: Overfill a plastic rice cooker cup (or use a ¾-cup measure) with uncooked short-grain rice and level it off. Put the rice in a large bowl. Repeat until you have the measured amount of rice needed. For this recipe, I measured 2¼ cups (3 rice cooker cups) of short-grain white rice. Tip: Without leveling it off, your rice will not have enough water to cook properly.

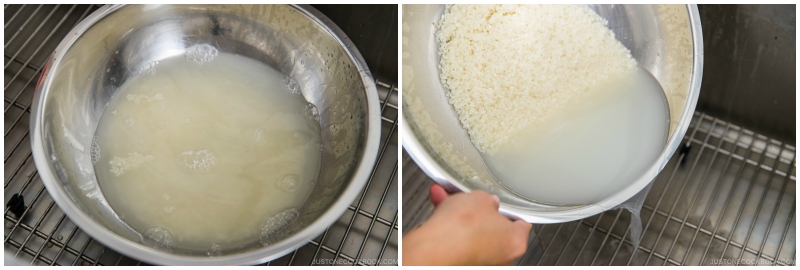
To Wash the Rice
- Quick Rinse: Add just enough tap water to the bowl to submerge the rice. Then, discard the water immediately. Tip: Rice absorbs water very quickly when you start rinsing, so this quick rinse helps remove impurities from the rice and prevent it from absorbing the first few rounds of milky water.

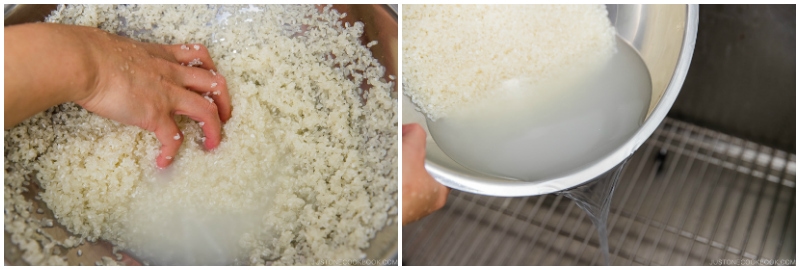
- Wash: Next, use your fingers to gently agitate the wet rice grains in a circular motion for 10–15 seconds. Don‘t use a strainer as it can break the rice. Tip: Using very little water allows the grains to rub against each other. It also reduces the absorption of impurities from the milky water.
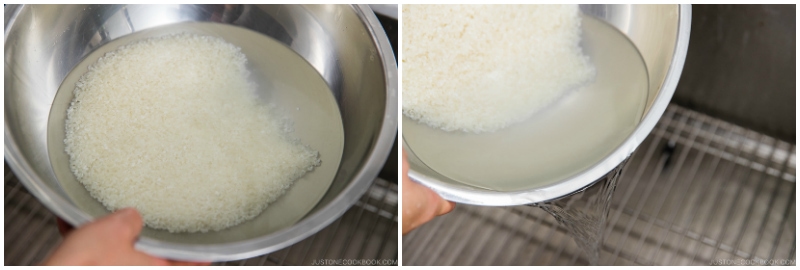
- Rinse: Add tap water and immediately discard the cloudy water. Repeat one more time.
- Repeat the Wash and Rinse process (steps 2 and 3) one to two more times.
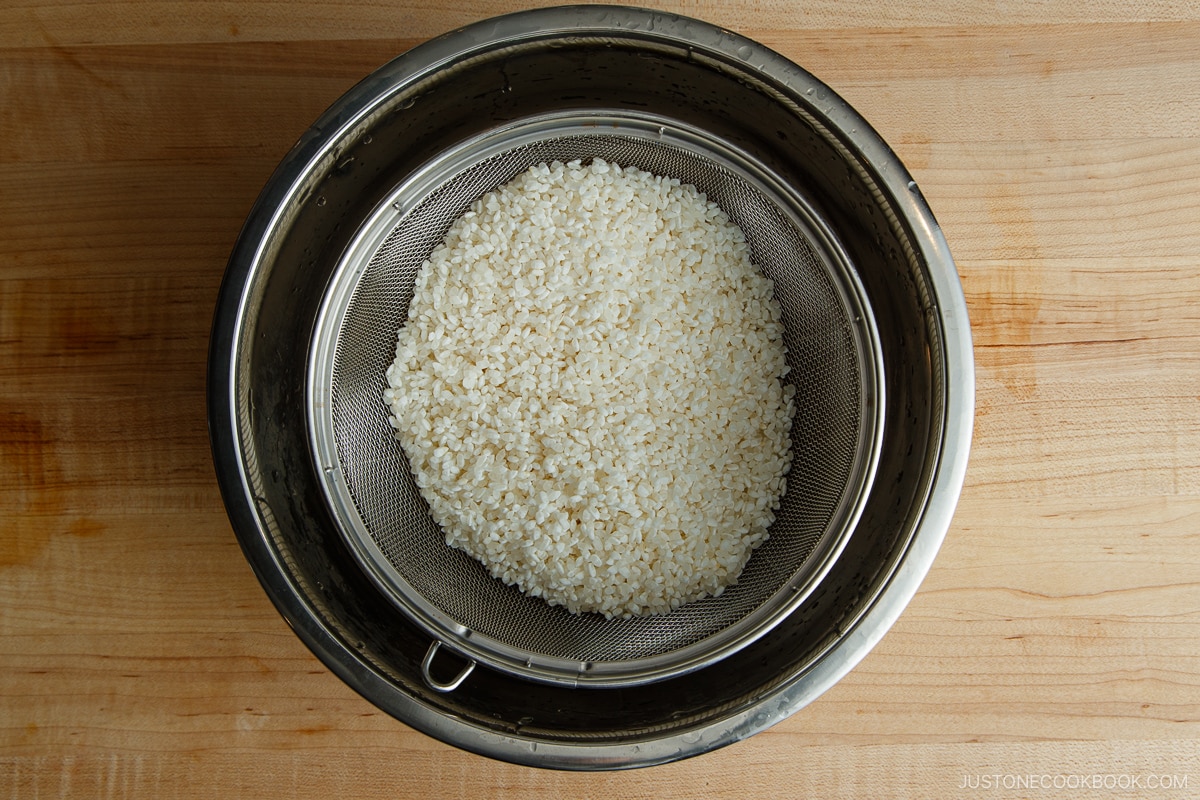
- Drain: When the water is almost clear, drain the rice completely.
- Use a fine-mesh sieve to drain and shake off any excess water. Do not leave it for more than 5 minutes as it can easily get too dry.

To Soak the Rice
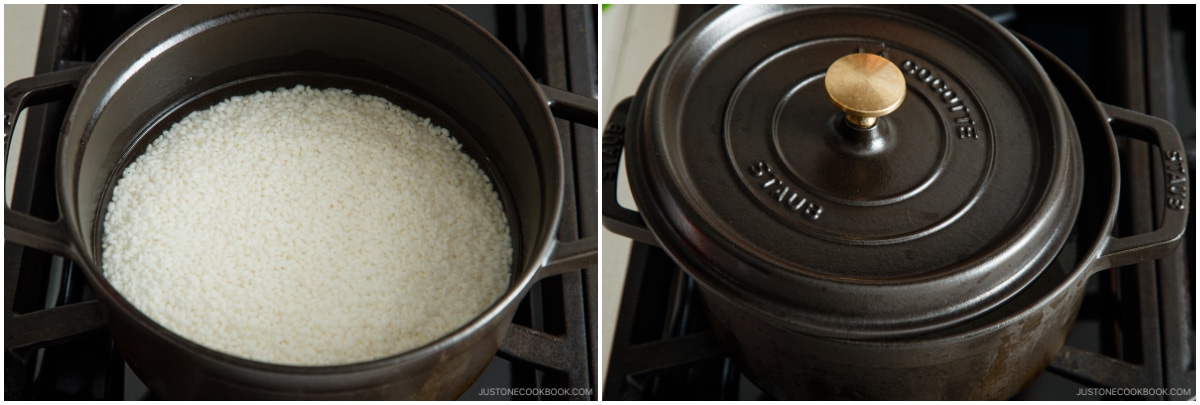
- Put the well-drained rice and measured water in a heavy-bottomed pot with a tight-fitting lid. For example, if you‘re cooking 2¼ cups uncooked Japanese short-grain white rice (3 rice cooker cups), add 2½ cups water (600 ml). Soak the rice for 20–30 minutes before cooking.

To Cook the Rice
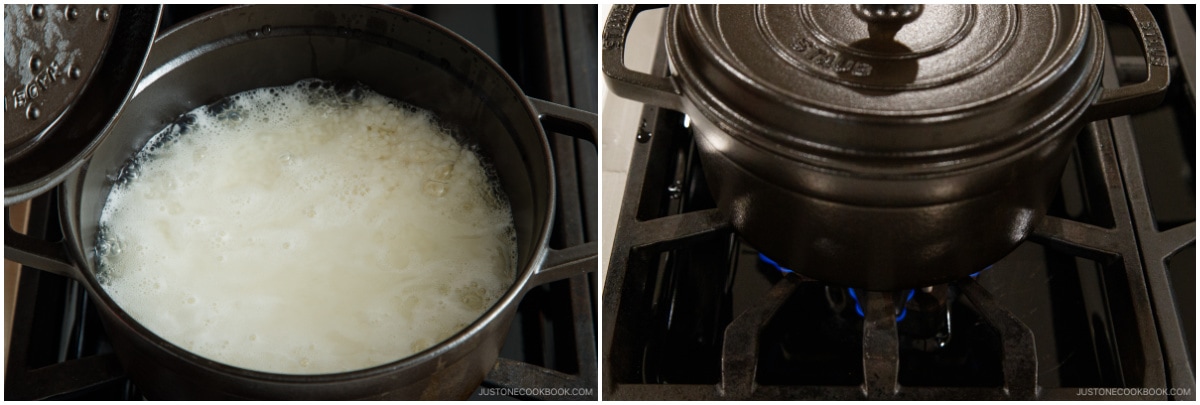
- Cover the pot with a lid slightly ajar and bring it to a boil over medium heat. Take a quick peek to see if the water is boiling.
- Once the water is boiling, turn the heat to low and cook, tightly covered, for 12–13 minutes.
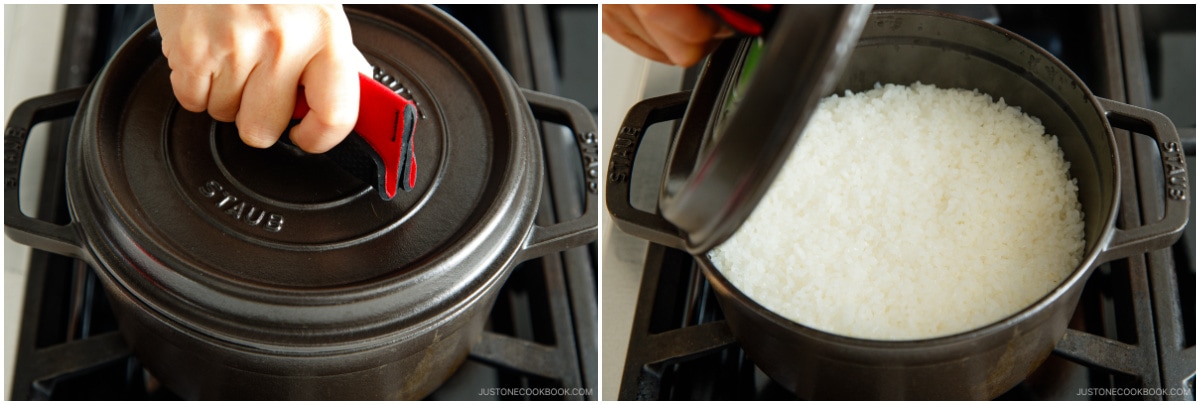
- When it‘s done cooking, open the lid and take a quick peek to check if the water is completely absorbed. If there‘s water left, close the lid and cook for a little longer.
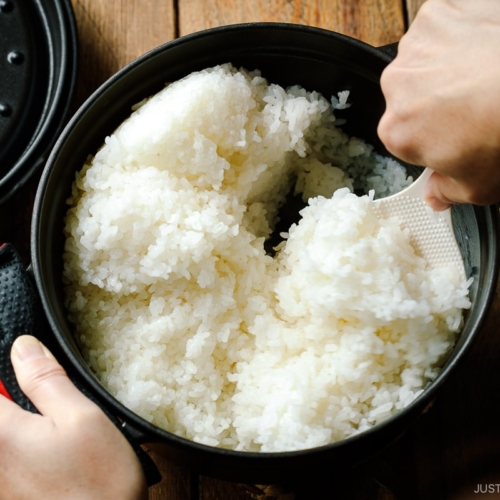
To Steam the Rice
- Remove from the stove and let it steam with the lid on for another 10 minutes. Tip: This resting period is crucial for the rice to steam properly. Resist the urge to peek under the lid and release the steam during this time. After 10 minutes, uncover the pot and fluff the rice with a rice paddle. It‘s now ready to serve.
To Store
- Transfer the rice to airtight containers and close the lids to keep the moisture in. Let cool completely before storing the containers in the freezer (read my tutorial post on how to freeze rice).

Nutrition
Editor’s Note: This post was originally published on December 4, 2013. It was republished with a new video and more helpful content on March 15, 2024.


Just tried it and the result was great, thank you!
In Japan rice isn’t cooked in seasoned water (in Portugal we always cook it in salted water). Is it because it’s combined with other ingredients that have stronger/salted flavours and it ends up being seasoned or what you’re after is that “clean”/bland flavour ?
Oh and, sorry if you already answered this question, does the washing of the rice influence the degree of stickiness of the rice or is it just to clean the possible impurities? Thank you
Hi Catarina! Not the stickiness, but more for taste. You can taste the difference when you rinse vs you don’t. 🙂
Hi Catarina! We do have seasoned rice (we call it “Takikomi Gohan”: https://www.justonecookbook.com/?s=takikomi+gohan), but we normally eat plain rice because other food is salty (soy sauce and miso are salty). Japanese rice in Japan taste amazing by itself. It’s something we can’t get oversea. If you have a chance to visit Japan, do enjoy simple white rice. It’s shiny, fluffy, and has sweet taste to it. 🙂
Hi,
I am wondering if rice is cooked the same way everytime no matter what it’s used for? For example, rice for sushi would be the same cooking method for rice to eat on the side with your main entree?
Thanks!
Good question! I’m glad you asked. I mentioned in How To Make Sushi Rice post, but I didn’t write it here. When you make sushi rice, we do decrease water a little bit as we pour sushi vinegar AFTER cooking rice. So we make rice with less water. Otherwise, you will cook rice same way. 🙂
Thank you!! Will try your pieces of advice – I had a housekeeper from the Philippines for 14 years and she used to make Japanese rice for us in her rice cooker. Once I moved to the US , I decided not to buy a rice cooker and cannot seem to be able to do it in my dutch oven either!! Now I know why : I am not washing as much as you do , I am not soaking either and I am cooking with lid haf closed !!!!! It’s always a disaster !! Thank you so much for your video
Hi Marcia! Oh half closed only? No no no, NEVER open the lid while cooking. I think you’ll be okay next time! If you use Japanese short grain rice, soaking does help. 🙂
I swear by this rice cooking method. I must have tried 5 other online methods for stove top rice and this is the only one worth using. I highly recommend this method for use at high altitudes. Other methods don’t use enough water for the mile high area and as such make dry crunchy rice. This is the only ratio I have tried that works here in the Rockies.
Hi Christine! Japanese rice usually requires more water than other types of rice. If the other recipes didn’t include that to consideration, the rice probably won’t come out well. Also, for Japanese rice, soaking is very important. 🙂 So happy to hear this recipe worked out for you! 🙂
Thanks for the helpful recipe!
I also just bought an Instant Pot (partly due to your high endorsements ☺),
do you think there is a good way to prepare Japanese/Sushi rice using the Instant-Pot’s advantages, which is easier/faster than the regular stovetop method? I’ll be happy to hear your (or anyone else’s) thoughts about that!
Sorry, I just saw that you answered practically the same question in the comment above, so please ignore my previous comment and thanks anyway!
No problem! Feel free to ask me if you still have any question. 🙂 So glad you got an IP. More IP recipes coming soon! 🙂
Hi Nami san,
I’m really excited that you are using your Instant Pot more and more. I have tried so many times to cook Japanese rice in the Instant Pot, but it never turns out right. Because the Instant Pot is becoming more popular, maybe it would be a good update for your site!
Donna
(from Denenchofu!)
Hi Donna! Ohh you live in Denenchofu! You use the instant pot in Japan? COOL!
I usually use IP to make main dish, so I use my rice cooker to make rice all the time. Plus, I love Japanese rice cooker that I can set timer… so great, I can set it for the dinner time. I also heard that steamed rice sticks to the bottom of the stainless steel pot of Instant Pot. I do not waste any rice (you know how much Japanese people care about rice and eat till last rice kernel… haha). So I don’t plan to make it with IP… sorry! 😀
Hi, i followed all the steps, the rice turned out to be good. But the rice at the bottom was burnt and the water keep rising and spilling out during the 12mins cook.
may i know why is this so?
Hi Annie! Two possible reason:
1) Probably the heat was a little stronger for your pot.
2) You could stop cooking 1-2 minute before and let the steam cook all the way (inside the rice kernel). So the water didn’t dehydrate everything and end up burning on the bottom.
Hope this helps!
I was always told that no matter how much rice you have in the pot, the water should come up to your first knuckle if you put the tip of your finger on the rice, and it works perfectly every time. Here in Charleston SC rice is served with every meal, or IS the meal.
Hi Kendall! Really, I had no idea people in Charleston eat rice every meal! That is so cool!!!! Thanks for teaching me something new. I guess you grow rice there? Your trick is same in Japan too!
Can I use this recipe for onigiri rice?
Hi Laura! Yes, for Onigiri, you need regular steamed rice like this, NOT sushi rice that includes vinegar. 🙂
Argh! I can never make perfect Japanese rice! I’ve tried it many times with always the same result…mush. :((
I followed your instructions to the T and I still have a bowl of mush.
Doesn’t make a difference if I use a pot or a rice cooker. I was so excited to make onigiri with the two fillings I came up with tonight but can’t even use the rice. Guess I’ll be making congee (rice soup) instead.
I give up.
Hi Minh! First of all, it’s important to know about the quality of rice and how the rice is (kind of silly, but we actually experiment as each brand is slightly different – some needs more water etc). It also matters how old the rice is.
If you (always?) get mushy rice, have you reduced the amount of water, with the same amount of rice, same method, etc? When I switch the brand of rice, I sometimes get mushier (softer) rice – so I had to adjust next time and it works. It sounds like it’s not about your skill – it’s so simple you won’t do much to affect the rice. Try reducing the water and experiment. 🙂 Good luck!!
Thank you for sharing this recipe with us! We love to eat short grain rice, but I hate to cook it because it’s never right. Tonight however it came out perfect! I had to Pin it for next time…surprised I was the first to save it.
Thanks again!
Hi Linda! Thank you for trying this recipe and I’m so glad your rice came out well! 🙂 Thank you for pinning. I updated the website not a long ago and I now use a different plugin so I lost all the pinning counts… although that’s okay. 🙂 Thank you for your kind feedback. 🙂
Hello Nami,
I wanted to firstly say that I am so happy I found your blog. I do not have a rice cooker and none of my Asian friends know how to cook rice on the stove. I am used to Jasmine, Basmati and Carnaroli rice and the way to cook them are all different from each other and from Japan short grain rice.
I had a business trip to Japan last month and my colleague made me buy this rice called Aomari. I made your kimchi gyoza nabe with some rice and it came out perfect! It was shiny and fluffy just like in Japan. The only thing was I felt the rice in Japan was “saltier” or had some flavour…I don’t know if it’s the altitude or the water. I live in Toronto. Do you think I should add salt when cooking the rice? If yes, at which step?
I also read your recipe on cooking rice in the rice cooker just for fun. And you mentioned the first two times, to rinse & discard the water very quickly and then after do the circular motion of washing the rice. Should I also do the same for the stove recipe ?
Thank you
Hi Jade! Thanks for finding my site! Did you get rice from Aomori (prefecture)? I purchase imported rice from Japan because they taste much better than California-grown rice. It’s just so different. They are plump and taste amazing, I pay extra and consider it a luxury in my house (no wasting!). 🙂
I’m not sure about “saltier” rice in Japan though. We never add salt. Could be water? Maybe. But don’t add salt unless you season the rice and cook with other ingredients (like Takikomi Gohan – mixed rice).
Rice rinsing method should be the same. My instructions may be slightly different (like how many times you rinse etc) but do the circular motion and all. You just need a bit of water to get going with circular rubbing with your hand. The most important part about short-grain rice is soaking rice for 20-30 minutes. Do not skip – you need to let the rice absorb water to core of the rice kernel. 🙂
Hope you enjoy!
Hello Nami,
Thank you for the prompt reply..I am not too sure if the rice is from the Aomari prefecture however I found that the brand is called Seiten no hekireki. The rice comes in a white and sky blue bag. Here is a link https://www.umai-aomori.com/products/rice/seiten-no-hekireki/
I’ve followed the recipe almost to T. Next time I’ll use a ratio 1:1.2 since I did 1:1.25 this time around. I’ll check to see if it changes anything. The first two rinses I’ll add less water and keep washing in circular motion as I did previously and I’ll try to soak it for 30 minutes instead of 1 hour to see if more “flavour” stays in the rice instead of going into the water. Thank you very much 😉
Hi Jade! Thanks for the link. The rice is from Aomori prefecture and it’s recommended to use 10% less water than the usual amount. You may actually want to try 1:1 or 1:1.1… 🙂
Hello Nami,
Thank you so much for letting me know. I am making a poke bowl tonight I’ll definitely use the 1:1.1 ratio
Hi Jade! Hope poke bowl came out well (as well as steamed rice)! 🙂 ox
Hello Nami, it came out perfect with the 1: 1.1 ratio. I think having a ratio of 1:1.25 was making the rice lose its natural flavour.
Thank you again 😉
How should I reheat the frozen rice? By microwave? If so, for how long and at what power? Also, the instructions on the page for “How to freeze rice” are missing…
Hi Poonnapa! Thank you for letting me know! I fixed the issue and now you can read the page properly…
https://www.justonecookbook.com/how_to/how-to-freeze-rice/
I use microwave to reheat, and with 1 bowl of rice it takes about 2 to 2 1/2 minutes on 1100 w microwave. Hope this helps.
Hi Nami, may I ask if I were to use this recipe to make sushi rice do I have to reduce the amount of water since I need to mix vinegar into the rice later ? If yes how much water and vinegar should put ? Thanks in advance.
Hi Ping! If you were to make sushi rice after making this rice, I recommend you to reduce the water a little bit. I have a separate post on how to make sushi rice here:
https://www.justonecookbook.com/how_to/how-to-make-sushi-rice/
Instead of using a rice cooker, you can use a heavy pot like this to cook rice. Hope this helps! 🙂
Hi Nami – how much should we reduce the water if we follow this recipe to make sushi rice? It isn’t clear to me what measurements I should use for the other ingredients if I want to use 2 “American” cups of rice, cooking it on the stove. How much water? And then how should I adjust the measurements for the sushi vinegar? Thank you!
Hi Hilary! For 2 American cups (480 ml), use 2 cups water.
480 x 1.1 or 1.2 (10 to 20% more water) for regular rice.
You should deduct 5-10% of water for sushi rice, which makes it 475 ml, and that’s roughly 2 cups.
For sushi rice vinegar (recipe link below), don’t use all the sushi vinegar, leave 2 Tbsp or so. It’s really up to you how much you want to season your steamed rice. You don’t want the rice to be soggy, either.
https://www.justonecookbook.com/how-to-make-sushi-rice/
Hello! I recently discovered this site and I’m eager to start making the recipes. I just tried this rice recipe, but my rice came out incredibly mushy and fat. My mom said I put too much water, but I used the amount of water proportional to the amount of water you used. I used 4/3 cups of rice and 1200 mL of water. I even checked with a proportions calculator to check that the amount of water was correct with the amount of rice. Was that too much water?
Hi Fay! Welcome to my blog and thank you for trying this recipe already. Please be aware that water amount slightly varies depends on the type of rice – first, this recipe is for short-grain rice, and even the same Japanese short grain rice, new crop and older crop requires different amount (for newer crop, reduce the amount slightly). I hope you experiment to see the perfect amount of rice for your rice you’re using. When you finish cooking the rice (and wait for 10 minutes), the pot should not have any water left on the bottom. At step 5, make sure there is no water left. 🙂 Hope this helps!
Thank you very much. Very helpful!:)
Thank you for reading my post! 🙂