
As a home cook and Japanese cuisine advocate, I want to share not just the recipes but the tradition of making food from scratch. I believe there is a beauty in preserving the heritage integral to our food culture. Do you agree?
This year, I’ve taken up a few new cooking projects, and making miso paste from scratch is one of them. This is my first time making miso, and I couldn’t be more excited to share the experience with you!
Before we start, I wanted to reassure you that making your homemade miso is easier than you think. You will only need a few simple ingredients and a little patience.
What is Miso?
Miso (味噌) is a Japanese seasoning produced by fermenting soybeans with salt and koji. It has been used in Japanese cuisine since 1200 AD (a precursor of miso arrived in Japan from China around 600 AD).
As one of Japan’s superfoods, miso is well recognized for its many great health benefits. It is rich in essential minerals and a good source of various B vitamins, vitamins E, K, and folic acid. As a fermented food, miso is full of probiotic that provides the gut with beneficial bacteria that help us to stay healthy.
You might have seen various types of miso available at the grocery stores, but in general, miso can be categorized by 3 factors: ingredients, color, and taste. In Japan, miso can also be categorized by regions.
* To learn more about miso and its different types, please read my detailed miso post on my blog.
My Miso-Making Journey
When I get home from a long trip, I often crave simple homemade miso soup and onigiri. Even though miso is indispensable in my diet and cooking, I realized that I had never made it from scratch before. Like making your own mochi or plum wine, it struck me that there was something special about making your own miso, and I really wanted to do just that!
So if you’re like me, wishing to make this Japanese condiment from scratch, try making your own miso! My miso recipe is based on a Japanese miso company’s tutorial that I found upon my research. I will try different recipes in the future and update/modify my recipe based on my own experimentation.
The Best Time of Year To Make Miso
While you can make miso year round, I recommend that you start your miso in late fall to winter for the best results. Here’s why:
- Miso fermentation works best starting from a cold winter into a cool spring and ending in a hot summer.
- It’s less prone to contamination because the drier air in the colder months is less humid.
- Miso develops a deeper flavor in lower temperatures because it’s fermenting more slowly.
- You can use freshly harvested ingredients to make your miso since rice and soybeans are harvested in late fall.
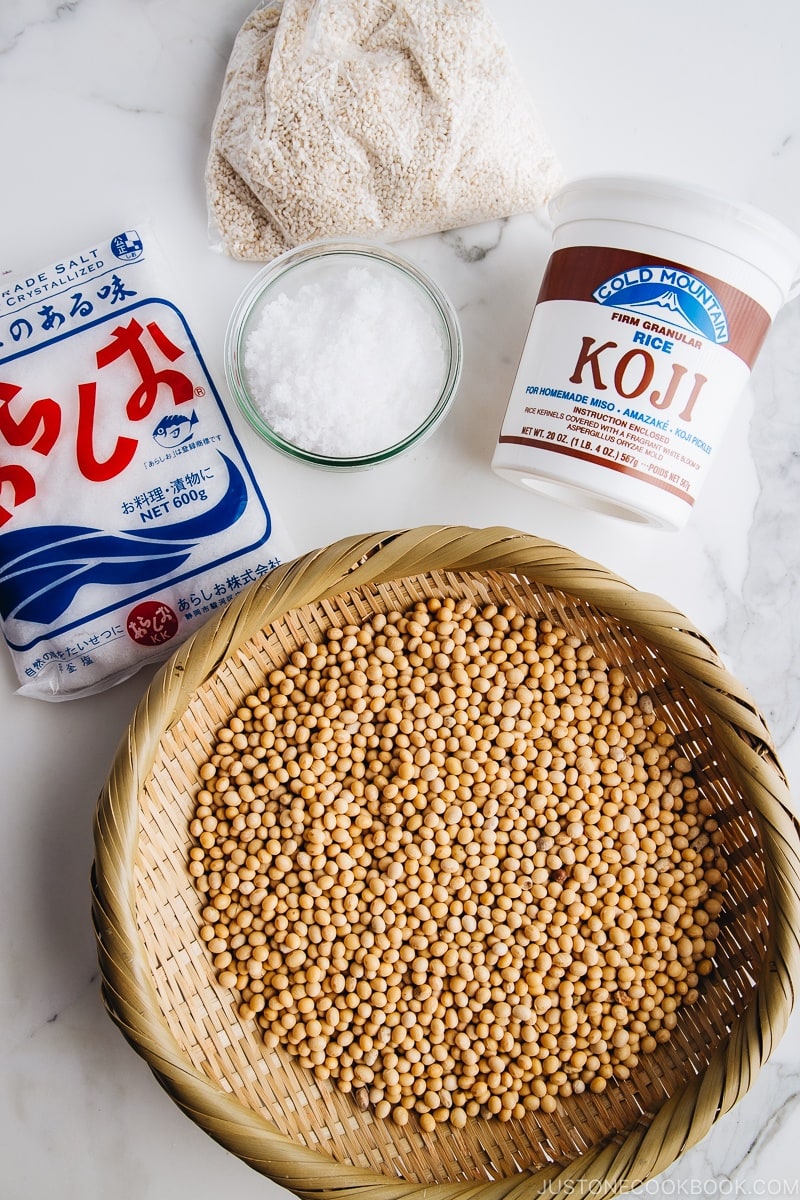
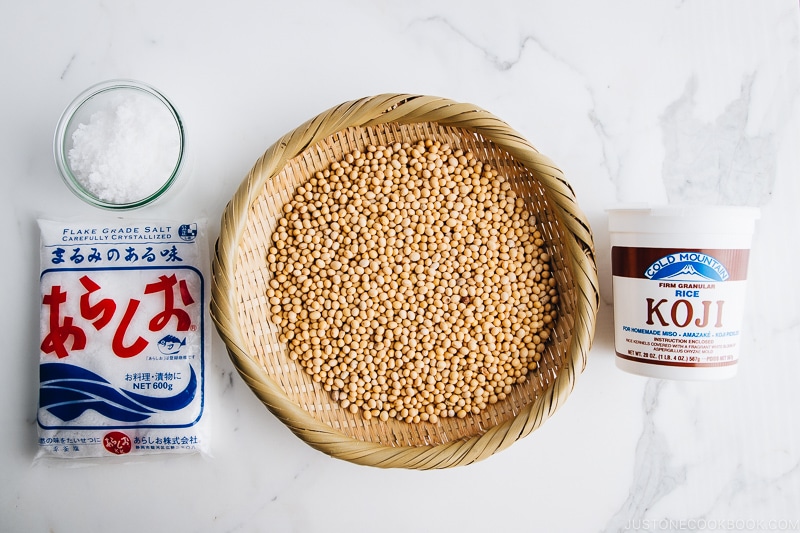
4 Simple Ingredients To Make Miso
- Organic soybeans – I purchased organic American soybeans from Whole Foods where you can get the exact amount you need from a dispenser. You can also purchase from Laura Soybeans or on Amazon.
- Fine sea salt – this salt yields the best flavor and is rich in minerals.
- Rice koji – This is steamed rice (and sometimes with barley or other grains) that has been treated with the fermentation culture Aspergillus oryzae, or koji-kin (麹菌) in Japanese. The enzymes in the koji break down the carbohydrates and proteins into amino acids, fatty acids, and other nutrients during fermentation. You can find Cold Mountain brand rice koji in Japanese markets in the US or at Anything from Japan, which also ships internationally.
- Filtered water. The quality of the water plays an important role in making good miso paste. Be sure to use filtered water that is safe and with most of the impurities removed.
Tools For Making Miso
- Kitchen scale – It’s important to measure accurately when you make miso. I recommend using a kitchen scale like the digital scale that I got from Amazon years ago. I use metric (gram) measurements for baking and other traditional recipes like making miso or Japanese pickles (tsukemono).
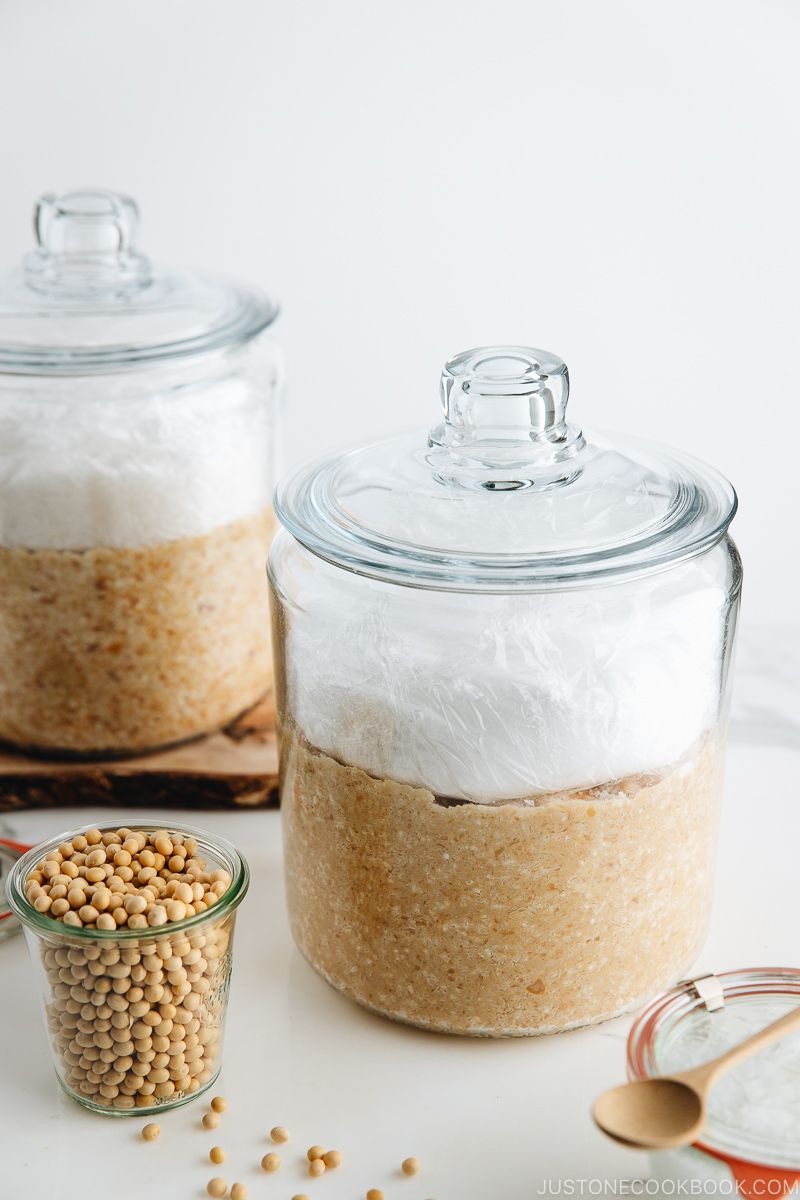
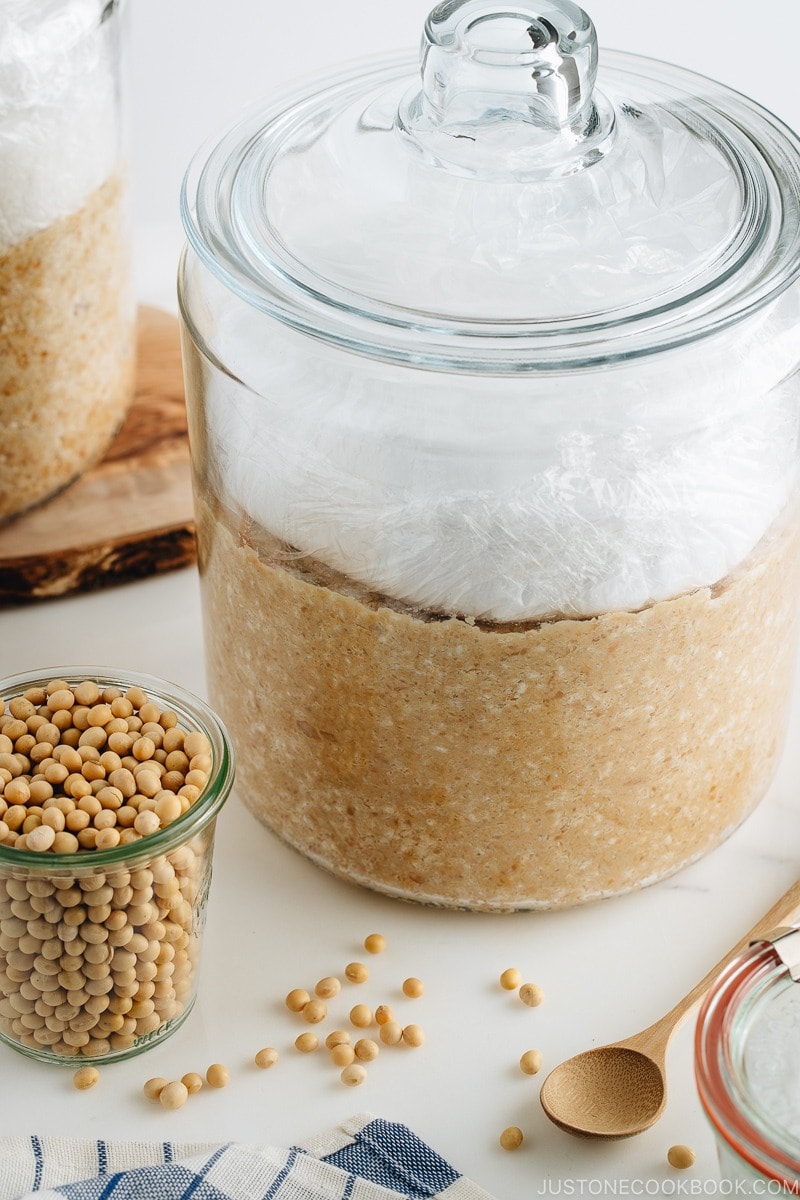
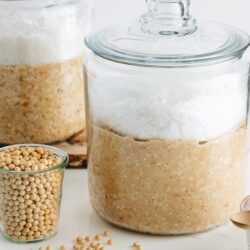
- One-gallon container with lid – I highly recommend a glass container so you can see the progress of the miso fermentation. I use a 1-gallon (large) biscotti jar, but you could use an Anchor Hocking glass storage jar, a stoneware crock, or a large plastic bucket.
- Heavy object – Use a heavy object that fits in your 1-gallon container. A plastic bag of table salt works well. The heavy object must be one-third of the miso weight. In this recipe, the miso weighs 3 kg (6.6 lb), so the heavy weight should be 1 kg (2.2 lb) salt.
- Large bowl – Use a large mixing bowl or serving bowl to mix the mashed soybeans, koji, and salt.
- Plastic wrap – Tightly covering the miso with plastic wrap will prevent mold growth.
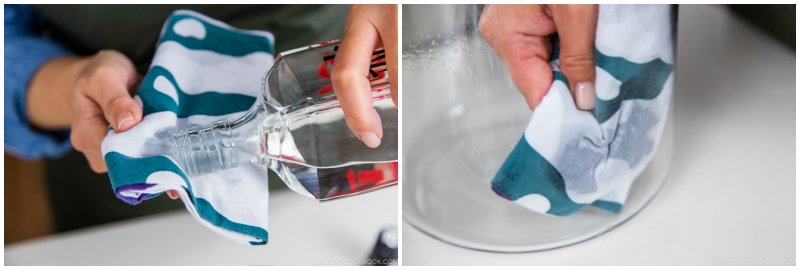
- Shochu (or vodka) and clean towel – We use distilled alcohol to disinfect the container to prevent mold growth.
How To Make Miso
Making miso takes 2 days of active time and 6 months of inactive fermentation time, so you have to wait half a year before you use your batch. Umm… are you still here? It may sound daunting, but the method is actually simple and the result is totally worth the effort!
In my recipe below, I included both Instant Pot and stovetop options for cooking the soybeans.
Day 1
- Wash the soybeans.
- Soak the soybeans for 18 hours (and don’t cut it short!)
Day 2
- Cook the soybeans. Pressure cook for 20 minutes or simmer on the stove for 3–4 hours.
- Mash the soybeans.
- Combine the soybeans, salt, and koji.
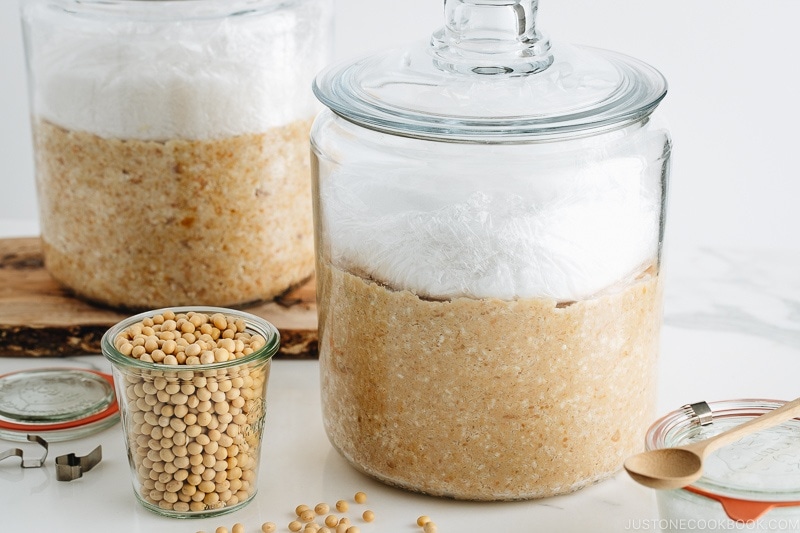
- Pack the mixture into a jar.
- Store the miso in a cool place.
Then, wait patiently for 6 months…
Check the Progress of Your Miso
The timing and season matters for the speed of fermentation and maturation. For example, miso prepared in summer will be ready in 3–4 months. On the other hand, if it’s prepared in winter, it takes more time to ferment and mature, roughly 6 months.
Keep checking the progress of the fermentation. Taste your miso, and if it reaches the flavor profile you like, move it to the refrigerator. This slows down the maturation, discoloration, and flavor changes.
5 Important Cooking Tips
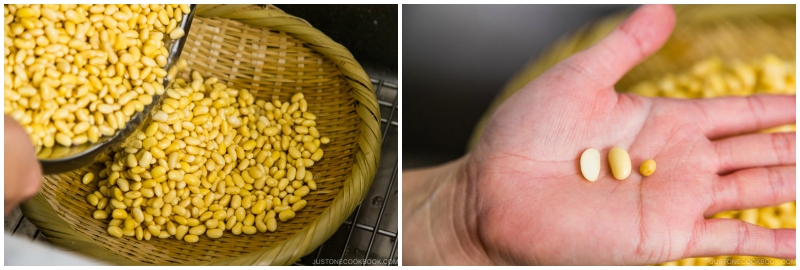
1. Soak the soybeans for 18 hours

Dried soybeans take time to absorb moisture (See above photo: 18-hour soaked bean on left vs dried bean on right). To make sure the soybeans are cooked through to the core, you need to soak the soybeans for 18 hours. If you want to start cooking (pressure cook/simmer) soybeans from 10 am, you need to start soaking the soybeans at 4 pm on the previous day.
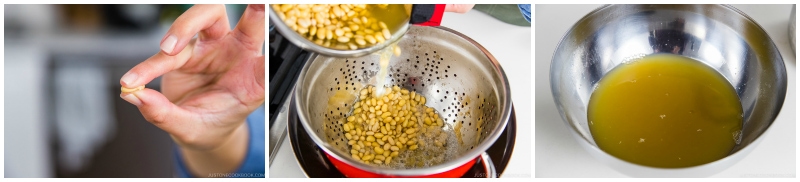
2. Check for doneness by crushing a soybean
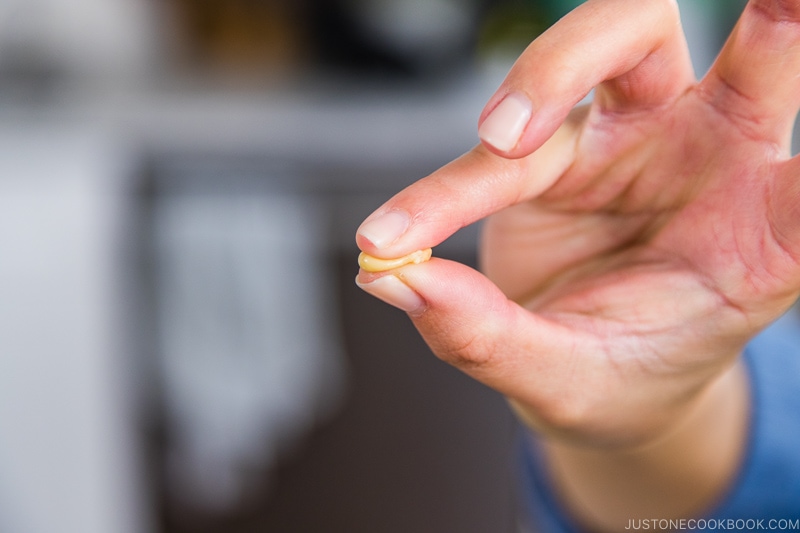
Pressure cook or simmer the soybeans until they are soft enough to easily crush between your thumb and pinky.
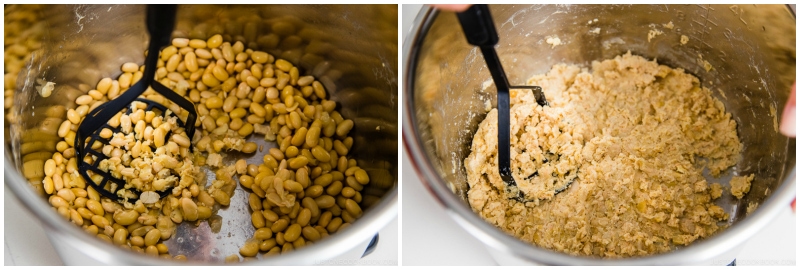
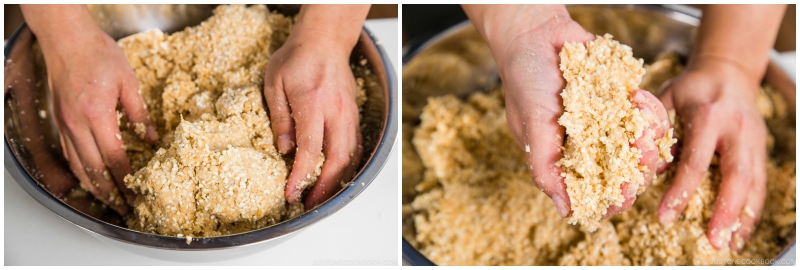
3. Mash the soybeans well
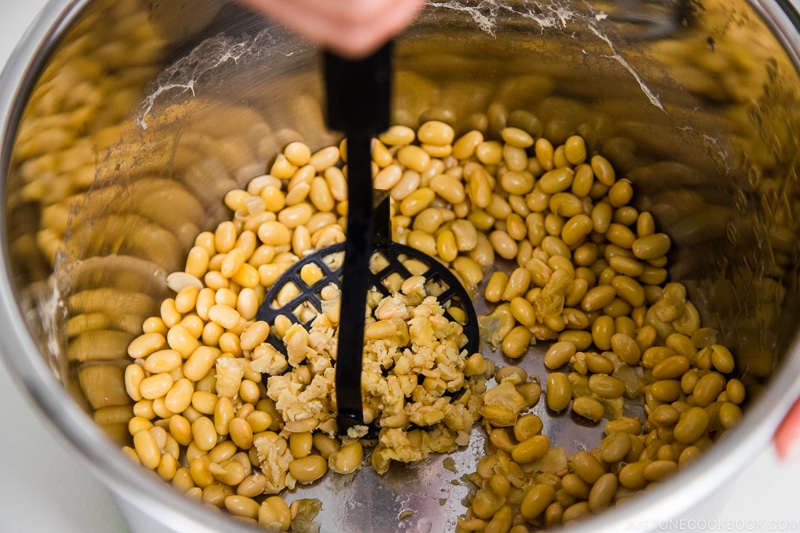
Mash the hot soybeans, a small amount at a time, to an even consistency. It’s okay to have small bits of chunky soybeans here and there, but try your best to mash most of them well.
Alternatively, you can use your food processor if you have one, which will definitely speed up the process.
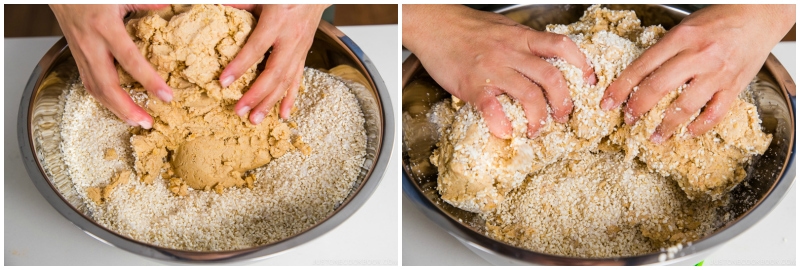
4. Knead the mixture well
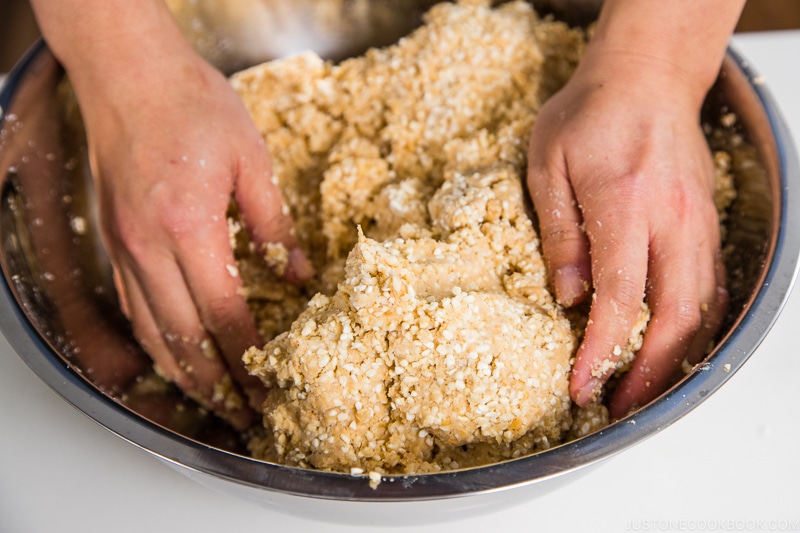
Make sure the mashed soybeans are warm or at room temperature when you combine with the koji and salt mixture. Knead well to distribute the koji to facilitate good fermentation throughout.
5. Remove the air pockets completely
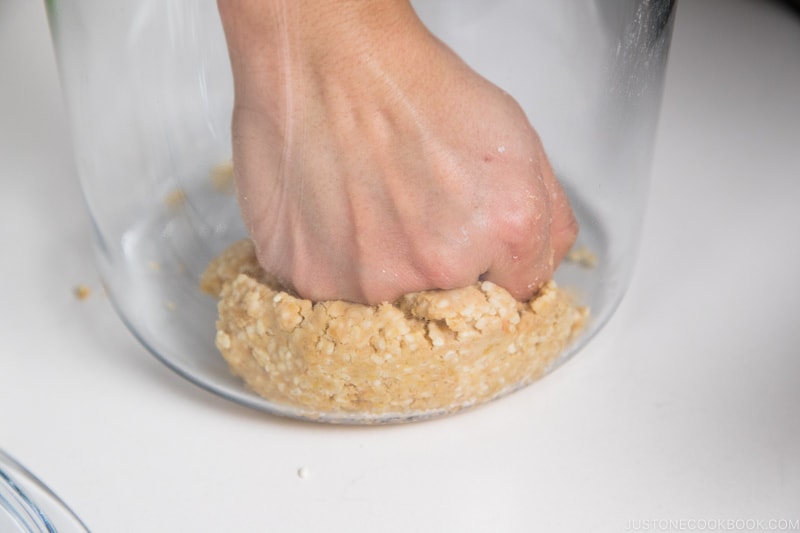
Form balls of the soybean mixture and pack them tightly in a jar. Press down each ball of the mixture as firmly as possible to remove any air pockets. This will prevent unwanted mold growth.
FAQs
1. Can I halve the recipe?
Yes, you can.
2. What type of miso are we making here?
Since we’re using rice koji, the type of miso in this recipe is considered kome miso (米味噌). However, the process and length of fermentation will determine the final color and taste of the miso.
White miso requires a shorter fermentation time (6 months) and you’ll get a sweeter flavor and smoother texture. To make saltier miso, you can leave the miso to ferment for up to 1–1.5 years as the color darkens and the flavor develops stronger.
Having said that, there is a lot more to it than simply categorizing them by type. The method of preparing the soybeans and the ratio of ingredients also play a part in the end product. That is why there are SO MANY types of miso in Japan.
3. Where can I buy rice koji?
In the US, you can find Cold Mountain brand of rice koji for sale. If you live outside of the US, you can buy rice koji from Anything from Japan which ships internationally.
If you live in Oakland, a reader shared that you can buy fresh koji from this shop called Preserved Goods.
4. Can I use a mix of soybeans with other beans like garbanzos (chickpeas)?
Yes! If you’re willing to experiment, feel free to mix the soybeans with other types of beans or grains. We have readers who have tried it with garbanzo and northern beans with success. However, the soaking time for garbanzo should take just about 10–12 hours.
5, What should I do if I spot some mold growth during the fermentation?
Mold can be quite normal, especially if you live in a humid climate. Gently scrape them off and transfer the miso into a different container. Make sure to keep an eye on them.
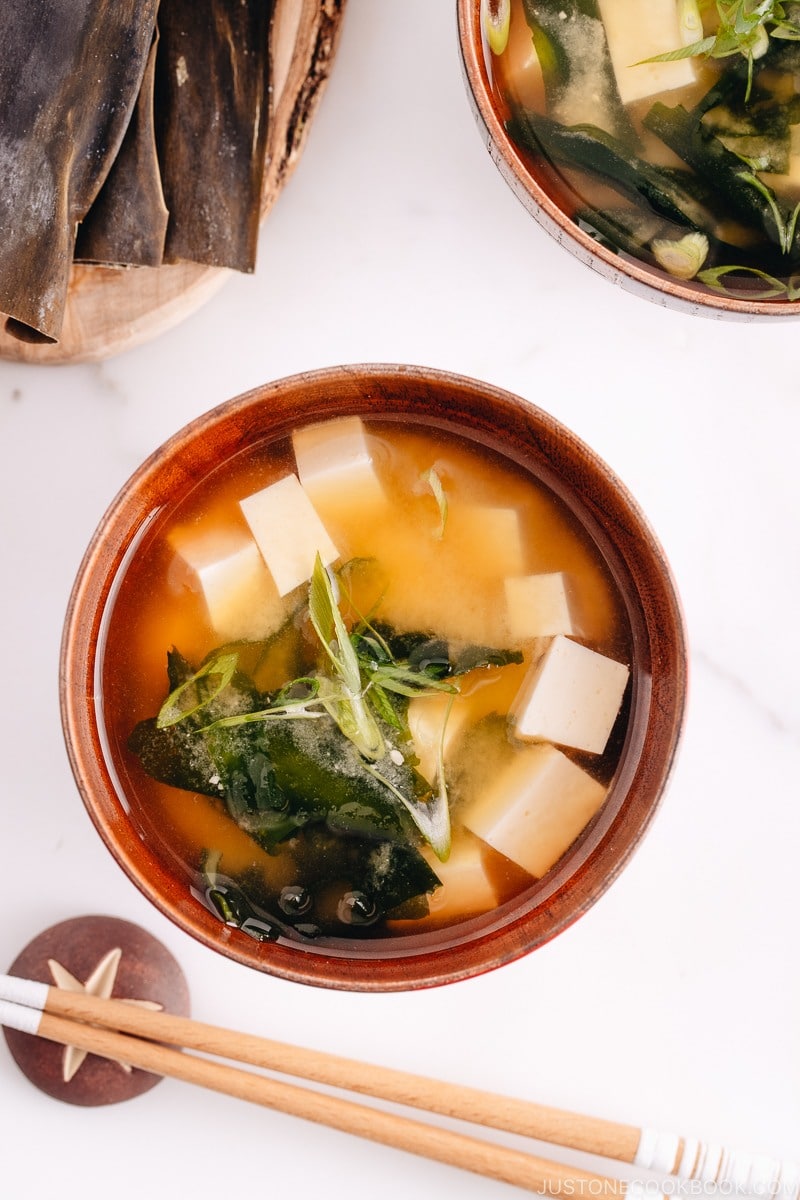
How To Enjoy Homemade Miso
The first thing you should make with your homemade miso is of course some delicious homemade miso soup. But miso has so many more uses you can think of! It’s essentially the most versatile seasoning you can have in your pantry. Think marinades, sauces, glaze, compound butter to baked goods!
Here are just some of my popular miso recipes you can dream of using when you have the jar of miso ready to be enjoyed:
- 15 Delicious Miso Recipes
- Homemade Miso Soup
- Miso Cod
- Miso Ginger Pork
- Miso Chicken
- Miso Salmon
- All-Purpose Miso Sauce
- Miso Ramen
- Miso Butter Cookies
- Miso Tomato Chicken Stew
- 10 Minute Meal – Niku Miso
Share Your Miso-Making Journey With Us
I wish you plenty of success in making your own miso! If you have gone ahead and tried my recipe below, please share your experience with us in the comment below. How long did you leave it for? Did you make any adjustments to the ratio? I’d love to hear from you.
Wish to learn more about Japanese cooking? Sign up for our free newsletter to receive cooking tips & recipe updates! And stay in touch with me on Facebook, Pinterest, YouTube, and Instagram.
Homemade Miso
Ingredients
- 1.4 lb soybeans (dry; 1 cup of dry soybeans is 6.3 oz/180 g)
- 5 cups rice koji (2 Cold Mountain packages; you can buy it from Anything from Japan, Amazon, or a Japanese grocery store; you can find Cold Mountain and other brands at Nijiya)
- 13.2 oz arajio natural sea salt (for mixing with the rice koji; plus ½ Tbsp more for sprinkling on top of the miso)
- filtered water (for soaking and cooking the soybeans)
Instructions
Before You Start…
- Please note that once you start the fermentation process, it takes about 9 months of mostly inactive time to make miso.
To Start Your Miso (in January/February)
- Gather all the ingredients. For the equipment, you will need 2 large bowls (one should be a very big one), 1 strainer, an Instant Pot (or pressure cooker or a large pot), a clean cloth, alcohol (shochu or vodka), a potato masher (or a food processor), a 1-gallon glass jar to put the miso in, and a bag of 1 kg (2.2 lb) table salt.
- Soak the Dry Soybeans: Gently wash 1.4 lb soybeans thoroughly several times under running water. Note: The foam shown in these images is not soap.
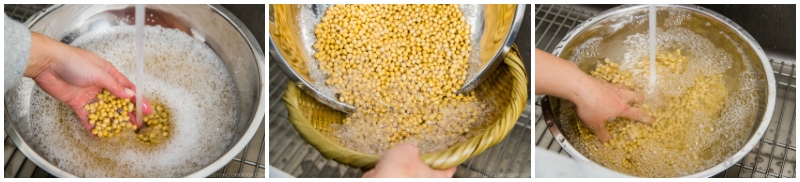
- To a large bowl, add the rinsed soybeans and enough filtered water to reach about 5 inches (10 cm) above the beans. Soak the soybeans for 18 hours.
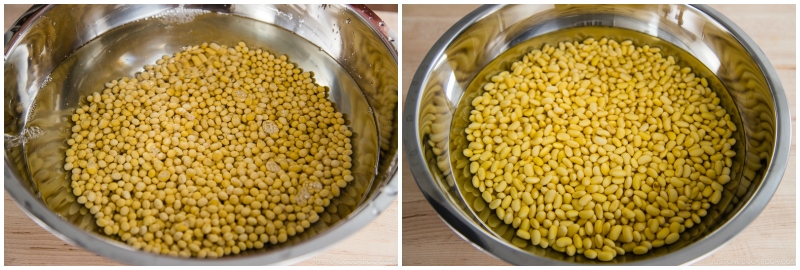
- Drain the beans. Look how large the beans are now. The right image shows the soybeans before soaking, and the left two soybeans are after 18 hours of soaking. After soaking, the soybeans weigh 1435 g.
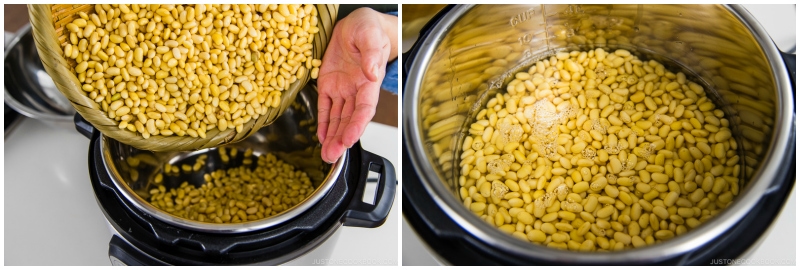
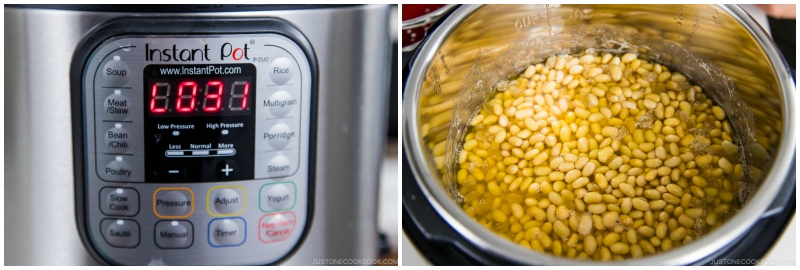
- Cook in a Pressure Cooker/Instant Pot: Add the soybeans to the inner pot of an Instant Pot. Add filtered water to about ½ inch (1.2 cm) above the beans (to roughly the 8-cup line for one batch).
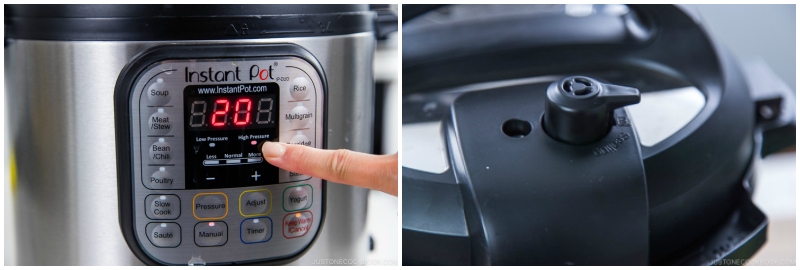
- Close the lid and set to High pressure for 20 minutes. Make sure the steam release handle points at Sealing and not Venting.
- Cook on the Stovetop: Alternatively, you can cook the beans on the stovetop. Bring to a boil over high heat, skim off the surface scum, lower to a simmer, and cook for about 3–4 hours, uncovered, until the beans are soft. Add water as needed during simmering. You want to keep the soybeans submerged in just enough water.
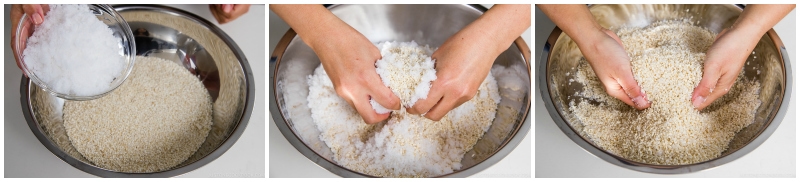
- Prepare the Koji Mixture: Meanwhile, in a very large bowl (that‘s big enough to add the mashed soybeans later), combine 5 cups rice koji and 13.2 oz arajio natural sea salt with your hands.
- Clean the Jar: Put some alcohol (shochu, vodka, soju, sake, etc.) on a clean cloth and wipe the inside the jar or container you will store the miso in. This helps to deter mold growth.
- Once the pressure cooking is finished, release the pressure naturally. It will take about 30 minutes until it releases completely and you can open the lid.
- Test the Beans: To check if the beans are cooked enough, press one between your pinky finger and thumb. If it mashes easily and nicely, it’s ready. Drain the soybeans over a bowl to capture the liquid. Save about 1 cup of cooking liquid (just in case; you will only use a small amount of it). NOTE: When you are mashing the beans, you may need a bit of cooking liquid. Ideally, it’s best not to add any cooking liquid at all for this recipe, which is designed to make miso without adding liquid. Water in the miso has a higher risk of potentially causing mold growth.
- Mash the Soybeans: While they‘re still hot, transfer some of the soybeans back to inner pot of the Instant Pot and mash them with a potato masher (or a pestle or bottle). Do this process in batches so it’s easier to mash nicely.
- If you have a food processor, process some soybeans until they are in paste form. Do this in batches so it’s easier to process.
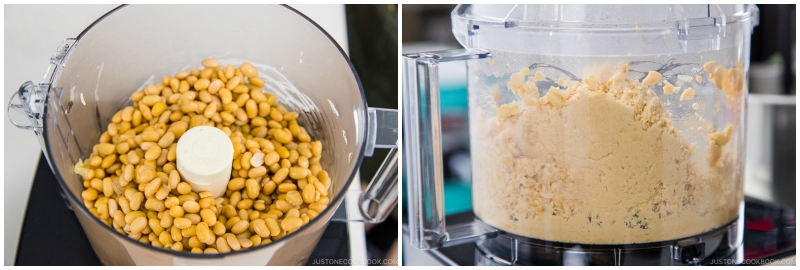
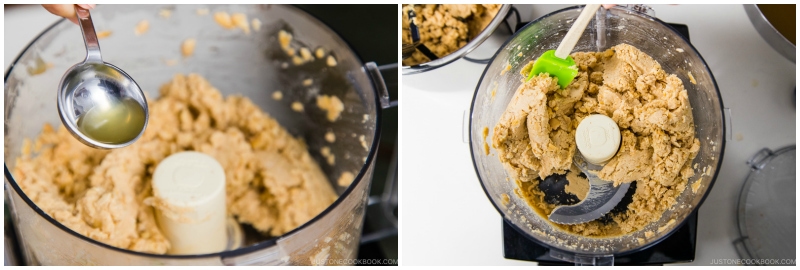
- ONLY if the soybeans look really dry, add a small amount of cooking liquid. As I mentioned earlier, it’s best not to add liquid for this recipe, but I used a little bit. Scoop out the paste and continue with the next batch.
- Mashed soybeans must be warm or at room temperature (NEVER hot) before combining with the koji because heat can kill the koji mold. Mashing takes time (unless you make a small batch), so the soybeans should be cool enough by the time you‘re done mashing all of it.
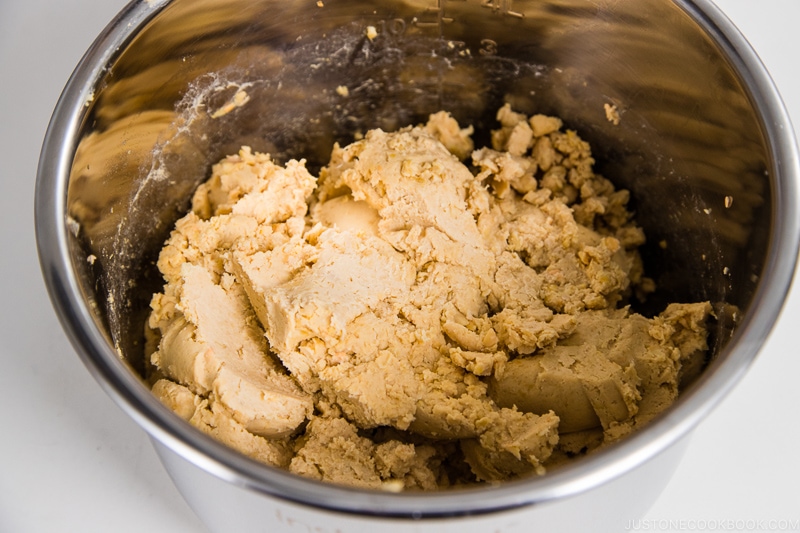
- Combine the Soybeans and Koji Mixture: Add the warm (not hot!) mashed soybeans into the bowl with the koji and salt mixture.
- Knead well to evenly distribute the rice koji and salt into the soybeans. Take time to do this and mix it well. Add a small amount of the reserved cooking liquid only if necessary.
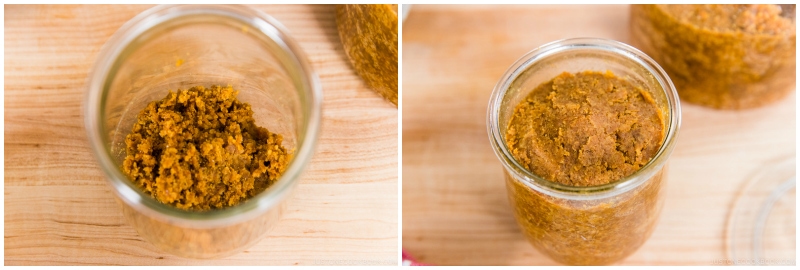
- Pack the Jar: Using your hands, form tennis ball-sized balls with the mashed soybean mixture.
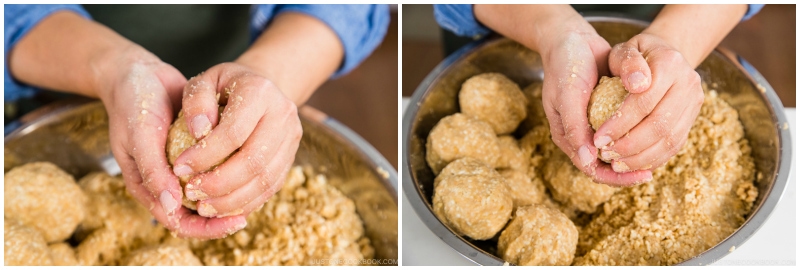
- Put the balls into the container, one layer at a time. As you add each ball, mash it with your fist and knuckles to ensure that you‘ve eliminated all the air pockets. Press down tightly. If you have a glass jar, you can check for air pockets by looking from the side.
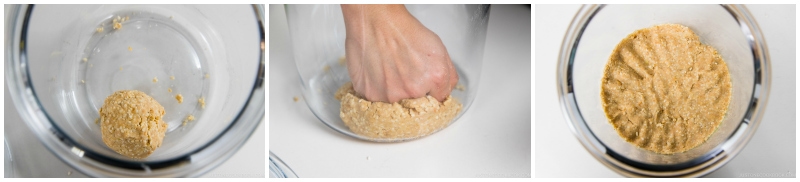
- Repeat the layers until all the balls are pressed tightly in the jar. Pat down and smooth out the surface with a flat palm or your knuckles. Make sure you have space left for placing a weight on top of the miso. If your jar/container is too small, use another container. Clean the inside surface walls of the container with a shochu-soaked cloth/paper towel to deter mold.
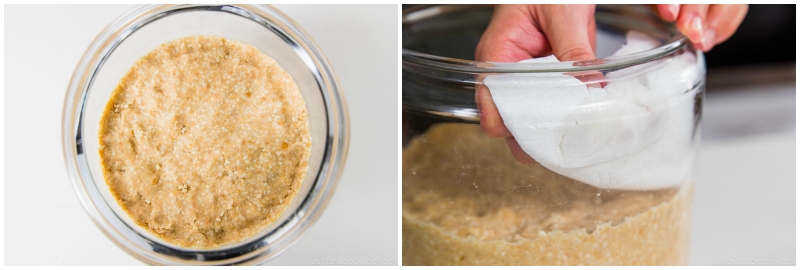
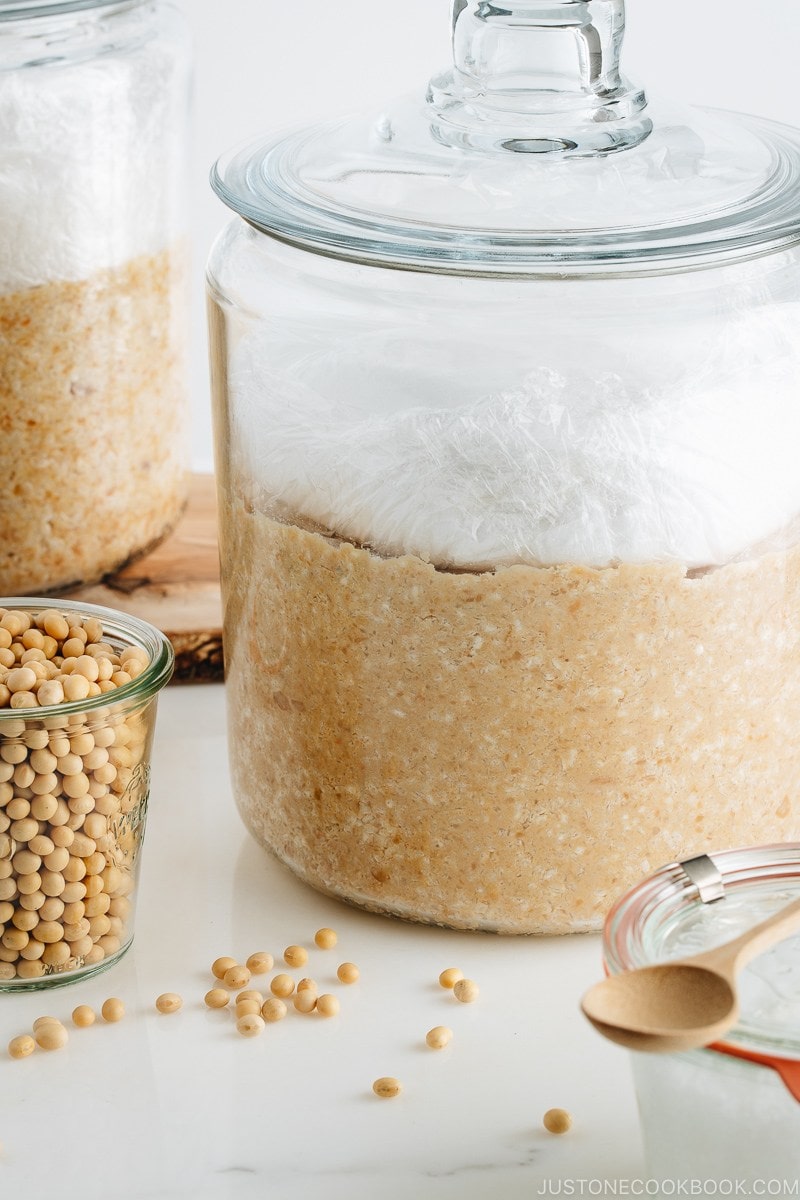
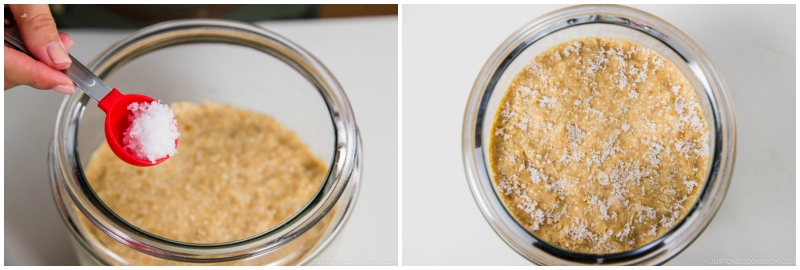
- Sprinkle ½ Tbsp arashio natural sea salt on top of the surface.
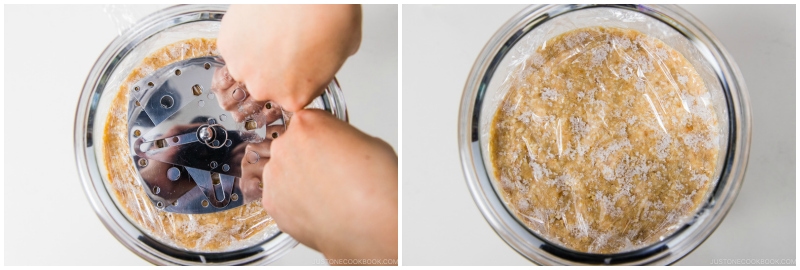
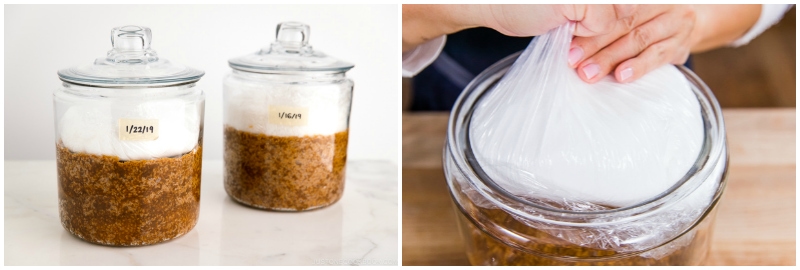
- Place a sheet of plastic wrap on the surface and make sure to cover it well. I use my adjustable drop lid (otoshibuta) to hold down the plastic wrap while I work on covering the edges and remove it when I was done.
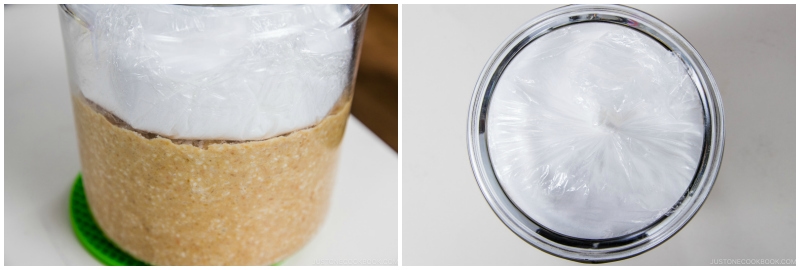
- Put heavy objects (or rocks) on top of the entire surface of the miso. I put 1 kg (2.2 lb) of inexpensive table salt in a plastic bag and placed it on top.
To Begin Fermentation
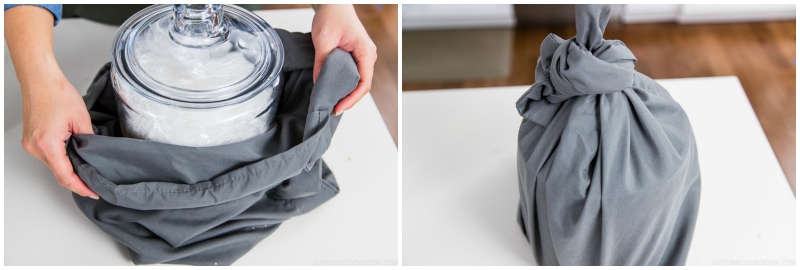
- Cover the jar with the lid; DO NOT use an airtight lid. Write today‘s date on some masking tape and label the jar. Place the miso in a dark and cool place for at least 3 months. I put it in a storage closet underneath my stairs. You can also use a dark pillowcase and try to find a darker spot in the house.
To Stir After 3 Months (in April/May)
- Check the miso quickly to avoid exposure to air. If you see any mold on the surface, carefully scrape it off. Stir the miso from the bottom up to avoid mold forming. Clean the inside surface walls of the container with a shochu-soaked cloth to deter mold. Smooth the surface, place a new plastic wrap on top, and put the weight back on top. Place the container back in a dark and cool place for another 3 months.
To Stir After 3 More Months (in July/August)
- During the summer months, the fermentation is faster but the chance of mold growth is higher. Stir the miso from the bottom up every 2–3 weeks and check your jar regularly and remove any mold appearing on the surface. Even if a layer of mold covers the entire surface, the miso below should be fine. Just scrape off the surface to a sufficient depth to where you only see mold-free miso. Clean the inside walls of the container with a shochu-soaked cloth to deter mold. Smooth the surface, place a new plastic wrap on top, and put the weight back on top. Place the container back in a dark and cool place.
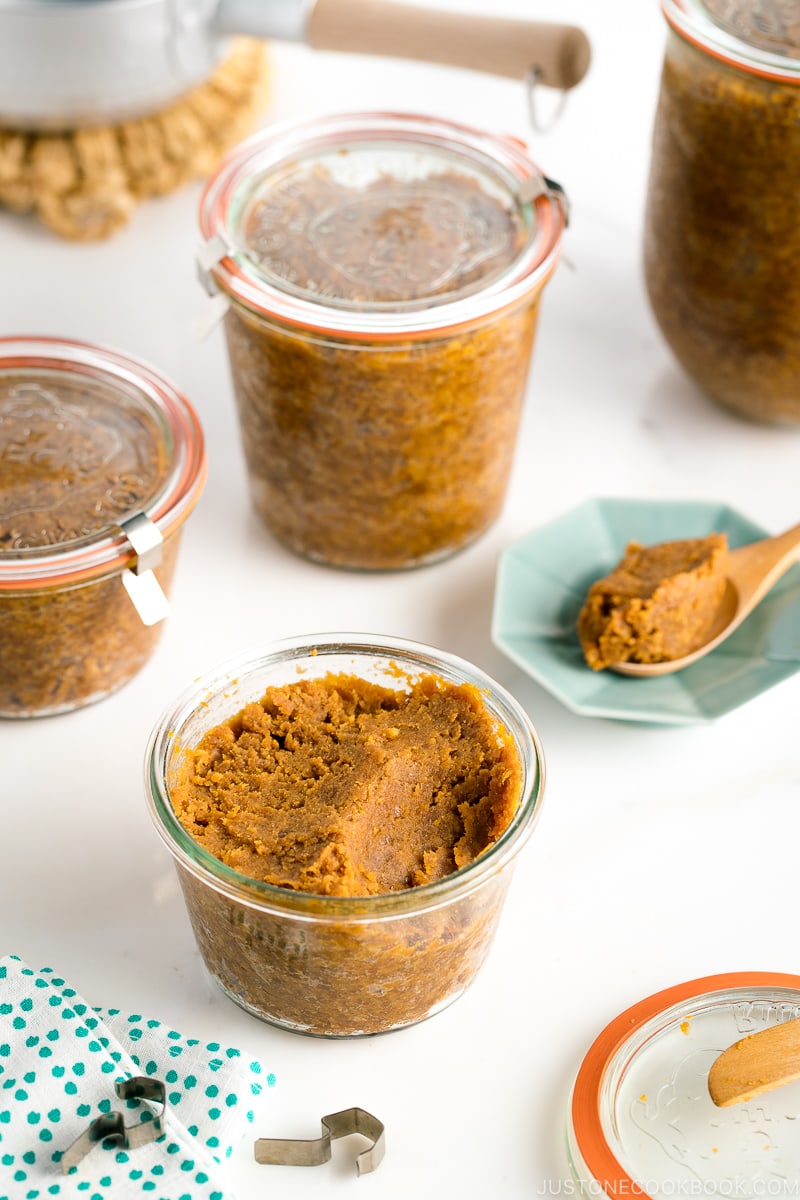
When the Miso is Done (in September)…
- Because San Francisco has a cool climate year-round and does not get hot, I waited for about a year to mature my miso (darker and saltier miso). Remove the weights once the miso is done.
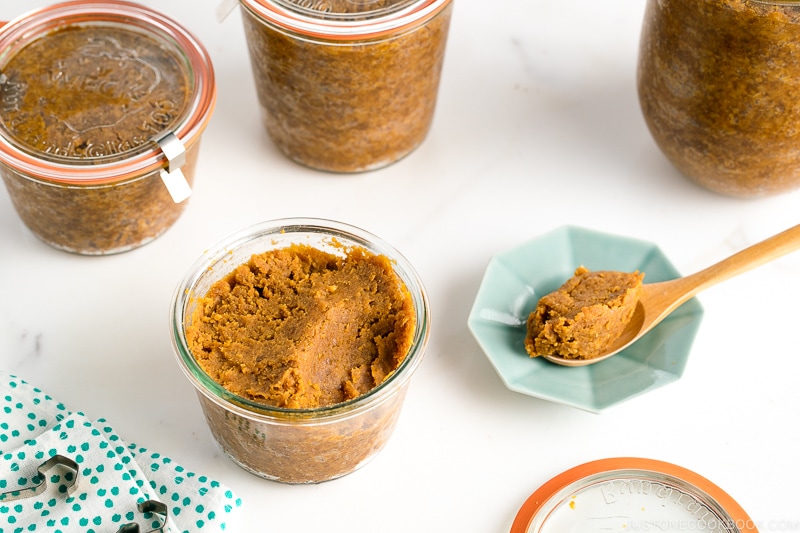
To Store
- Divide the miso into smaller containers so they will fit in your refrigerator. Store it in the refrigerator to prevent overfermenting. Now, you can enjoy your own miso paste made with patience, love, and perseverance.
Notes
Nutrition
Did you make this recipe?
Tag @justonecookbook on Instagram so we can see your delicious creation!