In this guide, we’ll take you through the essentials of creating a sashimi meal at home, covering everything from the proper techniques for cutting and preparing sashimi to presenting it in visually pleasing platters.
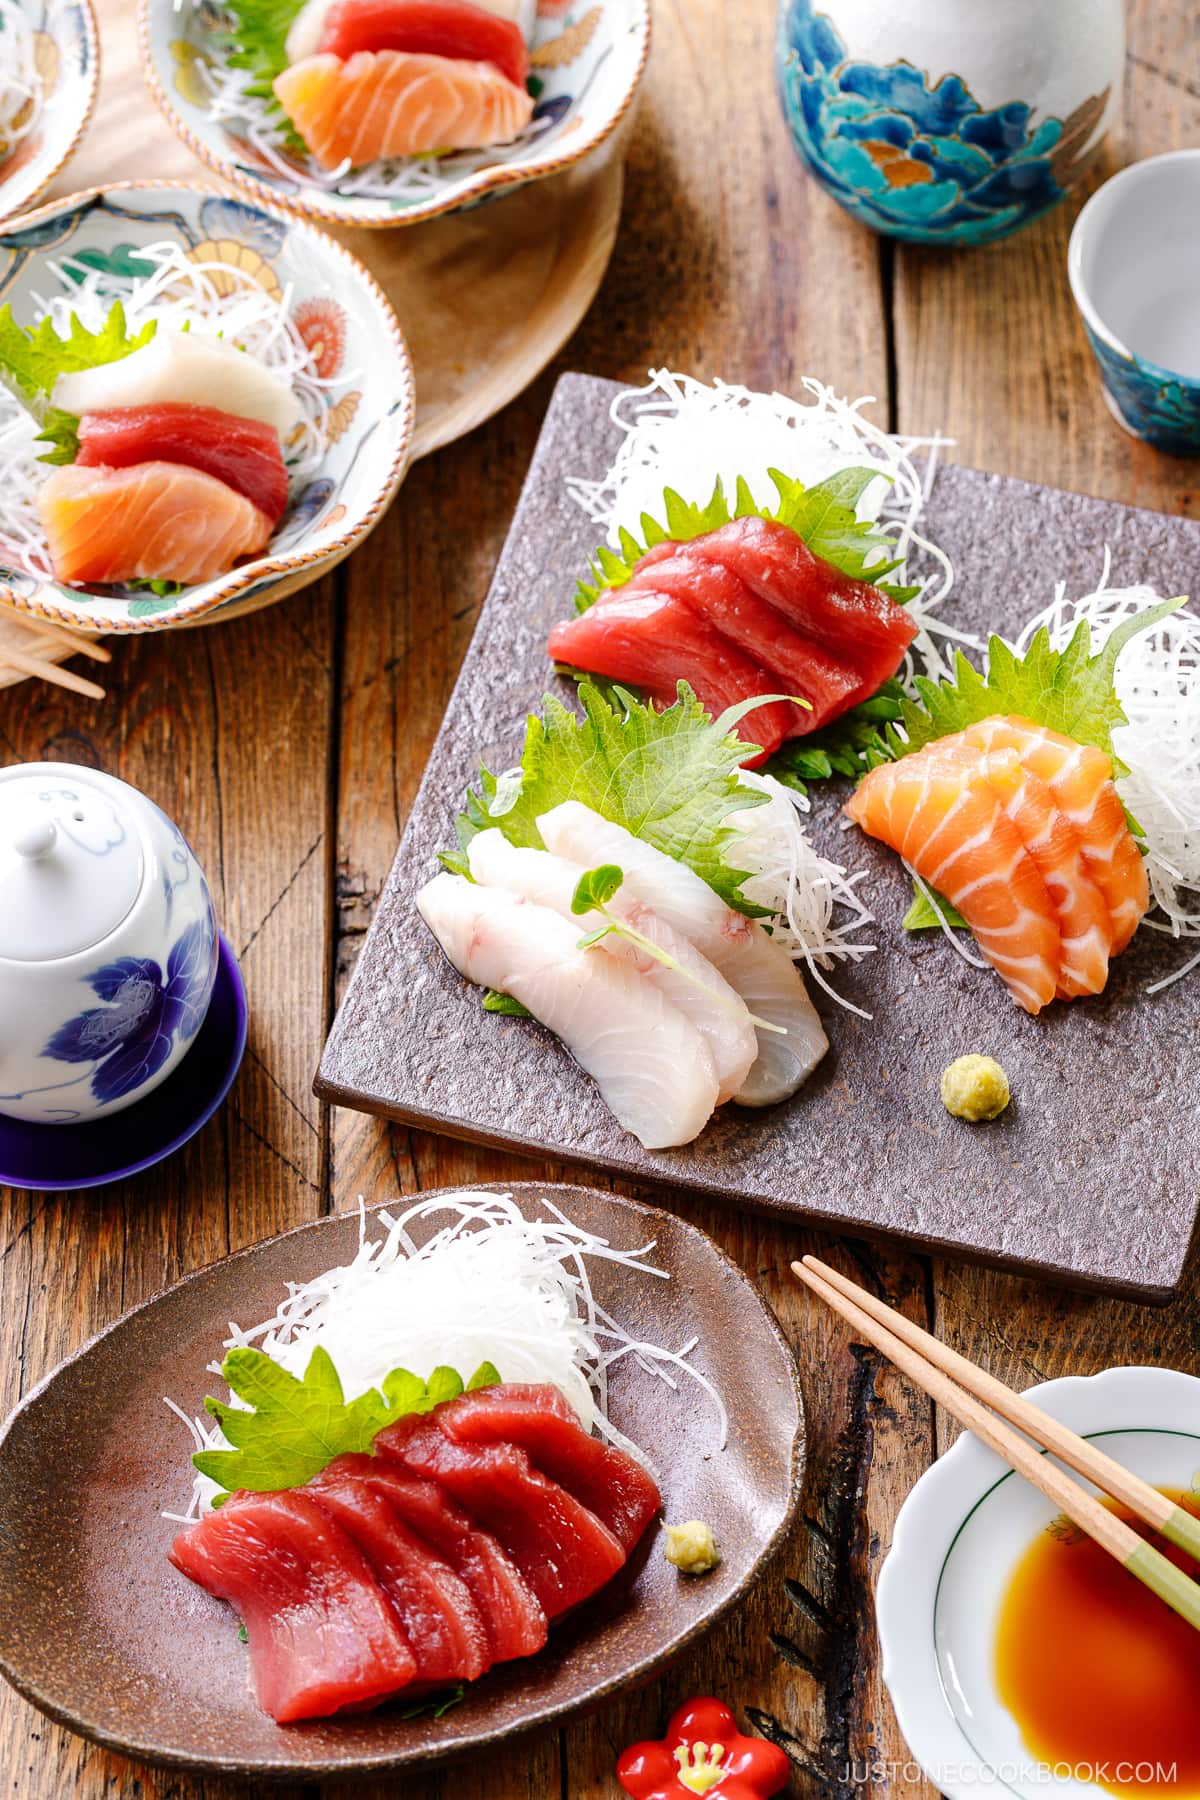
Sashimi (刺身), literally “pierced body” in Japanese, refers to thinly cut slices of raw seafood often served with soy sauce and wasabi.
This traditional Japanese dish, rooted in precision and appreciation for the freshest ingredients, involves the meticulous slicing and presentation of high-quality raw fish. Unlike sushi, which incorporates rice, sashimi highlights the unadulterated flavors and textures of the seafood. It’s pure, simple, and amazingly delicious.
Today, we’ll learn the basics of creating a sashimi meal in your own home, including tips on slicing the fish and presenting them aesthetically on platters for the most enjoyable experience.
Table of Contents
What You Will Need
To begin, here is what you will need to serve sashimi at home.
1. Sashimi-grade fish and seafood


You will need to find a trustworthy fishmonger, as the last thing you want is to get food poisoning from iffy-looking fish! Note that in the U.S., “sashimi-grade” and “sushi-grade” are not based on any food safety criteria or backed by a governing body; they are just marketing terms (for a deep dive, I recommend this post on Serious Eats).
Another important thing to know is that freezing, searing the surface, and marinating in vinegar will not kill off parasites lurking in the flesh. There will always be a risk involved in consuming raw fish and seafood, so I highly recommend researching in advance, talking to the staff behind the fish counters at Japanese grocery stores or seafood markets, or sourcing it from a trustworthy online store.
If you live in the San Francisco Bay Area, here are some good sources of fresh sashimi-grade fish:
- Suruki Market in San Mateo
- Tokyo Fish Market in Berkeley
- Japanese grocery stores: Nijiya, Marukai, and Mitsuwa
While presliced sashimi is convenient, it may not be available where you are. The fish may be sold in filets or blocks, which you must slice once you get home. The upside is that the quality will be fresher than pre-sliced.
Pro Tip: Make sure the fish is well chilled! Just like you can get clean slices of butter when chilled instead of at room temperature, it’s much easier to cut the fish when chilled, either in the fridge or in the freezer. This will also preserve the quality.
2. A sharp knife
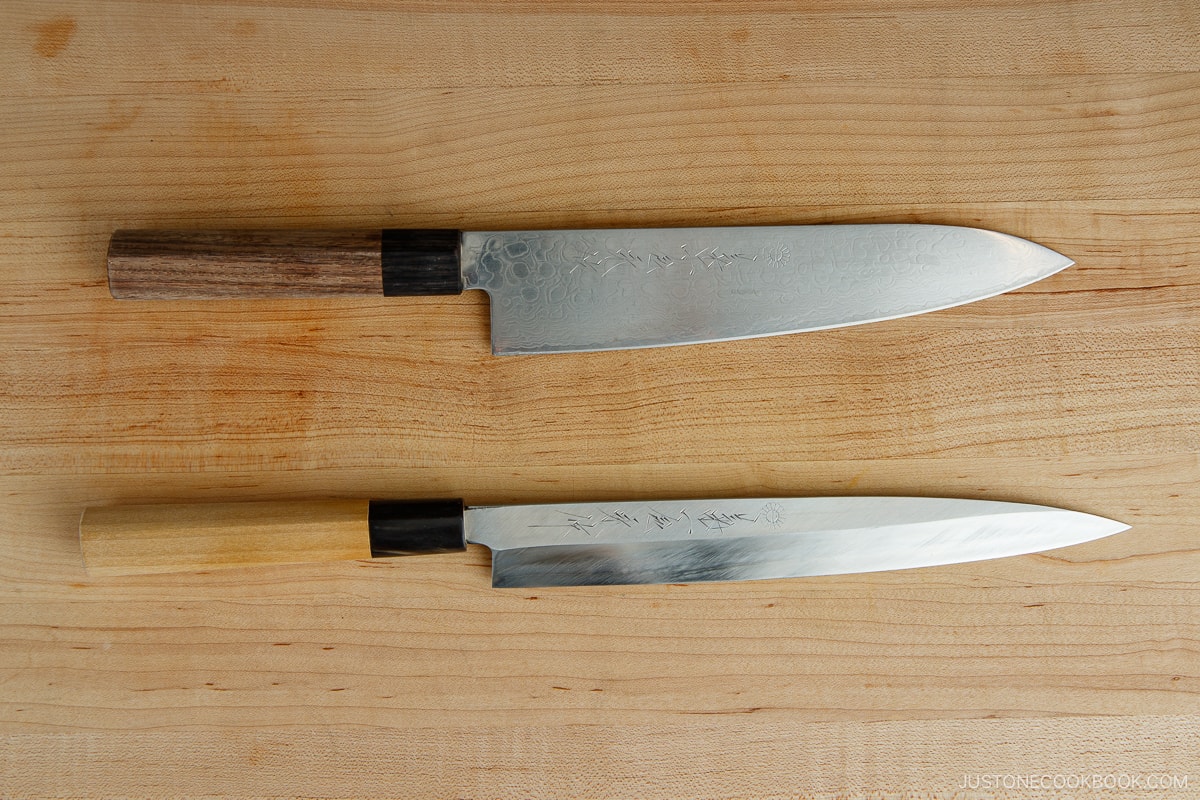
You must cut the fish and seafood yourself unless you’re lucky enough to buy pre-sliced sashimi. To cut sashimi, you will need a sharp knife. Buying a fancy and expensive sashmi knife for the task is unnecessary; any sturdy and sharp kitchen knife will do.
Take your knife to a knife store to get it sharpened and polished (we highly recommend Perfect Edge Cutlery in San Mateo), or watch tutorials on YouTube to do it yourself on a whetstone (I do not recommend using a knife sharpener as it can eat away too much of your blade).
- Santoku knives (三徳包丁), literally “three virtues,” are great all-around knives for meat, fish, and vegetables. They’re excellent for chopping and long-cutting strokes and can also be used for non-Japanese cuisine.
- Sashimi bocho (刺身包丁) or Yanagiba (柳刃) is a knife specializing in sashimi cutting. It has a long, slim blade, and you may have seen chefs wielding one at sushi restaurants. However, you do not need to buy one for sashimi cutting; a Santoku knife can do the job well.
- Deba bocho (出刃包丁) is a must-have if you wish to start by gutting, descaling, and breaking down the fish. It has a chunky blade to withstand cutting thick fish bones. However, if you are buying sashimi by the block, you will not need one.
🔪 To learn more about Japanese knives, read Your Guide to Japanese Knives
3. Chilled serving plates
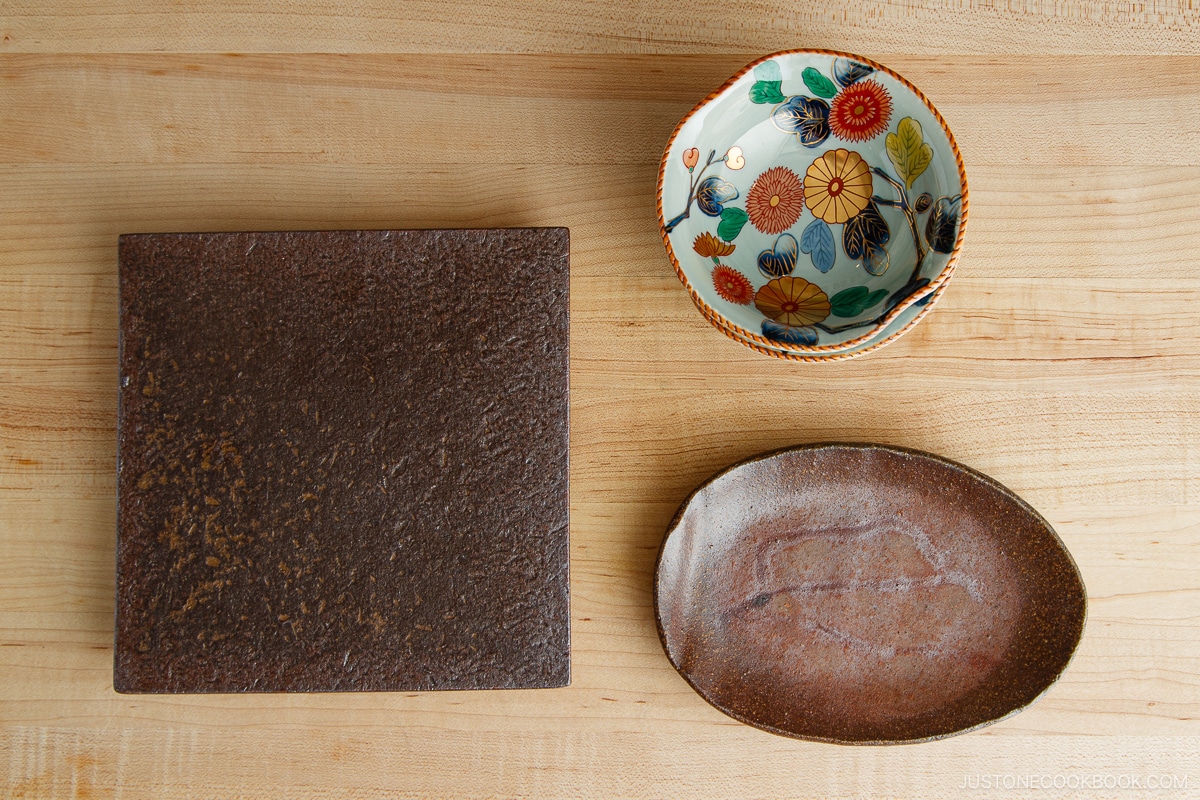
This is one of the easiest yet counterintuitive tricks to keep your food at the ideal temperatures. Restaurants that know their stuff chill or heat plates when serving food. Likewise, you can do the same with sashimi plates.
Chilling the plate before serving is a best practice to maintain food safety, preserve the freshness and quality of the seafood, and enhance the overall dining experience by ensuring that the sashimi is served at the correct temperature.
4. A clean and tidy kitchen environment
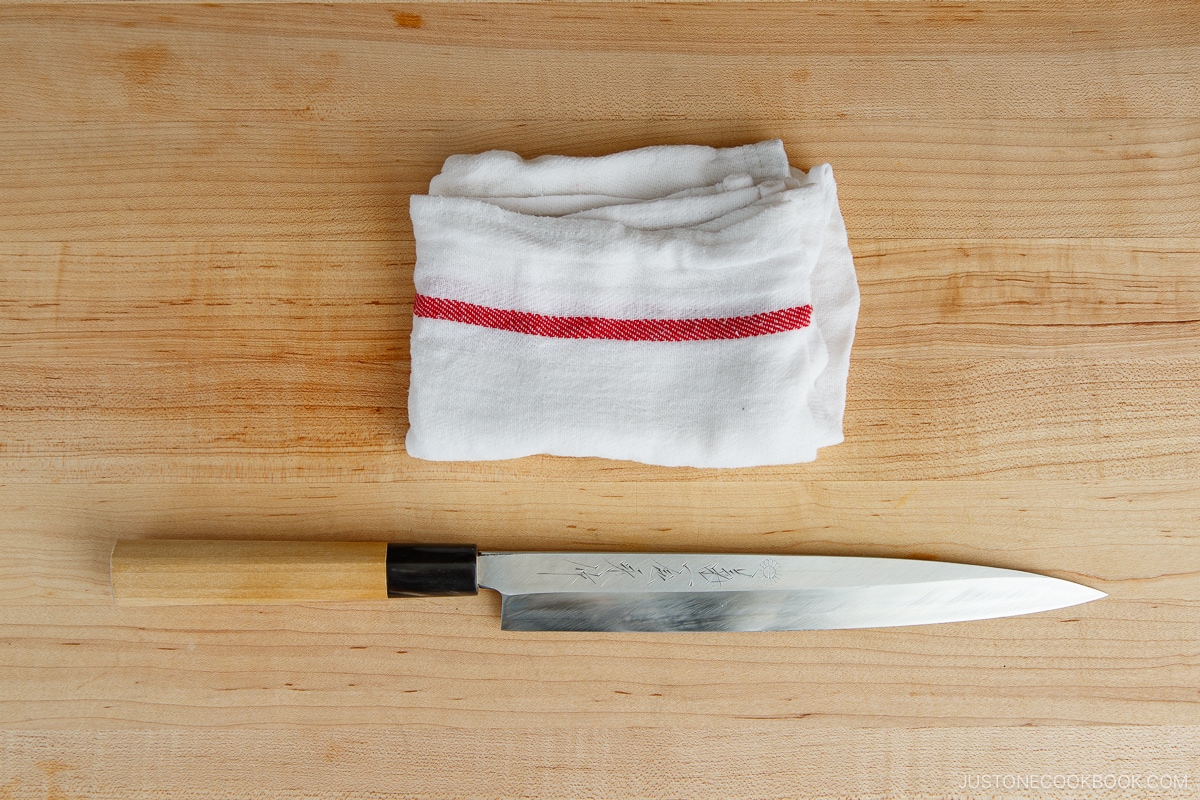
This may seem like a given, but you need a clean, tidy work environment. Remove unnecessary objects and kitchenware and give yourself ample space. You want to keep your space sanitary, especially when handling raw produce!
If using a plastic cutting board, consider squirting kitchen bleach on the surface before you start. I recommend setting your cutting board close to the sink to quickly wash off your hands, knives, or board.
It might be helpful to have a clean towel or paper towels nearby. Japanese chefs usually use a small moistened towel that’s well wrung out to wipe down their knives, workspace, and hands as they work.
How to Hold the Knife
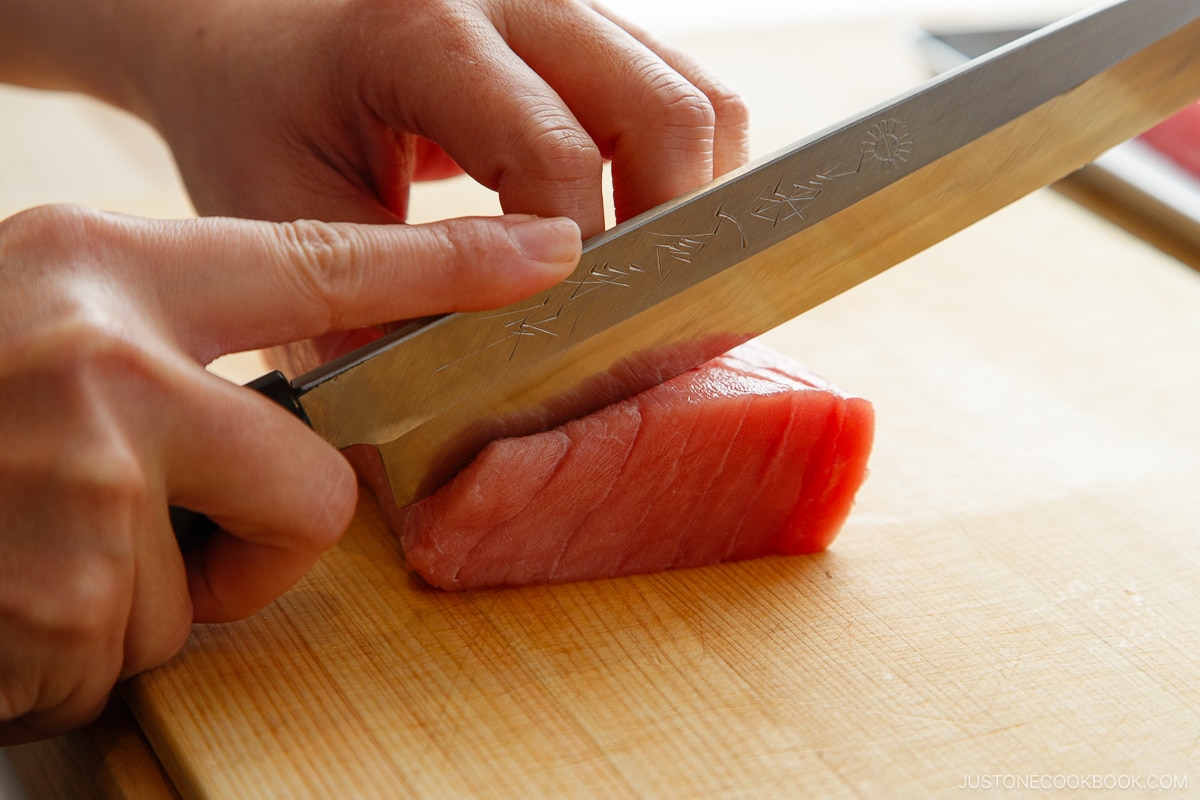
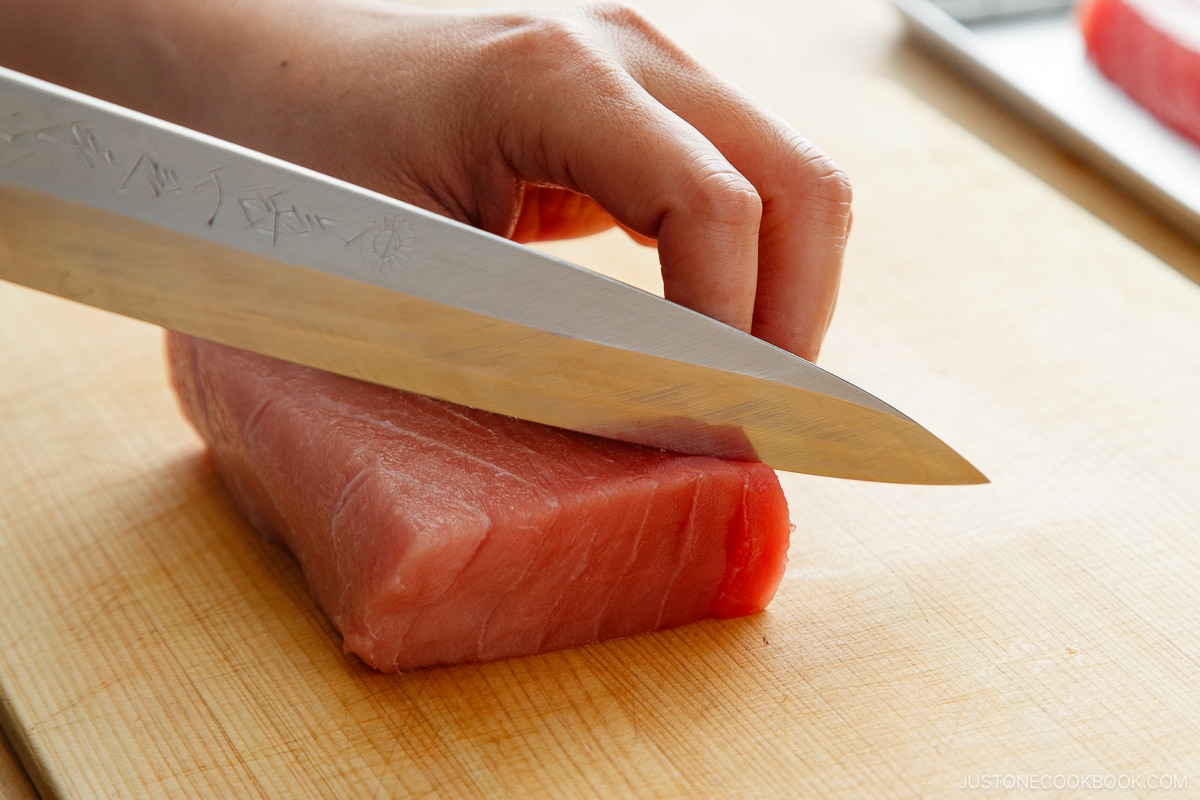
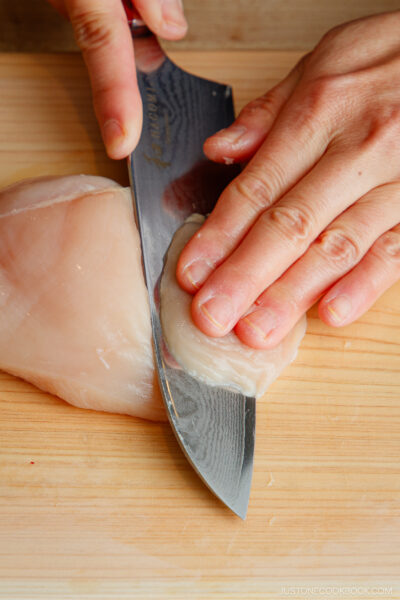
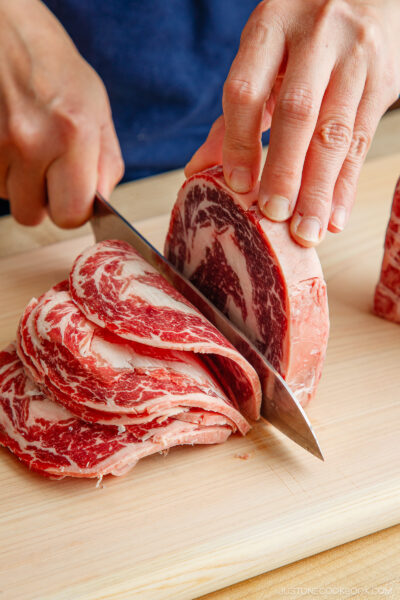
- Hold the sashimi block in place by curling your left hand over it into a light fist, as if cupping an egg inside, with the first knuckle of the left middle or index finger against the blade.
- Extend the right index finger over the spine of the knife; this allows you to sense the blade all the way to the tip and also stabilizes the knife, ensuring smooth, straight slicing.
- Hold the knife at a 45-degree angle to the cutting surface and pull the knife toward you in one motion. This allows for a smoother cut and gives the slices an attractive shape.
- Avoid sawing the knife back and forth, as this can damage the flesh and create raggedy cuts.
How to Slice the Sashimi
There are two basic cutting styles for cutting sashimi. Depending on the fish and your preference, you can slice the flesh following the two methods below:
1. Hira-zukuri (平造り)
If the sashimi block is thick and tender, it’s best to cut it thickly into rectangular slices to enjoy the meaty texture. Such fish include:
- Tuna (maguro)
- Amberjack (kanpachi)
- Salmon
- Bonito (katsuo)
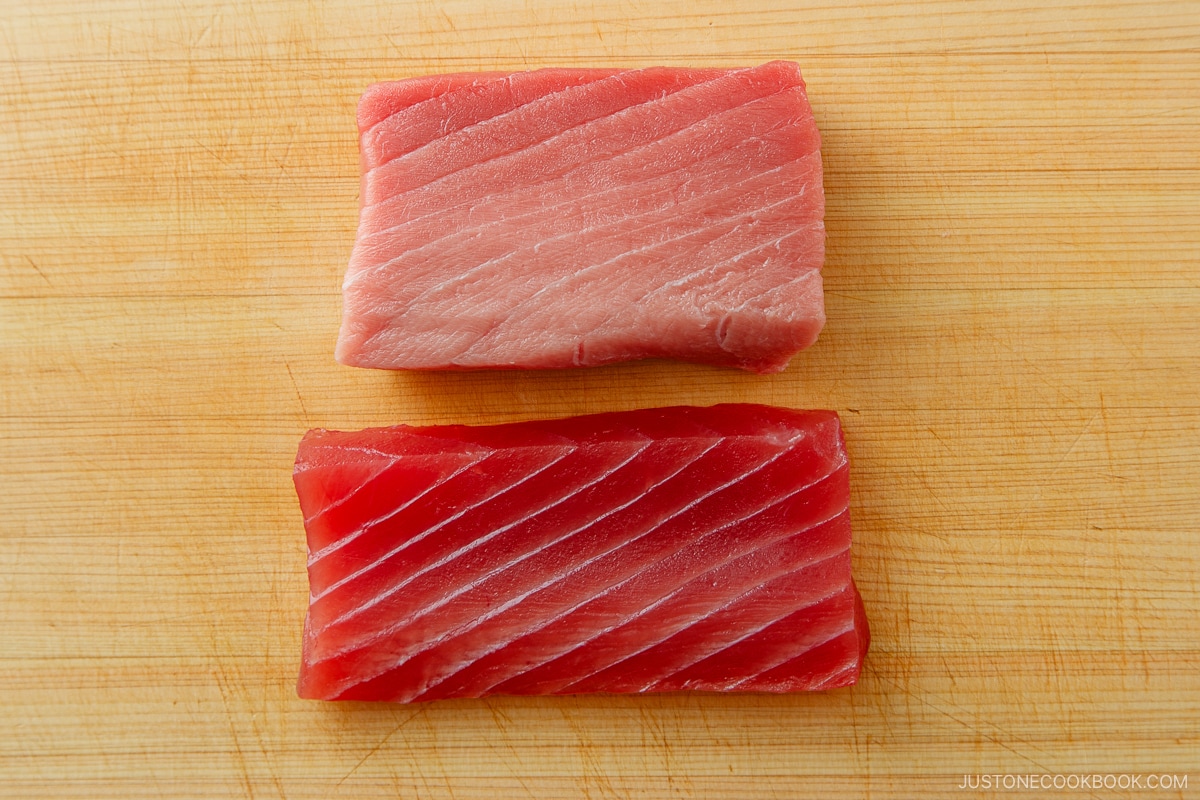
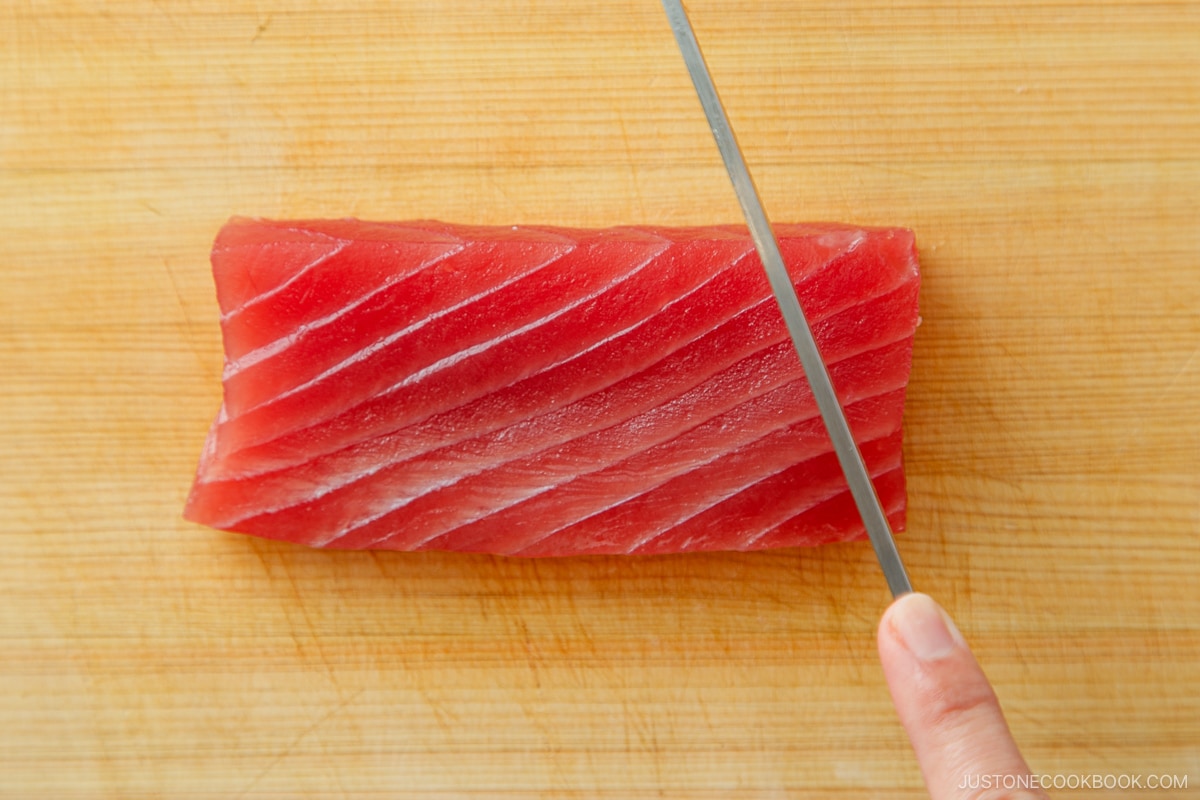
- Lay the fish block so the grain runs from the bottom left corner to the top right corner.
- Check the grain. You need to cut the fish fillet perpendicular to the grain.
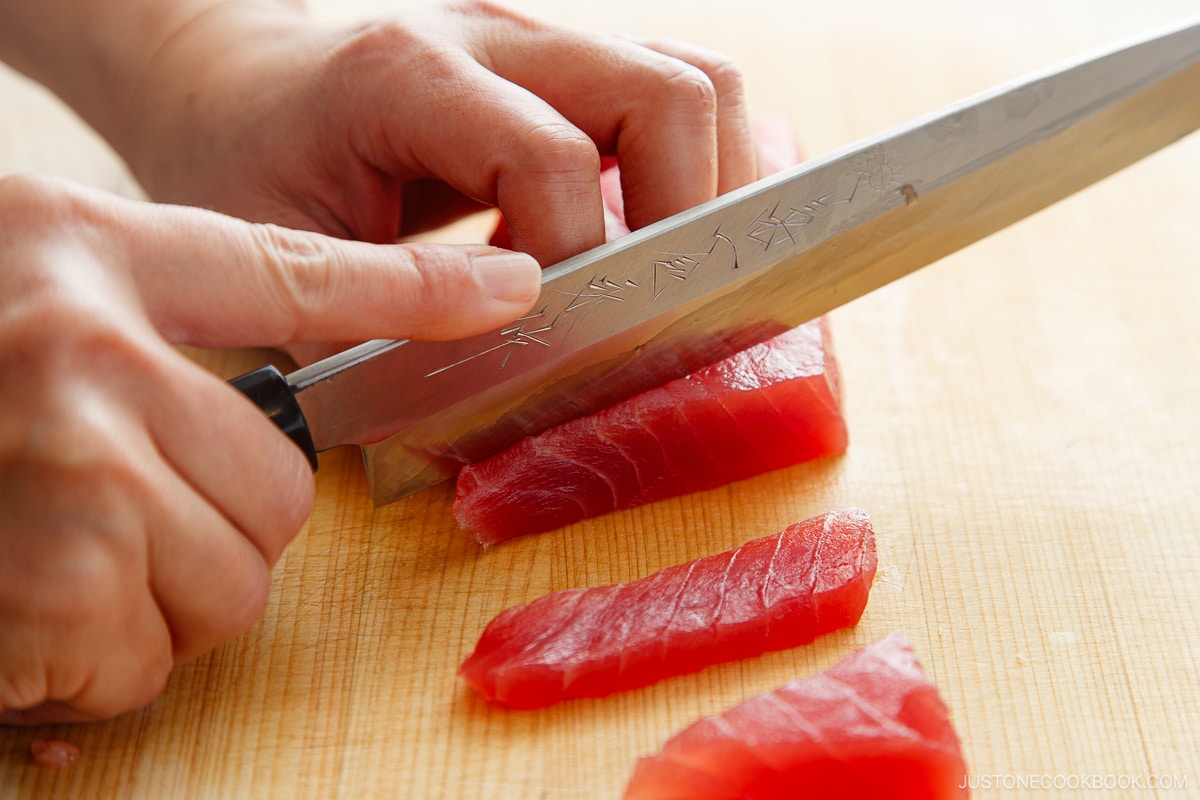
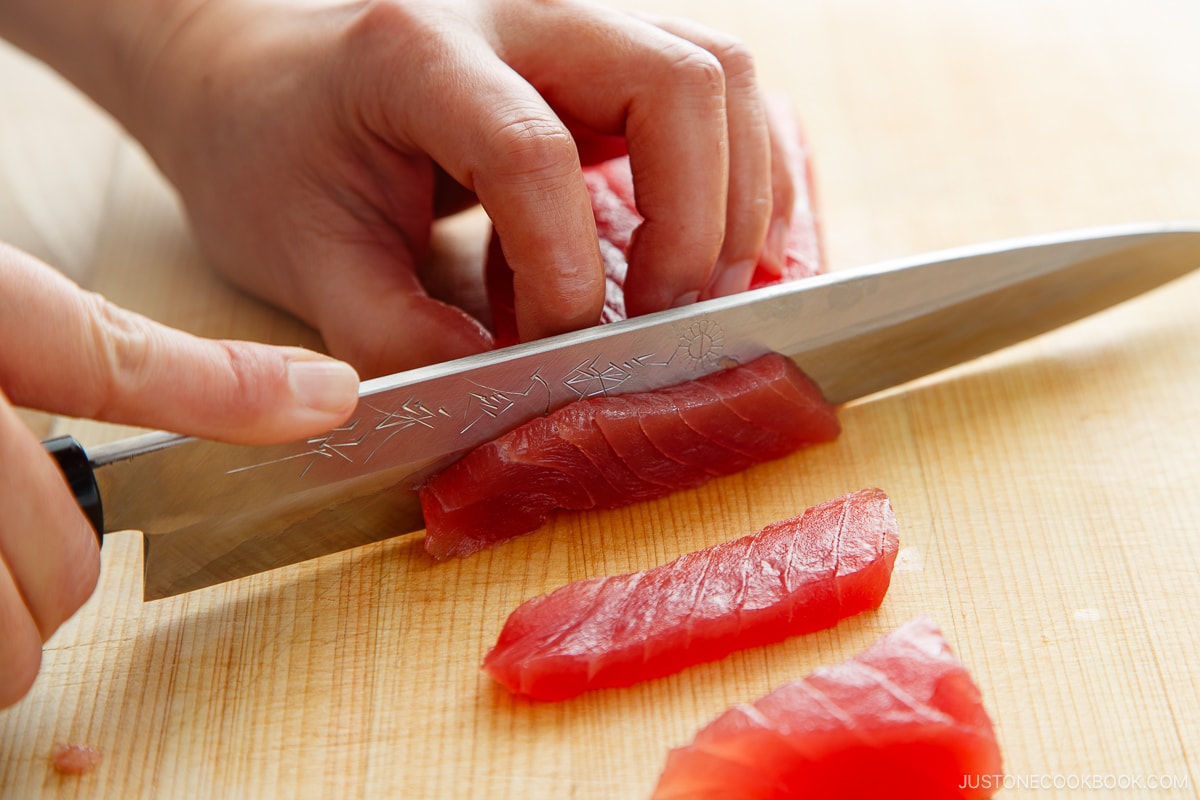
- Hold the knife at a 45-degree angle to the cutting surface.
- Pull the knife toward you in one motion and cut the fish into uniform pieces, about 1 cm (0.4 inches), in one smooth motion.
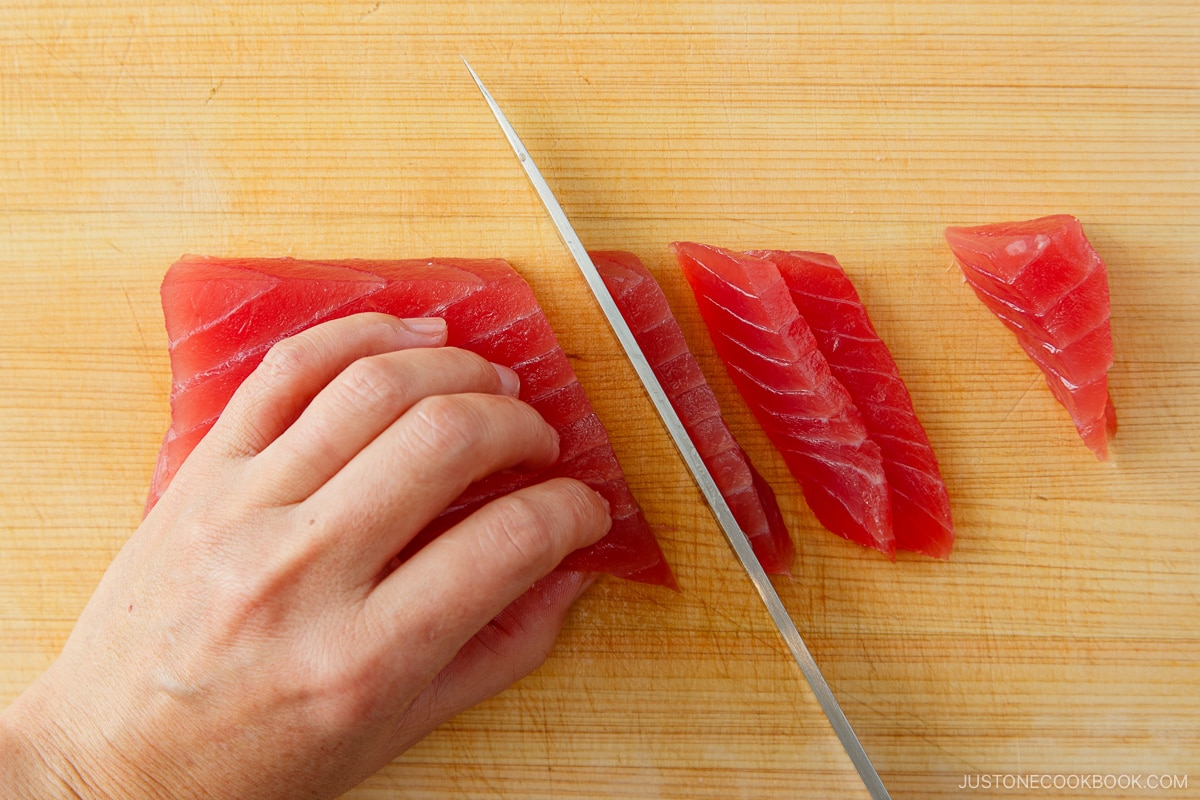
- After each slice, move or slide the cut piece to the right side.
- Wipe the knife with a damp cloth to remove any residue to ensure clean, smooth cuts.
2. Sogi-zukuri (そぎ造り)
White firm fish have tough and fibrous flesh, so cut the slices thinly for easy chewing. Since the cross-section is wide and thin, you can take advantage of its unique texture. The types of fish include:
- Sea bream
- Flounder
- Snapper
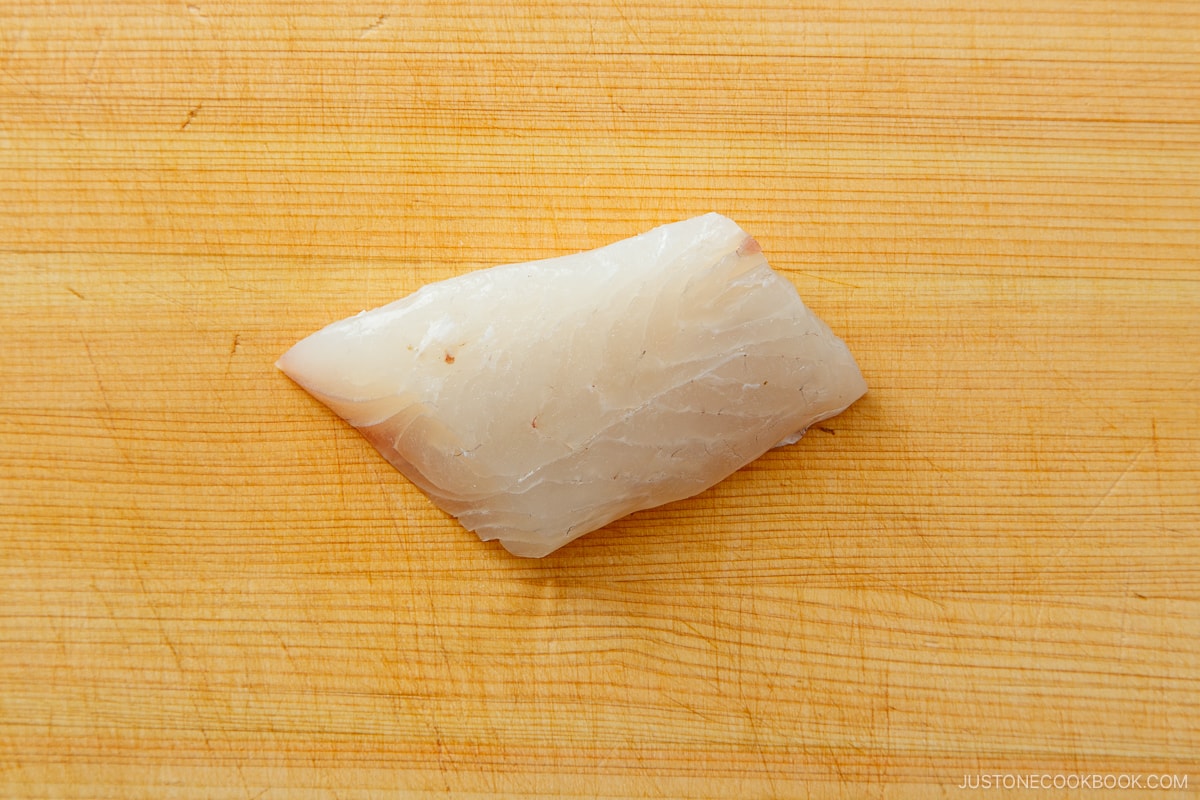
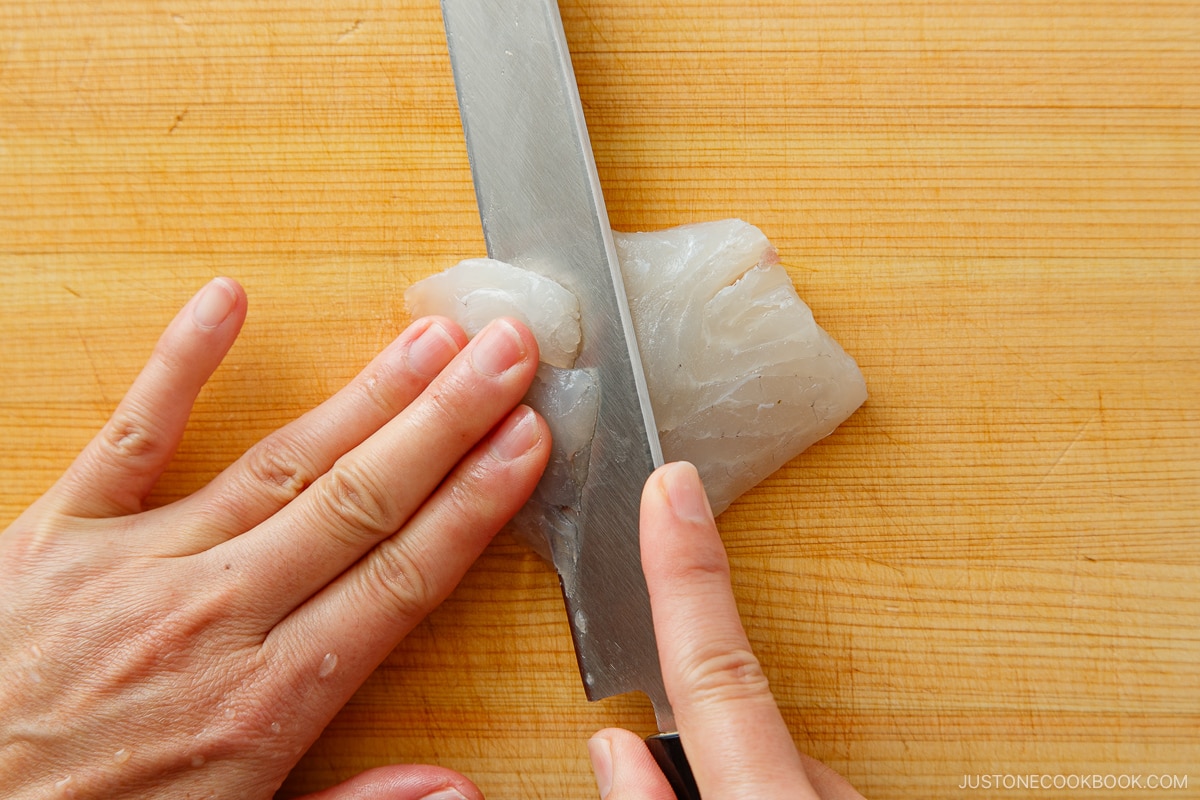
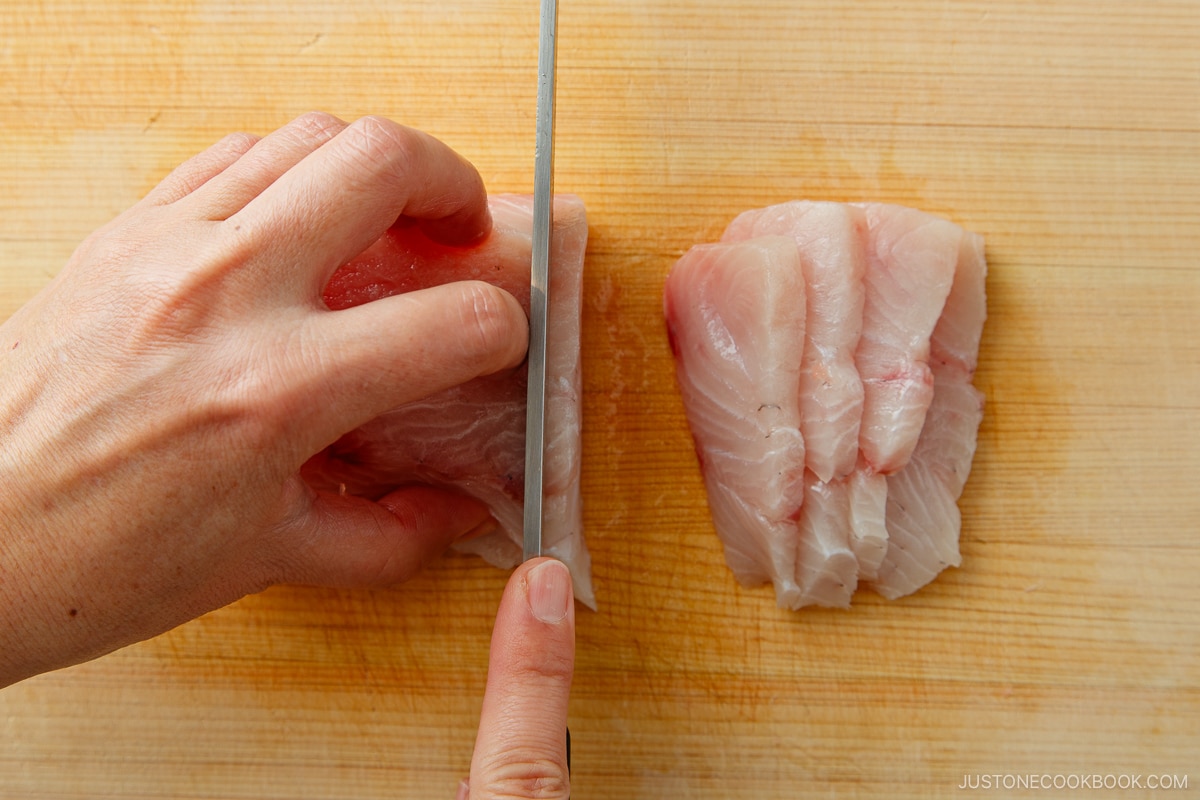
- Lay the filet, skin side down, placing the right end of the fillet higher than the left end.
- Lay the knife on the flesh as you slice down towards you. Hold the flesh with your non-dominant hand to steady the cut.
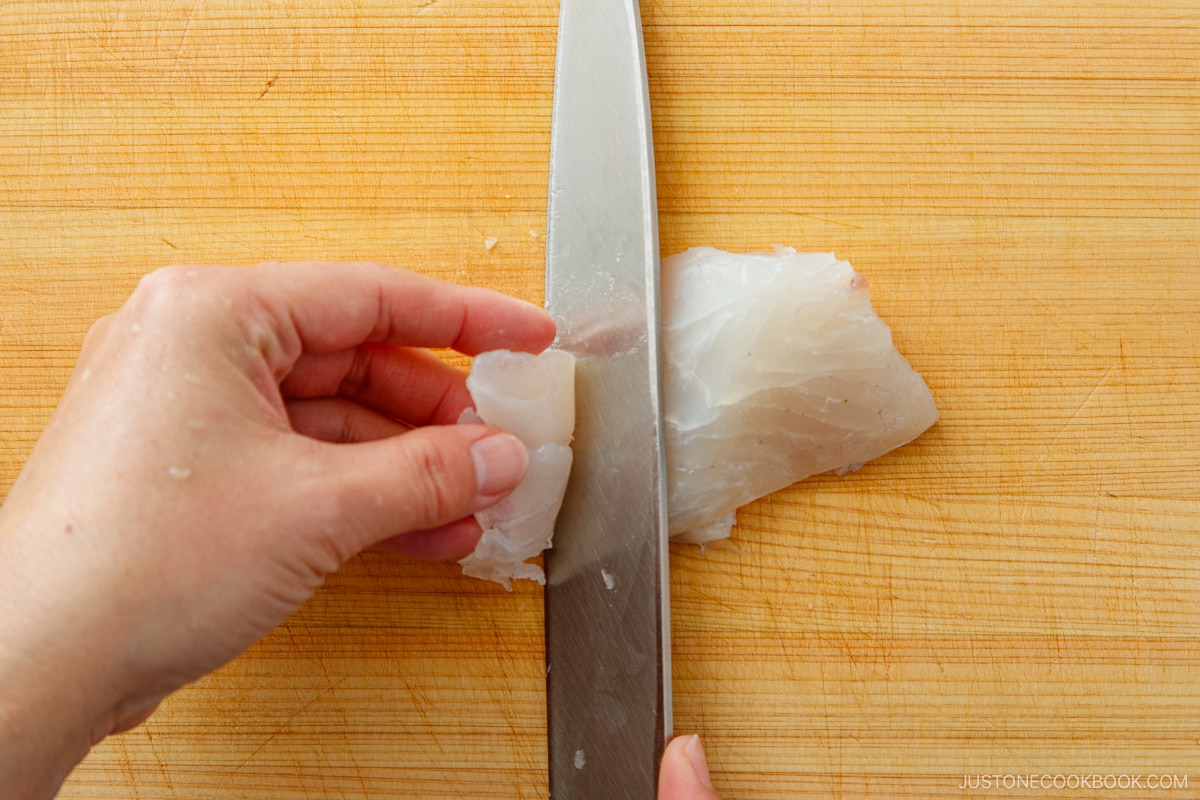
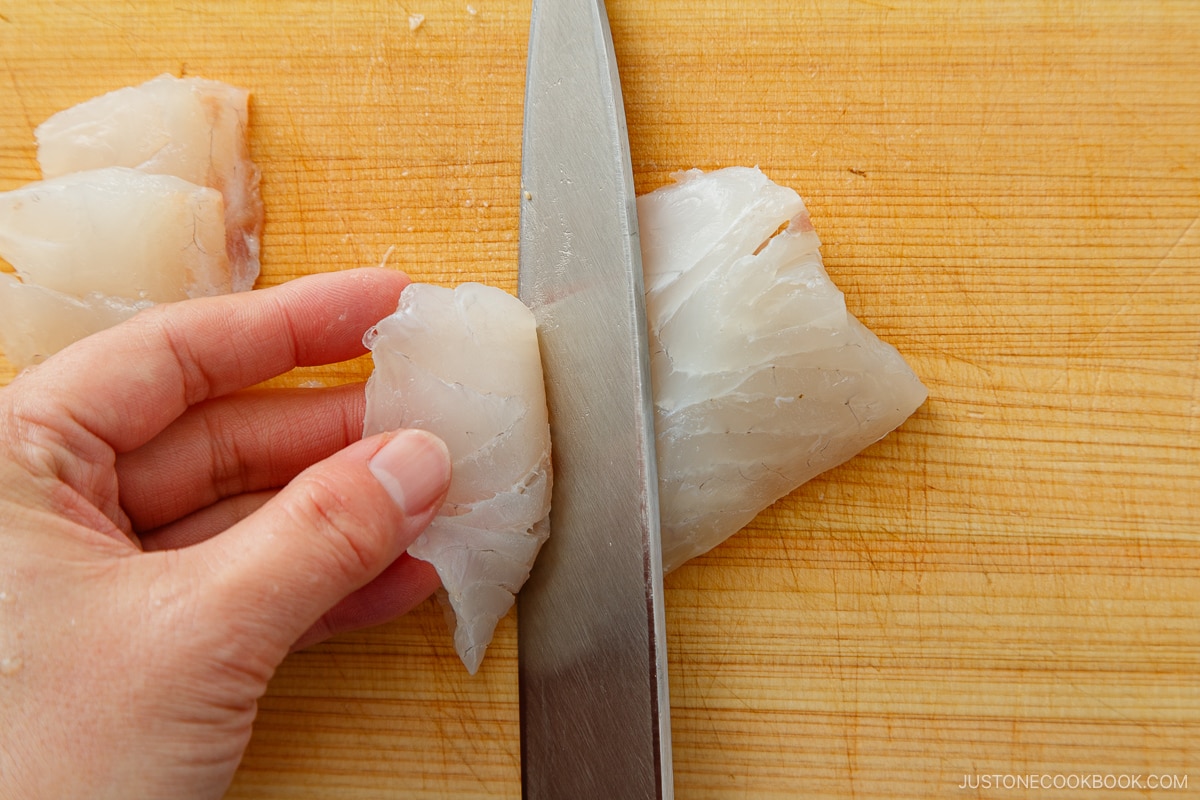
- Flip the slice with your left hand and fan out as you place it on the side.
How about Shellfish?
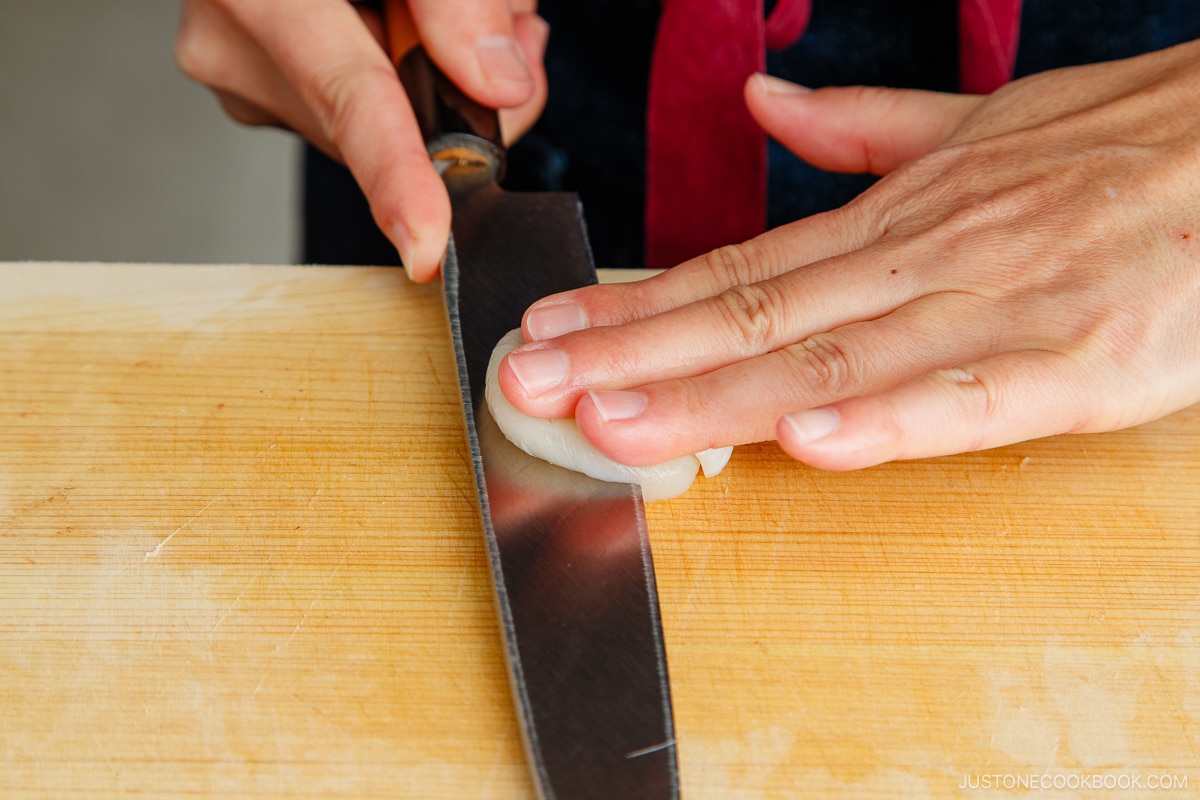
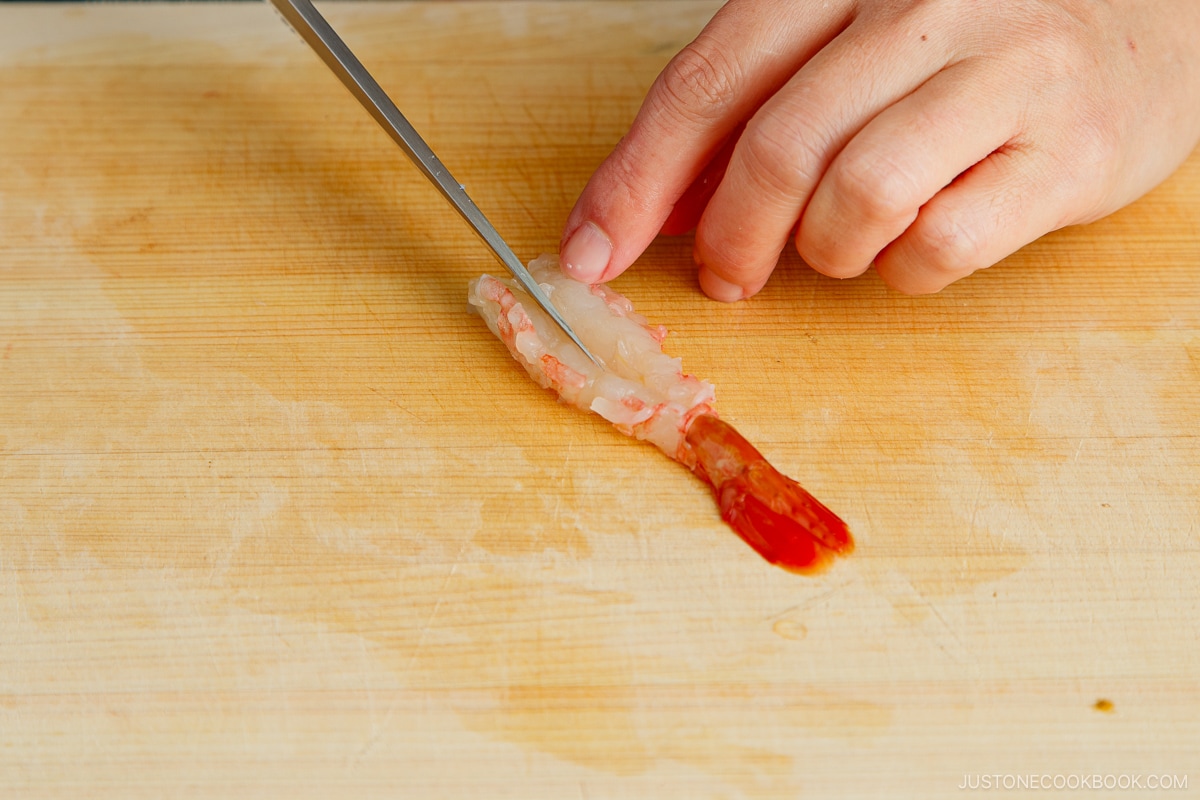
- Scallops: Depending on the size of the scallops, you may want to cut them into halves, quarters, or slice them vertically. You can also lightly char the surface with a butane torch for texture and aesthetics.
- Shrimp: Remove the shell except for the tails of the shrimp. You can butterfly them if you prefer by making a slit on the back to remove the digestive tract. Gently wash them in a bowl with cold water and a spoonful of salt, then pat them dry with paper towels to absorb excess moisture.
How to Arrange the Sashimi
Now, for the fun part! Depending on the selection of sashimi variety and plate size, you can get creative with the arrangement.
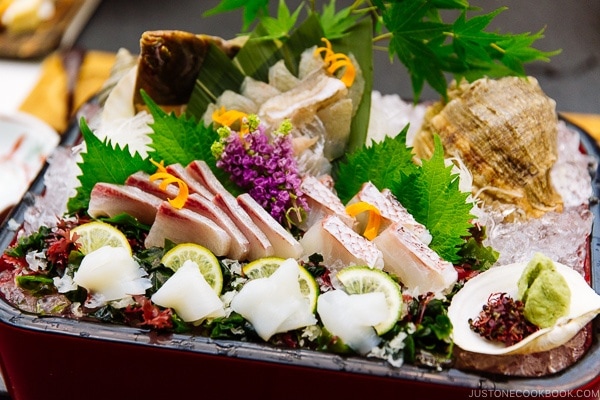
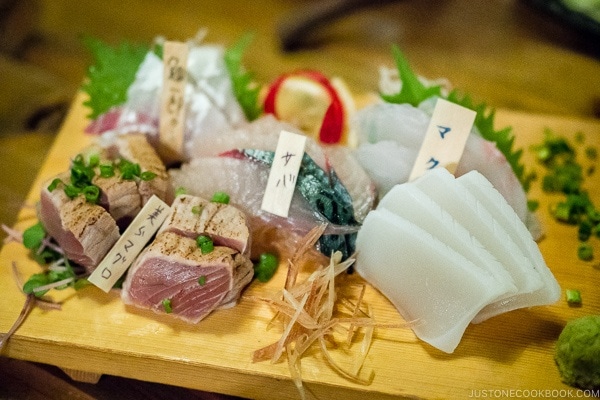
Here are some important tips to keep in mind.
- Height – When plating the sashimi, think of it as creating a landscape, like a cascade. Called Sansui-mori (山水盛り “mountain water heap”), creating height differences makes the plate impressive and festive. Here’s how to do this:
- Make height at the upper left or center of the plate using garnishes, like shredded daikon. Make a small mountain of shredded daikon (the mound should be fluffy and not packed) and add a shiso leaf on top.
- Fan out the sashimi with the skin side up. If you’re plating several varieties, the sashimi closest to you should lie flat on the plate, which should create height.
- Space – The Japanese are masters at utilizing negative spaces in their art and culture. This is also seen on a sashimi platter. Don’t crowd the plate; keep about 20-30% empty for balance.
- Odd Numbers – When plating sashimi slices and varieties, serve in odd numbers—for example, one or three slices of sashimi and three or five varieties. The Japanese have long valued odd numbers as auspicious, a belief stemming from the Chinese Yin and Yang philosophy, where odd numbers are associated with yang energy and considered lucky, while even numbers are linked to yin energy and considered less fortunate.
- Garnish Colors – As the color variety in sashimi tends to be sparse, use garnishes. Just remember not to go overboard with the garnishes; after all, they are meant to accentuate the plate and not to create a sashimi salad. For the color scheme, here are some examples:
- Yellow: lemon slices, edible chrysanthemum flowers
- Green: Shiso leaves, sudachi slices, wakame, cucumber, parsley, daikon sprouts
- Red: myoga, shiso flowers, shiso sprouts, cherry tomatoes, sliced radish
- Orange: carrots (in ribbons or julienned)
- Sashimi Color Balance – While there is no “correct” way of plating and eating sashimi, restaurants typically plate sashimi with mild-flavored sashimi, such as shellfish and white fish, towards the diner and dark-colored fish like tuna and bonito on the other side of the plate. As dark-colored fish have a meatier and stronger flavor, this is to prevent your mouth from becoming overwhelmed with the stronger flavors.
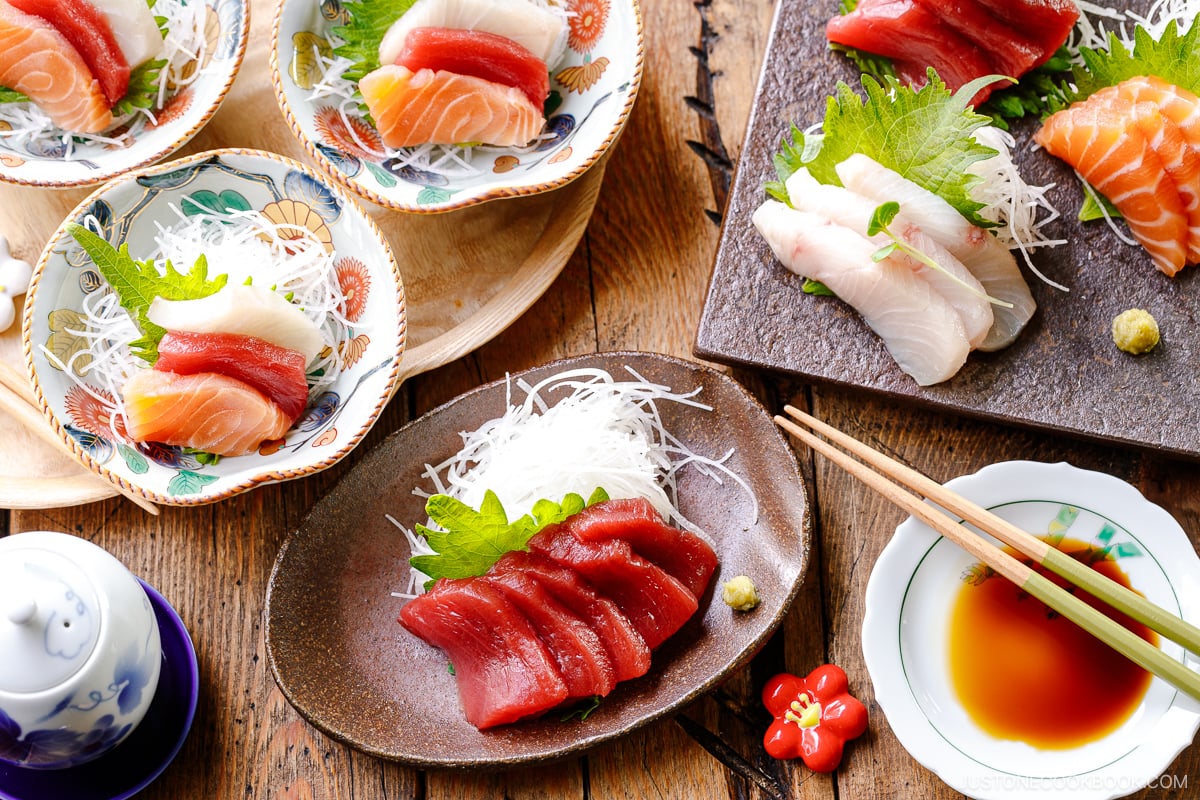
Sashimi Plate Examples
Now that we have gone through the variables in a sashimi plate, let’s look at some examples of sashimi plates. You can use Japanese or Western, round or square, big or small for plates. It may be easier for beginners to start with a white, round plate.
Example 1: One Variety
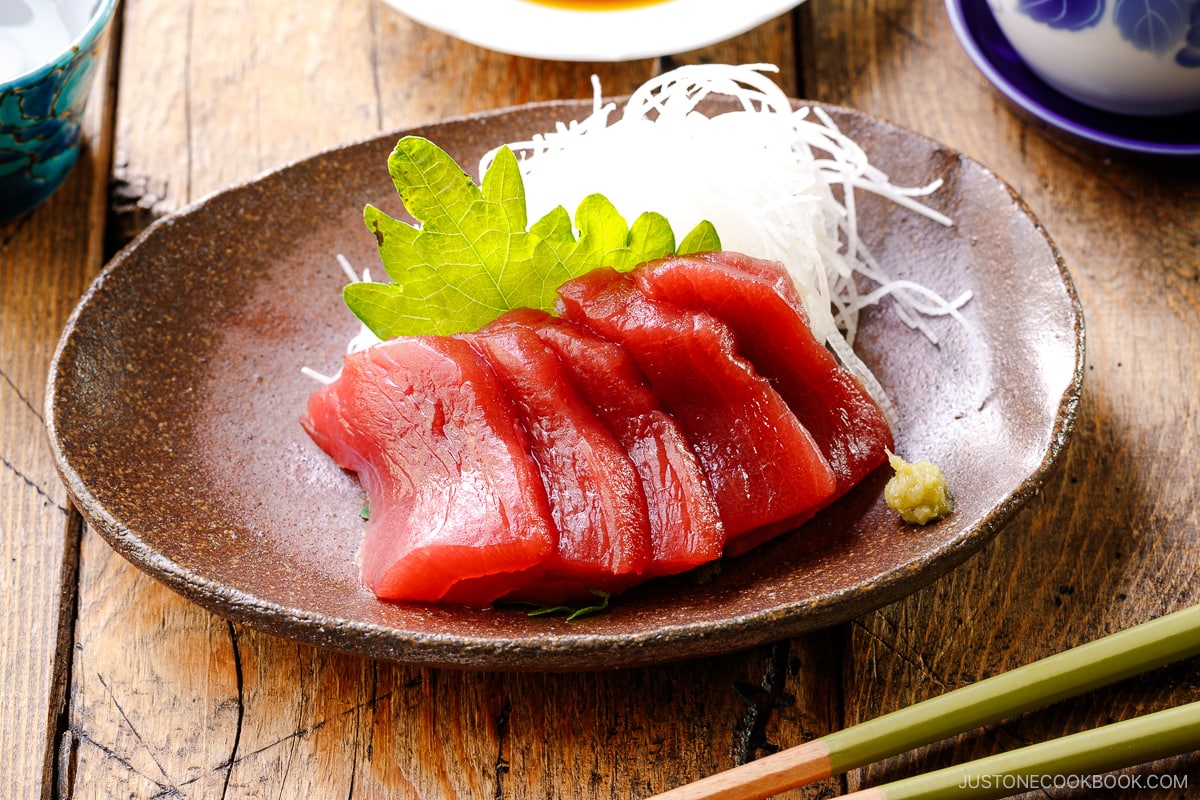
- Plate a small mound of shredded daikon in the center around 12 o’clock and diagonally lay a shiso leaf on top.
- Fan out the sashimi on top of the shiso leaf by layering from the back right to the front left to create a flow.
- Make a small mound of wasabi and place it on the right-hand side close to you.
Example 2: Three Varieties
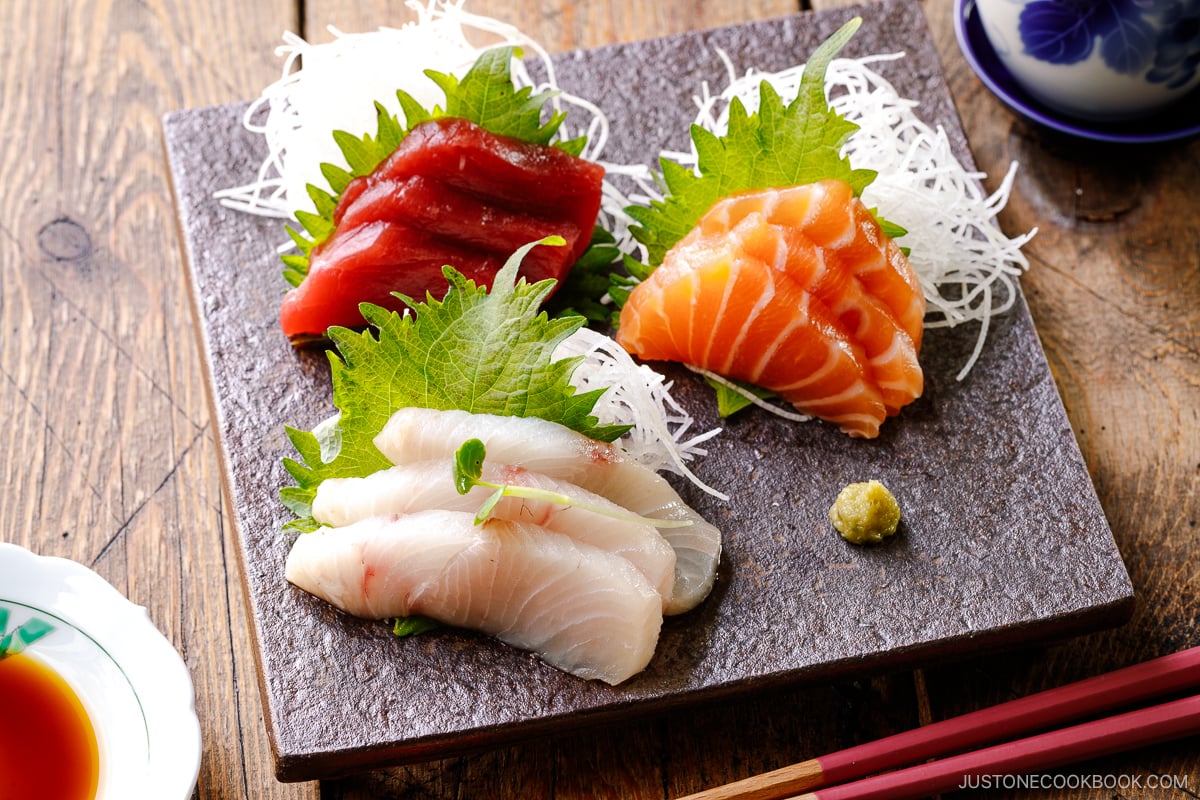
- Plate three small mounds of shredded daikon in the center around 1 o’clock, 6 o’clock, and 10 o’clock, and diagonally lay shiso leaves on each mound.
- Fan out the sashimi on top of the shiso leaf by layering from the back right to the front left to create a flow.
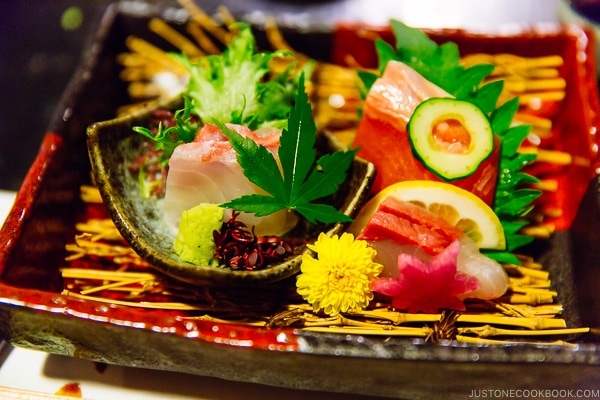
- Make a small mound of wasabi and place it on the right-hand side. Add more garnishes, such as shiso blossoms, parsley, and cucumber. Here in the picture above, kaiware daikon sprouts are used.
Example 3: Three Varieties for Single-Serving
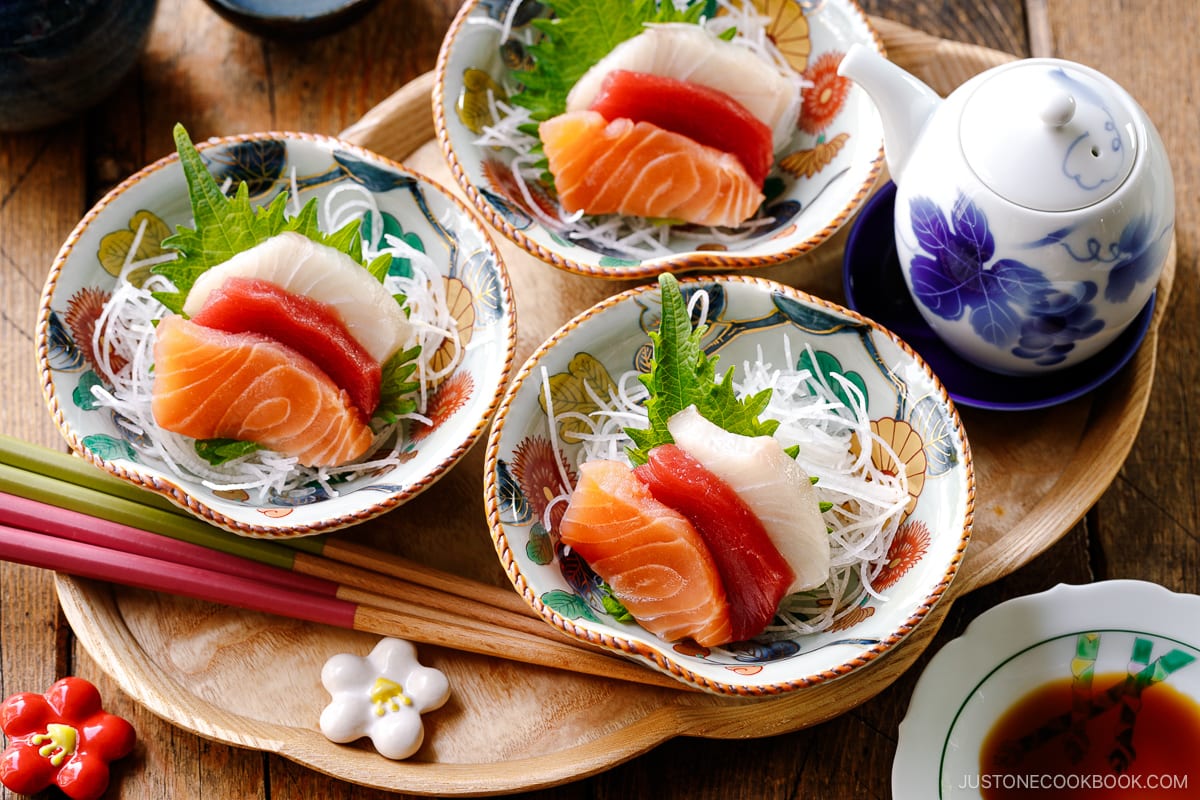
- Select a small bowl (kobachi) and lay shredded daikon (optional) and a shiso leaf in the center, with a little bit of the leaf tip sticking out.
- Fan out three sashimi slices on top of the shiso leaf by layering from the back right to the front left to create a flow. Alternatively, you can also fold each sashimi slice and place them at, 9 o’clock, 6 o’clock, and 4 o’clock.
- Make a small mound of wasabi and place it on the right-hand side.
Prepare the Garnishes
You can use various herbs and vegetables to add color, aroma, flavor, and texture to the plate and to prop up the sashimi. Collectively called tsuma (褄), these garnishes possess antibacterial properties and help neutralize the fishy odor. While you don’t need to prepare all the ones listed below, here are some commonly used garnishes in sashimi.
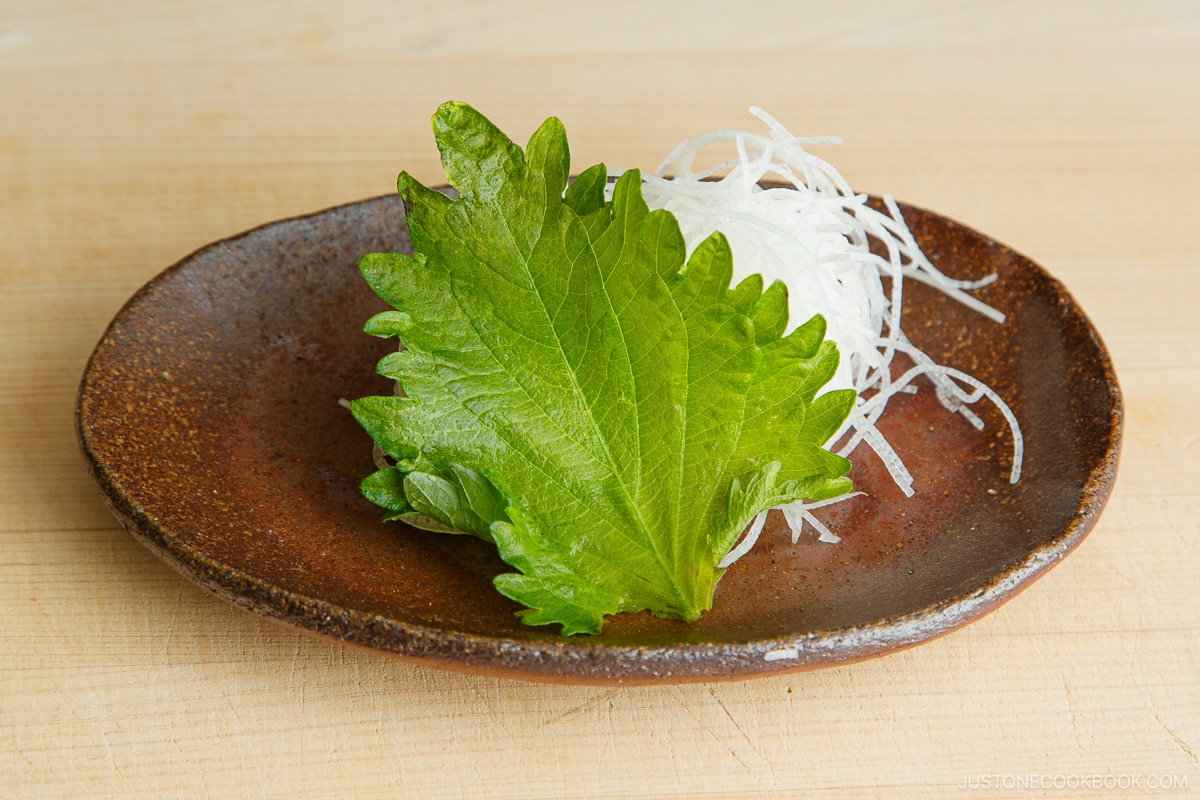
- Shredded daikon (大根) – Thinly julienned daikon can add structure to the plating and serve as a palate cleanser between bites. It’s made by thinly peeling the daikon in a continuous spiral, creating a thin, flexible sheet with consistent thickness (see the video), then thinly slicing for delicate and crunchy ribbons. This technique, called Katsuramuki (桂剥き), is a challenging knife cut that showcases the chef’s skills. Soak the shredded daikon in cold water for a few minutes to boost the crunchy texture, then drain well. Make sure to pat dry excess moisture before plating and softly roll the mound into a ball to prevent the daikon from spreading. Alternatively, you can also ask for shredded daikon at the sashimi counter in a Japanese supermarket.
- Shiso leaves (紫蘇, Perilla) – Add a herbaceous flavor and are known for their antibacterial properties. The forest green color also contrasts with the red tuna/maguro sashimi, which is why you often see cuts of maguro on top of shiso leaves. It also serves as a refreshing palate cleanser with fatty fish. You could also julienne the leaves and toss them with white fish or squid. Make sure to pat dry excess moisture before plating.
- Perilla sprouts (Mejiso 芽紫蘇) – The tiny shiso sprouts are often sprinkled on a sashimi platter and usually transferred to the soy sauce plate to be eaten with the sashimi. The green sprouts are called aome (青芽), and the purple sprouts are called murame (紫芽).
- Perilla flower buds (Hanahojiso 花穂紫蘇) – The petite shiso buds are also used as garnishes. They are eaten by removing them from the stems and adding them to the soy sauce. The pink-purple flowers are from red shiso, and the white flowers are from green shiso.
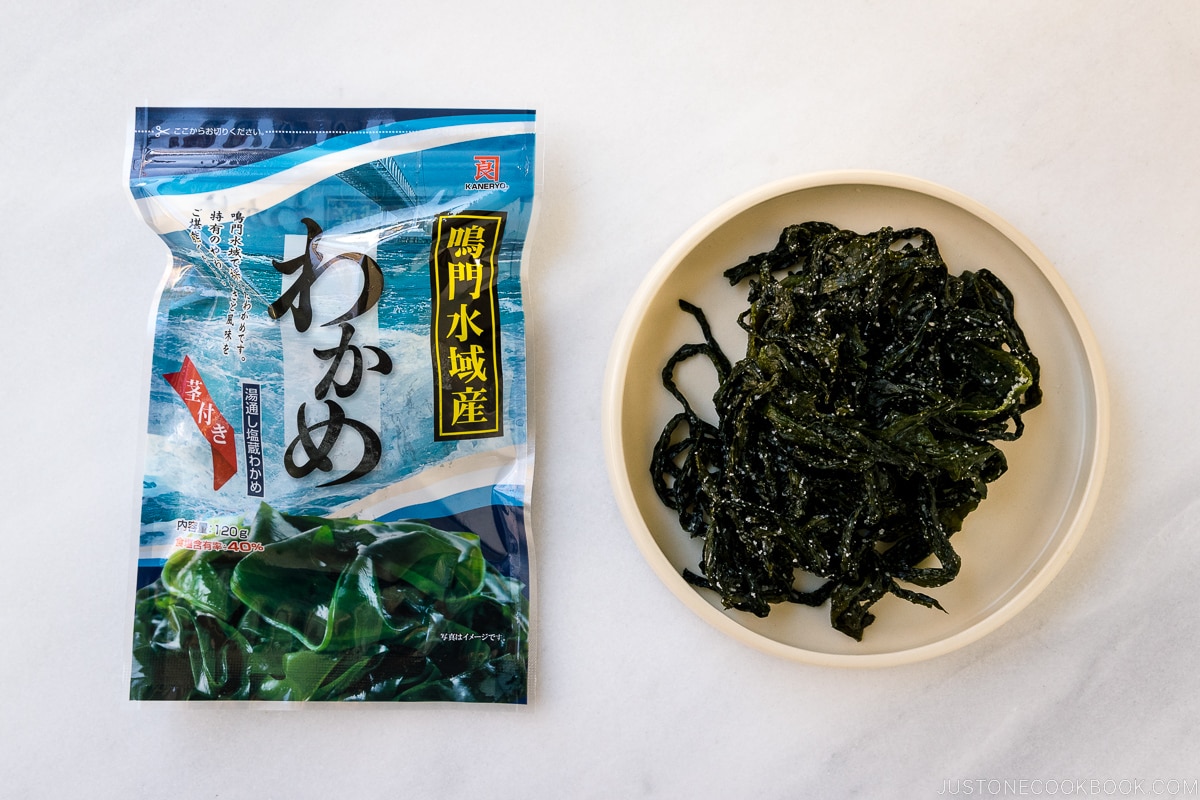
- Wakame seaweed (わかめ) – The Japanese consume a lot of seaweed, so it’s no surprise that wakame appears as a garnish. Boiled and undressed, it can be eaten with soy sauce or ponzu.
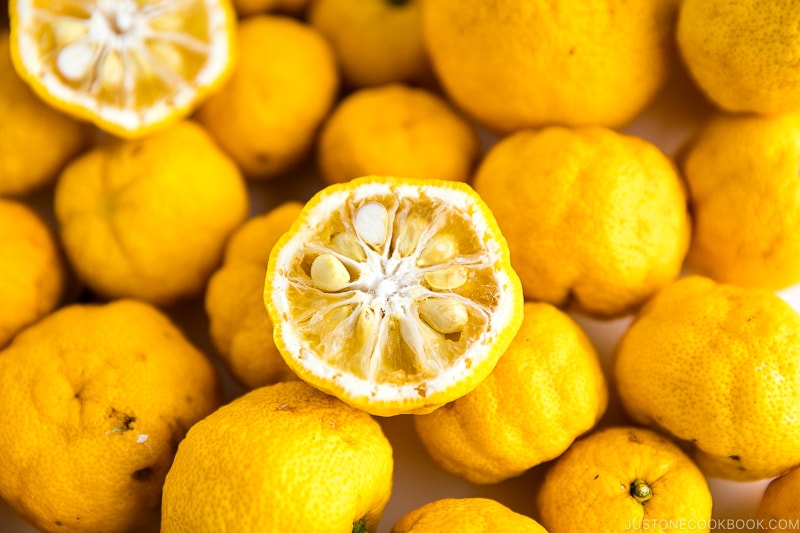
- Citrus fruits – Sudachi, yuzu, kabosu, and lemon, are used as garnish but are usually not eaten. You often see thin slices on top of white fish to add a refreshing touch and fragrance.
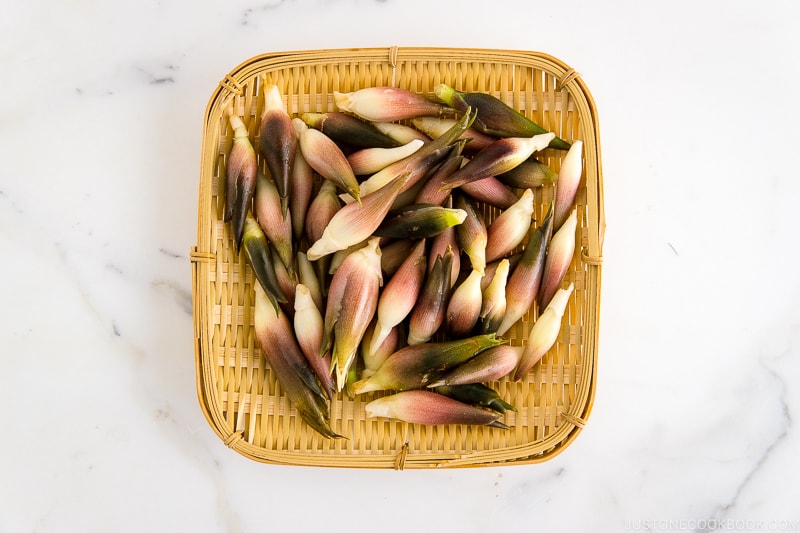
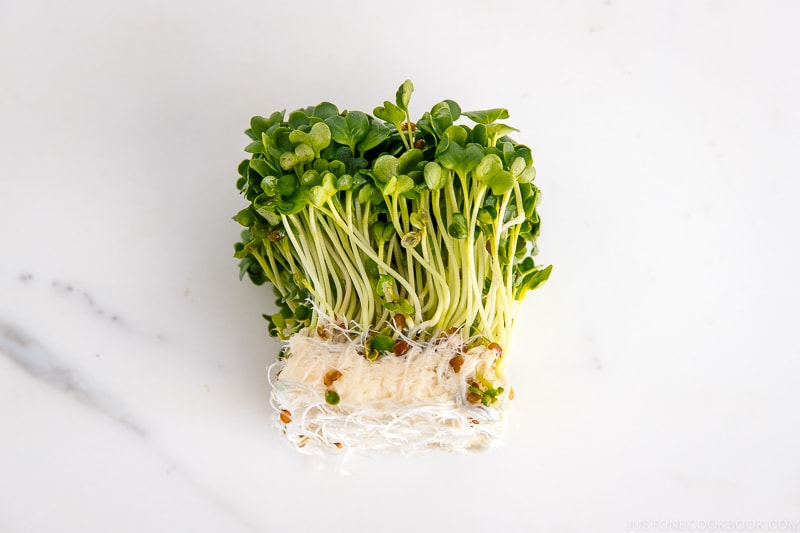
- Myoga ginger (茗荷) – Julienne or slice myoga in half for a zesty and crunchy palate cleanser and to add color to the dish.
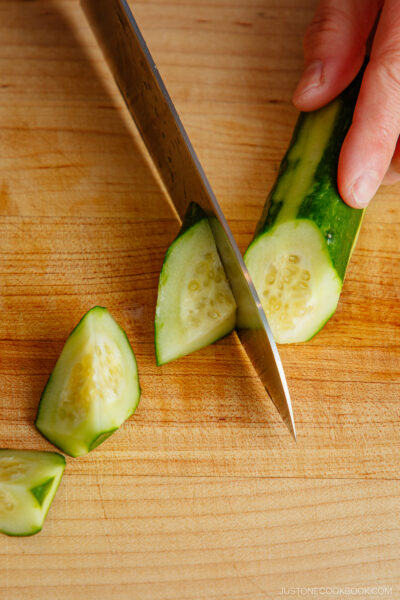
- Greens – Add greenery to the dish with a sprig of parsley, cucumber (julienned, sliced, or cut into intricate shapes kazarigiri 飾り切り), a pinch of kaiware daikon sprouts, or chopped scallions.
- Edible chrysanthemum flowers (shokuyo kiku 食用菊) – While edible, chrysanthemum flowers tend to be bitter, but they are said to serve as an antibacterial garnish. You can tear the petals and transfer them to the soy sauce plate to eat with the sashimi.
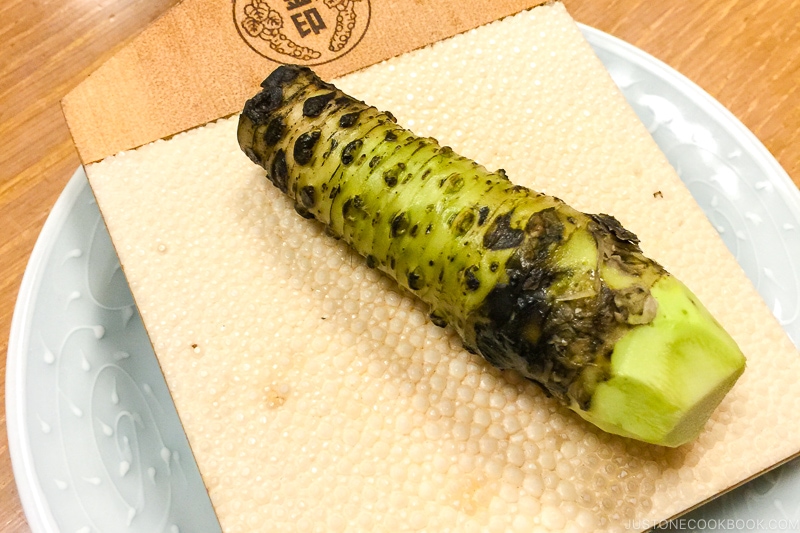
- Wasabi (山葵) – It is a must when eating raw seafood! If you’re lucky to get a hold of real wasabi, grate it with a fine grater or shark skin grater. If not, you can use commercial wasabi paste or reconstitute wasabi powder. Check the ingredient list for real wasabi, as cheaper brands often use horseradish and green food coloring. If putting a mound of wasabi on the plate, place it on the right side, as most diners are right-handed.
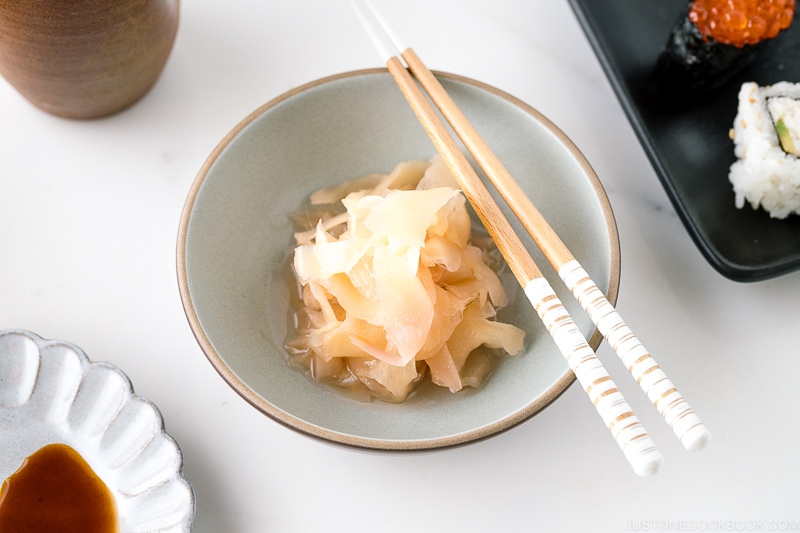
- Ginger – The Japanese often eat blue-skinned fish like sardines and mackerel with grated ginger to cut the fatty flavor. Grate a root of ginger, gently press out excess juice, and shape it into a mound. The Japanese usually DO NOT eat pickled ginger (gari ガリ) with sashimi but with sushi.
Presentation and Final Touches
After plating, double-check the arrangement to ensure it’s visually appealing. Here are the final tips:
- Make sure the plate is clean and free from smudges or spills.
- Check the overall balance of the plate’s colors, textures, and flavors. Don’t go overboard with the garnishes!
- Pairing opposite colors makes the sashimi stand out (e.g., tuna and shiso leaves, white fish on dark-colored plates).
- Serve the sashimi plate immediately to maintain freshness or refrigerate until it’s time to eat.
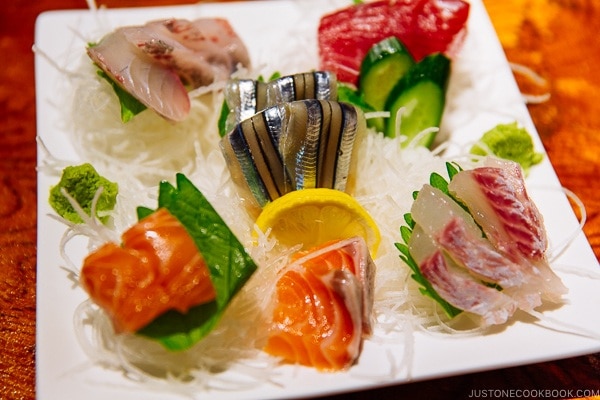
I hope this guide inspires you to serve and enjoy sashimi at home! It might be intimidating at first, but with a few rounds of practice, you will come to enjoy the process of mastering this art form.
Wish to learn more about Japanese cooking? Sign up for our free newsletter to receive cooking tips & recipe updates! And stay in touch with me on Facebook, Pinterest, YouTube, and Instagram.



I often have to buy the fish frozen, but this tends to mean that it gets quite wet as it thaws. I have used paper towel to try to dry the fish before slicing, but it always seems to still be wet by the time it’s sat on the plate for a little while. Any tips to avoid wet fish? Thank you!
Hi Alys! I’m not too sure about your whole process, but I think your defrosting process might be wrong. Many people don’t realize that most whole fish and sashimi blocks are shipped frozen, and sushi chefs have to properly defrost them on their own. So, the defrosting skill is critical, and some sushi restaurants do such a poor job defrosting that sashimi tastes very watery despite getting the fish from the same source as others.
Do you wrap the sashimi with paper towels and defrost it in the refrigerator overnight? The only time you defrost outside the fridge is when you defrost bluefin tuna in salt water. Make sure the fish is defrosted, but still has some firmness to it.
Hope that helps!
Thank you! I have defrosted in the fridge always, but before this time, I have not wrapped in paper towels (before, I just left the fish in its plastic until it was fully defrosted in the fridge). So I am hoping I will have a better result this time. I appreciate your reply!
Thank you so much for this guide! Sashimi is deceptively difficult to prepare. I’ve tried my hand at it on several occasions, and it’s never come out quite right. On the surface it seems like “cut up some fish,” but in reality it’s so much more.
I learned some valuable tips from this article, and I can’t wait to pick up some fresh fish to try out these techniques!
Hi John! We are glad to hear this post was helpful!
Thank you so much for reading Kayoko’s post. ☺️
One of my favorite websites by far!
Hi Zee! Aww.🥰 All of us at JOC are so happy to hear that! It means a lot to us.
Thank you very much for your love and support.
Great guide! 🙏🏽
Hello Oliver! Thank you so much for taking the time to read Kayoko’s post!
We are glad to hear you enjoyed it. Thank you for your kind feedback.🤗