
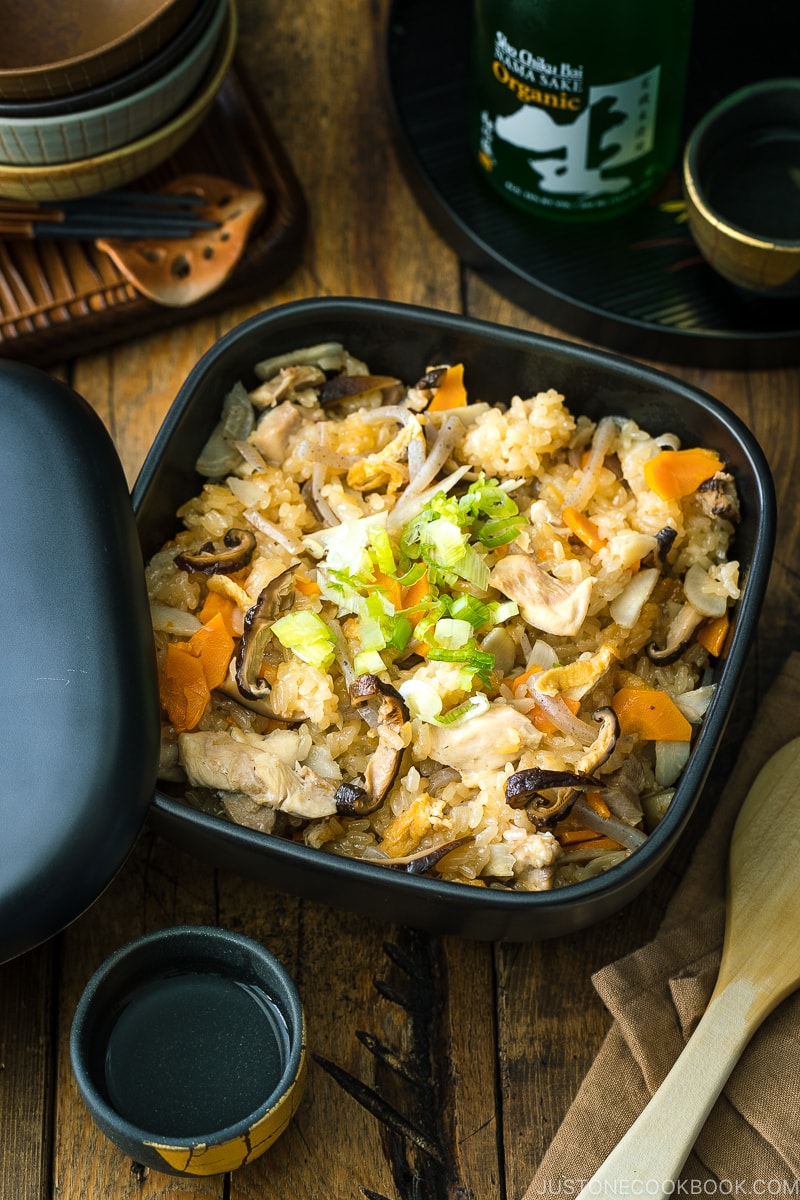
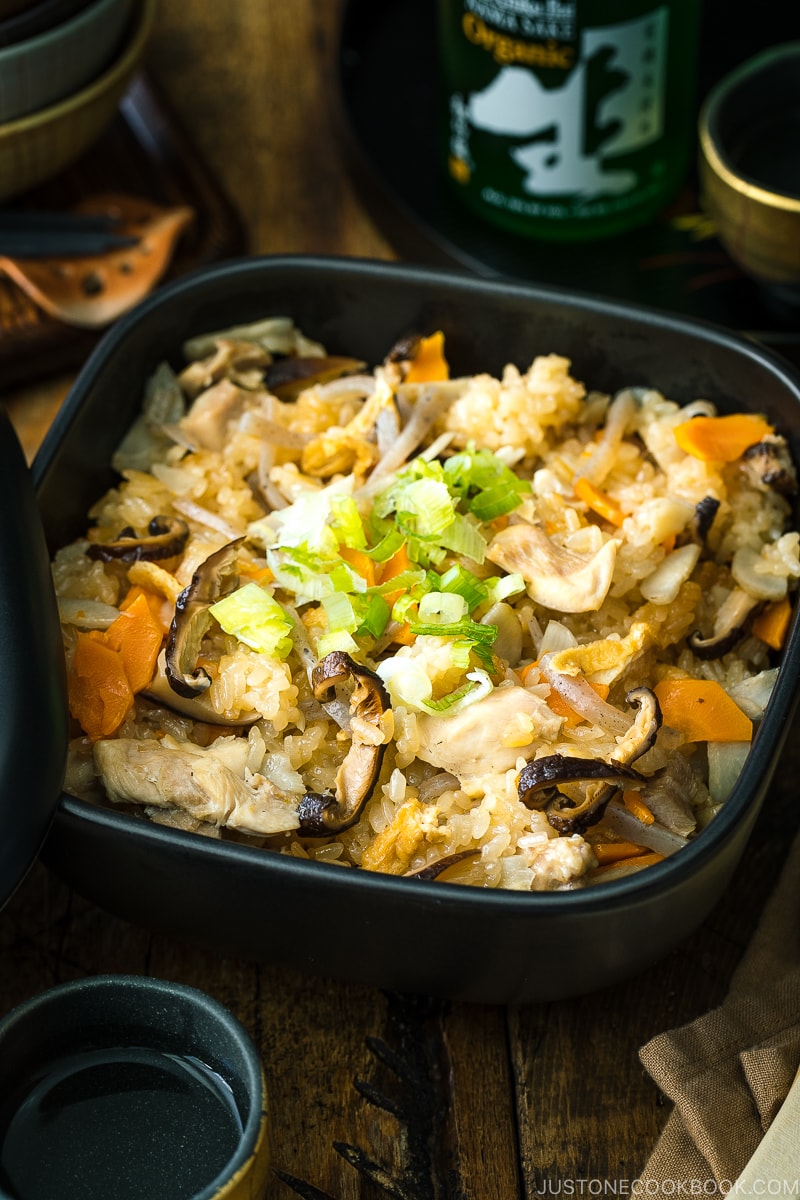
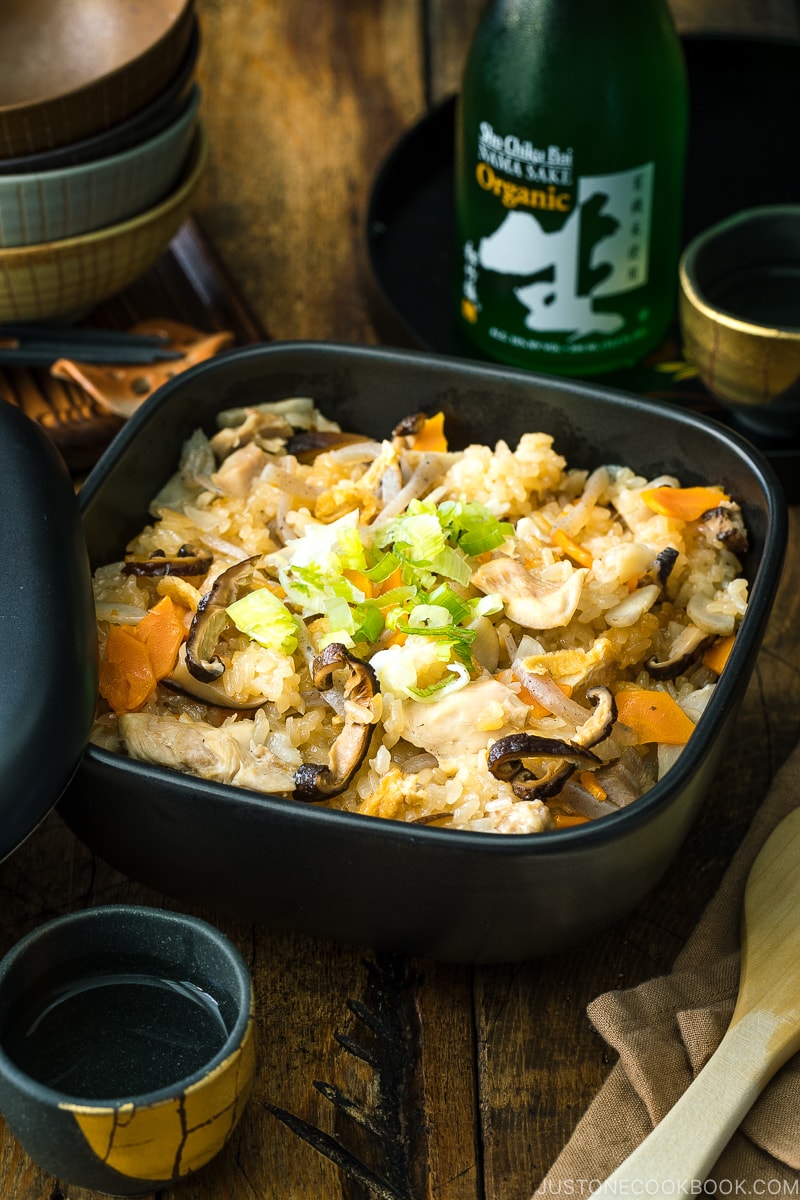
My son is a big fan of Chinese sticky rice with chicken (Lo Mai Gai) and he always orders it at dim sum. I realized I haven’t introduced him to the Japanese version of sticky rice, so here we are, this is my Japanese Sticky Rice with Chicken and Vegetables (also known as Gomoku Okowa (五目おこわ) or simply Okowa).
Not only the recipe has a great texture, it is also full-flavored and super comforting. You’ll be surprised how easy it is to make this at home.
What is Okowa?
Okowa (おこわ, 強飯) is a Japanese steamed rice dish made with glutinous rice, meat, and/or vegetables. There are a few varieties and the popular ones include:
- Azuki red beans – Sekihan (赤飯)
- Bamboo shoot – Takenoko Okowa (たけのこおこわ)
- Chestnuts – Kuri Okowa (栗おこわ)
- Japanese mountain vegetables – Sansai Okowa (山菜おこわ)
- Japanese sweet potatoes – Satsumaimo Okowa (さつま芋おこわ)
The unique feature about Okowa is that we enjoy it at room temperature, so you may find Okowa onigiri (rice ball) sold at rice ball shops or convenience stores in Japan.
The Japanese word ‘Okowa’ stems from a shortened form of Kowameshi (強飯, meaning “hard rice”). In the old days, white rice was hard to come by and expensive, so Japanese people could not eat pure white rice.
They commonly ate a porridge-like mixture made with wheat, Japanese millet, and foxtail millet. Because the texture was soft, it was called “weak rice” or Himeii (弱飯).
On special celebratory occasions and festivals, the glutinous rice was prepared instead of the porridge. It was called “strong rice” or Kowameshi (強飯) because of the firm texture.
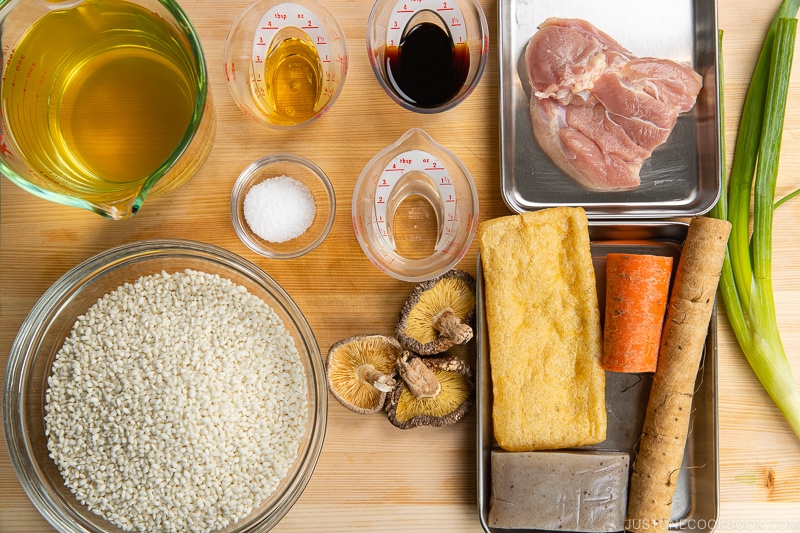
Ingredients for Japanese Sticky Rice
You’ll need basic and common Japanese ingredients for this recipe.
- Glutinous rice – make sure it’s short-grain Japanese “mochigome”
- Chicken
- Carrot
- Gobo – skip if you can’t find it
- Konnyaku (konjac) – skip if you can’t find it
- Dried shiitake mushrooms – can substitute with fresh shiitake or shimeji mushrooms
- Aburaage (fried tofu) – can substitute with tofu puffs from Asian grocery stores
- Green onion/scallion
- Seasonings: dashi (Japanese soup stock), sake, soy sauce, mirin, and salt
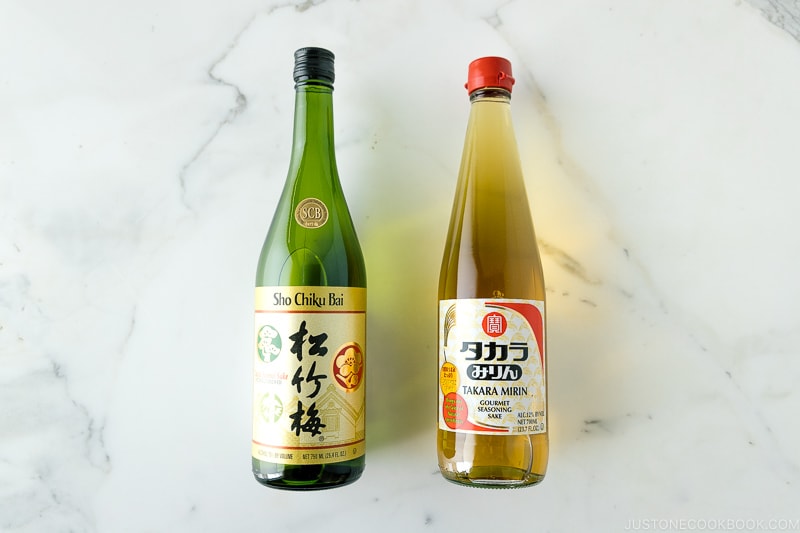
For sake and mirin, I recommend using Sho Chiku Bai Junmai Sake and Takara Mirin. I’ve been partnering with them for a long time because I use them in my daily cooking and love them.
Some of you ask if it’s okay to substitute or skip sake and/or mirin, but if you plan to make Japanese food in the near future, invest in these condiments. They are as equally important in Japanese cooking as soy sauce and miso, and they are one of 6 must-have Japanese condiments.
- Sho Chiku Bai Junmai Sake: This is a great $6-7 drinking sake, and I use it for my cooking too! I do not use cooking sake as it contains salt and other (unnecessary) ingredients.
- Takara Mirin: Made with premium rice, Takara Mirin is a natural sweetener. It enhances flavors and umami and boosts a beautiful glaze.
You can find Sho Chiku Bai Junmai Sake and Takara Mirin in Japanese and Asian grocery stores.
How to Make Japanese Sticky Rice
- Cut and prepare all the ingredients.
- Rinse rice and drain for 10 minutes.
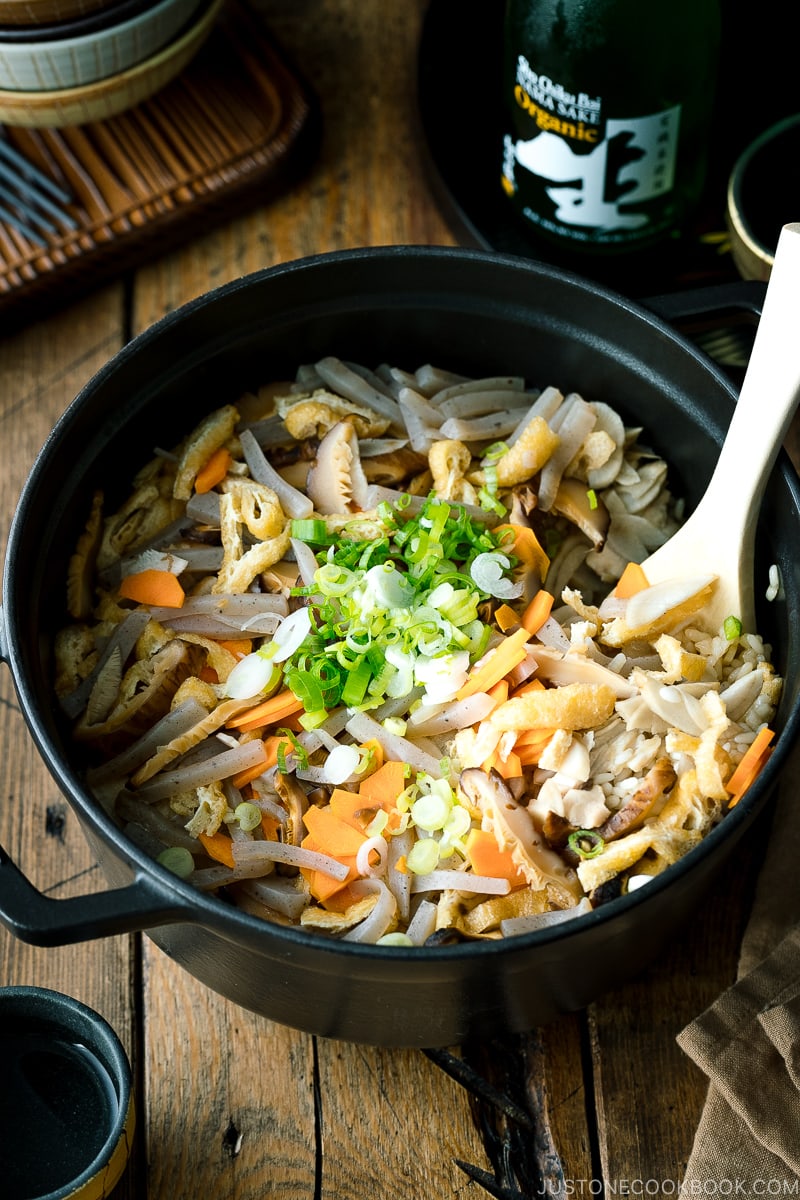
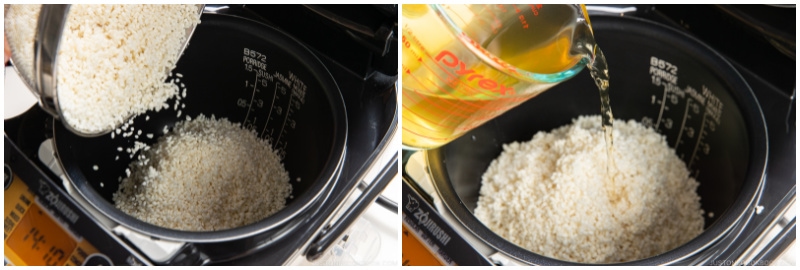
- Add rice, dashi, and condiments to the rice cooker/pot, and mix them all together.
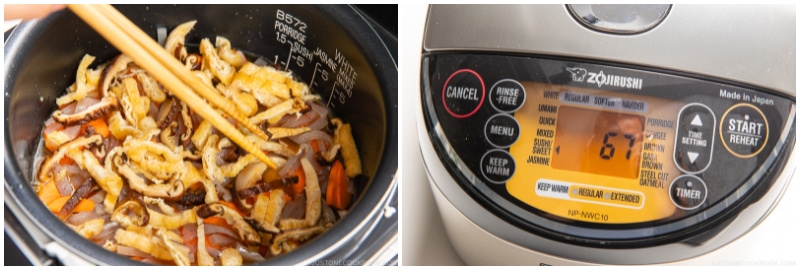
- Add chicken, root vegetables, and the rest of the ingredients on top of the rice (and DO NOT MIX).
- Cook in a rice cooker or pot over the stove (see next section).
Rice Cooker Method
If your rice cooker does not have a sweet rice mode, you can simply use a regular cooking mode to cook your Okowa. The glutinous rice absorbs water quickly so sweet rice mode cooks for a slightly shorter time.
Stovetop Method
If you don’t have a rice cooker, you can use a donabe (Japanese earthenware pot) or a heavy-bottomed Dutch oven. Don’t use a lightweight pot because the heat distribution is not very good and it may burn the rice. The lid must be tightly closed to seal in all the moisture and steam.
It’s really easy to cook Okawa and here are the 3 steps:
- Bring the broth to a boil over medium to medium-high heat. You can close the lid so it will boil quickly (it takes 10-15 minutes).
- Once boiling, cover the lid and turn the flame to low to medium-low heat and cook for 20 minutes (please adjust based on your stove).
- Turn off the heat, remove the pot from the stovetop, and let it steam for 15-20 minutes.
Cooking Tips
- Glutinous rice absorbs water very quickly. It’s important to rinse the rice in a quick manner and drain. Unlike regular Japanese short-grain rice, you do not need to soak the glutinous rice for 30 minutes.
- Cut the ingredients slightly smaller and flatter. I use the sogigiri (削ぎ切り) cutting technique for the chicken so that chicken will have a flat shape with more surface. I also cut ingredients thinly so everything will be cooked properly.
- Sake is to remove/mask any unwanted smell. I use it for chicken in this recipe. It also adds umami and natural sweetness to the dish.
- Parboil aburaage and konnyaku. It’s an extra step, but it’s important to use clean ingredients to produce a refined taste.
- Adjust the amount of cooking liquid based on your preference for glutinous rice texture. I prefer the rice to be on the firmer side, so I select dense root vegetables (less moisture) and avoid high-moisture ingredients. Based on the ingredients, I carefully adjust the amount of dashi.
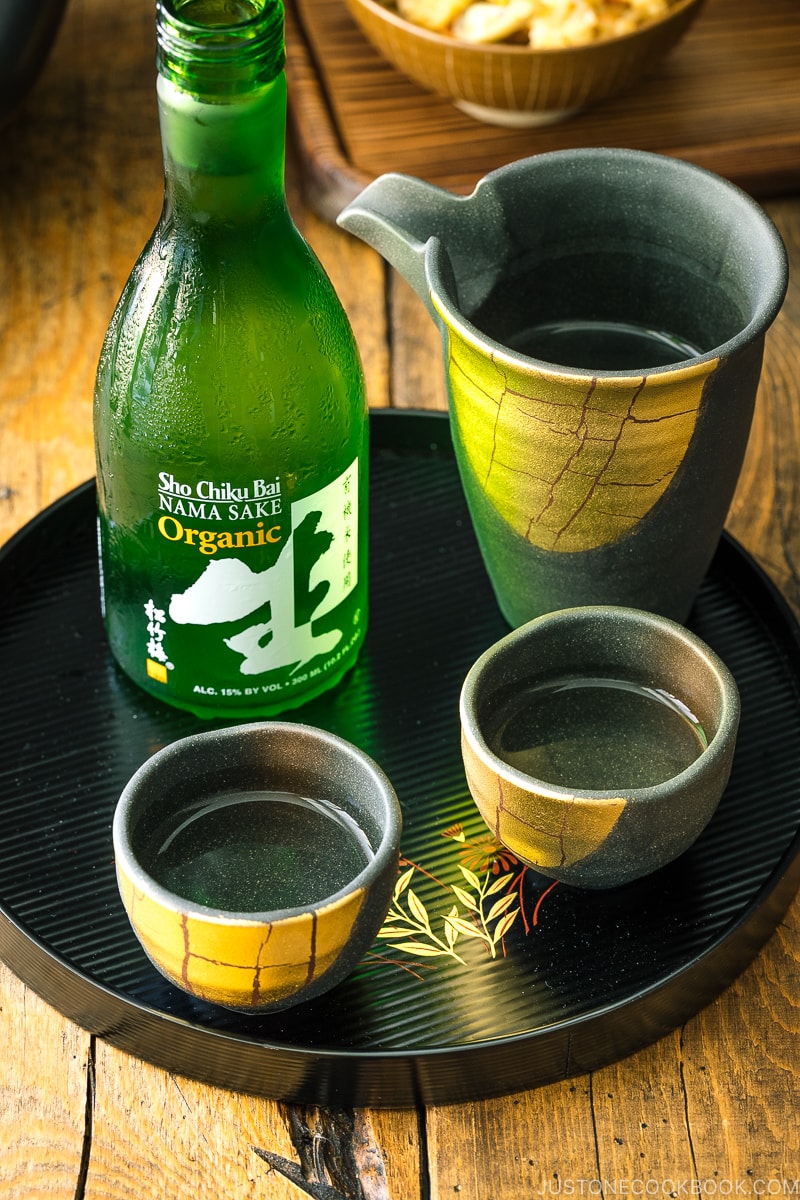
Pairing with Sho Chiku Bai Organic Nama Sake
We paired this savory Okawa dish with Sho Chiku Bai Organic Nama Sake. Since the dish is thick, chewy, and nutty from all the root vegetables and other ingredients, the Nama sake contrasts very well with its young and vibrant characteristics. This dry sake has a clean and crisp aroma, but don’t let it trick you. The taste profile is full-bodied and stands up to Okowa on its own.
Why is this sake called Nama? In Japan, “Nama” means raw and is used to describe beer that is not pasteurized, giving it better flavor and fresher taste. So when you’re in a restaurant or bar in Japan and you want beer, you order “nama-biru”.
Similar to “nama-biru”, this unique sake was not pasteurized by heat but micro-filtered, keeping subtle sake flavors that are sometimes lost through the pasteurization process. We really enjoyed the pairing and other recommended food to pair with Sho Chiku Bai Organic Nama Sake include soba noodles, smoked duck, and sushi.
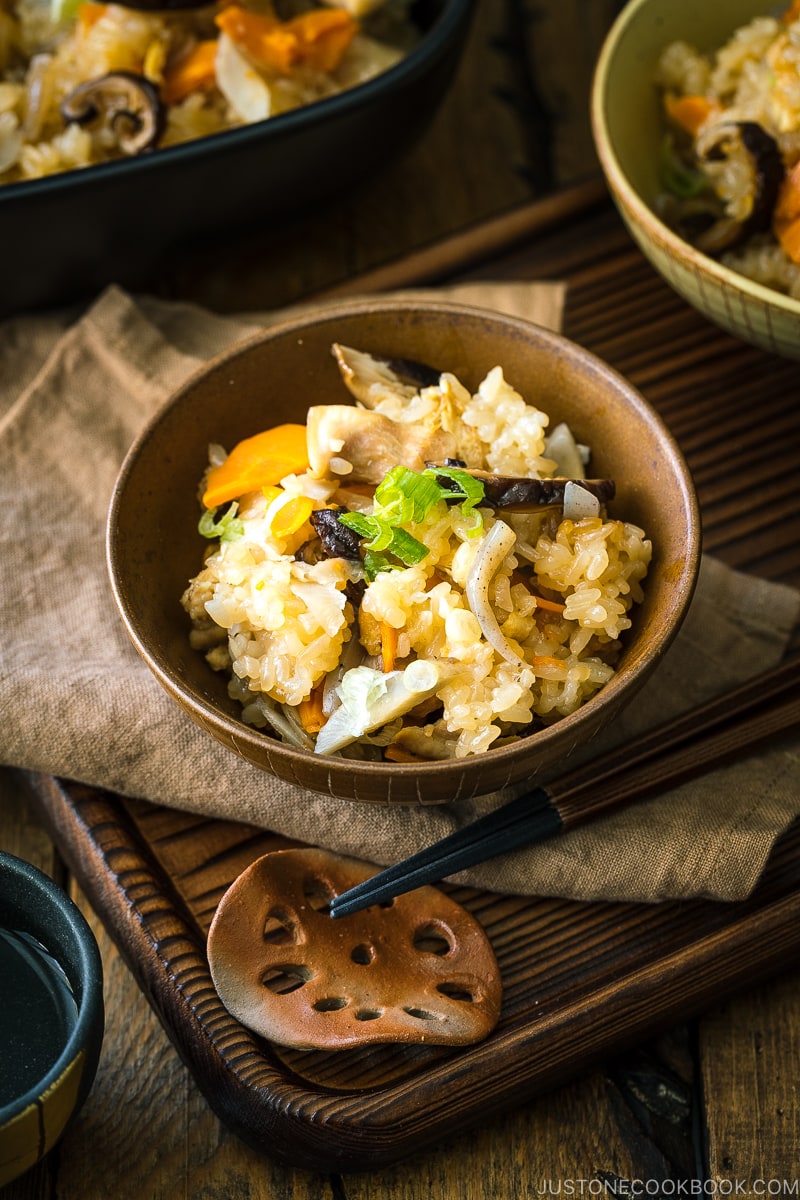
What to Serve with Okowa
You can enjoy this Japanese sticky rice as a standalone dish or serve it like you would with steamed rice. A miso soup and a side of vegetables such as Green Bean Gomaae and Hijiki Salad make good company for a light dinner.
Wish to learn more about Japanese cooking? Sign up for our free newsletter to receive cooking tips & recipe updates! And stay in touch with me on Facebook, Pinterest, YouTube, and Instagram.
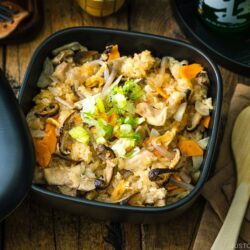
Japanese Sticky Rice with Chicken and Vegetables (Okowa)
Ingredients
- 3 dried shiitake mushrooms (0.7 oz, 20 g)
- 1 aburaage (deep-fried tofu pouch) (0.7 oz, 20 g)
- ⅓ konnyaku (konjac) (3 oz, 85 g)
- ⅓ gobo (burdock root) (2.5 oz, 70 g)
- ⅓ carrot (1.8 oz, 50 g)
- ½ chicken thigh (1.5 oz, 43 g; omit for vegan/vegetarian and use more vegetables)
- 2 Tbsp sake (for marinating the chicken)
- 2¼ cups sweet rice/glutinous rice (mochigome) (uncooked; 3 rice cooker cups, 3合, 540 ml); use 540 ml cooking liquid (see below); the glutinous rice-to-water ratio is 1:1)
- 1 green onion/scallion (chopped; for garnish)
For the Rice Cooking Broth (you‘ll need 540 ml)
- 2 cups dashi (Japanese soup stock) (use standard Awase Dashi, dashi packet or powder, or Vegan Dashi)
- 2 Tbsp mirin
- 2 Tbsp soy sauce (use gluten-free soy sauce for GF)
- 1 tsp Diamond Crystal kosher salt
Instructions
- Gather all the ingredients.
To Prepare the Ingredients
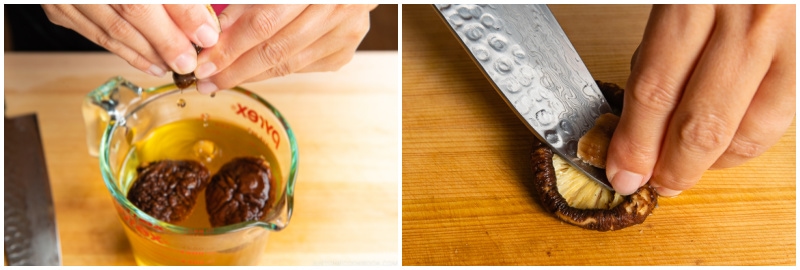
- Soak 3 dried shiitake mushrooms in 2 cups dashi (Japanese soup stock) for 20 minutes. Meanwhile, work on the other ingredients.

- Once the shiitake mushrooms are fully hydrated and tender, squeeze to drain the liquid back to the dashi. If the liquid is less than 2 cups (480 ml), add water. Discard the tough stems with a knife.
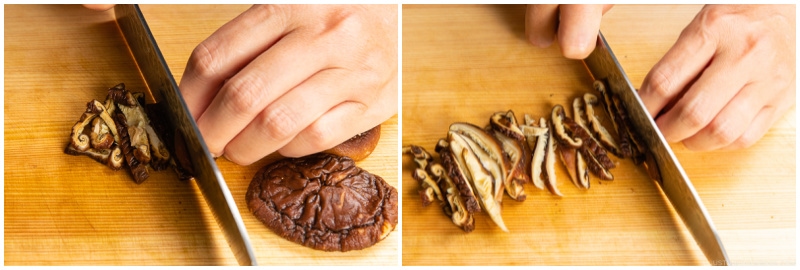
- Thinly slice the shiitake mushroom caps and set them aside.
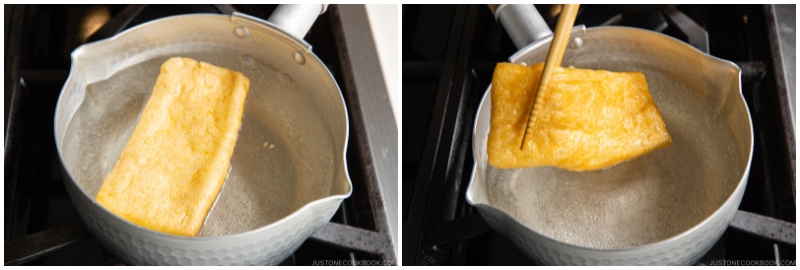
- While waiting for the mushrooms to rehydrate, bring a small pot of water to a boil and blanch 1 aburaage (deep-fried tofu pouch) for 15 seconds on each side to get rid of the factory oil from deep-frying the tofu. Drain the water. Keep the boiling water for the konnyaku.
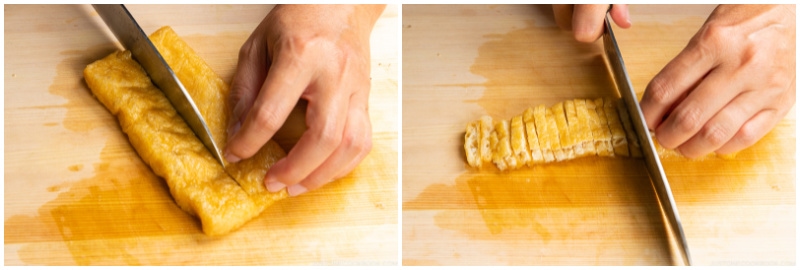
- Cut the aburaage in half and thinly slice into short strips.
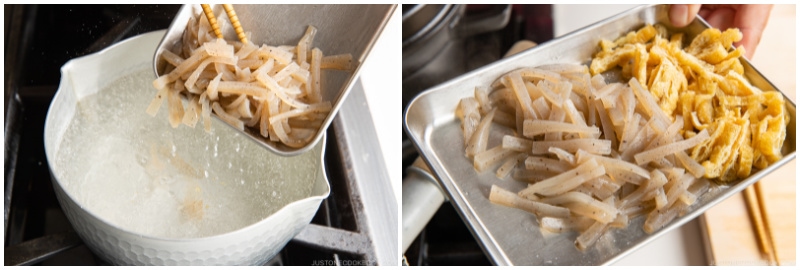
- Cut ⅓ konnyaku (konjac) into thin short strips, a size similar to the aburaage pieces.

- In the same boiling water, cook the konnyaku for 2–3 minutes to get rid of the unwanted odor. Drain the water and set it aside.
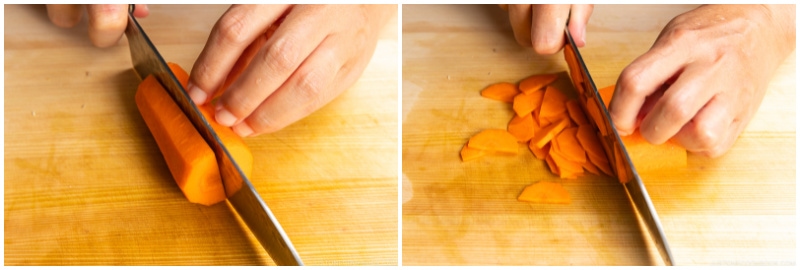
- Cut ⅓ carrot in half lengthwise and thinly slice into a half-moon shape.
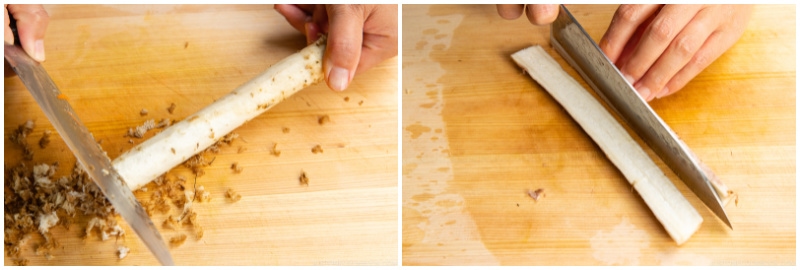
- Scrape off the skin of ⅓ gobo (burdock root) with the back of the knife. We do not use a vegetable peeler for gobo because the its earthy flavor is right underneath the skin and we do not want to discard it. Cut the gobo in half lengthwise.
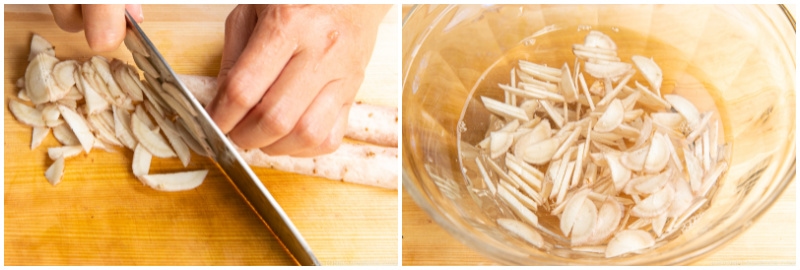
- Diagonally cut the gobo into thin slices. Soak them in water to remove astringency and prevent the change of color.
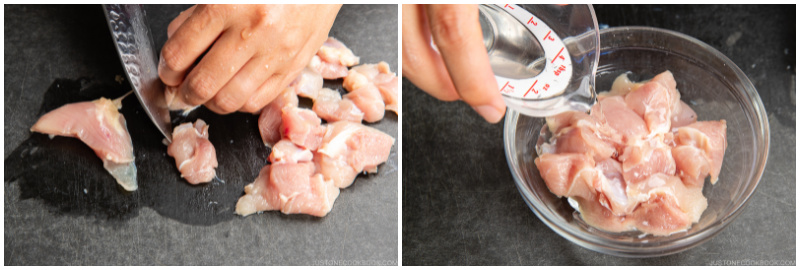
- Cut ½ chicken thigh into small, flat pieces. I recommend using the Japanese sogigiri cutting technique. This creates more surface area and helps the chicken cook faster. Put the chicken in a small bowl and add 2 Tbsp sake to remove the unwanted odor. Set it aside on the counter.
To Rinse the Rice
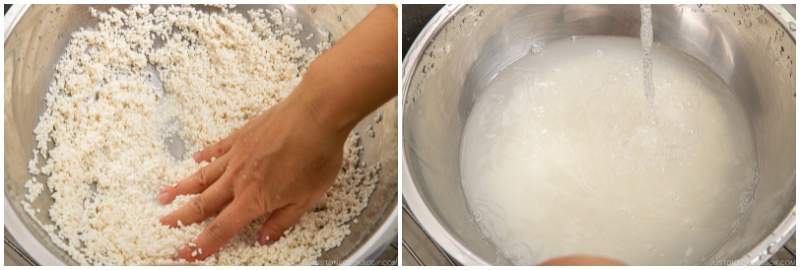
- To 2¼ cups sweet rice/glutinous rice (mochigome), add just enough water to submerge all the rice. Then, discard the water immediately since the glutinous rice absorbs water quickly.
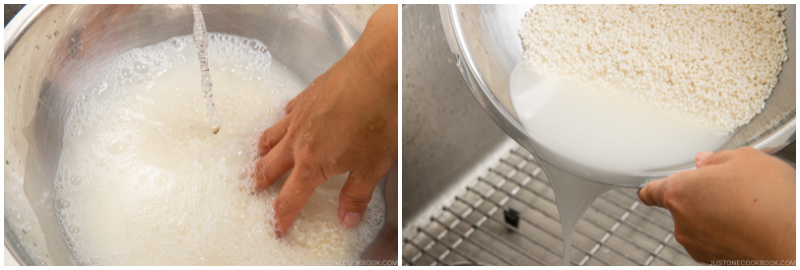
- Use your fingers to gently agitate or “wash“ the rice grains in a circular motion for 15–20 seconds. Add more water to rinse the rice.
- Drain and repeat this washing process.
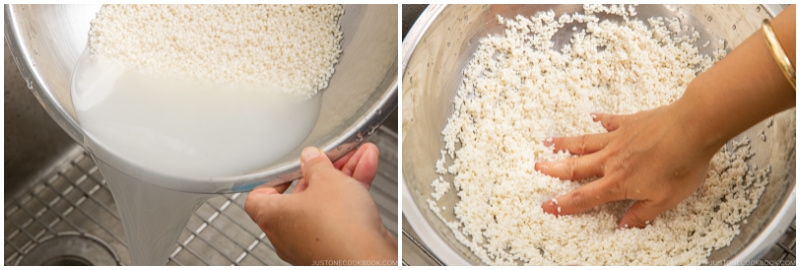
- Add water and drain, and repeat this process until the water is almost clear.
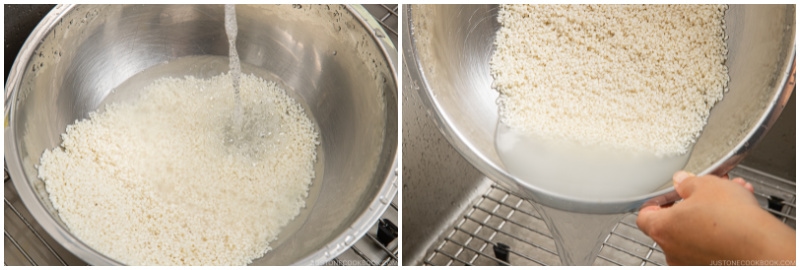
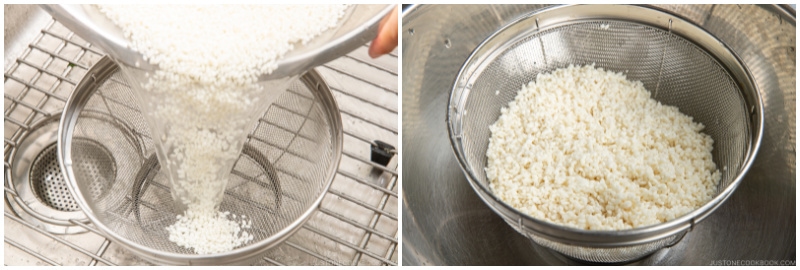
- Drain the rice into a sieve, shake off the excess water, and set it aside.
To Cook the Rice
- Transfer the well-drained rice to the pot and add 2 cups dashi (Japanese soup stock).
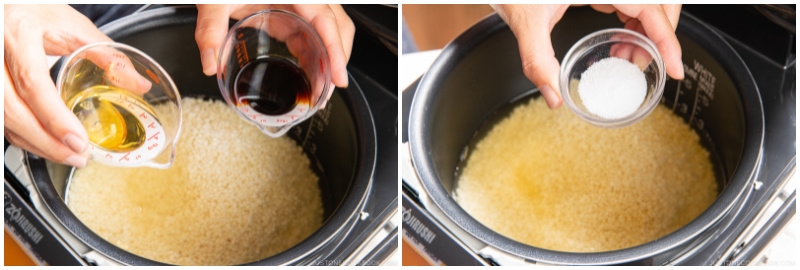
- Add 2 Tbsp mirin, 2 Tbsp soy sauce, and 1 tsp Diamond Crystal kosher salt.
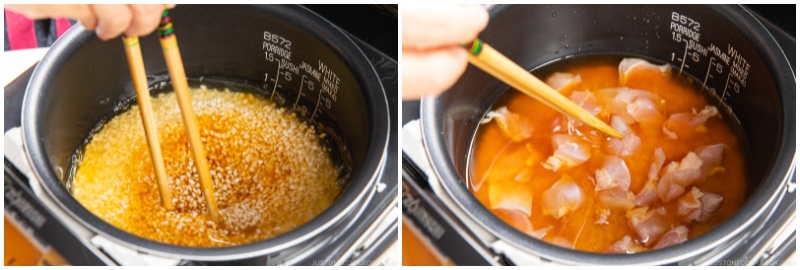
- Mix all together with chopsticks (or a wooden spoon). Drain the sake from the chicken and place the drained chicken pieces on top of the rice. DO NOT MIX. In order to cook rice evenly, the rice and other ingredients cannot be mixed together prior to cooking.
- Next, sprinkle the root vegetables on top. (Start with the tough/dense ingredients first.)
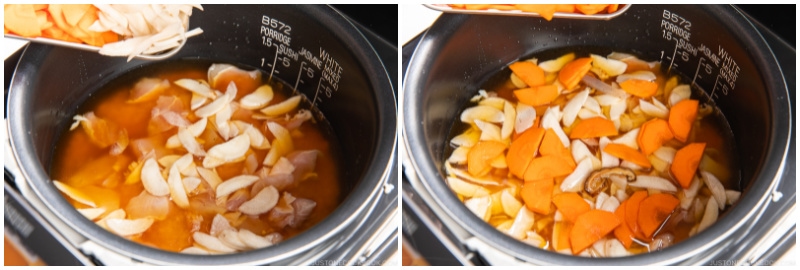
- Then, scatter the softer ingredients on top. Start cooking. Use the Regular or Sweet Rice setting on your rice cooker. The Sweet Rice setting is shorter in cooking time since glutinous rice cooks faster than regular Japanese short-grain white rice. If you want to cook this in a pot on the stove, see my blog post above for instructions.
To Serve
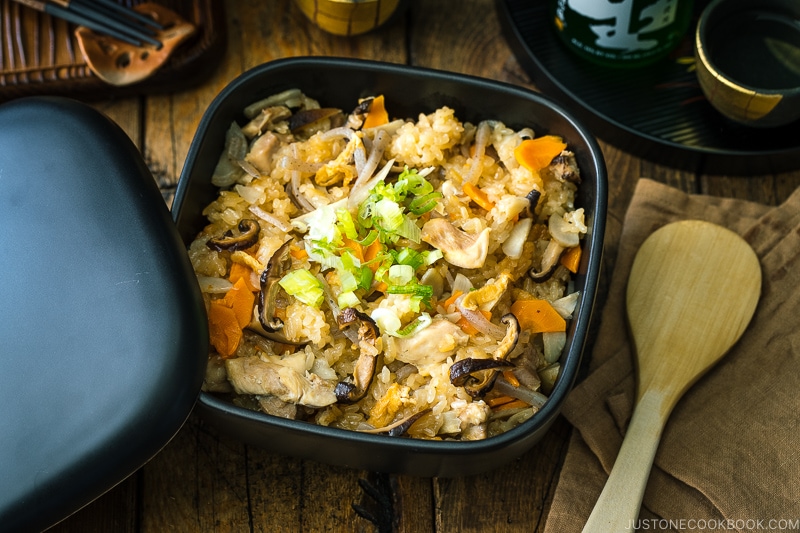
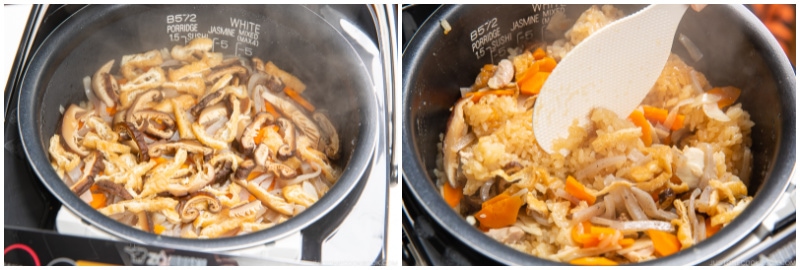
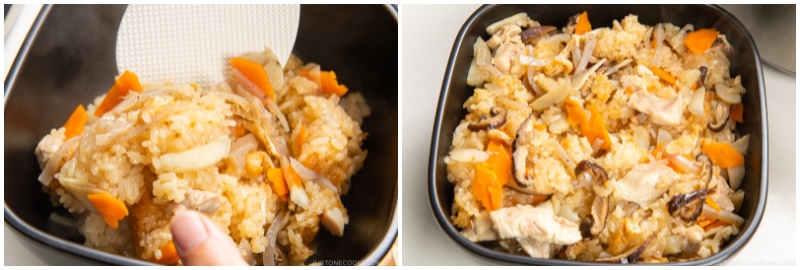
- Once the rice is cooked, fluff the rice. Don‘t stir or mix; insert the rice paddle vertically, then scoop up the rice from the bottom, turn it over, and break up the scooped pieces with a “cutting“ motion. Repeat until all the rice is scooped up and fluffed.
- Serve the rice into individual rice bowls or an ohitsu (rice container). Thinly slice 1 green onion/scallion and sprinkle on top. I also love making Onigiri (rice balls) with Okowa.
To Store
- You can keep the leftovers in an airtight container and store in the freezer for up to a month. I recommend not refrigerating the cooked rice even you are eating it the next day, as the rice gets hard.
Nutrition
Did you make this recipe?
Tag @justonecookbook on Instagram so we can see your delicious creation!