Matcha Mille Crepe Cake is a Japanese twist on the French classic of paper-thin crepes layered with fresh whipped cream. Light and creamy, it‘s a no-bake cake that‘s subtly sweet and slightly earthly from the green tea powder. This elegant dessert will wow your guests at any celebration!
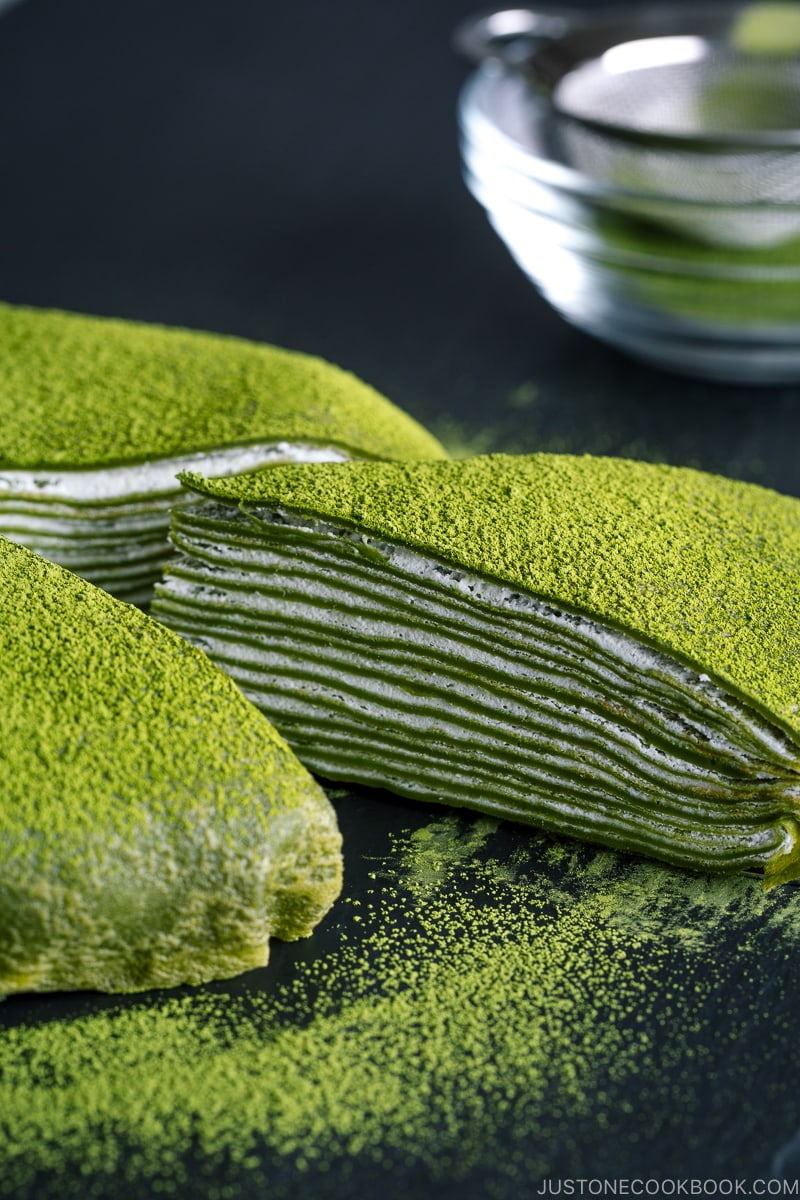
In Japan, matcha is not only used in wagashi (Japanese confectionery), but also in many western pastries. Mille crepe cake is no exception. We love this Japanese twist on a classic French pastry, Matcha Mille Crepe Cake (抹茶ミルクレープケーキ).
Table of Contents
What is Matcha Mille Crepe Cake?
But first, what is Matcha (抹茶)? Matcha is green tea powder. Many people ask me if the standard green tea (leaves) can be ground into “matcha”, but unfortunately, they can’t. The quality of the green tea leaves, and the complex process of drying and grinding the leaves is so much different for matcha, that it will not be something you will be able to do in your kitchen. Please read more about matcha where I explain the process in detail.
Mille Crepe Cake (ミルクレープケーキ) is a classic French pastry – Gâteau Mille Crêpes. Mille means ‘thousands’ in French. That’s an exaggeration, but it’s fun to imagine Gâteau Mille Crêpes with 1,000 layers. The pastry usually consists of 10 to 20 layers.
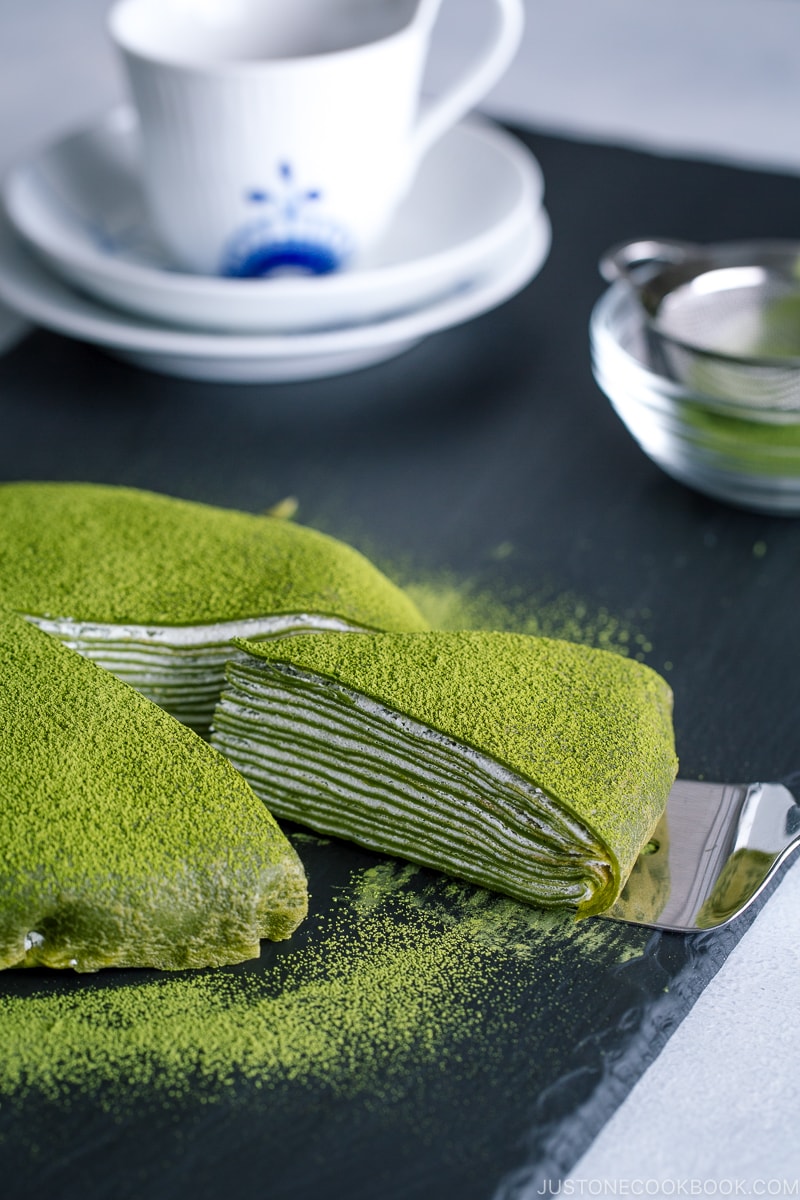
The most unique part of Japanese-style Mille Crepe Cake is the rounded edge of the cake. This Matcha Mille Crepe Cake is subtly sweet (it’s a real compliment to Asian desserts), creamy, and slightly bitter from the matcha flavor coming through the paper-thin layers of crepes.
5 Tips to Make Perfect Matcha Mille Crepe Cake
Tip #1: Good quality matcha powder
Ingredients matter, especially in this Mille Crepe Cake recipe. Number one is a high-quality matcha powder If the matcha powder is relatively cheap, it’s a guarantee that it’s not high-grade matcha. Matcha is pretty expensive, even in Japan. To learn more about where to buy matcha powder, please read more on my matcha post.
Tip #2: Rest the batter for an hour
I know it’s tedious to wait, but resting the batter relaxes the gluten and the dry ingredients continue to soak up moisture from the wet ingredients. As a result, it creates thicker consistency and helps prevent the crepes from breaking.
Tip #3: Heat the pan on low heat
When you heat up the frying pan too quickly, it gets hot spots. To avoid that, you slowly heat up the pan so the pan heats evenly. It’s the key to making those perfect first few crepes. After that first batch, just leave the same low heat on all the way through.
Tip #4: Use two frying pans – one larger than the other
In Japan, slices of mille crepe cake at the pastry shops have this signature look with a rounded edge. To make it perfectly round, make the top layer of the crepe big enough to wrap the outer edge of the cake. Use a round deep plate or shallow bowl (mine is from IKEA – something like this) to ensure a nice curve shape by molding the crepe cake.
Tip #5: Take a breath and swirl the pan slowly
I’m an impatient cook. But I realized it doesn’t help when I want to make a perfect circle crepe. Just breathe, and take your time to swirl the batter slowly with the pan.
Perfect Cake without Using an Oven
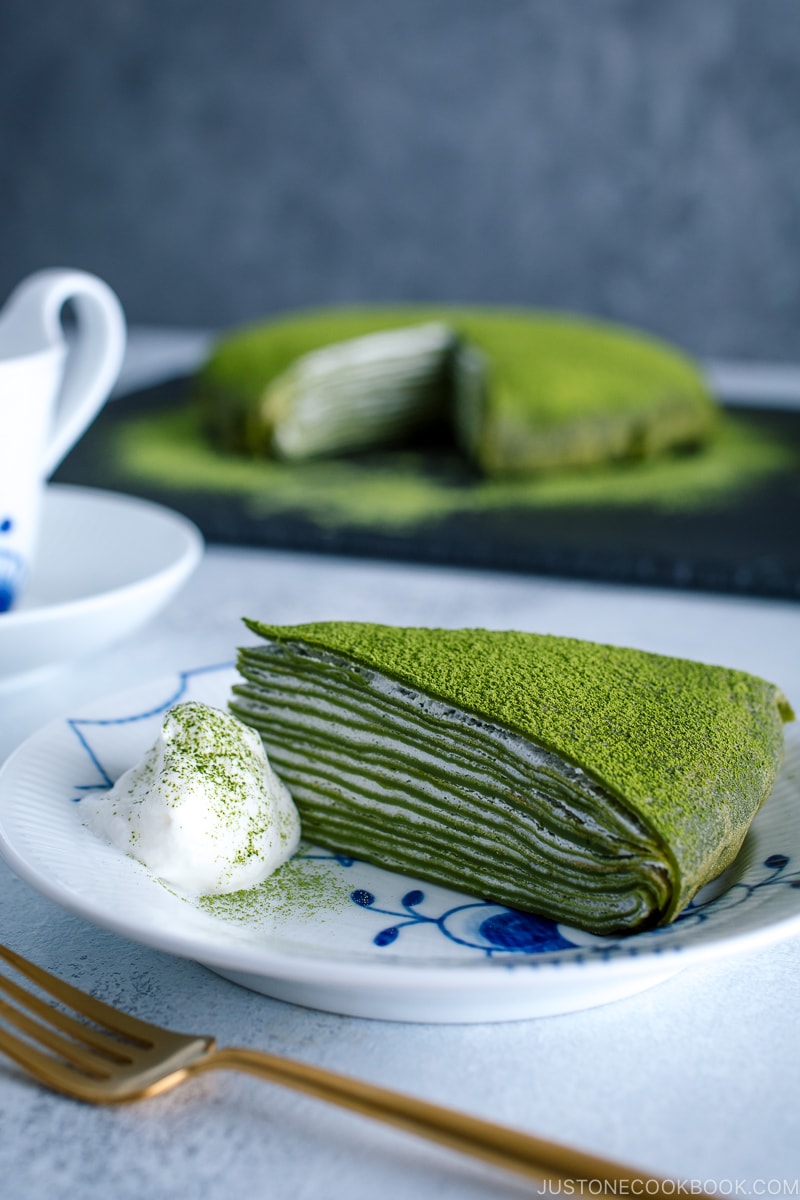
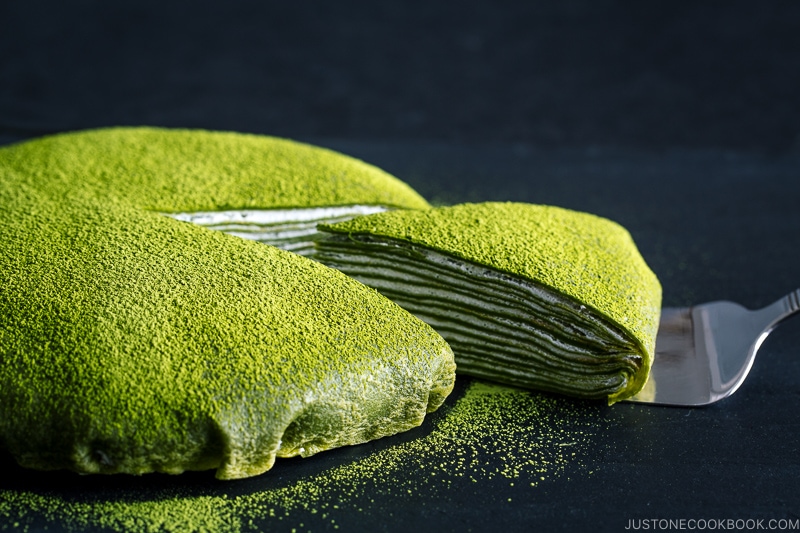
Mille Crepe Cake is a rare “cake” recipe that you can make with a frying pan over the stove. So if you don’t have an oven, or if you are looking for a unique dessert, try making this cake for any celebratory occasion or holiday!
Other Delicious Dessert Recipes
- Nougat Glacé Choux with Orange Caramel
- Matcha Swiss Roll (Roll Cake)
- Love all things matcha? Check out these matcha recipes you can enjoy every day or on special occasions.
Wish to learn more about Japanese cooking? Sign up for our free newsletter to receive cooking tips & recipe updates! And stay in touch with me on Facebook, Pinterest, YouTube, and Instagram.
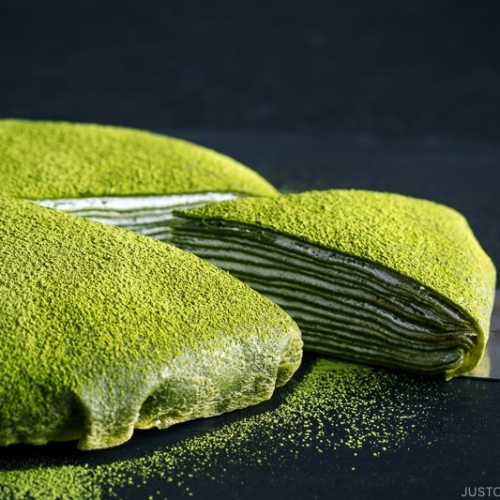
Matcha Mille Crepe Cake
Video
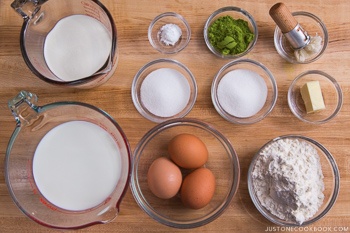
Ingredients
- 1¾ cups whole milk (plus 1–2 Tbsp to thin out the batter, if needed; use whole milk for crepes that are easier to handle; if you‘ve made crepes before, you can use reduced-fat milk for thinner crepes)
- 3 Tbsp sugar
- 3 large eggs (50 g each w/o shell)
- 1½ Tbsp unsalted butter (melted)
- 1 cup cake flour (weigh your flour or use the “fluff and sprinkle“ method and level it off; DO NOT use a different type of flour; you can make Homemade Cake Flour)
- 2 Tbsp matcha (green tea powder)
- ½ tsp baking powder
- neutral oil (for cooking the crepes)
For the Fresh Whipped Cream
- 1 cup heavy (whipping) cream (for layering)
- 3 Tbsp sugar
For Serving
- 2 tsp matcha (green tea powder) (for dusting)
- fresh whipped cream (optional; make a second batch of the above recipe right before you serve)
Instructions
Before You Start…
- Please note that this recipe requires 1 hour of resting time and 2 hours of chilling time.
- Gather all the ingredients. I highly encourage you to weigh your ingredients using a kitchen scale for this recipe. Click on the “Metric“ button at the top of the recipe to convert the ingredient measurements to metric. If you‘re using a cup measurement, please follow the “fluff and sprinkle“ method: Fluff your flour with a spoon, sprinkle the flour into your measuring cup, and level it off. Otherwise, you may scoop more flour than you need. Please use cake flour only! Do NOT use flour with a high-gluten content such as bread flour or all-purpose/plain flour for this recipe. Otherwise, you will end up with a rubbery cake.

To Make the Crepe Batter
- Add 1¾ cups whole milk and 3 Tbsp sugar to a small saucepan and combine well. Heat on medium until the milk is warm to the touch.

- Beat 3 large eggs (50 g each w/o shell) in a large bowl. Then, whisk the eggs continuously as you slowly and gradually add the warmed milk. Next, slowly add 1½ Tbsp unsalted butter to the egg mixture, whisking continuously.

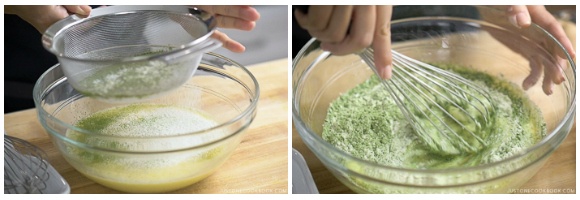
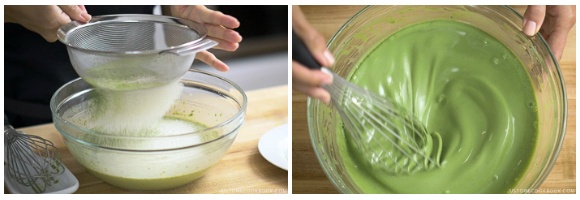
- Set up a fine-mesh sieve over the bowl. Add 1 cup cake flour, 2 Tbsp matcha (green tea powder), and ½ tsp baking powder to the sieve. Then, sift half of the dry ingredients into the batter. Use a whisk to combine the dry and wet ingredients together.

- Sift the rest of dry ingredients and gently mix just until there are no lumps in the batter. IMPORTANT: Do not overmix; mixing increases gluten formation in the batter and causes a rubbery texture.

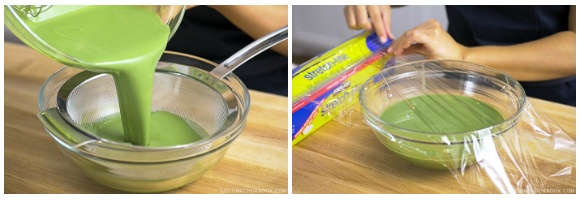
- Next, set the fine-mesh sieve over a large bowl and pour the batter through the sieve. This will remove any lumps and give you a smooth batter texture. Cover with plastic wrap and refrigerate for at least 1 hour. (DO NOT SKIP!) Tip: If you overmix the batter, you may want to rest the batter for a few hours. This allows the gluten to relax. If you don‘t rest it long enough, the crepes will be more rubbery due to gluten development.

To Cook the Crepes
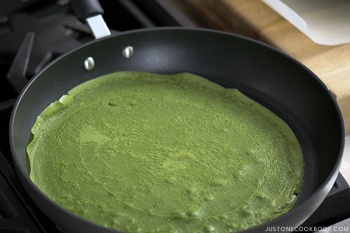
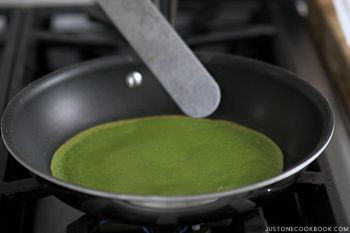
- Prepare a work surface with a sheet of parchment paper large enough to hold your cooked crepes. Now, make one large crepe for the top layer. First, set a 12-inch nonstick frying pan on low heat. Once the pan is hot, brush the surface with a thin layer of neutral oil (I used an oil brush); remove any excess oil with a paper towel (don’t worry, a thin layer of oil will remain). Gently stir the batter with a ladle just before scooping to redistribute the liquid and prevent the batter from getting thicker as you go. Then, pour just enough batter to cover the bottom of the frying pan in a thin layer. For my pan, this is about ⅓ cup of batter. Swirl the pan to distribute the batter and form a thin layer. Tip: If your first crepe seems too thick, thin the batter by gradually adding 1–2 Tbsp of milk.

- Cook the crepe for 2 minutes without touching it. After 2 minutes, the outside edge of the crepe will get a bit crispy. Using a chopstick, a spatula, or your hand, carefully flip the crepe.

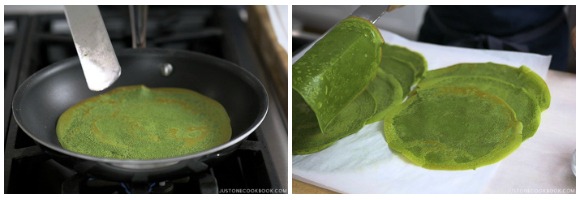
- Cook the other side for 30 seconds and transfer the crepe to the work surface lined with parchment paper.

- To make the crepes for the cake layers, set a 10-inch nonstick frying pan on low heat. Once the pan is hot*, brush it with the oil and remove any excess with a paper towel. Pour just enough batter to cover the bottom of the frying pan in a thin layer, about ¼ cup (60 ml) for my pan. Swirl the pan to distribute the batter into a thin layer.* The hot pan helps to steam the liquid in the eggs and milk, allowing the crepe to puff up and become softer. But the pan can‘t be too hot, which ends up cooking the crepe too fast and prevents you from swirling the batter into a thin layer.

- Cook the crepe for 2 minutes without touching. After 2 minutes, the outside edge of the crepe will get a bit crispy. Using a chopstick, a spatula, or your hand, carefully flip the crepe.

- Cook the other side for 30 seconds and transfer it to the work surface lined with parchment paper.

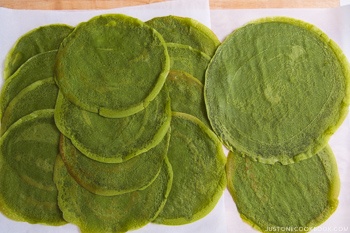
- Continue making crepes until you‘ve used all the batter. Make sure to stir the batter EVERY TIME before you make a new crepe (otherwise, the batter will become too thick toward the end). With this batter, I made 1 large crepe for the top and 13 smaller crepes for the layers.

To Make the Whipped Cream
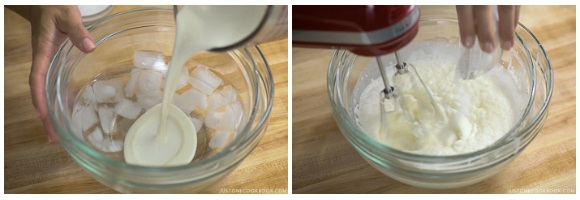
- Prepare an ice bath by adding ice cubes and water to a larger bowl and setting a smaller bowl on top. Add 1 cup heavy (whipping) cream to the smaller bowl. Using a hand mixer, start whisking it at a low speed. Once you see bubbles form, slowly add 3 Tbsp sugar.

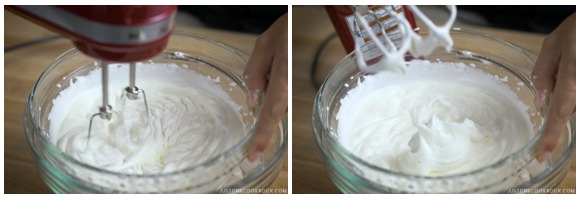
- Increase the speed and whip the cream until firm peaks form. With medium peaks, the whipped mixture is firm and glossy. When you lift up your beaters, peaks will form but curl down slightly at the tips.

To Assemble the Cake
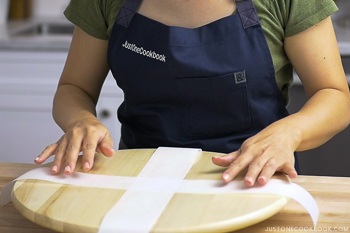
- Prepare two long strips of parchment paper and lay them down in a cross pattern on a working surface or rotating cake stand (I used IKEA‘s lazy Susan). These strips will go under the cake and help you transfer it to a dish. Tip: You can watch how I assemble the cake in my video.

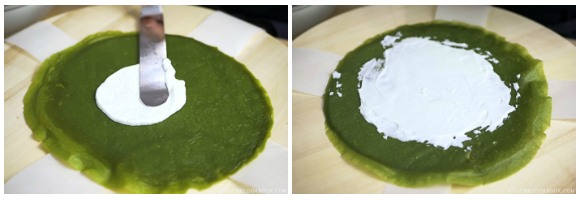
- First, center the larger crepe on top of the crossed strips. This will be the top layer when we flip the cake over. Put a small amount of the freshly whipped cream in the center. Using an offset spatula, spread it evenly and thinly, about ⅛ inch (3 mm) thick, in the center 8 inches of the crepe, leaving a 2-inch (5-cm) border around the edge.

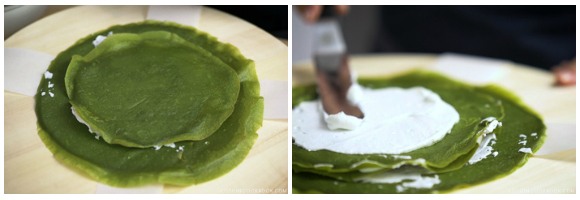
- Next, center and place another crepe on top of the cream layer. Spread a small amount of whipped cream evenly in the middle of the crepe, leaving a ½-inch (1.3-cm) border around the edge.

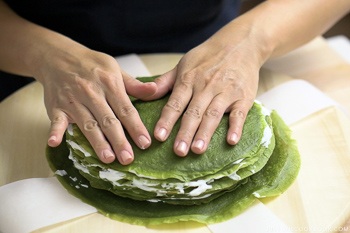
- Continue this process of layering, ending with the final crepe on top.

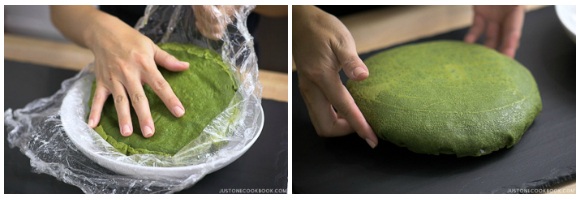
- Prepare a round, curved shallow dish (mine is from IKEA) and line it with a piece of plastic wrap large enough to wrap around the entire cake. Remove any air pockets and smooth out the plastic on the dish‘s surface. Using the paper strips you made, transfer the mille crepe to the shallow dish. Place your cake in the middle of the dish and remove the strips from the bottom of the cake.

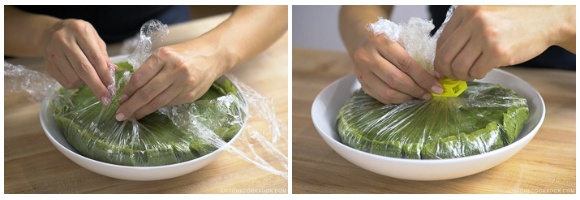
- Starting at one corner and moving clockwise, pull the plastic wrap snugly over the cake edge so it‘s smooth and curved and gather the plastic in one hand above the center of the mille crepe. Continue to wrap this way until you‘ve gathered all the plastic in the center. This will make the final cake evenly round; you won‘t get a smooth, curved shape if you wrap it randomly. Secure the gathered plastic with a clip (I use one from IKEA). Refrigerate for at least 2 hours until the cake is set.

To Serve
- Once chilled, unwrap the plastic wrap and flip the mille crepe over onto a serving platter. Now, the large crepe will be on top of the cake.

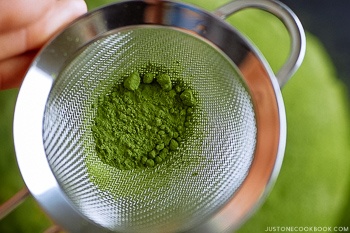
- Dust 2 tsp matcha (green tea powder) over the cake using a fine-mesh sieve. If you plan to serve extra fresh whipped cream on the side (optional), make a second batch now. Slice your Matcha Mille Crepe Cake into wedges while chilled (as it‘s easier to cut), and let it stand at room temperature for 5 minutes before serving.

To Store
- Wrap and refrigerate any leftover cake. Enjoy it within a few days as we are using fresh cream.














[…] 20. Matcha Mille Crepe Cake […]
This looks amazing and I’m planning on making it for thanksgiving, but I have a pretty large crowd to serve. Do you see any issues if I double all the ingredients for the crepe batter? I’m not sure if I should aim for a larger cake diameter with the same number of layers as you had, or a similar size with more layers..
Hi Phil! If you want to make a larger cake, then you will have to cook crepes in a large frying pan and that can be challenging to some as you have to flip a large thin crepe without messing up. And if put more layers to make one big cake, then it can be hard to cut… Especially you have to cut into smaller triangles.
Considering the options, I would suggest to make two cakes. You have a better control, in terms of the size of crepe and making layers.
Also, if you can, make a bit thinner batter than how I made in this recipe. This recipe is easier for beginners as crepe is thicker to handle, but the cake is more delicate when you stack thinner crepes. 🙂
Hope that helps!
Hi!
Thanks for sharing this recipe with us! I’m planning to make this crepe cake for my sister’s 30th birthday. I have a few questions.
Can I make the batter the night before and leave it in the fridge overnight? If so, do I need to bring the batter back to room temperature before making the crepe layers?
Also, would it be ok for me to add the green tea poweder into the whipped heavy cream and leave it out for the batter? I was thinking to make yellow/golden crepe layers with green whipped cream in between the layers.
I appreciate your help! Thank you!
Sincerely,
Emily H.
Hi Emily! Happy 30th Birthday to your sister!
1) I had never done it myself but yes I think you can do that. Also yes, please bring the batter back to closer to room temperature.
2) Sure, you can do that. 🙂 Hope you and your sister will enjoy the recipe!
Thank you! =)
I made the cake a few days ago already but thanks for replying back! The cake looked gorgeous but the crepe cake itself was chewy. What may be the problem you think? I followed the ingredients to the tee. I just swapped the green tea powder into the whipped cream (which worked out). Do you think maybe the crepes need to be even thinner than it already was? Trying to figure it out so that I can try again next time! =)
Hi Emily! I apologize my response couldn’t make it to you before you make this recipe.
Yes, you can make thinner cake to avoid that problem. I recommend to thin out the batter and ideally it’s best to have the crepe maker… special pan with spatula to spread thinly. 🙂
why need to heat the milk? Can I just use cold milk?
Hi Sasa! Warm milk dissolve sugar completely, and to dissolve matcha completely, you need warm water/milk (any liquid). Otherwise, matcha will become lumps. Most matcha recipe you see (in Japan – at least) use warm liquid to mix. 🙂
Hi Nami! I actually need your advice and I hope to hear from you, so thank you in advance. I’m not good at baking, so I tend to avoid DIY desserts. But, when I saw your no bake recipe for this gorgeous maccha crepe cake and yours look the most professionally done, I decided to give it a try. I followed every step closely except one, which is let it sit in the fridge for 1 hr. Patience isn’t my virtue, so in my caveman mind, I put the batter in the freezer for 10 mins and then checked to make sure it wasn’t freezing at all and then I let it sit in the fridge for another 20 mins. My first crepe wasn’t cooked in 2 mins so I turn the heat up a lil and it started to bubble slightly but after +/- 5 mins, it still wasn’t cooked at all. The end product isn’t crepe like texture wise, more like mochi texture. I did snap a pic but I don’t know where to post it to show you. Hopefully if/when I receive your email, I can attach the pic. I know you are busy, so I’m gonna be patient, but I do hope you can help me solve this predicament of mine. Thanks again!!!
Oh, I forgot to mention one more thing, I have an electric stove top (which I absolutely hate), perhaps you can tell me at approx. what temp. is good to start cooking the batter? I mentioned my “batter in freezer” and my stove top because in retrospect, those are the only two things that I can logically think of that caused the end product. In terms of maccha quality or measurements of ingredients, my batter looked almost identical color and consistency wise as yours in the video and I didn’t substitute anything for anything else. Thanks!!
Hello Caveman Baker! Thank you so much for your detailed comment and I apologize for my late response due to my travel.
1) Is it possible to thin out the crepe and make it? It might be easier for you?
2) Keeping the batter in the fridge is to rest the gluten in the batter.
3) I do not wait the crepe to become bubble. It’s still smooth when I flip over (shown in the video).
4) If the pan is too hot, I recommend to quickly cooling down on a wet towel. Otherwise you just need to keep the heat consistent, and the temperature should be around 300F. Some thin bottom frying pan has hot spot, so be careful – some area gets too hot while other part is less hot.
5) You can send the images to my email. 🙂 Happy to help or find out what could be the reason why it didn’t go well. 🙂
Hi Nami,
You do not ever need to apologize, I went on my summer vacation too (hence also my late reply ????), so I totally understand.
Just the fact that you replied with such a detailed explanation to aid in my success of making the crepe cake, shows how much you care and that gives me confidence to give it a go again.
I won’t bother you with my pics of failure for now but I’m gonna follow every step to the T this time and hopefully I can successfully reproduce your amazing looking (bet it tastes even better) Maccha Crepe Cake! Perhaps then I’ll email you my crepe cake pic. ????Thanks again!
Thank you for your kind feedback and I hope you had a great holiday as well. I just came back from Japan. 🙂
Yes, please email me. I’m always happy to help! 🙂
Hello! This looks wonderful, I can’t wait to start making it!
I was just wondering, what do you think of a fruit such as strawberries being used to decorate the top for an extra hint of sweetness? I’ve never cooked with matcha before and I’m not quite sure what would be paired well with it, given its bitterness.
Hi Natalie! Sure! I think decoration would be great! I don’t taste much “bitterness” of matcha especially when whipped cream is used like in this recipe. So you probably don’t need to worry about countering that flavor. However, any decoration would be beautiful. I have seen someone did that too, forgot where I saw it… maybe Instagram or Facebook (my readers use #justonecookbook to share what they make from my blog).
How long will the cake be good for?
Hi Katiia! Enjoy it within a few days as we use fresh cream in between. 🙂
Looks wonderful. Thanks for the tips!
Hi Emily! Thank you so much for reading my post! 🙂
Hi Nami – Thank you again for your lovely website. I have a few questions about this Matcha crepe cake. (1) My matcha batter did not turn out bright green like yours – it’s more like a grayish green. Does it have to do with the quality of the matcha powder? I am using one that’s organic. (2) My crepe did not turn out like yours; yours are bright green just like the batter, but mine are brown – NOT burned, just brown, like an ordinary crepe without matcha (but of course, they still have that grayish green tone). Did I do something wrong? Please advise. Thanks!!
Hi Michelle! Thank YOU for reading my blog!
1) Matcha color doesn’t change that much from the powder form to the batter. So from how you describe, it seems like the matcha quality is not as good as mine?
2) The bright green color again comes from the quality. One of the easiest way to tell the quality difference is the color. Cheaper matcha = yellowish green. You wouldn’t say it’s a beautiful green color. When you have a decent matcha, you will know it’s good matcha because of the color – it’s bright vivid green color. Not dull that you would question about the quality… Hope that helps?
Hello,
I love your recipes however I have a question about this one.
I was trying to make this but then during the process I realized my batter was very liquid. Should I have added the whole 1 3/4 cup milk and sugar mix to the batter or only 1/2 cup of that mix? Sorry it wasn’t quite clear to me! Thank you!
Hi India! I see where you were confused. I should have said 1/2 cup AT A TIME. I’ve fixed the recipe. Yes, you have to add all of the milk + sugar warm mixture to the egg. If the batter was thinner than mine, probably dry ingredient ratio could be different from mine…
Thank you for your clarification, the cake turned out perfect and was delicious! Will definitely be making it again!
Hi India! Wonderful, thank you for your kind feedback. I’m so happy to hear you enjoyed it. 🙂
Hi Nami, I love this recipe! However, I don’t see the step where I add the milk into the batter (1/2 cup at a time or otherwise). Am I missing something?
Hi Ashley! Thank you very much for trying Nami’s recipe!
The milk will be in the batter at Step 2. Please add slowly, little by little. We hope this helps!
Thank you for this recipe! I’ve tried making crepe cakes twice, and I was quite disappointed with the outcomes because my crepes were too thick and they seized so quickly in the pan (my pan was too hot I guess?). Do you have any tips on how to make the crepes thinner other than lowering the heat?
Hi Galahad! If the crepes get cooked too quickly, maybe your pan is too hot? Here’s two way: 1) Prepare a damp towel next to your stove and as soon as you realize your pan is getting too hot, put the pan on the towel to cool the pan. This technique can be used when your pan has hot spots. 2) You can thin out the crepe if the batter is thick. You have to find the texture you like. When layers are too thin, you don’t see the layer of the cake, too. So find the right consistency for the batter. 🙂
Hi Nami!
I have a few (actually a lots of) question about your experiences and I would like to ask for your opinion.
How easy to sliced after cooling? The layers are not sliding on each other? The crepes and the cream stick together well? Is it necessary to add stabilizer to the cream? I thought I would make it but in square shape, then I cut it into smaller cubes. On this way it’s easier to offer for the guests (maybe).
Thank you in advance for your answers!
Majacica
Hi Majacica! I apologize for my late response. Here are my answers: 1) It’s easy to slice with a sharp knife, none of us had any issue slicing. 2) Nope, unless you really want to cut thin slice (me) and the top few layers just slide off. If it’s regular cake side, it stays in shape. 3) Once it’s chilled, yeah, the cream is more stable so it won’t be sliding off everywhere like… Napoleon cake for example. 4) This recipe works as it is…so no stabilizer for me. 5) The problem of square shape cake is that you won’t be covering with a larger crepe… so the crepes are just piled up, right? Hmm.. Might be harder to cut? I feel round is easy to offer to guests, but that’s my opinion. 🙂 Again, sorry I couldn’t get back to you sooner. I was extremely busy… 🙁
Hi Nami!
Thank you very much your answer, I really appreciate it!
I’m thinking of making square pancakes and I put them into a square cake frame with the cream layer by layer. After I cool it well, I cut it to small cubes. The point is to have a shape and size which can be eaten without a fork or plate (two or three mouthful of size). I have a tamagoyaki pan, it will be good for baking. And we will see the rest! 🙂
Majacica
I see! Sounds wonderful! Good luck, and if you get a chance please share the photo with me (either email or social media – Instagram/FB/Twitter). I’m so curious. 😀
Hi Nami, I just tried your recipe and my crepe turned out rubbery and tasteless, do you have any advice to this? thankuu☹️
Hi Yan! Probably the crepe is too thick? Thinner crepe is harder to make but it creates better texture. If the batter is thick, you can add a tiny bit more milk to thin out. 🙂 You can add more matcha/sugar to give flavors too.
Wow! I am so glad you posted this recipe! I’ve been wanting to try making one, but was kind of intimidated! But because you post so many pictures and good instructions, I feel like I can actually make it!
It’s easy to make, but it’s tedious a little bit. If you’re comfortable making crepes already, this should be pretty easy. Spreading the batter evenly may require a practice. If you plan to bring the cake, maybe practice at least one time. 🙂 Hope video and step by step will be helpful when you make it!
It looks yummy. How advance I can make the batter ahead? Would that me make that a day ahead? Wondering I can make it two days ahead for a dinner party?
Hi Frances! You can make the batter ahead, but since we use fresh cream, it’s best to be enjoyed sooner. So… if you’re going to make for a party, maybe 1 day ahead is okay.
OhMyyummyGoodness! This is amazing! I hope I have the patience for this one! Thank you so much as I am a ????Matcha Lover????
Hi Deanna! Yeah, making each crepe takes time… but each crepe is pretty quick to make so time passes by quickly. 🙂 Hope you give this recipe a try!