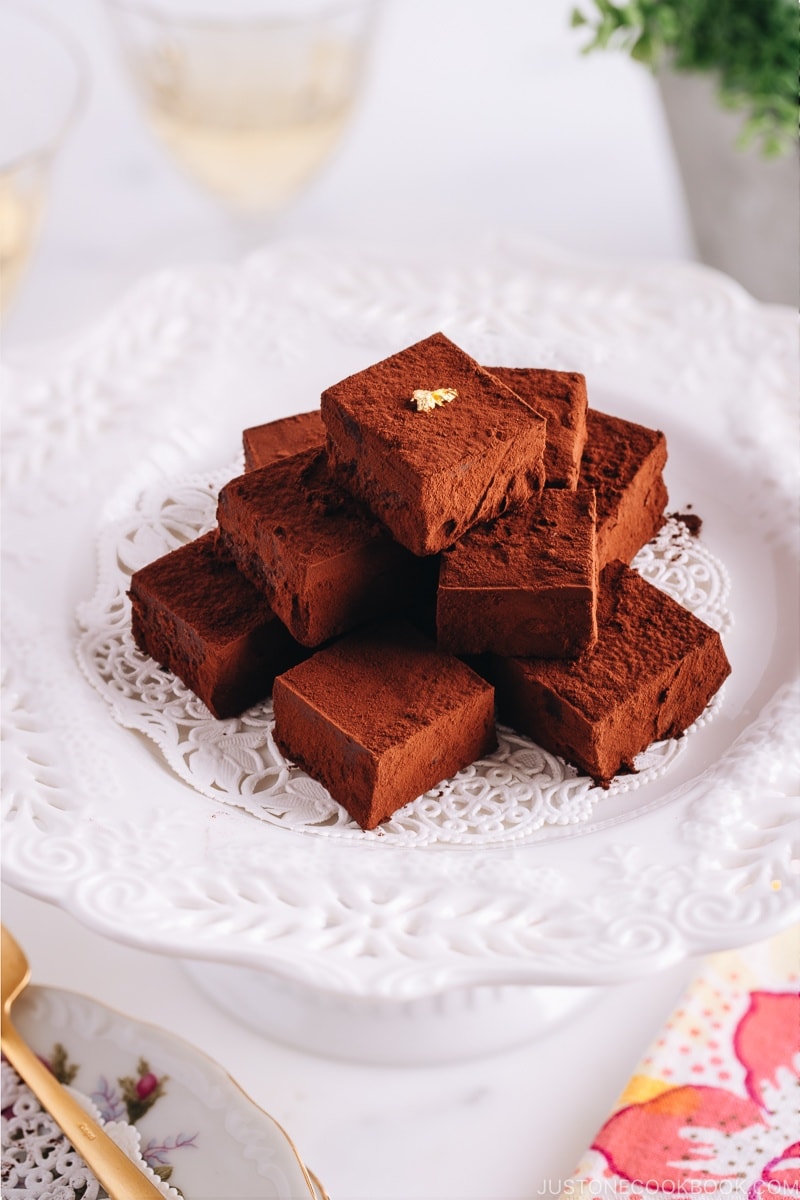
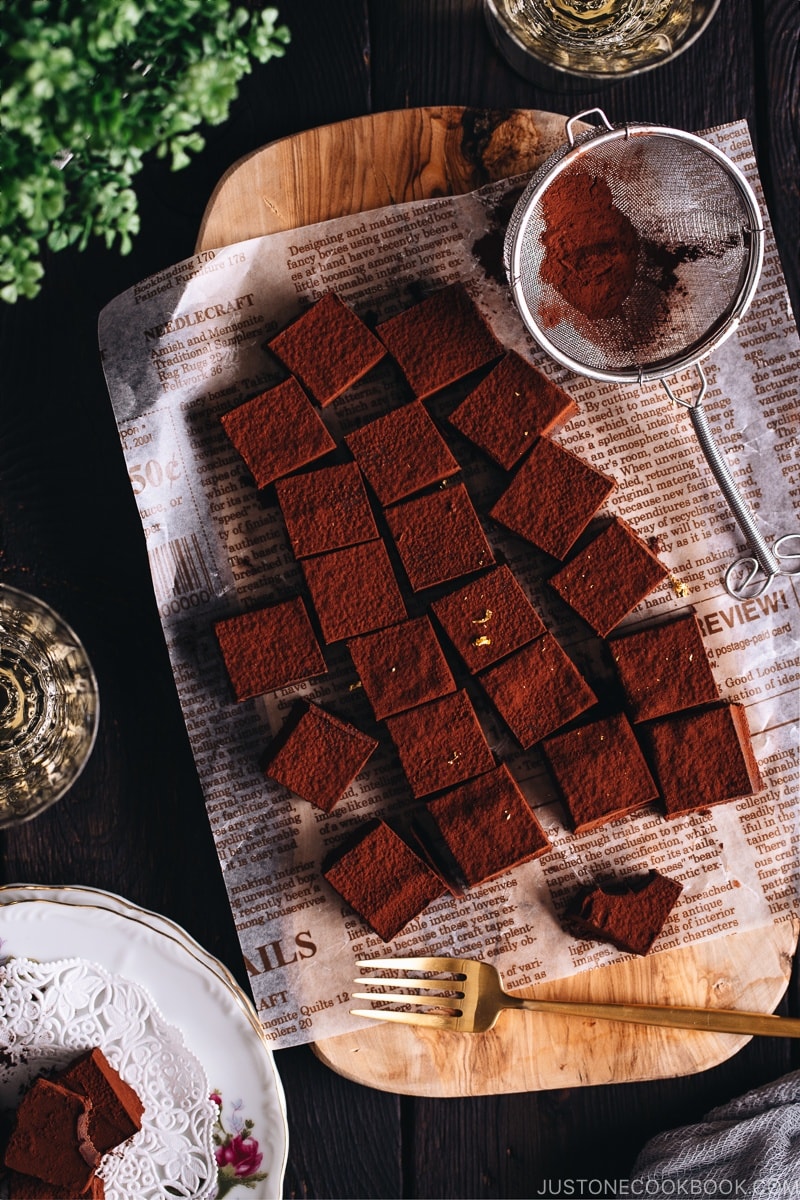
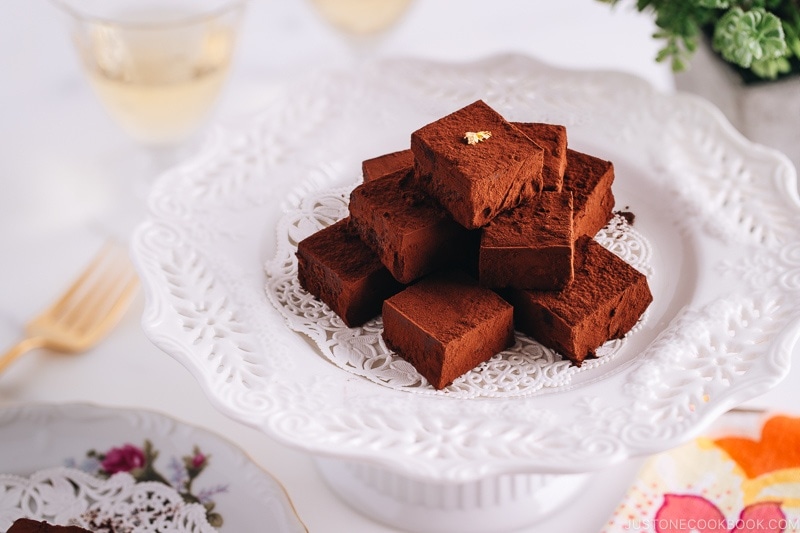
Silky-smooth Nama Chocolate with fresh cream simply melts in your mouth. Rich, moist, and decadent, these sweets are a very popular gift item from Japan. With my copycat recipe of the famous ROYCE‘ chocolate, you can easily make this special treat at home.
If you are a frequent visitor to Japan, you probably have heard of or tasted this Japanese chocolate called Nama Chocolate (生チョコレート). You can’t really avoid it at the airport gift shops. They come in fancy packaging that makes them a popular gift item to bring home from Japan.
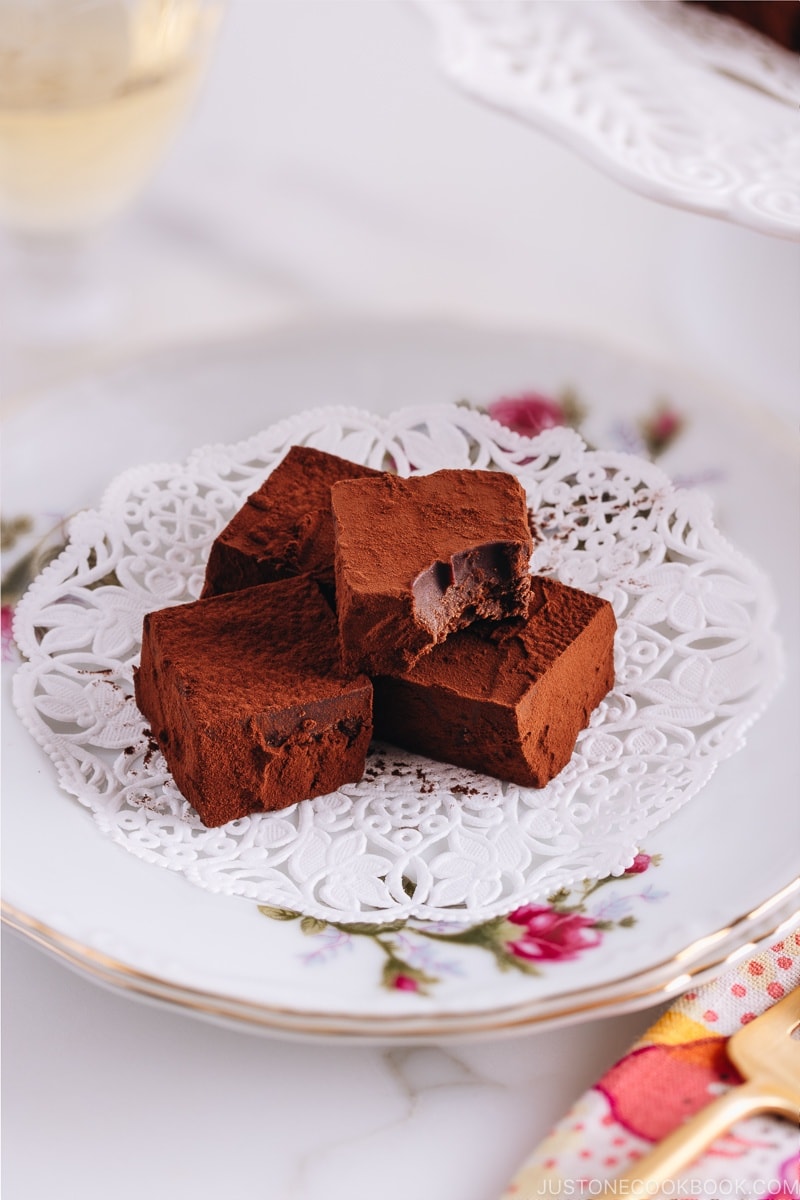
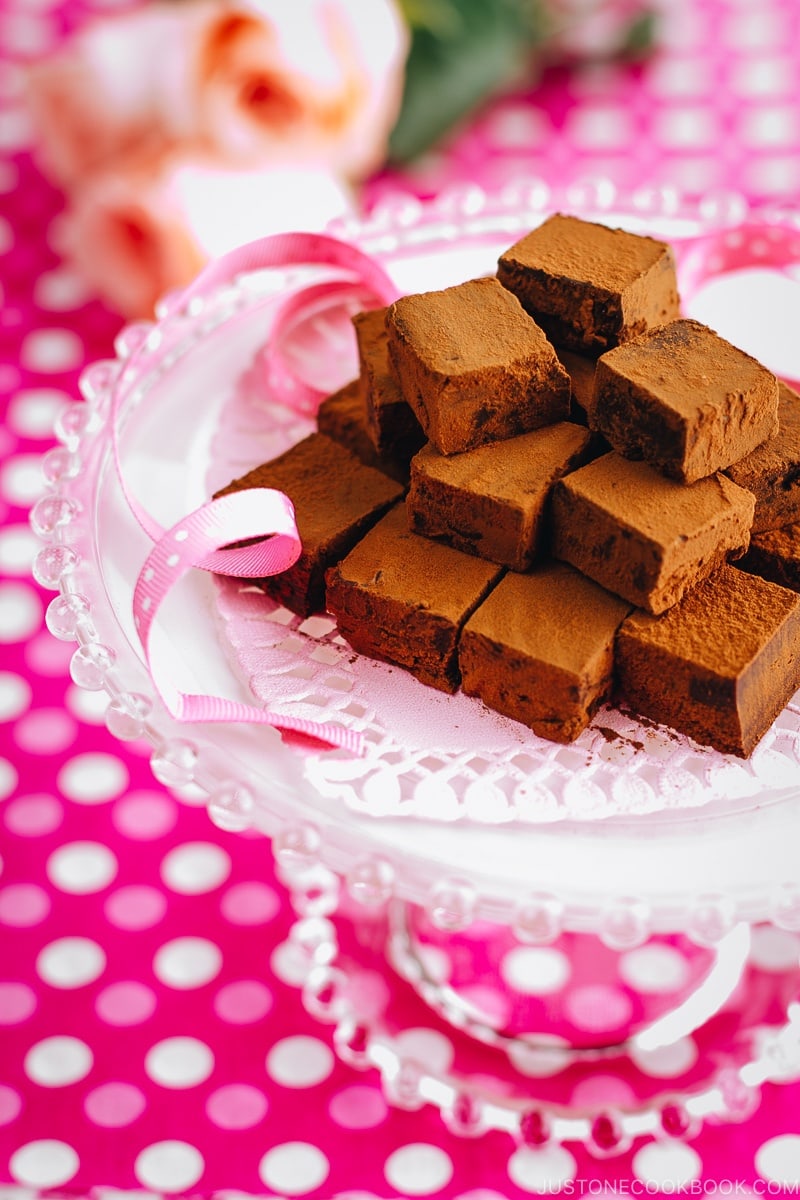
Nama Chocolate is rich, smooth, and moist, with a silky texture that literally melts in your mouth. The good news is you don’t have to fly to Japan to enjoy the luxurious sweet. With this recipe, you can make your chocolate dream come true today!
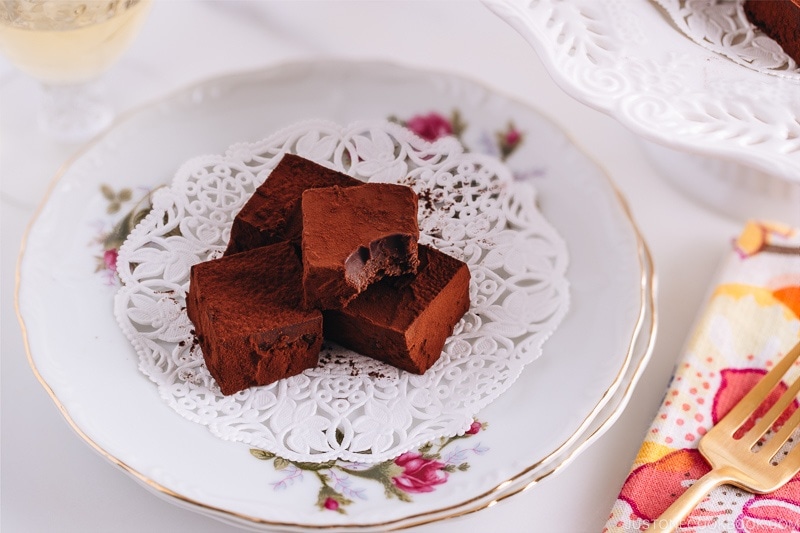
Table of Contents
What is Nama Chocolate?
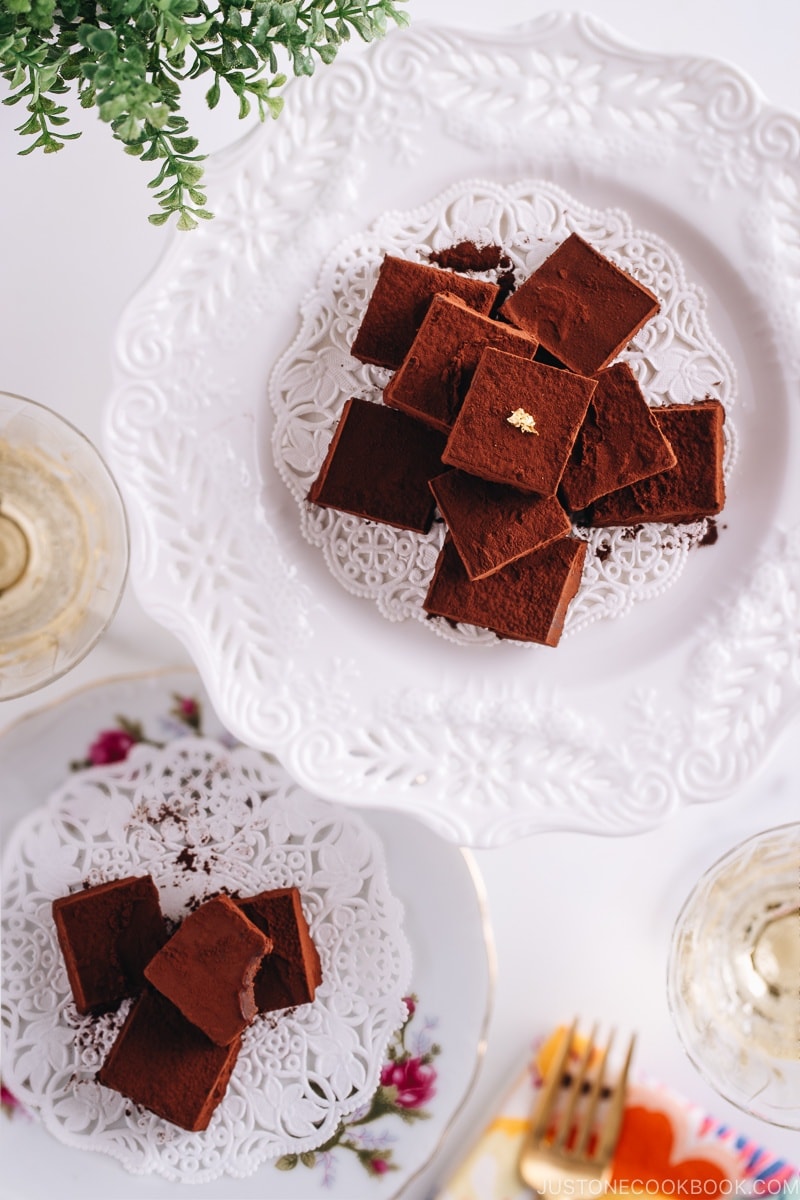
Nama Chocolate is a form of ganache, similar to the filling inside French truffles. It’s made of fresh cream and chocolate, cut into little cubes, and dusted with fine cocoa powder.
We can only call it “Nama Chocolate” when it contains at least 40% chocolate and 10% cream by weight, and no more than 10% water.
Nama Chocolate is much easier to prepare than truffles because the chocolate is poured into a square pan, chilled until firm, then cut into mini squares. No messy hands since there’s no rolling required.
What Does Nama in “Nama Chocolate” Mean?
Nama (生, pronounce [na-ma]) means raw or fresh in Japanese. The name “Nama” Chocolate refers to the plentiful use of rich, fresh cream in the chocolate.
Because of the fresh cream, we must refrigerate Nama Chocolate at all times and enjoy them within 4 days of making them. You can also keep in the freezer for up to a month.
If you’re planning to give Nama Chocolate as a gift, make sure to let the gift receiver know to consume soon.
History of Nama Chocolate
In 1988, the owner and chef Masakazu Kobayashi at the sweet shop Sils Maria created a new type of chocolate, and he named this chocolate Nama Chocolate and Nama Choco (生チョコ) for short.
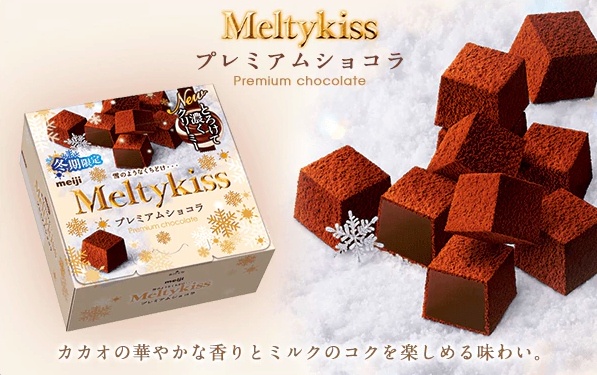
In 1993, Meiji, a snack company, released a chocolate product called Meltykiss (メルティーキッス) which was produced and supervised by chef Kobayashi. You can purchase a box of Meltykiss at Asian supermarkets, convenience stores, and train kiosks in Japan. This chocolate is known for its limited-time offering during the winter months as the chocolate melts quickly during the rest of the seasons.
Since then, major confectionery manufacturers started to sell Nama Chocolate, and it became a huge trend all over the country.
In 1996, Hokkaido-based ROYCE’ (ロイズ) released ROYCE’ Nama Chocolate. Many of you probably spotted this chocolate at the airports or gift shops at sightseeing spots in Japan. Due to their popularity, this Nama Chocolate is known to visitors who have been to Japan.
Although “Nama Chocolate” was invented in Japan in the late ’80s, this specific type of chocolate called “Pave de Geneva” was born in Geneva, Switzerland in 1930s. Pave de Geneva is made of chocolate and fresh cream and cut into small cubes smeared with cocoa, just like Nama Chocolate.
I’m not sure whether the Japanese chef had traveled to Geneva and knew of Pave de Geneva, or he figured out the Nama Chocolate formula on his own. Regardless, this is not an original Japanese product as it existed in Switzerland.
If you’re a Genevan who tried both Pave de Geneva and Nama Chocolate, please share your thoughts in the comment below. Are they similar or exactly the same?
Tips for Making Nama Chocolate
1. Use Good Chocolate
High-quality chocolate is mandatory since that’s the most important ingredient for making delicious Nama Chocolate. Make sure the chocolate is made of 100% cocoa butter and does not include vegetable fat in the ingredient list.
2. Use Heavy Cream
American heavy cream or heavy whipping cream (they are the same thing) has a 36-38% fat content. The ratio of heavy (whipping) cream (gram/ml) and chocolate (gram) should be 1:2. For this recipe, please do not replace chocolate with white chocolate (which I used in Green Tea Chocolate).
3. Dry and Clean Utensils
Make sure the bowls and utensils you are using are perfectly dry. Even a small amount of water/steam can “seize” the chocolate melting process. It can happen all of the sudden from a smooth bowl of liquid chocolate to a lumpy, grainy mass of chocolate.
Green Tea Matcha Nama Chocolate
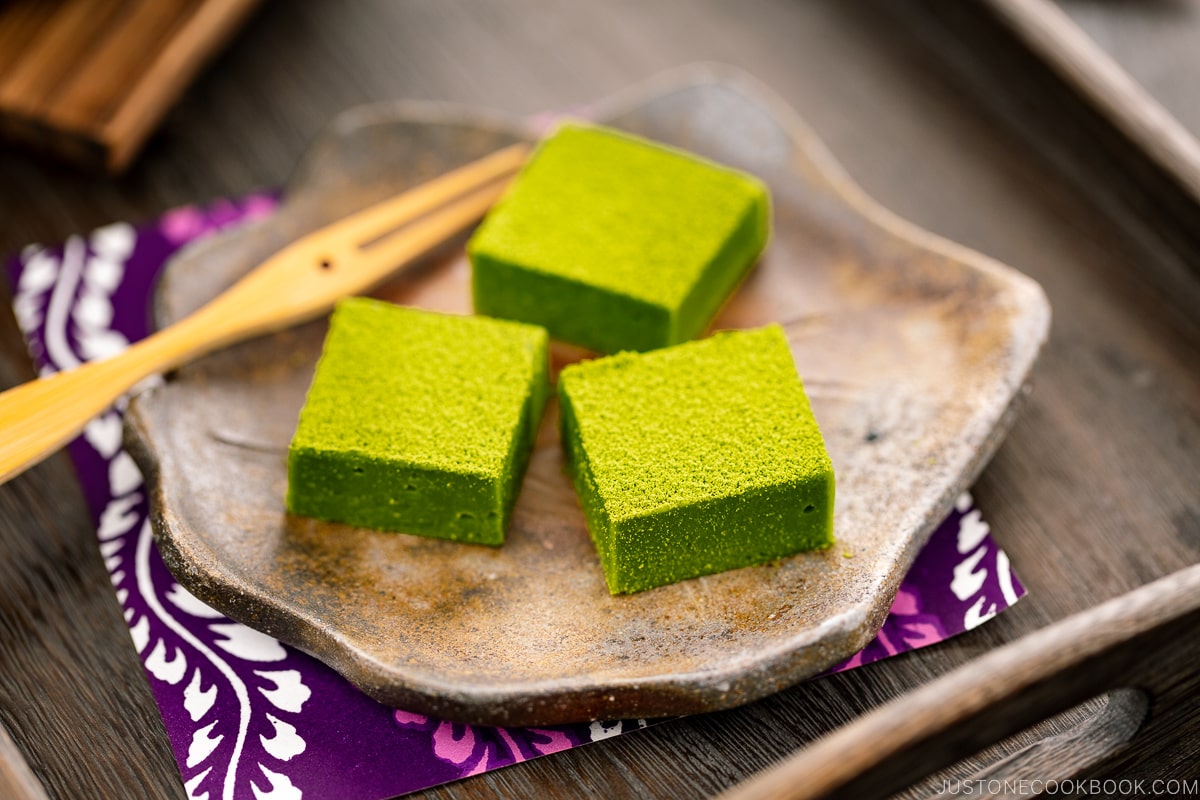
Here’s a Green Tea Matcha version!
Other Delicious Chocolate Recipes
These chocolate goodies are perfect for special occasions or as a hostess gift during the holiday season. I hope you enjoy making this Nama Chocolate recipe!
- Frozen Chocolate Banana
- Chocolate Covered Strawberries
- Chocolate Almond Toffee
- Chocolate Chiffon Cake
- Matcha Gateau au Chocolat
- Chocolate Chip Cookies with Nutella
- Valentine’s Day Chocolate Recipes
Wish to learn more about Japanese cooking? Sign up for our free newsletter to receive cooking tips & recipe updates! And stay in touch with me on Facebook, Pinterest, YouTube, and Instagram.

Nama Chocolate
Video
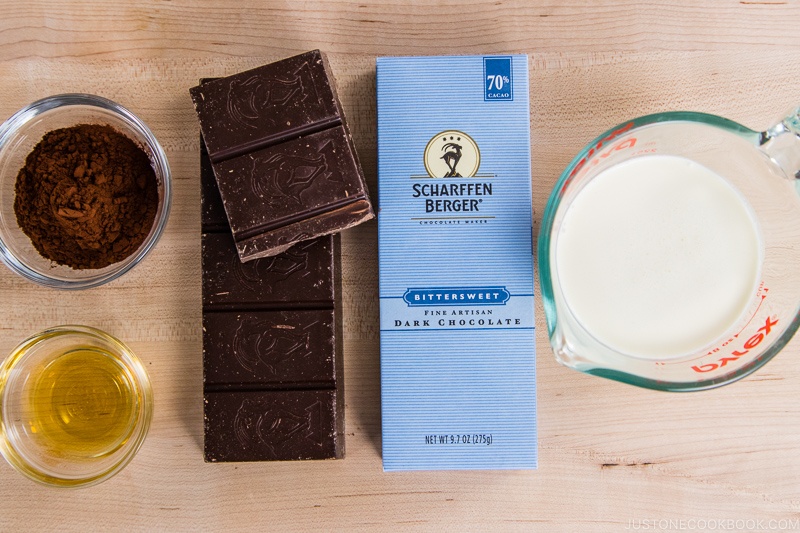
Ingredients
- 14 oz good-quality dark chocolate (70% cacao) (use semisweet chocolate if you prefer a less bitter taste)
- 200 ml heavy (whipping) cream (¾ cup + 4 tsp; 36% milkfat)
- 1 Tbsp liqueur of your choice (optional, to taste; I use brandy)
- Dutch-process cocoa powder (to coat the chocolate; you can buy it on Amazon)
Instructions
Before You Start…
- Please note that this recipe requires a chilling time of 4 hours. Also, read the Notes section at the end of this recipe card for important tips to successfully make this Nama Chocolate.
- Gather all the ingredients.

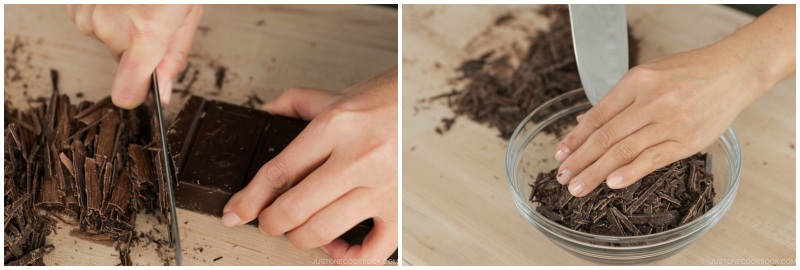
To Prepare the Nama Chocolate
- With a sharp knife, chop 14 oz good-quality dark chocolate (70% cacao) into smaller pieces so that they will melt faster and more evenly.

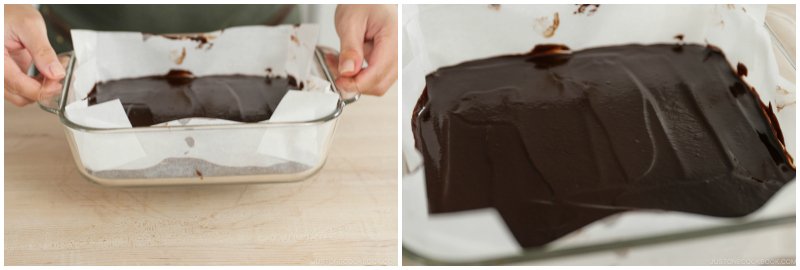
- Line an 8- x 8-inch (20- x 20-cm) baking dish with parchment paper. Tip: To make the chocolate the correct height, it‘s important to choose a dish or tray that‘s the right size; if you use a bigger tray, the chocolate will be flatter.
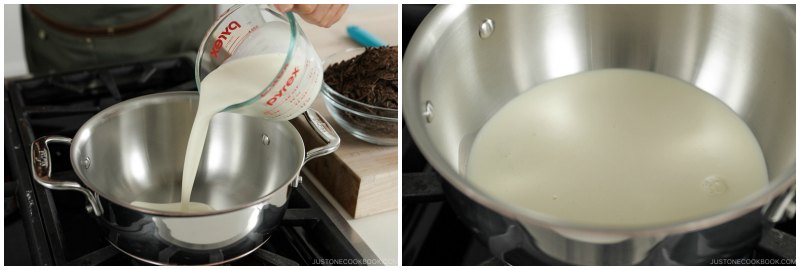
- Add 200 ml heavy (whipping) cream (¾ cup + 4 tsp) into a small saucepan over medium heat. Heat the cream to ALMOST a boil. Whisk lightly to evenly distribute the heat. Keep an eye on the cream to make sure it doesn‘t boil. Tip: Overheating the cream may cause the chocolate to separate in the next step (see Notes below for more information).
- When you see small bubbles form around the edges of the saucepan, remove it from the heat.
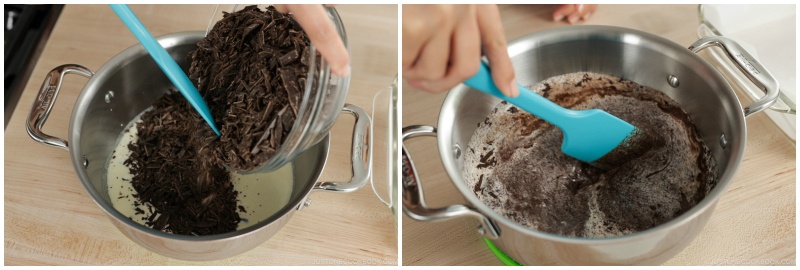
- Next, add the chocolate pieces into the cream and stir with a silicone spatula to combine. Tip: Make sure your utensil is completely dry; introducing even a tiny amount of water or steam may cause the melted chocolate to seize (see Notes below for more details).
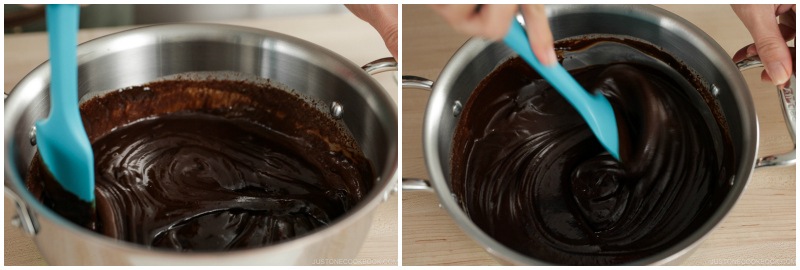
- Mix until the chocolate is melted and there are no more lumps. The chocolate and cream mixture should be completely smooth.
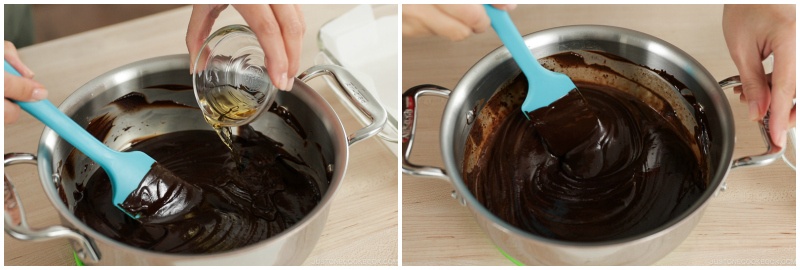
- If you‘d like, add 1 Tbsp liqueur of your choice (optional), and stir to incorporate.
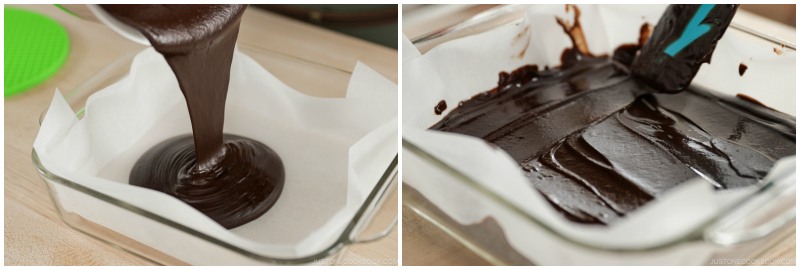
- Pour the mixture into the prepared baking dish and smooth the surface with the silicone spatula.
- Tap the baking dish onto the counter a few times to make sure the chocolate is evenly distributed. Refrigerate until firm, about 4–5 hours.


To Cut the Chocolate
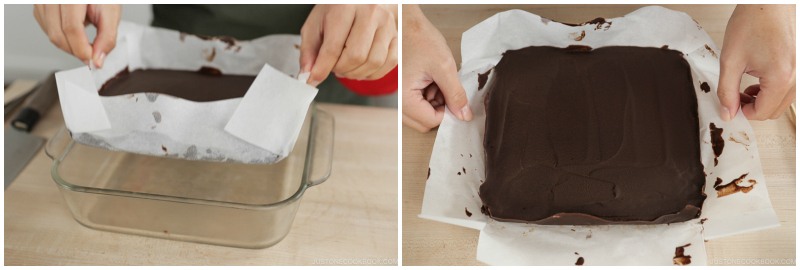
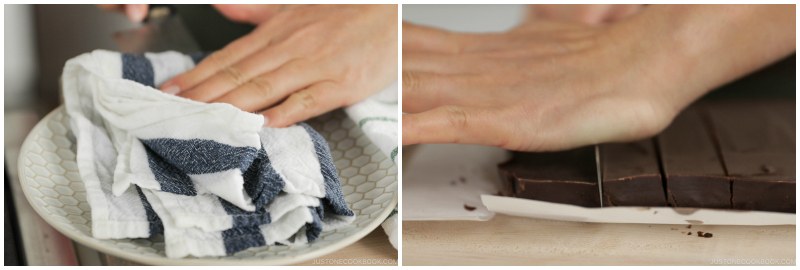
- After chilling for 4–5 hours, remove the chocolate with its parchment paper from the baking dish. Peel away the parchment paper from the sides.
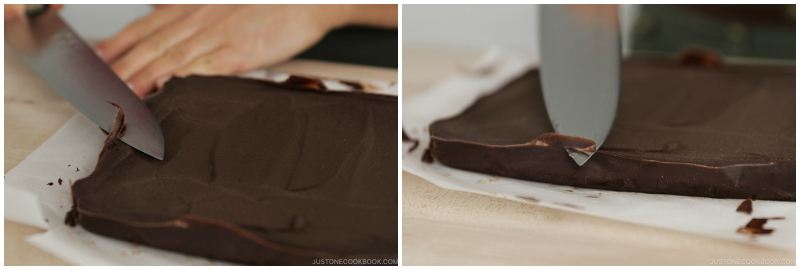
- With a sharp knife, cut off the stray pieces of excess chocolate around the four sides to make sharp corners and edges.
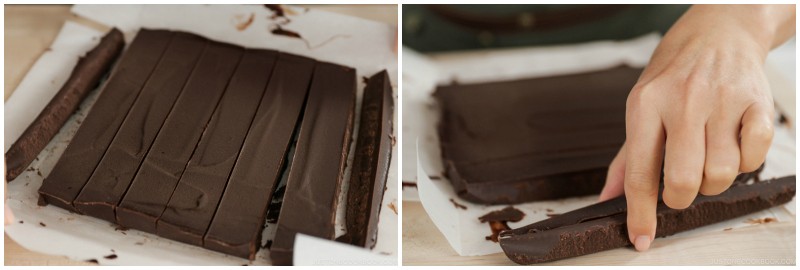
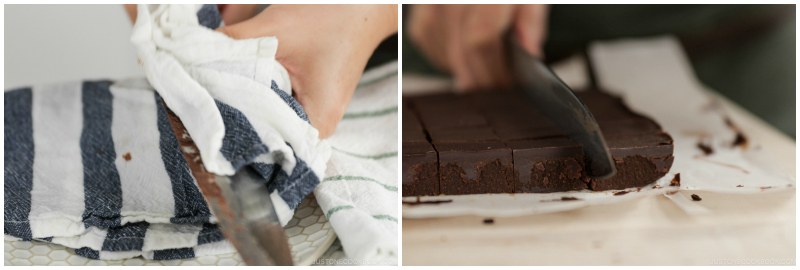
- Warm up the knife with a hot towel. Then, cut the chocolate slab into 1-inch (2.5-cm) strips. Make sure to clean and warm the knife before each cut to achieve a nice sharp cut.
- If your baking dish has curved edges and corners like mine, the edge strips may not be the ideal shape for cutting into neat chocolate cubes. If that‘s the case, cut off and save these chocolate pieces for yourself to enjoy.
- Next, cut the strips into cubes. Remember to clean and warm up the knife before each cut.
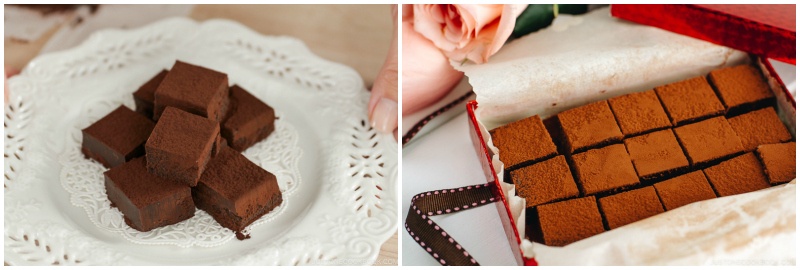
- Using a sugar duster or fine-mesh sieve, sprinkle the cubes on top with Dutch-process cocoa powder. Optionally, if you prefer the powder to completely cover the chocolate, you can dip each piece in the cocoa powder to coat all sides.

To Serve
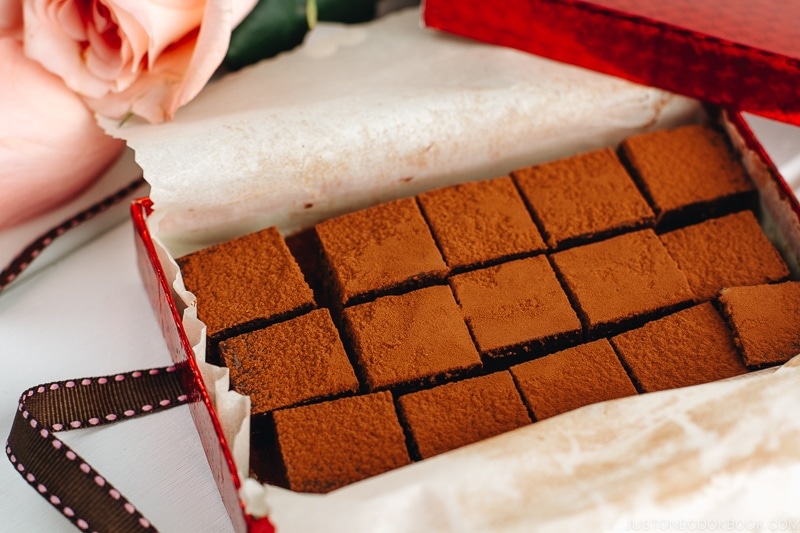
- Keep the Nama Chocolate refrigerated. Serve it on a plate, or put it in a box as a gift. I recommend letting the chilled and firm chocolate sit at room temperature for 5–10 minutes before serving so it‘s soft enough to melt in your mouth.
To Store
- Keep in an airtight container and store in the refrigerator for up to 4 days or in the freezer for up to a month.
Notes
- Separation (when oil comes out of the chocolate) happens when you get the chocolate too hot. Never heat dark chocolate above 120ºF (49ºC) and never heat milk chocolate and white chocolate above 110ºF (43ºC). When chocolate gets too hot, the cocoa butter separates from the solids, and there is no way to salvage it (although you can bake with it and it tastes fine). The best way to prevent separation is to stir the mixture frequently. Since we’re not using a double boiler in this recipe, make sure you do not bring the mixture to a full boil. Remove from the heat as soon as you see bubbles around the edges of the saucepan.
- Seizing happens when moisture is introduced to melted chocolate, even a tiny amount of liquid or steam. When this happens, a smooth bowl of liquid chocolate can suddenly become a lumpy, grainy mass. To prevent this, make sure the bowls and utensils that you are using are perfectly dry.
- To learn more details and how to fix overheated or seized chocolate, please read here.
- The ratio of heavy whipping cream and chocolate should be 1:2. Please do not replace the chocolate with white chocolate for this recipe. The ratio is not the same.
Nutrition
Editor’s Note: The post was originally published on February 6, 2012. The content has been updated.


Hi Naomi
Saw your video on making mama chocolate and I want to try it. I bought 100% cacao but it’s not sweetened. So I am just wondering how much sugar I should add to the recipe you have given and looking at other truffle recipes, please confirm I should add sugar into cream to melt the sugar first before adding the chocolate to the hot cream.
Thank you very much for your reply and your wonderful recipe !
Best,
Serena
Hi Serena!
We do not add sugar to this recipe, so we are unsure how the outcome will be…
Since this is your first time making Nama Chocolate, please follow Nami’s recipe precisely, so we can help if there is something wrong.
We hope you enjoy this recipe. Good luck! 😉
Hi Nami!
I want to make these as gifts for the holidays. Where did you get your box in the picture? Also can I substitute milk chocolate as well? I want to do both milk and dark versions.
Thanks!
Darlene
Hi Darlene,
Nami got these boxes at Daiso (a Japanese dollar store and there’s one in SF). She has tried this recipe with semi-sweet, but not milk chocolate before. Let us know how it goes!
why use liquor? and can i add butter ?
Hi Kevin,
Thank you very much for the 5 stars! The liquor is optional and I know people put Grand Marnier or Cointreau. You can start with 2 Tbsp, and add more if you like. As for butter, we’ve never used butter before, so I’m not sure how the outcome will be… please let us know how it goes!
Great and easy recipe! I did exactly as you described. I used a cream with 32% fat and a mixture of Lindt 70% and Lindt milk chocolate. It was delicious! Many thanks!
Hi Luna! Thank you so much for trying this recipe and for your kind feedback. So glad you enjoyed this chocolate recipe! 🙂
Kinichiwa Nami! I have been a huge fan of these chocolates for a long time and this is the closest i have come to tasting them when im not in Japan. Thank you for this recipe, everyone who tastes them thinks they are the best chocolate.
Just one cookbook is definitely my fav go to cooking blog.
Thanks! 🙂
Yianni
Hi Yianni! Thank you so much for trying this recipe and I’m so glad you and everyone liked it! It’s definitely “closest” to the real thing. 😉 Thank you for your kind feedback. xoxo
Hi, I tried your recipe and it tastes great. It’s just that mine is super sticky that its difficult to remove the parchment from it, not to mention that it’s kind of impossible to cut. Do you have any idea what might went wrong? Did you mean put in freezer before cutting?
Hi Wendy! Hmmm I usually don’t have problem with parchment paper being stuck, but when I cut the chocolate itself, it does stick to the chocolate so I have to remember warming up my knife and wipe every time I slice… otherwise, I can cut each piece nicely because it’s like a chocolate magnet attached to the knife.
Step 3: Warm up the sharp knife with a hot towel, and cut the chocolate into 1” strips. Make sure to clean/warm the knife before each cut to achieve a nice sharp cut.
Hi
I found the cocoa powder will get slightly wet and clump up a little after 3-4 days even in an airtight container kept in the fridge , what is the solution to keep it for as long as possible ?
Hi Rehab! Did you use a fine-mesh sieve/sifter to sprinkle? It should be a very thin coating on top of the chocolate that the cocoa powder should not become clump up. It should stay just like right after sprinkle. I’m not too sure how it looks like but maybe sprinkle again? Nama Chocolate should be eaten soon too. 🙂
Hi there,
I whipped some of this up, on a whim today, and thought it looked the right consistency, but only after it was chilled did I find that it was a little grainy inside, and also not quite as firm as I expected (a bit jiggly). My kitchen scale had run out of batteries so I had to guess the amounts, so it’s possible I used too much liquid for the right firmness.
Mainly I wanted to ask if you think it’s possible, at this point, to re-melt it all slowly, in an attempt to smooth it out, at least. I don’t mind if it’s still a bit soft…since it’s just for personal snacking this time.
Oh, also, I wondered if you could explain a bit of how it works to add an alcohol, when liquid water is supposed to mess it up – that seemed counter intuitive to me, and I wondered if that was what made it slightly grainy…though it could have also been that I didn’t melt all the bits as well as I thought I did first, and/or the cream was potentially too hot.
Anyway, I chose to just use an alcohol-based organic vanilla extract in place of a liquor. It all tastes good, I would just love your feedback on potentially smoothing it out better, if possible after chilling has happened? I did read that helpful linked page about how to fix seizing during the mixing process, but I think it’s far past those steps so I wasn’t sure now.
Thank you for a fun recipe all the same. And Happy 1st Day of Summer!
Hi Krystal! I apologize for my late response (I was away from work due to my post-surgery). It’s usually quite difficult to make it work. It’s a bit hard to assess what happened when the ingredients are not properly measured, but I think your chocolate might have seized? There are tutorials online and youtube on how to fix it but it has to be done prior to chilling.
Can I use Vodka or Whiskey instead?
Hi Angela! Maybe whiskey? 🙂
Made them yesterday for my family and they tasted exactly like Royce. Thank you for this recipe and the useful tips – the chocolates were amazing!!
Hi Jay! Thank you for trying this recipe. I’m so glad you enjoyed it! 🙂
Hi can i use all purpose cream or culinary cream? Will there be any difference on the nama chocolate? Thank you 😊
Hi Joliza! I’m not sure what’s all-purpose cream or culinary cream mean. American heavy cream is 36 to 38% fat. I hope this helps to find the right one.
On the mama chocolate, if it seizes is it ruined? The recipe said to cook over medium heat. Then upon reading troubleshooting it says to cook on low. I’m having tonight. It’s in refrigerator, but is it ruined? I’m making 3 dishes from your website tonight.
Hi Patty! I apologize for my late response. Due to traveling and getting sick after coming back, I’m finally being able to go through comments now. I’m very sorry.
I remove the note section mentioning “low heat” as it can be confusing. You can heat the milk over low, medium or high heat as long as you’re watching the heavy cream and make sure it does not boil. Just small bubbles appear around the edge and need to turn off.
If your chocolate is seized, then it’s more like there was some moisture in the utensil or introduced to the chocolate. You have to make sure nothing is wet when you are making chocolate. Hope this helps…
Hi Nami!
Yesterday I tried out this lovely recipe and it was my first time dealing with chocolate on such a scale. I had a little issues though since I couldn’t seem to tell whether the lumpiness i had from the chocolate was due to separation or not melting thoroughly. I ended using an improvised double boiler method to heat the chocolate up again and it became smooth but this morning I noticed a whitish ring around the edge of my refrigerated chocolate which I fear might be a sign of separation. Is there an easier way to tell separation versus just not melting enough? Hopefully it still tastes okay 😣 Thanks!
Hi Caitlin! I apologize for my late response. I was traveling and then got sick. Separation is very obvious and it’s really hard to fix, so I doubt you had that. Hope your chocolate came out well…
Mine don’t look as nice, but wow, they taste AMAZING.
Hi Celina! I’m so happy to hear that you enjoyed this chocolate. Thanks for trying this recipe!
Hi Nami! My friend and I are thinking of using milk tea powder to flavor the chocolate – how would we add it to this recipe without thickening the mixture too much? It’ll definitely be too sweet in the white chocolate, so we were hoping to mix it with the dark. Thank you so much!
Hi Ariel! Hmmm…. I’ve never used milk powder so I honestly don’t know what to expect. I’m so sorry…
it’s okay!! just in general then – is there any way to combine the dark chocolate with any powders? i’ve tried the normal recipe and it was amazing so i don’t want to mess up the texture or anything
Hi Ariel! I’ve only used milk powder when baking bread so I have no idea how much of milk powder is needed for chocolate or how the taste is affected by the milk powder etc. Sorry I wish I could help, but I just have no experience in this. 🙁