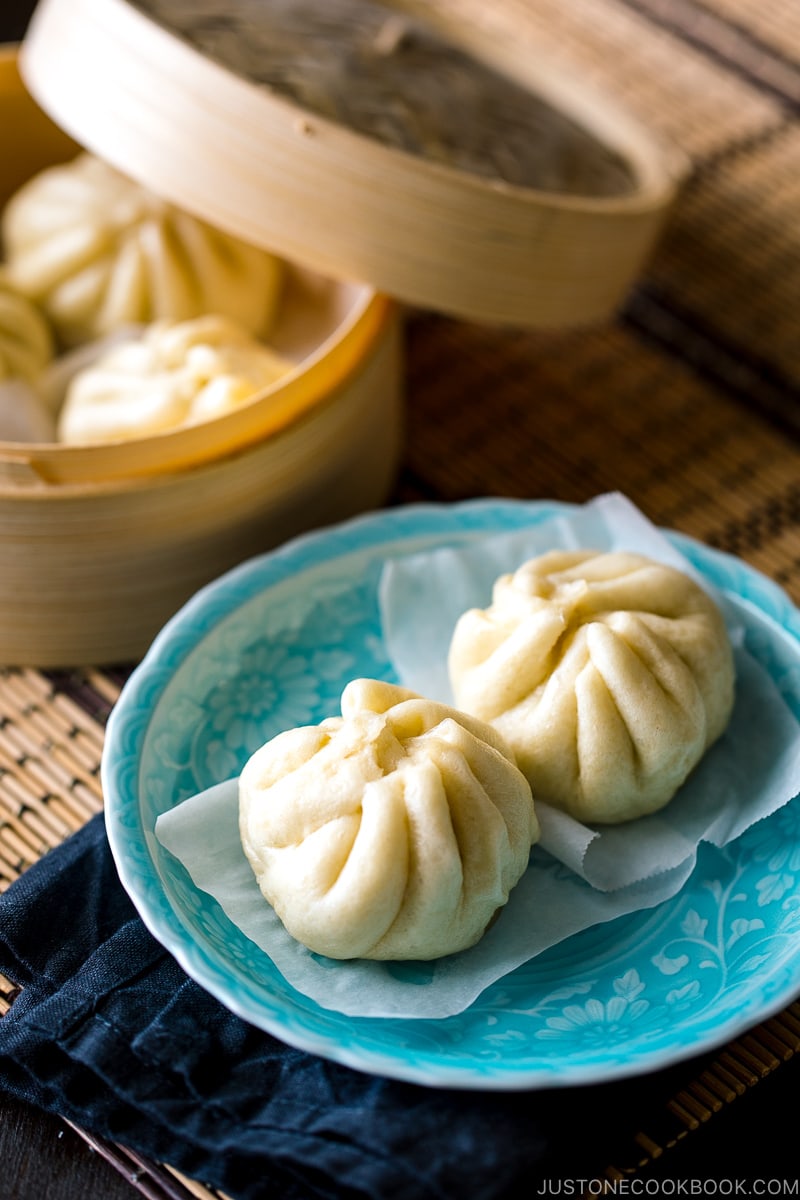
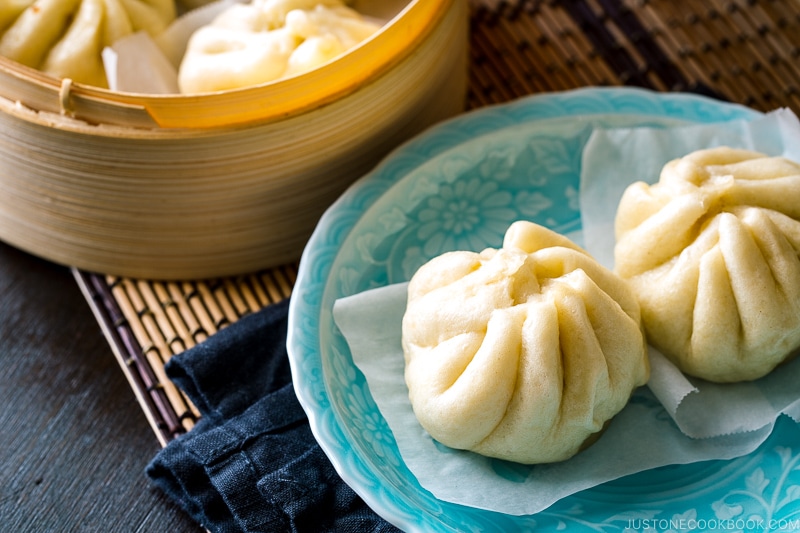
Nikuman is Japanese Steamed Pork Buns filled with juicy ground pork, shiitake mushroom, and cabbage inside. The hot and fluffy buns fresh out of the steamer basket will warm your heart and soul. It‘s surprisingly easy to make this delicious snack at home!
Do you have any food that evokes a special memory of your life? One of my dearest memories is snacking on a warm steamed bun called Nikuman during my commute home from college in the cold months. For me, Nikuman (肉まん), or Japanese-style Steamed Pork Bun, was not only my favorite winter snack but also a taste of nostalgia.
I used to stop by a convenience store for my Nikuman treat; the steaming hot bun kept my hands and heart warm. By the way, Japanese convenience stores sell not only snacks and drinks but a dizzying array of items like a mini supermarket. If you visit Japan, it’s definitely one place you should take a peek inside – it’s literally a “convenient” store.
What is Nikuman?
Nikuman is the Japanese name for the Chinese baozi (包子,肉包), also known as Chūka Man (中華まん). These steamed buns are made from flour dough and filled with meat and other ingredients. In western Japan (西日本) including Osaka, they are called Buta Man (豚まん).
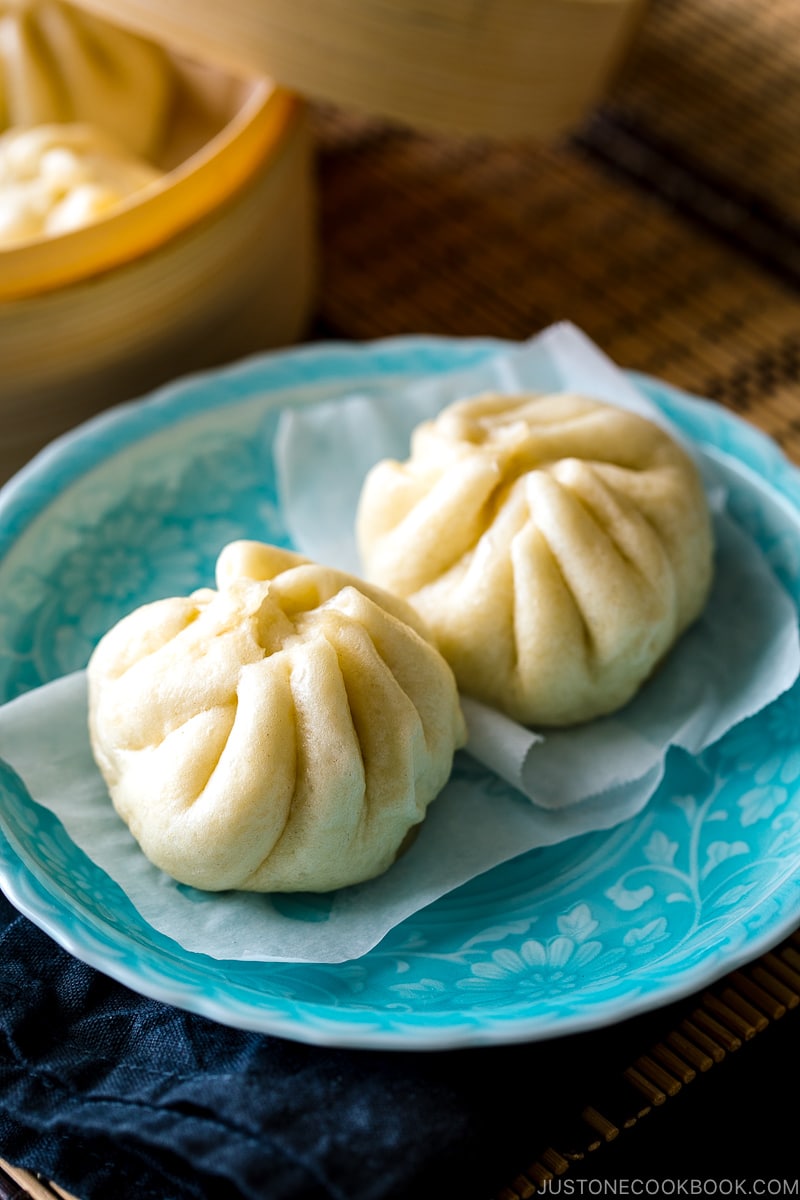
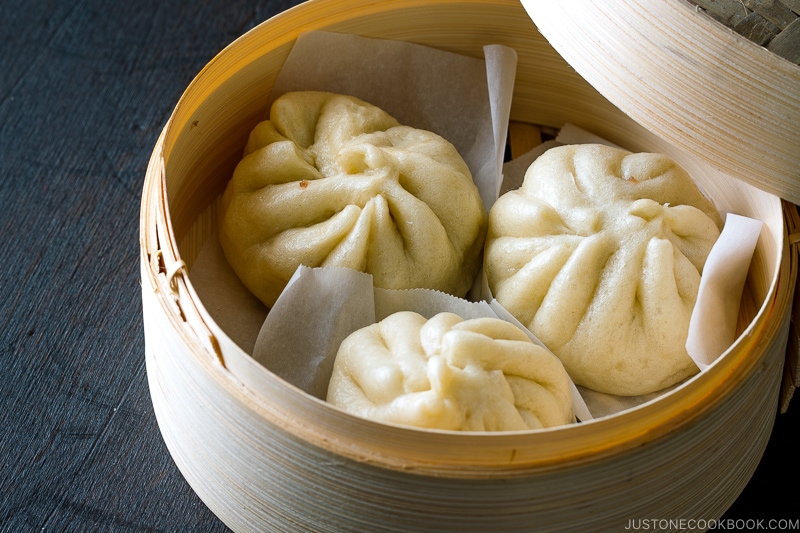
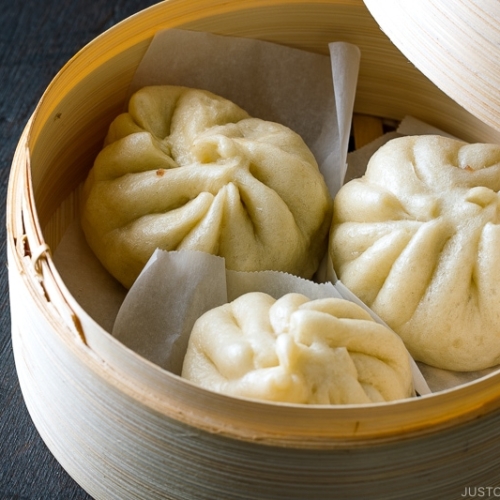
The savory buns are usually steamed inside the bamboo steamer and taste the best when you enjoy them right out hot and fluffy. The texture of the buns is tenderly soft and moist, and when you take a bite, the inside is bursting with sweet-savory, juicy meat mixtures.
During the winter months in Japan, convenience stores sell hot steaming chūka man including Nikuman, Kare–man (curry flavor), An-man (with red bean paste), and Pizza-man (pizza flavor).
Yokohama, Japan’s 2nd largest city I grew up in, has the largest Chinatown and I just loved walking around to see the traditional Chinese steamed buns that are as big as my face being sold at the stores. Or at least that’s how I remembered as a small child.
Homemade Nikuman
My mom used to buy packaged steamed buns from the store and they tasted pretty good as I remembered. I never thought this dish is something we could make at home until I visited my high school friend’s house for lunch years ago.
She made homemade nikuman for us and I was very impressed that she made the pork buns from scratch. To my surprise, she told me that they are very easy to make. The buns were so good as they were freshly made and everyone loved them. Since then I started to make my own and my family simply can’t get enough, especially my daughter who loves the soft white steamed buns.
You might wonder if it’s really worth your time to make the steamed buns at home, especially if you can just buy pre-packaged stuff from the grocery stores. But, let me tell you why you’ll love the homemade buns:
Why We Make Nikuman at Home:
- Healthier – Prepackaged steamed buns tend to have additives or less ideal ingredients. It’s different when you make the buns from scratch.
- Customization – Don’t like pork? Then use your favorite ingredients for the fillings. Make it vegetarian or vegan. These steamed buns are for YOU! I like to make them in two sizes, big ones for the adults and small ones (like today’s recipe) for the kids.
- An approachable recipe – I was so glad when I discovered how easy it was to make my own steamed buns. Watch my video, and follow the step-by-step instructions. You’ll see how easy and straightforward the recipe is.
- Taste fresh and delicious – Nothing is better than food made fresh, right in your own kitchen. Steamed buns are definitely one of those dishes. These nikuman are so fresh tasting and satisfying!
- Freezer-friendly – Leftovers can be kept frozen and reheated easily to enjoy later.
Making these steamed buns do pose some small challenges such as:
- Requires to rest the dough for some time – You have to let the dough rest and it’s necessary for good steamed buns.
- Needs lots of practice in folding and pleating – Making the steamed buns look good will require a little practice. But don’t worry. I’ll show you an easy method in the recipe and in my video tutorial, so you can follow along with confidence.
But don’t worry, nothing is too hard to stop anyone from giving the recipe a try!
Mastering The Folding & Pleating for Steamed Pork Buns
This is the part that intimidates people most. For many years, I folded the dough with the EASY method I shared in my recipe. My Nikuman tasted great, but the look could be better.
When my friend Maggie of Ominivore’s Cookbook shared her Kimchi Pork Steamed Bun recipe, she showed her mom’s technique of folding and pleating in her youtube video. Since then, I’ve been wrapping my nikuman the same way. I still need to perfect my skill, but I’ve seen huge improvements with the method.
So I leave it up to you on how you want to wrap the dough. The nikuman taste great either way. Meanwhile, I’ll keep practicing my folding and pleating!
PS: If you enjoyed these steamed pork buns, I think you ought to check out Shumai and Manju too!
Similar Savory and Sweet Treats You’ll Enjoy:
Wish to learn more about Japanese cooking? Sign up for our free newsletter to receive cooking tips & recipe updates! And stay in touch with me on Facebook, Pinterest, YouTube, and Instagram.
Nikuman (Steamed Pork Buns)
Video
Ingredients
For the Dough
- 2½ cups all-purpose flour (plain flour) (plus more for dusting; weigh your flour or use the “fluff and sprinkle“ method and level it off)
- 2 scant Tbsp sugar (20 g; 2 Tbsp sugar is 25 g, so measure 20% less)
- ½ tsp Diamond Crystal kosher salt
- 1 tsp baking powder
- 1 tsp instant yeast
- 1 Tbsp neutral oil (plus more for coating the proofing bowl)
- ⅔-¾ cup water (start with 160 ml and add more, if needed)
For the Filling
- 2 dried shiitake mushrooms
- ½ cup water
- 1 green onion/scallion
- 4 leaves green cabbage (6.3 oz, 180 g)
- 1 tsp Diamond Crystal kosher salt
- ¾ lb ground pork
- 1½ tsp ginger (grated, with juice; from 1-inch, 2.5-cm knob)
- 1 tsp sugar
- 1 Tbsp sake
- 1 Tbsp soy sauce
- 1 Tbsp toasted sesame oil
- 1 Tbsp potato starch or cornstarch
- freshly ground black pepper
For Serving
- soy sauce
- Japanese karashi hot mustard
Instructions
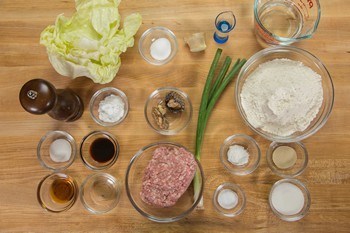
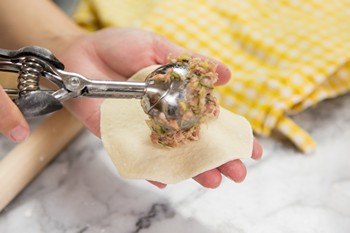
- Gather all the ingredients. I highly encourage you to weigh your ingredients using a kitchen scale for this recipe. Click on the “Metric“ button at the top of the recipe to convert the ingredient measurements to metric. If you‘re using a cup measurement, please follow the “fluff and sprinkle“ method: Fluff your flour with a spoon, sprinkle the flour into your measuring cup, and level it off. Otherwise, you may scoop more flour than you need.Prepare one square piece of parchment paper for each bun you will make, about 3 x 3 inches (7.6 x 7.6 cm) for small buns. Set aside.

To Make the Dough
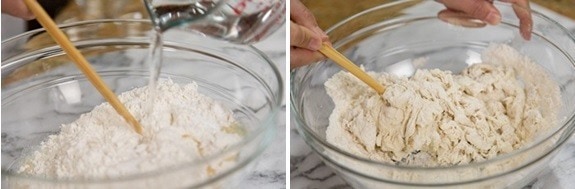
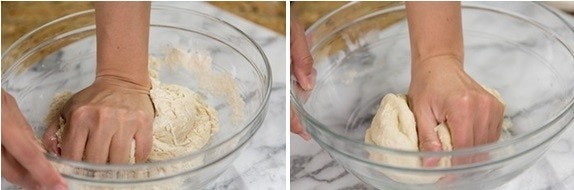
- Put 2½ cups all-purpose flour (plain flour), 2 scant Tbsp sugar, ½ tsp Diamond Crystal kosher salt, 1 tsp baking powder, 1 tsp instant yeast, and 1 Tbsp neutral oil in a large bowl. While mixing the ingredients with chopsticks or a wooden spoon, slowly pour ⅔-¾ cup water into the bowl and mix with the other ingredients until they are incorporated and there are no dry spots of flour left in the bowl. Tip: Start with 160 ml water and only add the rest if you need it to achieve the right dough consistency. You may need more or less depending on the humidity of your environment.

- Lightly dust your hand with flour to keep the dough from sticking too much. Use your hand to knead the dough in the bowl, pressing it down and reshaping it until you can form it into a ball.

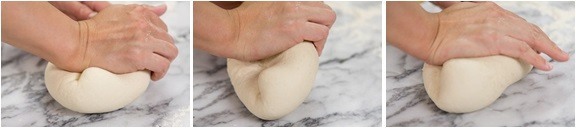
- Sprinkle a working surface with flour. Transfer the dough onto the surface and start kneading. This is how I knead: First, press the top half of the dough, pushing forward slightly. Then pull it back and fold it in half and press it forward again with the heel of your hand twice. Then, turn the dough slightly, about 30 degrees, and repeat this process. Continue turning and kneading the dough for 10–15 minutes or until the dough becomes smooth and silky. Sprinkle the dough with a little bit of flour at a time to help decrease the stickiness.

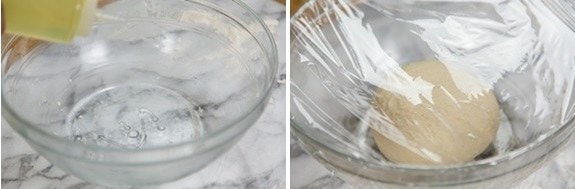
- Form the dough into a smooth, round shape, gently tucking the loose ends underneath. Coat the bottom of the bowl with oil and place the dough back in the bowl. Cover it with plastic wrap and put it in a warm place until the dough doubles in size, about 30–60 minutes.
To Prepare the Filling
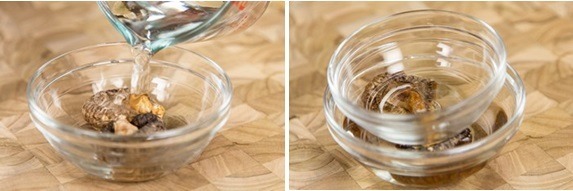
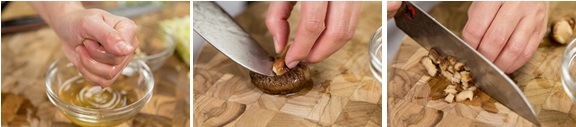
- While you’re waiting for the dough to rise, make the filling. First, soak 2 dried shiitake mushrooms in ½ cup water. Place something heavy on top to completely submerge the shiitake. Set aside to rehydrate for 10–15 minutes.

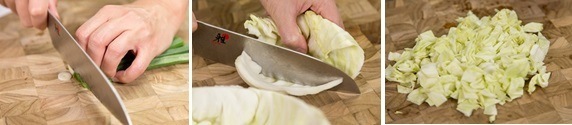
- Thinly slice 1 green onion/scallion. Remove the tough core of 4 leaves green cabbage and chop the leaves into 1-inch (2.5-cm) pieces.

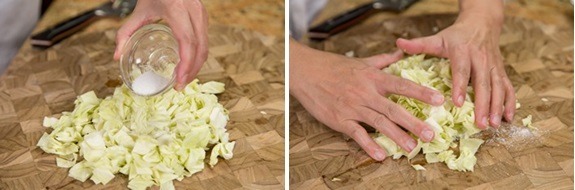
- Sprinkle the chopped cabbage with 1 tsp Diamond Crystal kosher salt to draw out the excess water.

- Once the shiitake mushrooms are rehydrated, squeeze the liquid out, cut off the tough stems, and mince the mushroom tops.

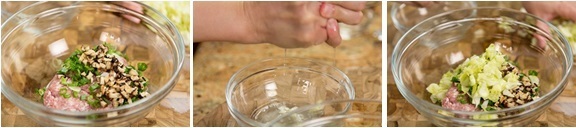
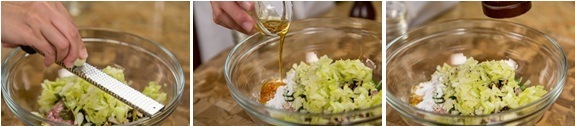
- In a large bowl, combine ¾ lb ground pork, the sliced scallion, and the minced shiitake mushrooms. Squeeze out the excess water from the cabbage with your hands and add it to the bowl.
- Grate the ginger and add 1½ tsp ginger, grated (with juice), to the pork mixture. Then, add 1 tsp sugar, 1 Tbsp sake, 1 Tbsp soy sauce, 1 Tbsp toasted sesame oil, 1 Tbsp potato starch or cornstarch, and freshly ground black pepper.

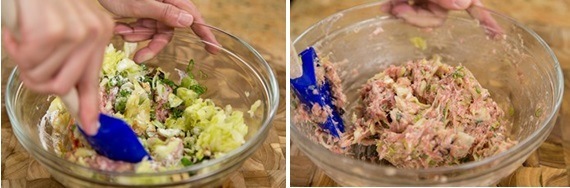
- Knead the mixture until it is well combined and looks pale and sticky. Set it aside (or cover with plastic wrap and keep in the fridge) until the dough is ready.

To Form the Buns
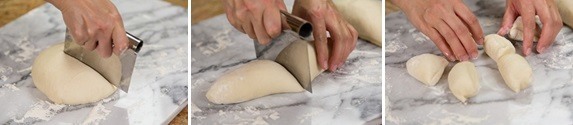
- Once the dough has doubled in size, place it on the work surface that you‘ve dusted with flour. Divide the dough into 2 pieces and then roll each piece into a log. Cut each log into 5 equal pieces and then cut each piece in half. You should have 20 pieces of dough. You can divide the dough into fewer pieces of dough to make bigger buns, if you wish. However, it‘s easier to work with a smaller piece of dough to make nice pleats when you wrap because it‘s hard to hold a big piece of dough plus filling in one hand. Form each piece of dough into a ball and dust the dough balls with flour to keep them from sticking to each other. Space each ball apart and cover loosely with a damp kitchen cloth to avoid drying out. Let them rest for 10 minutes.

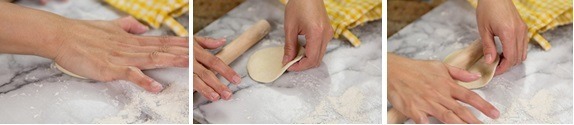
- Take a ball of dough and flatten it with your palm. Then roll it with a rolling pin into a round wrapper. Here’s how I roll the dough: Hold the top of the dough with your left hand and use a rolling pin to roll out the dough with your right hand. You only need to roll up and down on the bottom half of the dough. After rolling 1–2 times, rotate the dough about 30 degrees with the left hand. Repeat this process until the dough becomes thin. The center of dough should be thicker than the edge.

- Scoop 1½ Tbsp of filling (I use this 1½ Tbsp cookie scoop) and place it in the center of the dough.
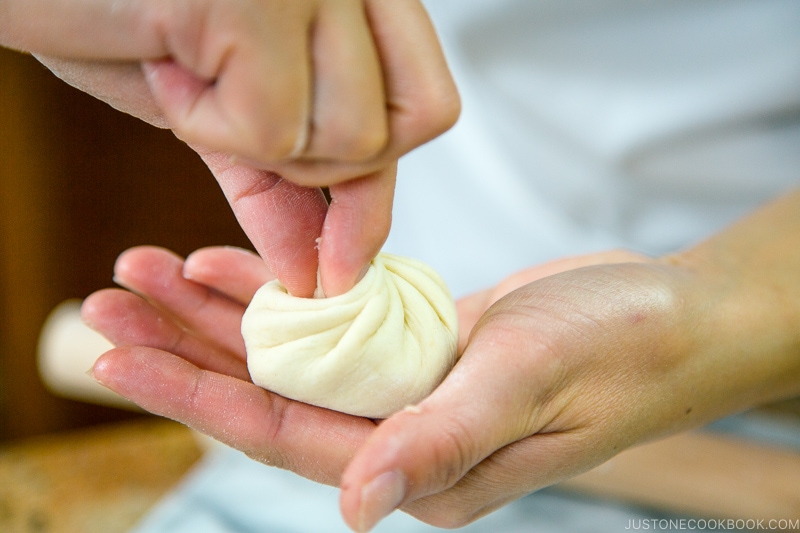
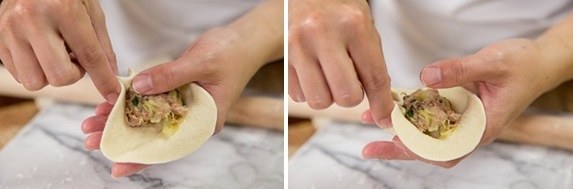
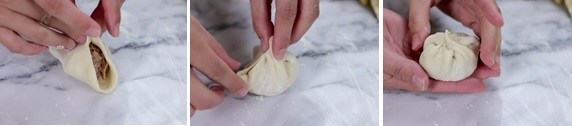
- Hold the dough with your left hand and seal the bun using your right index finger and thumb. First, pick up a corner of the dough with your right index finger and thumb and pinch together (left picture). Without moving your thumb, use your right index finger to pick up more dough and pinch it with your thumb while rotating the dough clockwise with your left hand (right picture).

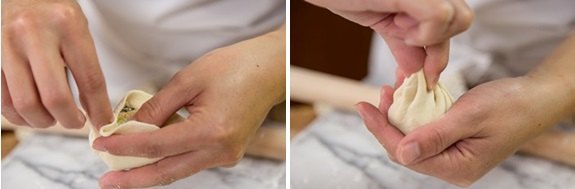
- Repeat this process about 10–12 times (for 10–12 pleats) until you seal the bun closed by pleating and pinching the last piece of dough tightly. Tips: Your left thumb should hold down the filling while you use your left fingers to turn the wrapper. Use your left index finger to help pleat the dough. Also, lift up the pinched pleats slightly while you make a new pleat so the filling stays inside the dough.
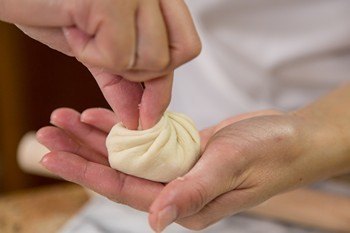
- Once you finish sealing the last part of the dough, twist the pleats further with your right index finger and thumb to maintain a tight seal. If you’re left-handed, reverse the directions.
- Easy Alternative Option: Wrap the filling by bringing the dough up around the meat to the top, forming little pleats with the excess dough, then slightly twisting the dough to close it and pinching it firmly to join the edges.

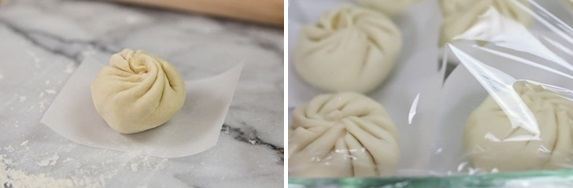
- Place the bun on a square piece of parchment paper that fits the bun. Cover the finished buns with plastic wrap and repeat this process with the rest of the dough. Let the buns rest for 20 minutes.

To Steam
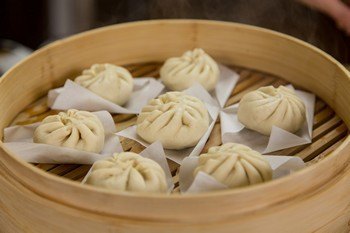
- Bring water to a boil in a large wok (or a pot) and set a steamer on top. Once the water is boiling, place the buns with their parchment paper squares in the steamer tray, leaving about 2 inches between each bun (as they will get larger while steaming). Close the lid and steam over high heat for 10 minutes for small buns (or 13 minutes for medium buns and 15 minutes for large buns). If you use a regular pot for steaming, wrap the lid with a kitchen cloth to prevent the condensation (formed on the lid) from dripping onto the buns.
To Serve
- Serve the hot Nikuman with soy sauce and Japanese karashi hot mustard on the side. Enjoy immediately.
To Store
- The buns keep well in the fridge until the next day and freeze well after steaming. Wrap them in plastic wrap and then pack them in freezer bags; I suggest to consume them within 1 week for the best flavor and freshness. To reheat, steam the frozen buns for a couple of minutes.
Nutrition
Editor’s Note: This post was originally published on Mar 16, 2015. It’s been edited and republished in April 2020.


Hello Nami,
For the steamed buns (no filling) could I steam them in my Instapot? If so, for how long?
Thank you,
Wendy
Hi Wendy! I’ve never tried steaming the buns in my Instant Pot, so it’s hard for me to guess. I don’t know if the condensation will drop on the steamed buns… you can’t cover with the towel but the lid is “slightly” curved so the condensation may not drop right above the buns… hard to tell. If you decide to try using your Instant Pot, let us know how it goes! The cooking time should be similar if you use the steam function. But if Instant Pot Steam temperature is higher, then I’m not sure how long it takes to cook through… Please test and see. 🙂
Can you pan fried first and steamed these pork buns??
Hi Dorothy! Hmm, I have not tried that before… I’m sorry I wish I could answer.
Hello! I was wondering if the sugar is necessary for the development of the dough or if it’s just for that slightly sweet flavor. Have you made them without it before?
Thanks!
Hi Angelina! Sugar provides “food” for yeast, which converts it to carbon dioxide and alcohol, along with enhancing the flavor and helping retain moisture. 🙂
Hmmmmm, they were great! I ate almost half of the recipe myself.
There were superhuge! Because I misread and made only 10 out of the recipe. But that’s okay, like I heard in ine video: never underestimate the emotional impact of huge round food. She meant huges cookies. Well I had the same with your nikkuman. It felt so good. One were as huge as a mans palm, big like an orange. I felt like a kid with a BIG BIG delicous ball in my hands. It was a wonderful eating experience!
This almost let me forget that I eat them solo. I was so absorbed in doing the buns that I forgot making something to eat with them. What do you and your familie eat with them? Do you dip them like gyozas? Or eat like them are with a salad or something?
The filling was rich, I especially liked a lot the taste of ginger.
I’m going to store the rest and take it with me tomorrow.
How to close the buns is something I need to train more to look beautiful, but it was really okay for the first time.
Are there vegetarian fillings for this buns? I like everything with dough but don’t eat a lot of meat.
Ah I did them with ground beef instead of pork. It still was delicious.
Thank you a lot Nami! I love your recipes (and japans food, except of natto 😉
Hi Anna! I’m glad to hear you enjoyed making this recipe! Thank you for your feedback. I enjoyed reading it. 🙂
I can totally relate the happiness of the big round fluffy steamed bun. In Yokohama Chinatown, they sell a humongous steamed bun and it makes me happy… We eat this as a snack, lunch, not so much for dinner. This takes a lot of time and effort, so if you serve this as a meal, you can only serve small side dishes that you can make ahead, spinach salad, stir fry… something similar and more veggie focus.
For the vegetable filling, I’d use cabbage or napa cabbage as base, and add finely chopped carrots, shiitake mushrooms (and all kinds of mushrooms – they taste like meat especially king oyster mushrooms!), bell peppers, eggplants…. anything, really.
If you feel the filling can have more taste, serve with soy sauce. 🙂
I’m happy to hear you enjoy Japanese food!
Wow! I would like to eat this enormous steamed bun at Yokohama Chinatown now (and tomorrow too)! I think I’m drooling here a bit … 😉 I LOVE Japanese food, well except natto I guess
I eat them with a green salat with a plain oliveoil, aceto balsamico, herbs, salt, pepper Dressing, worked really good and was super for my bento box, which is since a few weeks in use again.
Like you describe freezing and resteaming worked perfectly. So I think I’m going to make a big batch of a delicious vegetable filling the next time,like you described it and freeze it, so the effort isn’t that much.
Hi Anna! I hope you enjoy the recipe! 🙂
Hi Nami,
What kind of cabbage did you use?
Thanks!
Hi Cupcake! I use regular cabbage, not napa cabbage. 🙂
Can you use a regular steamer or it needs to be the bamboo?
Thanks
Hi NBA! Any steamer would be okay. Hope you enjoy!
Hey! Love the recipe but everytime i make them there is still some pink in the meat even if i cook them longer than you recommend here. I am using the scoop you suggested so i don’t think i am making them too big. Ideas?
Hi Sky! It’s important to know the internal temperature instead of the color.
https://www.npr.org/sections/thetwo-way/2011/05/24/136613898/a-little-pink-is-ok-usda-revises-cooking-temperature-for-pork
Hope this article helps! 🙂
WOW these are so good!! I’ve never made nikuman before and I don’t have a bamboo steamer, but I made a test batch and they turned out amazing! Thank you for such an amazing and easy recipe!
Hi Tessa! I’m so happy to hear you liked this recipe! Thank you for trying it! 😀
Just wanted to thank you for your amazing recipes. I love them and they have taken my cooking from okay to delicious! You rock.
Hi Larisa! Thank you for your kind feedback! I’m so happy to hear you enjoy cooking my recipes! 🙂
Hi Nami,
Which bamboo steamer do you recommend? I have looked at so many on Amazon but not sure which one to get. Some have metal rings around.
Hi Marale! I wish I remember where I got mine, but to be honest, I don’t remember… it’s been a while. It’s for sure the Chinese one as I never got it from Japan. Mine does not have metal rings around. 🙂
That’s okay. Thanks!
A *ton* of work, but I knew it would be. I measured everything carefully, but I feel like I had not quite enough dough. I think I’d make a double batch of the dough next time and just make plain steam buns with any leftovers. These ended up thinner than we prefer, but I also have a tiny steamer, so I guess that was just as well for now.
The filling would be really good in gyoza also (which I somehow find less work than these), or even just as meatballs for a bento.
Thank you for trying this recipe, M! Yeah…it’s a bit of work during the weeknight for me, which is why it’s a treat in my house when I make it. I make smaller nikuman compared to ones in Japan. Thank you for your feedback! xoxo
[…] it for other noodle dishes like Hiyashi Chuka and Tsukemen or make a sandwich with steamed buns (use this recipe) and Chashu Fried Rice, which is my favorite way to use up the broken pieces or edges of […]
Took me a while to find your website, and also glad I found your Nikuman recipe Nami! Just have one quick question, should I freeze the Nikuman after steaming it or before? Just two of us at home and the recipe yields several of them…Thank you!
Hi Jules! I recommend freezing AFTER you steam. You need to reheat/resteam the buns when you’re ready to eat. 🙂 Hope you enjoy!
Hi Nami! These are always a family favorite, so I am making them once more. As for the dough, do you recommend making the dough and steaming the same day, or can the dough be pre-made the day before it’s steamed?
Thanks for your help and amazing recipes 🙂
Hi Christina! Yes, I recommend making on the same day as you don’t want the dough to over-proofed. It’s best to make everything and re-steamed. 🙂 Hope you enjoy!
Hi, I was getting the ingredients to make this and I saw that it had sake. My family tries to avoid alcohol and I was wondering if the recipe would be okay without it, or if there was a substitute for it?
Hi Adele! All the alcoholic content will be evaporated completely (there is no alcohol in food), but if you do not want to use it at all, then you can add water or chicken broth etc. 🙂 Hope you enjoy!