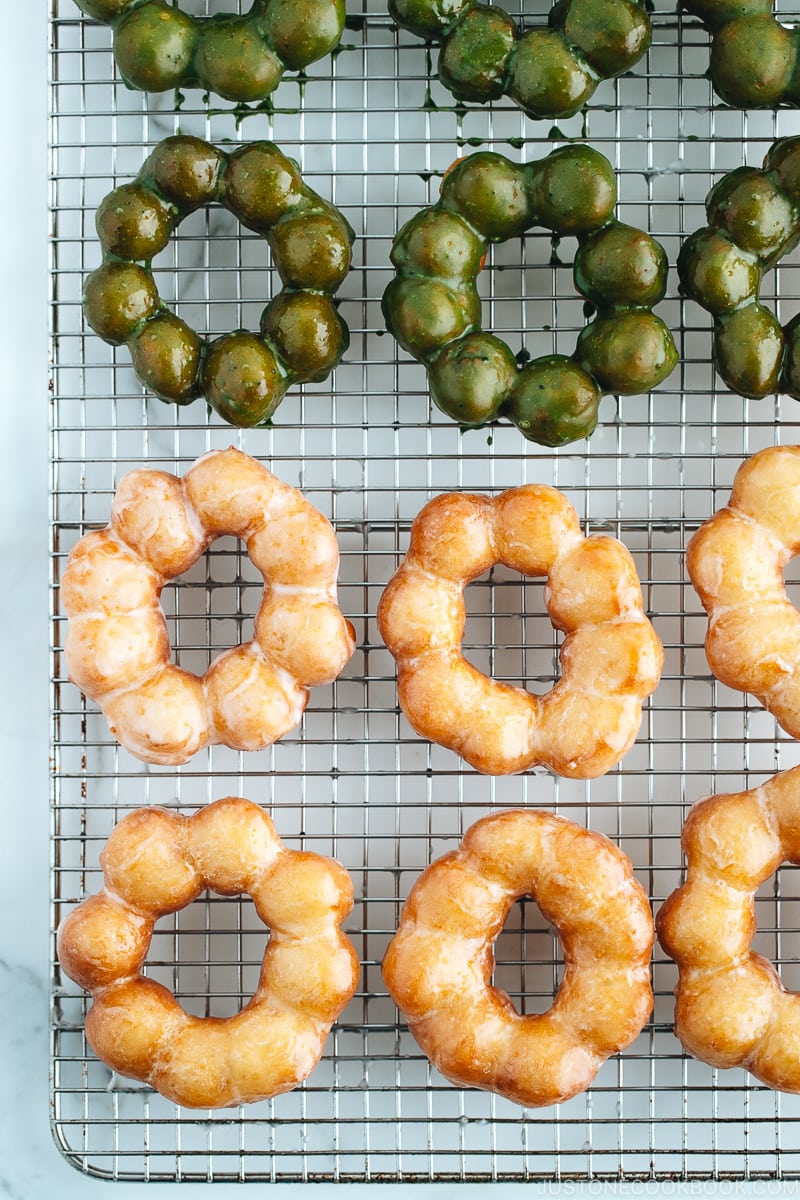
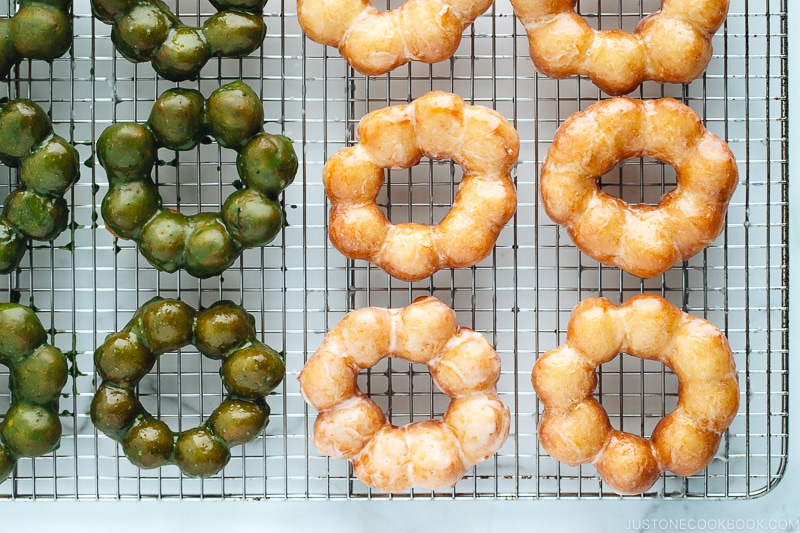
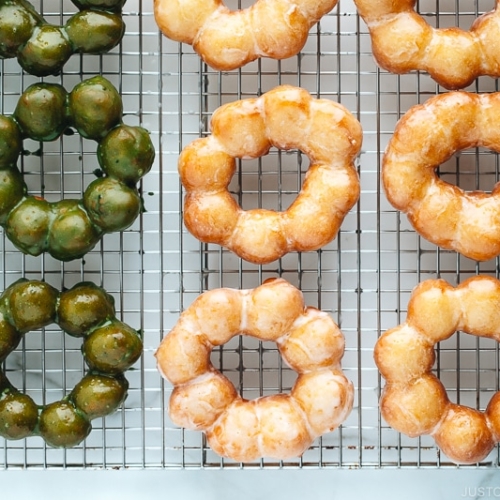
Here’s my copycat recipe for the popular Pon de Ring Donut from Mr. Donut in Japan! They are soft, airy, bouncy, and chewy all at the same time! The mochi-like texture is unique and different from traditional donuts. Enjoy them with either a classic or matcha glaze.
When we talk about Japanese donuts, Pon de Ring Donuts (ポンデリング) from Mr. Donuts instantly comes top in my mind. Have you seen them before? Yeah, I’m talking about these slightly quirky, ‘baby teething ring’ looking donuts that hit the sweet spot when snack time is calling.
Besides the funky outlook, Pon de Ring Donuts have a unique chewy (we call it the mochi-mochi) texture that set them apart from the regular donuts. I will say that they are GOOD. And dangerous. My family is crazy about these donuts whenever we’re in Japan, so I’ve challenged myself to make them at home!
Table of Contents
What is Pon de Ring?
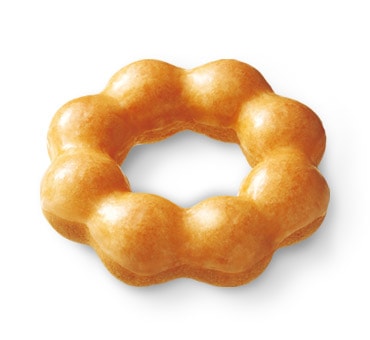
Pon de Ring (ポンデリング) is a Mister Donut’s signature donut in Japan, which is made of a connected circle of 8 dough balls. The name Pon de loosely came from Pao de Queijo, a popular savory Brazilian cheese ball made of tapioca flour.
In case you’re not familiar with Mister Donut, it is the largest donut chain in Japan with over 1,300 stores across Asian countries such as Taiwan, South Korea, and Thailand. What’s really interesting is Mister Donuts originated from the US and opened its first store in Osaka in 1971. While Japan’s Mister Donuts was expanding over the past four decades, almost all the Mister Donuts in the US changed their name over to Dunkin’ Donuts due to mergers and acquisitions.
You can find the classic Pon de Ring flavors (below) at almost every single Mister Donut in Japan and they also release many seasonal and unique flavors:
- Pon de Ring (with simple glaze)
- Pon de Kokuto (dusted with brown sugar)
- Pon de Strawberry (with strawberry glaze)
- Pon de Angel (cream-filled)
- Pon de Chocola (made with chocolate dough)
- and more!
If you’re curious about all the current and past donut flavors at Mister Donut, you can check out this official page (it’s in Japanese, but use Chrome to translate).

Pon de Ring vs. Mochi Donut
Some of you may be wondering if Pon de Ring is (or is similar to) Mochi Donut. But I have to tell you Pon de Ring is NOT Mochi Donut and here’s why.
Pon de Ring
- Made of tapioca flour and wheat flour (officially mentioned by Mister Donut)
- Soft, airy, bouncy, and chewy
Mochi Donut
- Made of glutinous rice flour
- Dense and chewy
- Not sold in Japan, but pretty popular in the US
As you can see, the ingredients and texture of these two donuts are very different. If you have tried Pon de Ring in Japan, you would be able to tell them apart. Even though some of the mochi donuts might look like a copycat of Pon de Ring.
In Japanese, we describe Pon de Ring’s mochi-like texture as mochi-mochi (モチモチしてる) or mocchiri (モッチリしている) texture, but it does not always mean that the food being described is made of mochi. For example, bagels with a chewy texture can be described as it has a mochi-like texture.
If you have tried and loved the texture of mochi donuts, check out Mandy’s website, Lady and Pups for the recipe. I’ve made it before and they were excellent.

My Pon de Ring Making Journey
* Please read, only if you’re interested.
Mr. JOC and I spent 2 weeks figuring out the Pon de Ring recipe, sometimes making donuts several times a day! Our focus from the beginning was to achieve the right airy but mochi-like texture of Pon de Ring. If we can’t make it the same due to lack of machinery or unnatural ingredients, we wanted to at least achieve the best possible quality.
Challenge #1: Choosing the right flour(s)
We started by working out the main ingredients – specifically flours. We tried the following flours in chronological order:
- glutinous rice flour only – It tasted like Mochi Donut, but not the same as Pon de Ring.
- glutinous rice flour + tofu (with different ratios) – You’ll find tons of Japanese “Pon de Ring-like (ポンデリング風)” recipes online using the glutinous rice flour and tofu combination, so I had to try at least once. Just like everyone claimed, this is almost Pon de Ring-like donuts but not quite right at all. Why tofu, you may ask? Any food made of rice (in this case, glutinous rice flour) becomes hard naturally when it’s cool. Adding tofu (and decreasing the rice component in the mixture) helps the texture to stay a bit softer.
- tapioca flour only – After further research, I learned that Mister Donut officially said Pon de Ring contains tapioca flour. So I tried making the donut with 100% tapioca flour but couldn’t achieve the right texture.
- glutinous rice flour + tapioca flour (with 3 different ratios) – I thought I should combine glutinous rice flour and tapioca flour and see what happens. The glutinous rice made the donuts denser as expected from our trials #1 and #2.
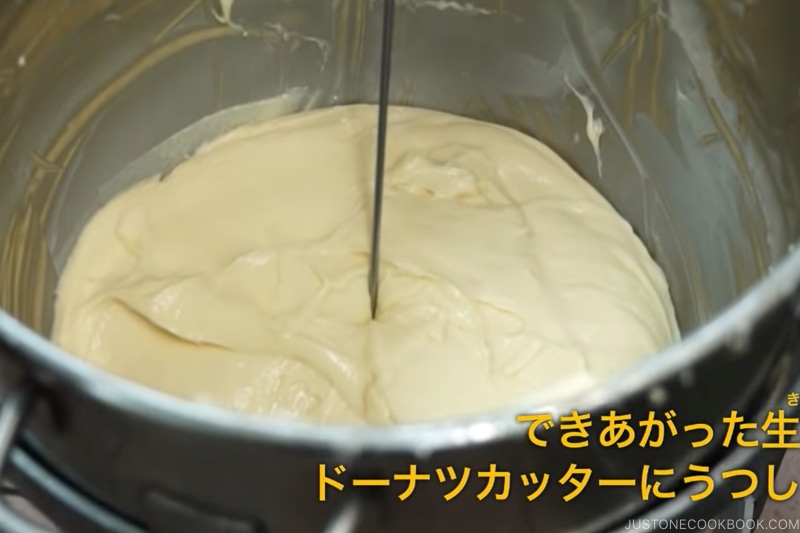
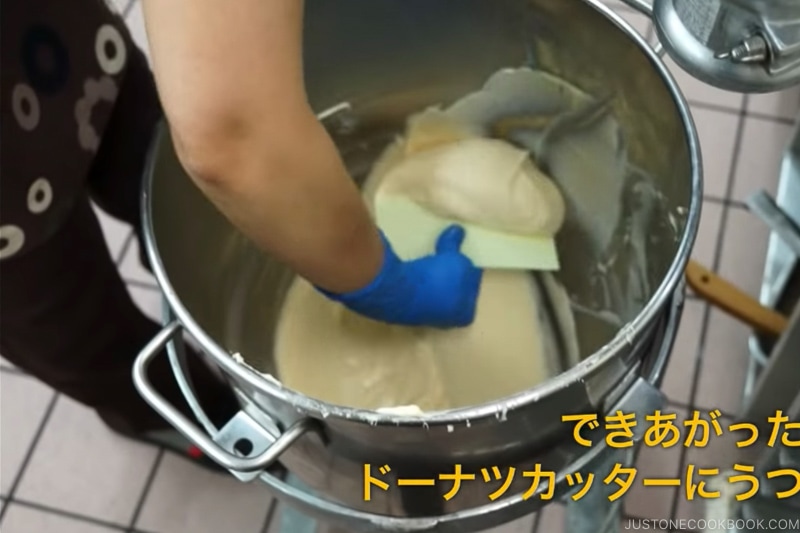
- all-purpose flour + tapioca flour (with different ratios) – We researched more. This time we found this YouTube video that allowed a camera to go into the Mister Donut’s kitchen. Mr. JOC saw a thermometer in the donut dough (see below) and he also remembered seeing a thermometer in the video clip that was looping inside Mister Donut in Japan. This was our turning point! We realized that they are a donut shop after all and also use flour and yeast for Pon de Ring, just like making other donuts! So we tested different ratios of flour and tapioca flour to find out the right texture.
- bread flour + tapioca flour – We also tried using bread flour (more gluten) to increase the bouncy texture. The donuts came out with a good mochi-mochi texture but they weren’t airy and light.
Challenge #2: Dealing with the sticky soft dough
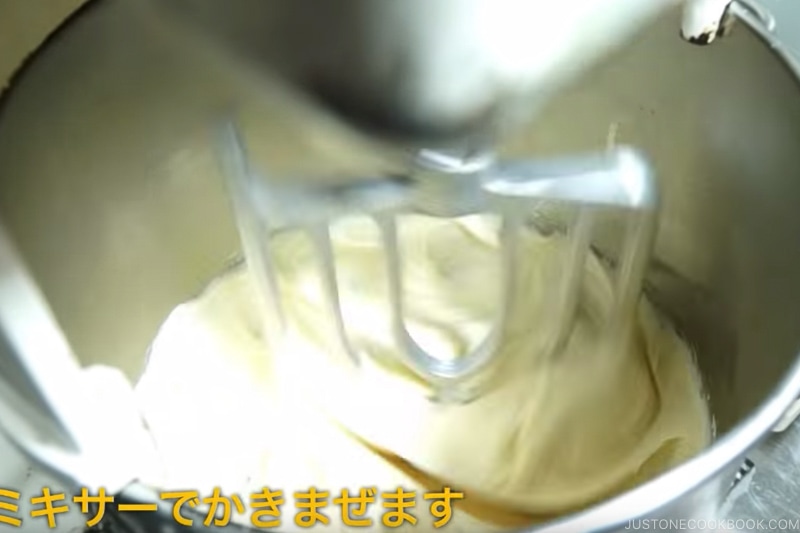
In the YouTube video I mentioned earlier, you can see Mister Donut’s Pon de Ring dough is quite sticky and soft when kneading.
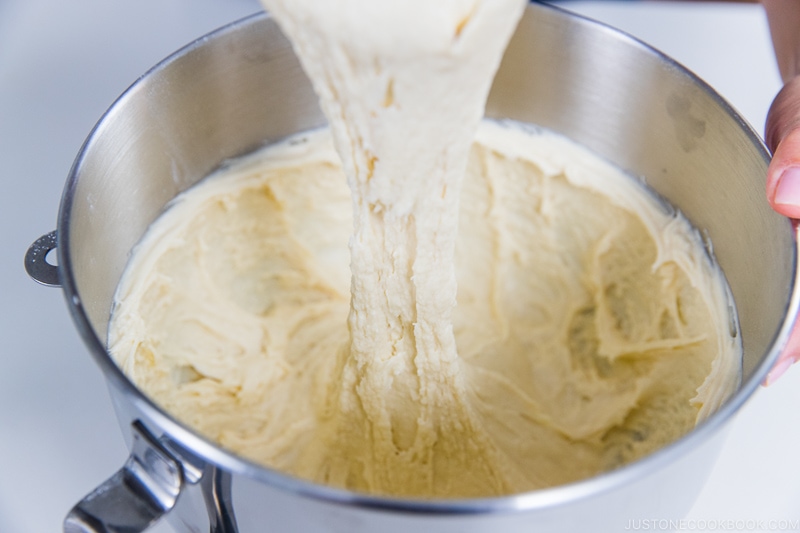
And the final stage of the dough (see below) is still pretty sticky and soft.
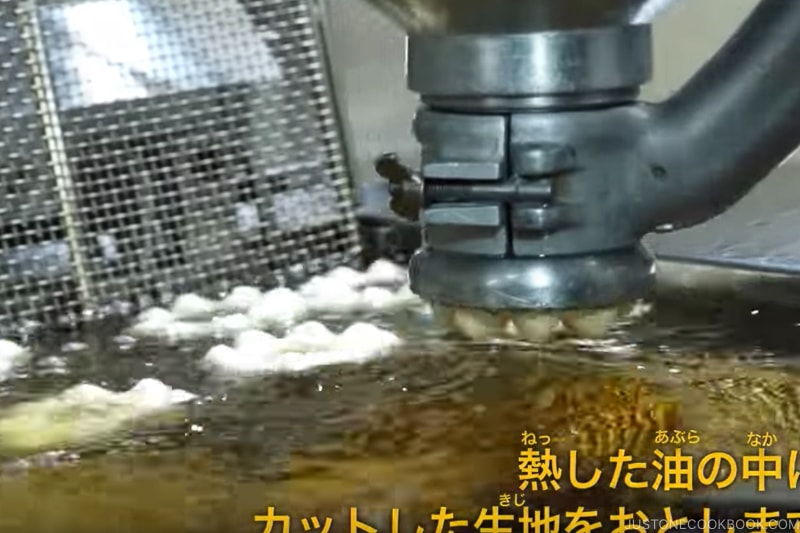
Mister Donut does not need to shape the dough into a Pon de Ring shape by hand. The machine squeezes out the dough to create its funky ring shape and shot directly into the hot oil. Obviously, I don’t have that machine in the kitchen and I will need to shape the sticky dough with my hands.
I tested all-purpose flour and tapioca flour ratios to see if I can achieve a dough that’s easier to deal with. However, the ratio for tapioca flour needs to be higher and it yields a pretty soft dough. When you increase the flours, the final texture of the donuts becomes denser and cakey. So I just learned to deal with the soft and sticky dough and figured out some tricks to shape the connected bubble ring of the donuts.
Key Ingredients & Tools for Making Pon de Ring
1. Tapioca Flour and All-Purpose Flour
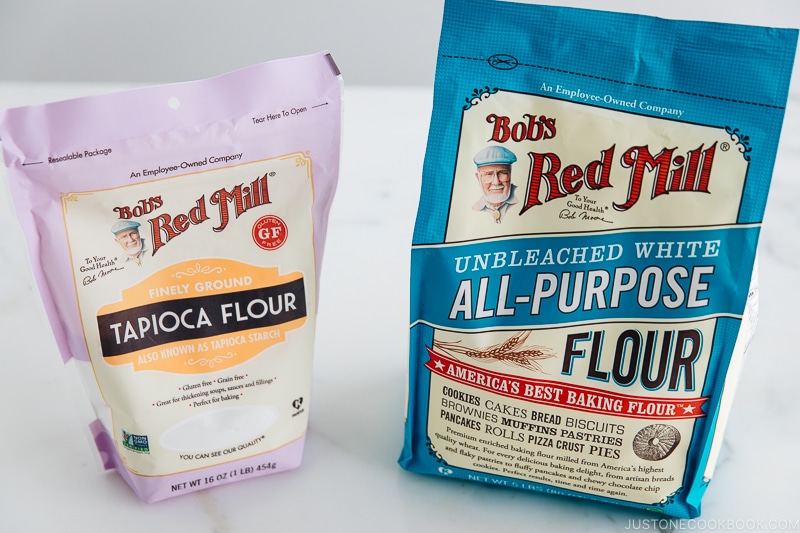
To achieve the perfectly airy, mochi-like texture for the Pon de Ring donuts, I’ve partnered with Bob’s Red Mill® and used their Tapioca Flour and All-Purpose Flour.
When comes to baking and flour products, I highly recommend Bob’s Red Mill. The quality of the flours is unbeatable and I genuinely admire the company for their honest ingredients and the processes used in producing the products.
You should be able to find these flours at any major grocery store. Alternatively, you can also buy on Amazon (Tapioca and AP Flour).
2. Instant Yeast
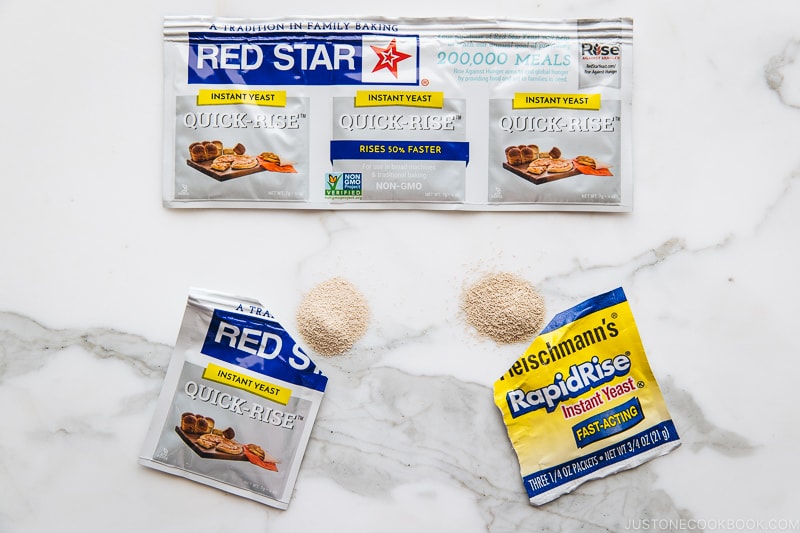
The two most common dry yeasts are Instant (Quick/Rapid-Rise) Yeast and Active Dry Yeast. You can read this detailed information about different types of yeasts.
The major difference is that active dry yeast always needs to be dissolved in warm liquids (water or milk) before use while instant yeast can be mixed right into the dough. For convenience, I like using Instant Yeast.
The two popular instant yeast brands are Red Star and Fleischmann’s and you can find them at grocery stores. I have tried both brands before, and for this recipe, I used Red Star Quick-Rise instant yeast to make my donuts.
After reading this page on instant yeast, I’ve decided to hydrate/dissolve my instant yeast (even though it’s not active dry yeast) in warm milk (110 ºF or 43 ºC – slightly warmer than body temperature) to give it a good start. It allows the yeast to become very active and ready to work in my dough.
3. Deep Frying Oil – Safflower Oil
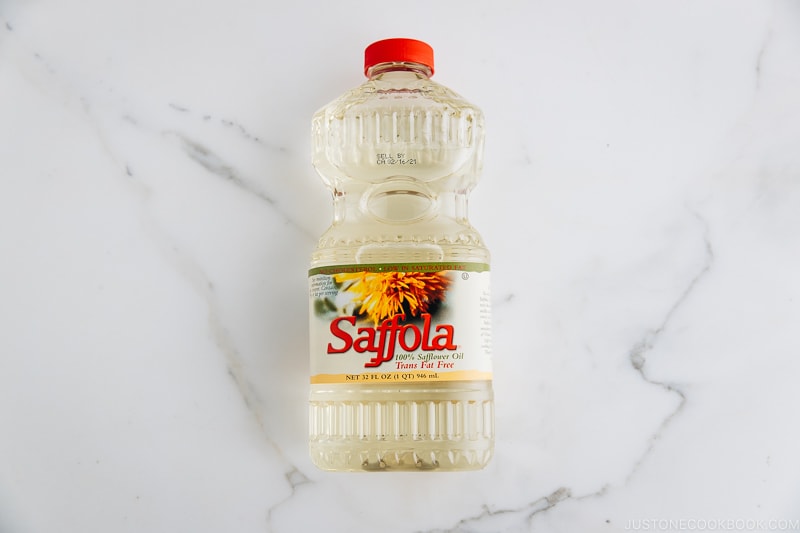
From the Mister Donut website and other public articles online, we learned that their donuts are deep-fried in lard, and possibly a combination of other oils such as vegetable shortening. They are both saturated fats that stay solid at room temperature, which allows the donuts to stay crisp and not “wet” after deep frying.
As I wanted to avoid lard or vegetable shortening, we tried deep frying the donuts in our go-to oils for their neutral flavor and high smoke point – vegetable oil and canola oil. However, we did not like the vegetable oil taste that’s been left on the donuts.
After reading this article, we gave safflower oil a try and we agreed that it’s the best oil for frying donuts.
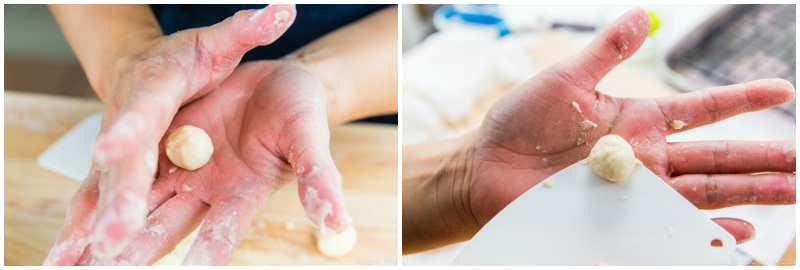
4. Pastry Card
To work with the sticky dough, I learned that this thin plastic pastry card (shown above) became very handy! If I was only using my fingertips, the dough sticks and grows spike tips everywhere I touch and loses its round shape.
This pastry card also helps to divide, scrape, and transfer the mini dough balls, and I didn’t let go from my right hand (except for the time when I was rolling the dough ball with my palms).
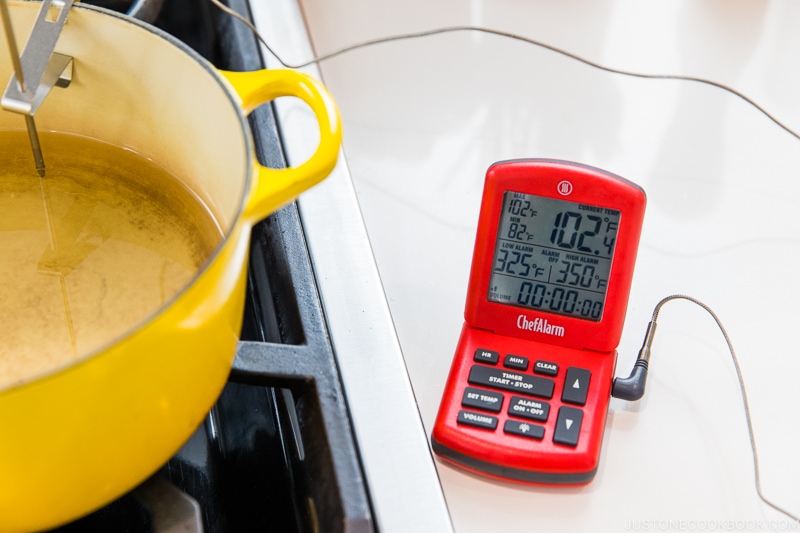
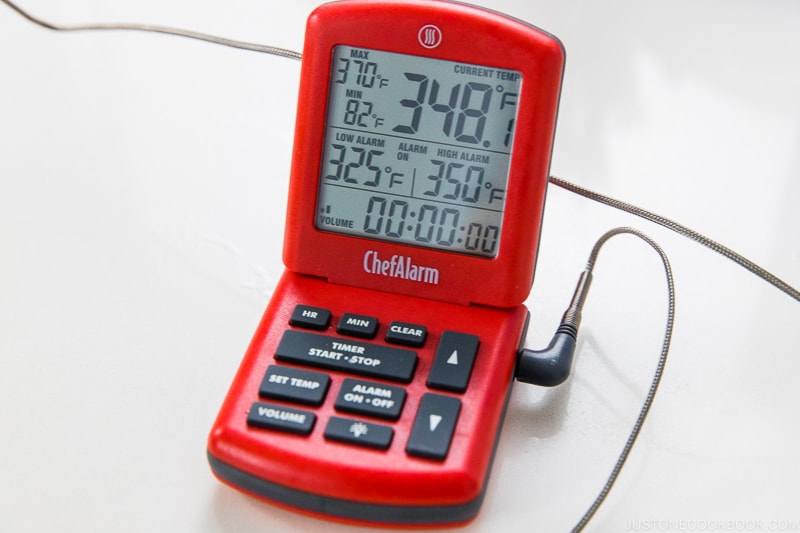
5. Thermaworks ChefAlarm
After deep-frying Japanese croquettes, Chicken Karaage, and Tempura for over 20 years at home, I can deep-fry comfortably without a thermometer.
On the contrary, Mr. JOC loves “high tech” gadgets, and set up my deep frying station with our Thermaworks ChefAlarm. I started deep frying and noticed that ChefAlarm warns me when the oil temperature exceeds the low and high temperatures. I didn’t realize how super convenient and helpful it was until I got busy juggling deep-frying and glazing the hot donuts at the same time.

5 Helpful Tips to Remember
- Knead the dough well to activate the gluten – I highly recommend using a stand mixer to knead the sticky dough. To achieve mochi-mochi texture, a strong gluten needs to be formed. We did try kneading without a stand mixer but the final texture of the donut was not optimal.
- Try not to add too much flour – With tapioca flour being the majority of the ingredients, the dough should be soft. To get the ultimate texture for Pon de Ring, try not to add additional flours. I prepared 2 tablespoons of additional all-purpose flour to dust my work surface and my hands. However, I didn’t finish using all the extra flour.
- Don’t deep fry at high temperature – The optimal deep-frying temperature for Pon de Ring donuts is between 325 ºF (168 ºC) and 350 ºF (177 ºC). When the oil is too hot, the donuts will turn brown too soon and the texture of the donut skin gets too crispy. When the oil temperature is too low, the donuts don’t look appetizing and absorb too much oil.
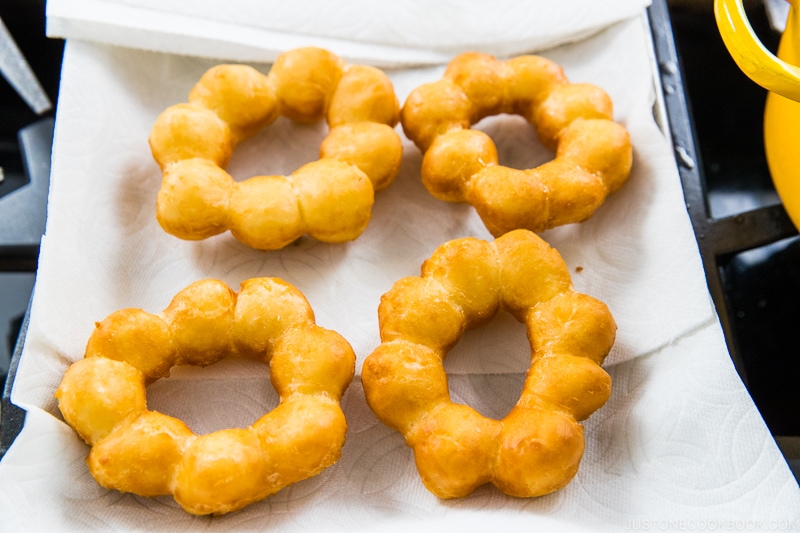
- Use a paper towel to drain oil – From my countless recipe testings, I learned that draining oil on sheets of paper towels works better than on a wire rack. After draining, transfer the donuts to a wire rack to cool and glaze.
- Put glaze when donuts are still hot – You MUST glaze your Pon de Ring donuts while they are hot! The remaining heat from the donut spreads the glaze beautifully when you flip over. Don’t wait until you finish deep frying all the donuts. Multitask deep frying and glazing at the same time could be hectic so find a partner for this project.
For the donut fans and baking aficionados out there, I hope you would try your hand at Pon de Ring. The donut making was no doubt an endeavor, but we were glad that we perfected the recipe and the reward paid off. Otherwise, add the Pon de Ring donuts to your list of must-eats when you visit Japan.
Wish to learn more about Japanese cooking? Sign up for our free newsletter to receive cooking tips & recipe updates! And stay in touch with me on Facebook, Pinterest, YouTube, and Instagram.
Pon de Ring Donut
Ingredients
- 6 Tbsp unsalted butter
- 2 large eggs (50 g each w/o shell)
- 1 cup whole milk (heat to 110ºF or 43ºC–slightly warmer than body temperature; use whole milk for the best results; I do not recommend low-fat or skim milk)
- 1 tsp instant yeast
- ¼ cup granulated sugar
- 1 tsp pure vanilla extract
- 2½ cups tapioca flour (2½ cups + 2½ Tbsp, to be precise; I strongly encourage you to use a kitchen scale; if you‘re using a measuring cup, please follow this method to measure; otherwise, the amount of flour tends to be more than you need; 1 cup should weigh 120 g)
- 1¼ cups all-purpose flour (plain flour) (1¼ cups + 1 Tbsp, to be precise; I strongly encourage you to use a kitchen scale; if you‘re using a measuring cup, please follow this method to measure; otherwise, the amount of flour tends to be more than you need; 1 cup should weigh 120 g)
- ½ tsp Diamond Crystal kosher salt
- 4 cups safflower oil (for deep-frying; see Notes for the amount of oil to use)
For the Glaze
- 2 cups confectioners’ sugar
- ¼ cup whole milk
- ½ tsp pure vanilla extract
- 1 Tbsp matcha green tea powder (optional)
Instructions
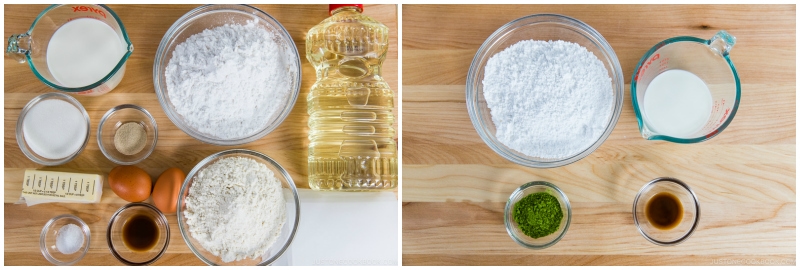
- Gather all the ingredients and measure everything ahead of time. I strongly encourage you to use a kitchen scale to measure my flours. Prepare one square of parchment paper for each donut you‘re making. Each square should measure 4 inches x 4 inches (10 x 10 cm). For this recipe, I DO NOT double/triple the recipe. Make in batches, if needed.

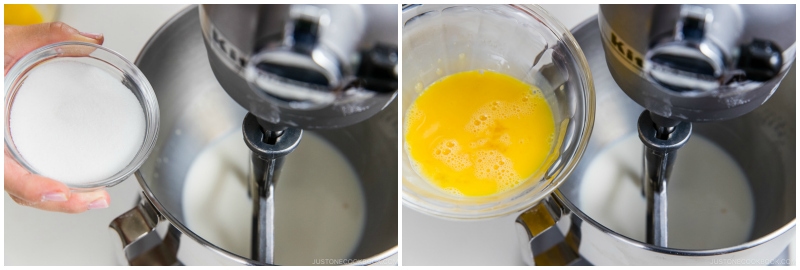
- Melt 6 Tbsp unsalted butter in the microwave or in a saucepan on the stove and let it cool slightly. Crack 2 large eggs (50 g each w/o shell) in a bowl and beat them with a whisk. Set aside.
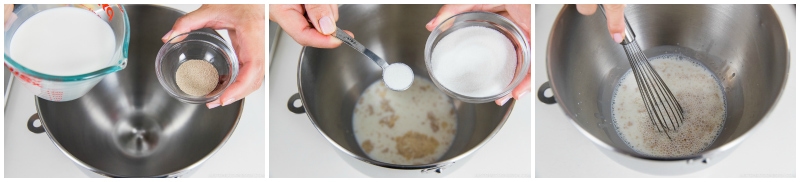
- In the bowl of a stand mixer (or a large mixing bowl), combine 1 cup whole milk (110ºF or 43ºC–slightly warmer than body temperature) and 1 tsp instant yeast. Then, take ½ tsp sugar from the ¼ cup granulated sugar you measured earlier and add it to the milk and yeast. Whisk the mixture well. Set aside for 5–10 minutes. Note: If you wonder why I hydrated the instant yeast (even though it’s not active dry yeast), please read the post.

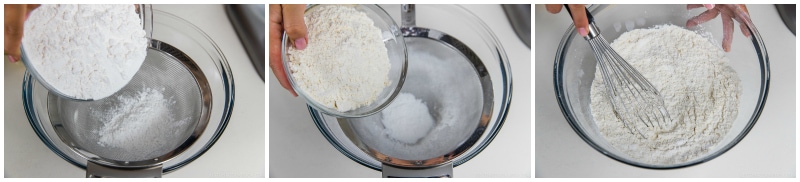
- Prepare a large mixing bowl and sift 2½ cups tapioca flour (2½ cups + 2½ Tbsp, to be precise) and 1¼ cups all-purpose flour (plain flour) (1¼ cups + 1 Tbsp, to be precise) through a fine-mesh sieve. Whisk to combine.
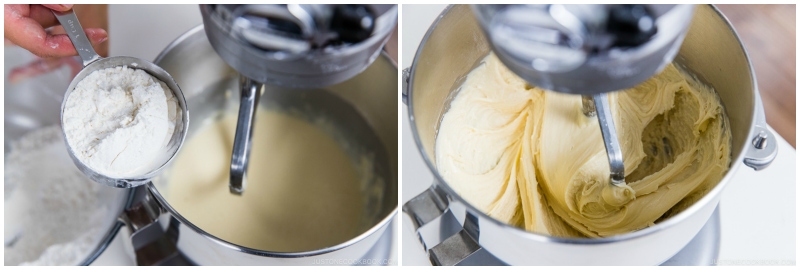
- Set the stand mixer with a flat beater attachment. Add the rest of the sugar and beaten egg to the milk mixture.
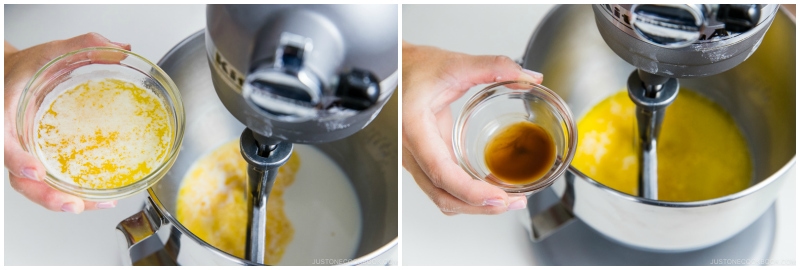
- Add the melted butter and 1 tsp pure vanilla extract.
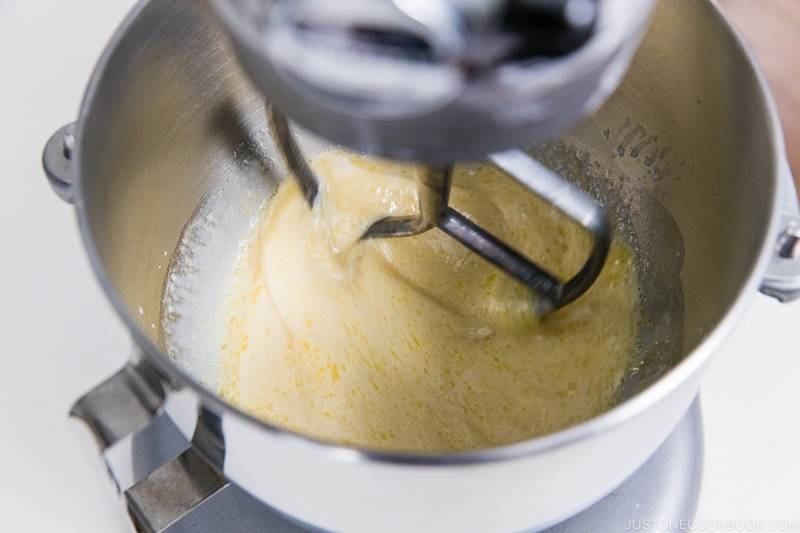
- Beat on low speed (Speed 2 on my KitchenAid Professional HD stand mixer) for 1 minute until combined (or, stir with a wooden spoon).

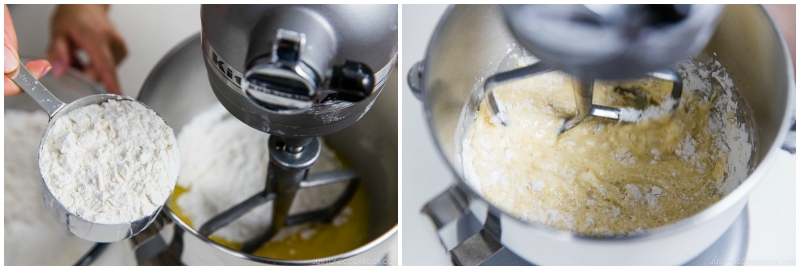
- Add roughly 2 cups of the flour mixture and beat on low speed (Speed 2) until well combined.
- With the stand mixer running on low speed (Speed 2), add ½ tsp Diamond Crystal kosher salt and the remaining flour mixture, one scoop at a time. Set aside the mixing bowl that the flour mixture was in for the next step (you‘ll put the dough in it). Meanwhile, you‘ll notice that the dough mixture has thickened.

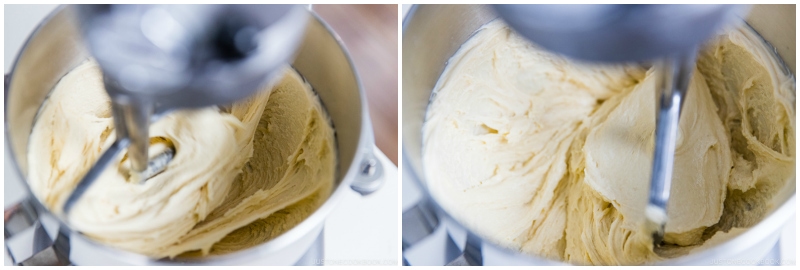
To Knead the Dough
- Now, increase to medium-high speed (Speed 6) and knead the dough for 3–4 minutes, or until smooth and elastic. Note that this is a sticky dough, so do not add additional flour. Tip: Kneading develops the structure of the dough by folding and stretching the strands of gluten. Hand Kneading: Because of the wet nature of this dough, it’s hard to knead the dough by hand. You can add 1–2 tablespoons of flour if it’s too wet to handle, but do not add any more flour than that. Knead by hand for 5–6 minutes.
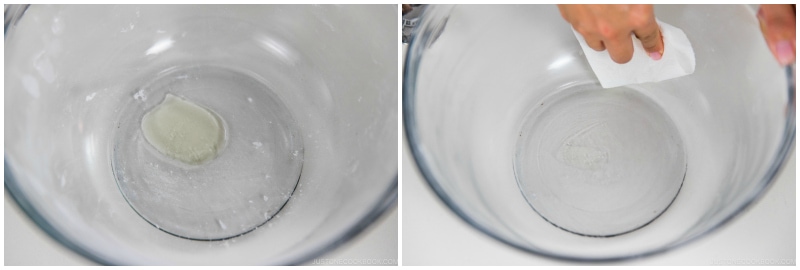
- While the dough is kneading in the mixer, add a little oil to the large mixing bowl that held the flour mixture and grease it with a paper towel.
- Stop the mixer after 3 or 4 minutes or when the dough is smooth. The dough should be sticky and stretchy when you remove the flat beater from the mixer.
To Proof the Dough
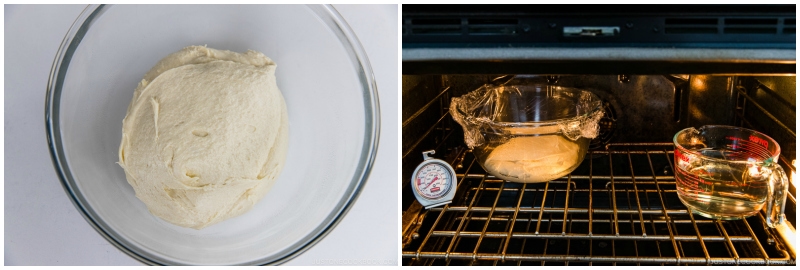
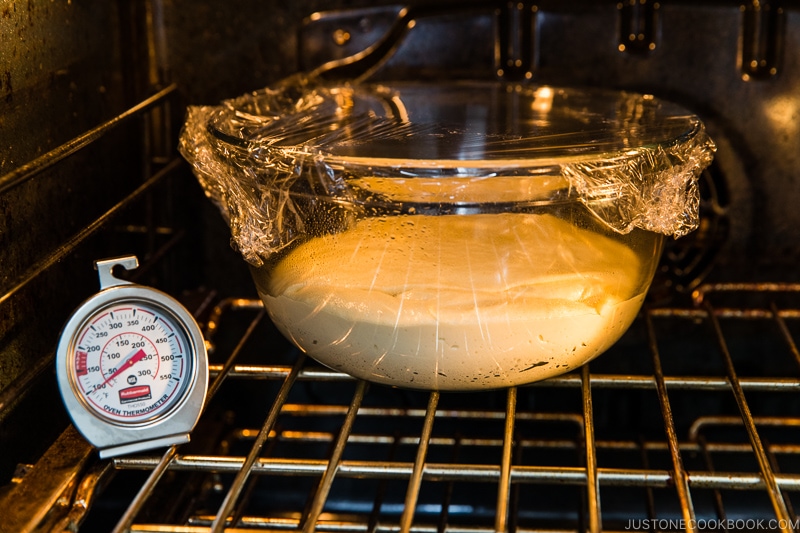
- Using a dough scraper, scrape down the dough from the sides of the stand mixer bowl. Collect the dough into one big mass, then gently scrape it into the greased bowl. The key here is to make sure the surface of the dough is mostly smooth (so that it will rise well). Loosely cover the bowl with plastic wrap (or a clean shower cap) and place it in a warm environment to rise until doubled, about 70–80 minutes. I use the Proof setting of my oven at 100ºF (38ºC). I place a bowl of warm/hot water inside the oven, but away from the dough, to keep the oven environment moist. Tip: Make sure the proof temperature is not too high. If the dough gets too warm, it will ferment too quickly (or overferment) and impair the flavor.
- After 70–80 minutes, pour 4 cups safflower oil into the Dutch oven or heavy-bottomed pot (see Notes for the amount of oil to use). If you have a thermometer, set it up. I used ThermoWork’s ChefAlarm. A clip attaches the probe to the side of the Dutch oven, holding it securely in place and keeping it from flopping around. Set the alarm on your thermometer to a low of 325ºF (168ºC) and a high of 350ºF (177ºC).
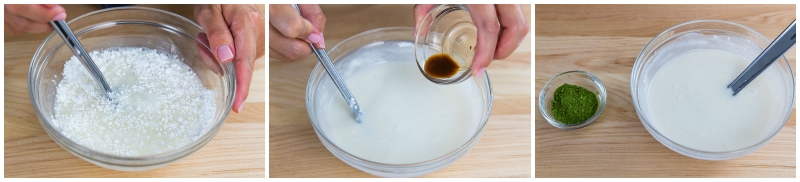
- In a medium bowl, combine 2 cups confectioners’ sugar, ¼ cup whole milk, and ½ tsp pure vanilla extract. Whisk it really well to make sure there are no lumps of confectioners’ sugar. Keep the matcha powder to the side for now.
- The image below shows that the dough has doubled in size after 75 minutes of proofing.
To Shape the Dough Balls
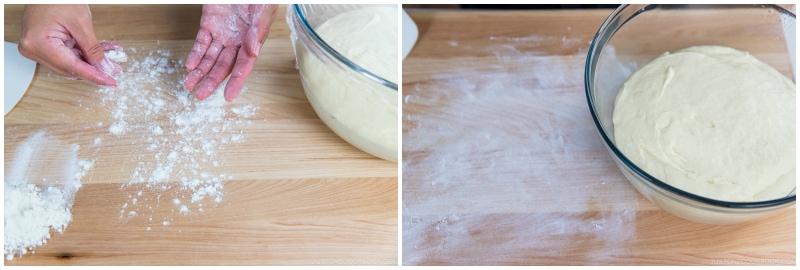
- Prepare 1–2 Tbsp of all-purpose flour and put it at the corner of your work surface. Lightly flour the work surface and your hands.
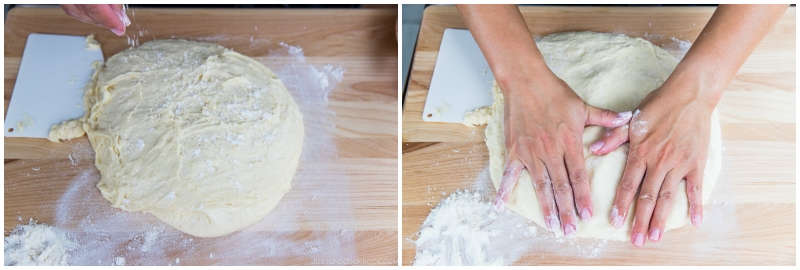
- Using the dough scraper, remove the dough from the bowl and transfer it to the lightly floured surface. Sprinkle some flour on top of the dough and press the dough down with your hands to release any air bubbles.
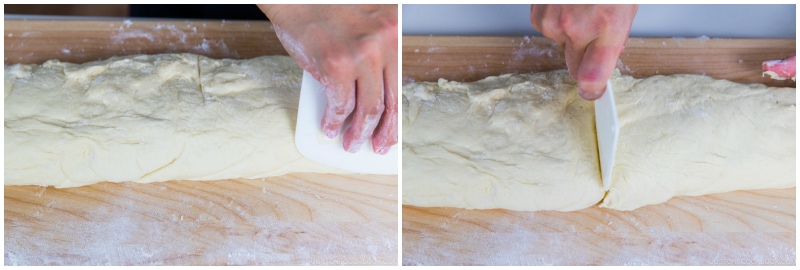
- Use the dough scraper to form the dough into a rough log shape. Cut the log into two equal pieces.
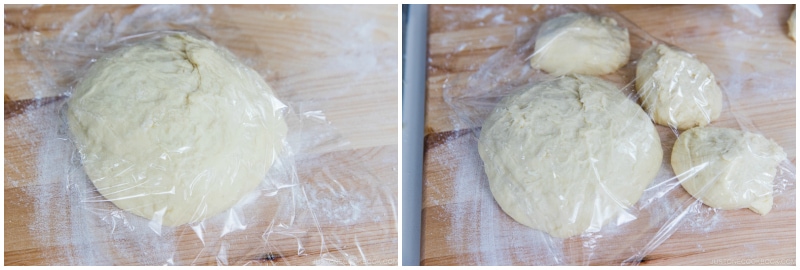
- Set one piece of dough on your work surface. Shape the other piece into a ball and cover with plastic wrap. Cut the piece on your work surface into quarters and roll them into balls. Work with one dough ball at a time, and keep the other balls under plastic wrap so they don‘t dry out.
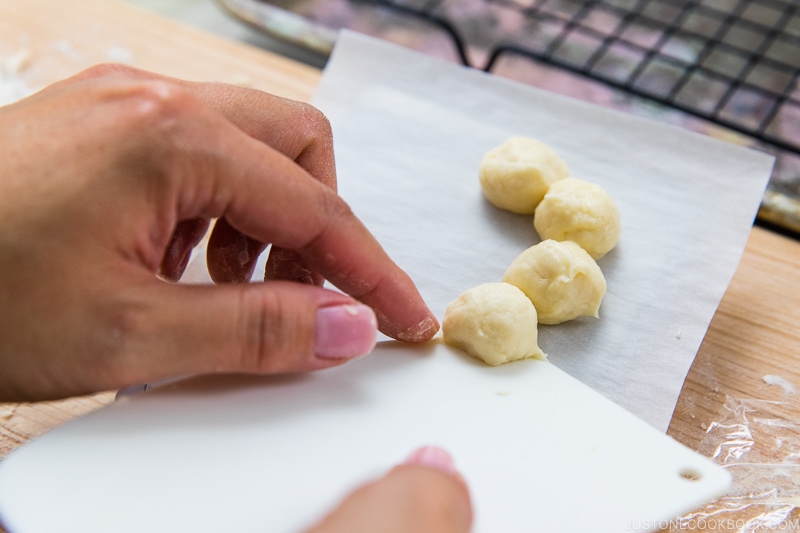
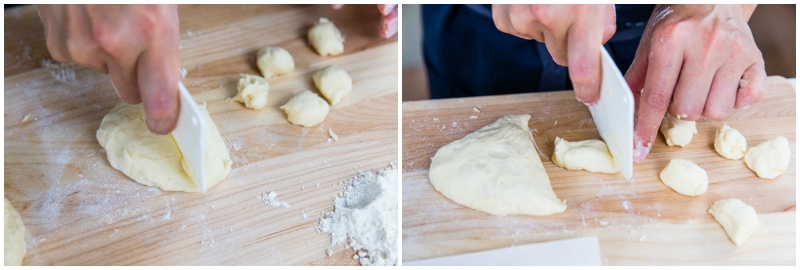
- Each dough ball will make roughly 3 Pon de Ring donuts. Using the dough scraper, cut the first dough ball into 24 small balls. Each ball size should be ½ to ¾ inch (1.5 cm) in diameter. If you have a digital kitchen scale, each ball should weigh 5 grams.
- Roll each small dough ball between your hands, but try not to spend too much time. Overkneaded dough often results in a hard crust and a dense, dry interior. Since the dough is very sticky, the dough scraper is very helpful for picking up each piece of dough.
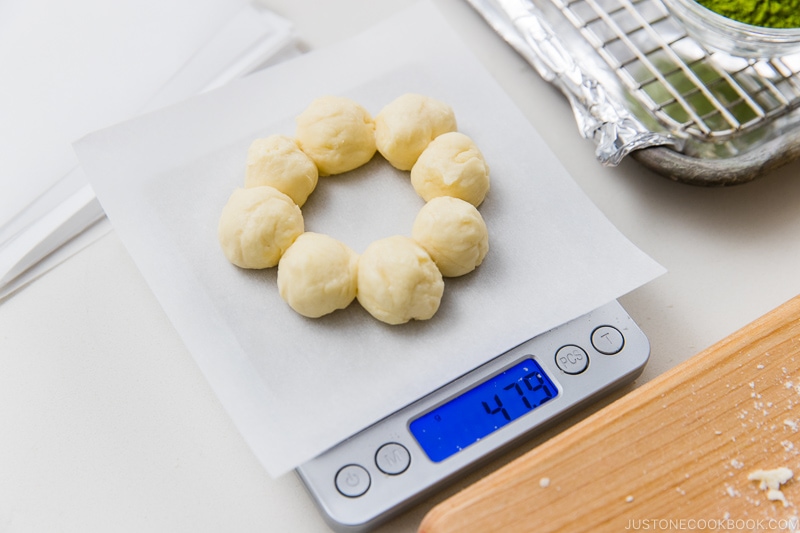
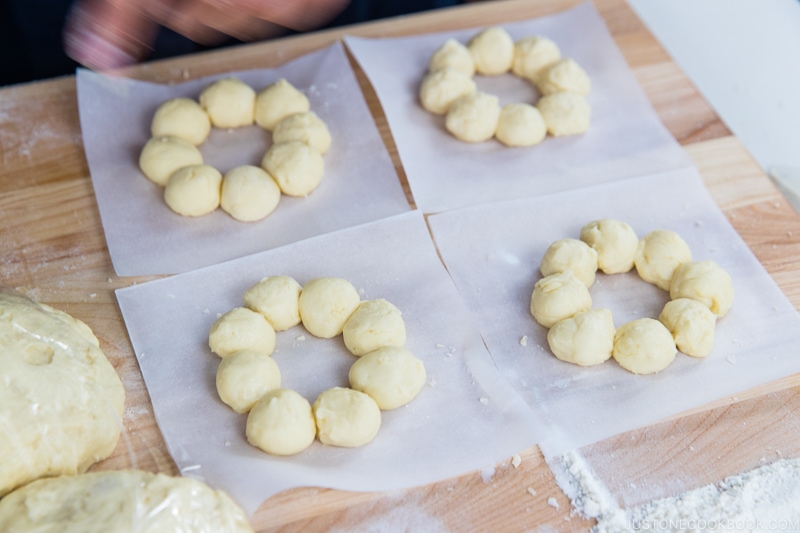
To Form the Donuts
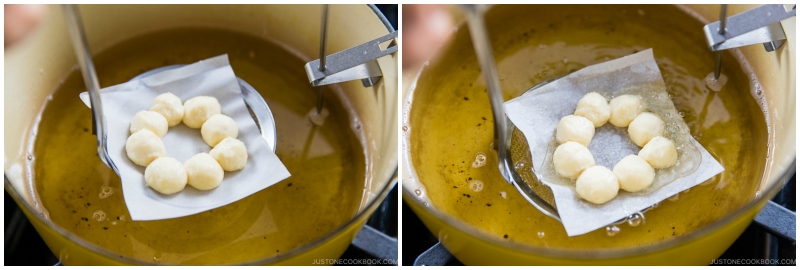
- Now, form the donuts. Use one square of parchment paper to hold each donut. Using the dough scraper, transfer one ball at a time to the parchment square, forming a ring as you go. You will need 8 balls to make a Pon de Ring shape.
- The total weight of the Pon de Ring should be roughly 40 grams (8 balls at 5 g each).
- Continue with the rest of the dough.
- To make sure the balls won’t separate in the hot oil, use a pastry brush to dab water on the dough where each ball attaches to the neighboring one (make sure they are connected). Cover the donuts with a damp paper towel or light cloth (make sure it’s not heavy) and allow them to rest for 15–20 minutes. Continue with the rest of the dough. If you are taking a very long time, it’s very helpful to work with a partner or keep the donuts in the refrigerator to slow down the proofing so the dough doesn't overproof.

To Fry
- When you’re finishing up with the last batch of dough, start heating the oil in the Dutch oven to 350ºF (177ºC). Line one baking sheet with a paper towel. Line a second baking sheet with parchment paper and put a wire rack on top.
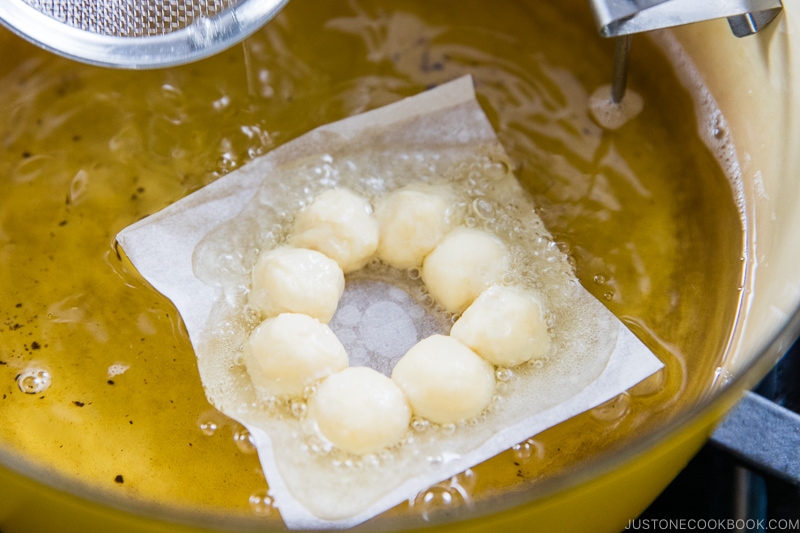
- Pick up one parchment square with a donut ring on top. Using your hand or fine-mesh skimmer (the kind that has a flat mesh), carefully place the donut with the parchment paper into the hot oil.
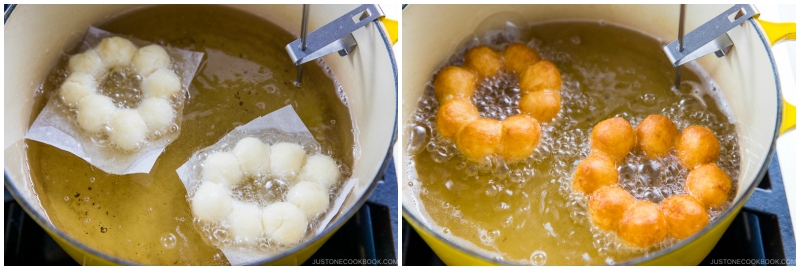
- Let go of the donut and paper and set the timer for 1 minute 15 seconds for the first side. Tip: Only add enough donuts for a 5–10 degree drop in temperature. I only add 2 donuts per batch. If the oil cools down too much, the donuts won’t fry properly.
- When the timer beeps, flip the donuts quickly using chopsticks or tongs. Fry the second side for 45 seconds; set a timer. Using tongs or chopsticks, carefully remove the parchment square from the donut and discard.
- When the 45-second timer beeps, scoop up the donuts with the skimmer or tongs and drain the oil well. Then, transfer to the paper towel to drain any additional oil. Repeat with the remaining donuts, then turn off the heat.
To Glaze
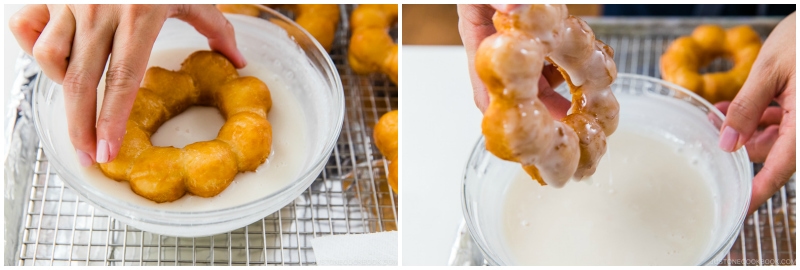
- While the donuts are still hot, dip each one into the glaze, making sure to coat both sides well.
- Place the glazed donuts onto the prepared rack to allow the excess glaze to drip down. The glaze will set and harden on the donuts after 30 minutes.
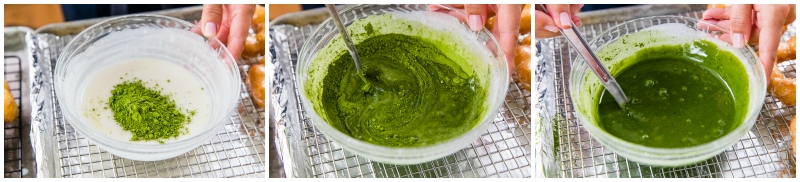
- After making 12 glazed donuts, you can add 1 Tbsp matcha green tea powder to the leftover glaze. Whisk really well to combine.
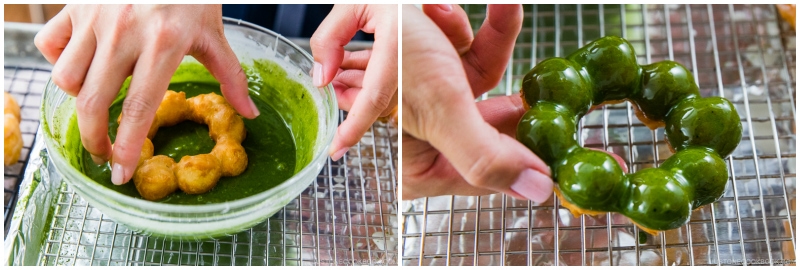
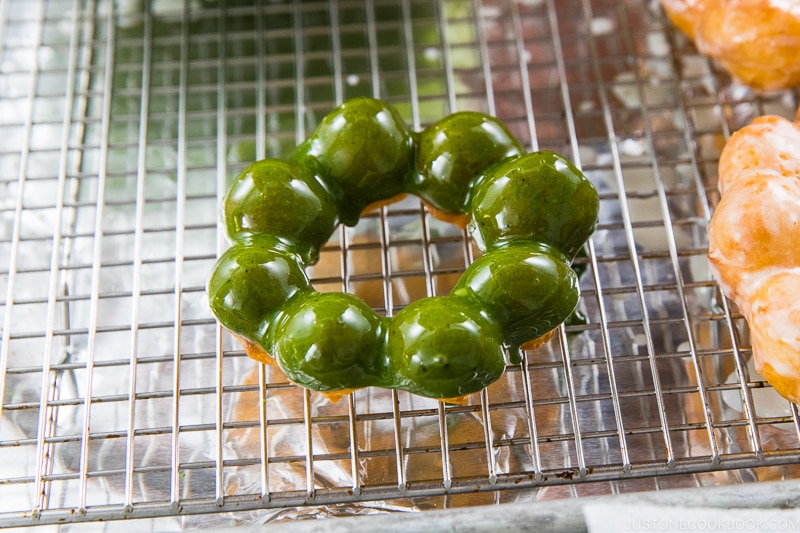
- Dip each donut into the matcha glaze, making sure to coat well. Place them onto the rack to allow the excess glaze to drip down. The glaze will set and harden on the donuts after 30 minutes.
- Just like any other deep-fried food, it’s best to eat the donuts while they are warm. Enjoy!

To Store
- Enjoy the donuts on the same day you made them. You can keep them at room temperature for a day in an airtight container. Reheat in the microwave for 15–20 seconds before eating.
Notes
- Oil: Avoid using vegetable oil (read my post). Please adjust the amount of the oil based on how wide and tall your pot is. My Dutch oven is 3.5 QT and I used 1 QT (1000 ml, 4 cups) of safflower oil. The Dutch oven is heavy and thick, and it conducts and retains heat very efficiently. The high sides also help prevent splatters during frying. What to do with leftover oil? Please read this post.
- Helpful Tools: Stand mixer, dough scraper/pastry card, kitchen scale, thermometer, Dutch oven or heavy-bottomed pot. Please read the post.


Thank YOU and Mr. JOC for decoding Mister Donut’s pon de ring donuts. I followed the recipe up until the rolling part. I ended up coating my hands with sunflower oil because the dough was too sticky and I didn’t want to use more flour. I was able to roll the mini balls and put it together! Mister Donut’s have been one of the reasons I go to Japan every year. Modo donuts do not taste like Mister Donut’s and have never satisfied with pon de ring cravings. The tapioca flour makes a world of a difference and I again, REALLY appreciate all of your trials to publish this recipe (esp since I had to cancel my Japan trip this year). I look forward to making this again!
Hi Tami! Awww! Thank you so much for trying this recipe! Yeah… I assumed Modo Donuts are different from Pon de Ring because Modo Donuts are “Mochi” donuts made of glutinous rice flour but Pon de Ring does not include the same ingredients – so they are not the same stuff. It’s such a time-consuming recipe and my kids always request this… and I should make them soon (I’ve been resisting haha). They taste so delicious and I overeat them when I make. 😀
What’s the difference with the tofu? Texture wise
Hi Emily! The only reason why we add tofu in the copycat pon de ring recipes is to make sure the glutinous rice flour (shiratamako or mochiko) does not become too firm the next day. It helps decrease the amount/ratio of glutinous rice flour. Mochi (made of rice) ALWAYS gets tough the next day. Mochi is always sticky and chewy, but as soon as it’s cool/cold and pass several hours, it gets harden. Adding tofu “helps” prevent hardening a bit. Not much, but it helps.
I do not think pon de ring from Mister Donut includes glutinous rice flour to be honest. They did say they use tapioca flour for that mochi-mochi texture. Tapioca flour is not easy to get in Japan, so I think glutinous rice flour was the first option to create this mochi mochi texture… and since it gets hard, they add tofu to minimize it.
Anyway, there is no point in using the tofu in this recipe as I do not use the glutinous rice flour in this recipe. Hope my explanation makes sense. 🙂
First off, I just want say how awesome this recipe is! I remember going to Mister Donuts in Japan when I was living there and eating the pon de ring donut and this is the closest recipe that I’ve come across that has come close to replicating that same texture. However, I do have a few questions. I noticed though that the donut had more of the desired mochi-mochi texture when it was still warm out of the fryer and had less of it as it got cooler. Mister Donut’s pon de ring kept that same mochi-mochi texture even after sitting out in the display case all day.
My question is this: during your research, did you adjust the tapioca: flour ratio so that it would be easier for you to handle and shape at the expense of sacrificing more of what you would have considered the ideal mochi-mochi texture? If so, what ratio of tapioca:flour do you think would have given the closest texture to Mister Donut’s dough?
Hi Victor! Thank you for trying this (time-consuming!) recipe and fo your kind words. During testing, my mom went to get pon de ring for me and we compared it with mine. Surprisingly the (real) pon de ring is so elastic that it can flip the dough around. It was crazy! I don’t think it’s possible with the ingredients we have in our normal kitchen? It was really interesting what pon de ring can do with that dough! It’s really mochi mochi – but not like glutinous rice flour mochi mochi… it’s kinda like elastic like rubber. During my research, I also learned the oil they use is probably not the type of oil we want to use at home. It helps the donut to stay crisp and less soggy and oily because of the animal shortening. Which helps the donuts to stay better for a longer time. When I make food at home, I won’t sacrifice that part in order to get a closer result. Yes, I did adjust the tapioca from almost tapioca to least tapioca by ratios. Give it a try. We needed the yeast dough to make it more like donut texture too. Kids like both ways but at the end we just decide what’s closest to pon de ring. 🙂
Can I use tapioca starch instead of tapioca flour?
Hi Nhi! Please read this post. It looks like it depends!
https://www.bobsredmill.com/blog/healthy-living/what-is-it-wednesday-tapioca-flourstarch/
I’m having trouble finding tapioca flour. Would corn starch be similar?
Hi Ashley! No, they are not quite the same. If it’s a small amount (like only a tablespoon or so), I would say it’s okay… I just don’t feel comfortable making this recipe with cornstarch… Sorry… Have you tried looking for it online?
Ah, I see. Well, I’m glad I asked before I sunk a bunch of time into trying it. Yes, I’ve looked online, but it is also showing a backlog for my area. I’ll just have to wait, maybe in a few weeks supplies will be better. Thanks.
Hi Ashley! This is such a time-consuming recipe and I don’t want you to waste your time or energy with a substitute that I have no experience with… Hopefully one day! 🙂
Would I be able to refrigerate the dough and fry the next day?
Hi MyLinh! I have never done it, and I’m not comfortable to say “you can do that”. I’m not experienced enough with the yeast and I worry about over proofing the dough (even it’s kept in the fridge), so I can’t really tell from my experience… sorry!
Hello! Is it possible to bake the donut rather than fry it?
Hi Vi! This is not a baked donut recipe, so you can’t bake them. 🙂
Hi, i was wondering if i can use another type of oil besides safflower oil? Since its not as accessible . Can i use canola oil instead? Thanks!
Hi Jasmine! Sure you can use canola oil. 🙂
It was a pretty good donut. However, the taste is not so much like Mr.donut, but more like fried rice cakes. The doughnut was soft like krispy kreme but chewy like a tapioca pearl. Also, the donut absorbed too much oil. Maybe the ratio of tapioca to all purpose could be altered a little?
Hi Frankie! Thanks for trying this recipe and your feedback! What’s fried rice cake? I guess you are talking about the texture and not flavor as rice is not in the ingredient? I’m not sure what fried rice cake is in Japanese…
You can definitely decrease the tapioca flour if you like. I’ve experimented with different ratios for flour vs tapioca too (like a science experiment!). As you increase the flour and use less tapioca, it loses that unique pon de ring texture and it becomes more like typical donuts.
And you probably saw how Mr. Donut made Pon de ring. They shoot the (liquid) batter into the hot oil… which we can’t do that without that special machine, so we have to work around it. The batter is hard to the same consistency as Mr. Donut and they put other unnecessary ingredients, too.
Oh and about the deep frying. I feel like your oil temperature was a bit lower than it should be. The dough absorbs too much oil when the temp is low (just like other deep-frying dishes). So make sure the temperature is optimal before you drop the donuts into the oil. 🙂
Hi Nami,
yes I was talking about the texture of fried rice cake. Also, did your donuts turn out abit bread like ? Thank you.
Hi Frankie! Bread as in deep-fried bread (Agepan)? Hmm I don’t remember feeling that way… What’s fried rice cake? I don’t think I had it to compare… 🙁
Hi Nami,
Kind of, I remembered that Mr.donut was not extremely chewy like tapioca pearl but very bouncy. Mr. Donut would bounce right back if you squished it, kind of bread-like. Fried rice cake is like a very oily and a little crispy exterior with soft but chewy inside.
Hi Frankie! No, the donuts won’t be chewy like tapioca pearl (boba, right?) at all. That’s way too dense. I have a facetime video of my pon de ring donuts comparing with my mom’s pon de ring recorded (I asked her to get some so we can compare live)… but I’m a bit too embarrassed to share. Haha. Mine was pretty similar when we pulled out the donuts with fingers etc… and my mom decided to flip one of the balls inside out!! That was SO weird and creepy!! It was almost like silicone rubber… I don’t think we can create such a thing with simple home cooking ingredients…
Okay, I don’t think I’ve had fried rice cake before (I thought “rice cake” is an English word for mochi but maybe not this case).
Hi Nami,
Haha, that’s pretty funny. Well, my donuts turned out abit too chewy, but it was still light and airy. Thanks for the recipe anyways. Also did you manage to make a batch that was not stretchy and a little bread like? Thanks. Sorry I bothered you so much. Ps. I really like your website, it has every little detail in the recipes:)
Hi Frankie! I just asked my family (3 of them) and they don’t remember much. After eating all different kinds, it’s sort of hard to remember which one was which at this time. I’m sorry I’m not so helpful. My kids keep asking me if I can make this recipe again and I’m giving excuses I’m too busy for this time consuming recipe LOL (trauma from making SO MANY for creating this recipe)… if I make it again, I’ll let you know. 🙂
Thanks so much for your kind words!
Hello! Your donuts were amazing at first! They were very reminiscent of the Pon De Ring, they were just like I remembered. However, as the day progressed the donuts became less fluffy and more like a funnel cake. It was hard and crunchy at first and then i dont know what happened! I just warmed it and its better, but not as good. Why is that? Either way, thank you so much!!
Hi Brooke! Thank you so much for trying my recipe! I mentioned in the recipe that I recommend eating the donuts on the same day. You can keep at room temperature for a day in an airtight container. Reheat in the microwave for 15-20 seconds before eating. But I don’t recommend more than that…
Hi Nami,
I’m just wondering if the shape of the donut matters. For example, would I have to cook it longer if it was shaped round like a normal donut? thanks.
Hi Frankie! You can definitely change the shape! I just had to make it look like pon de ring to call the recipe pon de ring (and of course the taste and texture!). 😉
I made these in an air fryer and it turned out quite well! Put them on parchment paper brushed with some oil and air fry for 5 min at 350F. Though the surface is a bit dry, nothing some glaze can fix! The texture was still amazing and felt less greasy, will definitely make again.
Hi Susie! AWESOME!!! Thanks so much for your kind feedback. Great to know air-fryer worked great with this recipe. Thank you Susie!
My favorite Mister Donut was the strawberry frosted. Will you ever post a recipe for that flavor donut? It’s definitely the sweet I miss most from Japan
Hi Vanessa! That’s my daughter’s favorite too! I’ll add to my list. Thank you! 🙂
Thank you Nami,
I tried this recipe and my consistency was dense and too chewy. I left the dough to rise for 75 minutes in proof oven for 100 degrees. Do you have any suggestions to make the donut more light|airy and less dense and chewy?
Hi Quy! Is it possible that your yeast was old and dead? If you left the dough for 75 minutes at 100F, and it didn’t rise properly (yeasty), it’s really possible that your yeast is dead. You might even buy a brand new package of yeast and find out that it is dead, too, no matter how recently it was purchased. If the dough is properly rising, it won’t dense or chewy. 🙁 You can smell yeast-bread and it’s very airy.
Hope this helps…
Hello,
Would it be possible to bake these doughnuts instead of fry them? Thank you.
-Hana
Hi Hana! I haven’t tried with this recipe, but maybe you can give it a try to see how it goes? Sorry I can’t give you further advice on the baked version…
I used this recipe and cooked them in my waffle iron (~400 degrees) and my kids loved them! I did mix in some pearl sugar though so it helped sweeten it a little and help some of the outside caramelize.
Hi Kim! Thanks for sharing your tip and experience!
This was by far the closest recipe I have ever tried in making Pon De Ring. It turned out wonderful!! It was light and airy. All the other ones I have tried were too dense and heavy. Thank you so much for the recipe!!!
Hi Karin! Thank you so much for trying this recipe! I’m glad yours came out well. I know how much work you had to put in… thank you for your kind feedback! 🙂