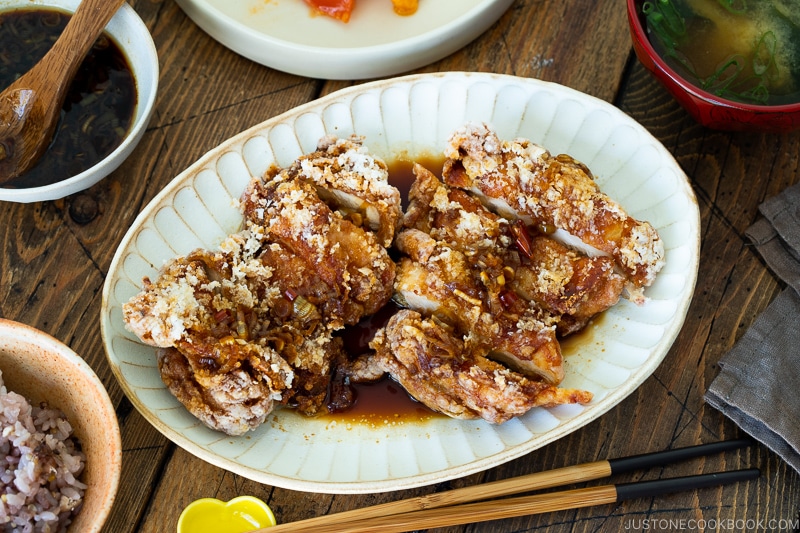
Love fried chicken? You’re going to absolutely love this Japanese-style Fried Chicken with Scallion Soy Sauce (Yurinchi). It has an insanely crispy thin crust and succulent meat and is served in an awesome tangy sauce. My family can’t get enough of it, and I hope it will be your favorite too.
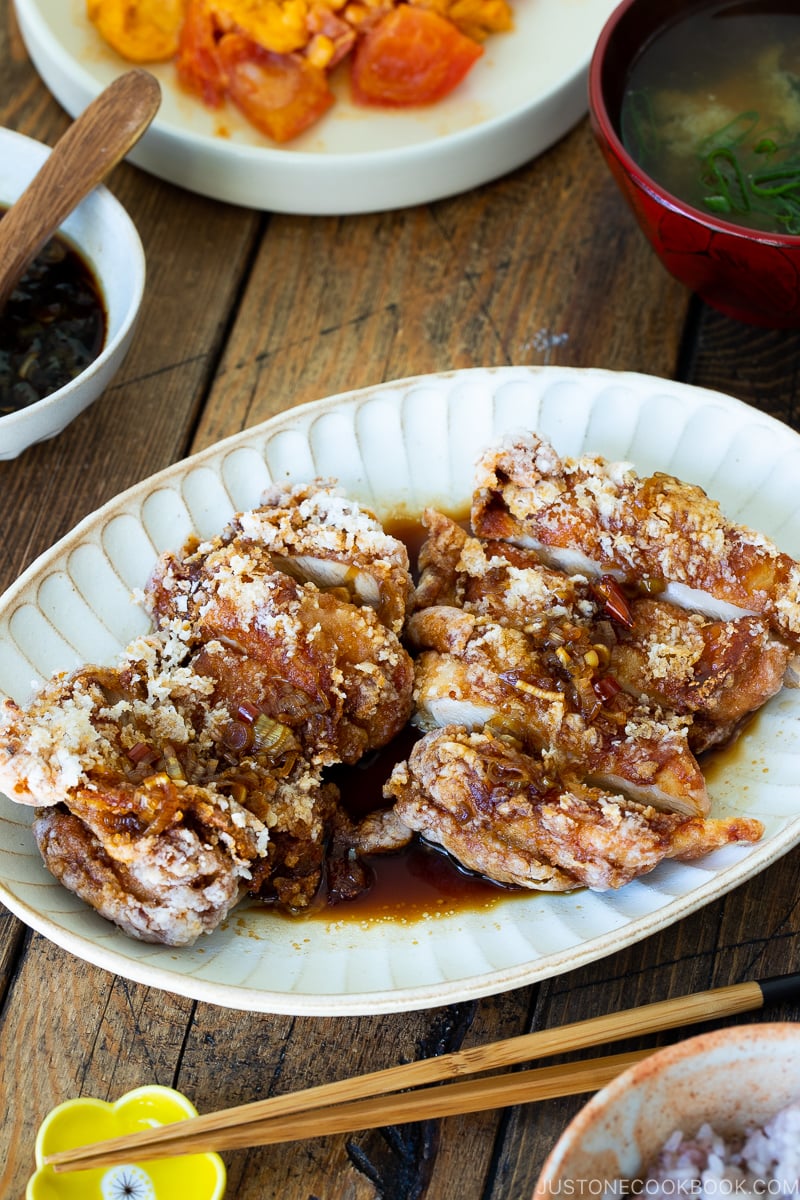
There are so many styles of Japanese fried chicken. Can you name them all? We have the well-known Karaage (JFC), the home-cooked favorite Chicken Katsu, the Portugese-inspired Chicken Nanban, and so on. It’s impossible to pick a side, but everyone in my family is obsessed with Fried Chicken with Scallion Soy Sauce (ユーリンチー).
Sure, it shares similar qualities as the other fried chicken: thin, ultra-crisp crust around a juicy interior, but the sauce is what sets it apart. The vinegary sauce cuts the grease and magically makes the fried chicken a light dish. You just have to try it once, and you’ll know I wasn’t joking about it!
Why You’ll Love This Fried Chicken with Scallion Soy Sauce:
- Super crispy on the outside and juicy on the inside
- Similar to Karaage, but with a delicious sauce
- The savory tangy sauce is addicting on its own (you want to drizzle it over everything!)
- Easy to put together
Known as Yurinchi (油淋鶏, ユーリンチー), this dish is an adaptation of the famous Chinese fried chicken originated in Guangdong, a coastal province in South China. It is sometimes written as 日式油淋鶏 which translates to “Japanese version of oil-drenched chicken”.
In Japan, you’ll most likely find this dish being served at Japanese-Chinese restaurants that serve chuka ryori. Since not many people are familiar with the Chinese name Yurinchi, some restaurants named it Chicken Karaage with Negi Sauce (唐揚げ香味ねぎソース) on their menus.
The Delicious Scallion Soy Sauce
The ingredients for the sauce are very simple:
- Sesame oil
- Scallion (I use the white bottom part of Tokyo negi also known as long green onion)
- Rice vinegar
- Sake
- Sugar
- Soy Sauce
- Optional—ginger, garlic, or dried red chili pepper. I make variations of this sauce by changing up the opt-ins. You can use all three ingredients, or just one like I did today for this recipe.
This amazing sauce doesn’t last long in our house at all. You’ll notice the amount in my recipe is slightly more than you need for two chicken thighs, but we enjoy drizzling the extra sauce over the chicken, the rice, and other dishes such as:
- Gyoza
- Chilled tofu
- Scallion pancakes
- Roasted/steamed/blanched veggies
- Grilled pork
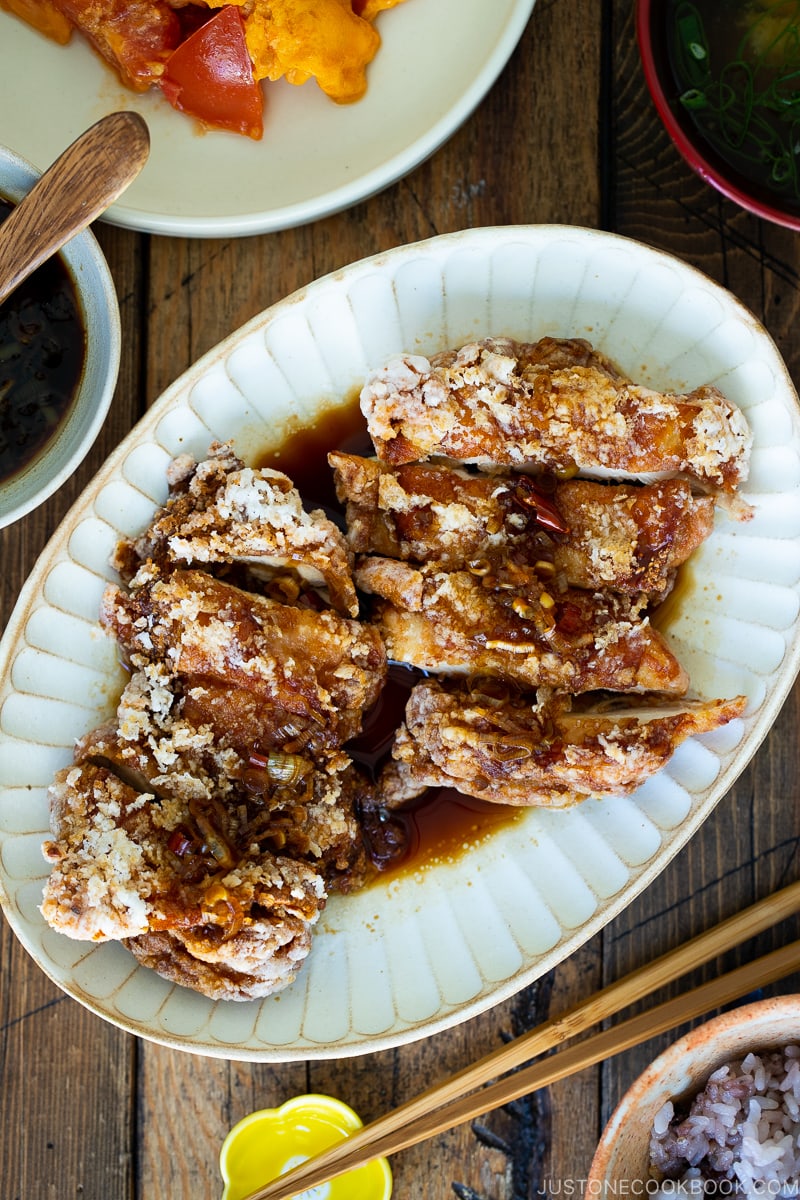
How to Make Fried Chicken with Scallion Soy Sauce
Ingredients You’ll Need
- Chicken: I always use boneless, skin-on thighs, but you can make it with skinless thighs, or butterflied chicken breast. Japanese fried chicken is typically made with skin-on chicken as the skin gives extra flavors and it gets crispy when deep-fried
- Seasonings (soy sauce, sake, salt, and pepper)
- Potato starch or cornstarch
- Oil for deep-frying
- Scallion soy sauce (the white bottom part of the Tokyo negi or scallions, sesame oil, dried red chili, sake, rice vinegar, sugar, and soy sauce)
Overview: Cooking Steps
- Make the scallion soy sauce: chop scallions and cook it with seasonings.
- Prepare the chicken by marinating with the seasoning.
- Coat the chicken with potato starch.
- Deep-fry the chicken until golden.
- Cut the cutlets into smaller pieces and serve with scallion soy sauce.
5 Helpful Cooking Tips
- Prick the chicken skin using a fork or the tip of a knife. This helps the marinade reach the meat under the skin more easily.
- Invest in an instant-read thermometer (and kitchen scale). You can easily avoid mistakes and failure by having these two items in the kitchen.
- Shake off any excess potato starch when you coat the chicken. Any extra starch will separate from the chicken and turn into crumbs as soon as you add it to the oil. So it’s best to shake it off before adding the chicken to the oil.
- Deep-fry the chicken skin-side down. When I tried deep-frying the chicken with the skin-side up, the skin separated from the meat. From my experience, the chicken looks better when it’s deep-fried skin-side down first.
- After deep-frying, the remaining heat will cook the chicken even more. Therefore, you don’t have to fully cook the chicken in the oil; or else, the chicken will become dry. Make sure the internal temperature of the chicken is at least 165ºF (74ºC).
Frequent Asked Questions
Can we bake the chicken instead of deep-frying?
Since it’s not a wet batter/breading, you can lightly brush the chicken with oil and bake in the oven.
Adjust the oven rack to the upper-middle position and preheat the oven to 400°F (200°C). Add chicken and cook for 30 minutes. Flip and continue to cook until crisp and golden brown, 15 to 30 minutes longer, flipping a few more times towards the end.
Do we have to use potato starch or cornstarch?
In Japan, we use potato starch for karaage (or a mixture of both potato starch and wheat flour). If you can’t find potato starch, you can use cornstarch as it’s more common in the U.S. I haven’t tried other starches, so I can’t give any recommendations.
How do you dispose the used oil?
We bring the used cooking oil to the local recycling center where they collect cooking oil. So that’s one thing you can check in your area.
If the local garbage company recommends to throw away, then here are some options:
- Use this Japanese oil waste cooking oil powder that can solidify the oil. You can read how to use it in my How to Deep-Fry post.
- Pour the cooled, used oil in a jar (keep your big pasta sauce jar!) and dispose.
I’m worried about deep-frying. Do you have a tip?
I am comfortable with deep-frying but this is after years of cooking and deep-frying. I believe you will learn fast through practicing and making many mistakes, and you will get better at it. I have the deep-frying guide page where I share some tips. Hope it’s helpful.
What deep-frying pot do you use?
I’ve gone through a couple of pots over the years and I have liked two kinds so far.
- Staub Cast Iron 2.75-qt Round Cocotte — I chose this matte black color so I don’t mind if it gets dirty. It has a perfect size for deep-frying cutlets (such as chicken katsu or tonkatsu) and the shallow depth means I don’t need to use a lot of oil to fill it up.
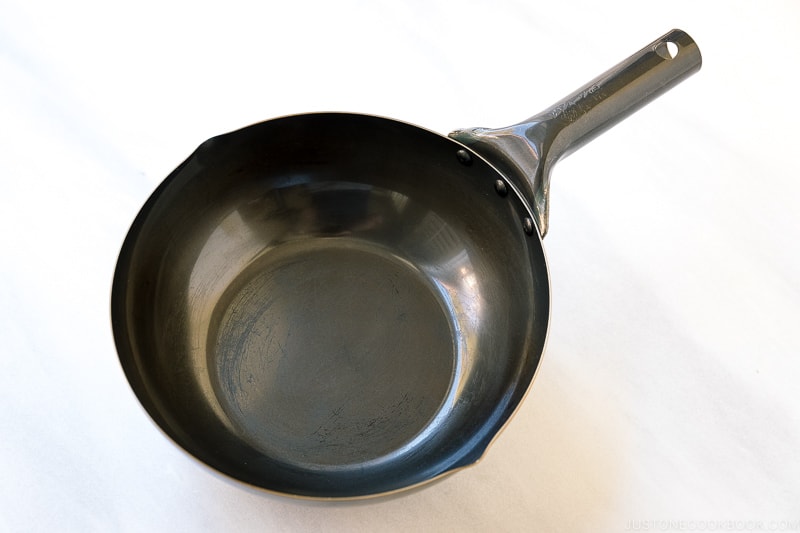
- Summit Iron Beijing Wok Stir Fry — This wok is a recent addition to my kitchen and I love using it for stir-frying and deep-frying! Compared to the Staub Cocotte I mentioned above, the oil heats up really fast due to the thin carbon steel pan. The size is similar to the Staub, so I like this for the same reason.
Kitchen Tools from MTC Kitchen
I’ve partnered with MTC Kitchen to introduce quality kitchen tools for your everyday Japanese cooking. You will get 10% off with a coupon code JOC10 for your purchase. In this post, I’ve used:
What to Serve with This Fried Chicken Recipe
- Spicy Japanese Pickled Cucumbers
- Asparagus with Miso Dressing (Karashi Sumisoae)
- Chrysanthemum Greens and Tofu Salad (Shungiku Shiraae)
- Green Bean Gomaae (Sesame Dressing)
Wish to learn more about Japanese cooking? Sign up for our free newsletter to receive cooking tips & recipe updates! And stay in touch with me on Facebook, Pinterest, YouTube, and Instagram.
Fried Chicken with Scallion Soy Sauce (Yurinchi)
Video
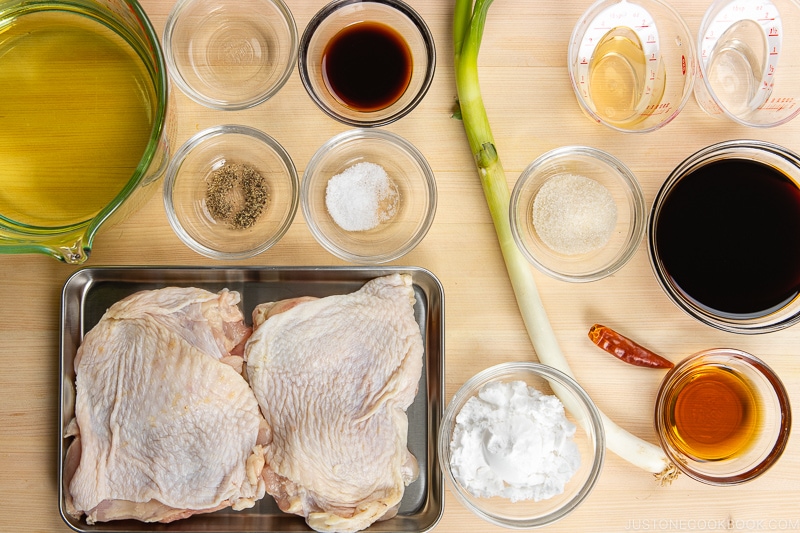
Ingredients
For the Scallion Soy Sauce (enough for 3 chicken thighs)
- 1 Tokyo negi (naga negi; long green onion) (use only the white bottom part; to substitute scallions, use the white bottom part of 3–4 stalks)
- 1 dried red chili pepper
- 1 Tbsp toasted sesame oil
- 1 Tbsp sake
- 2 Tbsp rice vinegar (unseasoned)
- 1½ Tbsp sugar
- 6 Tbsp soy sauce
For the Fried Chicken
- 2 boneless, skin-on chicken thighs (1 lb, 454 g; ask a butcher to debone the chicken thighs at the grocery store; you can also use skinless chicken thighs or 1 chicken breast, butterflied and cut in half)
- ¼ tsp Diamond Crystal kosher salt
- ⅛ tsp freshly ground black pepper
- 2 tsp sake
- 2 tsp soy sauce
- 4 Tbsp potato starch or cornstarch (highly recommend potato starch for all kinds of Japanese fried chicken)
- 2 cups neutral oil
Instructions
- Gather all the ingredients.
To Make the Scallion Soy Sauce
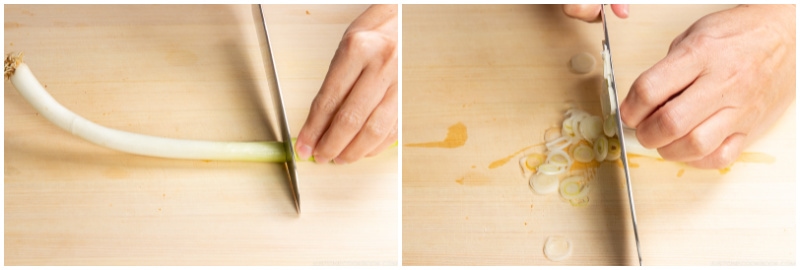
- Cut and separate the white and green parts of 1 Tokyo negi (naga negi; long green onion) and keep the green part for another use. Thinly slice the white part of the negi.
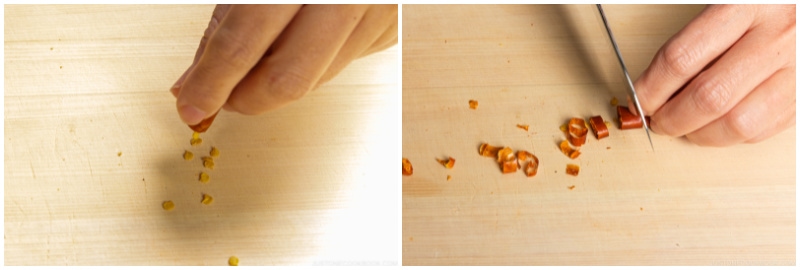
- Cut one end of 1 dried red chili pepper and shake it to discard the seeds inside. Cut into thin rounds. Set aside.
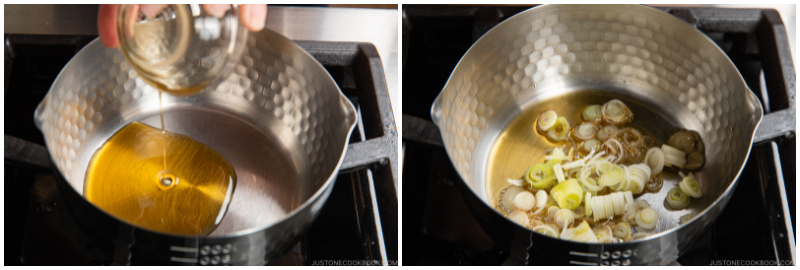
- In a small saucepan, heat 1 Tbsp toasted sesame oil over medium heat. Once hot, add the white part of the negi and stir-fry for 1–2 minutes.
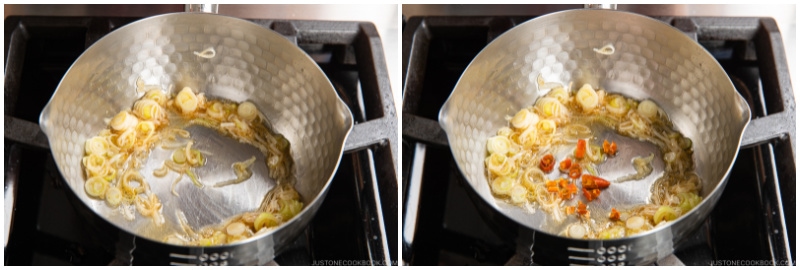
- Add the red chili pepper and stir-fry for 15 seconds.
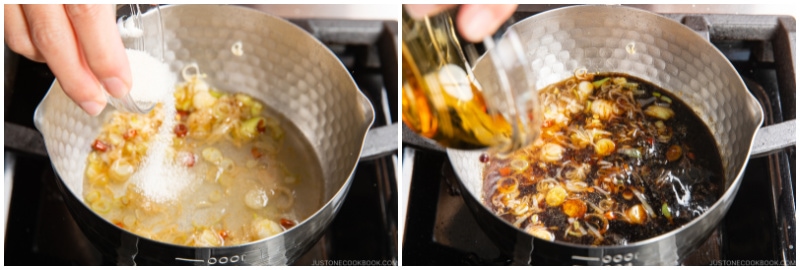
- Add 1 Tbsp sake, 2 Tbsp rice vinegar (unseasoned), 1½ Tbsp sugar, and 6 Tbsp soy sauce. Bring the mixture to a simmer for 30 seconds and turn off the heat. Set aside. You will reheat the sauce again right before you serve the fried chicken. The sauce is plenty for 3 thighs. If you have any extra, keep the leftovers to drizzle on other dishes (tofu, fish, etc.)
To Make the Fried Chicken
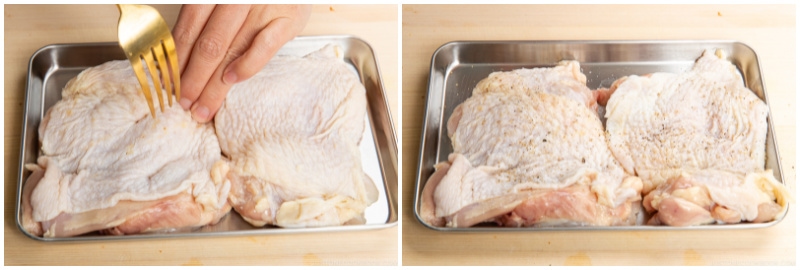
- Put 2 boneless, skin-on chicken thighs skin side up in a tray or flat container. Prick the chicken skin using a fork or the tip of a knife. This helps the marinade reach the meat under the skin more easily. Season both sides of the chicken with ¼ tsp Diamond Crystal kosher salt and ⅛ tsp freshly ground black pepper.
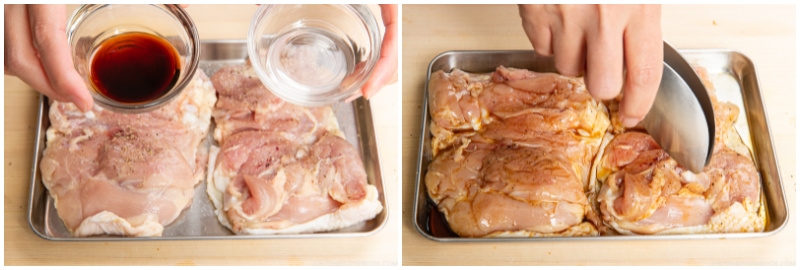
- Add 2 tsp sake and 2 tsp soy sauce to the chicken and coat it well. Set aside.
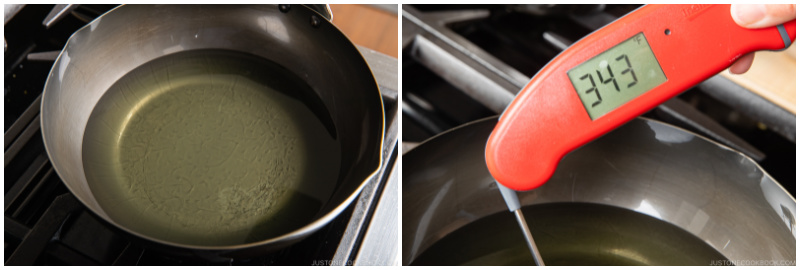
- Add 2 cups neutral oil to a medium pot (I used this carbon steel pot) and bring it to 340ºF (170ºC) over medium heat. If you don’t have an instant-read thermometer, you‘ll know the oil is the right temperature when you insert a wooden chopstick into the oil and small bubbles appear around it.
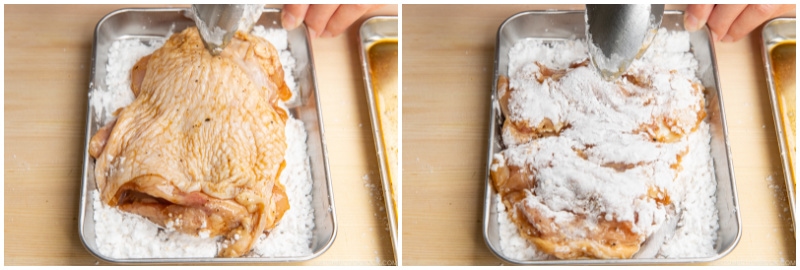
- While heating the oil, prepare 4 Tbsp potato starch or cornstarch in a shallow tray or container and coat the chicken with potato starch, pressing the starch onto the chicken and shaking off any excess. The potato starch will absorb the moisture from the chicken and adhere nicely while waiting for the oil.
- When the oil reaches 340ºF (170ºC), gently put one piece of chicken into the oil, skin side down, and cook for 5 minutes, flipping the chicken halfway through. Don‘t touch or flip the chicken for the first 30 seconds until the coating has set. Why do we deep-fry only one piece at a time? You don‘t want to reduce the oil temperature drastically by adding too much food to the oil at once. Scoop up and discard any fried crumbs in the oil with a fine-mesh skimmer so the oil does not get darker and dirtier with burnt crumbs.
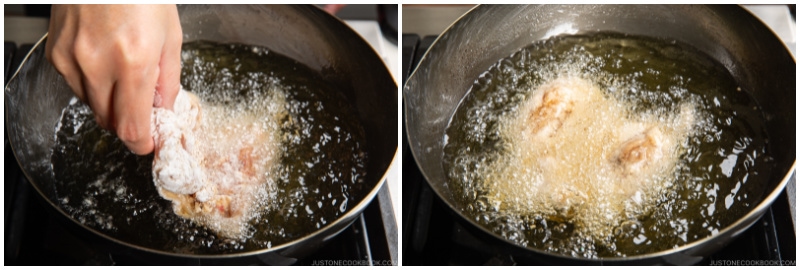
- Halfway through, flip the chicken. Keep watching the oil temperature and make sure it doesn’t go higher than 340ºF (170ºC) or else the chicken will brown too quickly while the inside will remain undercooked.
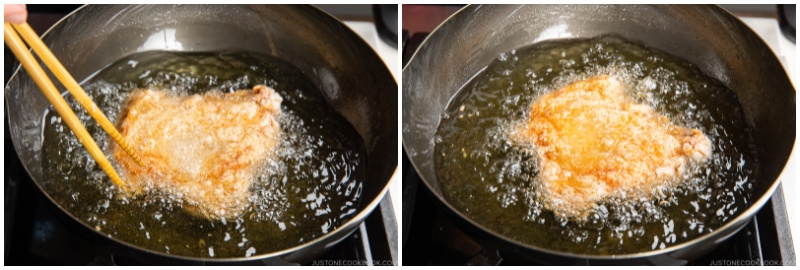
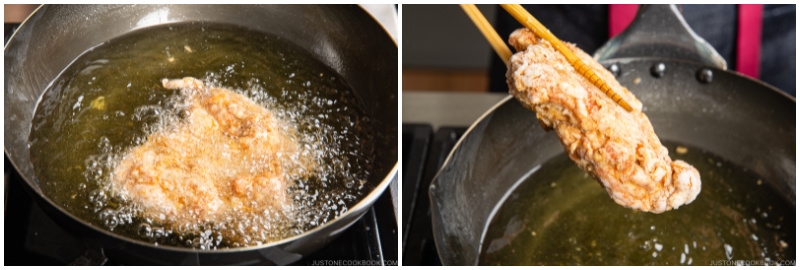
- After 5 minutes, transfer the chicken to a wire rack or a plate lined with paper towels and let it sit to remove excess oil. The hot oil on the exterior will slowly continue to cook the meat as it sits. After the fried chicken has rested for 3 minutes, check to make sure the internal temperature of the chicken is at least 165ºF (74ºC) with an instant-read thermometer. Repeat with the second piece of chicken.
To Serve
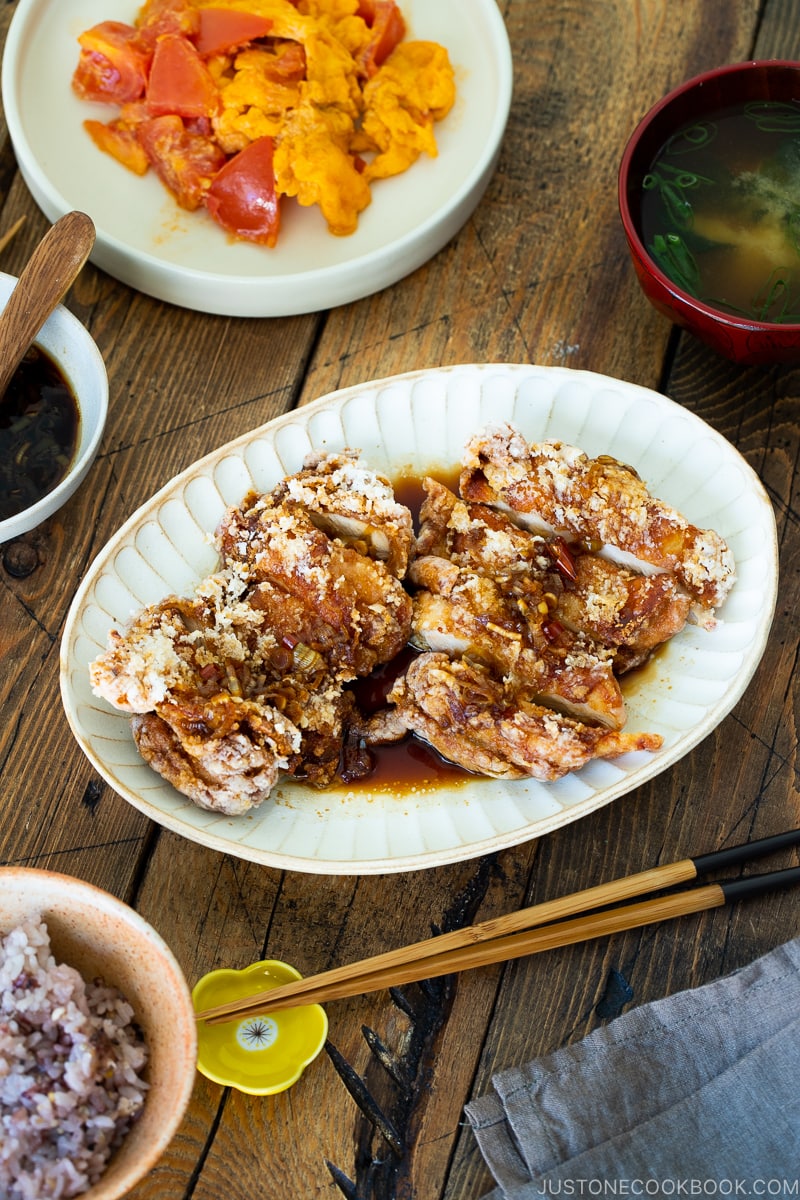
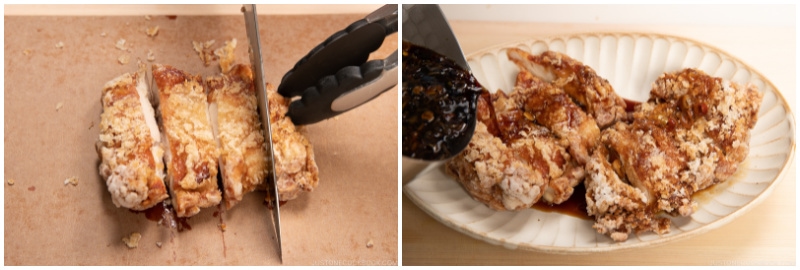
- Cut the fried chicken into pieces ¾ inch (2 cm) wide and transfer it to a plate. Reheat the Scallion Soy Sauce and drizzle it on top of the chicken. Put the extra sauce in a small bowl and bring it to the table for those who like extra sauce. Enjoy!
To Store
- You can keep the leftovers in an airtight container and store in the refrigerator for up to 3 days and in the freezer for a month.


Hi Konichiwa,
I tried it today, and both my wife and son said it was delicious!
Even better than the Seicomart Yurinchi.
I also marinated the chicken with tezukuri ninnikukoji, so I used less soy sauce to marinate the chicken or else it would get too salty.
Arigatou \(^;^)/
Hi Orandanopatochan, Thank you so much for trying Nami’s recipe!
We are glad to hear you and your family enjoyed the dish. Homemade Ninnikukoji sounds delicious as well.
Made this exactly as written except for a little less sugar and WOW. This is absolutely delicious. The chicken was crispy and juicy and the sauce, omg the sauce. Tangy, umami, spicy, so good. Had it with a simple salad and rice and thoroughly enjoyed it. It’s probably a good thing deep frying is so messy otherwise I’d be making this 3 times a week from now on haha. I don’t have a themometer but the chopstick trick + 5 minutes per piece + flipping halfway through gave perfectly cooked chicken. Thanks for a great recipe!
Hi Carly! Aww. We are so happy to hear the chicken and sauce came out great and you enjoyed them!
Thank you so much for trying Nami’s recipe and for your kind feedback! Happy Cooking!
can you use an airfryer?
Hi Ann, Thank you very much for reading Nami’s post!
We didn’t test this recipe with an air fryer, and we are unsure whether it will work.
Please let us know how it goes if you try it.
Omg Nami. There are some Japanese foods I have eaten where I think “How does food this good exist? It’s so good and so rich it feels wrong.” 😂 The first time I thought that was with sushi, then okonomiyaki, then oden. Add yurinchi to the list. Woooooof.
This dish was very easy to make and so delicious! So beautifully textured too. It looks like professional cooking. I used potato starch as the recipe said and had no problem getting a delicious crunchy crust. In regards to some people having trouble with the starch not sticking, I think the trick is to definitely let it sit in the starch while the oil is heating up, like your recipe suggests. Then the starch soaks up the juice of the chicken as well as the remnants of soy sauce and sake it marinated in and solidifies and sticks to the chicken. I also think it very much helps to use thighs with the skin on (idk if anyone tried it with skinless ones). I can’t find skin-on boneless thighs near me, but I learned a really fast and simple way of deboning them with kitchen shears, so I’d advise anyone who wants to learn to debone them to run a search online or on Youtube for that method!
Last observation: I think the amount of sauce this recipe makes would be good for up to 4 thighs, definitely 3 at least.
Hey Lion! Long time no chat! Thanks for trying this recipe! I’m so happy you liked this recipe! It’s our family’s favorite for a long time. 🙂
Thanks for your feedback on starch and the sauce amount. I updated the recipe and mentioned that it’s enough for 3 (since we like to pour a lot of sauce… I want to make sure people have enough, so 3 should be good). Thanks!
Yeah, skin-on could adhere starch more too. We usually ask the butcher to debone but it’s pretty easy to remove the bone as you just score around the bone and take it out. Good suggestion on watching the how-to video on YouTube!
When I was a college student, I remember I couldn’t get potato starch and I always had to make fried chicken with cornstarch (the major brand of a yellow container, I still remember!). So I think maybe letting it sit would definitely help.
i wanted to buy the wok featured in the recipe but MTC charges $25 for shipping to Hawaii. anything similar that you recommend on Amazon that’s free shipping? thanks!
Hi Yumi! Thank you for reading Nami’s post!
This wok is Made in Japan, and you may need to get one from Japan. Try looking for SUMMIT pans サミット工業 北京鍋.
We hope this helps!
I will try this recipe! In the photo, I see an egg and tomato dish. When I lived in China, there was an egg and tomato dish that I loved! Do you have a recipe for this? Thank you!
Hi Sylvia! Thank you very much for reading Nami’s post and trying her recipe!
Yes, It will be posted soon! Stay tuned!🤗
Made this last night and it was delicious! The sauce was flavourful and the heat from the pepper (I had to sub crushed red pepper flakes as I did not have a dry chili) balanced perfectly against the tang from the vinegar and saltiness of the soy sauce. I will definitely be stealing this sauce for use with other dishes in the future. Also, this recipe was a great test for deep-frying in a Breville electric wok that I was recently gifted. After proving itself with this recipe, I look forward to using the wok for kushikatsu (which usually leaves a huge oil-spattered mess on our table).
Thanks for another great recipe, Nami!
Hi Darek! Oh, I’m so glad you tried this recipe and liked the sauce. Sometimes, it’s so hard to photoshoot the food to look good and write the recipe explaining how good it is, especially when the title of the recipe is so generic. I was a bit worried that I didn’t do a good job in both areas, so I’m glad you liked it.
This sauce goes well with other food, and I hope you enjoy using it for many dishes.
Interesting! I didn’t know about the electric wok! Have fun with kushikatsu! I miss eating it. I need to make it soon too!
I tried using corn starch to coat the chicken but most of the coating came off during the deep fry. Did I miss some steps?
Hi Lilian! Thank you for trying this recipe! I just made 2 sentences in the recipe bold so everyone will not miss them. It’s important to press the starch onto the chicken, and not to touch or flip the chicken for the first 30 seconds until the coating has set. If the potato starch (or cornstarch) is loosely attached to the chicken, it will immediately float and come off because it does not adhere to anything. You must press the starch to the chicken, and the starch will absorb the moisture (marinade) from the chicken, creating a crispy crust. And make sure not to touch until the coating is set once it’s in the oil. Hope this helps!
Thank you so much for your reply! I love your recipes. They are so easy to follow and taste really good!
Thanks, Lilian! Try potato starch next time and see if it helps!
OMG! I tried with potato starch this time and what a huge difference it made! Not only did the coating stay put, the chicken was the crispiest I’ve ever made!!!! And the oil has never stayed so clean too! Thanks for the advice!
Awesome! Thanks for your feedback!
Of the JOC recipes I’ve tried with a starch coating, I’ve always had better results with potato starch. At home, I always use potato starch and have had great crispy results with the soy-glazed eggplant donburi, agedashi tofu, as well as this fried chicken recipe. I’ve tried cooking the eggplant and agedashi tofu at my parents’ home (they have corn starch) and found the starch didn’t adhere well (similar to your issue), while also yielding more of a gummy (instead of crispy) texture. I’m not sure if there was some other factor impacting my cooking, but ya, having also encountered that corn starch issue I’ll always just use potato starch from now on.
Hi Darek! Thank you for your input!
Both starches look and taste similar, but the texture is quite different and you can tell which one is which by rubbing between your fingers (or even by touch). I did the comparison to make karaage when I made the karaage recipe for the blog and I shared my finding in the post too (“As a comparison, I found that karaage made with potato starch yields a crispier skin and texture.”).
Even in Japan, some people have a difficult time adhering potato starch to the chicken. So in a way, the issue “can” also happen to the potato starch.
Excess starch that’s on top of starch will slide off for sure. So it’s important to shake off any excess. That’s one thing we can do to keep the oil clean. The starch will cling to the moisture if the chicken is marinated and giving a bit of time for the starch to absorb will help a bit.
When I first came to the US, I couldn’t get potato starch. So I was always making fried chicken with cornstarch. I think it’s “possible” but as you said, it may be not as easy as potato starch. I deep fry often, so maybe unconsciously I am doing something that helps adhere.
Thank you so much for this discussion!