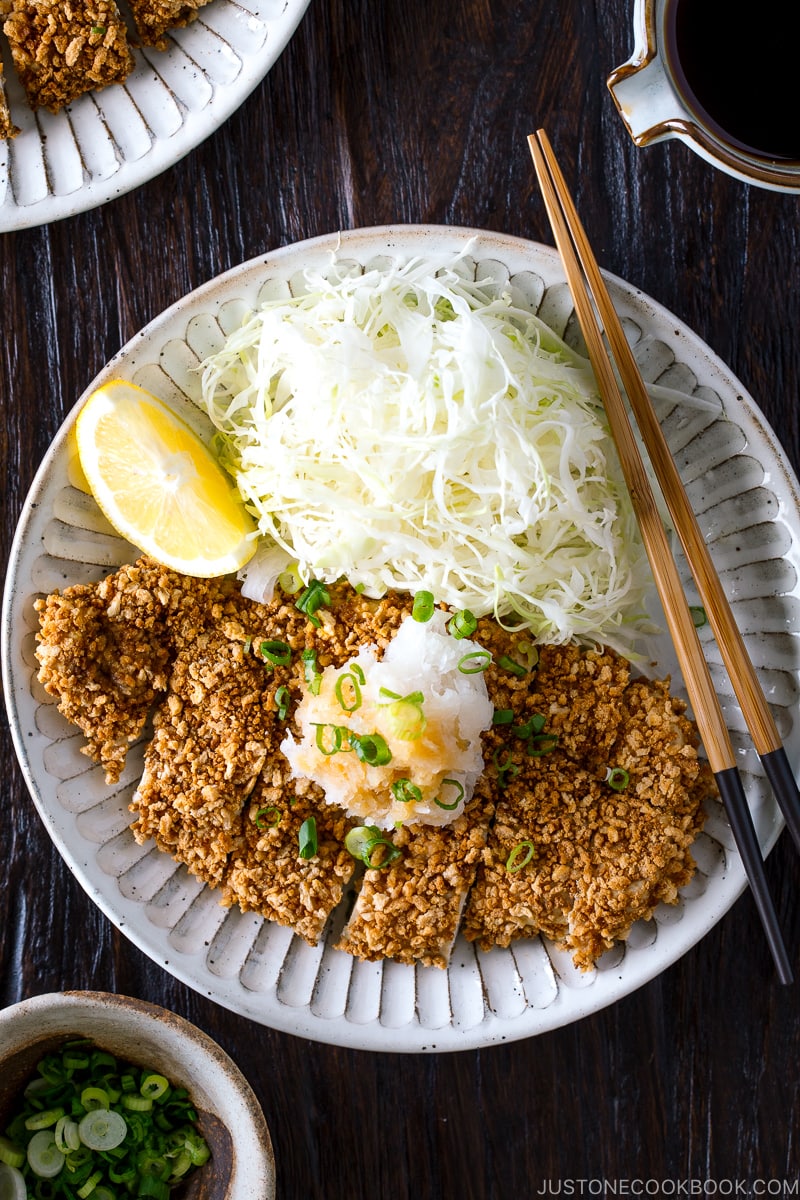
Try this 100% gluten-free version of my Baked Chicken Katsu recipe. Breaded in GF panko, baked, then served with homemade GF ponzu, these crispy chicken cutlets are a delicious option for anyone who loves this classic Japanese dish.
When I started to share more gluten-free Japanese recipes for my readers who can’t take gluten, many of them expressed how much they missed eating Tonkatsu and Chicken Katsu because they can’t consume panko made of wheat.
Today I’m really excited to share this Gluten-Free Baked Chicken Katsu recipe for those of you who are gluten intolerant and for those of you who eat meals with them. This easy and delicious recipe is a win-win situation for both parties.
Watch How To Make Gluten-Free Baked Chicken Katsu
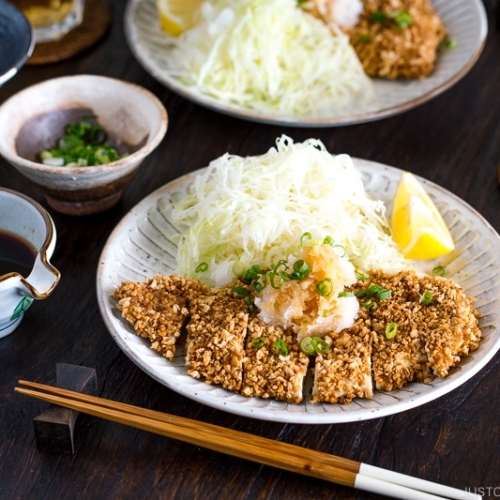
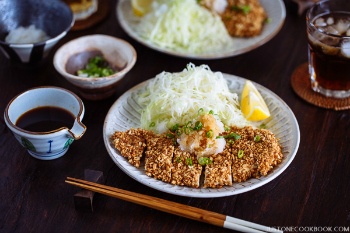
Japanese panko breaded and baked chicken cutlet served with homemade ponzu and grated daikon. This Baked Chicken Katsu recipe is 100% gluten-free. Perfect for those who love this classic Japanese dish but can’t take gluten.
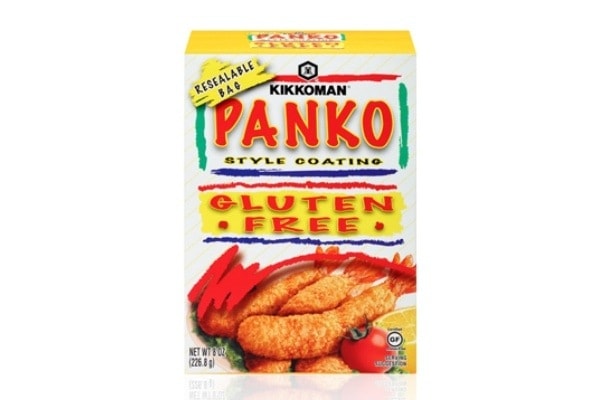
Your New Best Friend – Gluten-Free Panko for Chicken Katsu
For many of you who enjoy classic Japanese fried foods that are breaded with crunchy panko, I know how disappointing it can be if you are gluten-intolerant. The regular panko is made from bread without crust, which means you have to give up many tempting fried foods completely.
When I found out Kikkoman came out with Gluten-Free Panko that is made with rice flour, I thought it was such a brilliant invention! You can now enjoy the same crunchy texture without wheat (and soy, egg, and nuts). The good news is gluten-free panko is lighter and crispier, which makes it a perfect coating to make Japanese katsu. No more envy eyes when someone sitting right next to you bite into one of those crunchy pieces.

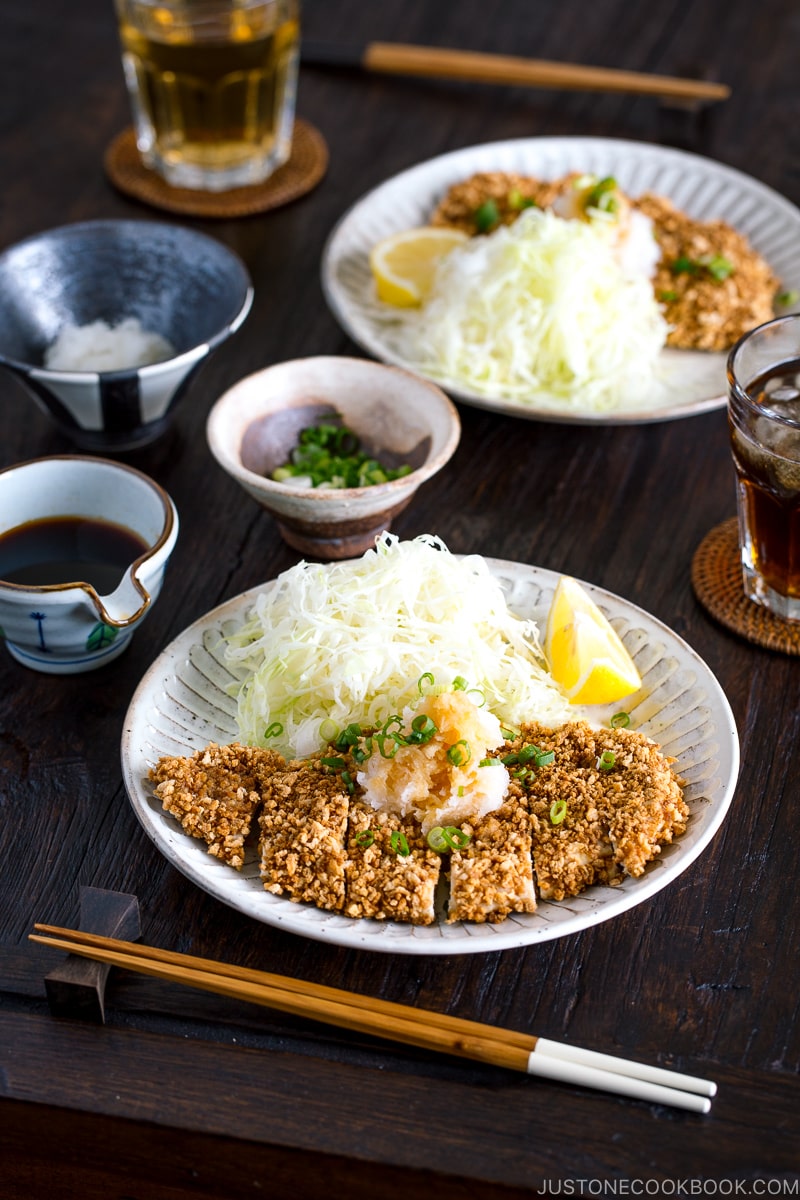
Enjoy Chicken Katsu with Ponzu
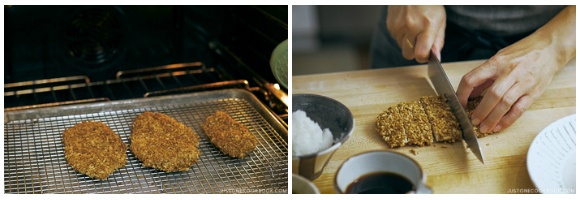
With the gluten-free panko, the preparation is the same as my regular baked chicken katsu recipe. You want to first toast the panko until nicely brown before you dredge the chicken pieces all over and bake. Once the chicken comes out of the oven piping hot, you can see how crispy, crunchy and golden the crust look. No grease, no fuss, these are ‘fried food’ at its best!
The only difference with today’s recipe is I served the chicken katsu with the light, citrusy ponzu sauce, instead of tonkatsu sauce. If you have never tried Japanese deep-fried cutlet (pork or chicken) with ponzu, you will have to give it a try! In Japan, a lot of Tonkatsu specialized restaurants offer options of both tonkatsu sauce and Ponzu sauce. You are served with ponzu and grated daikon to enjoy with the deep-fried katsu. It’s lighter and refreshing and it makes the whole deep-fried food so much easier to digest.
Make Homemade Ponzu Sauce with Gluten-Free Soy Sauce
The best thing about making homemade ponzu is that it’s SUPER easy to make. The taste is on the light side with an intermix of sweet, tart and savory. Soy sauce is traditionally brewed from water, wheat, soybeans, and salt; however, with gluten-free soy sauce, your ponzu will be totally gluten-free!
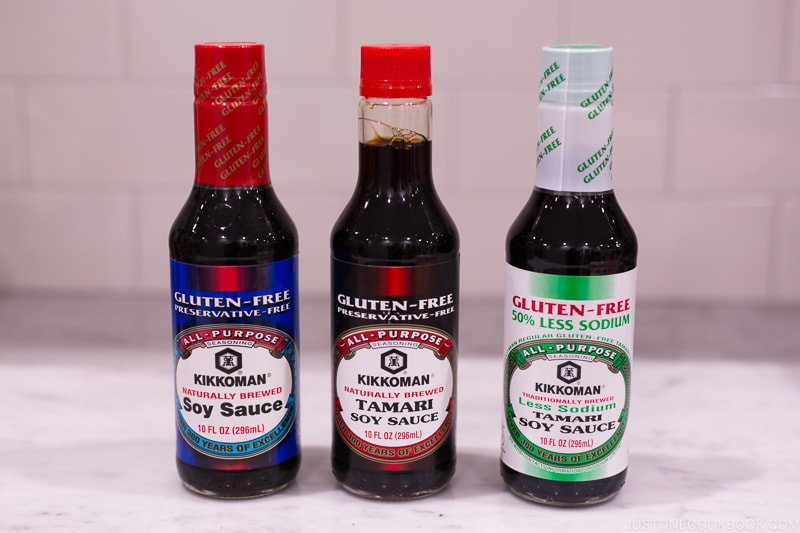
All you need is gluten-free soy sauce, hon-mirin (true mirin), citrus of your choice (read more in the recipe), katsuobushi (dried bonito flakes), and kombu. That’s it! It’s best for the ingredients to release the flavors so you want to make the ponzu sauce at least one day in advance.
I’ve been partnering with Kikkoman to create delicious gluten-free Japanese recipes with their gluten-free soy sauce so that gluten-intolerant JOC readers can enjoy Japanese foods without worrying about wheat.
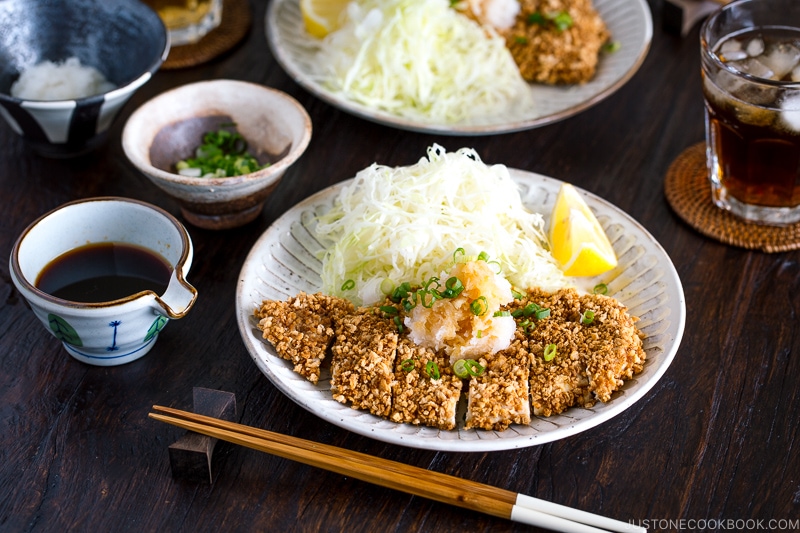
Whether you’re gluten-free or not, everyone can enjoy this crispy and crunchy panko coated baked chicken katsu. Serve with a wedge of lemon and a pile of shredded cabbage. I hope you enjoy the recipe with your family and friends!
Japanese Ingredient Substitution: If you want to look for substitutes for Japanese condiments and ingredients, click here.
Sign up for the free Just One Cookbook newsletter delivered to your inbox! And stay in touch with me on Facebook, Pinterest, YouTube, and Instagram for all the latest updates.
Gluten-Free Baked Chicken Katsu
Video
Ingredients
- 1 boneless, skinless chicken breast (11 oz, 314 g)
- ¼ tsp Diamond Crystal kosher salt
- ⅛ tsp freshly ground black pepper
For the Breading
- 1 cup gluten-free panko
- 1 Tbsp extra virgin olive oil (for toasting the panko)
- 2 Tbsp rice flour
- 1 large egg (50 g each w/o shell)
For the Garnish
- 3 inches daikon radish
- 1 green onion/scallion
- ponzu (homemade recipe below)
For the Gluten-Free Ponzu Sauce
- 3 Tbsp katsuobushi (dried bonito flakes) (0.1 oz, 3 g; 1 packet)
- 1 piece kombu (dried kelp) (0.1 oz, 3 g; 2 x 3 inches, 5 x 7.6 cm per piece)
- ¼ cup gluten-free soy sauce (4 Tbsp)
- ¼ cup lemon juice (4 Tbsp; I used 3 Tbsp lemon juice and 1 Tbsp fresh orange juice; I like the combination of lemon/orange/grapefruit/yuzu juice)
- 1 Tbsp mirin
Instructions
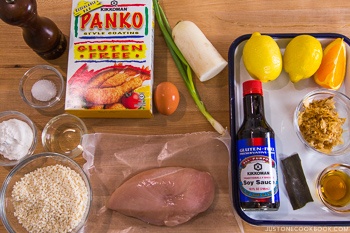
- Gather all the ingredients.

To Make the Gluten-Free Ponzu (1–2 days in advance)
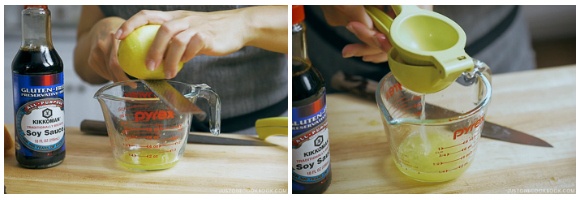
- In a liquid measuring cup, zest a lemon so you can have about ¼ tsp lemon peel. Then, squeeze the lemon (and orange) until you get ¼ cup lemon juice. I use 3 Tbsp lemon juice and 1 Tbsp fresh orange juice for ¼ cup total.

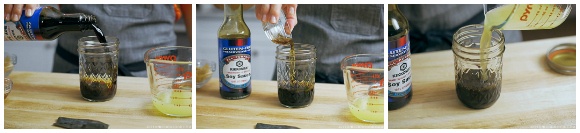
- In a mason jar, add ¼ cup gluten-free soy sauce, 1 Tbsp mirin, and ¼ cup lemon juice with the zest.

- Add 3 Tbsp katsuobushi (dried bonito flakes) and 1 piece kombu (dried kelp), and close the lid and shake it to combine. Refrigerate for a day or two before you make the chicken katsu. If you make a big batch, you can save it for a long time as long as you keep it properly in the refrigerator.

To Make the GF Chicken Katsu
- Adjust the oven rack to the middle position and preheat the oven to 400ºF (200ºC). For a convection oven, reduce cooking temperature by 25ºF (15ºC).
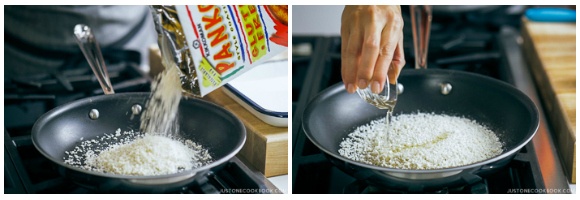
- Combine 1 cup gluten-free panko and 1 Tbsp extra virgin olive oil in a frying pan.
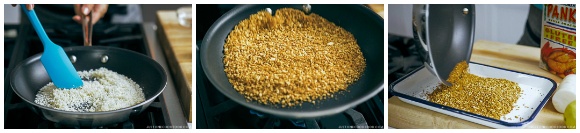
- Toast the panko over medium heat until golden brown. Try not to touch too much as the panko can break into powder. Transfer the toasted panko into a shallow dish and allow to cool.
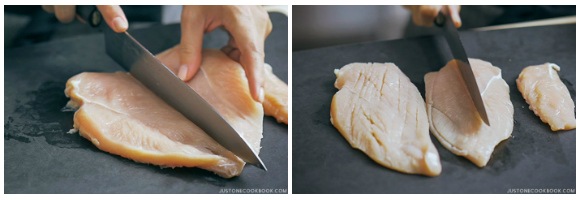
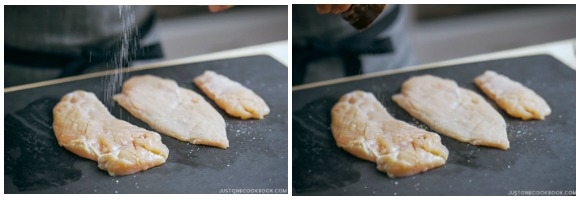
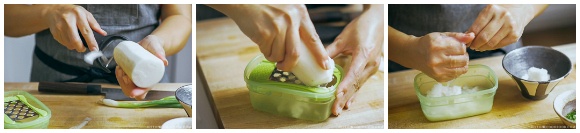
- Butterfly and cut 1 boneless, skinless chicken breast in half. I also separate out the chicken tender. With the back of the knife, pound the chicken to an even thickness.
- Sprinkle ¼ tsp Diamond Crystal kosher salt and ⅛ tsp freshly ground black pepper on both sides of the chicken.
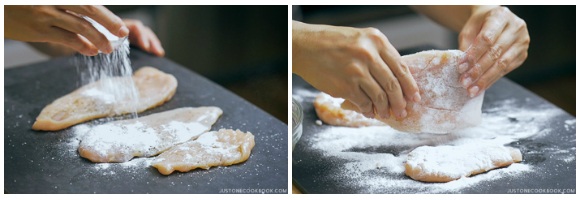
- Dredge each chicken piece in 2 Tbsp rice flour to coat completely and pat off the excess rice flour.
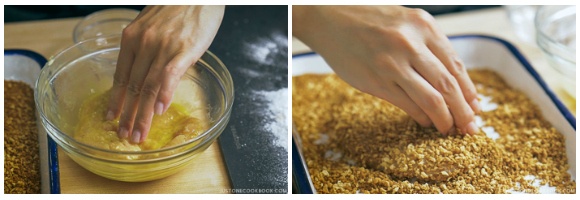
- Then, dip into 1 large egg (50 g each w/o shell) and finally coat with the toasted panko. Press on the panko flakes to make sure they adhere to the chicken.
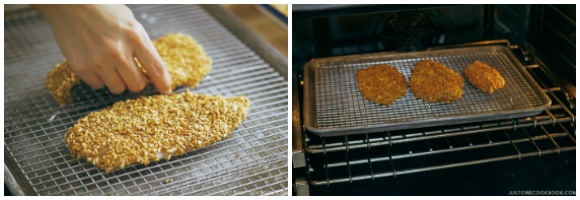
- Place the chicken on a prepared baking sheet lined with parchment paper or, even better, on an oven-safe wire rack (as air goes through on the bottom so the panko doesn’t get crushed). Bake at 400ºF (200ºC) until the chicken is cooked through, about 25–30 minutes.
- Remove the chicken katsu from the oven and cut into 1-inch pieces so you can eat it with chopsticks.
To Serve
- Peel and grate 3 inches daikon radish. Gently squeeze the water out and set aside.
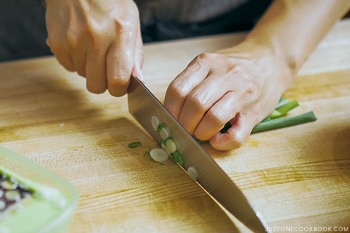
- Cut 1 green onion/scallion into small pieces.
- Serve the grated daikon and green onion on top of the Gluten-Free Baked Chicken Katsu (or on the side if you prefer) and pour the ponzu sauce to enjoy!
To Store
- You can keep the leftovers in an airtight container and store in the refrigerator for 3 days and in the freezer for a month. Reheat the baked katsu in the oven or oven toaster instead of microwaving to make it crispy. Bake at 350ºF (177ºC) until warm.
Nutrition
Full Disclosure: This post was sponsored by Kikkoman USA. Thoughts and opinions stated are my own.


Made this last night and it was delicious! The step by step directions were great. Thank you!
By the way, I paired the Katsura with a healthy dandelion salad and the flavors worked very well together.
Hi James! Thank you very much for trying Nami’s recipe and for your kind feedback!
We are glad to know that you found Nami’s tutorial helpful.😊
Healthy dandelion salad sounds very good!
Namiko, this was an excellent recipe and it came out so perfectly; I was able to use 2 chicken breasts with this recipe and had no leftover dredging flour or eggwash. Thank you so much for sharing!
Hi Sanjeev!
Thank you very much for trying this recipe and for your kind feedback!
You gave us more confidence in this recipe. Thank you!☺️
Hello Nami,
I love your recipes! I recently stopped eating meat but I really miss baked chicken katsu. Do you have any suggestions on how to substitute the chicken in this recipe? Perhaps tofu?
Thank you!
Hi Calin! Thank you!! You can make it with well-drained tofu or portobello mushrooms or king oyster mushrooms etc to make it too! 🙂
[…] Tonkatsu Recipes: Baked Tonkatsu, Gluten-free Baked Chicken Katsu, Miso Katsu, Menchi […]
I wanted to try something new for dinner, so I made this. This was absolutely amazing! I admit I cooked it for a tad bit too long because I was doing laundry, but this was still super delicious. I will definitely be making this again. I paired it with some spicy ramen, and it the combo blew me away. Definitely need to branch out with my cooking a lot more now.
Hi Mone’t! I’m so happy to hear that you enjoyed this recipe! Thank you so much for your kind feedback. 🙂
Hi, I am a great fan of your site so first many thanks for all your delicious recipes. Can you tell me if the chicken can be prepared in advance and reserved in the fridge? I’d like to make the chicken katsu onigirazu and preserve that as well for a dinner party I’ll be hosting. Thanks!
Hi Elise! Thank you so much for reading my blog and trying out my recipes!
Yes, you can prepared a head of time. Finish all the way, and let cool, and FREEZE (even you use next day – so it doesn’t get soggy) Next day, reheat in the oven (without defrosting). Then make Onigirazu. 🙂
Tx – might just give it a try.
Hi Miranda! Hope you enjoy! 🙂
Hi Nami – can I prepare the Chicken Katsu in the morning and bake at dinner time when my guests have arrived? Or should I prepare and bake in one go? Tx!
Hi Miranda! Ideally one go, or bake first and rebake (but it might get too dry). The problem with leaving the breaded chicken katsu in the fridge is that moisture content will be drawn outside and the breading gets soggy… so you can toast the panko first. But maybe breading and baking when you come back? 🙂
I haven’t been able to find the Kikkoman Gluten Free Panko in Mountain View area. I tried Safeway, Nijiya, and Nob Hill so far. Do you have any suggestions as to where I might find it?
Hi Joanne! I can ask somone at Kikkoman. I’ll get back to you… I feel like I saw it at the store but I forgot which store I was at…
Hi Joanne! I got their response. You can find it at Ranch 99, Marukai, Korean Plaza, San Francisco Supermarket, Little Japan.
https://www.99ranch.com/stores/mountain-view-california
https://www.marukai.com/t-cupertino.aspx
Hi I want to thank you for this recipe.
I regularly make this recipe because I have allergies to certain ingredients.
I would like to add a tip!!
When before toasting the panko, I notice the gluten free panko is thick, so I put it in a bag with garlic powder and salt for seasoning and roll it with my rolling pin. Yes you will have more powder, however I put the panko in a sieve afterwards.
The garlic and salt make it taste so nice, and is good without any sauce. I like to make tonkatsu sauce with it vs ponzu and I reccomend adding some spices to the panko before toasting to make it a little different!! Chinese 5-spice is really good too. Or even plain.
When coating the chicken or pork etc, is olive oil okay as a substitute to egg?? I try not to eat eggs because I have a dairy allergy as well.
Thank you so much!!
Hi Shahlaa,
Thank you very much for trying this recipe and for sharing your cooking experience and tips with us!
If you wish to skip the egg, we recommend using water as a substitute. The olive oil will work as well but add a different flavor to the dish. 😉
I’m looking forward to trying the Gluten Free Panko. We will not be able to use egg (due to food allergies). Do you have any suggestions to replace the egg?
Hi Joanne! How about soy milk or milk to wet? Hope that will work. 🙂
I am delighted that you are baking and not frying this well beloved Japanese recipe . . . and suggesting we have it with Ponzu! Lovely!! That said I shall be making it with ordinary panko crumbs. If one is truly coeliac, and the latest university papers put that number at about ..64% of the population, one does not need to eat ‘gluten-free’ and that may indeed leave you deprived of nutritional needs . . . so, by all means, make use of this version, but only if your physician has made the required tests . . .
Hi Eha! Yes, make it with regular panko unless you or your friend/family is gluten intolerant and have to make one dish for everyone. It’s really light and delicious with grated daikon and ponzu sauce. 🙂